_GOTOBOTTOM
The Garage
For general automotive modeling or non-modeling topics.
Official tv and movie build thread
pastafarian
_VISITCOMMUNITY
United States
Joined: April 10, 2008
KitMaker: 207 posts
Auto Modeler: 66 posts
Posted: Friday, October 01, 2010 - 08:18 AM UTC
Hey folks,

It's October 1st so let's get started on this one. There are several other builds going at the same time so there might be some overlap (maybe a time machine in von cuda's demolition derby?) haha

I don't know how to make ribbons, so if someone can help out with that, it would be great.

I'm going to start with Darth Vader's Advanced Tie Fighter and then move into Mr. Bean's Mini (after I order it and finish with the Tie).

Let's find some inspiration in your favorite shows and movies and build something.

John
old-dragon
_VISITCOMMUNITY
Illinois, United States
Joined: August 30, 2005
KitMaker: 3,289 posts
Auto Modeler: 1,620 posts
Posted: Friday, October 01, 2010 - 04:03 PM UTC
As for the ribbon...might I suggest a simple black side profile of a twin reel movie camera.......

Now to grab the kit and start the clean up prosess.....

"Lights....Camera......ACTION!"


...I'm not ready for my close up yet!!!
pastafarian
_VISITCOMMUNITY
United States
Joined: April 10, 2008
KitMaker: 207 posts
Auto Modeler: 66 posts
Posted: Saturday, October 02, 2010 - 11:23 AM UTC
That sounds cool. Either that or a couple film canisters. It would probably be easier to figure out what the film reels were though.

I accidentally blocked me from seeing your posts bob. I guess you gravely offended me somehow. Anyway, I figured it out and you're back now, so you're forgiven. lol

John
windysean
_VISITCOMMUNITY
Wisconsin, United States
Joined: September 11, 2009
KitMaker: 1,917 posts
Auto Modeler: 268 posts
Posted: Saturday, October 02, 2010 - 03:05 PM UTC
I trust you guys to come up with a nice ribbon.
I assume we're posting our starting kits for this campaign (this is my third start, haven't finished the first two yet).

For this campaign, I'll cut up this 25-year-old build. The body sits too low, and bed is too long. Not to mention, this is a 75 or 76 Toyota, and the "1979 Gyoza" of Toy Story is a slightly newer, rounder body style, with different headlights and taillights. The most notable change will be adding a topper, custom decals, and of course the rocket delivery sign on the cab roof.
I hope I'm not biting off more than I can chew, but winter will bring me indoors, and the projects for my other campaigns are wrapping up soon.
cheers!
Sean
old-dragon
_VISITCOMMUNITY
Illinois, United States
Joined: August 30, 2005
KitMaker: 3,289 posts
Auto Modeler: 1,620 posts
Posted: Sunday, October 03, 2010 - 12:09 AM UTC

Quoted Text

That sounds cool. Either that or a couple film canisters. It would probably be easier to figure out what the film reels were though.

I accidentally blocked me from seeing your posts bob. I guess you gravely offended me somehow. Anyway, I figured it out and you're back now, so you're forgiven. lol

John


It was the whole "train" thing .....wasn't it?!

I cleaned up all the flash and mold lines and then started some sub assemblies. Painted the body in primer and it now has it's 2nd coat of white. The "new" printed decals have they'er 2nd coat of sealer{should be enough - I hope}
Here's some of the assemblies and pieces-

Here's the origonal decal sheet-

Here's the replacement sheet...has the GB 1 ghost decals{no peace sign!}, redone sign boards and some excellently done add-ons. I can't remember who it was that did these on another site to give the due credit{and then some} he deserves.....

...more to follow later.
pastafarian
_VISITCOMMUNITY
United States
Joined: April 10, 2008
KitMaker: 207 posts
Auto Modeler: 66 posts
Posted: Tuesday, October 05, 2010 - 08:18 AM UTC
It was the train deal. I'm mad at you again now. LOL

Change of plans for me. I found a Fujimi Chevy Astro on ebay for a great deal so I'm going to run with the Bug A Bago from King of the Hill. It should be here in a few days ))))))))))))

John
windysean
_VISITCOMMUNITY
Wisconsin, United States
Joined: September 11, 2009
KitMaker: 1,917 posts
Auto Modeler: 268 posts
Posted: Thursday, October 07, 2010 - 09:55 AM UTC
My original message blew up, so here goes my second attempt:
I found a lot of good photos on the internet, so I can make the signage for the doors and roof. It seems several people have tried this project already, since the original Toy Story in 1995.
I bought strip styrene, and I'm ready to begin fabricating a new chassis-- not good enough to look at, but good enough to keep the body off the ground.
We'll see how my weathering goes-- I don't usually weather too heavily, but this thing is a rust bucket.
-Sean.
old-dragon
_VISITCOMMUNITY
Illinois, United States
Joined: August 30, 2005
KitMaker: 3,289 posts
Auto Modeler: 1,620 posts
Posted: Saturday, October 09, 2010 - 04:03 AM UTC
Some recent progress-
-The main assemblies are nearly done. The body still needs trim done up and the interior tub was just started, but the wheels are done as well as the front and rear bumpers.

- I scratched a better scanner{RH piece} and added a CB radio from the truck spares box and the two boxes under the dash contain 10 switches{wire} for all the lights{hard to see, I know}....the dash is ready.

- Here's the whole top assembly nearly done. All I need to do is to make the 4 wire lift hooks for the green box....those were cast on solid so I cut them off. Oh, I also had to scratch the tall yellow radome{w/ black band} since one wasn't supplied with the kit.


She's getting there.......
old-dragon
_VISITCOMMUNITY
Illinois, United States
Joined: August 30, 2005
KitMaker: 3,289 posts
Auto Modeler: 1,620 posts
Posted: Saturday, October 09, 2010 - 04:28 AM UTC
...3 more just for laughs-
-Top shot of the rack assembly-

-You can see the lil switches easier from this bottom shot of the dash-

-Here's the rear shot of the body...masking off those red sections was a hassle due to the compound curves and the gas cap...the instructions were really vague as to how to paint them so I used my web resources for reference.

Pretty darn close!
pastafarian
_VISITCOMMUNITY
United States
Joined: April 10, 2008
KitMaker: 207 posts
Auto Modeler: 66 posts
Posted: Saturday, October 09, 2010 - 12:34 PM UTC
That looks great Bob. Are the proton packs included in the kits?

I got the Astro Van the other day and am itching to start on it. It's a really nice kit! I'll post some pics later, but I was impressed.

Got a question, what do you guys think I should use to make the dead ant on top? I was thinking about clay, but that likes to crack as it drys. I'm not sure if my hand is steady enough to use a dremel and carve it out of wood. any ideas?

John
old-dragon
_VISITCOMMUNITY
Illinois, United States
Joined: August 30, 2005
KitMaker: 3,289 posts
Auto Modeler: 1,620 posts
Posted: Saturday, October 09, 2010 - 02:57 PM UTC

Quoted Text

That looks great Bob. Are the proton packs included in the kits?
[answer A]

Got a question, what do you guys think I should use to make the dead ant on top? I was thinking about clay, but that likes to crack as it drys. I'm not sure if my hand is steady enough to use a dremel and carve it out of wood. any ideas?
[answer B]
John


A - Thanks, and no unfortuantely niether the gurney nor the packs are included...but a guy's modelling site I found shows how he made not only those two things but the foot operated trap and the slimer backpack as well. We'll see what I wind up adding once the basic build is ready to be buttoned up...
B - I've used "Sculpey" clay with great success...it comes in alot of colors, forms easily to what you want and then is baked to a hard item which can be easily painted if the colors available aren't to your liking. I'd suggest you form it and add the legs, then bake it the way you want it so you don't have to try and drill in it later after it's hardened...my 2 cents. I got mine from the local Hobby Lobby craft store - one pack cost under $2.{you might need two though}
old-dragon
_VISITCOMMUNITY
Illinois, United States
Joined: August 30, 2005
KitMaker: 3,289 posts
Auto Modeler: 1,620 posts
Posted: Sunday, October 10, 2010 - 03:10 PM UTC
I got alittle more done today...finished up the frame and the rims-

I wanted the "old but still solid" look for the chassis...
windysean
_VISITCOMMUNITY
Wisconsin, United States
Joined: September 11, 2009
KitMaker: 1,917 posts
Auto Modeler: 268 posts
Posted: Sunday, October 10, 2010 - 03:27 PM UTC

Quoted Text

I got the Astro Van the other day and am itching to start on it. It's a really nice kit! I'll post some pics later, but I was impressed.

Got a question, what do you guys think I should use to make the dead ant on top? I was thinking about clay, but that likes to crack as it drys. I'm not sure if my hand is steady enough to use a dremel and carve it out of wood. any ideas?

John


I have a similar problem with the rocket ship on top of the delivery truck. I was preparing to sand balsa or basswood to shape. I'm more accurate with files and sanding, so that was my plan. If you get a better answer here, I'm willing to follow.
-Sean.
windysean
_VISITCOMMUNITY
Wisconsin, United States
Joined: September 11, 2009
KitMaker: 1,917 posts
Auto Modeler: 268 posts
Posted: Sunday, October 10, 2010 - 03:30 PM UTC
... and Bob, fantastic paint work and detail. Just awesome.
old-dragon
_VISITCOMMUNITY
Illinois, United States
Joined: August 30, 2005
KitMaker: 3,289 posts
Auto Modeler: 1,620 posts
Posted: Sunday, October 10, 2010 - 03:50 PM UTC
Sean, thank you sir...I simply painted the chassis flat black, painted the pipes/mufflers steel, then fired a rust wash thru the AB where I wanted it @ 5psi, then used a black wash to follow to shade in where I didn't want any rust overspray and to tone it all down. I always have 3 washes on hand for the AB; rust, black and sand{dust/dirt look}. Took half an hour of tinkering around.
Oh, the answer to your other above question{rocket ship construction possiblities} please see 4 posts above this one, answer B, for John - but it'll work the same for you too! {neat stuff}
FWIW....black wash in the 4 rim slots{car grill slats too for depth} and you could make the rim look alittle rusty with a rust wash in the nooks and crannies
Sabot
Joined: December 18, 2001
KitMaker: 12,596 posts
Auto Modeler: 59 posts
Posted: Monday, October 11, 2010 - 02:52 AM UTC
Here's the Mach 5 I intend to build. Picked it up for a whopping $7. They had two of them, one with a simplified snap tite and the glue one with more options and addtional suspension details. The photo is of the glue one.
windysean
_VISITCOMMUNITY
Wisconsin, United States
Joined: September 11, 2009
KitMaker: 1,917 posts
Auto Modeler: 268 posts
Posted: Wednesday, October 13, 2010 - 01:50 AM UTC
I shortened the truck bed last night, so I'll know the dimensions of the frame. It might be too short now, but as a cartoon pickup it works. Nothing to see yet, but the build is officially underway! The excitement grows.
-Sean.
VonCuda
_VISITCOMMUNITY
North Carolina, United States
Joined: November 28, 2005
KitMaker: 2,216 posts
Auto Modeler: 522 posts
Posted: Monday, October 18, 2010 - 11:12 AM UTC
John, I've been out of action for a few weeks and didn't know anything about this campaign, but I'm enlisted now. I won't be able to get started right away (more like Christmas) but I'll build the triple black Cuda' from the movie Phantasm.

Hermon
Sabot
Joined: December 18, 2001
KitMaker: 12,596 posts
Auto Modeler: 59 posts
Posted: Wednesday, October 27, 2010 - 01:33 PM UTC
I haven't had a chance to get working on my Speed Racer, but I have been building a slew of kits that still fit this TV campaign build. I've been busy trying to get my 6 yr old son building but he lacks the finer motor skills and still wants to play with the kits. He is a big Star Wars The Clone Wars fan. We watch the animated show on Fridays and he plays Lego Star Wars on the PS3 and Nintendo DS quite often. He was looking at a Fine Molds Snow Speeder I got from eBay and showed a great interest in the kit.

Not wanting to let him loose on an expensive Fine Molds kit, I found a few of the pre-decorated snap tite Revell Star Wars kits at Marshall's for a whopping $4.99 a piece. I bought some of the bigger Revell Star Wars kits at the local hobby shop, eBay and Squadron.com for around $20 a piece. I had to help him, basically had to remove parts and press them together to gain a positive lock. He followed along and we had a bit of fun.

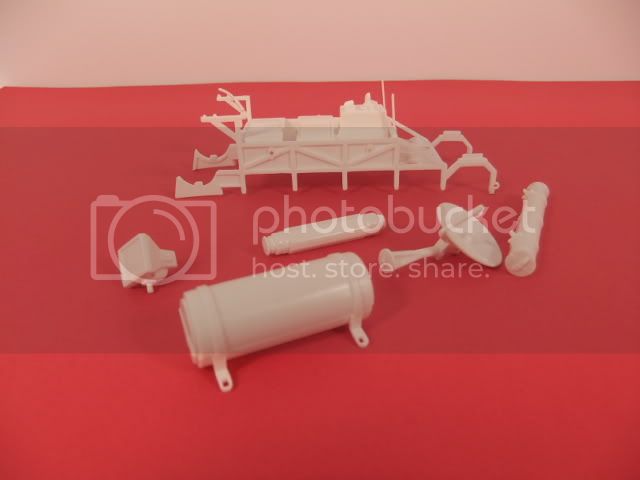
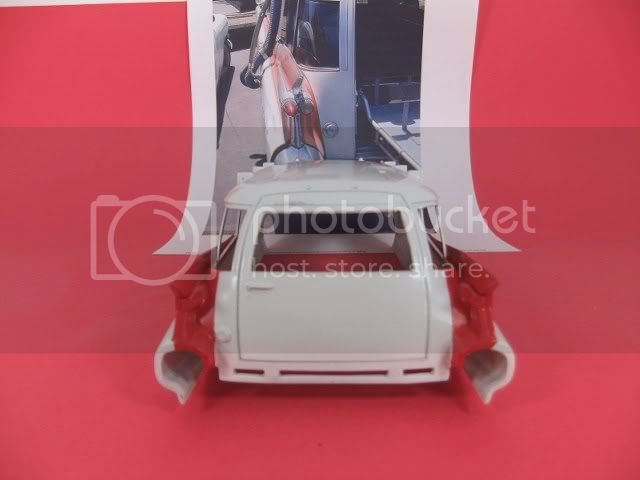
These kits are light years beyond the MPC kits from the 1970s and 80s and much better than the AMT/Ertl kits released after Episodes 1, 2 and 3. The level of detail on them are amazing and they are well engineered. Only a few spots required some glue to flow with minor clamping to close wing gaps. Other than that, they fit like a glove.

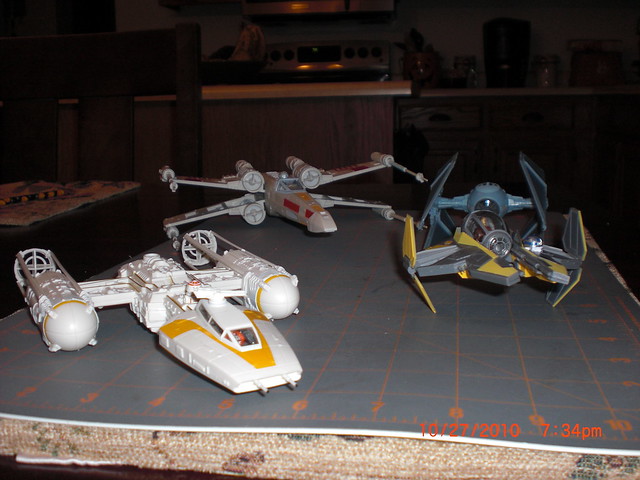
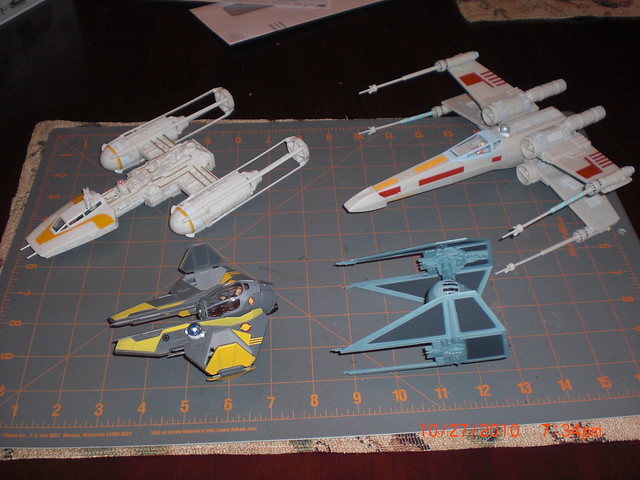
Here's what we knocked out during the weekend and a few evenings after homework was done (yes, 1st graders get homework). There are two bigger kits, the X-Wing and Y-Wing fighters and the TIE Interceptor and Eta-2 Jedi fighter were the $5 bagged kits.

I wish we had finished the fleet earlier in the day and I had a chance to take better shots, but here they are:


old-dragon
_VISITCOMMUNITY
Illinois, United States
Joined: August 30, 2005
KitMaker: 3,289 posts
Auto Modeler: 1,620 posts
Posted: Thursday, October 28, 2010 - 12:29 PM UTC
Sabot, your son did some very nice work there...it was nice of him to let you help "alittle". {my 5yr old is the same way}
We're on the Star Wars kick around here as of lately too since my son picked out a storm trooper costume for this year....and your not alone{well, your son that is}, my son is in kindergarden and he has a sheet of homework every night{catholic school taskmasters! }.
Sabot
Joined: December 18, 2001
KitMaker: 12,596 posts
Auto Modeler: 59 posts
Posted: Thursday, October 28, 2010 - 12:41 PM UTC
Mine is going as a mini Darth Vader, complete with light saber
old-dragon
_VISITCOMMUNITY
Illinois, United States
Joined: August 30, 2005
KitMaker: 3,289 posts
Auto Modeler: 1,620 posts
Posted: Friday, October 29, 2010 - 02:44 AM UTC
Cool!...I got my son the clone wars talking helmit...the thing is huge on him. Isn't it great that we can live thru our kids!


Alright...I need to get back to the ghost buster's build........time for some decals!
windysean
_VISITCOMMUNITY
Wisconsin, United States
Joined: September 11, 2009
KitMaker: 1,917 posts
Auto Modeler: 268 posts
Posted: Friday, November 12, 2010 - 04:06 AM UTC
A little bump to this forum, with a minor update.

I've shortened the truck body and chassis. I had originally thought I'd replace the frame and underside details, but changed my mind. I won't create more detail than the original, especially with the holidays coming and all. I'll just put in some spacers to raise the body a bit.
I dug up wheels of a good size. I vaguely remember they're the "stock option" wheels from an old 1/25 MPC or AMT Chevette kit.
The rear bumper can probably be reused here, but the front bumper and grill will have to be custom built to match the movie stills.
Studying the photos, I also see a good opportunity to try the hairspray rust finish on this beater truck.
Forward ever, backward never!
-Sean.
Removed by original poster on 11/12/10 - 16:12:10 (GMT).
windysean
_VISITCOMMUNITY
Wisconsin, United States
Joined: September 11, 2009
KitMaker: 1,917 posts
Auto Modeler: 268 posts
Posted: Tuesday, November 16, 2010 - 04:06 AM UTC
another bump for a quick status update.
I modified the front end of the Toyota model to Pixar's generic Gyoza truck. More of a newer Toyota front end, mixed with Nissan or Mazda? Mine has little detail, as I think the movie truck was supposed to be missing the chrome grill altogether and just a void there, so I'll paint it a dark gray.


Cheers,
Sean.
 _GOTOTOP