

D,
Outstanding scratch building on that rubber boot. What a difference it makes to the interior. As for the interior, Aces on it.
Looking forward to following your adventures with the engine.
Joel


Go to automodeler.com for the current dynamic site!
Hosted by Jim Starkweather
Tri-Five Project Part 1 - 55 Series

Joel_W

Joined: December 04, 2010
KitMaker: 11,666 posts
Auto Modeler: 2,974 posts

Posted: Tuesday, February 18, 2020 - 01:52 AM UTC


AussieReg

#007

Joined: June 09, 2009
KitMaker: 8,156 posts
Auto Modeler: 2,953 posts

Posted: Thursday, February 20, 2020 - 04:01 PM UTC
Thanks Joel, I'm glad that I made the effort to add the boot on the gear shift. It just didn't look right sitting straight through the console with no surround.
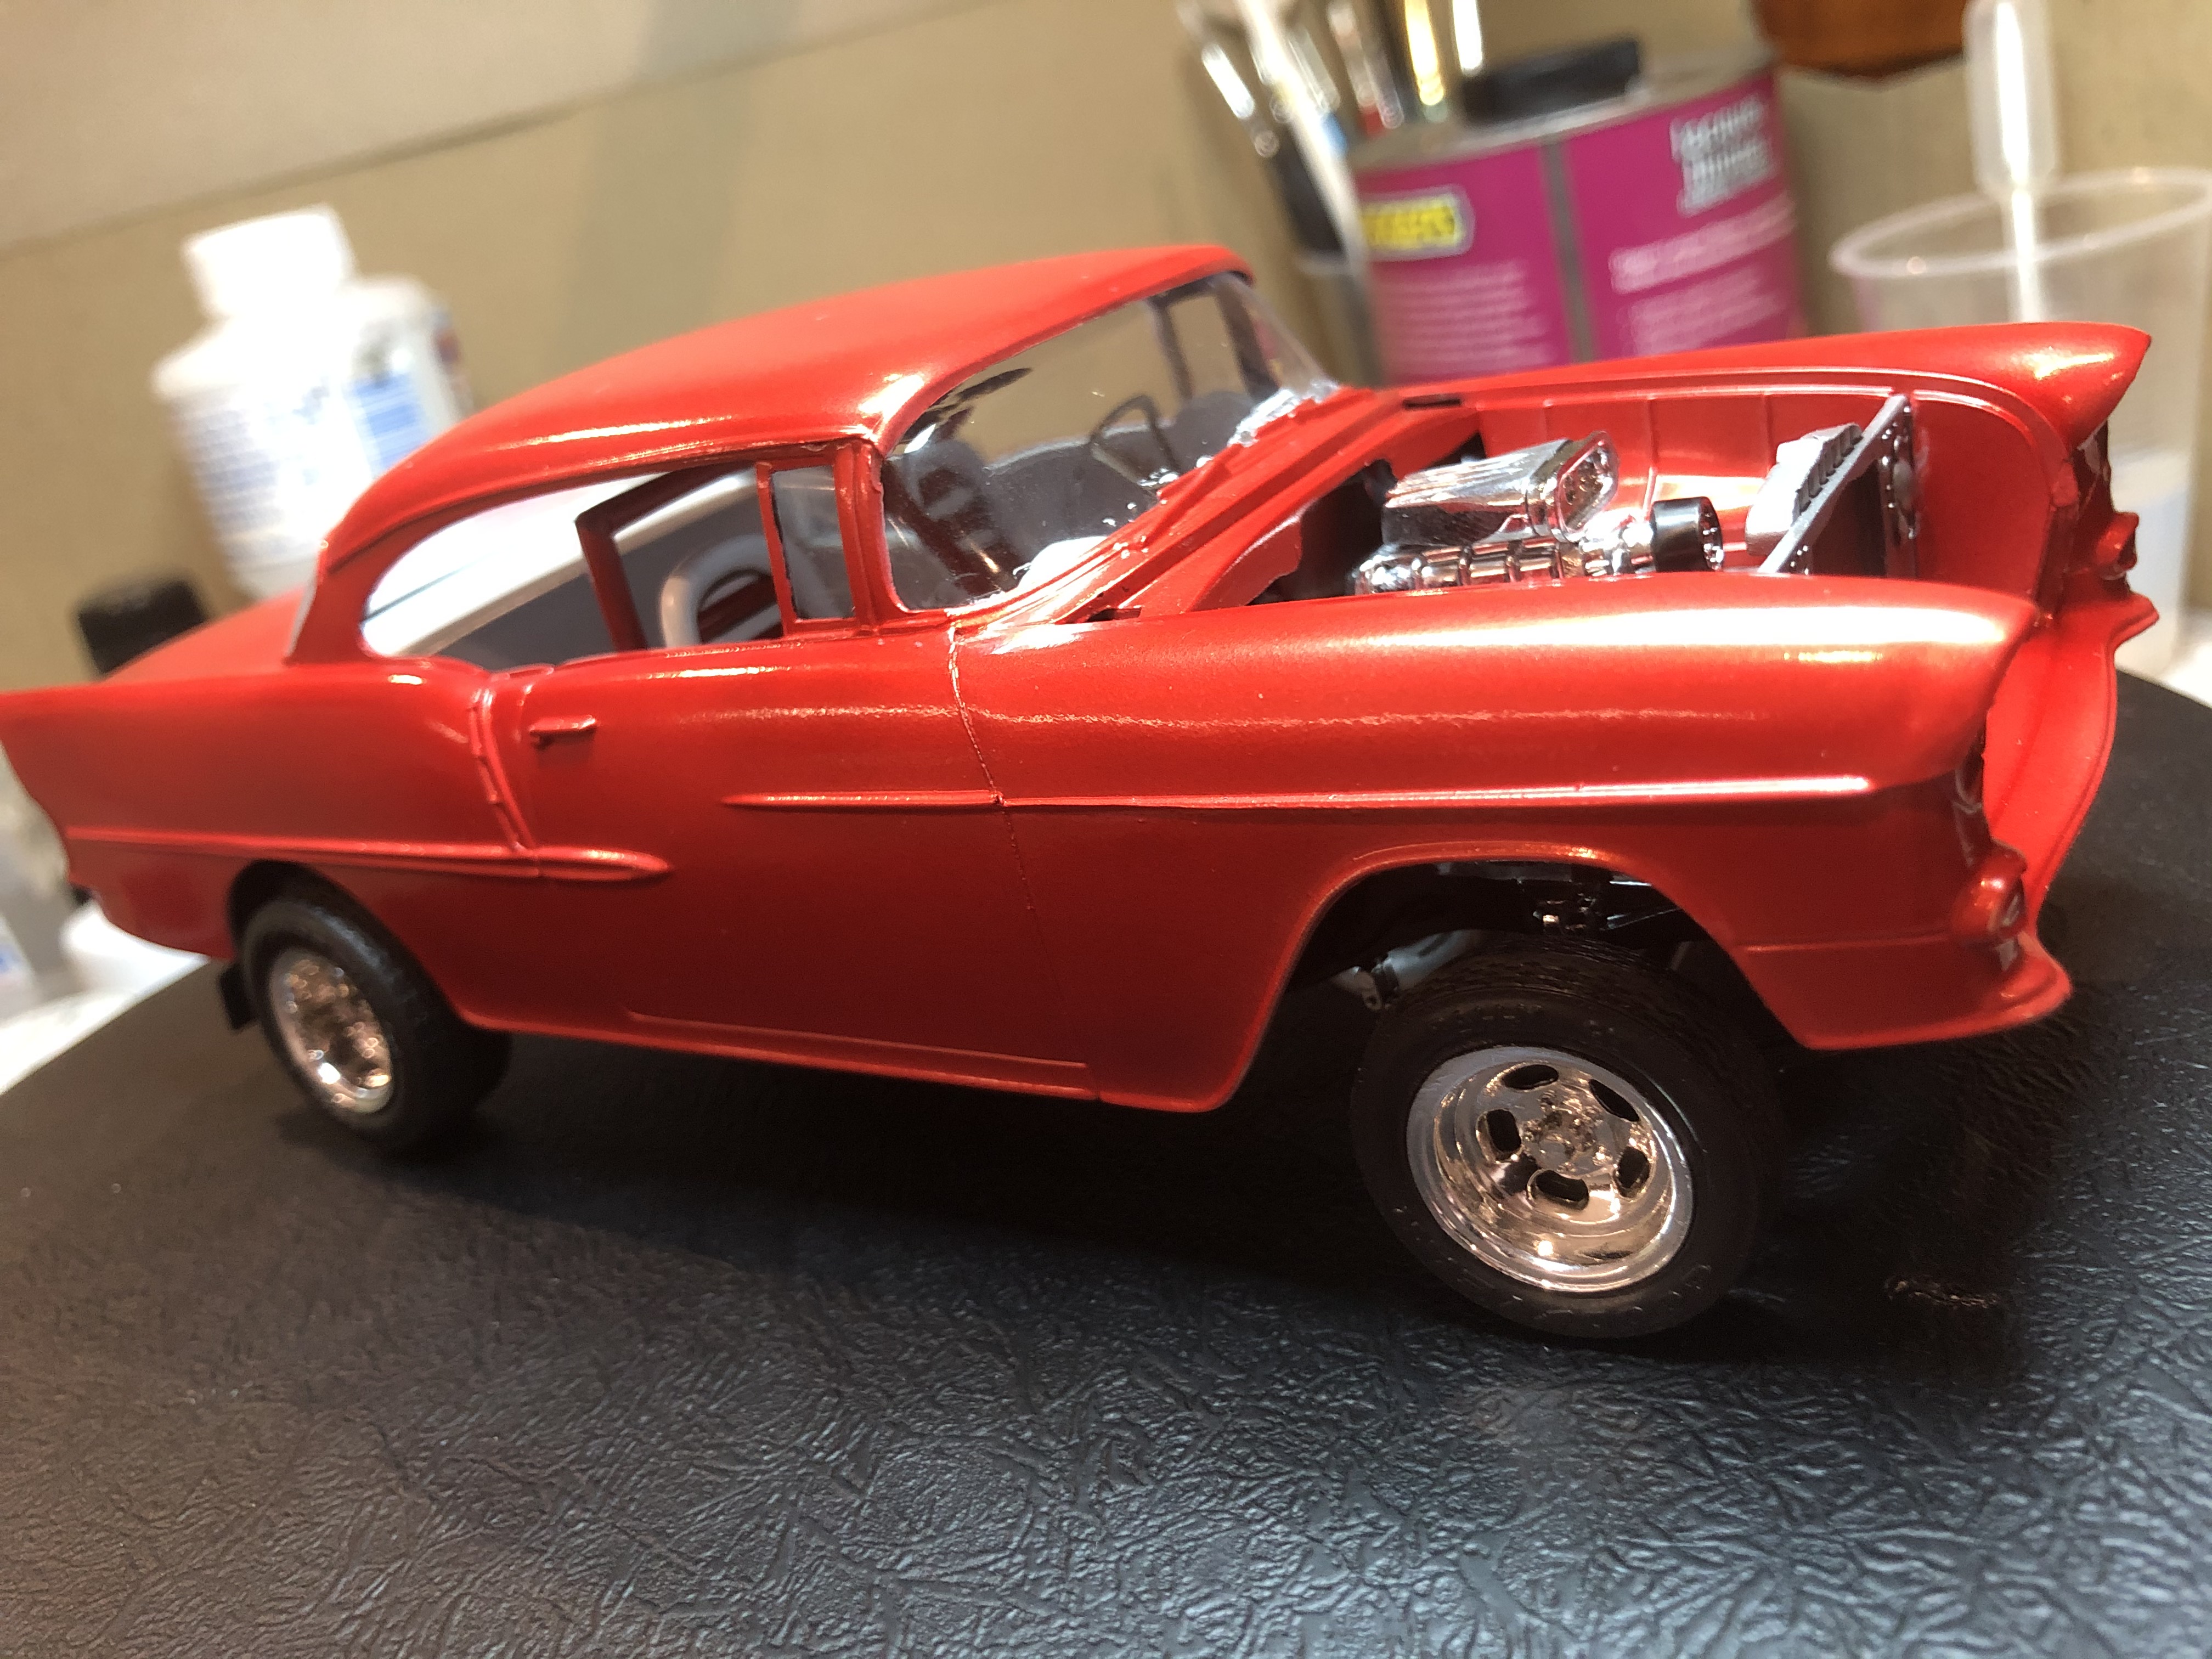
Engine painted and assembled.
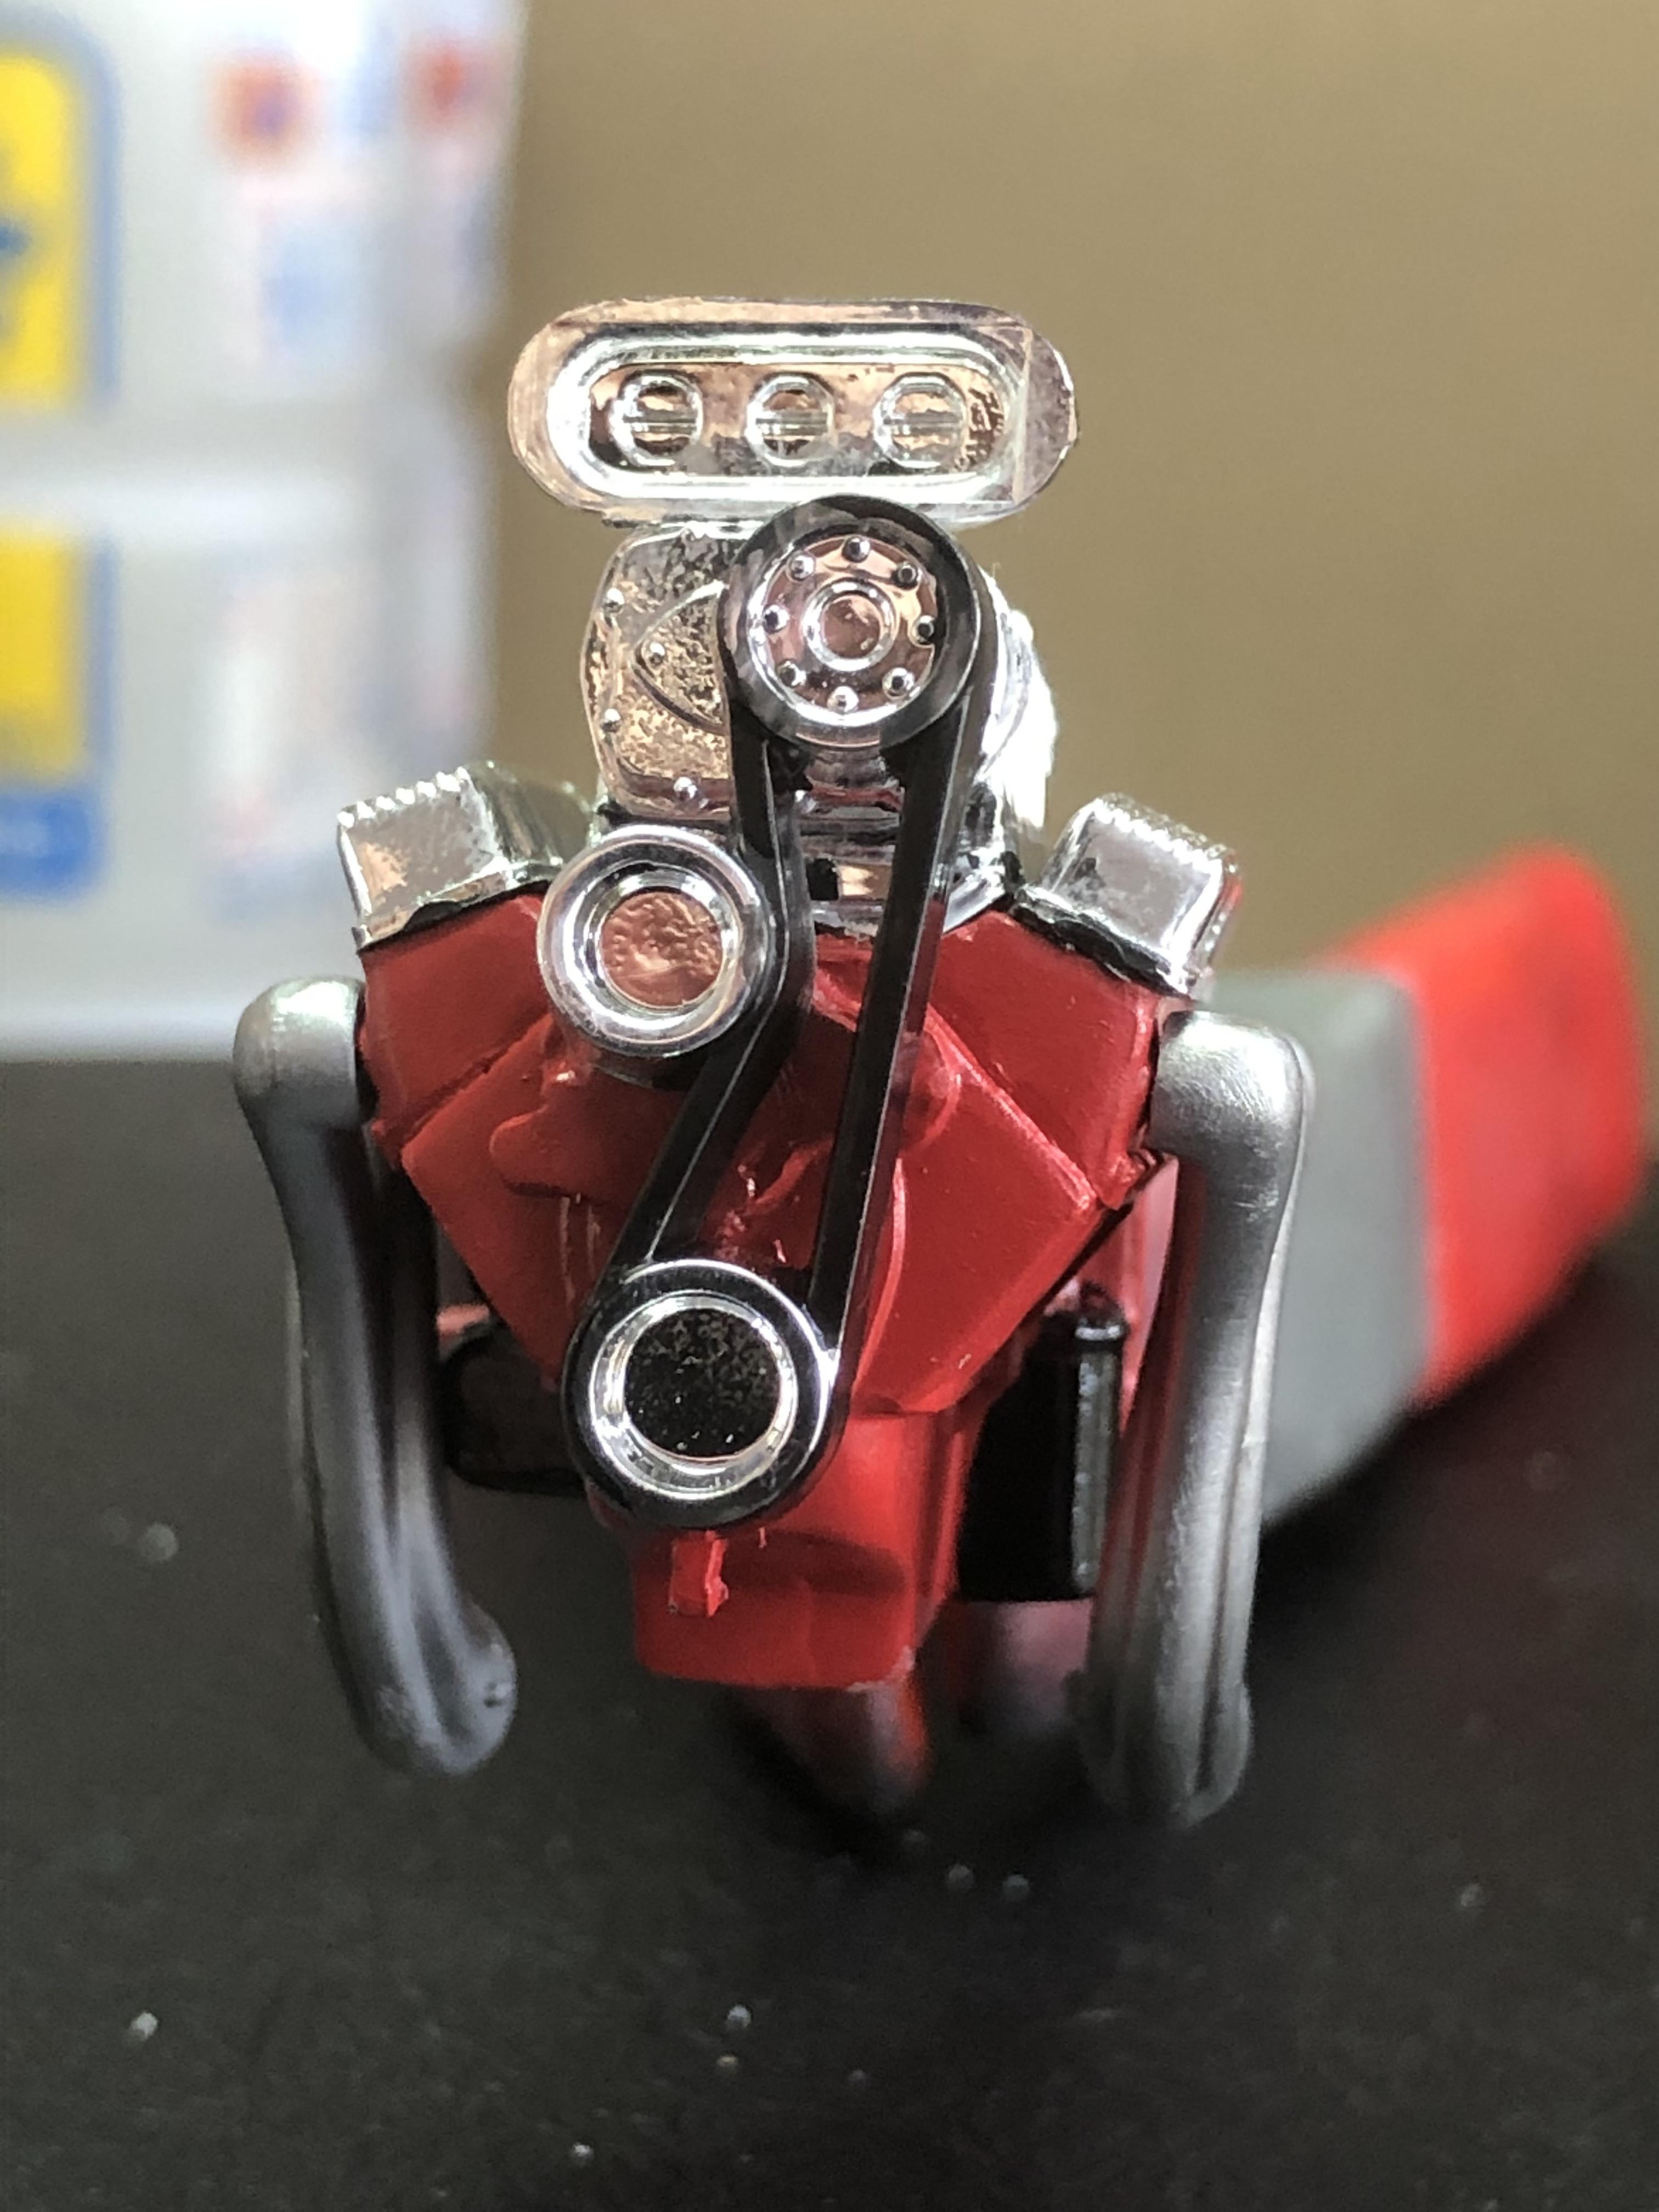
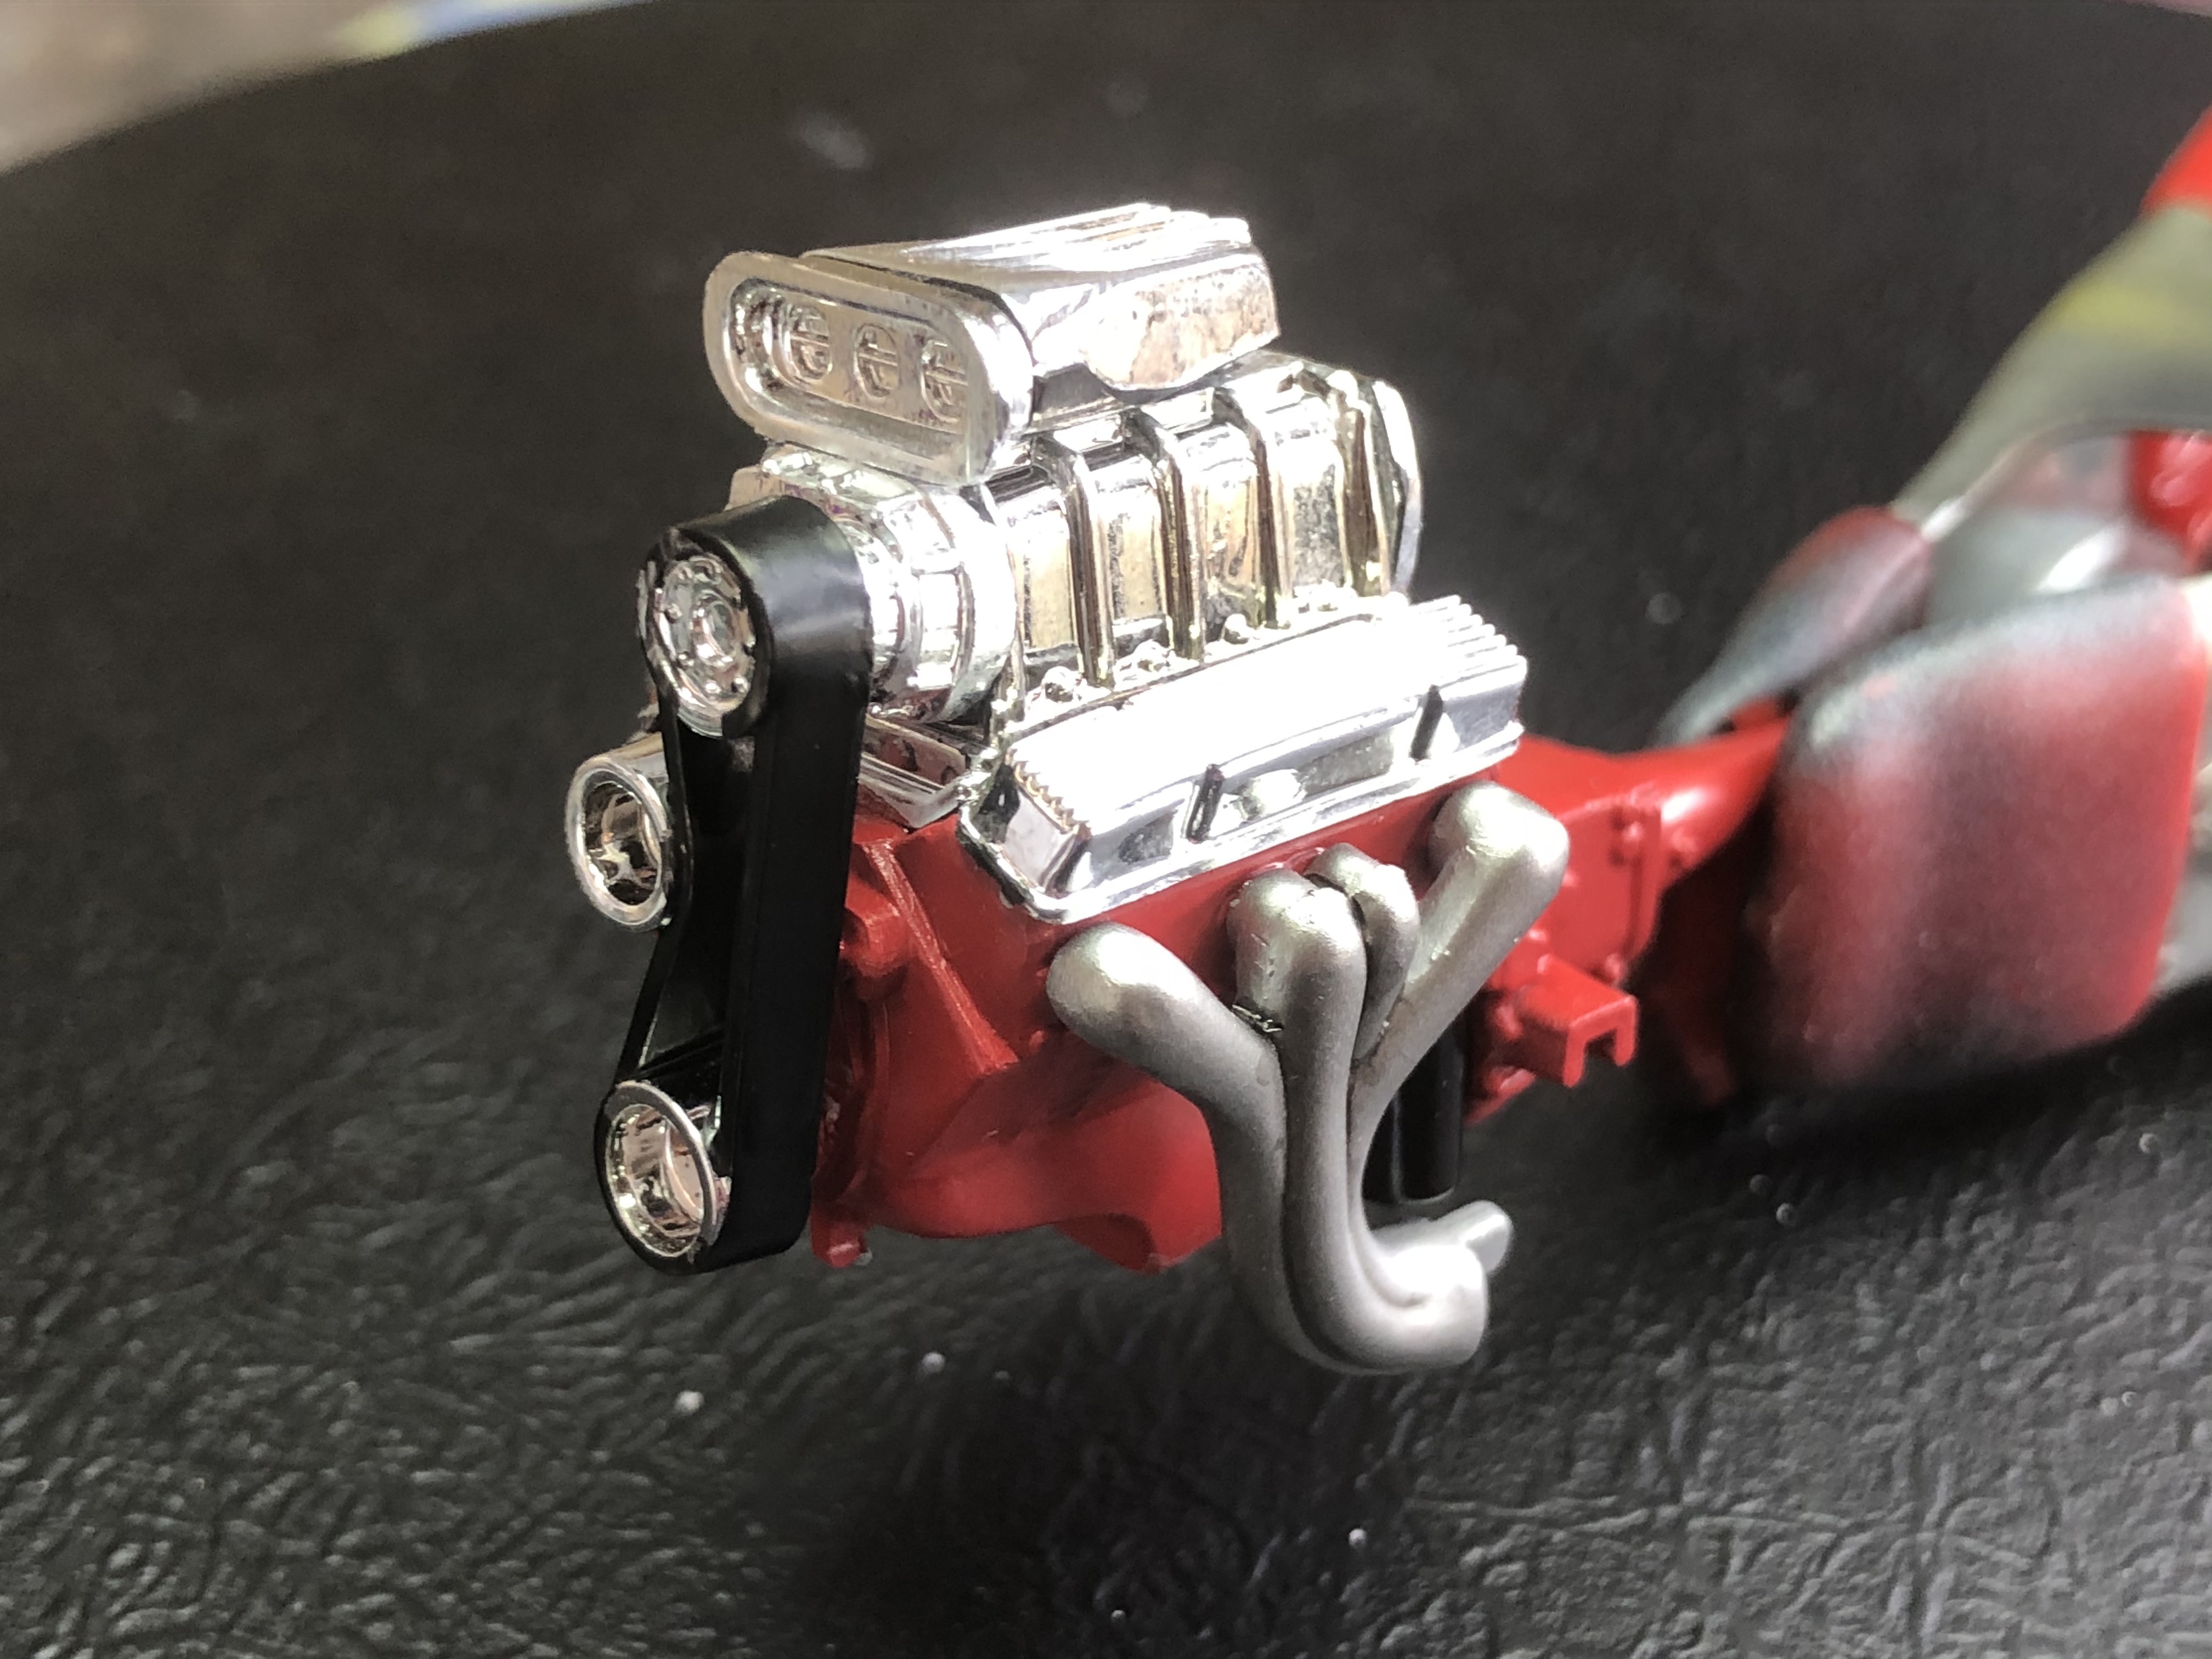
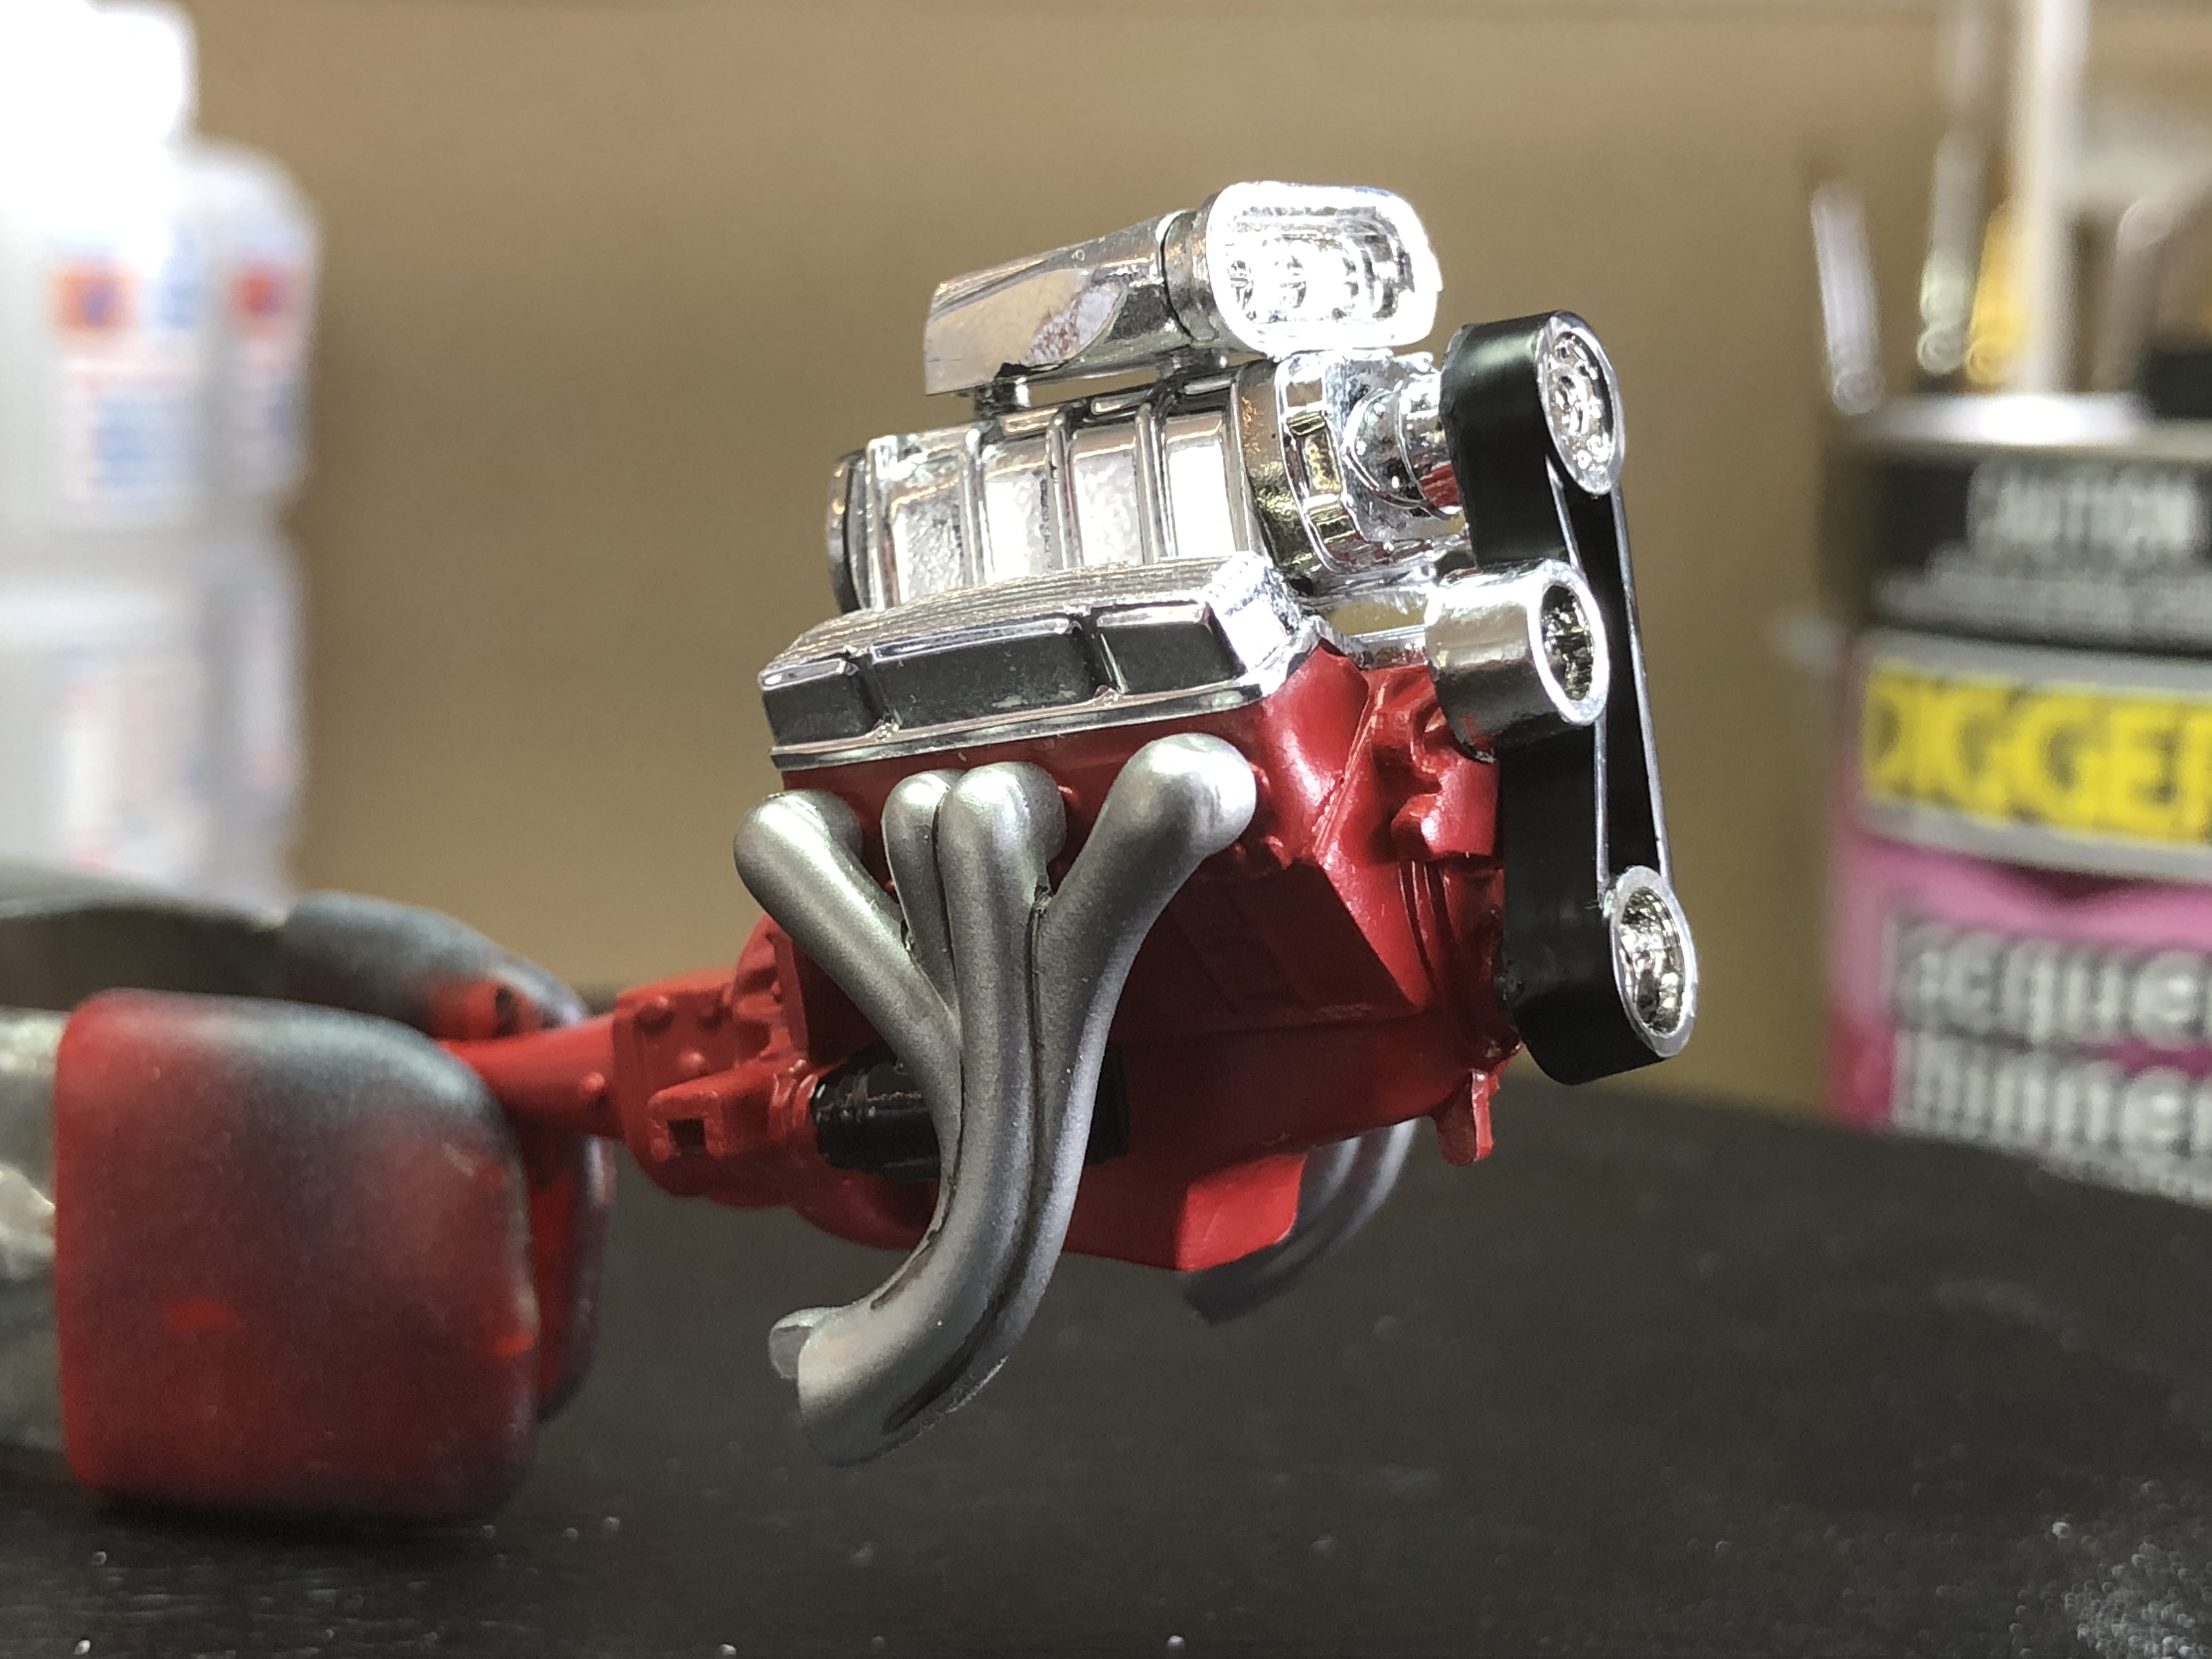
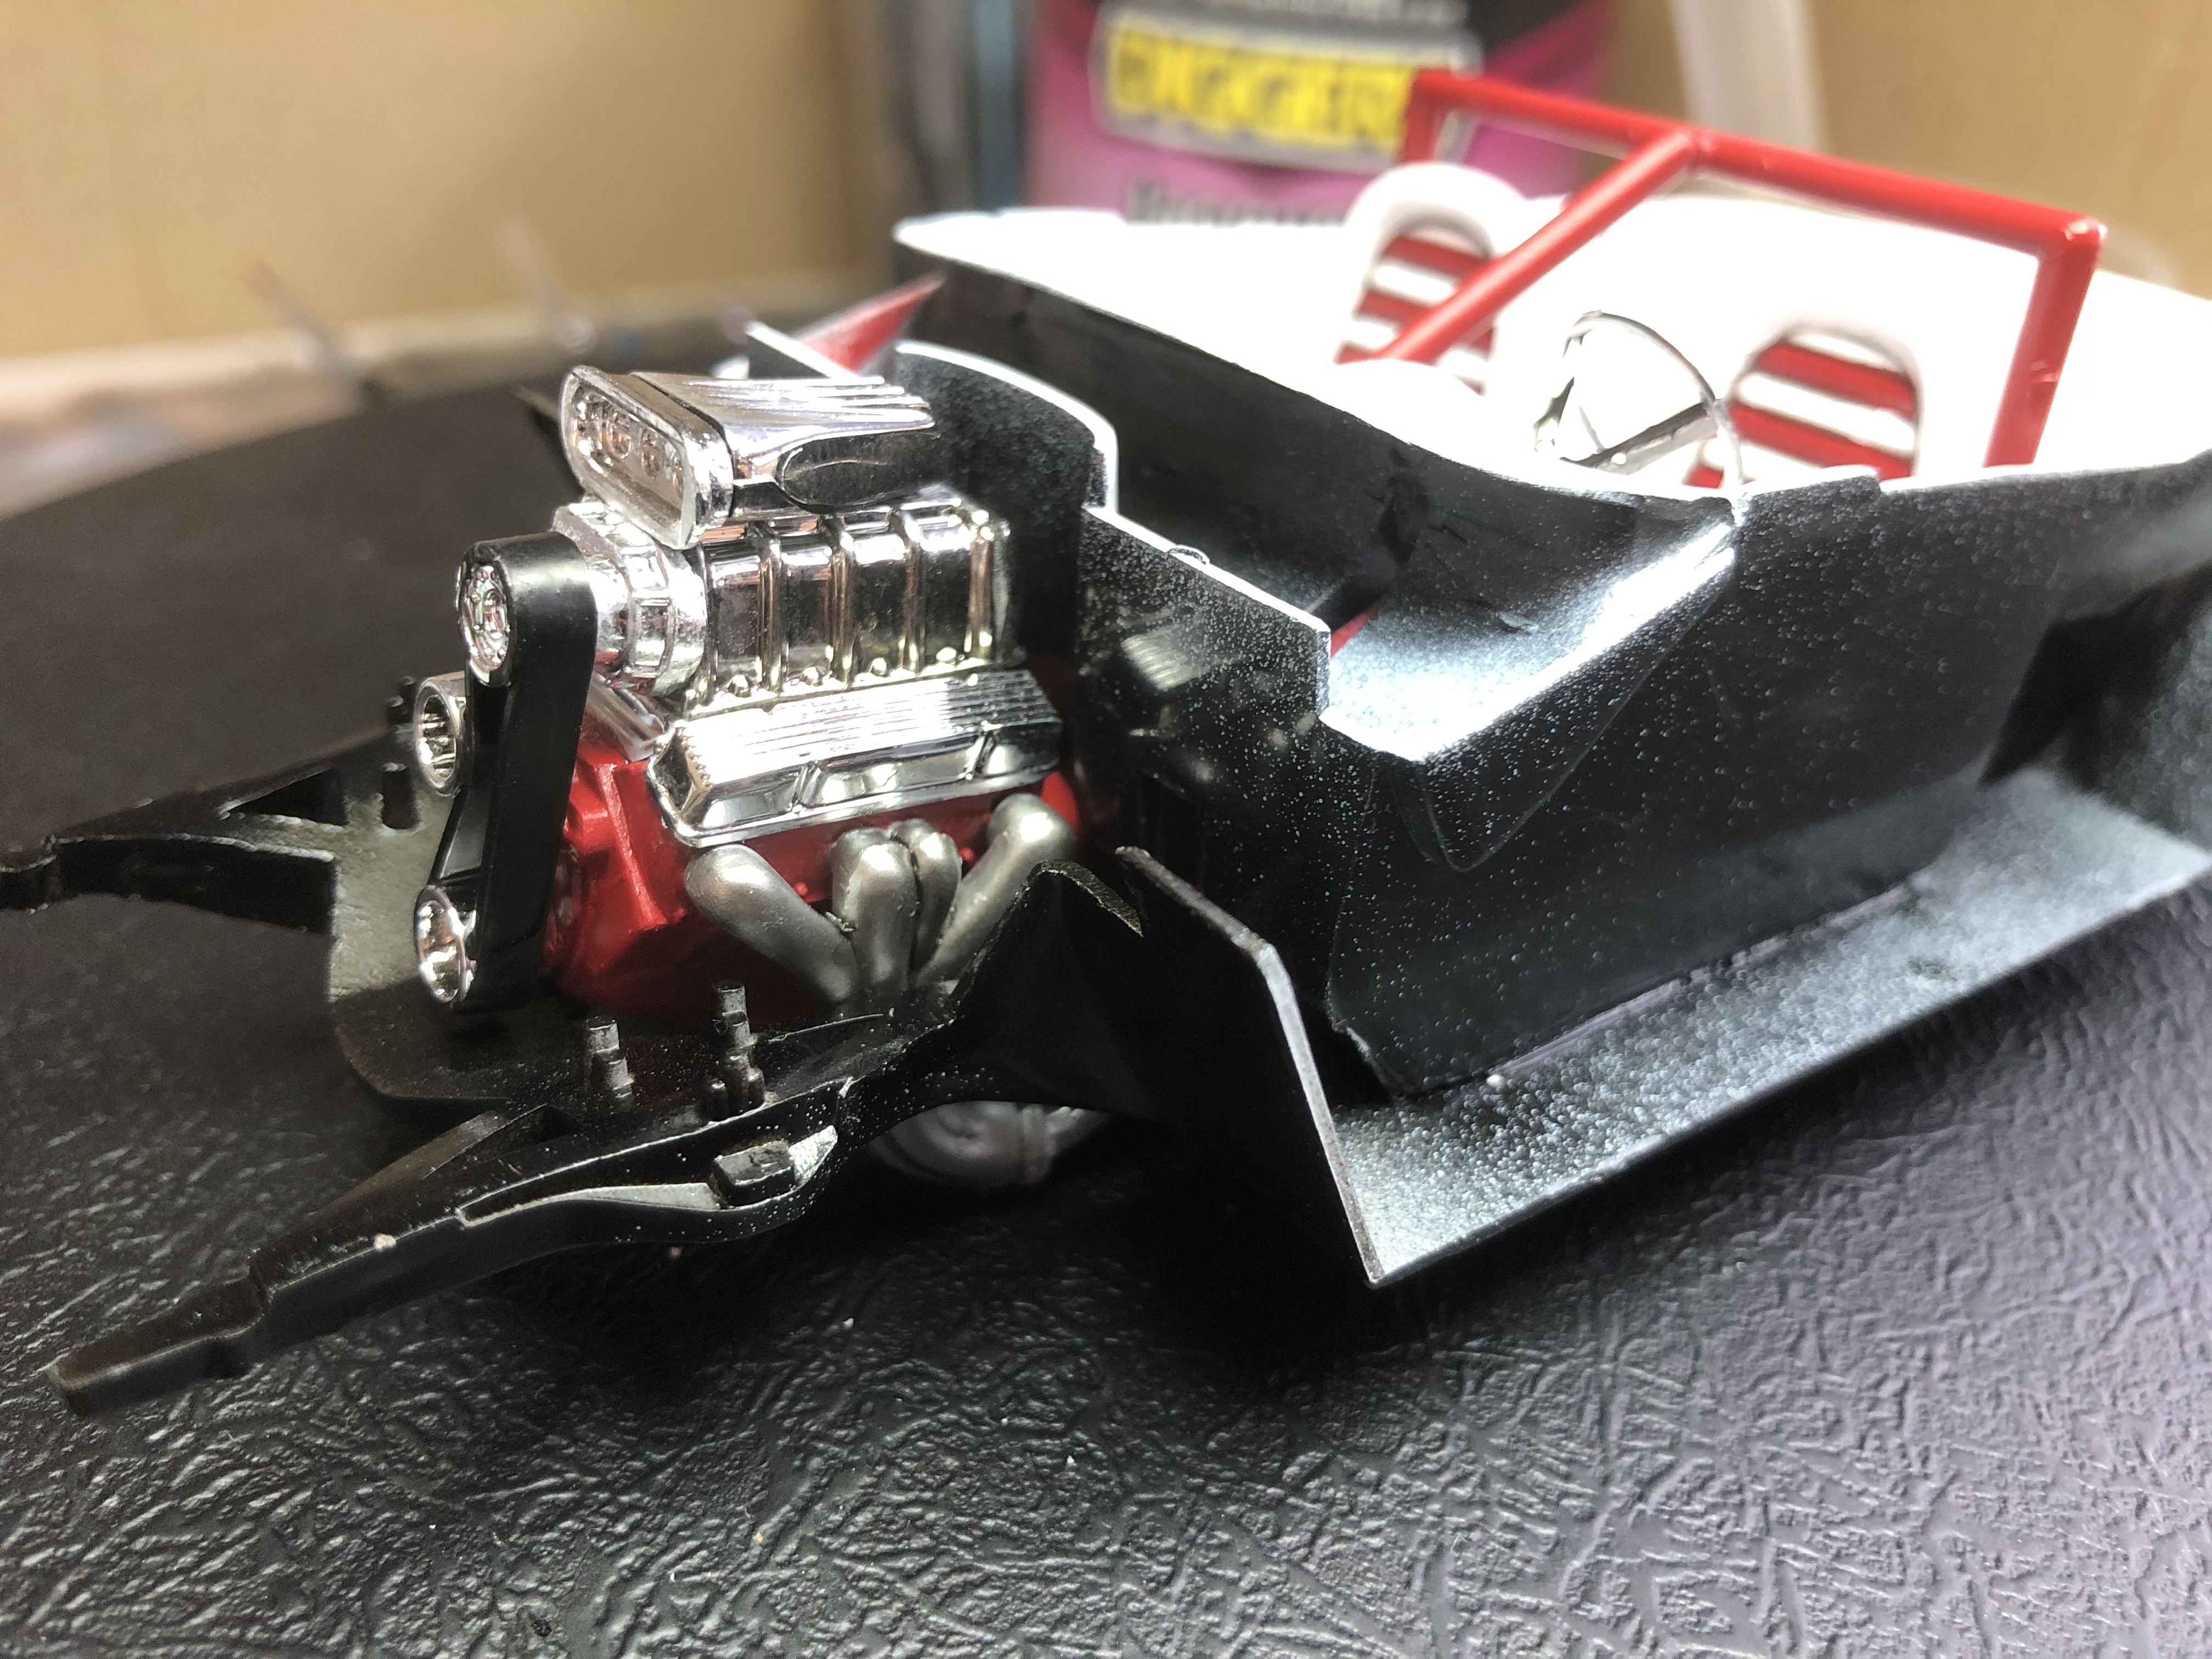
And installed. I still need to give it a pin wash but that will wait until the last bits are fitted off and cured.
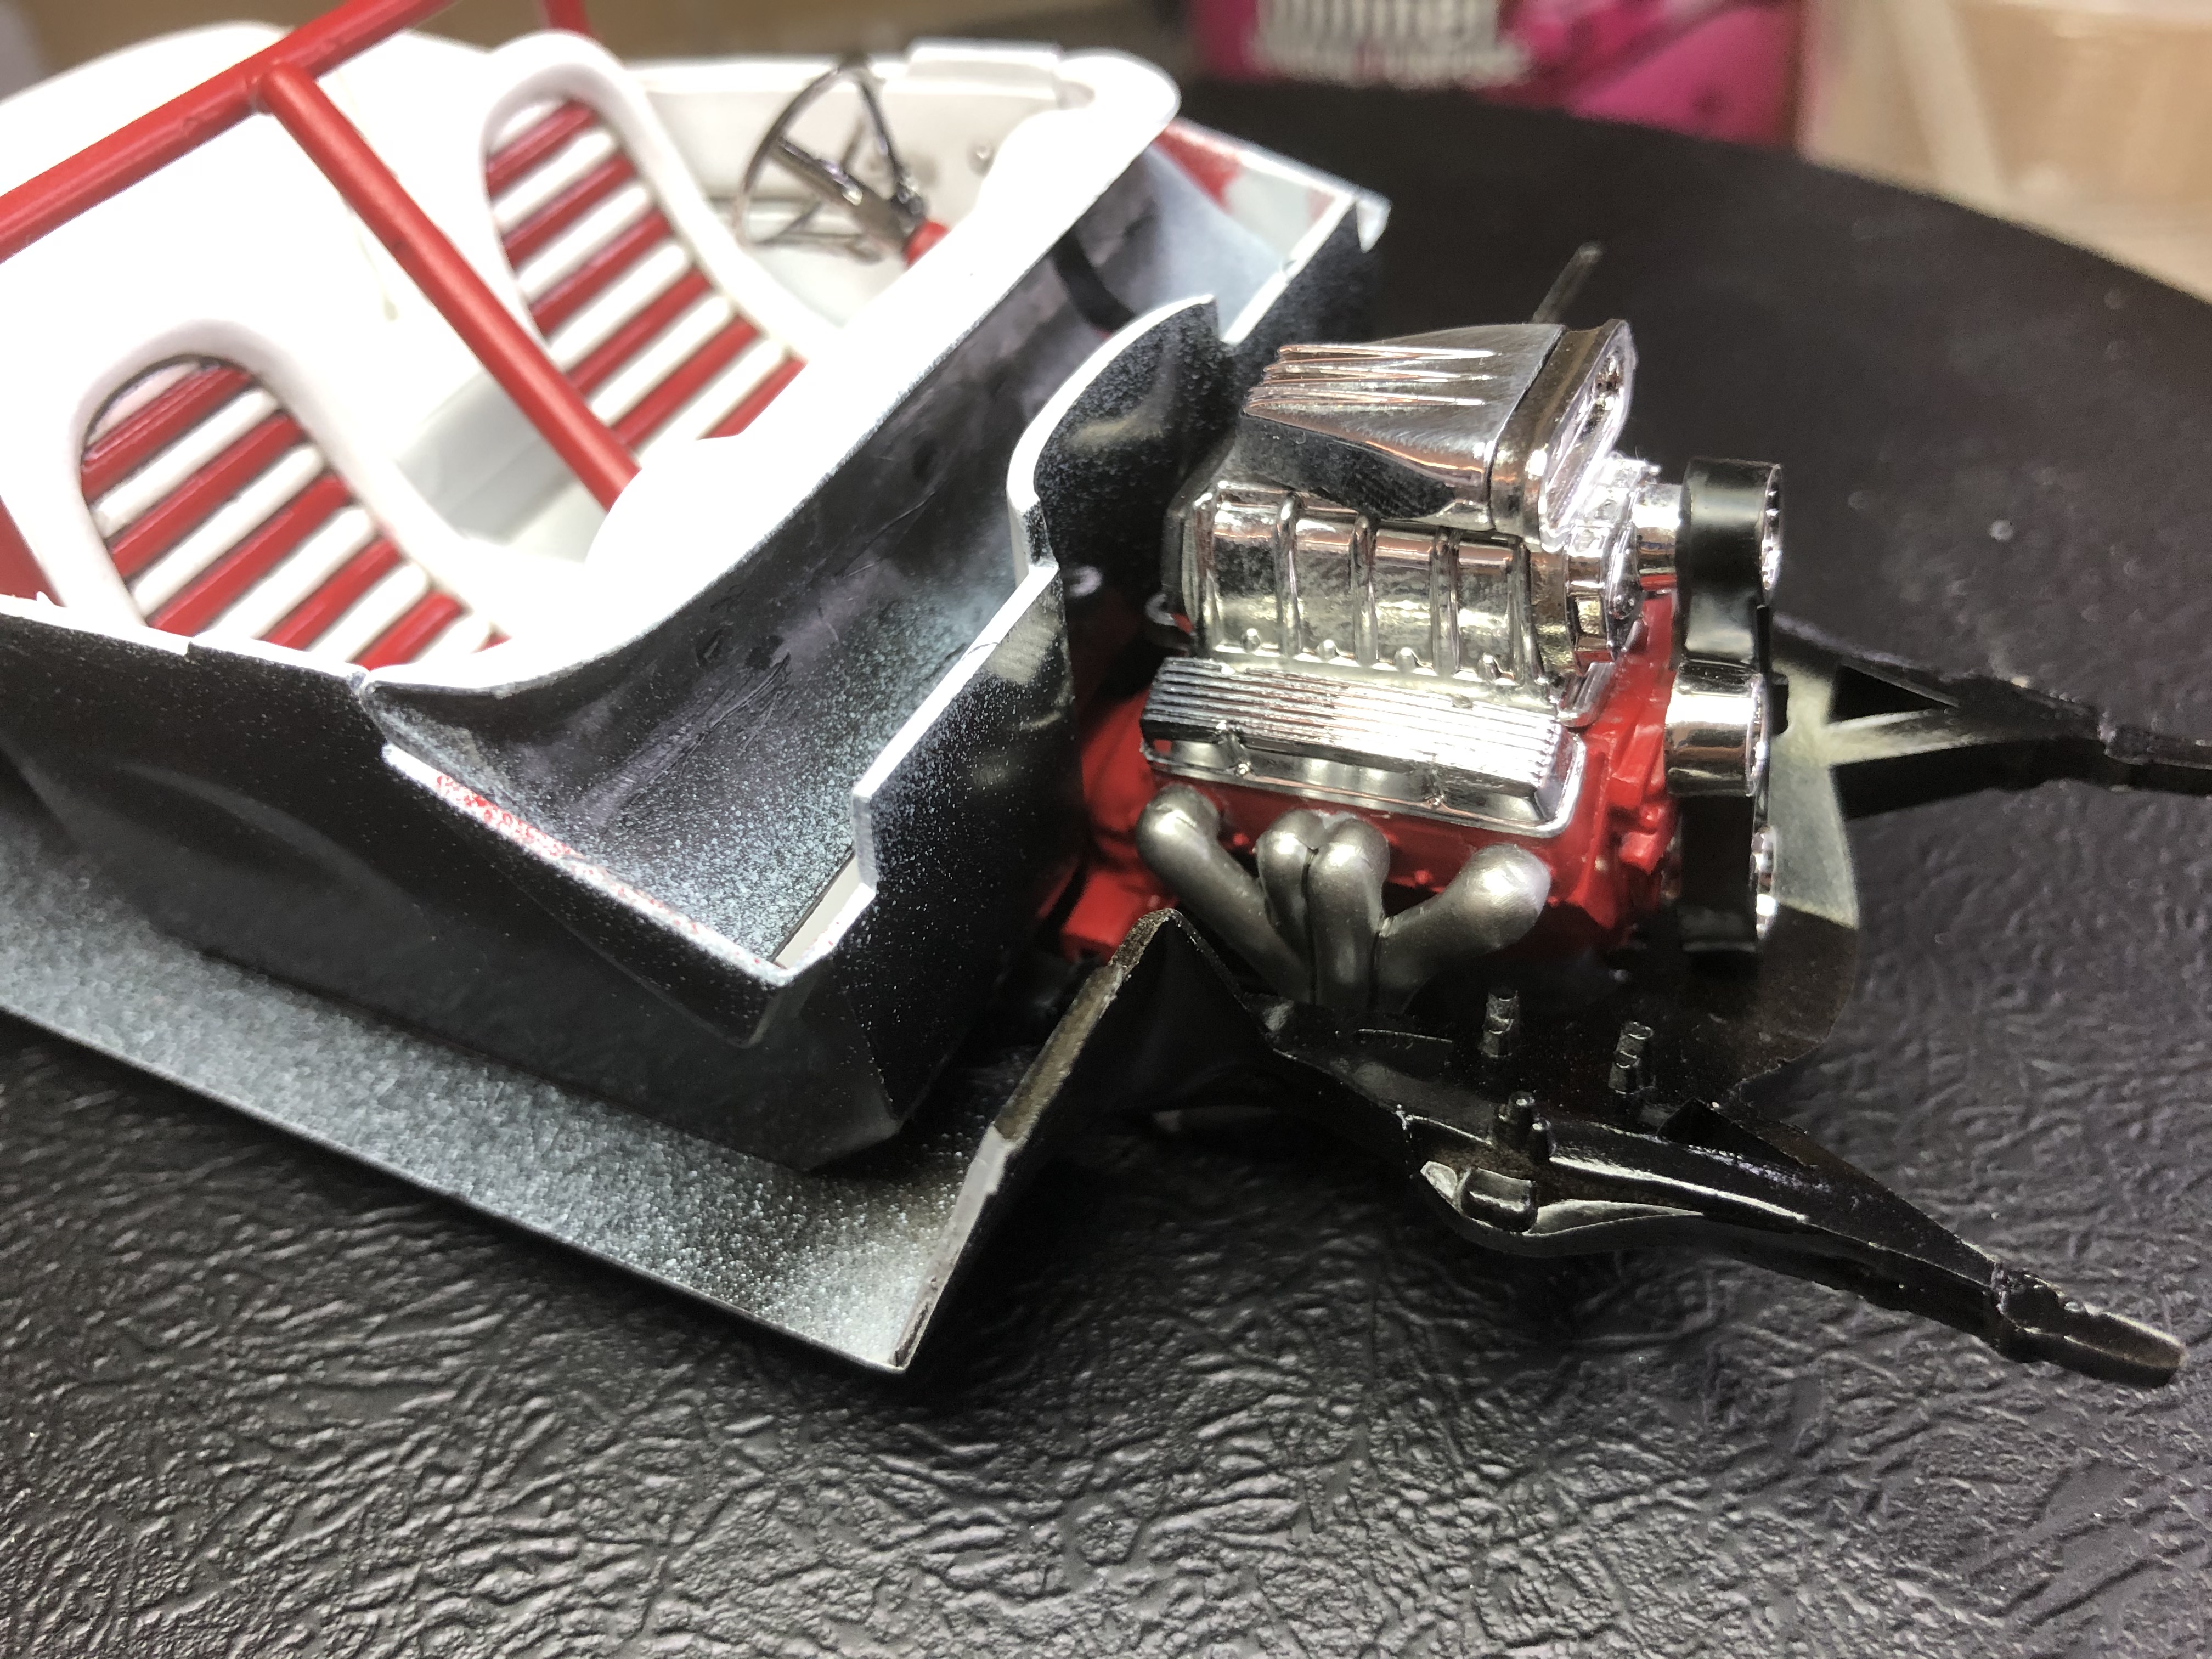
I have also painted and pinwashed the radiator and mount frame, and pinwashed the grille.
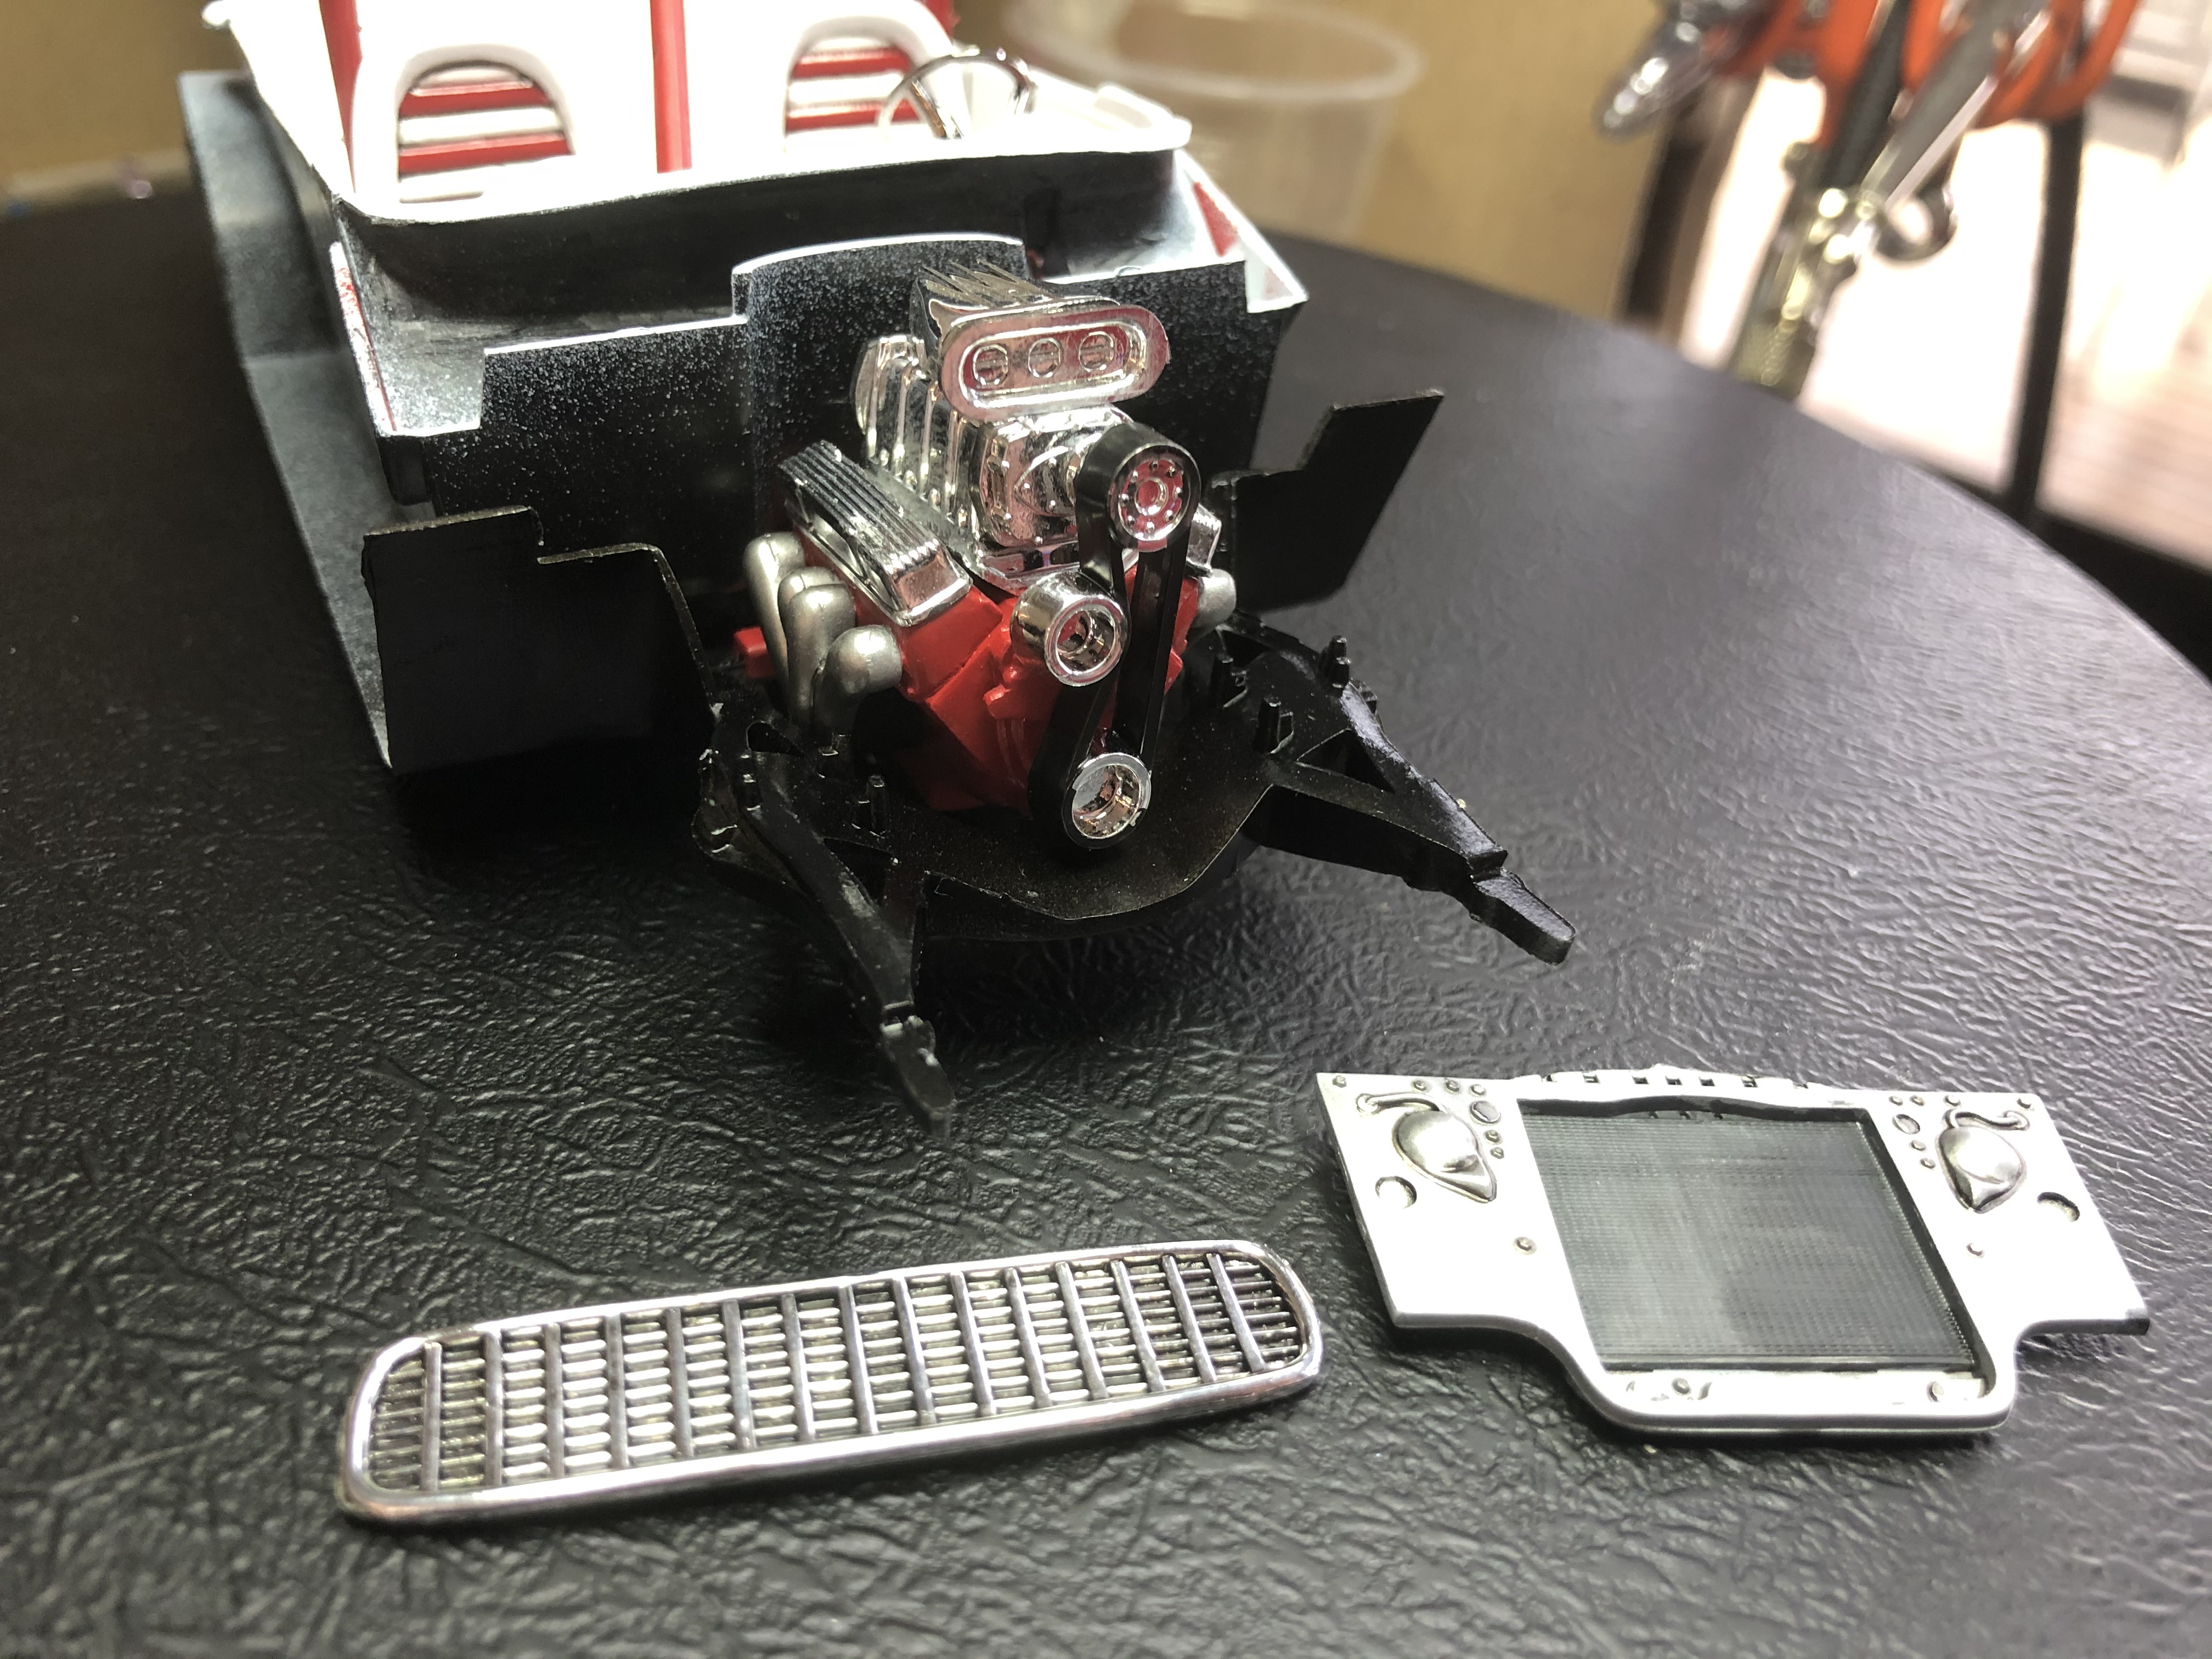
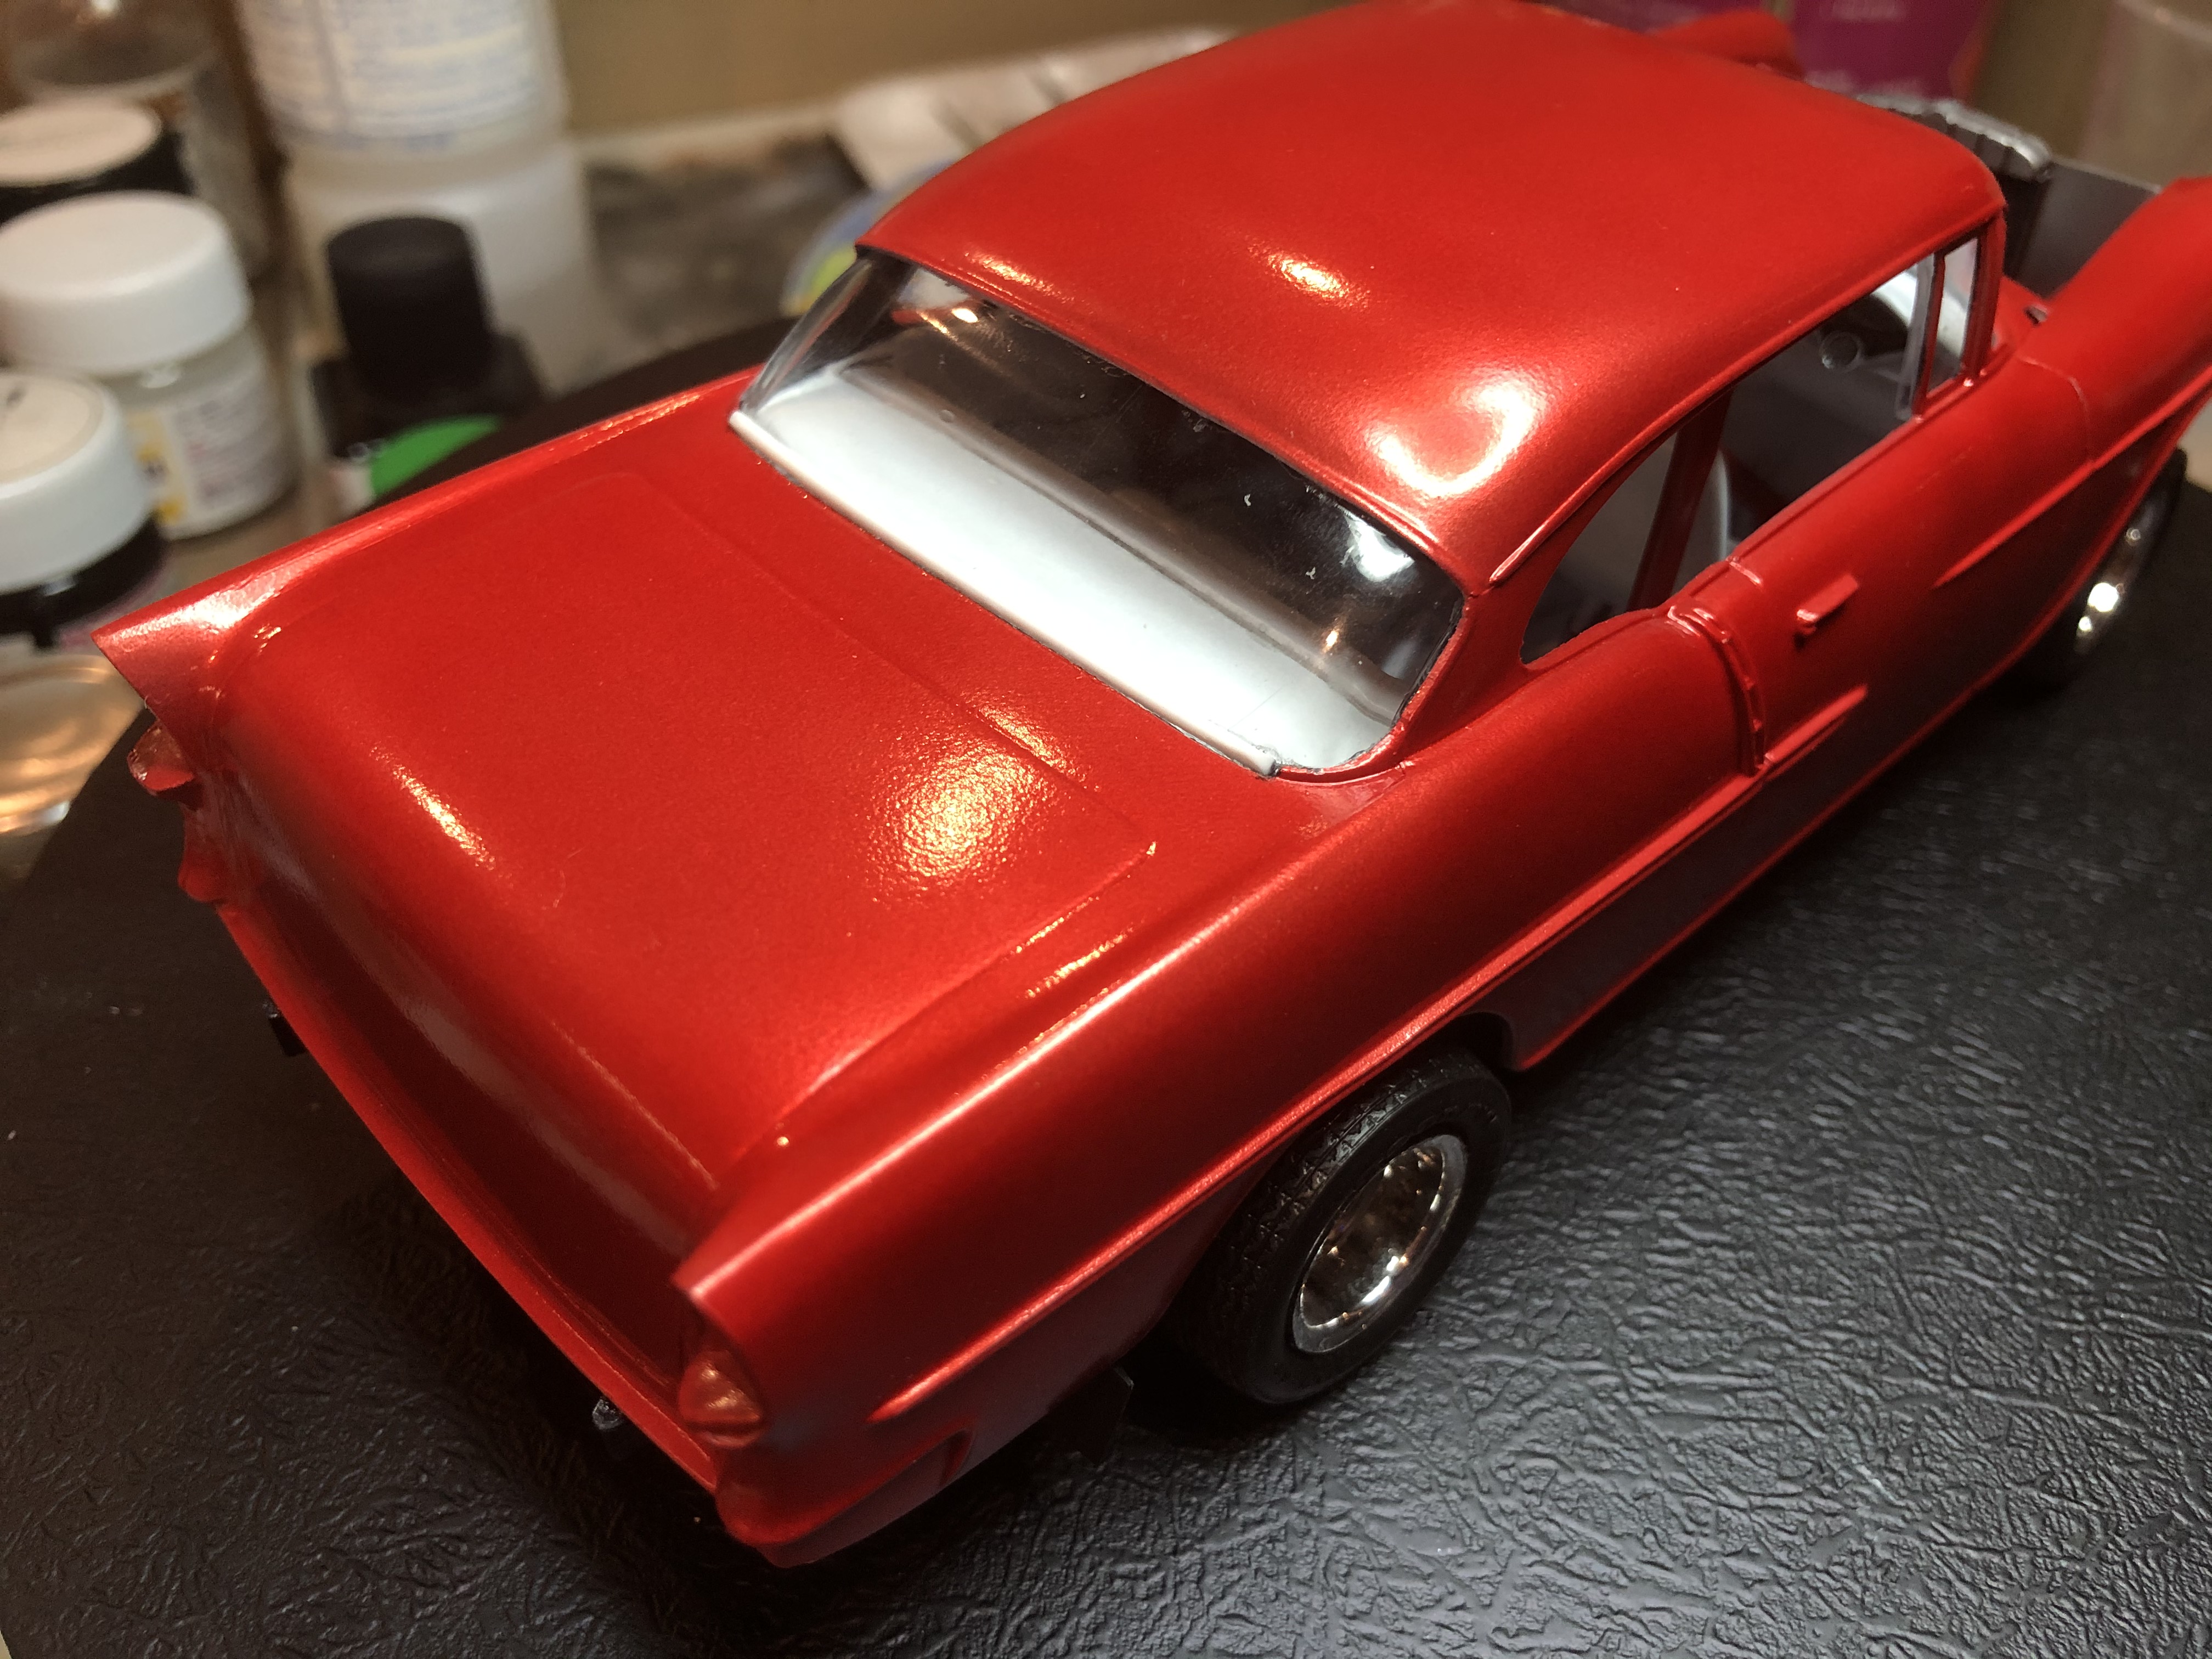
On to the rear glass, I found some 1.5mm half round and shaved it down to close to the size of the body mould, then trimmed it to length and cemented it down on the clear part with TET.
I will give this a day or so to fully cure then do some more whittling to get it closer to the body mould dimensions. It's close, and I'm happy with the result.
Cheers, D
Engine painted and assembled.
And installed. I still need to give it a pin wash but that will wait until the last bits are fitted off and cured.
I have also painted and pinwashed the radiator and mount frame, and pinwashed the grille.
On to the rear glass, I found some 1.5mm half round and shaved it down to close to the size of the body mould, then trimmed it to length and cemented it down on the clear part with TET.
I will give this a day or so to fully cure then do some more whittling to get it closer to the body mould dimensions. It's close, and I'm happy with the result.
Cheers, D

AussieReg
#007
Joined: June 09, 2009
KitMaker: 8,156 posts
Auto Modeler: 2,953 posts
Posted: Thursday, February 20, 2020 - 09:34 PM UTC
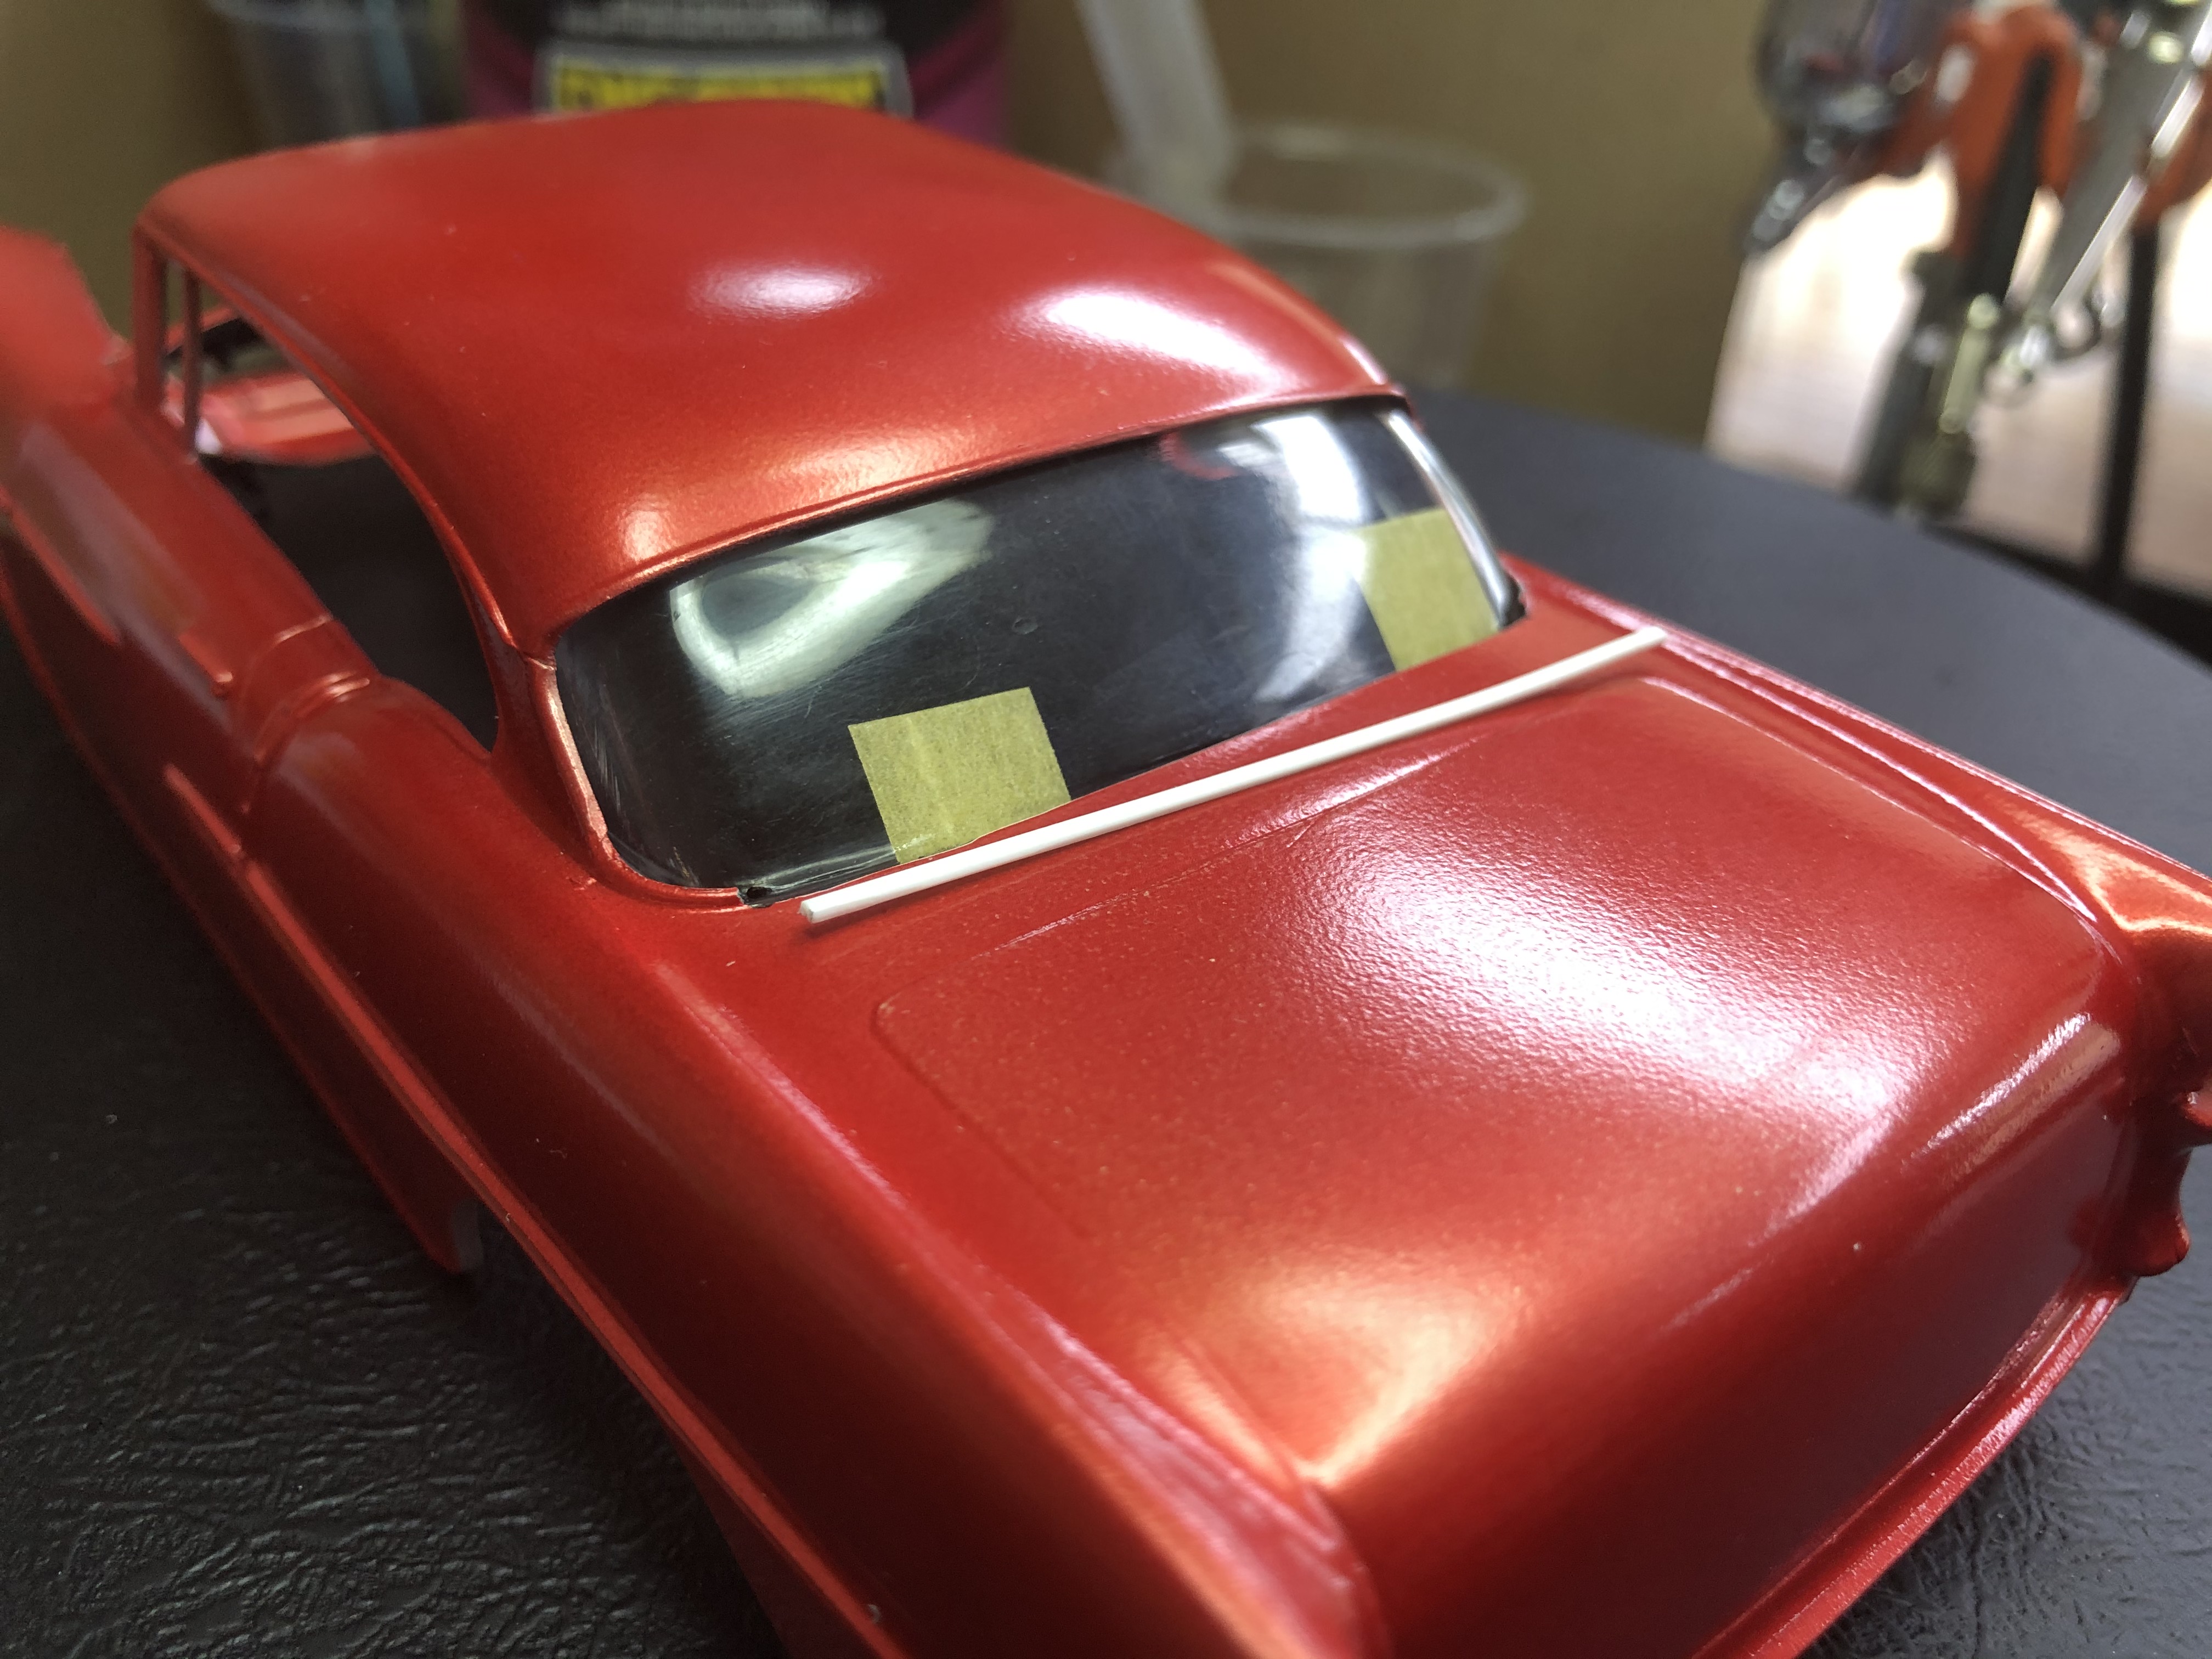
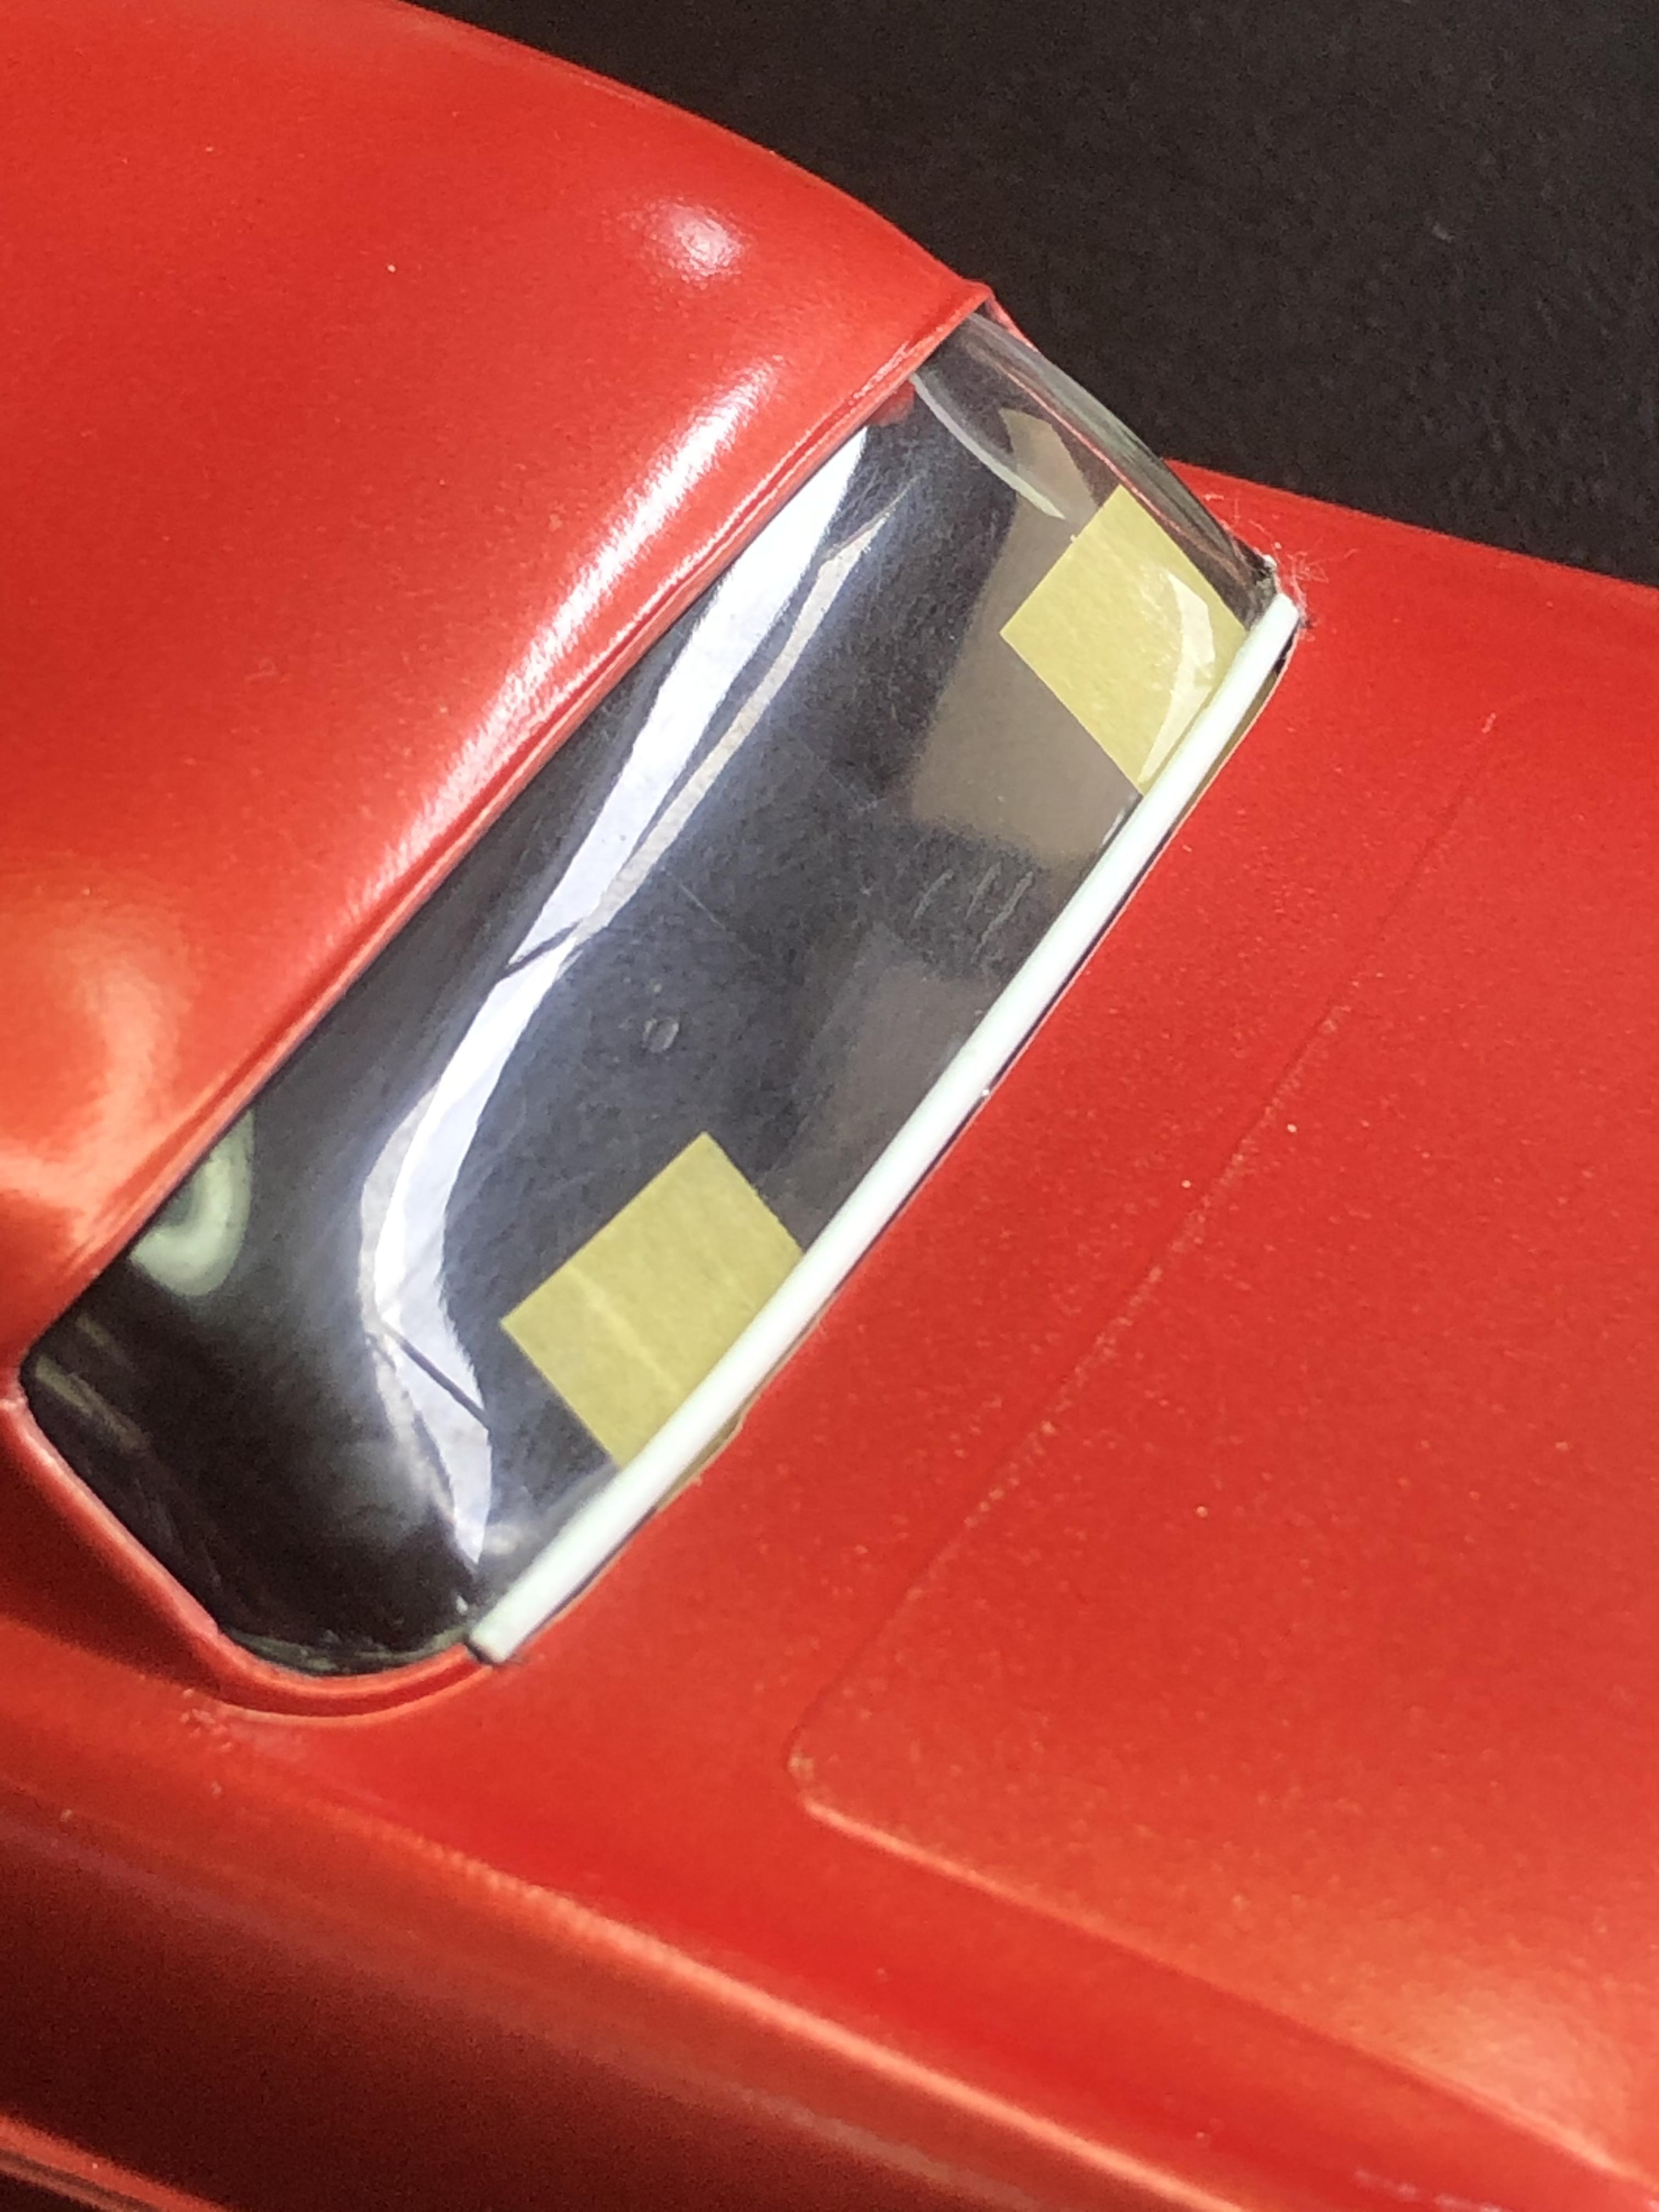
Ok, I got impatient! I gave it several hours for the TET to set up properly, then took to it with a ceramic scraper and sanding stick.
I'm really happy with this result. I will do a tiny bit more straightening up of the body lines where it was short shot. Once the rear glass is in glued in place I can dilute some of the clear parts cement (basically white glue), and capillary it down into the small gaps. Once the BMF is on, they should all be hidden.
Cheers, D

RussellE

#306
Joined: June 27, 2010
KitMaker: 3,959 posts
Auto Modeler: 495 posts
Posted: Thursday, February 20, 2020 - 09:56 PM UTC
I love a blower on a Rod! 
looks great D, and the rear window/panel fix is looking nice!
looks great D, and the rear window/panel fix is looking nice!


Dixon66
Joined: December 12, 2002
KitMaker: 1,500 posts
Auto Modeler: 645 posts

Posted: Friday, February 21, 2020 - 01:57 AM UTC
Nice save.
Joel_W
Joined: December 04, 2010
KitMaker: 11,666 posts
Auto Modeler: 2,974 posts
Posted: Friday, February 21, 2020 - 03:41 AM UTC
D,
The engine really looks quite good. Just not use to seeing a street car with a blower on it. The owner must be changing rings and valves on a regular schedule.
And as for the rear glass trim modifications, buddy you really nailed it but good.

Joel
The engine really looks quite good. Just not use to seeing a street car with a blower on it. The owner must be changing rings and valves on a regular schedule.
And as for the rear glass trim modifications, buddy you really nailed it but good.
Joel

Hwa-Rang

Joined: June 29, 2004
KitMaker: 6,760 posts
Auto Modeler: 2,182 posts

Posted: Saturday, February 22, 2020 - 10:34 PM UTC
The boot, for the shifter, makes a huge difference.
Love the look, of the engine. Big engine, big blower, big pullies, you gotta love IT.
Great save, in the rear window trim.
Love the look, of the engine. Big engine, big blower, big pullies, you gotta love IT.
Great save, in the rear window trim.
AussieReg
#007
Joined: June 09, 2009
KitMaker: 8,156 posts
Auto Modeler: 2,953 posts
Posted: Wednesday, February 26, 2020 - 12:26 AM UTC
Thanks for the feedback folks, much appreciated.
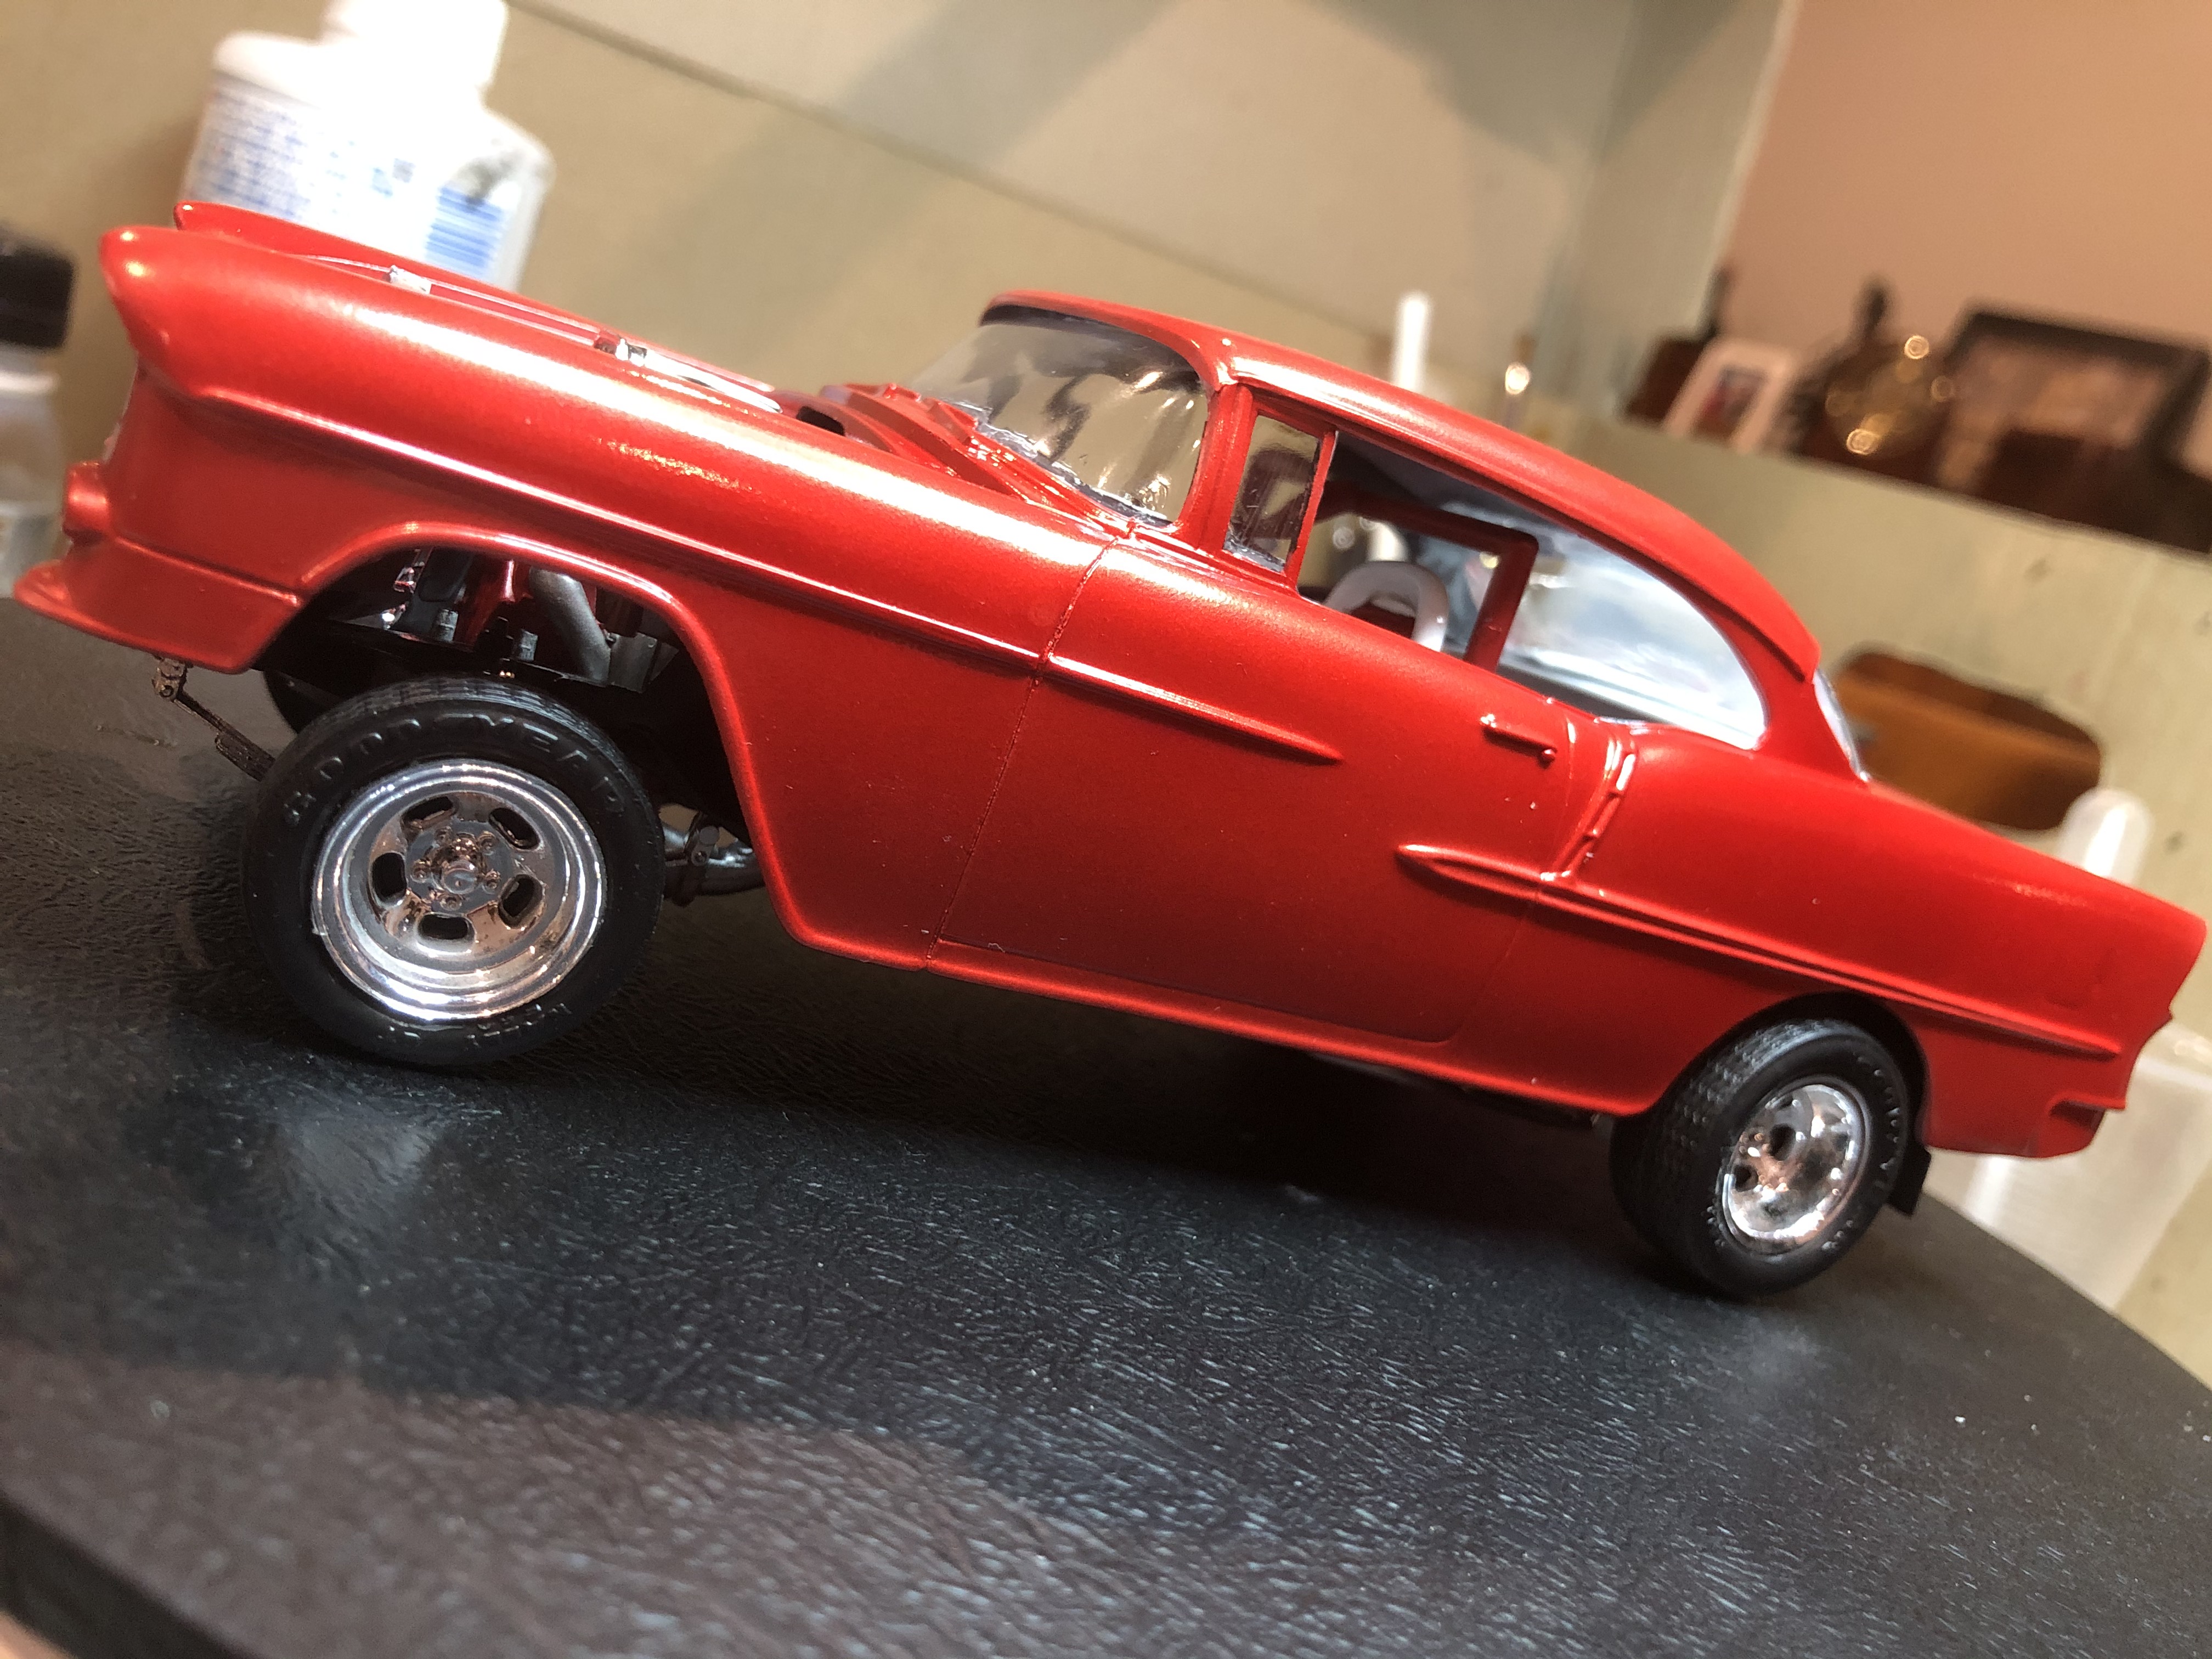
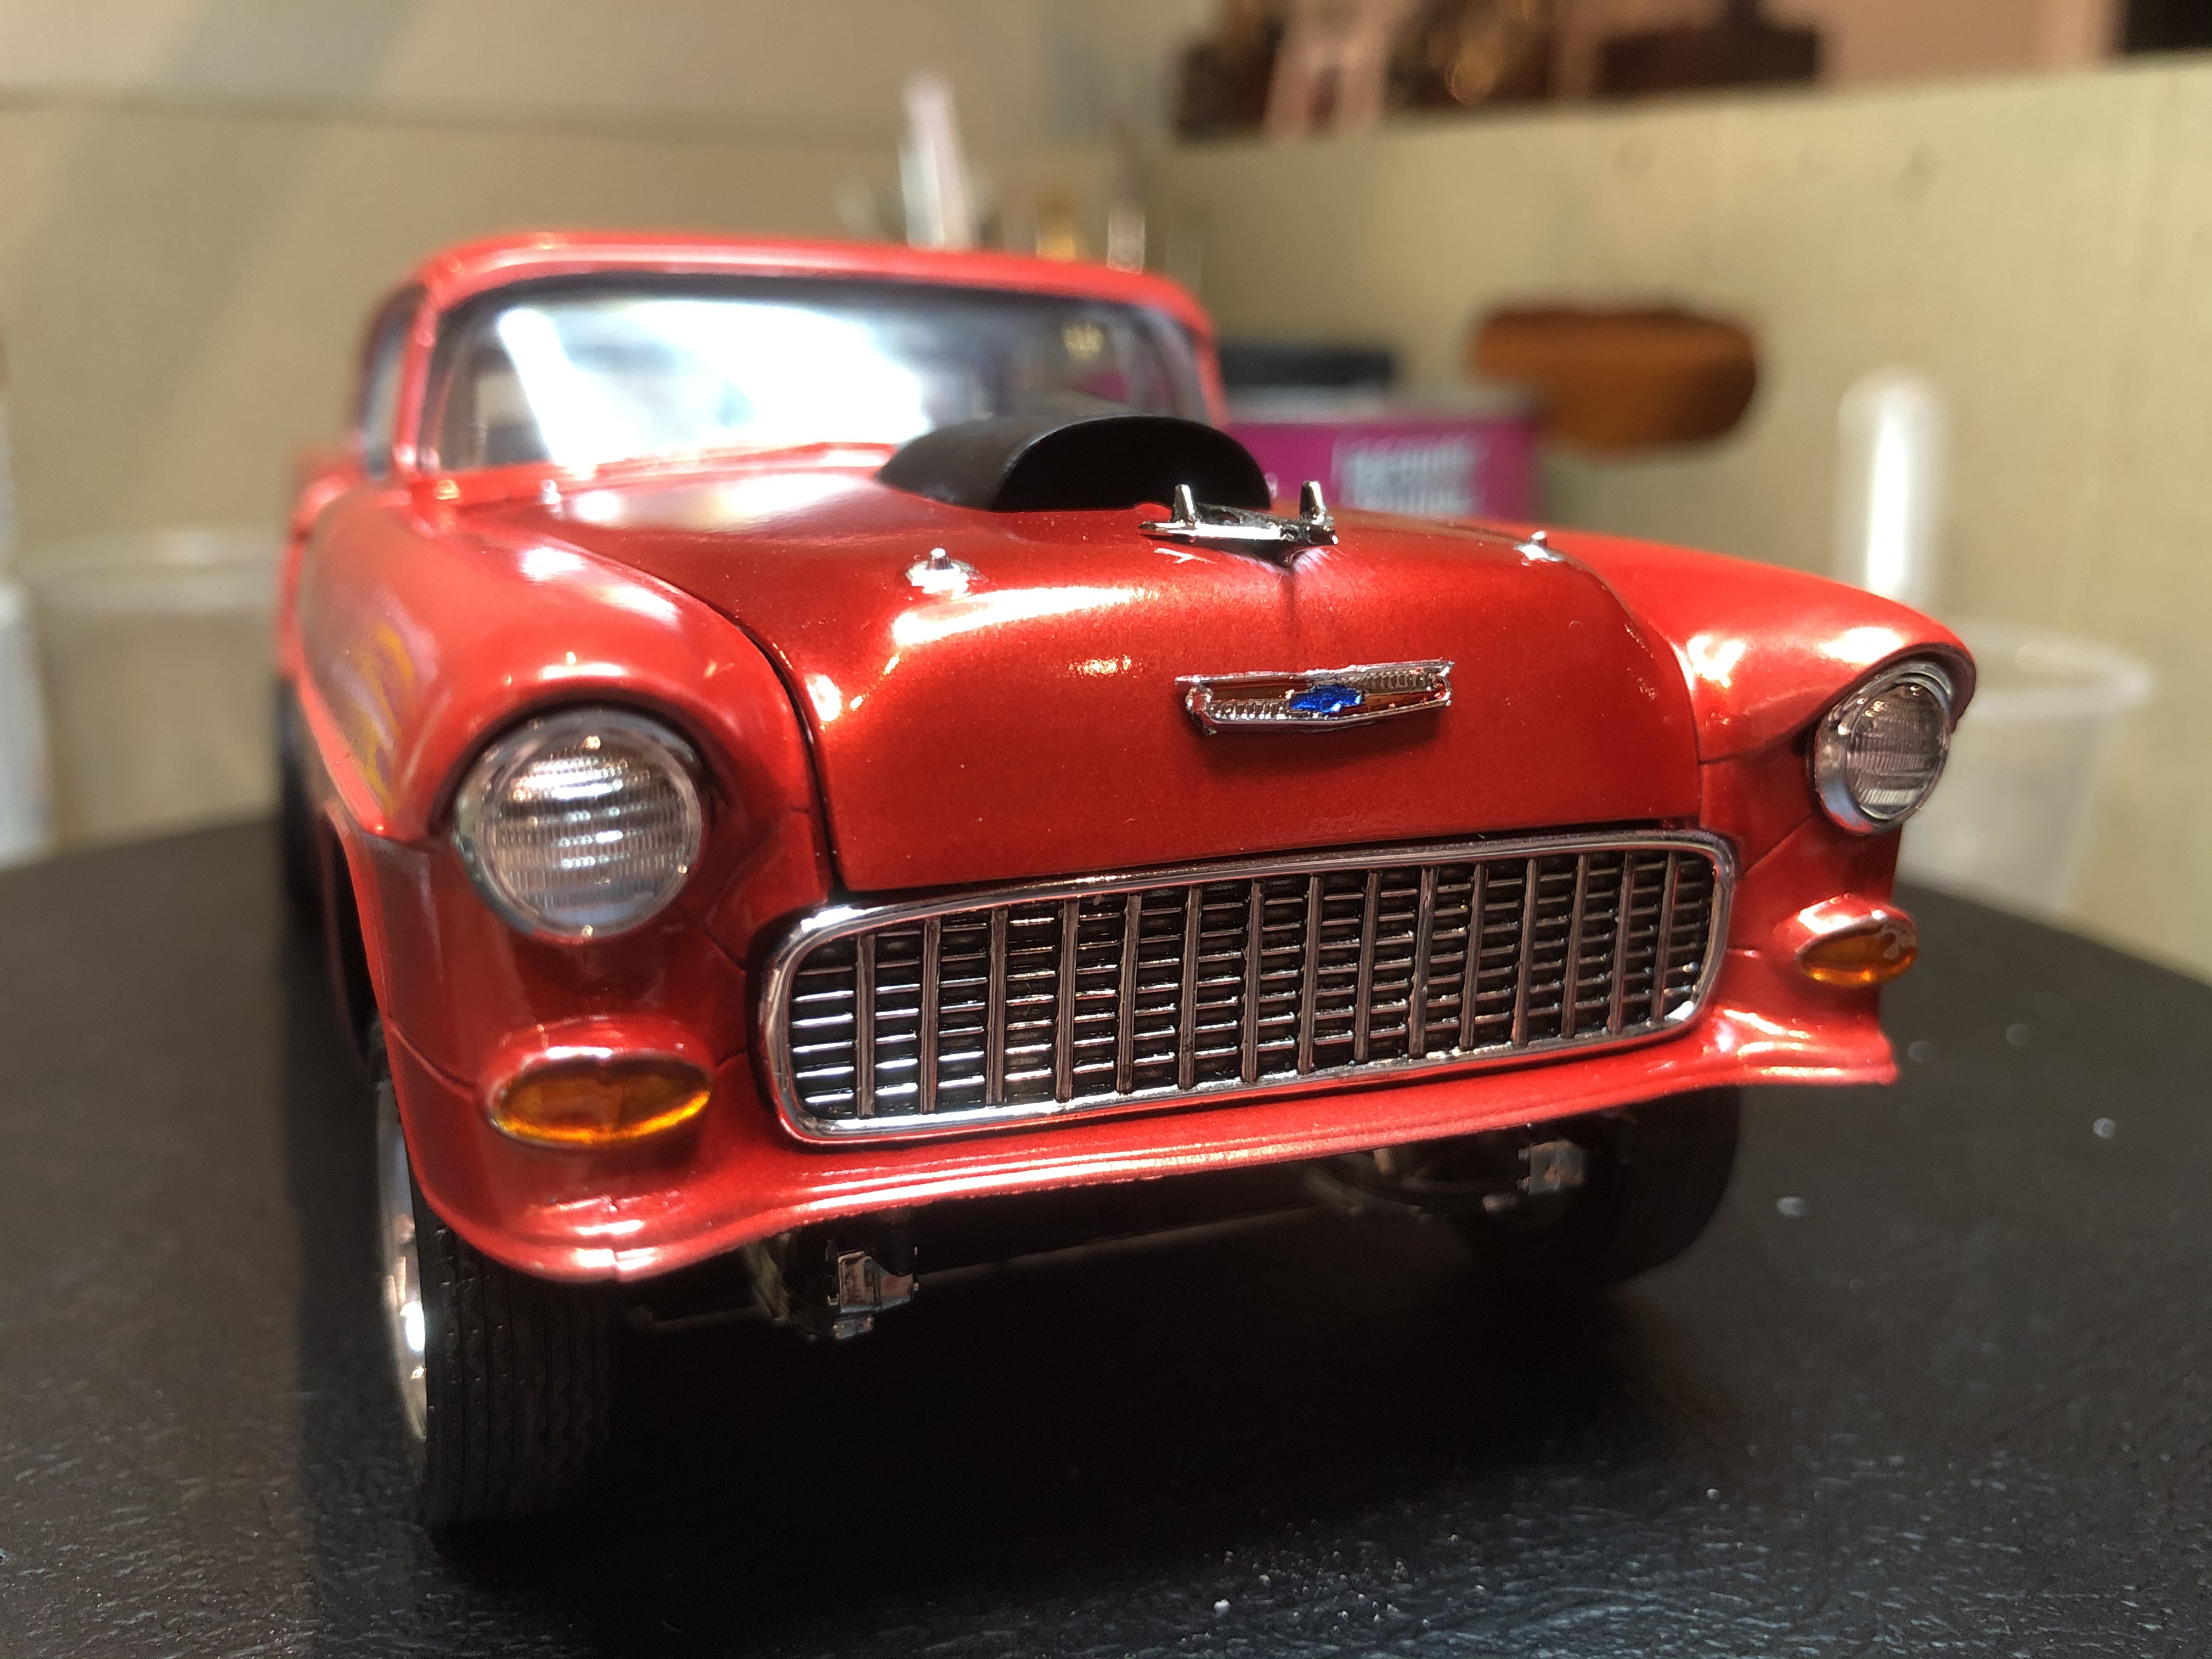
I was sitting tonight working on my SOSIG P-47 and listening to a great Aussie Scale Modeling podcast called "On The Bench" and I picked up the '55 and turned it over and around under the light, and decided that I wasn't quite satisfied with the consistency and depth of colour on the body.
Half an hour later I had given it a light fine sand, shot another light coat of Clear Red, and a couple of coats of Super Clear.
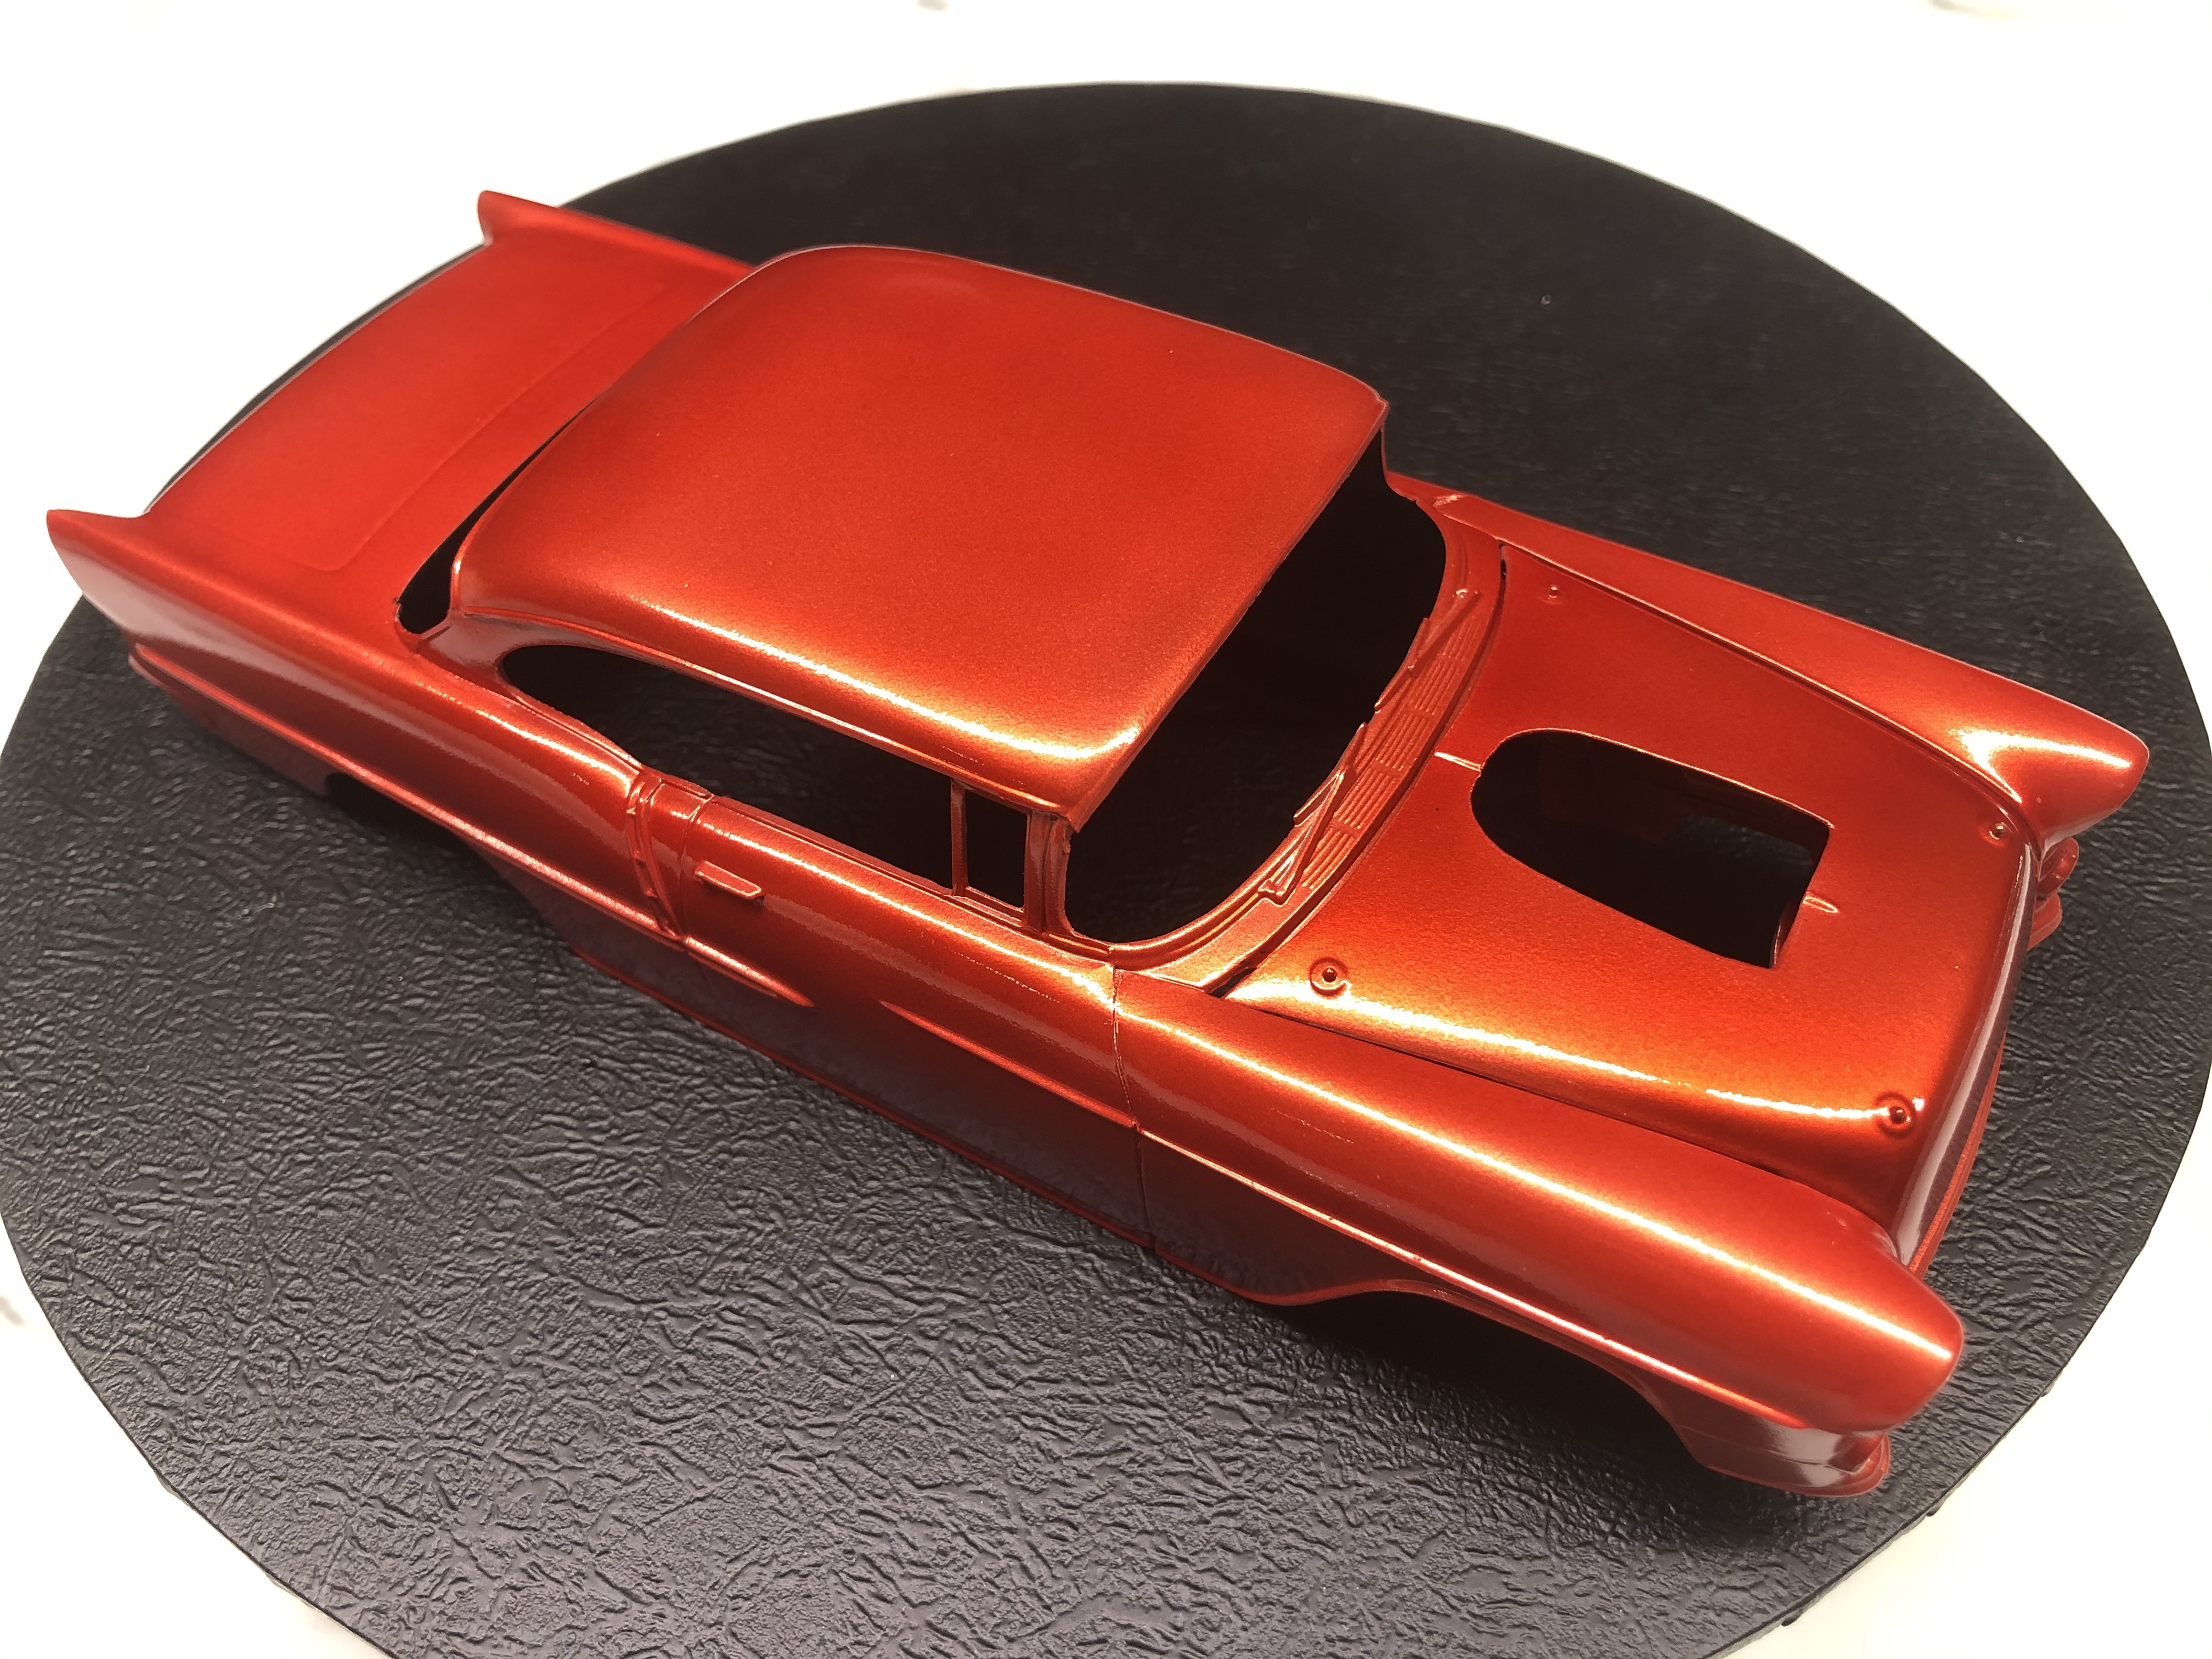
Hard to see the difference in the photo, but I'm much happier with it now.
Cheers, D
I was sitting tonight working on my SOSIG P-47 and listening to a great Aussie Scale Modeling podcast called "On The Bench" and I picked up the '55 and turned it over and around under the light, and decided that I wasn't quite satisfied with the consistency and depth of colour on the body.
Half an hour later I had given it a light fine sand, shot another light coat of Clear Red, and a couple of coats of Super Clear.
Hard to see the difference in the photo, but I'm much happier with it now.
Cheers, D
RussellE
#306
Joined: June 27, 2010
KitMaker: 3,959 posts
Auto Modeler: 495 posts
Posted: Wednesday, February 26, 2020 - 08:52 AM UTC
The Mk1 eyeball test results seem pretty darn good to me 

jimb
Joined: August 25, 2006
KitMaker: 2,539 posts
Auto Modeler: 1,405 posts

Posted: Wednesday, February 26, 2020 - 09:16 AM UTC
Looking pretty slick, D.
Jim
Jim
Joel_W
Joined: December 04, 2010
KitMaker: 11,666 posts
Auto Modeler: 2,974 posts
Posted: Wednesday, February 26, 2020 - 09:25 AM UTC
D,
Honestly, the final prep, then another wet color coat and finish up with Super Clear, really does look better as the painted surface is smoother and therefore more consistent to my eye. When I compared the two pictures. You surely kicked it up a few notches
Joel
Honestly, the final prep, then another wet color coat and finish up with Super Clear, really does look better as the painted surface is smoother and therefore more consistent to my eye. When I compared the two pictures. You surely kicked it up a few notches
Joel
Hwa-Rang
Joined: June 29, 2004
KitMaker: 6,760 posts
Auto Modeler: 2,182 posts
Posted: Thursday, February 27, 2020 - 08:32 AM UTC
That extra work certainly paid of. Looks amazing.
AussieReg
#007
Joined: June 09, 2009
KitMaker: 8,156 posts
Auto Modeler: 2,953 posts
Posted: Friday, February 28, 2020 - 12:50 AM UTC
Thank you for the support team Auto, very much appreciated!
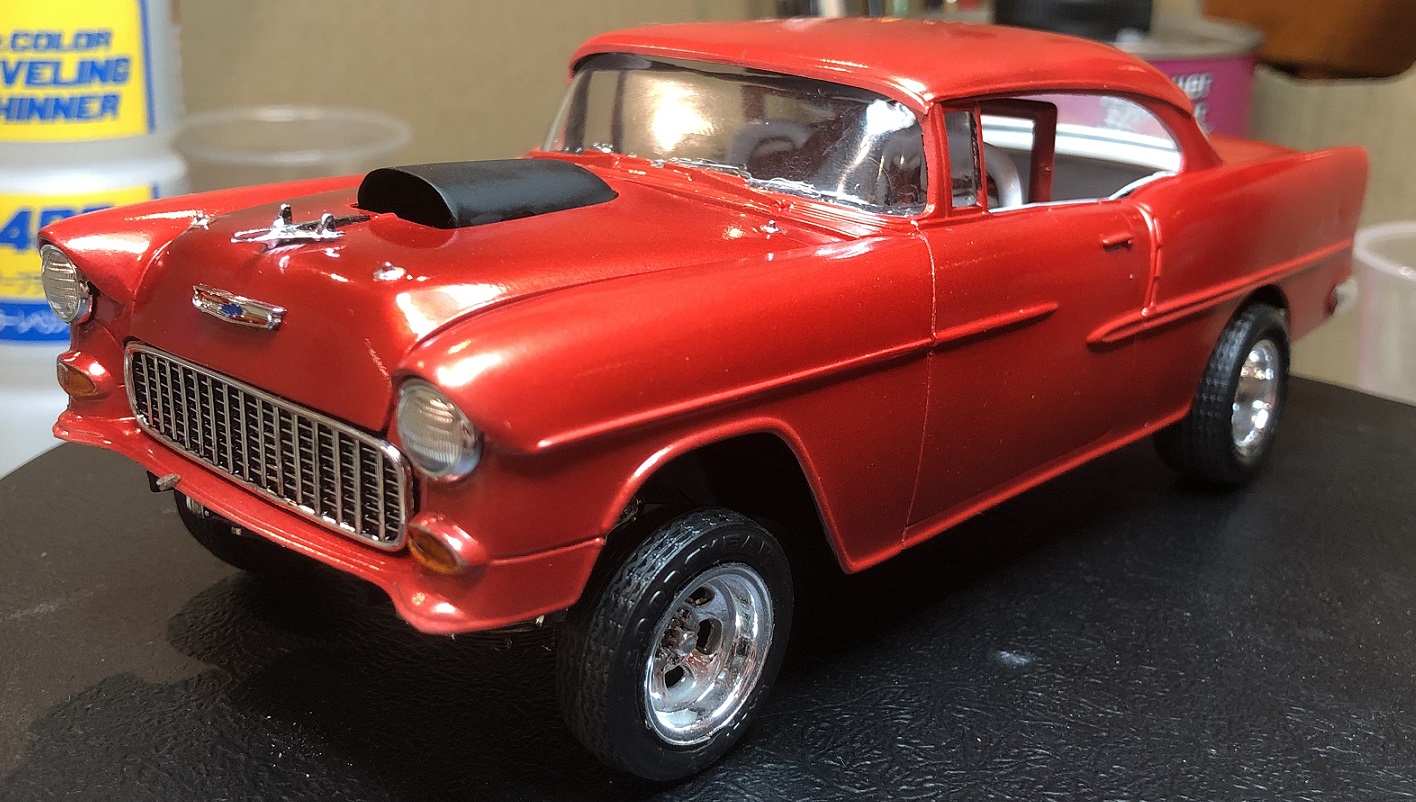
Assembly night tonight, this one is getting very close to completion now.
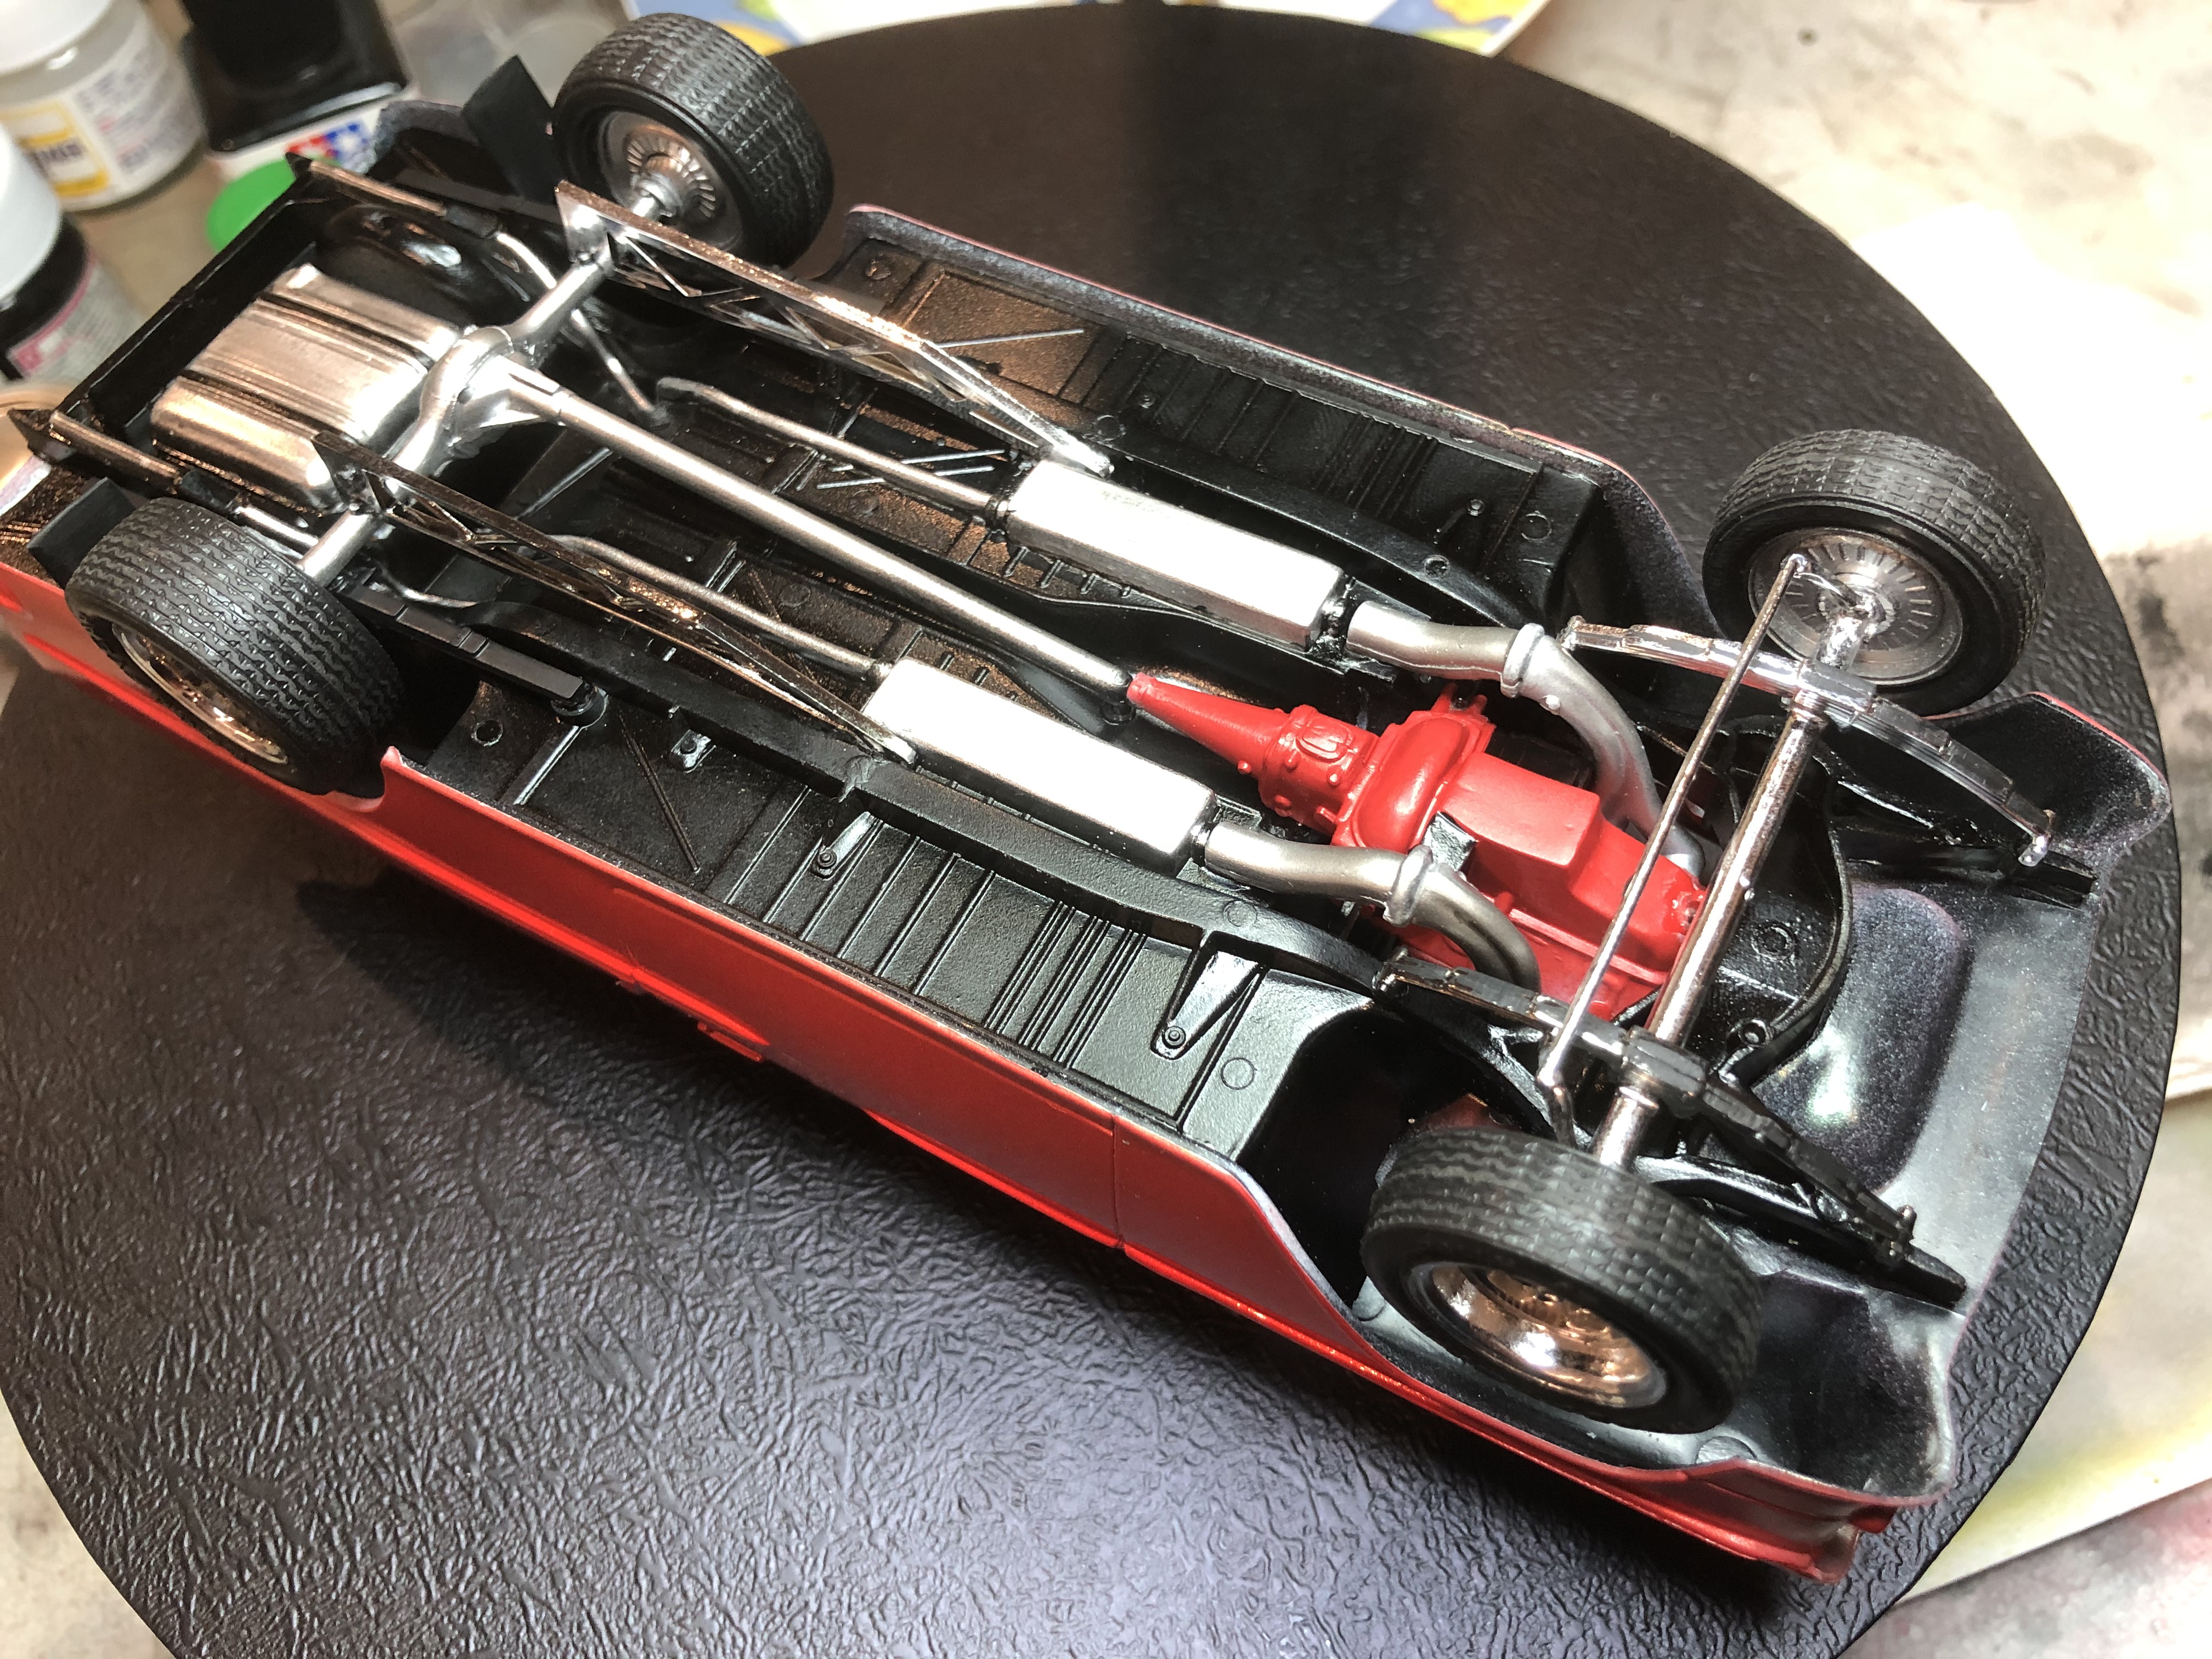
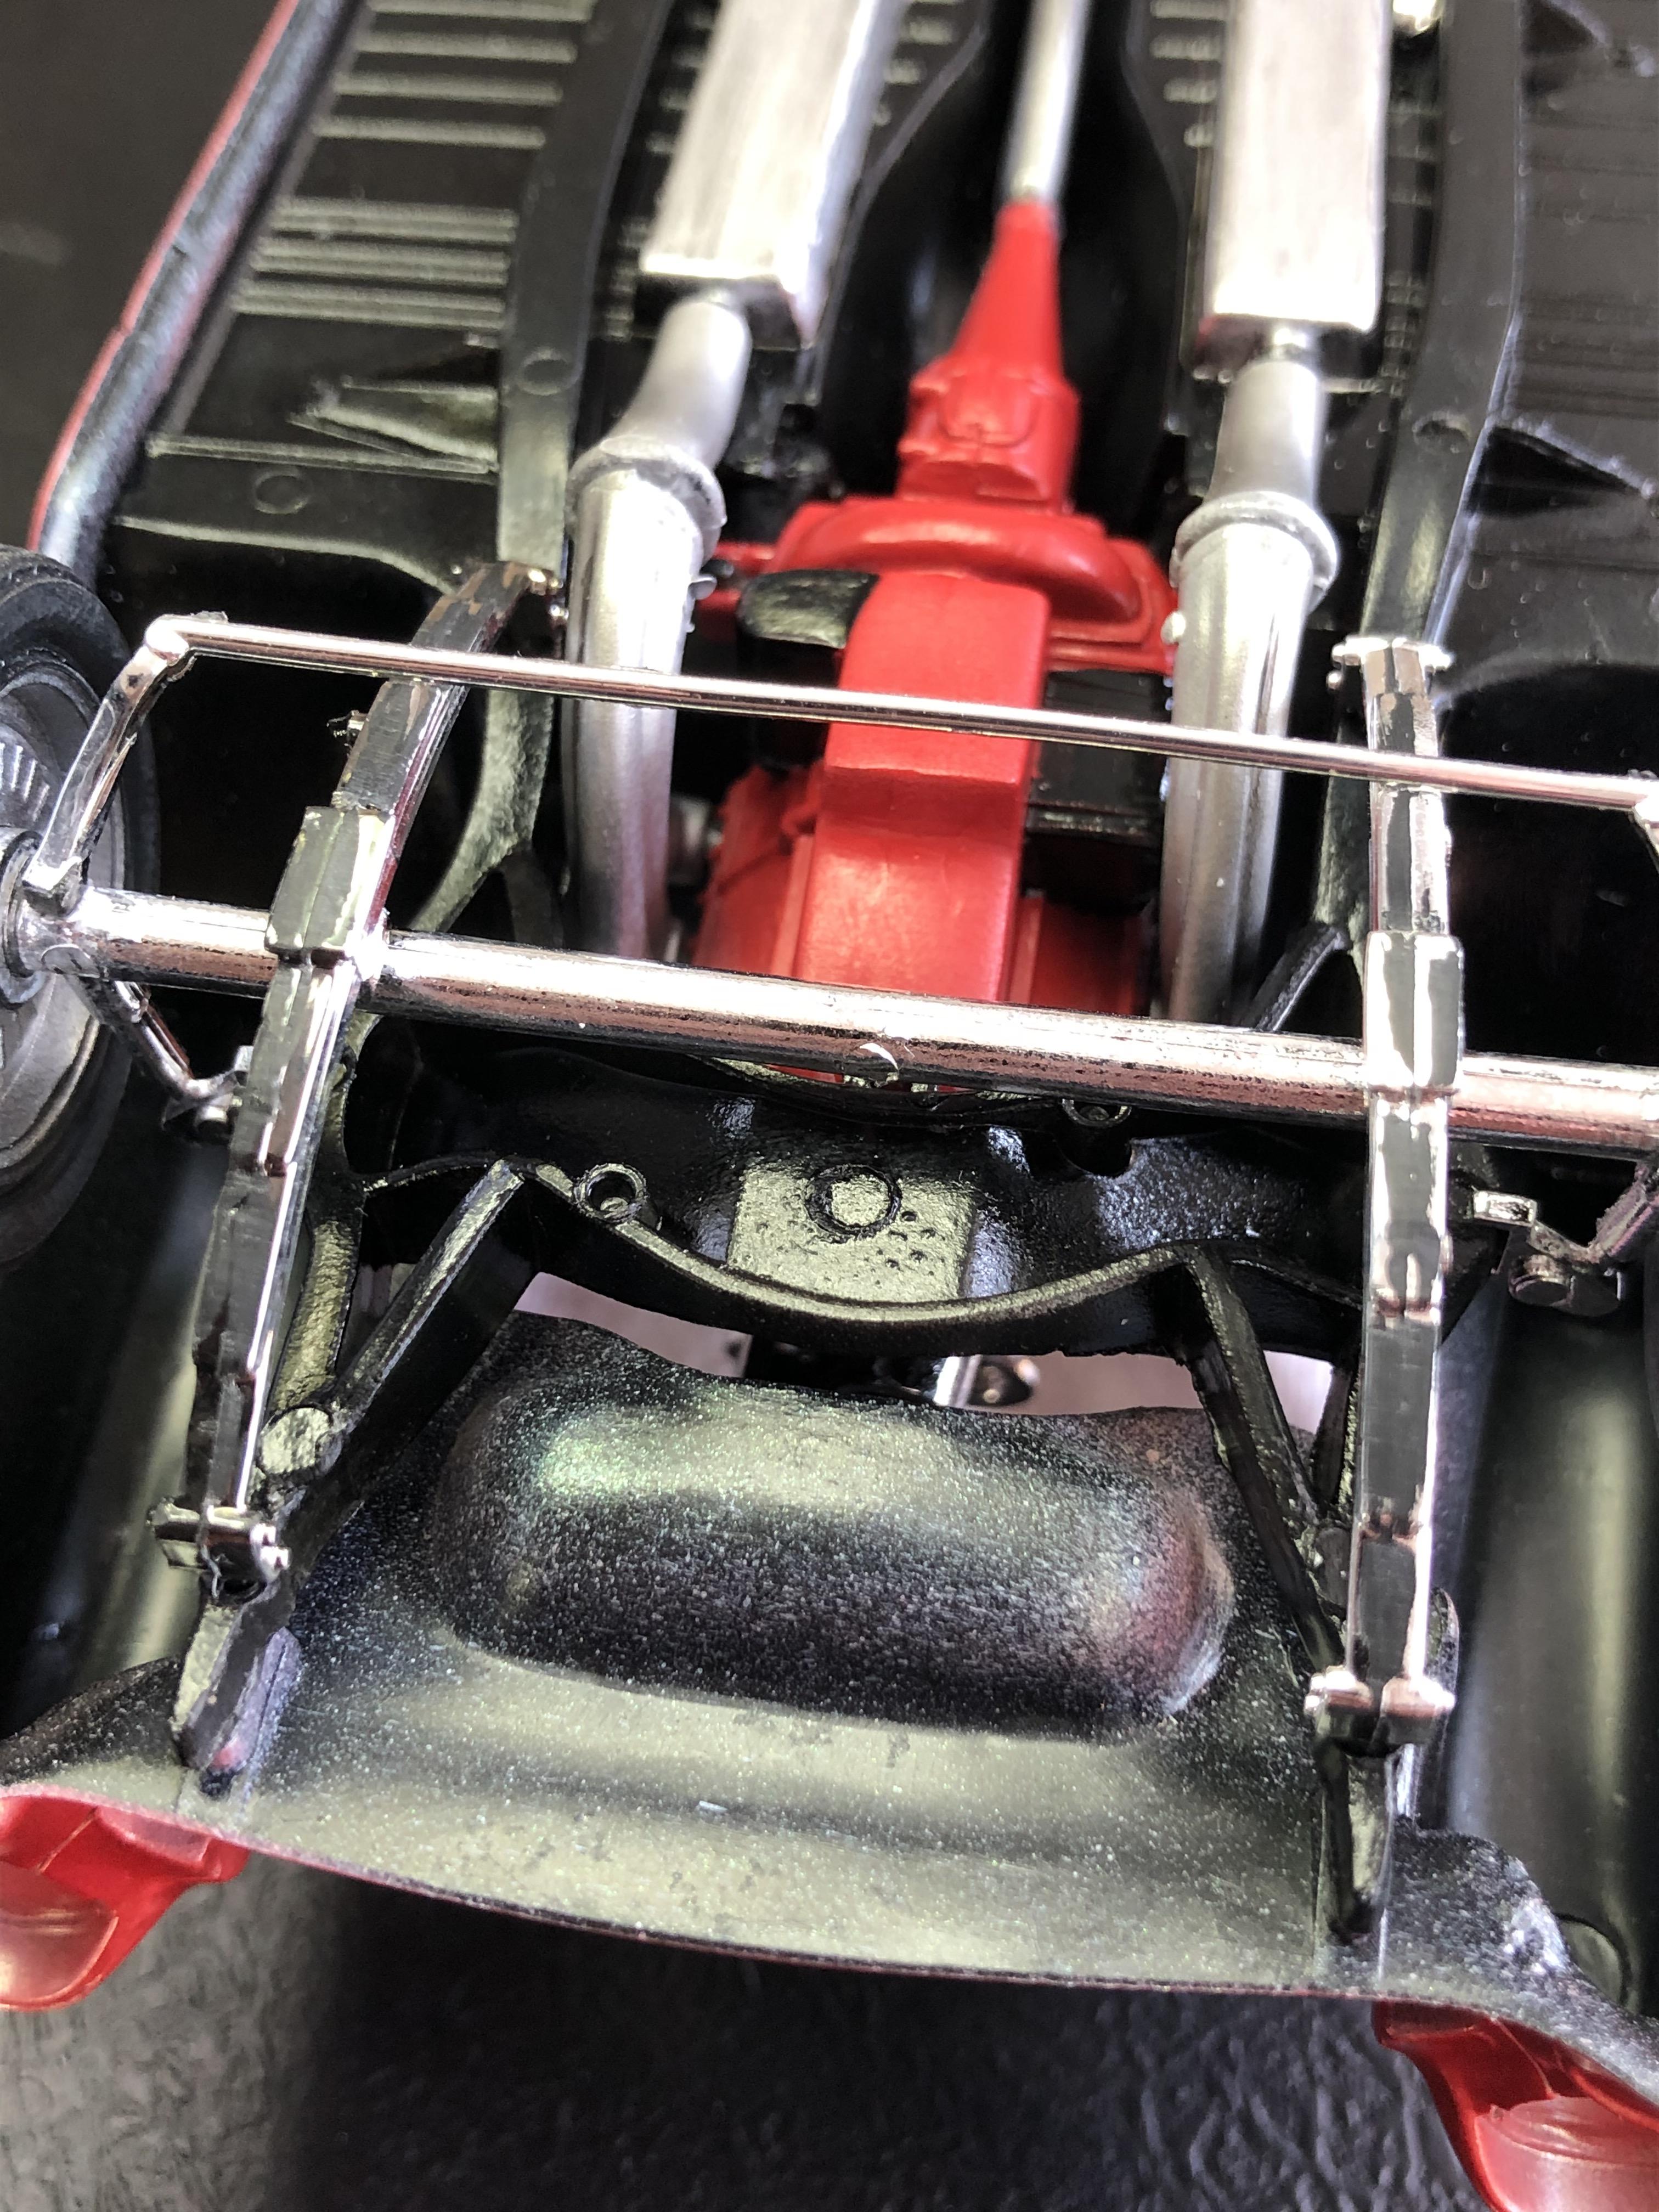
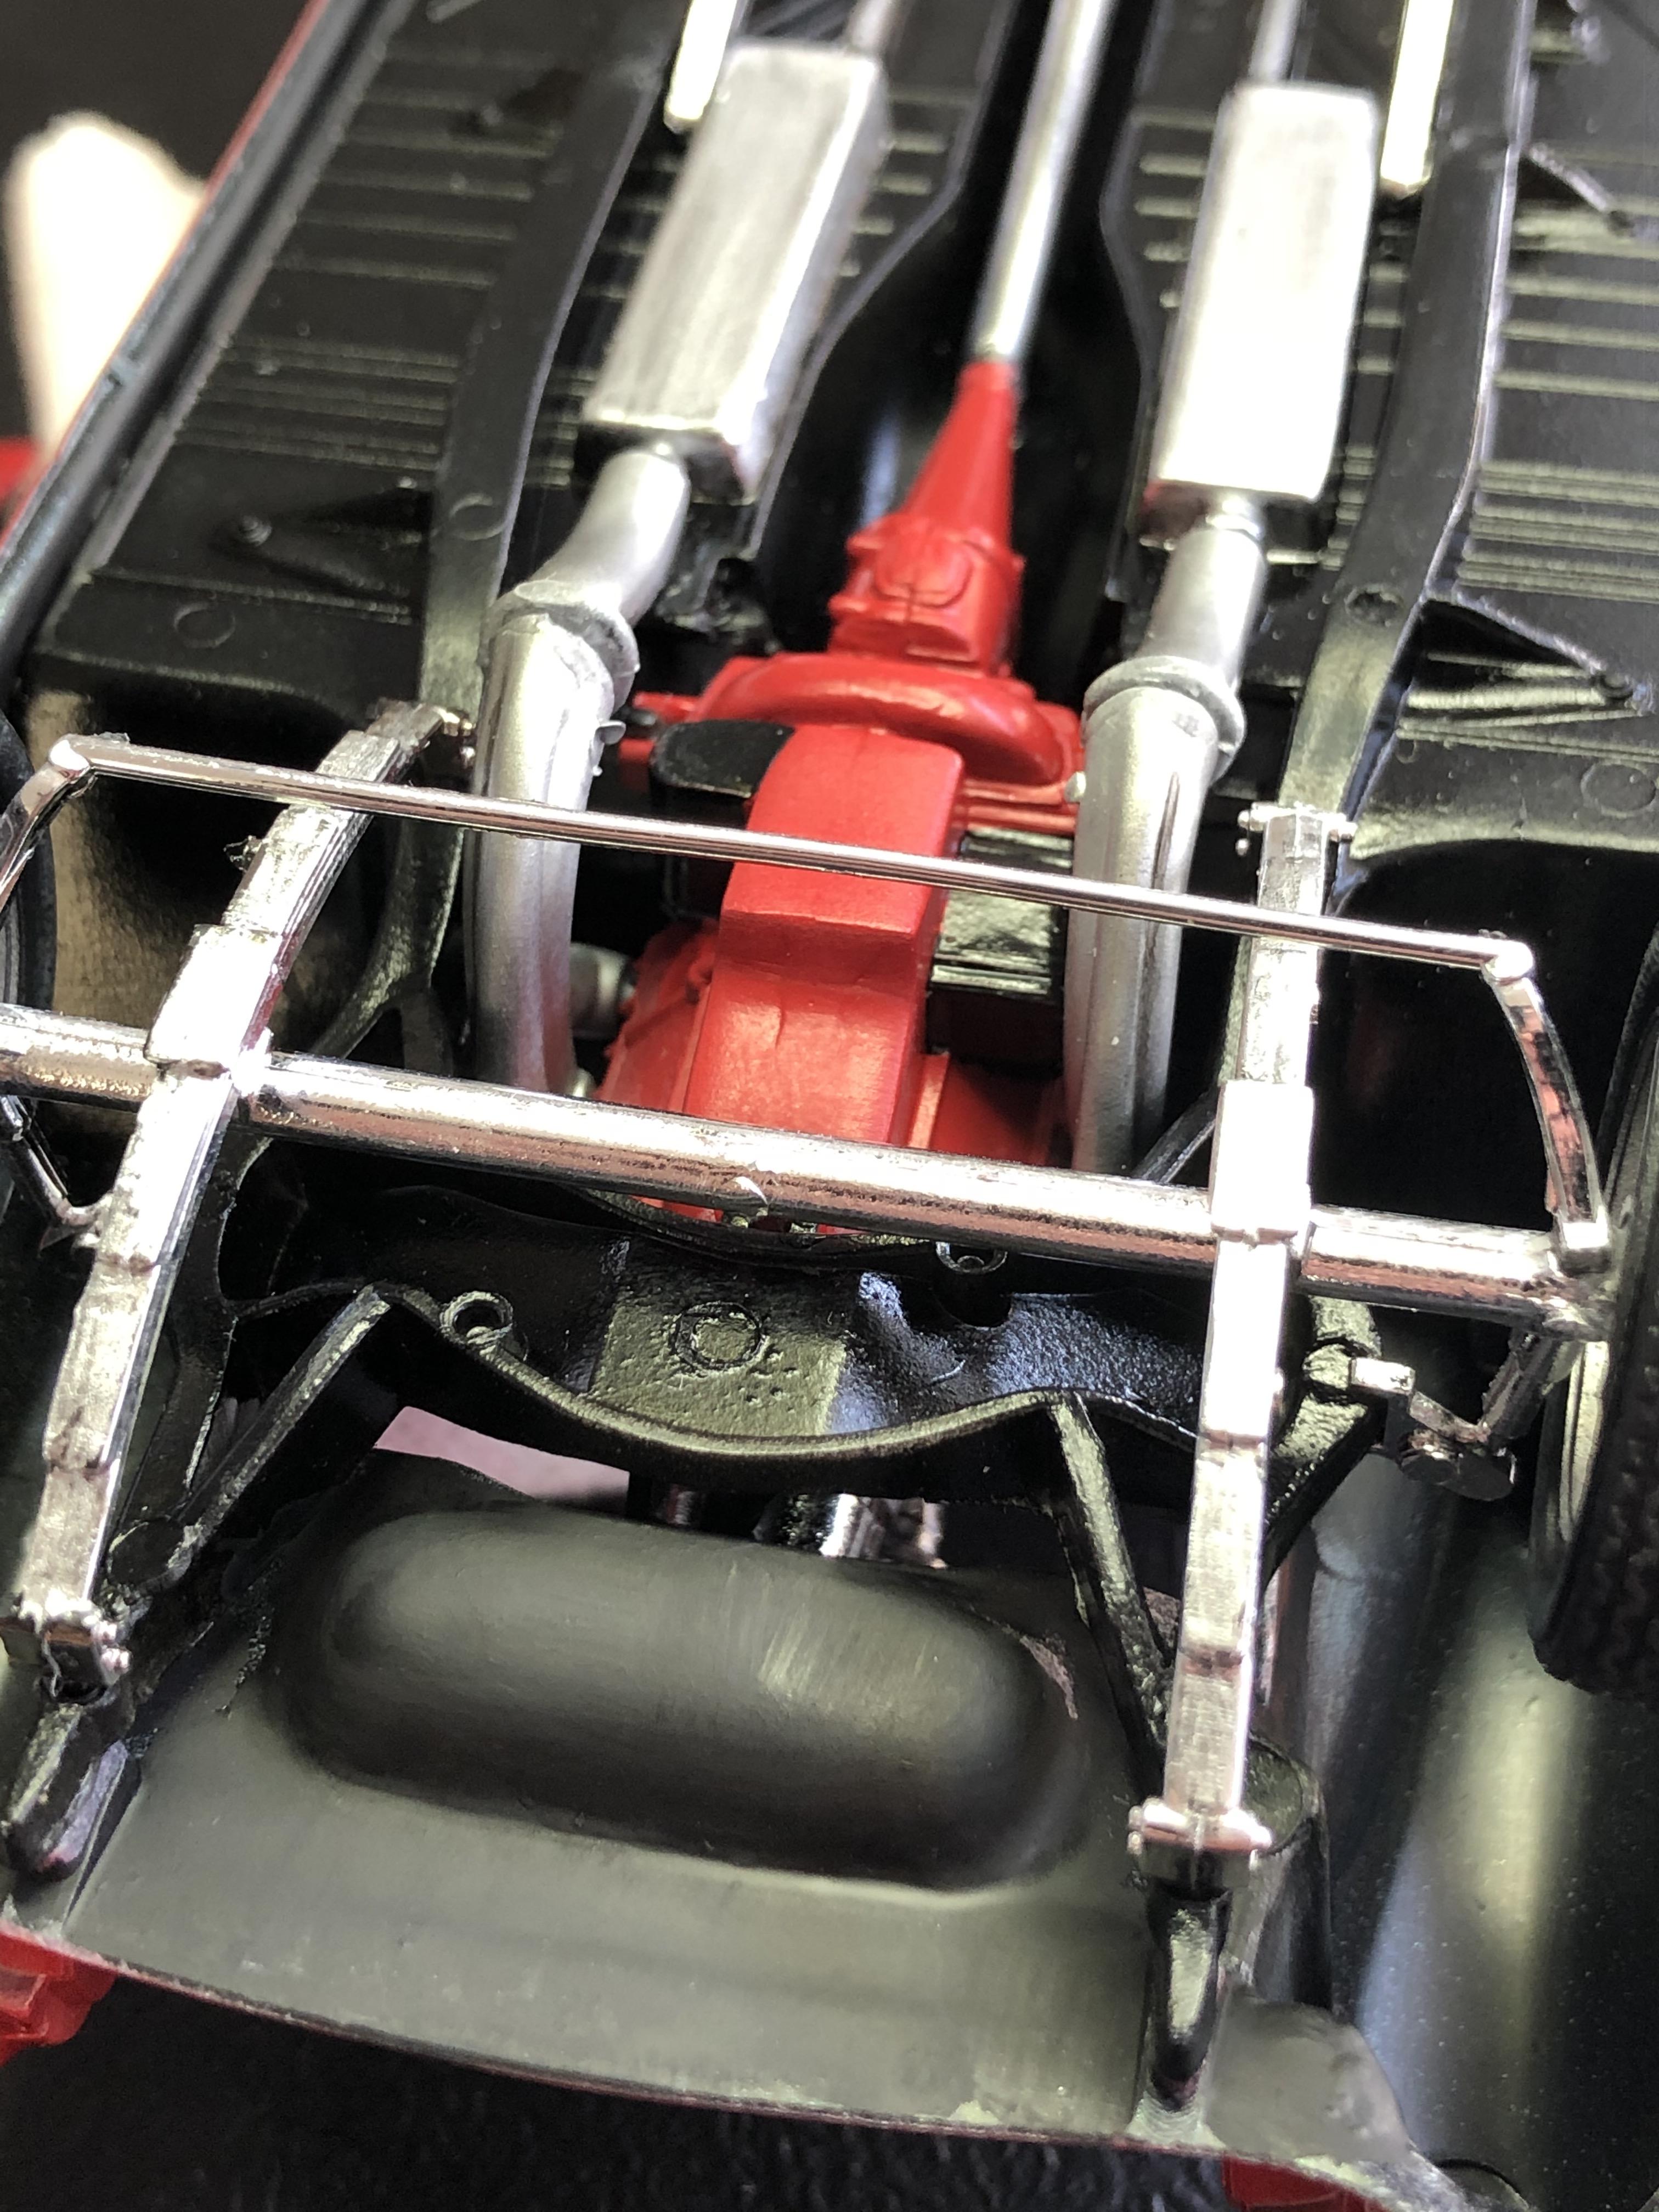
Front and rear glass in last night and left for a day to cure. Tonight I CA'd the base and body together and then set about fitting the front axle, springs, tie rod and wheels. Once they were cured the rear springs, diff/driveshaft, traction bars and wheels went on.
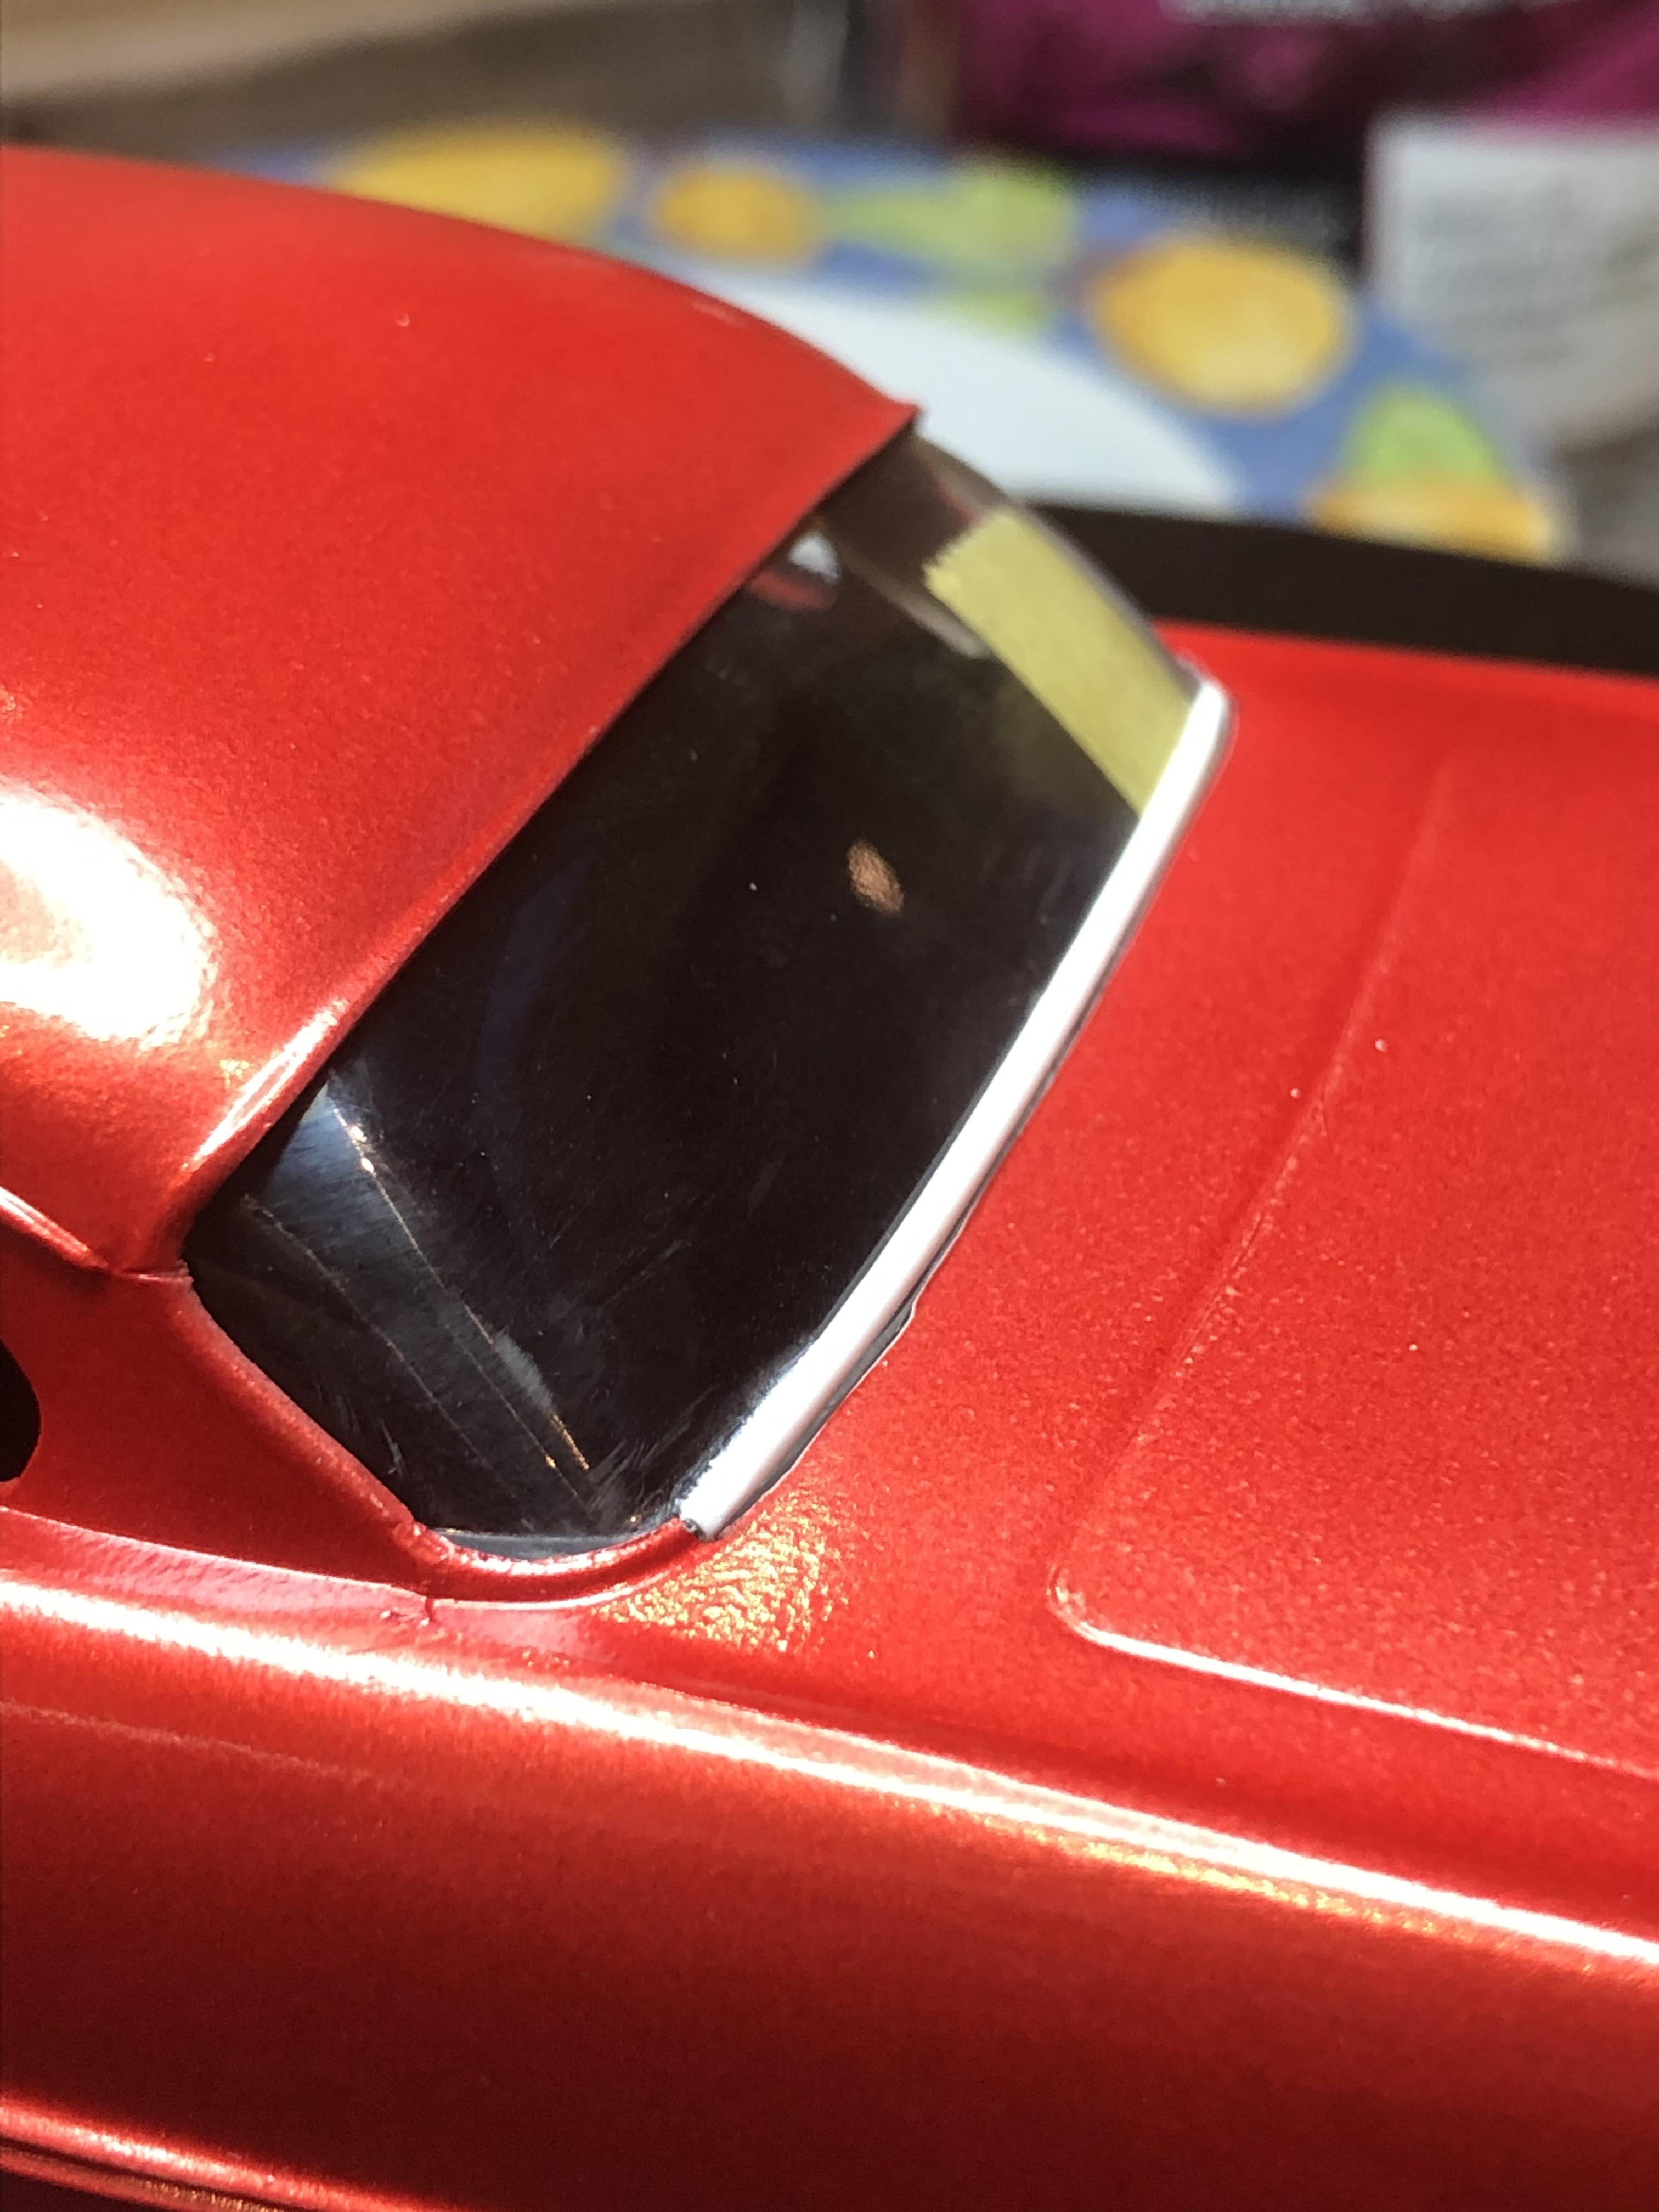
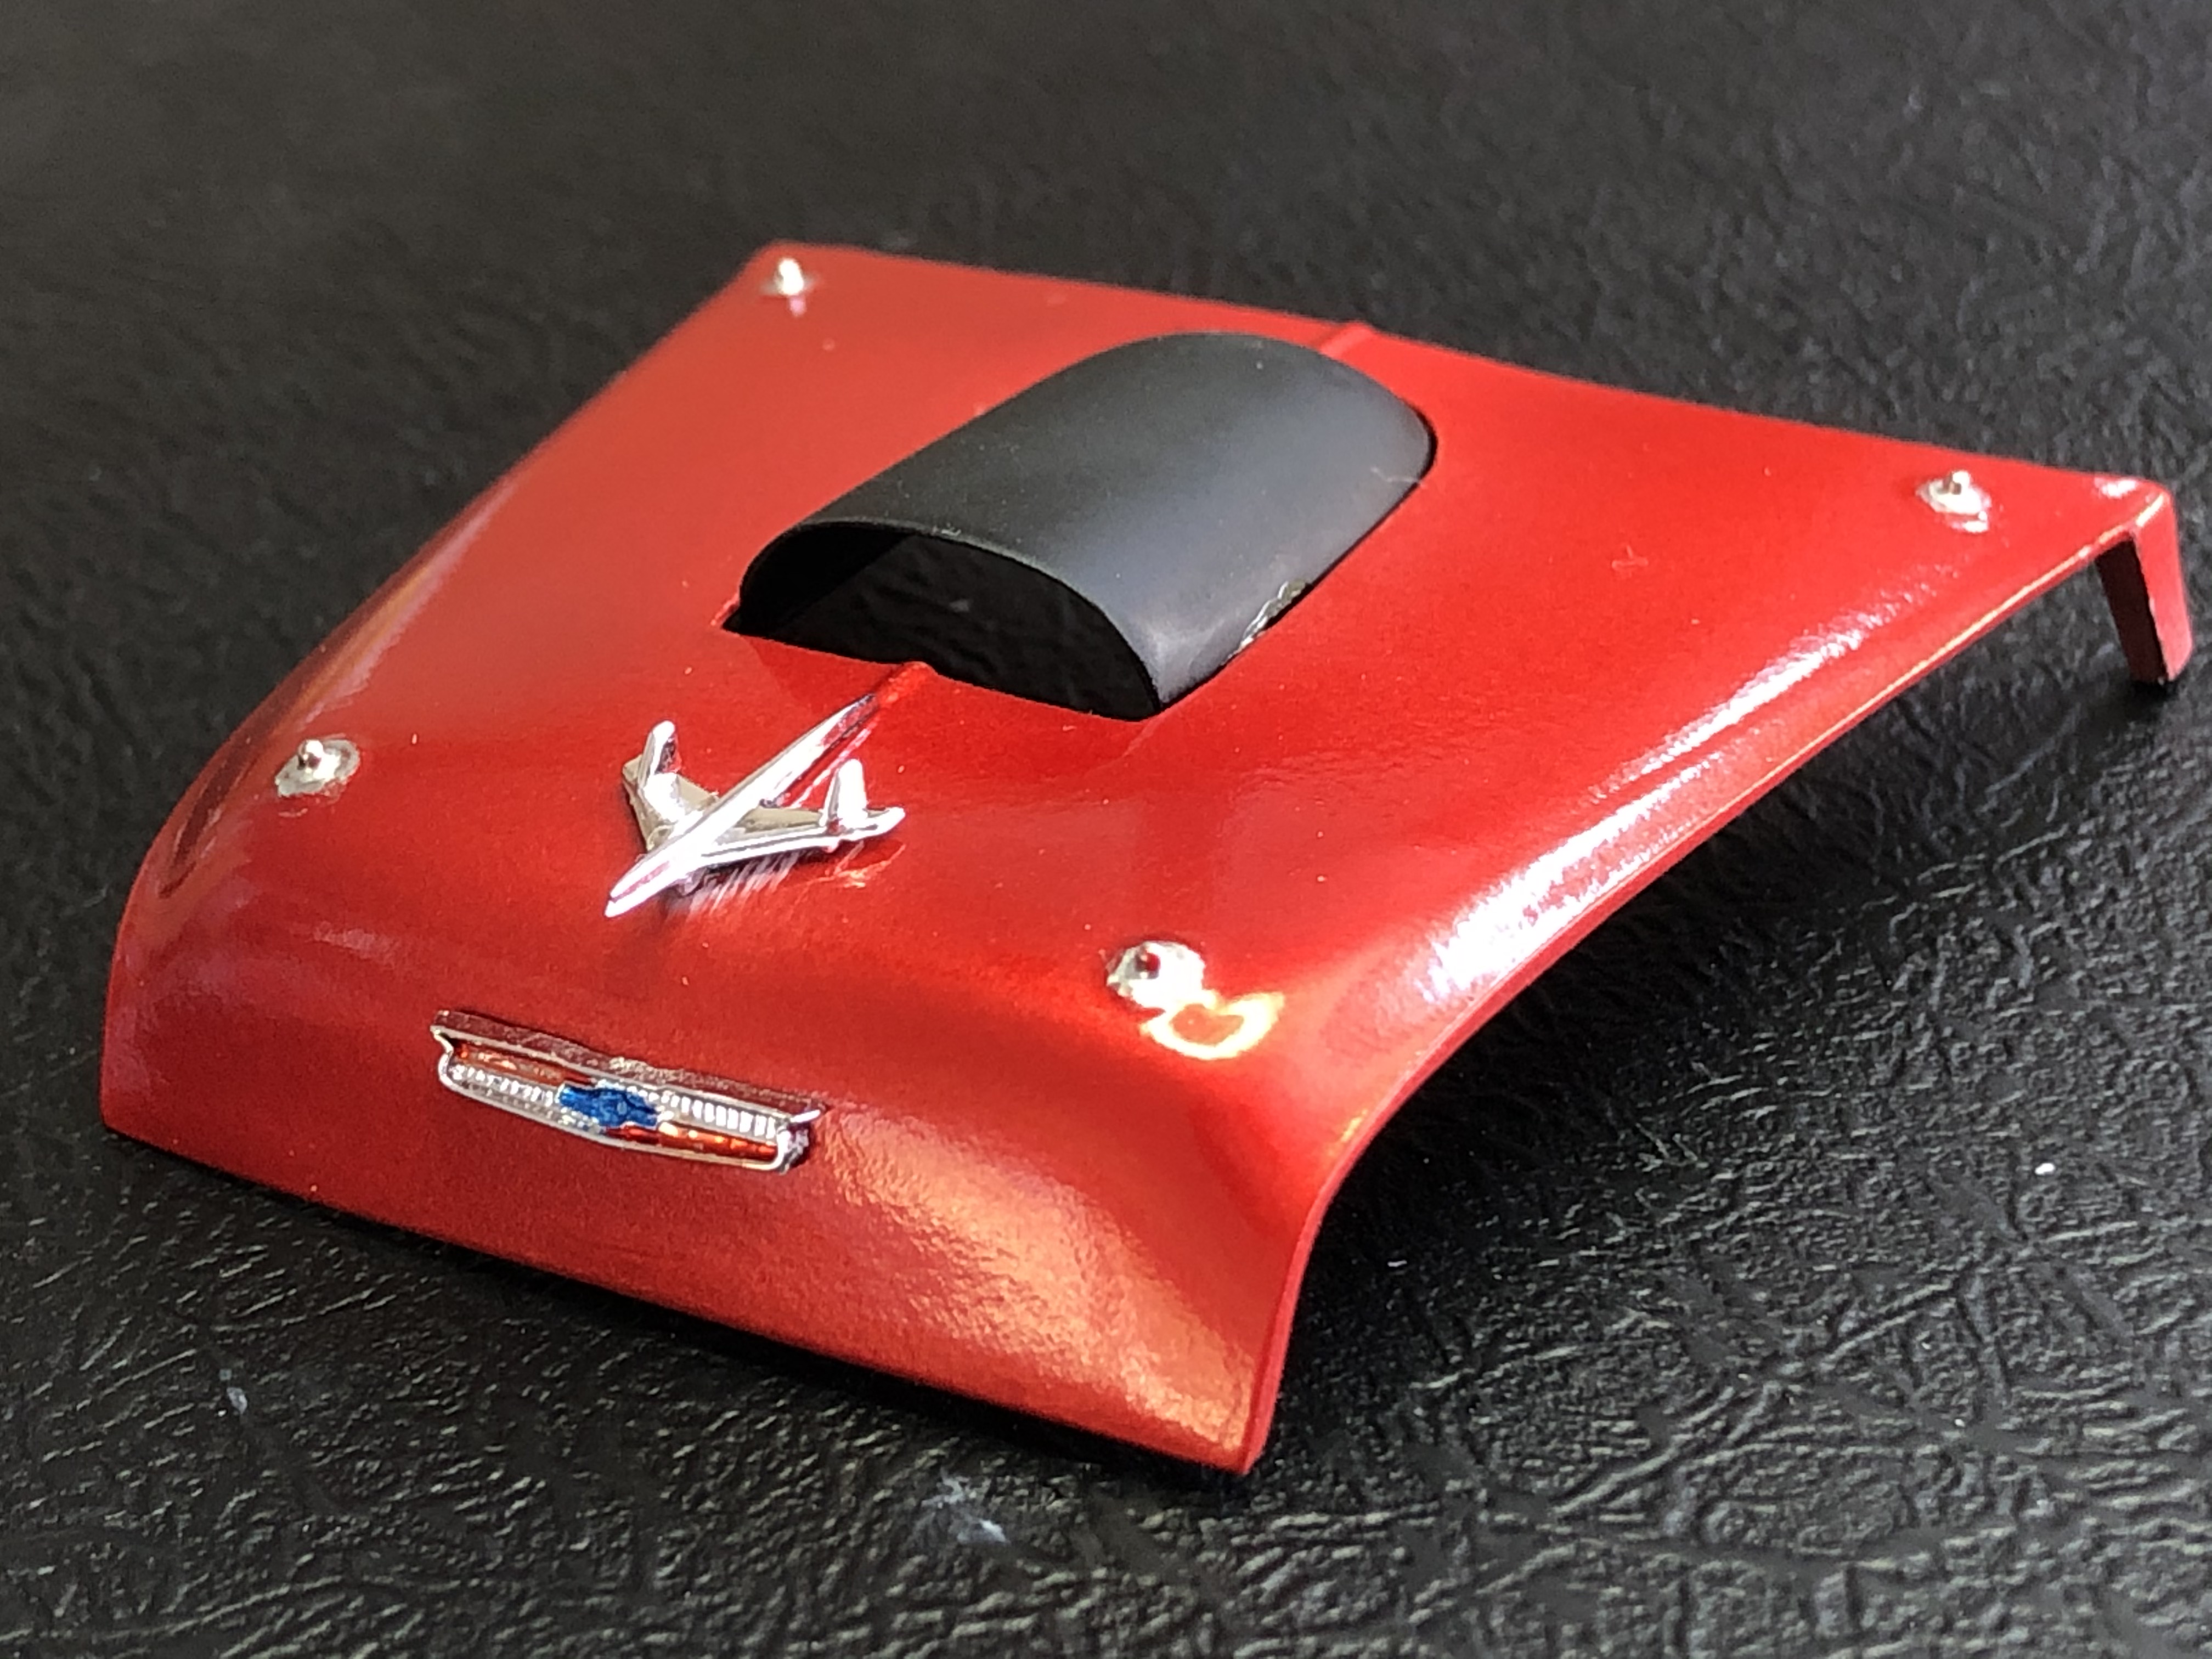
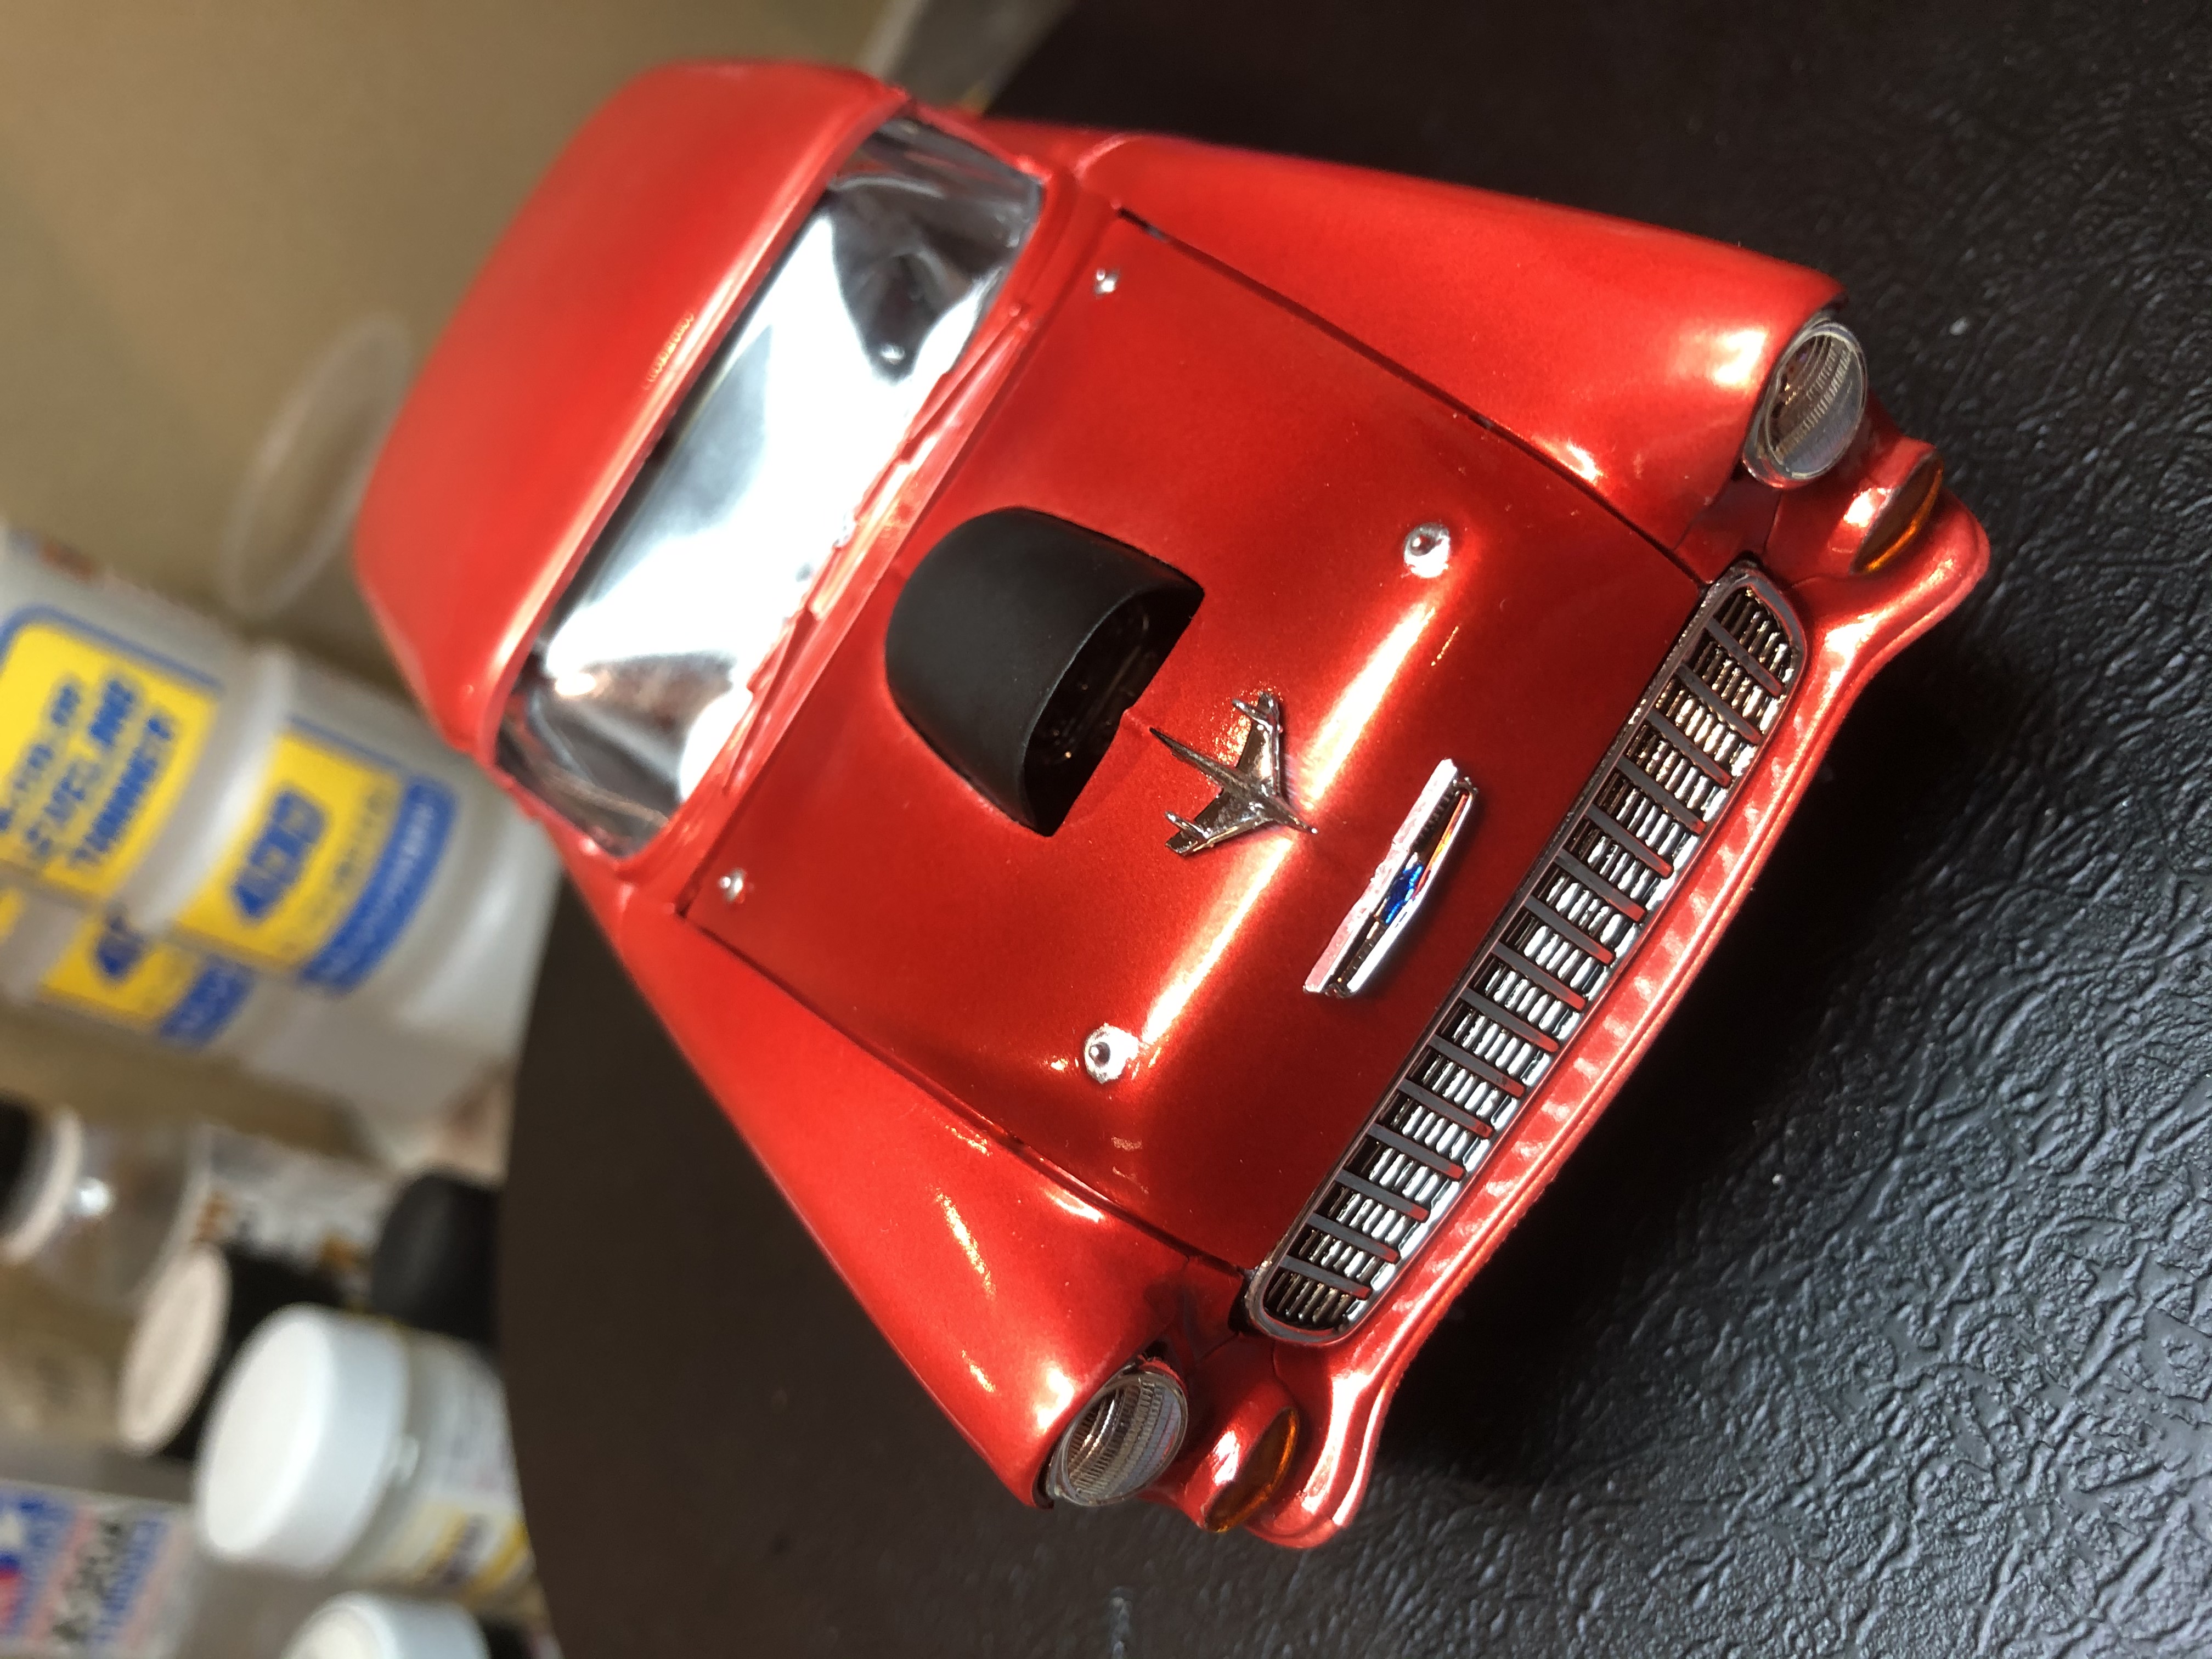
After some more curing time, the radiator went in. The scoop got a coat of MS1500 Black then a shot of Tamiya XF-1 Flat Black Enamel, and after a couple of hours to cure it was set in place in the bonnet.
Some shots of where we are at now.
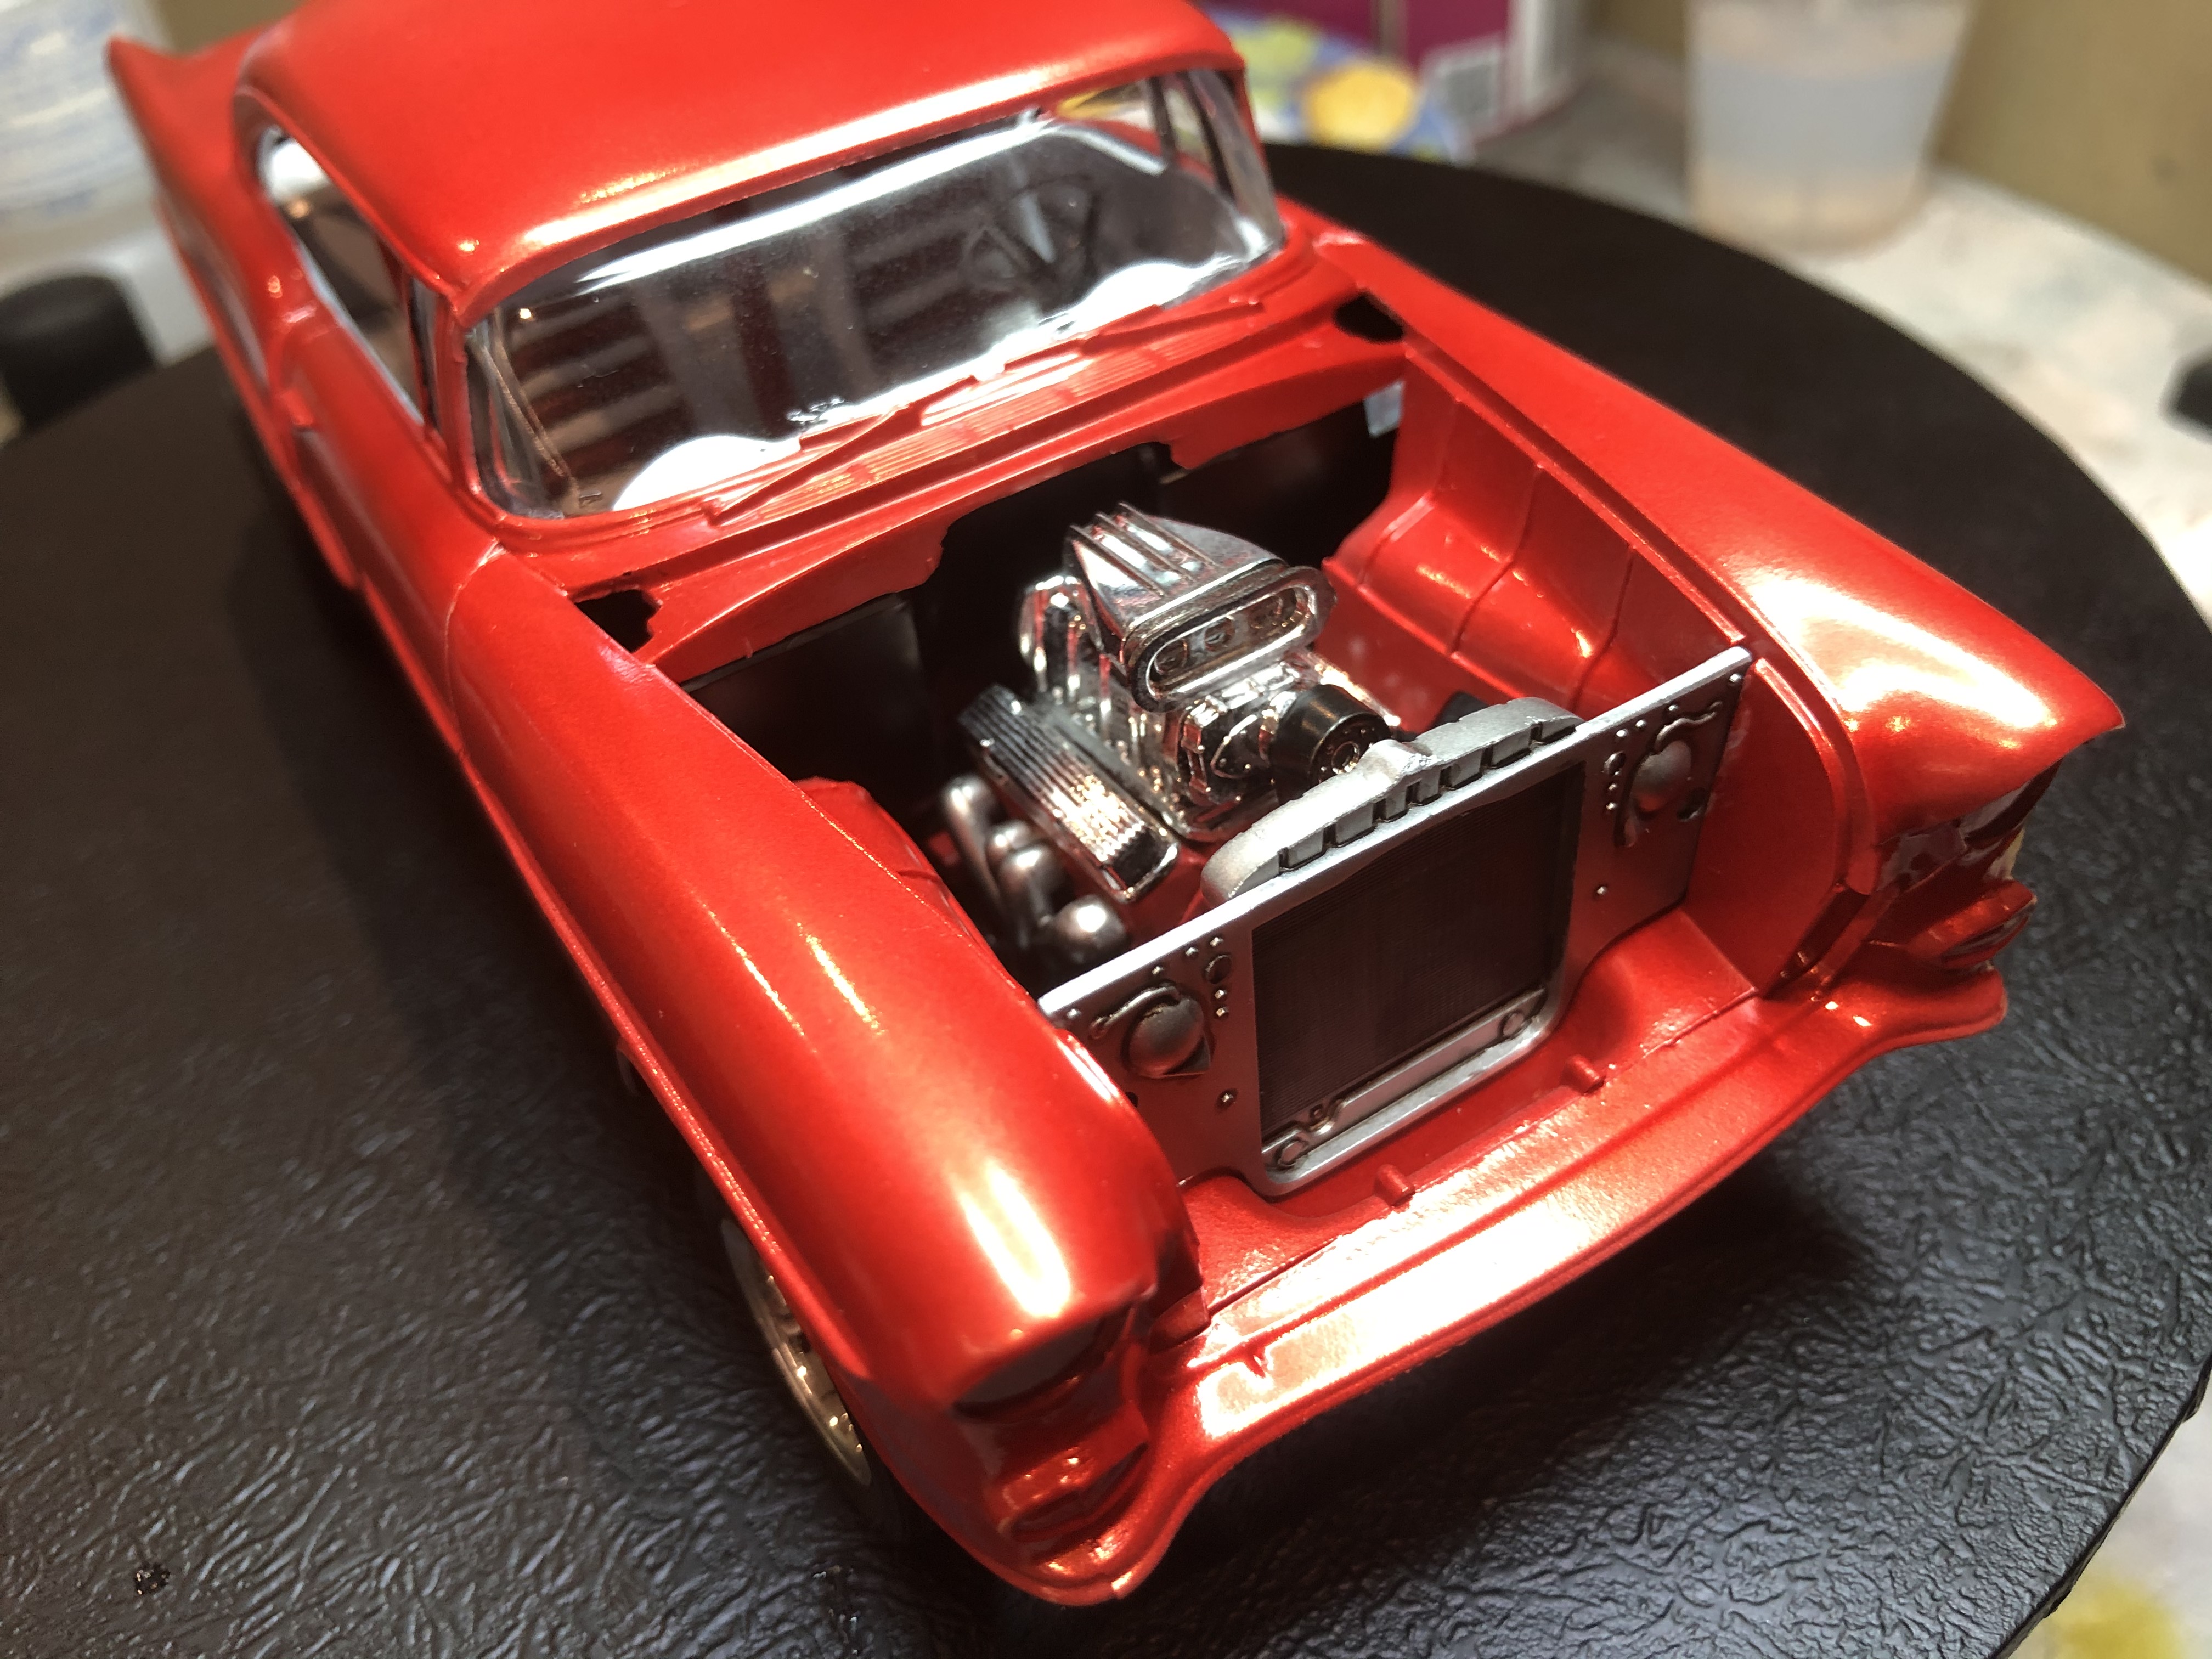
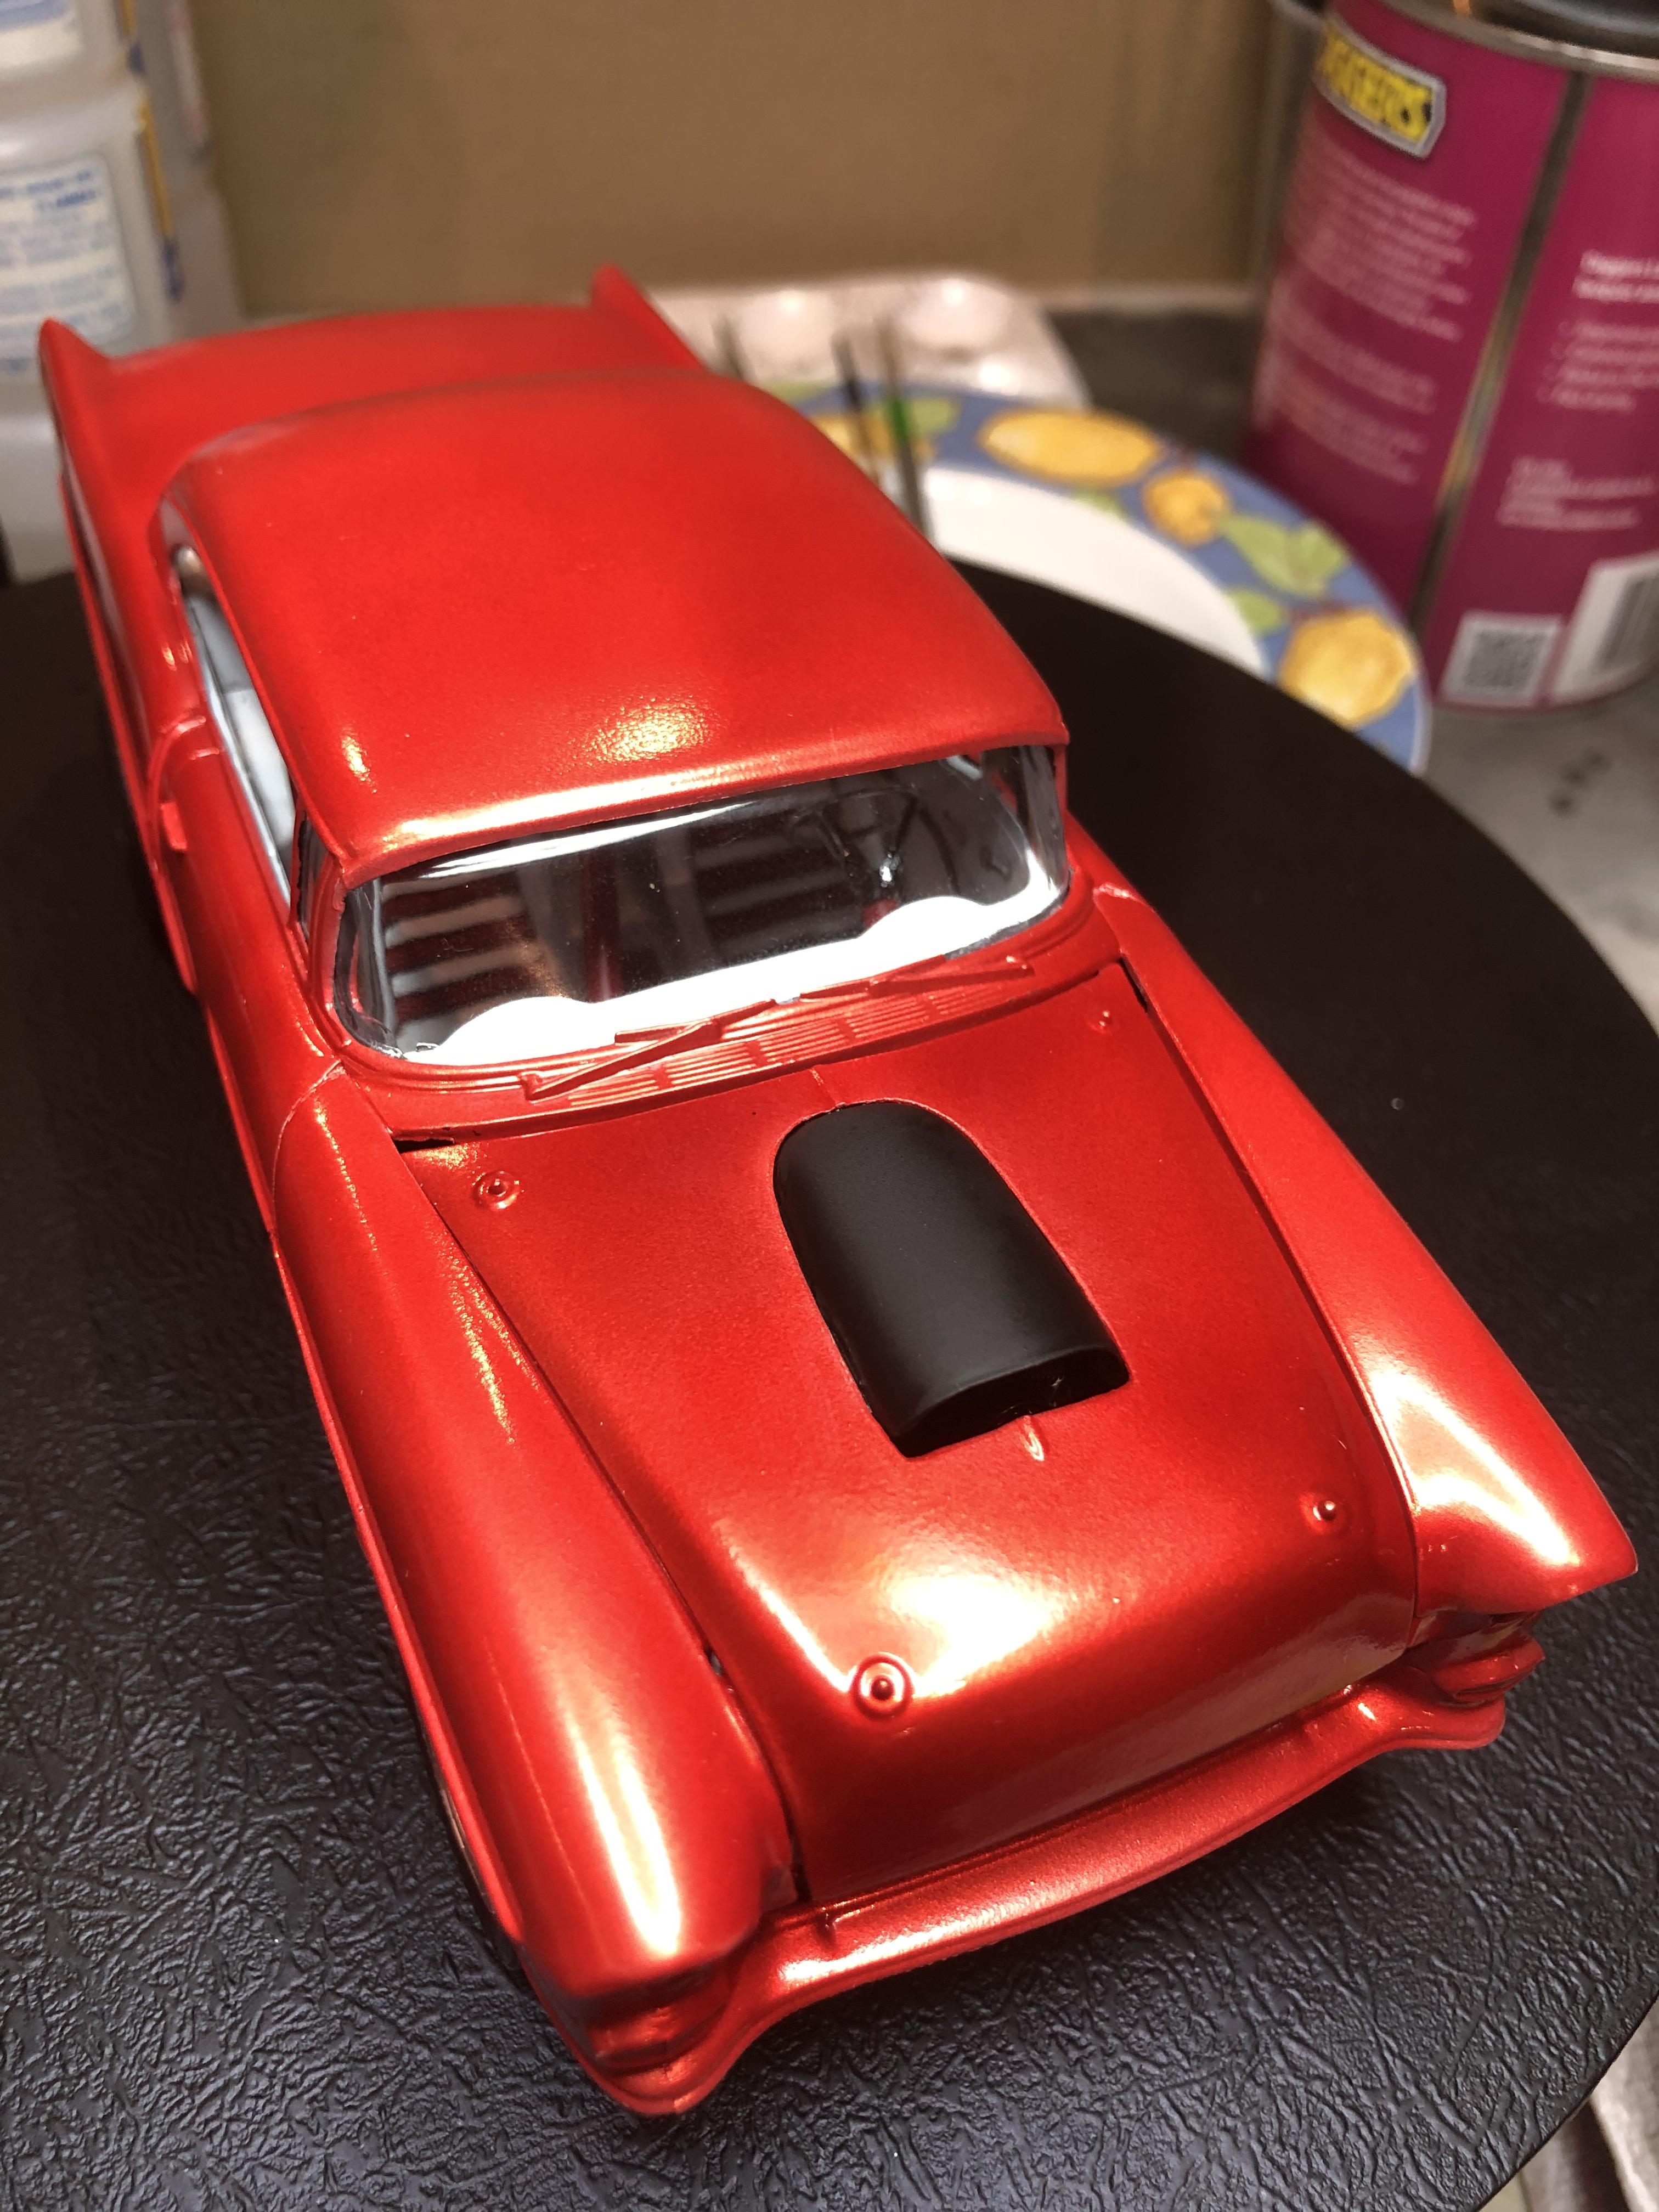
Some more chrome parts to fit including grille, front tank, rear bumper, headlights and signals, and exhaust tips, then BMF.
A couple of spots need touching up, and some of the clear part white glue to be cleaned up.
The final touches will probably be setting up a wire support for the bonnet when it's raised, and a drop of chrome paint on the bonnet hold-down studs.
Cheers, D
Assembly night tonight, this one is getting very close to completion now.
Front and rear glass in last night and left for a day to cure. Tonight I CA'd the base and body together and then set about fitting the front axle, springs, tie rod and wheels. Once they were cured the rear springs, diff/driveshaft, traction bars and wheels went on.
After some more curing time, the radiator went in. The scoop got a coat of MS1500 Black then a shot of Tamiya XF-1 Flat Black Enamel, and after a couple of hours to cure it was set in place in the bonnet.
Some shots of where we are at now.
Some more chrome parts to fit including grille, front tank, rear bumper, headlights and signals, and exhaust tips, then BMF.
A couple of spots need touching up, and some of the clear part white glue to be cleaned up.
The final touches will probably be setting up a wire support for the bonnet when it's raised, and a drop of chrome paint on the bonnet hold-down studs.
Cheers, D
Joel_W
Joined: December 04, 2010
KitMaker: 11,666 posts
Auto Modeler: 2,974 posts
Posted: Friday, February 28, 2020 - 02:21 AM UTC
D,
You're really making progress now. The bottom of the chassis view really came together. Even the exhaust system lines up by the headers, something that I've always struggled with.
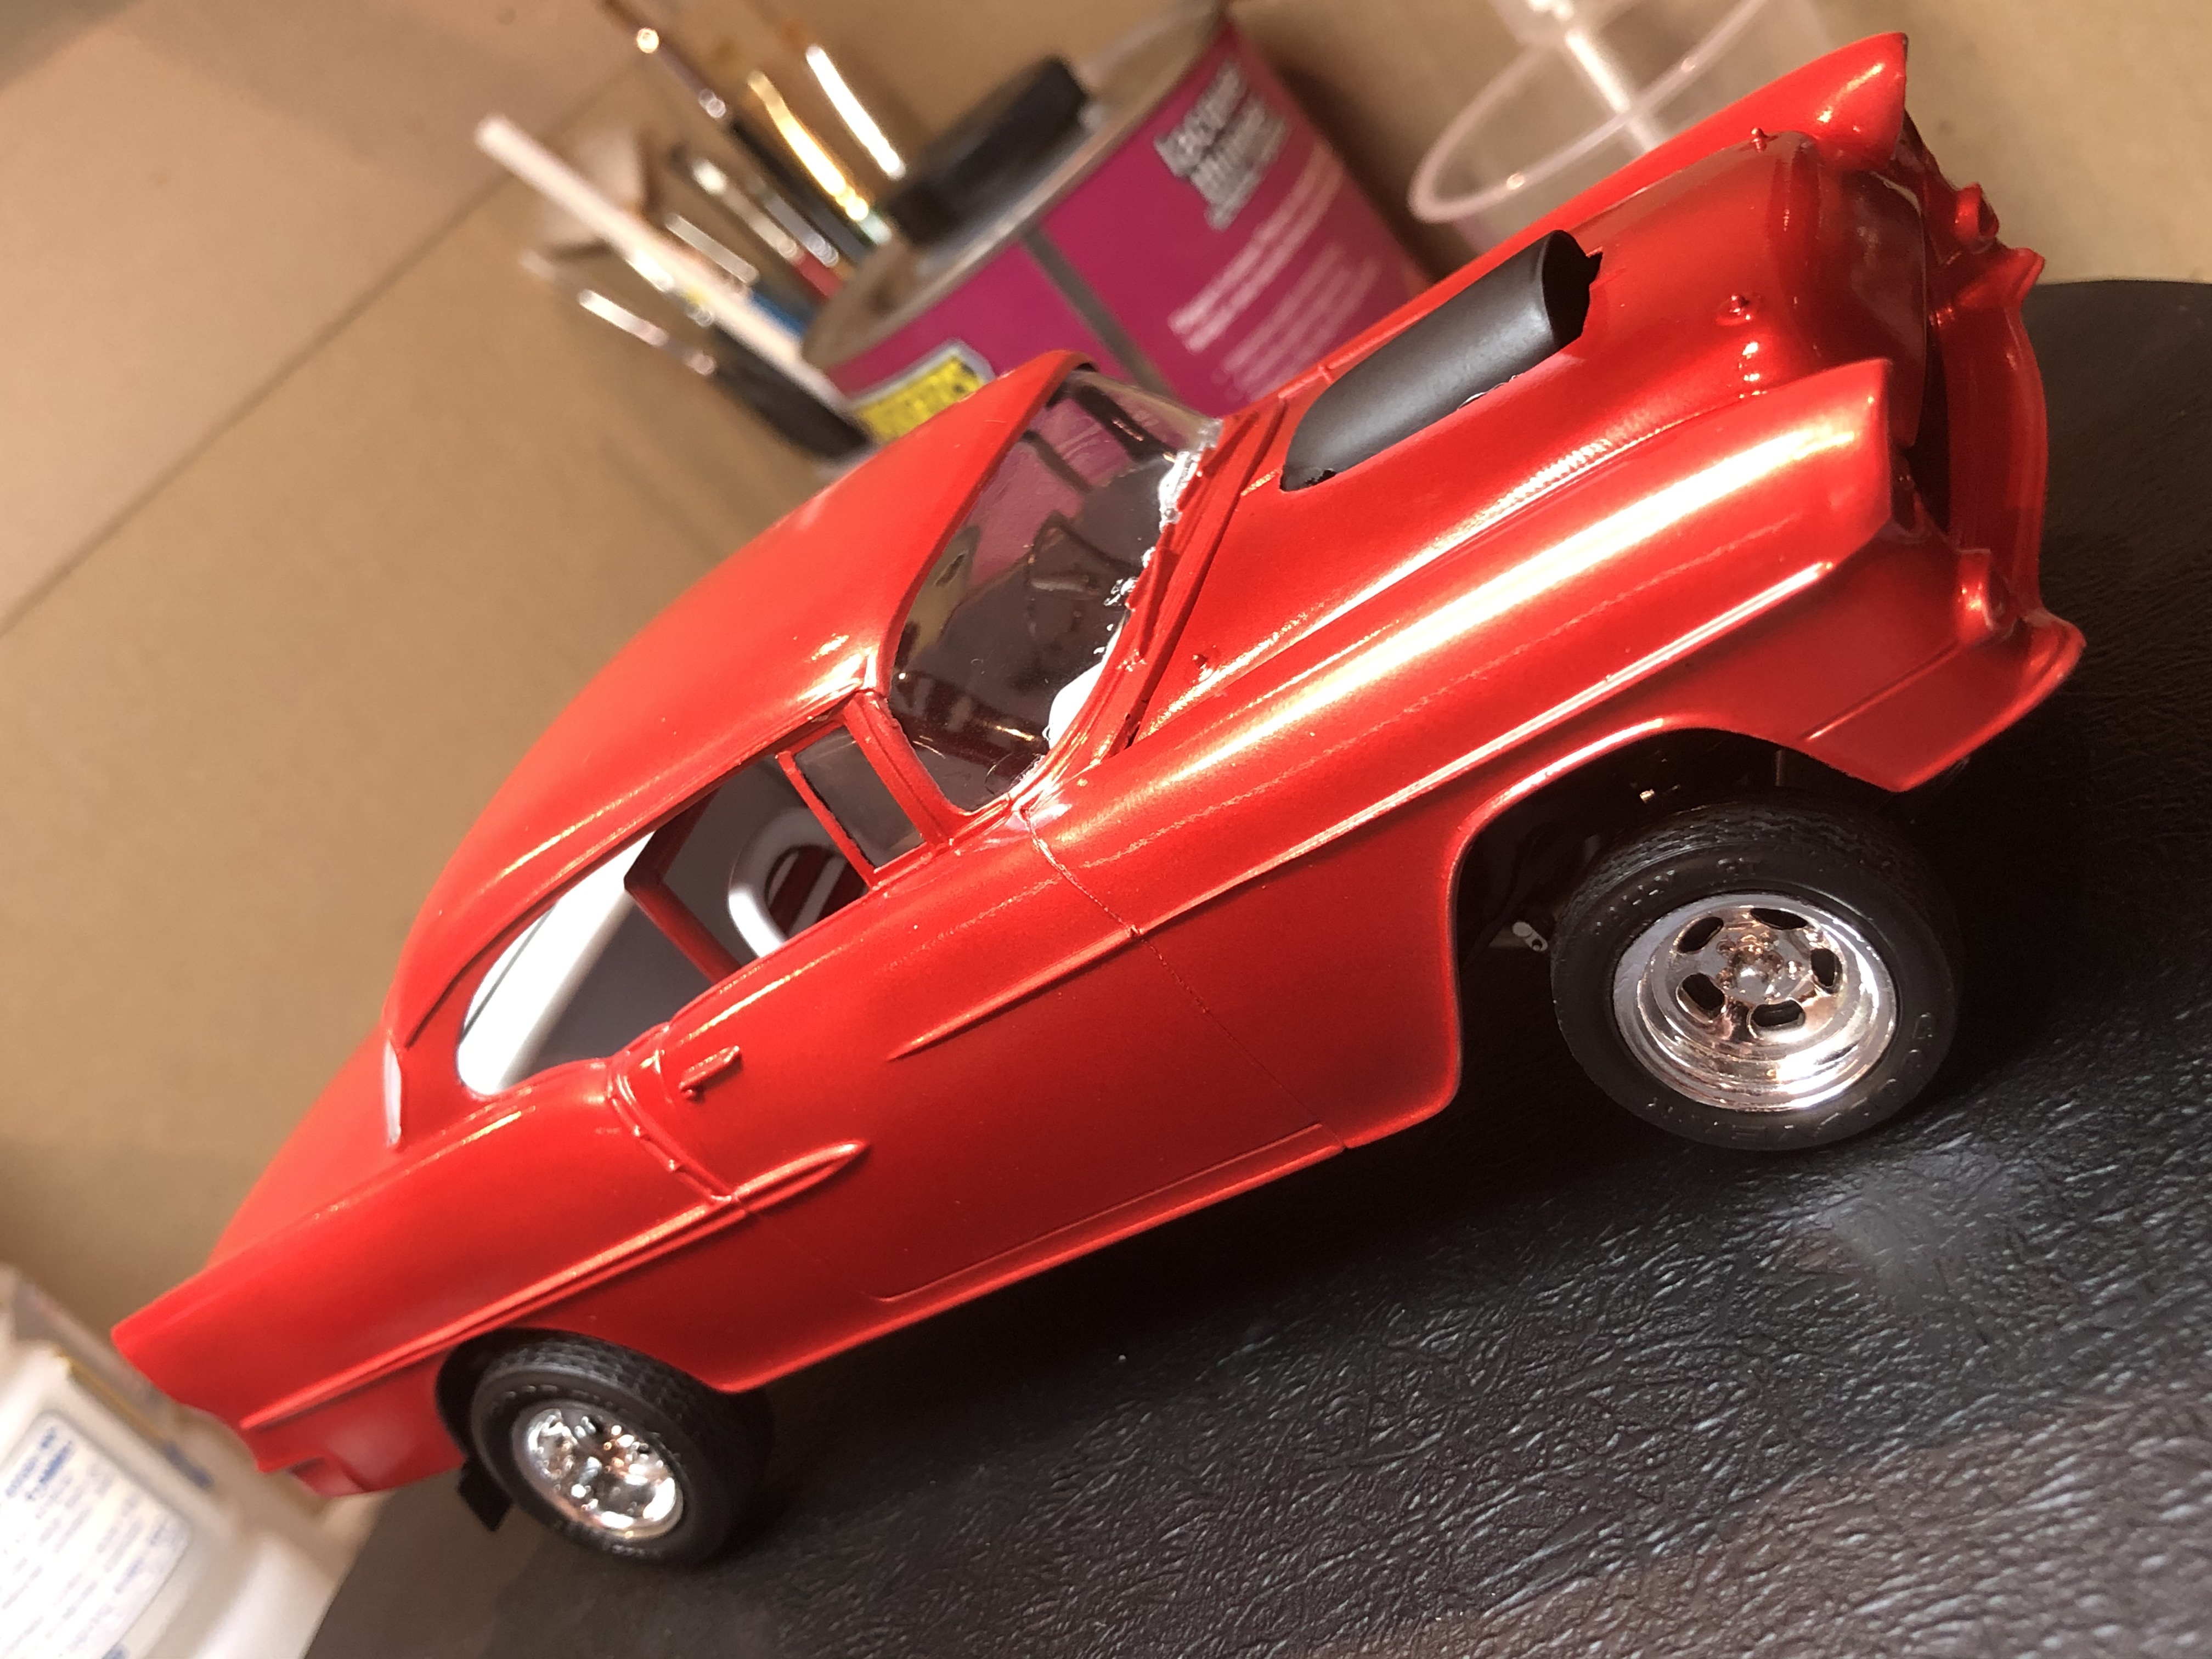
The overall stance with the front suspension jacked up has that 1960's look to it that I remember so well.
As usual, I'm looking forward to your next update as you cruise towards the finish line.
Joel
You're really making progress now. The bottom of the chassis view really came together. Even the exhaust system lines up by the headers, something that I've always struggled with.
The overall stance with the front suspension jacked up has that 1960's look to it that I remember so well.
As usual, I'm looking forward to your next update as you cruise towards the finish line.
Joel

Szmann

Joined: September 02, 2014
KitMaker: 1,977 posts
Auto Modeler: 1,371 posts

Posted: Friday, February 28, 2020 - 12:19 PM UTC
Looking good, D.
That red really pops, and the metallic helps a lot. Usually I'm being scornful about chromed engine parts, but this time you've made a sound decision to keep them.
Niiiiice!
Gabriel
That red really pops, and the metallic helps a lot. Usually I'm being scornful about chromed engine parts, but this time you've made a sound decision to keep them.
Niiiiice!
Gabriel
AussieReg
#007
Joined: June 09, 2009
KitMaker: 8,156 posts
Auto Modeler: 2,953 posts
Posted: Friday, February 28, 2020 - 04:40 PM UTC
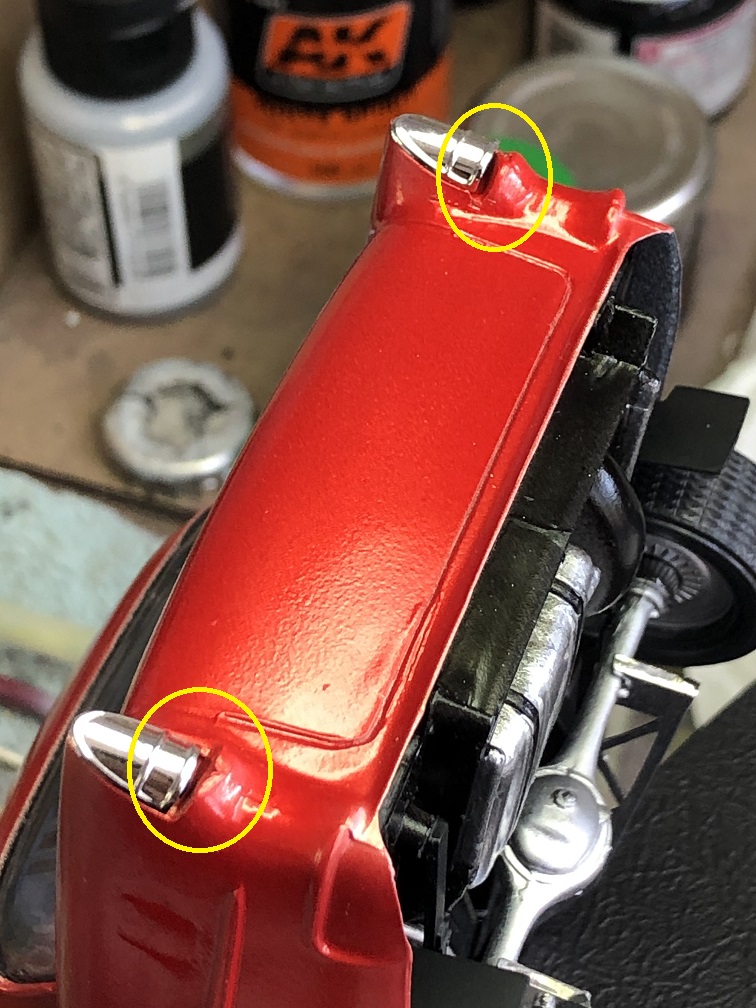
Thanks guys, it's been a fun build so far, with the usual challenges. Speaking of which, here's one for the Ï should have checked earlier" file! The chrome tail light parts fit nicely at the top profile, but at the bottom, not at all. This will take a bit of styrene shenanigans to sort out neatly 
Before and after shot of some touch-up painting under the noisy end!
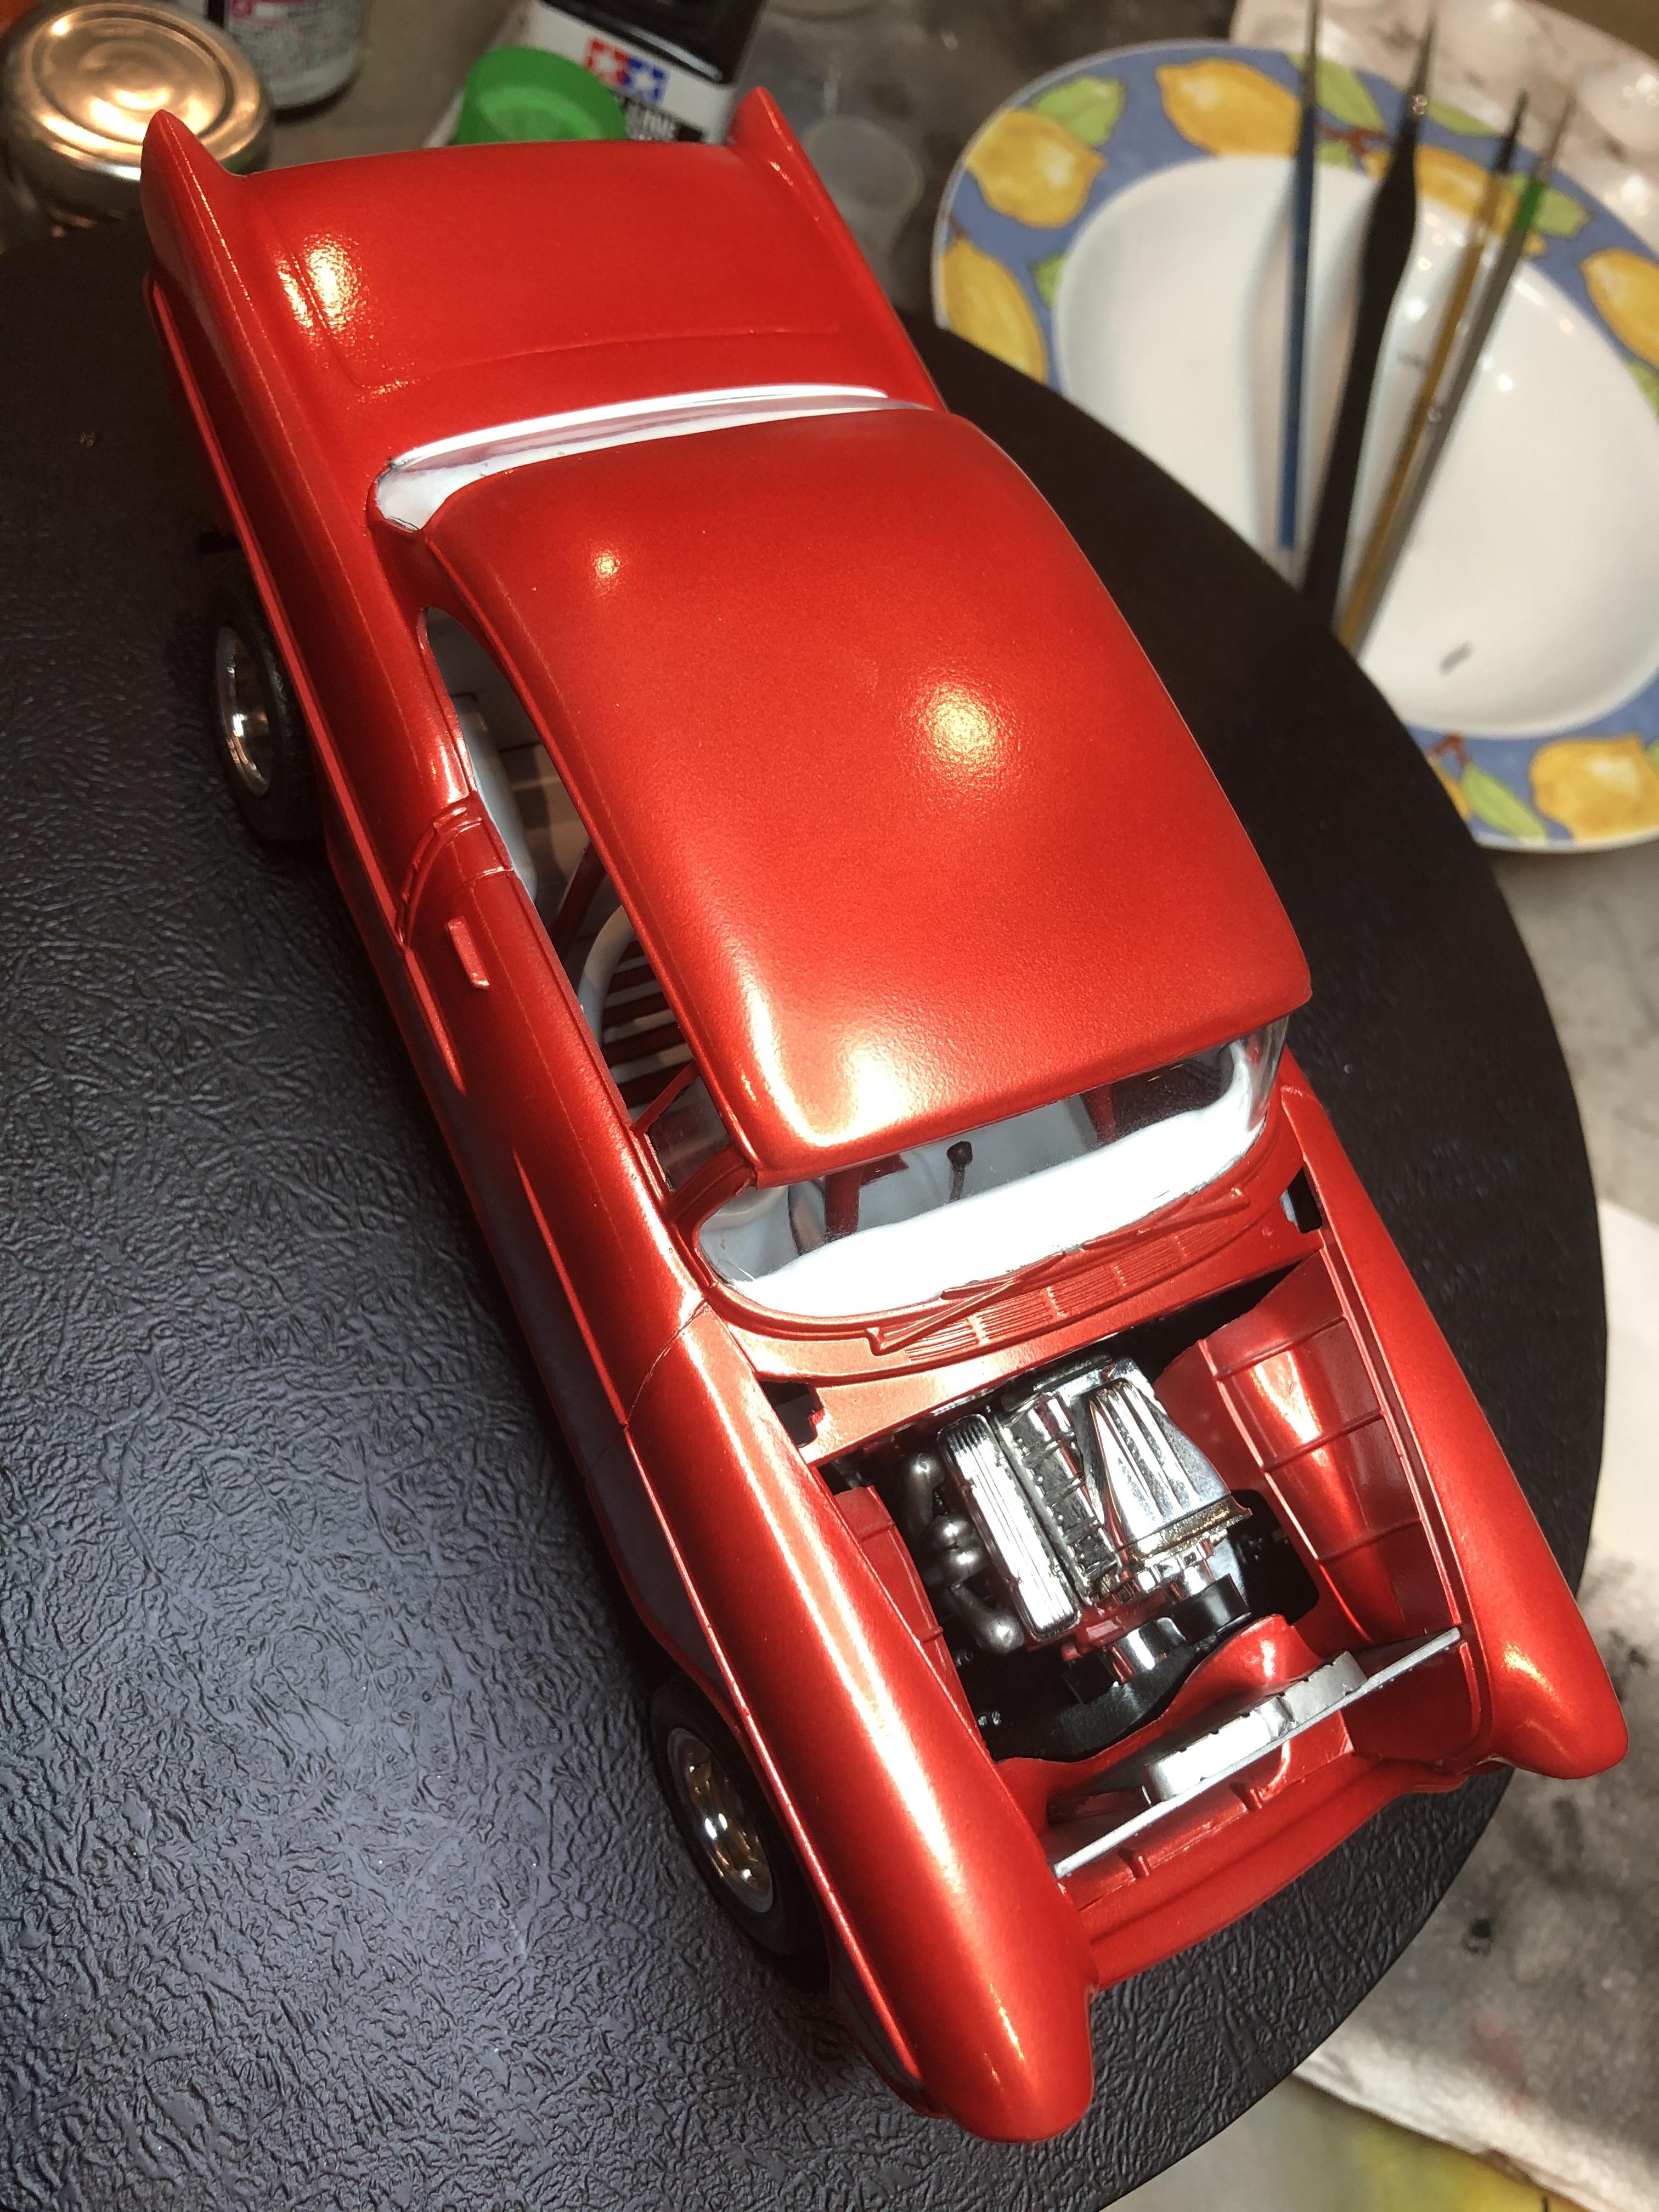
And I am very happy with the bonnet now that the bits and pieces are on.
Cheers, D
Before and after shot of some touch-up painting under the noisy end!
And I am very happy with the bonnet now that the bits and pieces are on.
Cheers, D
Joel_W
Joined: December 04, 2010
KitMaker: 11,666 posts
Auto Modeler: 2,974 posts
Posted: Saturday, February 29, 2020 - 03:01 AM UTC
D,
You're almost at the finish line for sure.
I'd suggest filling those spaces at the bottom of those bumpers as those they're separate pcs. Either go chrome, black for insulation, or Red as a factory filler piece.
Impressive change of color and texture to that what I'm thinking is a radiator protective plate from road crap getting kicked up into the radiator.
Joel
Szmann
Joined: September 02, 2014
KitMaker: 1,977 posts
Auto Modeler: 1,371 posts
Posted: Saturday, February 29, 2020 - 03:14 AM UTC
Quoted Text
The chrome tail light parts fit nicely at the top profile, but at the bottom, not at all. This will take a bit of styrene shenanigans to sort out neatly
Just asking: won't be easier to bring them all the way down and to paint the tip of the fins silver (or red)?
Nice work (as always) so far!
Gabriel
AussieReg
#007
Joined: June 09, 2009
KitMaker: 8,156 posts
Auto Modeler: 2,953 posts
Posted: Monday, March 02, 2020 - 11:58 PM UTC
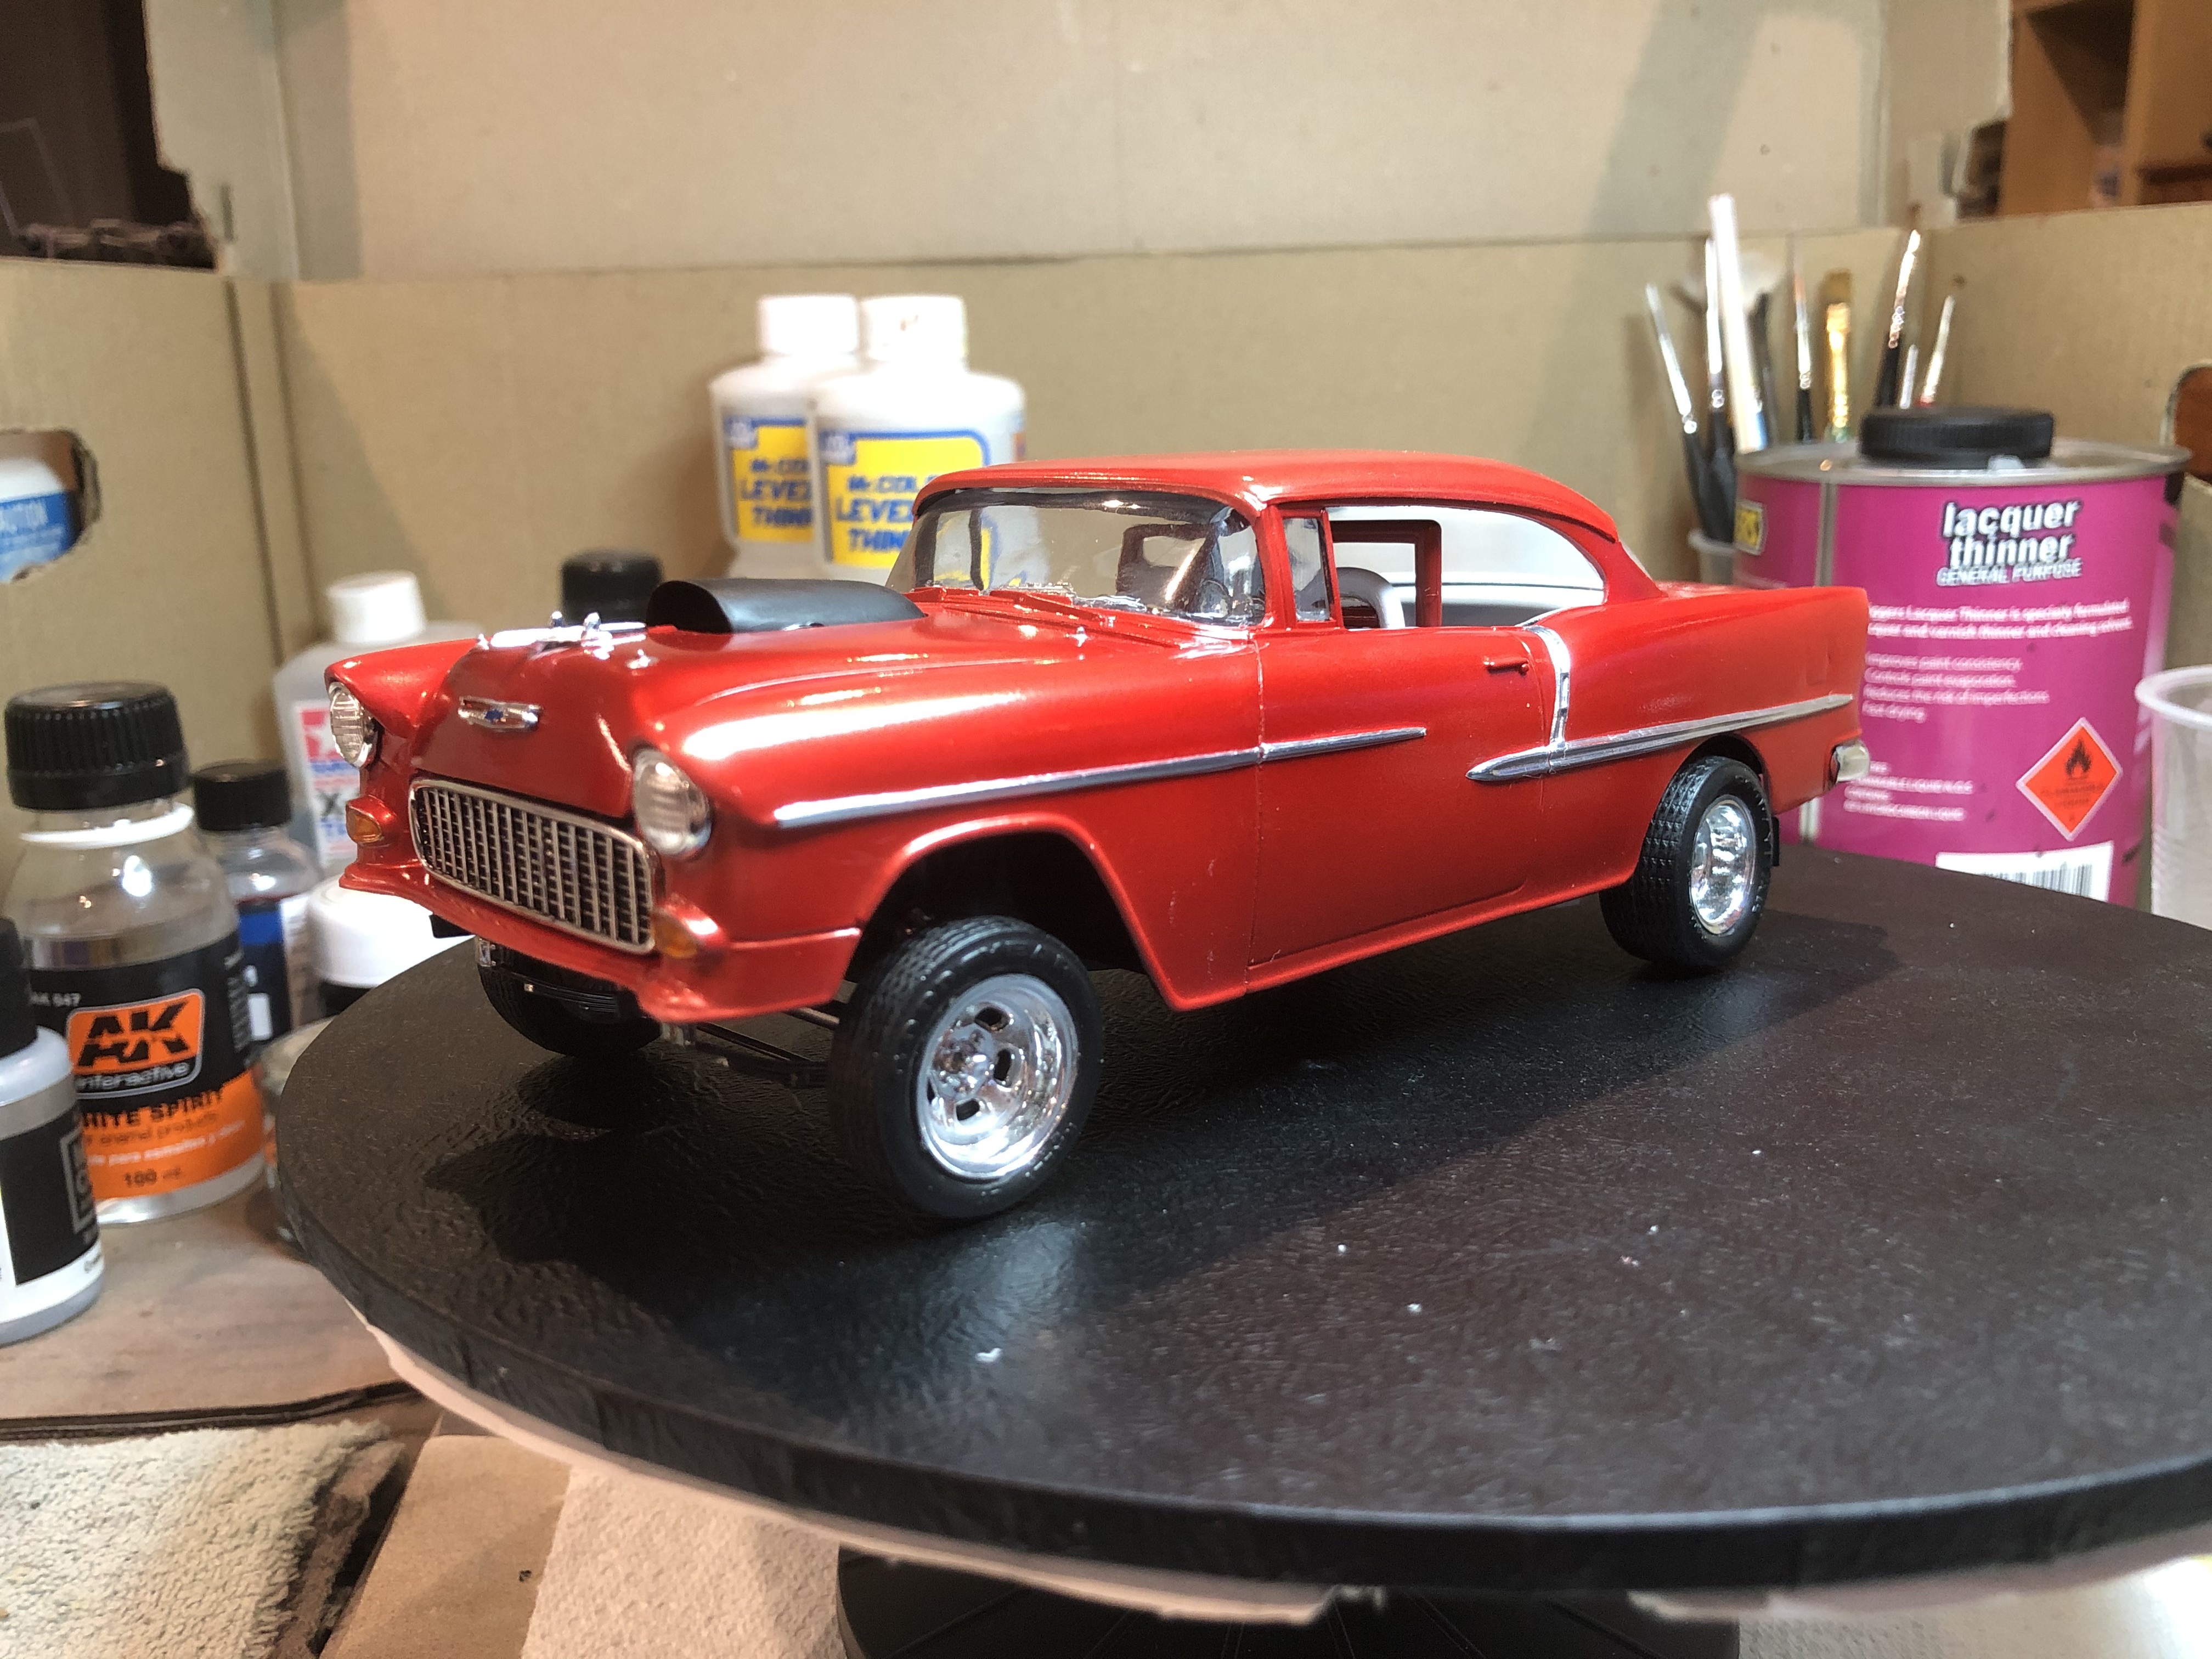
Played around with the chrome trim parts tonight, got almost everything set in place now. Just the exhaust tips and BMF to do.
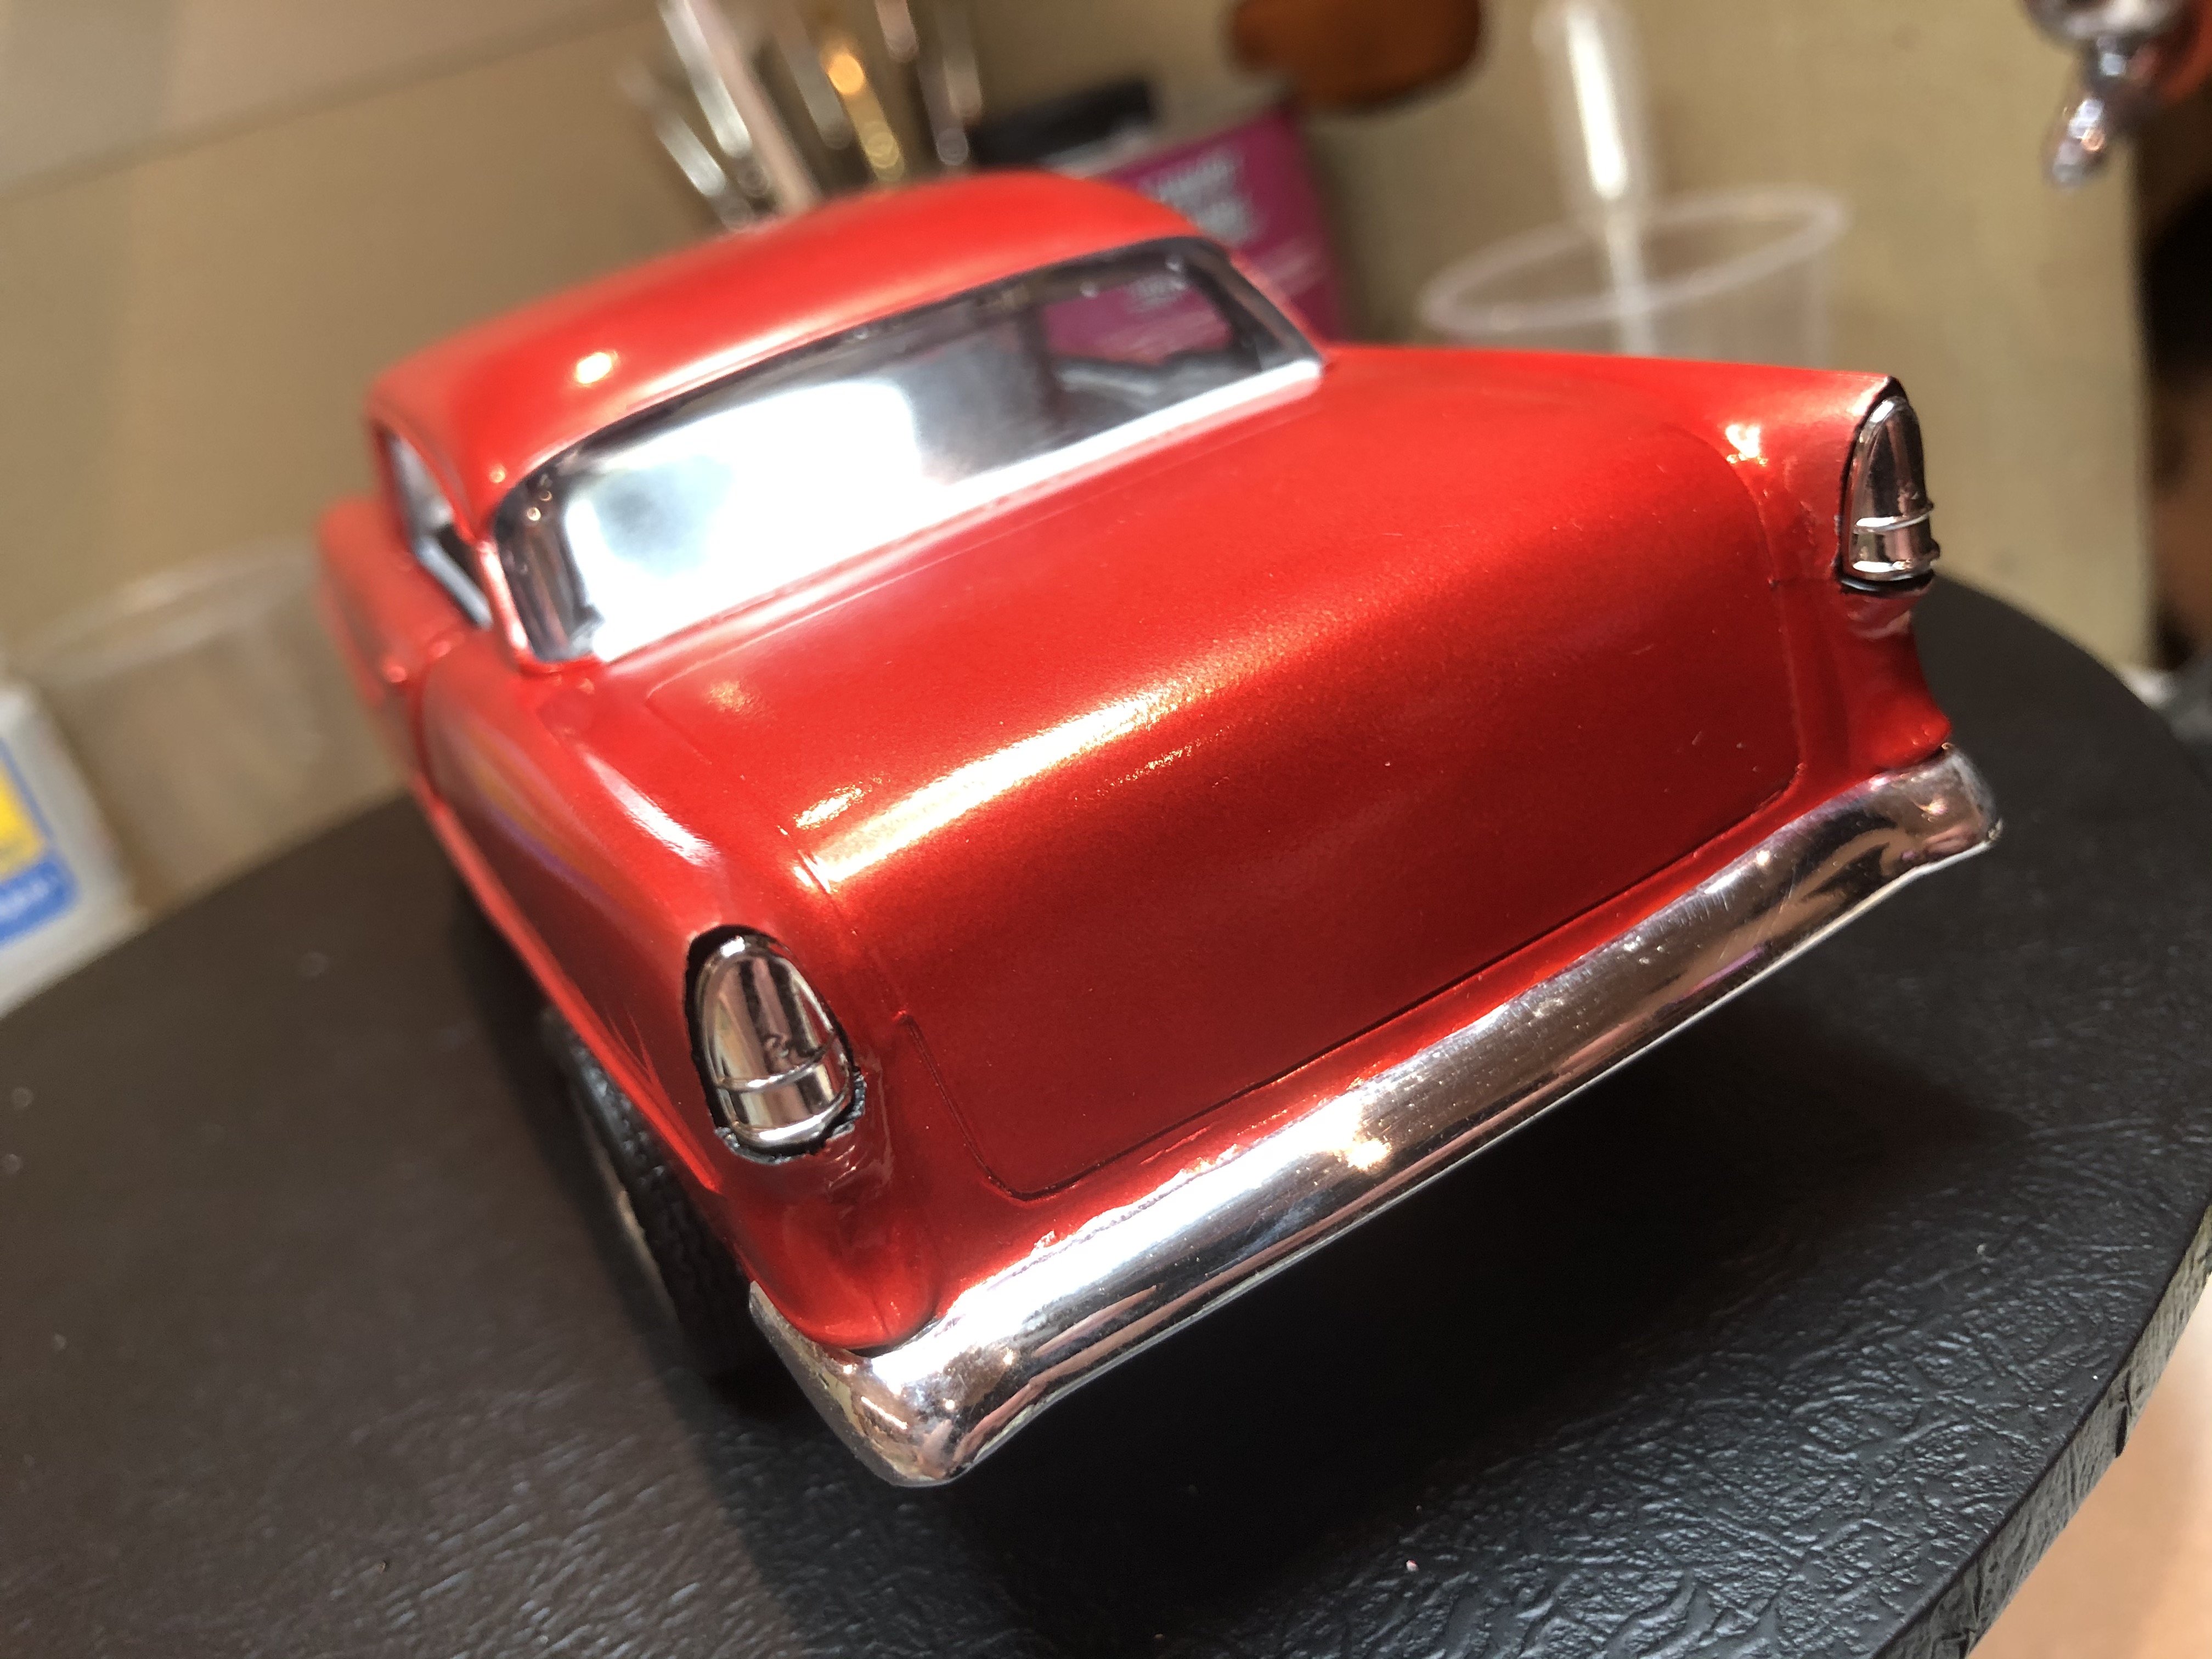
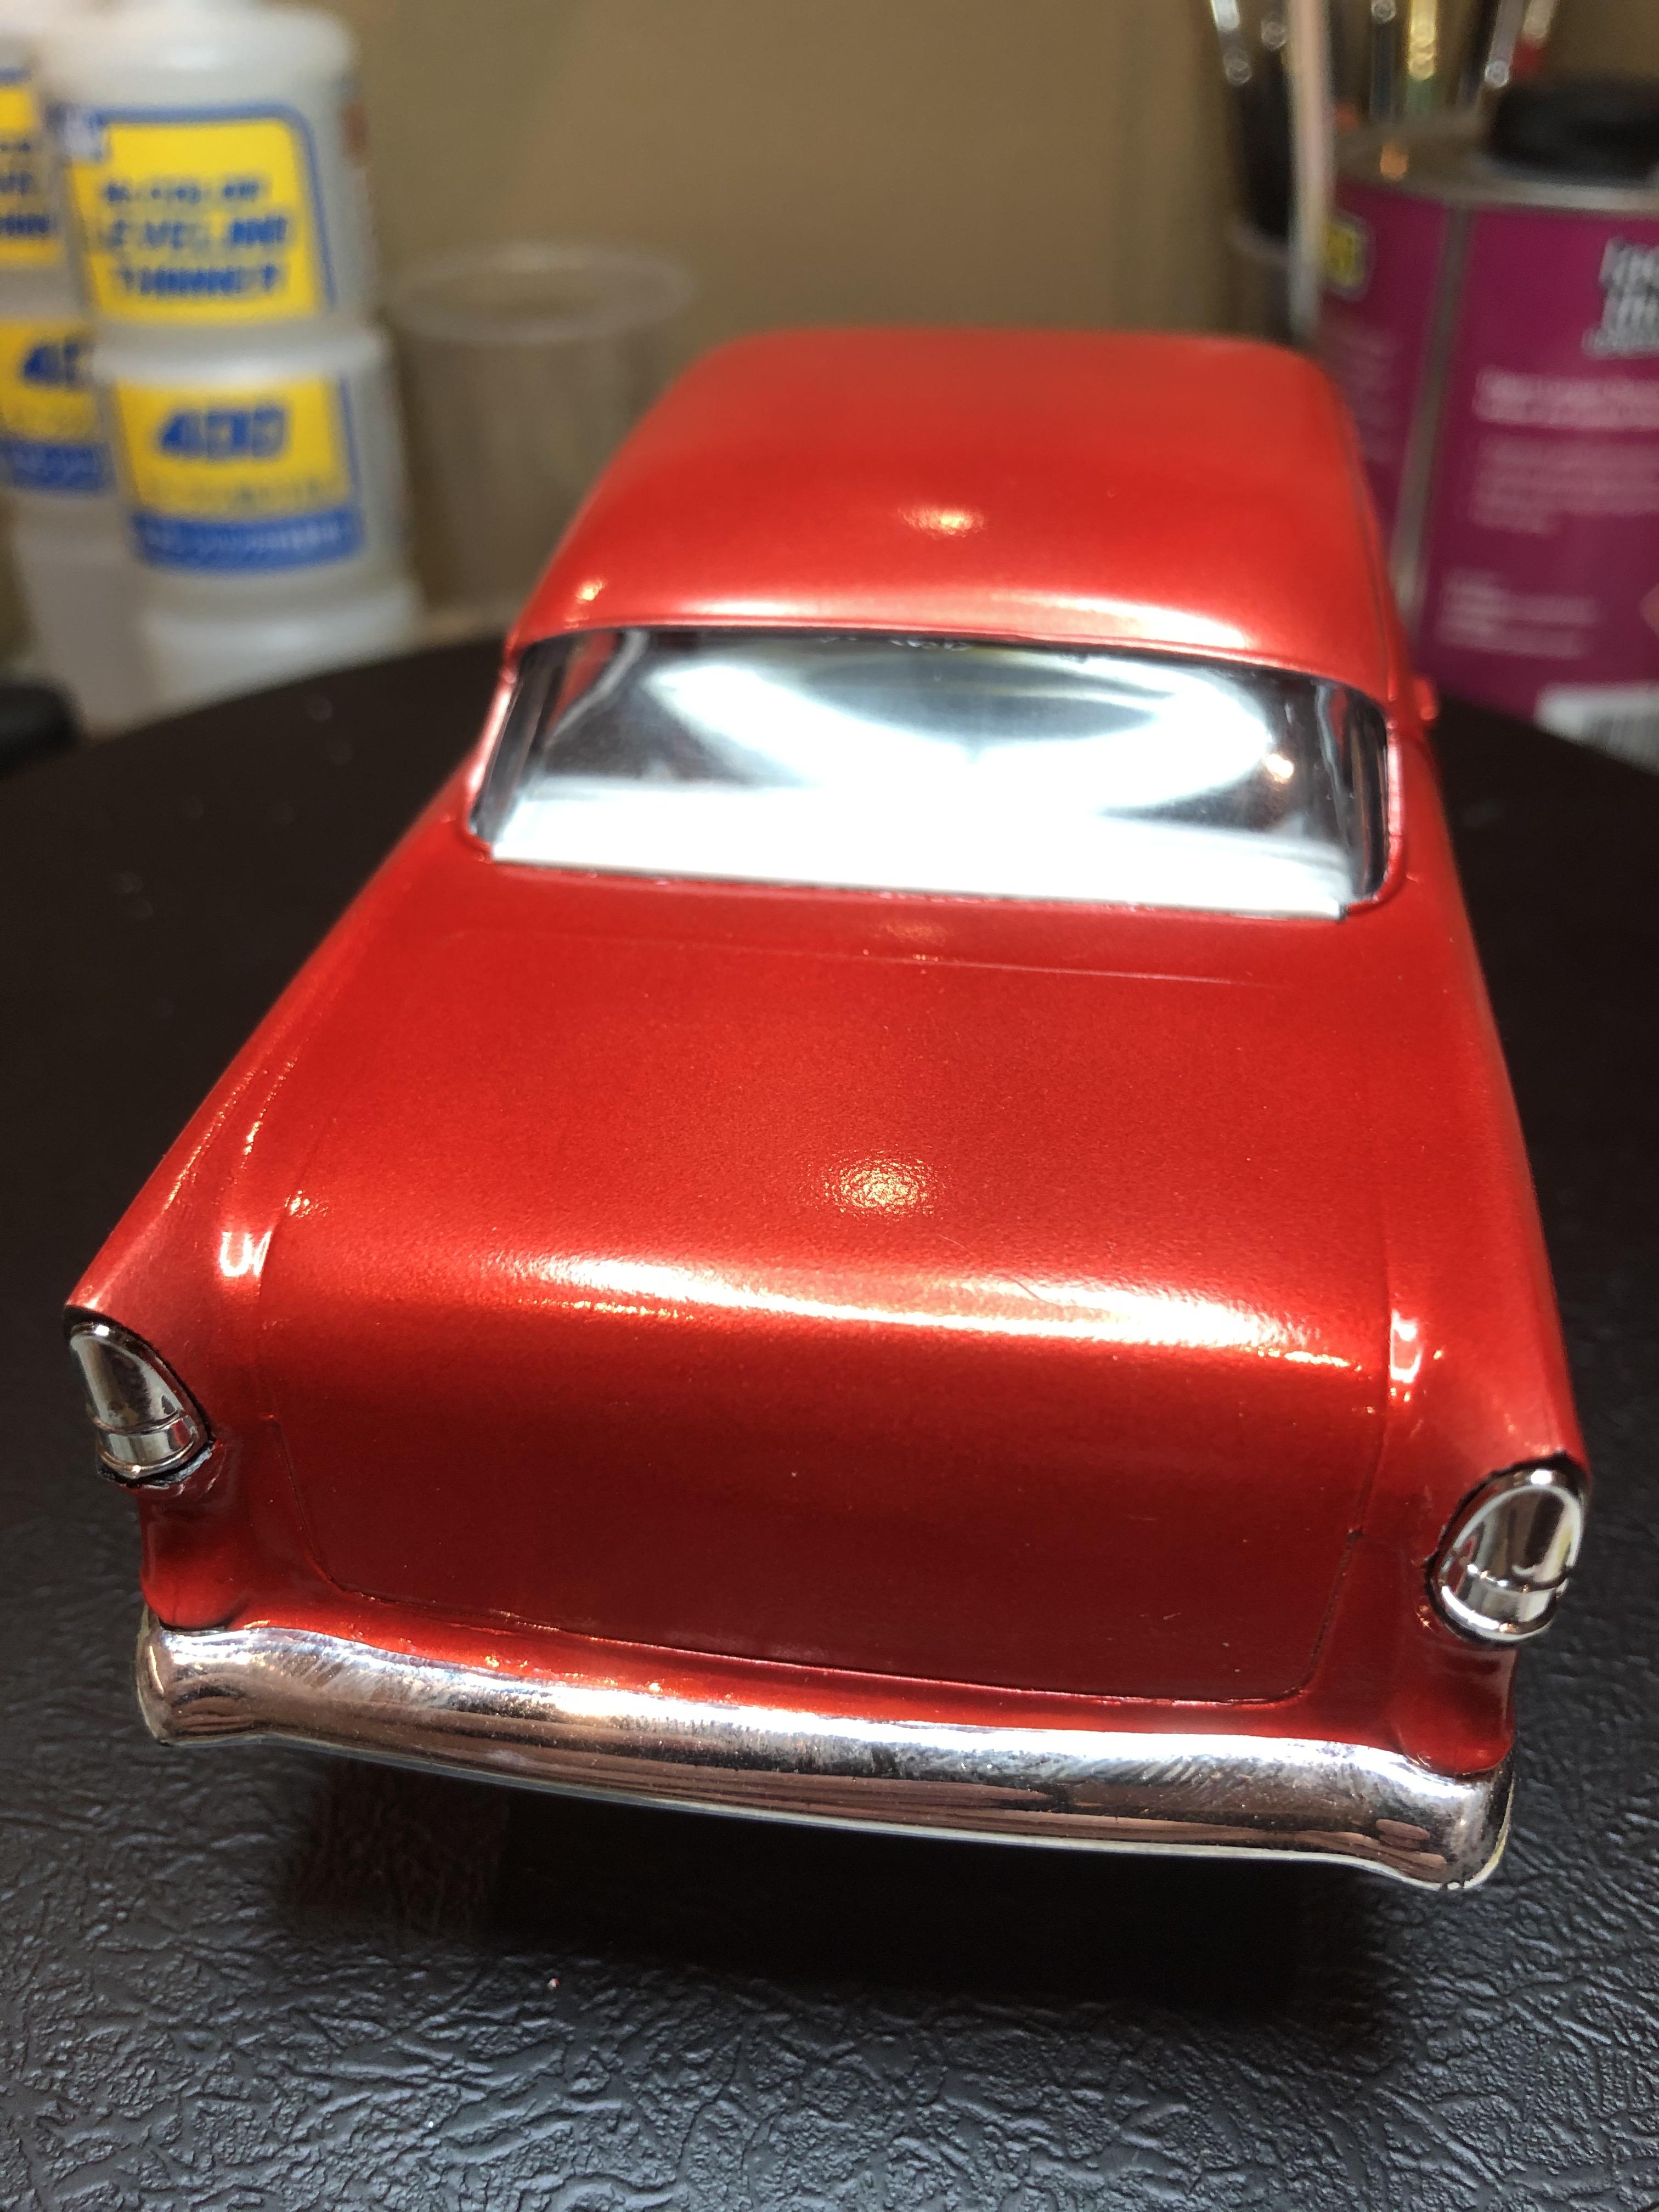
It's rough but it was an experiment test bed for a paint scheme right from the start, so I'm not too fussed about getting it spot on. The tail lights have squared up ok with a bit of work, but not perfect. There is clear parts cement sneaking up the bottom of the windscreen, I will try to get rid of most of it. I will also detail paint the front turn signal surrounds in chrome.
Next update it should be completed.
Cheers, D
Szmann
Joined: September 02, 2014
KitMaker: 1,977 posts
Auto Modeler: 1,371 posts
Posted: Tuesday, March 03, 2020 - 12:09 AM UTC
Looking good, D. as you managed to overcome the kit's shortcomings. Yes, the turn signals will benefit from silver bezels, also maybe you might want to chrome the door handles.
After I completed my Mustang and watching your pictures now, I have to re-do the list of Most Bugging Things in Auto-Modelling with no immediate solution:
- thick radiator blades
- thick steering wheel inner circle
- blind chromed lights.
Cheers!
Gabriel
After I completed my Mustang and watching your pictures now, I have to re-do the list of Most Bugging Things in Auto-Modelling with no immediate solution:
- thick radiator blades
- thick steering wheel inner circle
- blind chromed lights.
Cheers!
Gabriel

rv1963
Joined: December 07, 2004
KitMaker: 1,888 posts
Auto Modeler: 806 posts
Posted: Tuesday, March 03, 2020 - 02:16 AM UTC
Nice work Damian, you fixed a lot of problems on this kit, paint looks better also, Coming together nicely.
Joel_W
Joined: December 04, 2010
KitMaker: 11,666 posts
Auto Modeler: 2,974 posts
Posted: Tuesday, March 03, 2020 - 02:42 AM UTC
D,
I've also enjoyed your build as I'm constantly learning from your experiments to find a better way. I just got my 1st bottle of Testors clear glass glue as Extra Thin isn't always the right way to go.
The extra rubbing out of the Red paint virtually eliminated the Orange Peel. Your paint really looks 100% better, and I'm going on record as saying that moving forward your paint jobs will consistently reach new heights for sure.
Joel
RussellE
#306
Joined: June 27, 2010
KitMaker: 3,959 posts
Auto Modeler: 495 posts
Posted: Tuesday, March 03, 2020 - 08:20 AM UTC
Stunning work D
for a "test mule" she's looking gorgeous!
for a "test mule" she's looking gorgeous!
AussieReg
#007
Joined: June 09, 2009
KitMaker: 8,156 posts
Auto Modeler: 2,953 posts
Posted: Thursday, March 05, 2020 - 09:46 PM UTC
BMF time, side trims done.
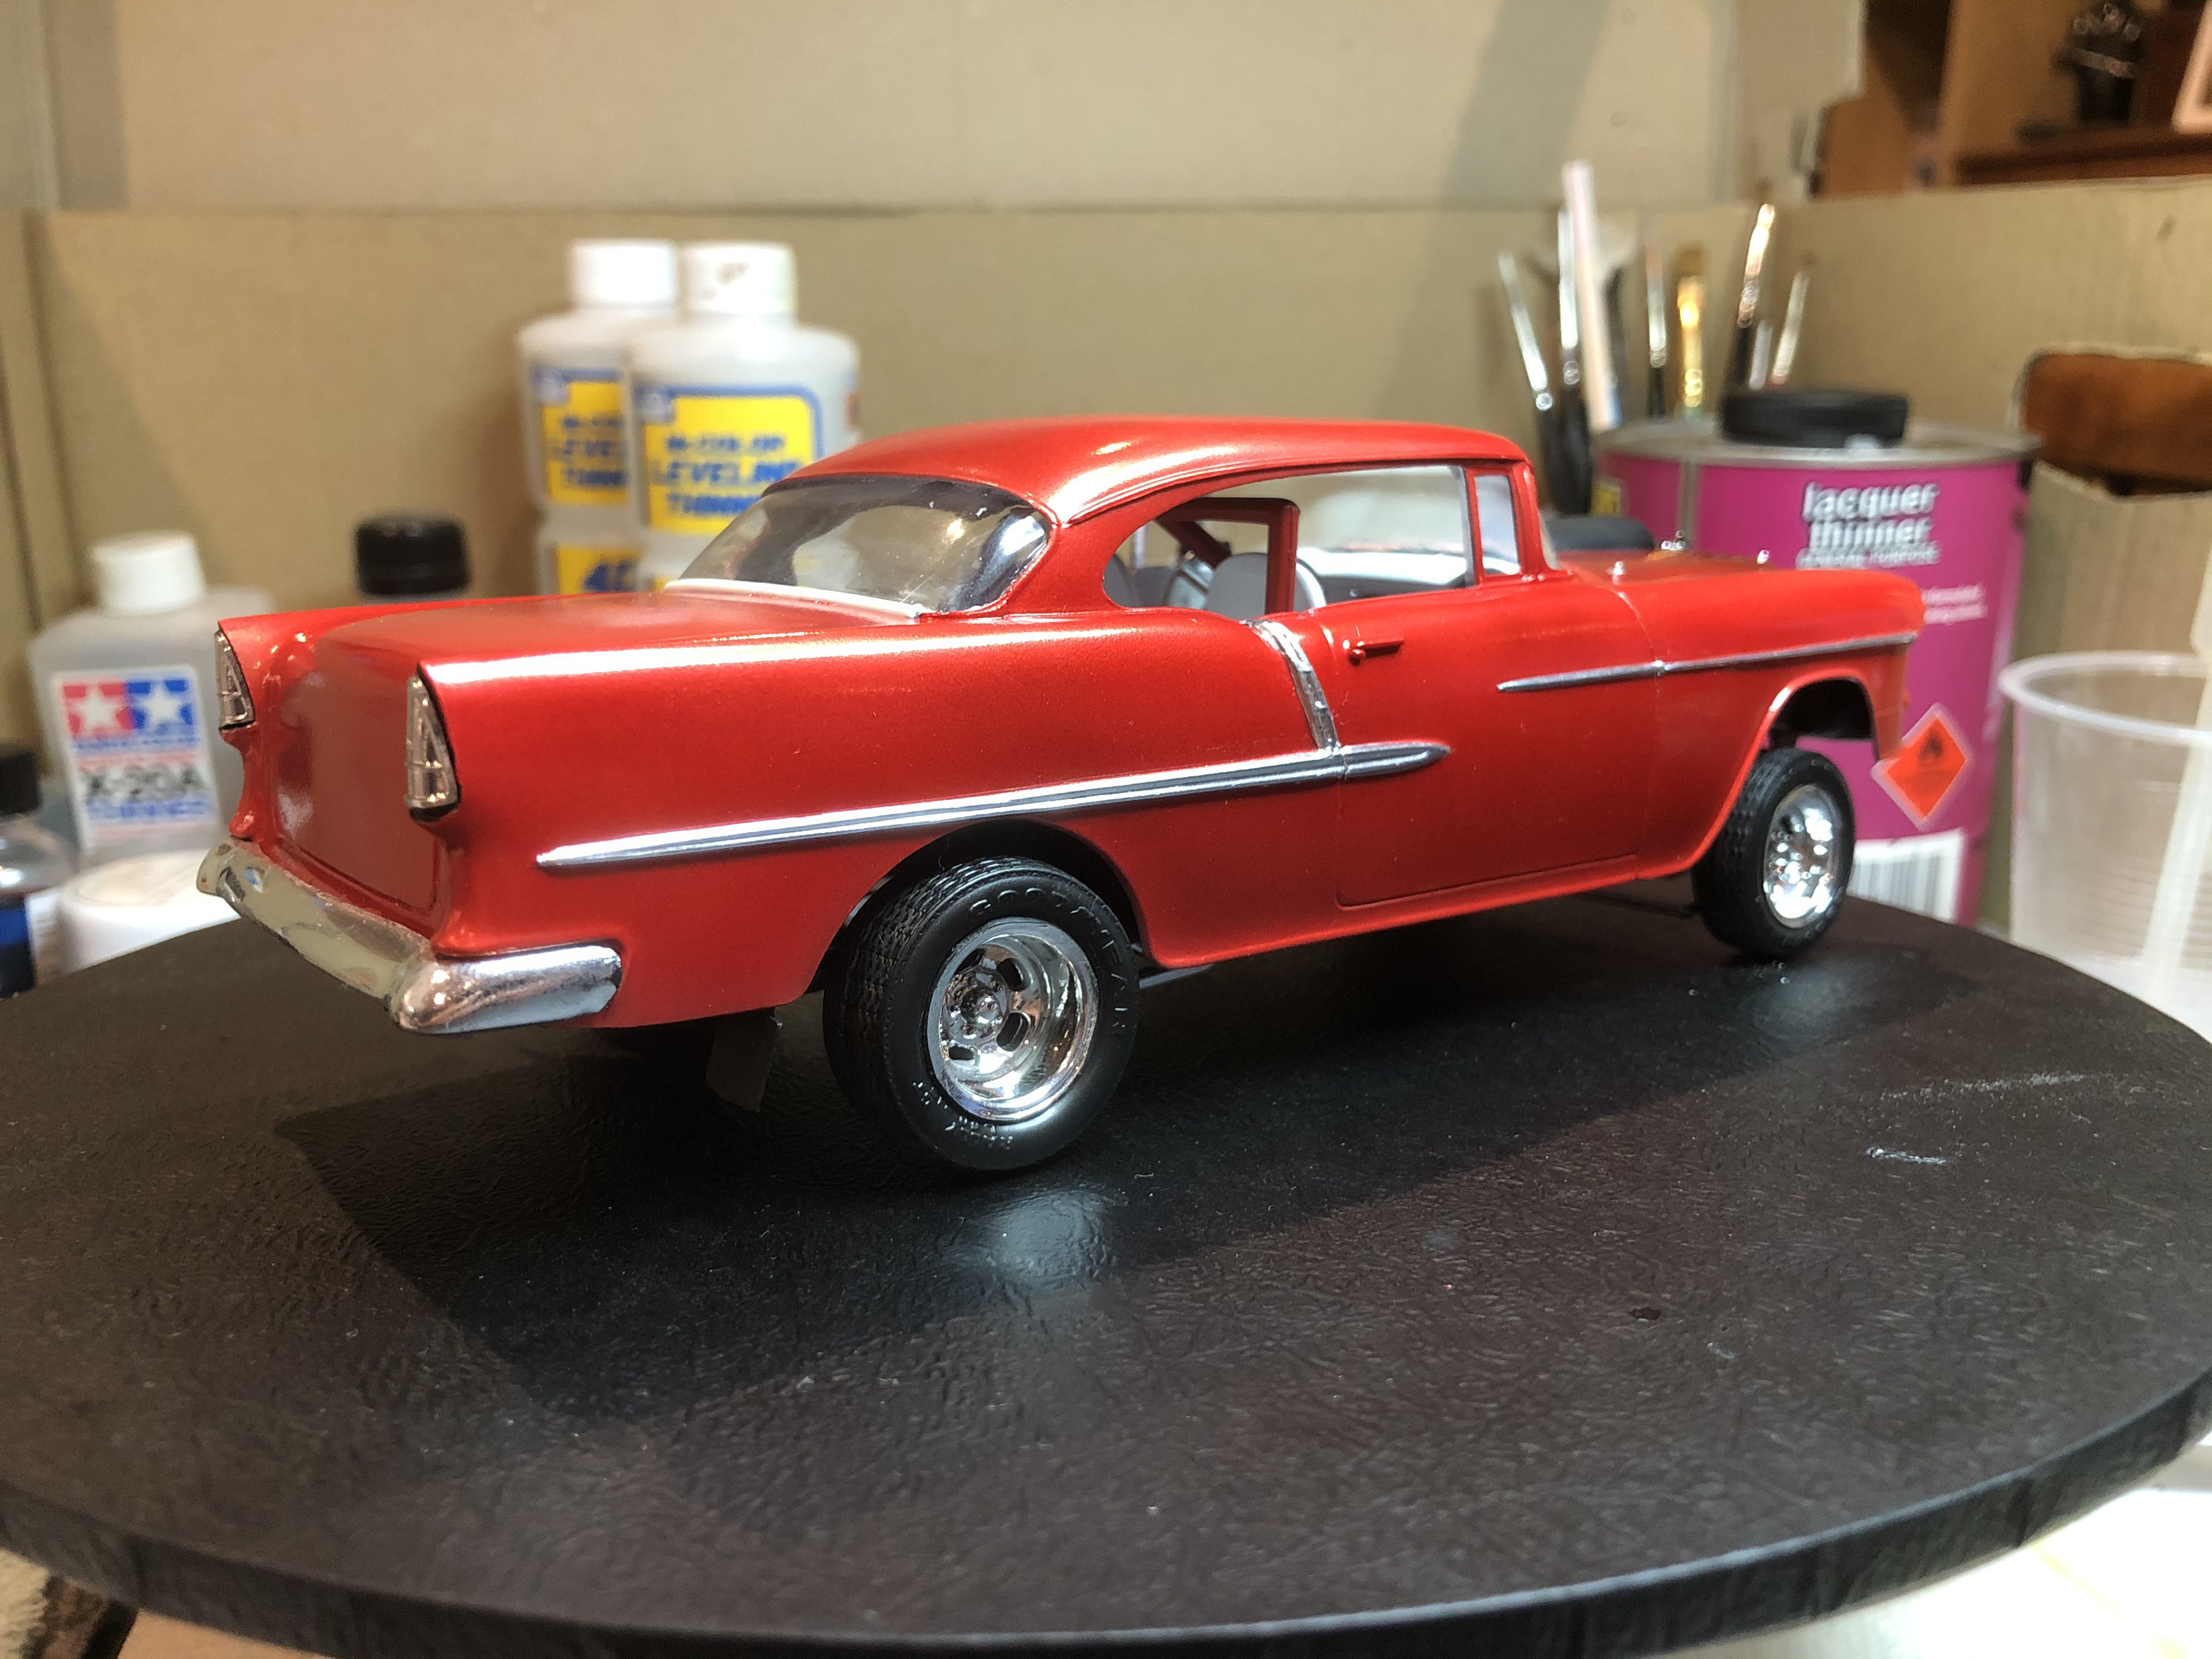
Cheers, D
Cheers, D
Szmann
Joined: September 02, 2014
KitMaker: 1,977 posts
Auto Modeler: 1,371 posts
Posted: Friday, March 06, 2020 - 01:10 AM UTC
Damian, superbly executed! Do you use super-bright or classic BMF variety?
Gabriel
Gabriel
 |

WEB HOSTING BY


Copyright ©2021 Auto Modeler and Kitmaker Network, a subsidiary of Silver Star Enterprises
All Rights Reserved. Please read our Conditions of Use and Privacy Policy.
All Rights Reserved. Please read our Conditions of Use and Privacy Policy.