I started with the game, and found a way to extract the 3d model from the gamefile to a 3d model I could use. Printed the model in the right scale in different views.

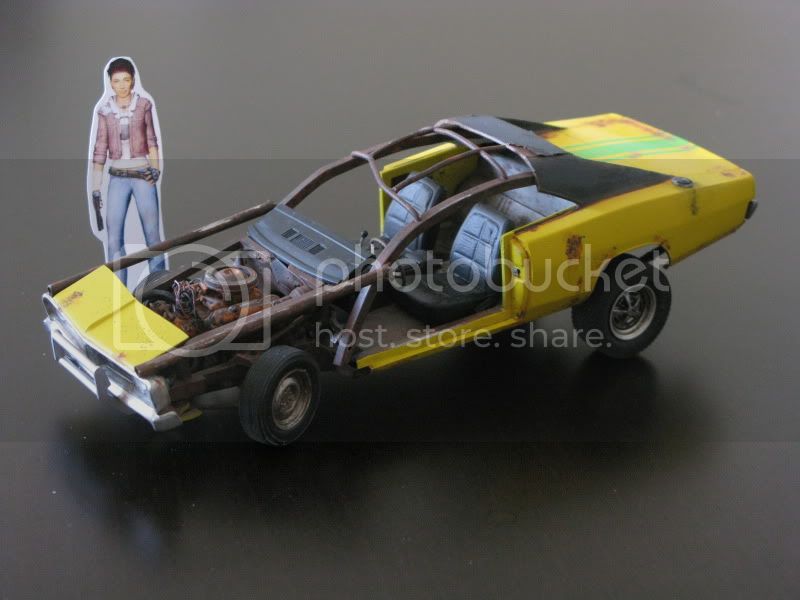
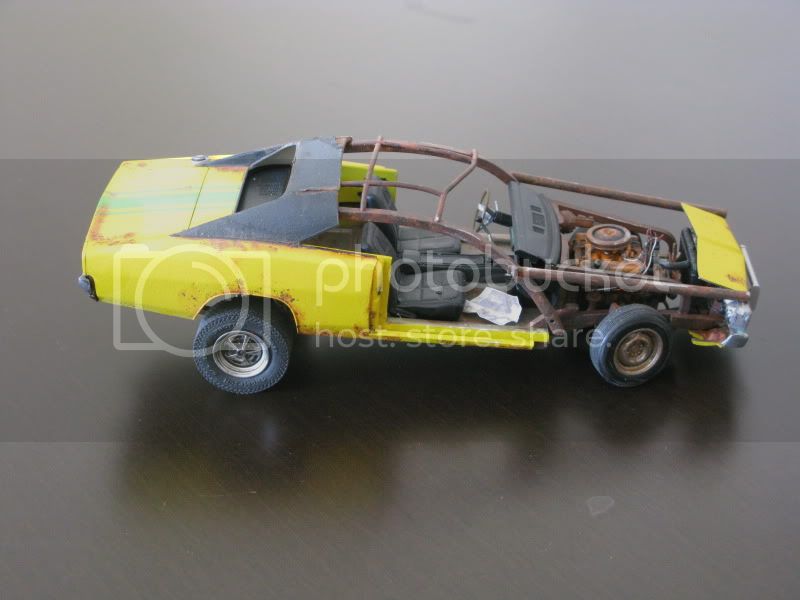
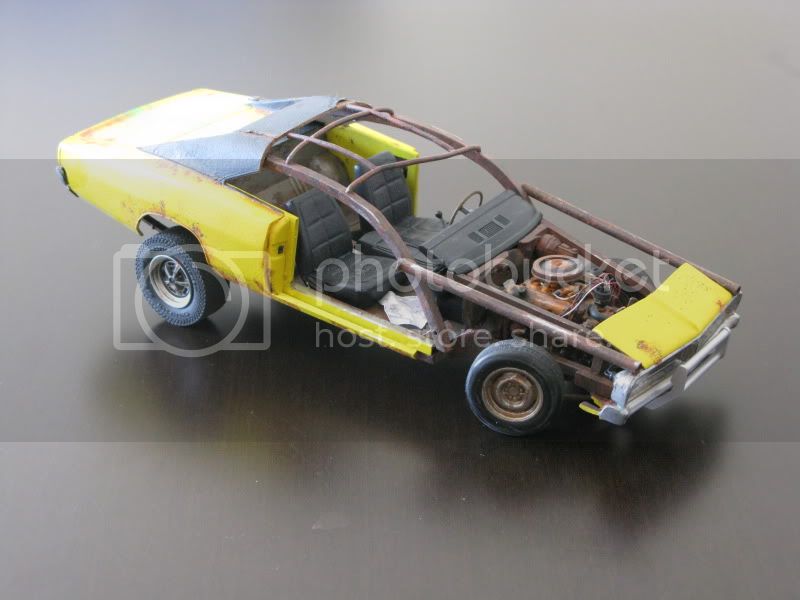
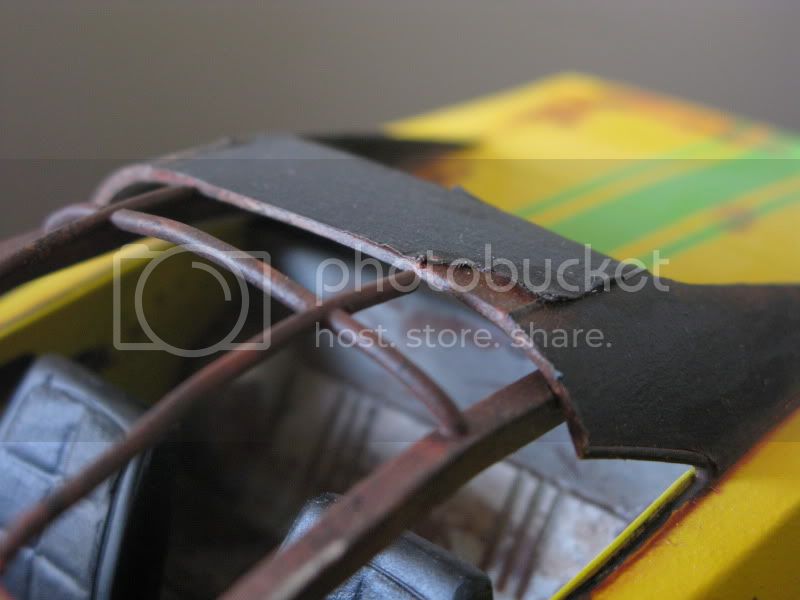
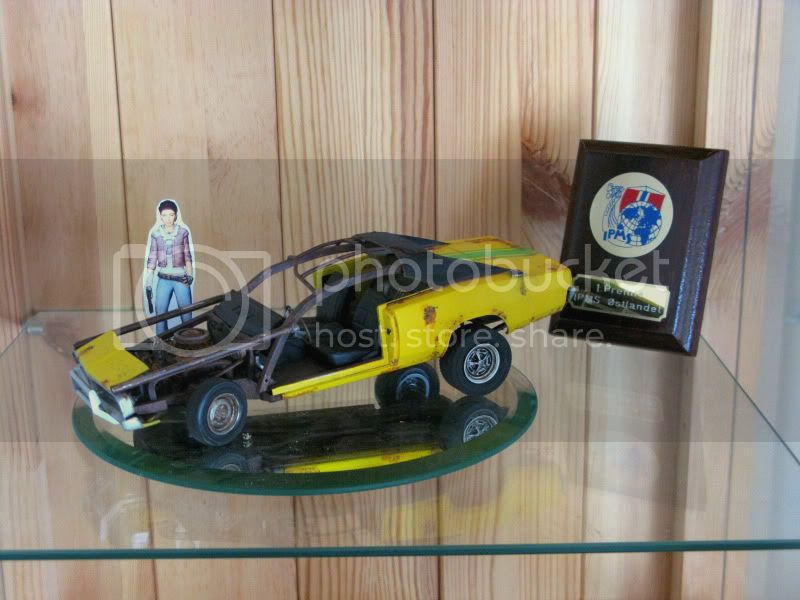
As I said, the kit is the Revell '69 dodge charger with a few modifications. All the mod's is made using a saw to cut the roof just about where I wanted it. Not so important where I cut, as long as I cut...

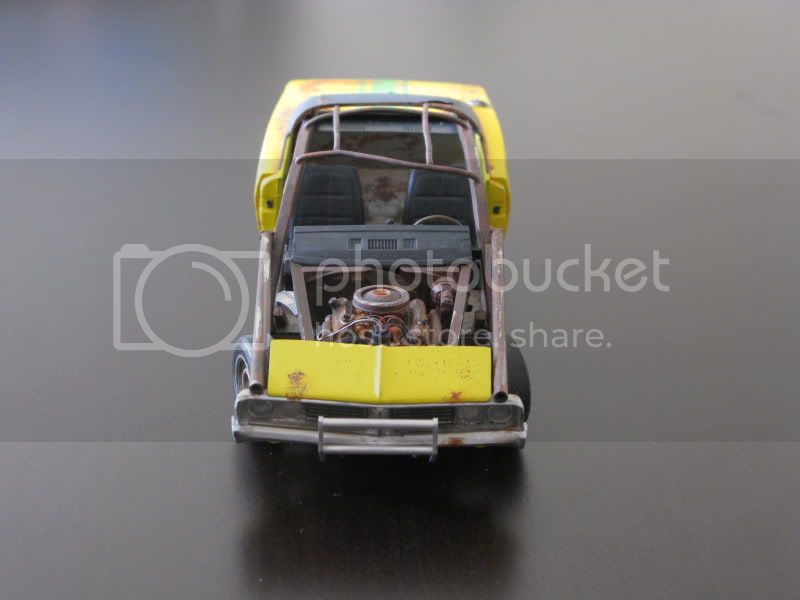
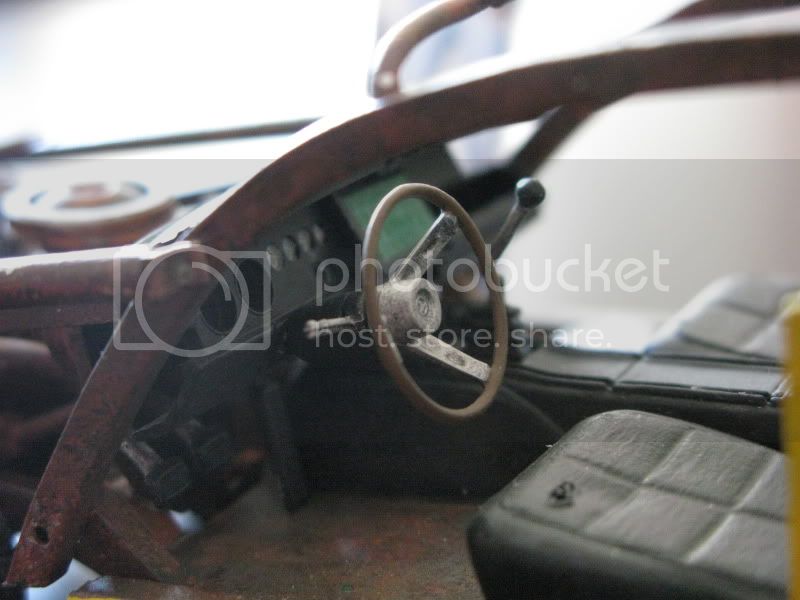
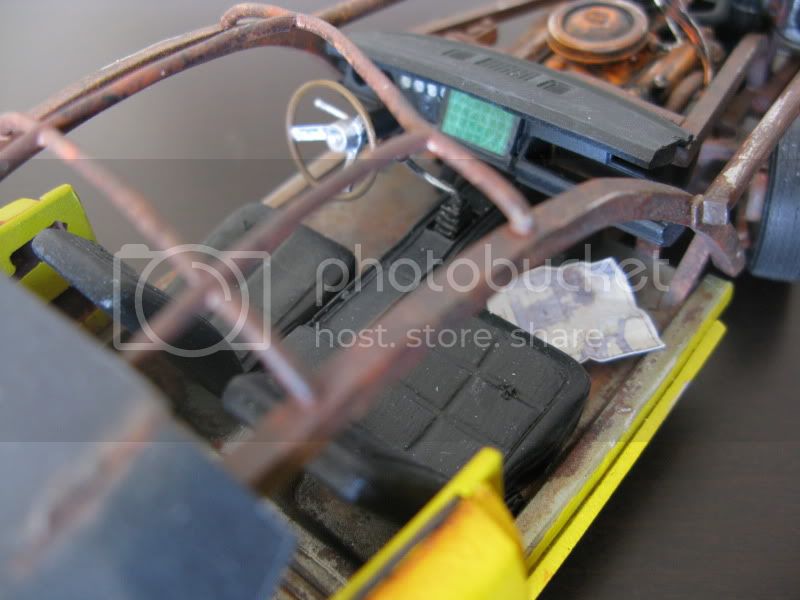
All the framework was made using different evergreen stuff. The rollcage was heated above a candel to make it bend where I wanted it to bend, not so easy when its the first time...

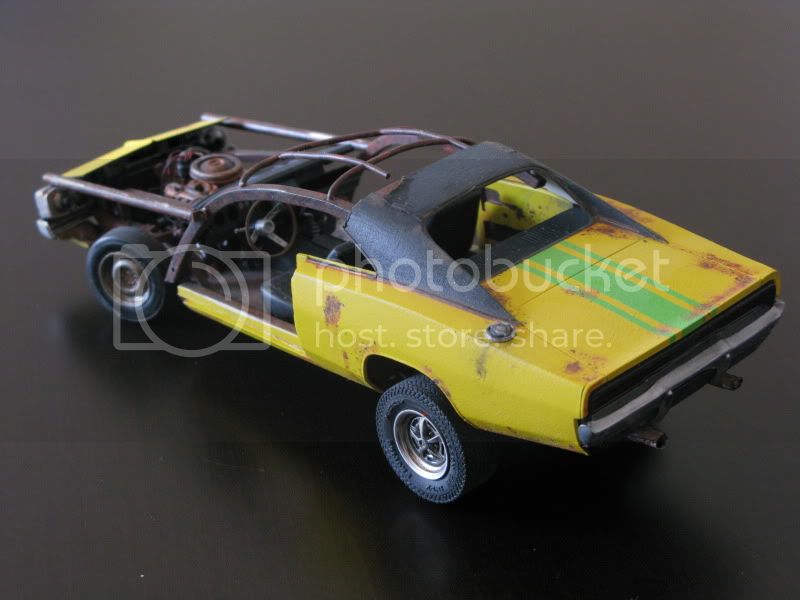
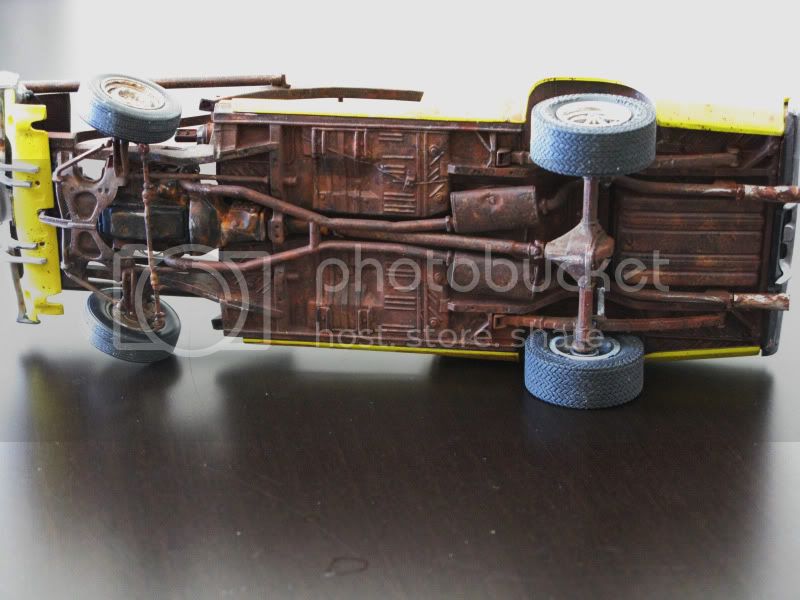
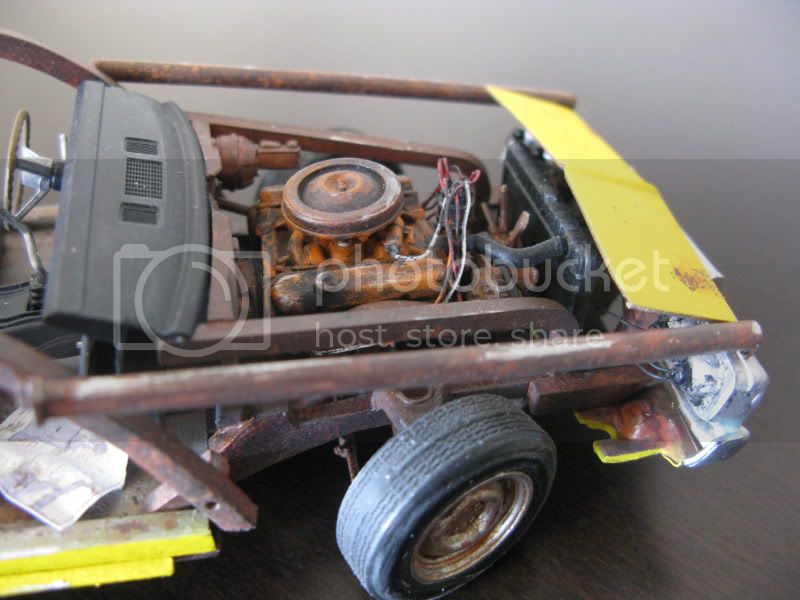
The lift of the rear suspention was made by moving the axle from the inside to the outside of the leafsprings.
I don't know what kit the rear rims and tires comes from. But the front is the one supplied with this kit (i think)
The engine is updated with a detail master distributer and sparkwires.
I thought that a beat up car like this should not have a huge blingfactor so I removed all the chrome using a drain cleaning product from mr muscle. To replace the chrome I used a wax based product called "Treasure Silver", and dipped the part in future/pledge to seal it. I also used future/pledge to "glue" both the front an rear light to the car.


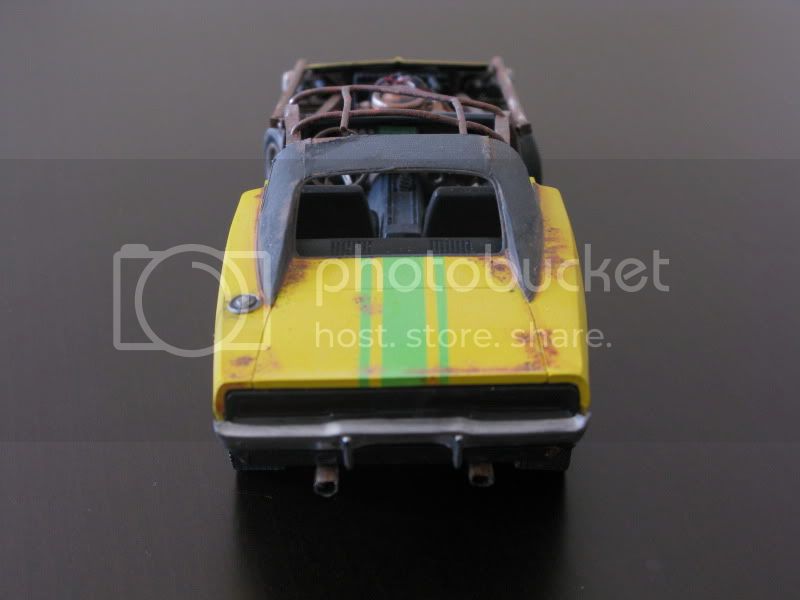
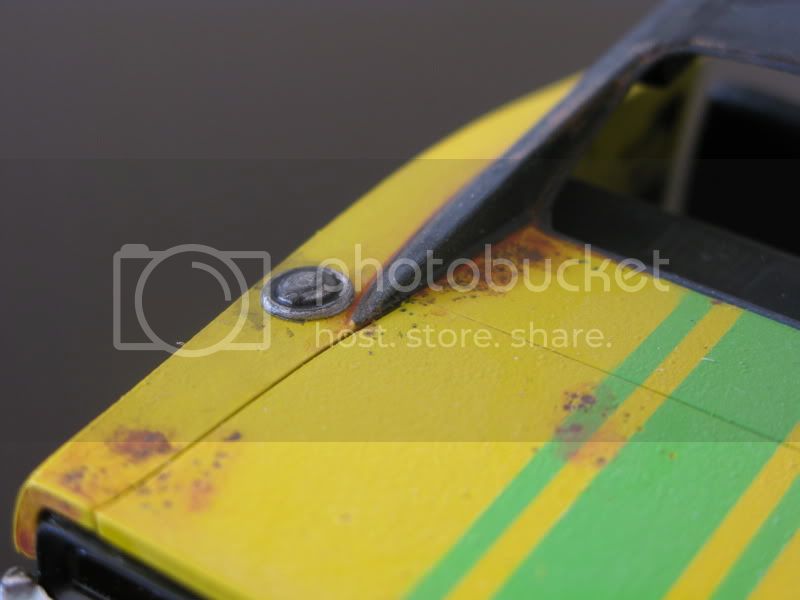
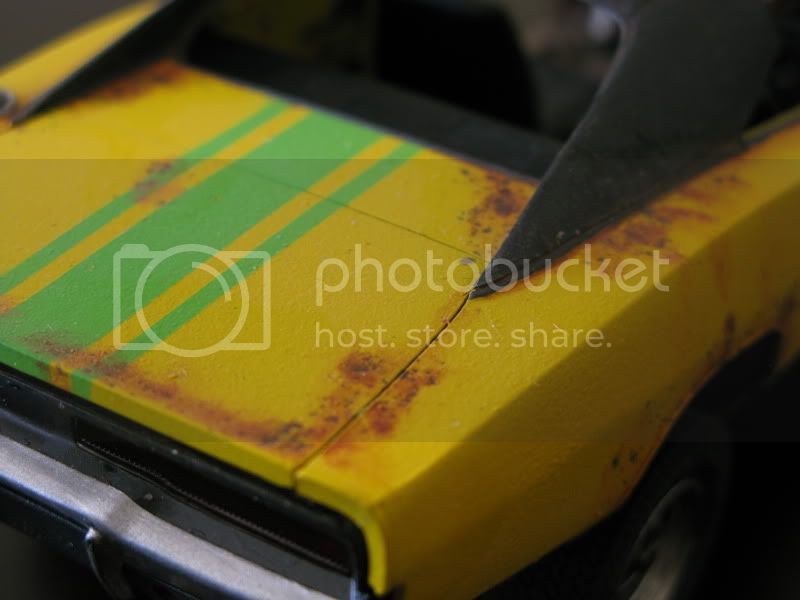
The paintjob was the most fun part. Started with a tamiya primer, then a Tamiya xf-10 flat brown to get the base rust color. To make the rust a bit more "living" I applied 3 different Vallejo rust colors using a small bit of a sponge, just dabbing it randomly.
When all the car was done rusting I applied salt grains with a wet paintbrush to get the salt grains stick. When the water/salt was dried I sprayed the color (tamiya X-8 Lemon yellow) and the stripes on the trunk (tamiya X-15 light green).
When the paint was dry I just remowed the salt with a wet paintbrush, the salt dissolwes even trough the paint.
The roof was covered with a cheap nonbrand masking tape to make the vinyl top look better (I don't like the look of plasic vinyl). Then I could also make some damage to the vinil bu ripping and lifting. Top was sprayed with black tamiya paint after masking the rust under the ripped part with liquid mask.
Some detailing with a few wires was done to make the battery and headlights look better.
Then there was the final assembly of all the parts, a very satisfying job! I do love the felling of finishing a model!
Questions welcomed!
I hope you all can understand this essay even if there is a few typos.....