Tamiya 1/24 Lotus Super 7 Series II
England - South West, United Kingdom
Joined: August 20, 2007
KitMaker: 409 posts
Auto Modeler: 87 posts
Posted: Monday, January 03, 2011 - 11:26 PM UTC
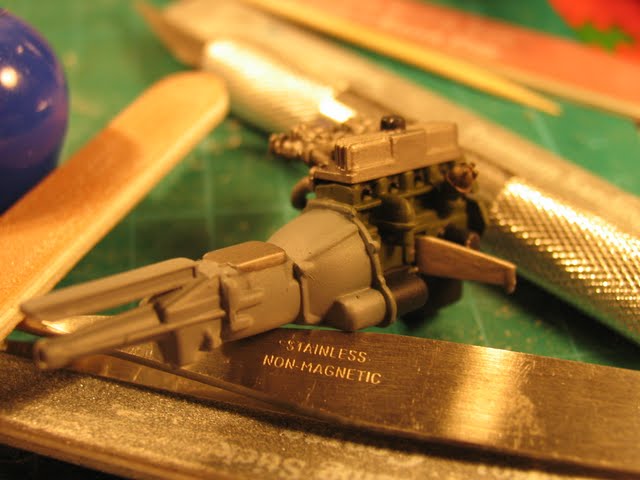
New build, engine components primed, ready for their coat of Flat Aluminum and Deep Green.
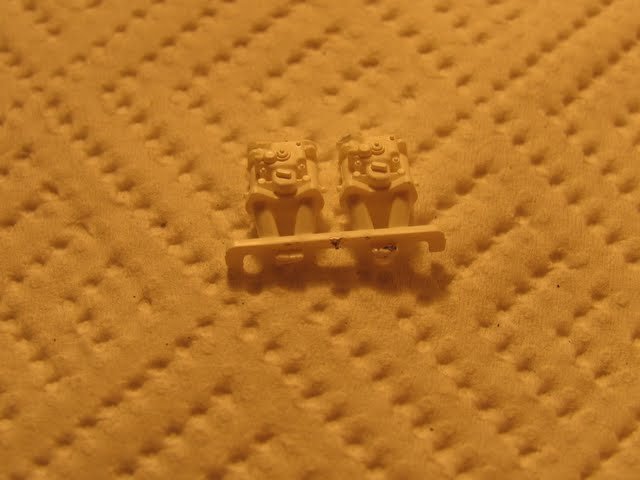
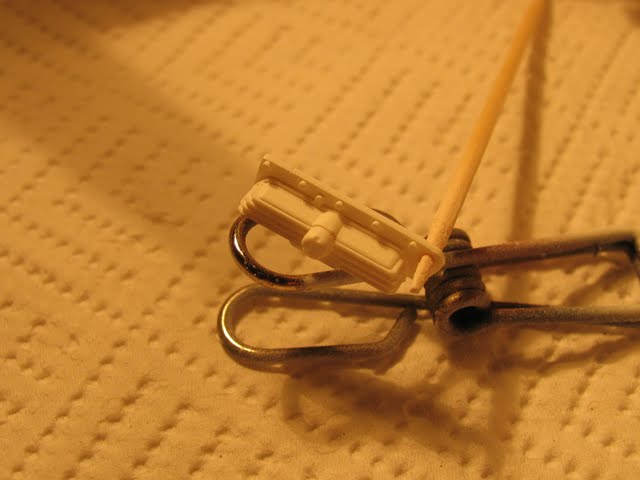
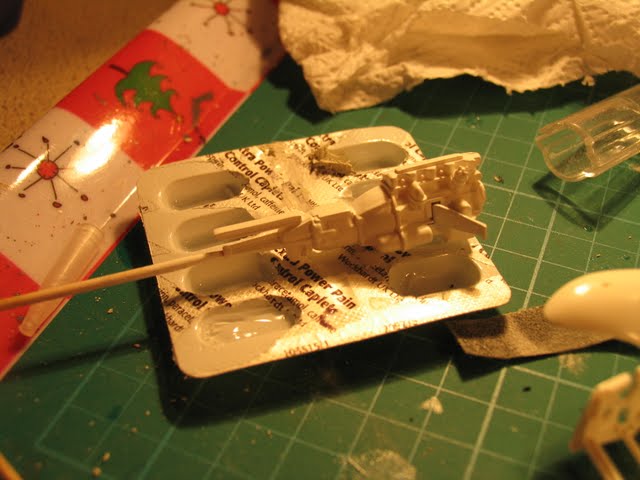
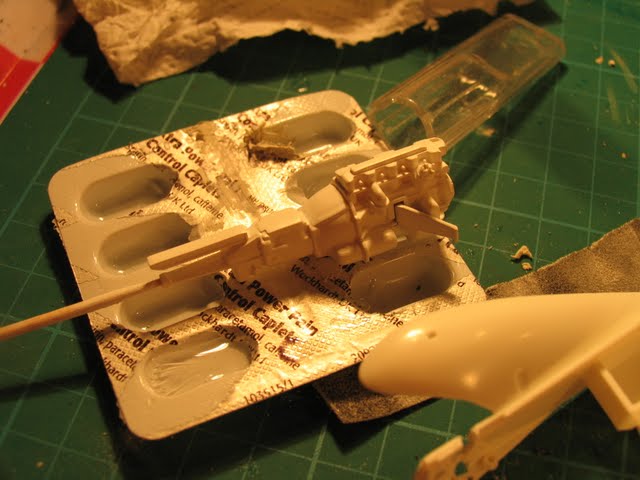
Engine does lack detail, and there were some seam issues, but otherwise it went together fine.
Body - Quite a few sink holes which had to be filled
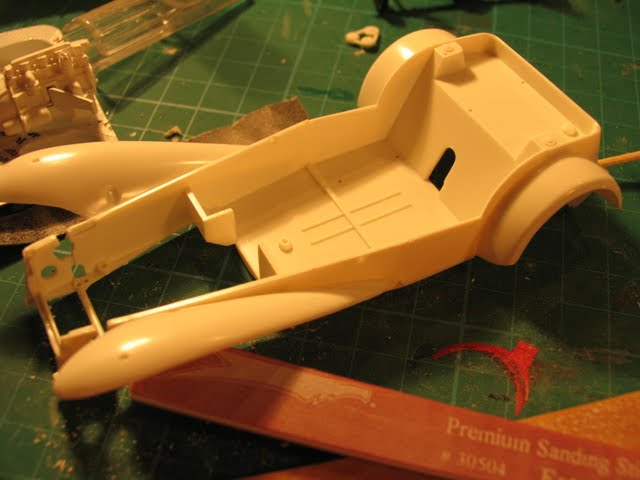

No body colour decided yet, any ideas? Its between Black, Blue, Green, Green/Gold Pristmatic
Cheers
Loobes
It's weird that photographers spend years or even a whole lifetime, trying to capture moments that added together, don't even amount to a couple of hours.
~James Lalropui Keivom
VISIT MY SITE ------>
Kobenhavn, Denmark
Joined: June 29, 2004
KitMaker: 6,760 posts
Auto Modeler: 2,182 posts
Posted: Tuesday, January 04, 2011 - 03:04 AM UTC
The prismatic green/gold is a beautiful color, but I'm not sure it will be a good choice for this particular car. I would go for blue.
On the workbench:
MPC: 1972 Pontiac GTO
Revell: 1965 Mustang
Verlinden 120mm guard of the marine.
Revell: 2010 Camaro
Monogram: 1931 Rolls Royce
Italeri: LVT2 Amtrac
England - South West, United Kingdom
Joined: August 20, 2007
KitMaker: 409 posts
Auto Modeler: 87 posts
Posted: Tuesday, January 04, 2011 - 03:53 AM UTC
Thanks Jesper, any particular blue? Tamiya recommend a Royal Blue for this car
Engine was about 5 pieces, done and painted
It's weird that photographers spend years or even a whole lifetime, trying to capture moments that added together, don't even amount to a couple of hours.
~James Lalropui Keivom
VISIT MY SITE ------>
Kobenhavn, Denmark
Joined: June 29, 2004
KitMaker: 6,760 posts
Auto Modeler: 2,182 posts
Posted: Tuesday, January 04, 2011 - 08:13 AM UTC
On the workbench:
MPC: 1972 Pontiac GTO
Revell: 1965 Mustang
Verlinden 120mm guard of the marine.
Revell: 2010 Camaro
Monogram: 1931 Rolls Royce
Italeri: LVT2 Amtrac
England - South West, United Kingdom
Joined: August 20, 2007
KitMaker: 409 posts
Auto Modeler: 87 posts
Posted: Tuesday, January 04, 2011 - 09:21 AM UTC
I have used humbrol Baltic blue before, and while they are good paints, i looking to experiment with laquers, Royal Blue looks nice
It's weird that photographers spend years or even a whole lifetime, trying to capture moments that added together, don't even amount to a couple of hours.
~James Lalropui Keivom
VISIT MY SITE ------>
England - South West, United Kingdom
Joined: August 20, 2007
KitMaker: 409 posts
Auto Modeler: 87 posts
Posted: Tuesday, January 04, 2011 - 09:27 AM UTC
It's weird that photographers spend years or even a whole lifetime, trying to capture moments that added together, don't even amount to a couple of hours.
~James Lalropui Keivom
VISIT MY SITE ------>
Kobenhavn, Denmark
Joined: June 29, 2004
KitMaker: 6,760 posts
Auto Modeler: 2,182 posts
Posted: Wednesday, January 05, 2011 - 11:00 PM UTC
I think Tamiyas french blue would be an excellent choice.
On the workbench:
MPC: 1972 Pontiac GTO
Revell: 1965 Mustang
Verlinden 120mm guard of the marine.
Revell: 2010 Camaro
Monogram: 1931 Rolls Royce
Italeri: LVT2 Amtrac
Illinois, United States
Joined: August 30, 2005
KitMaker: 3,289 posts
Auto Modeler: 1,620 posts
Posted: Friday, January 07, 2011 - 12:43 PM UTC
Nice build so far Lewis.
Prismatic paint to "me" is kinda like the old controversy whether a '32 ford should be build stock or custom...while the owner has all calls on it, the public may disagree....in other words....certain classic cars just shouldn't be painted with prismatic to keep they're charm. My Morgan build would really have been set off by a prismatic paint job with that swoopy body, but the purist in me couldn't do it. -but, that's just me.
Your model, your call.........and you can always build another same kit in the opposite type of paint scheme later just to satisfy any curiousities you may have. Some day I want to try my hand at a combo paint scheme where the flip-flop paint colors would compliment a standard color like fenders to a body.
-I say I have two kids- one son & one daughter...my wife says she has three- one son ,one daughter and one husband.
...and don't tell yourself you can't do it....it'll just take longer then
England - South West, United Kingdom
Joined: August 20, 2007
KitMaker: 409 posts
Auto Modeler: 87 posts
Posted: Tuesday, January 11, 2011 - 03:48 AM UTC
Ok guys, i have gone and ordered Tamiya French Blue, should be here by the weekend when i will be laying down the primer coats and initial body coats. Will be using
this and
this for reference...
It's weird that photographers spend years or even a whole lifetime, trying to capture moments that added together, don't even amount to a couple of hours.
~James Lalropui Keivom
VISIT MY SITE ------>
Kobenhavn, Denmark
Joined: June 29, 2004
KitMaker: 6,760 posts
Auto Modeler: 2,182 posts
Posted: Wednesday, January 12, 2011 - 08:04 AM UTC
Excellent reference. Lookng forward to seeing some color on the body.
On the workbench:
MPC: 1972 Pontiac GTO
Revell: 1965 Mustang
Verlinden 120mm guard of the marine.
Revell: 2010 Camaro
Monogram: 1931 Rolls Royce
Italeri: LVT2 Amtrac
England - South West, United Kingdom
Joined: August 20, 2007
KitMaker: 409 posts
Auto Modeler: 87 posts
Posted: Wednesday, January 12, 2011 - 07:46 PM UTC
They are very good tutorials, first time following them using lacquers so it should be interesting. Rattle can has arrived

So i should start priming the body at the weekend as the body needs to be painted before all he suspension etc goes in
It's weird that photographers spend years or even a whole lifetime, trying to capture moments that added together, don't even amount to a couple of hours.
~James Lalropui Keivom
VISIT MY SITE ------>
England - South West, United Kingdom
Joined: August 20, 2007
KitMaker: 409 posts
Auto Modeler: 87 posts
Posted: Friday, January 14, 2011 - 11:20 PM UTC
Righty hooo, Priming stages....
It's weird that photographers spend years or even a whole lifetime, trying to capture moments that added together, don't even amount to a couple of hours.
~James Lalropui Keivom
VISIT MY SITE ------>
England - South West, United Kingdom
Joined: August 20, 2007
KitMaker: 409 posts
Auto Modeler: 87 posts
Posted: Friday, January 14, 2011 - 11:28 PM UTC
Before

Wet sand with 1500grit
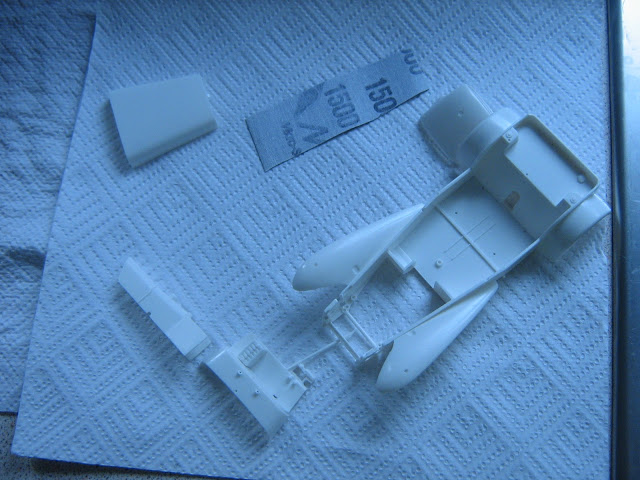
Wash

Dry

Found some work that needed doing right before priming...
So first coat of primer - only misted on to bring out flaws
Sanding down flaws
Second coat of primer is down, drying currently, then it will be a wet sand and a white primer coat
It's weird that photographers spend years or even a whole lifetime, trying to capture moments that added together, don't even amount to a couple of hours.
~James Lalropui Keivom
VISIT MY SITE ------>
England - South West, United Kingdom
Joined: August 20, 2007
KitMaker: 409 posts
Auto Modeler: 87 posts
Posted: Saturday, January 15, 2011 - 05:14 AM UTC
All the mistcoats down, tomorrow i will begin wetcoats, bit concerned that the paint isnt gloss; will this affect how deep the shine is after clear coats polish etc?
It's weird that photographers spend years or even a whole lifetime, trying to capture moments that added together, don't even amount to a couple of hours.
~James Lalropui Keivom
VISIT MY SITE ------>
England - South West, United Kingdom
Joined: August 20, 2007
KitMaker: 409 posts
Auto Modeler: 87 posts
Posted: Saturday, January 15, 2011 - 09:33 AM UTC
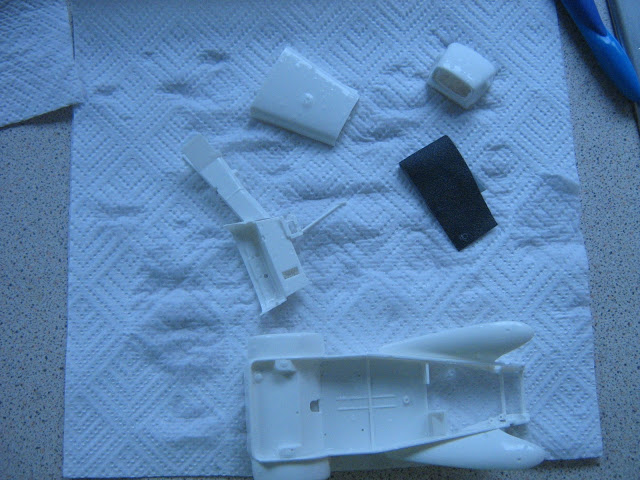
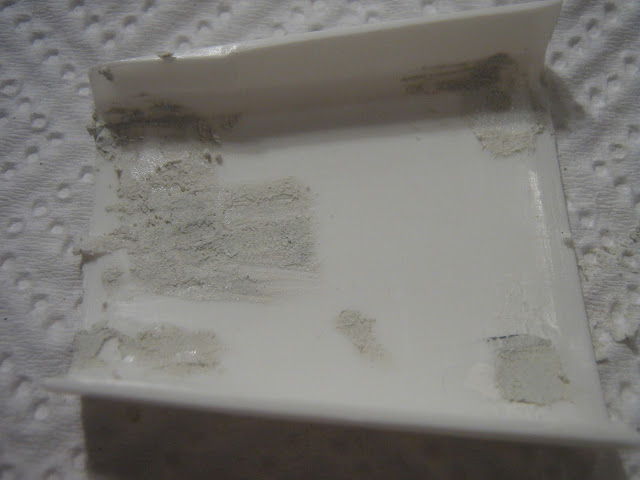
Pics, after three mist coats and a 4000 grit wet sand, looks shinier in real life though...
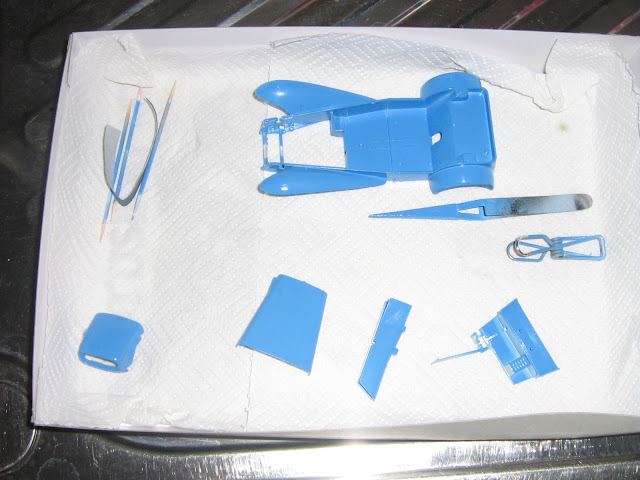
In the first picture you can see white marks on two items, these aren't on the actual model

It's weird that photographers spend years or even a whole lifetime, trying to capture moments that added together, don't even amount to a couple of hours.
~James Lalropui Keivom
VISIT MY SITE ------>
England - South West, United Kingdom
Joined: August 20, 2007
KitMaker: 409 posts
Auto Modeler: 87 posts
Posted: Saturday, January 15, 2011 - 10:38 PM UTC
First wet coat done, going down to LHS and when i get back i'll snap some shops of the first wetcoat dry, later today i will put on the second wetocat, cover it over untile next weekend
It's weird that photographers spend years or even a whole lifetime, trying to capture moments that added together, don't even amount to a couple of hours.
~James Lalropui Keivom
VISIT MY SITE ------>
Kobenhavn, Denmark
Joined: June 29, 2004
KitMaker: 6,760 posts
Auto Modeler: 2,182 posts
Posted: Sunday, January 16, 2011 - 06:30 AM UTC
Looks pretty good Lewis. Nice and shiny.
On the workbench:
MPC: 1972 Pontiac GTO
Revell: 1965 Mustang
Verlinden 120mm guard of the marine.
Revell: 2010 Camaro
Monogram: 1931 Rolls Royce
Italeri: LVT2 Amtrac
England - South West, United Kingdom
Joined: August 20, 2007
KitMaker: 409 posts
Auto Modeler: 87 posts
Posted: Monday, January 17, 2011 - 08:57 AM UTC
Right then, time for a small update

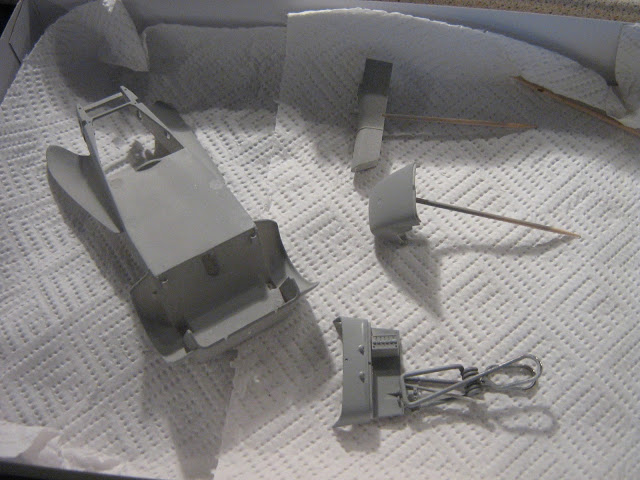
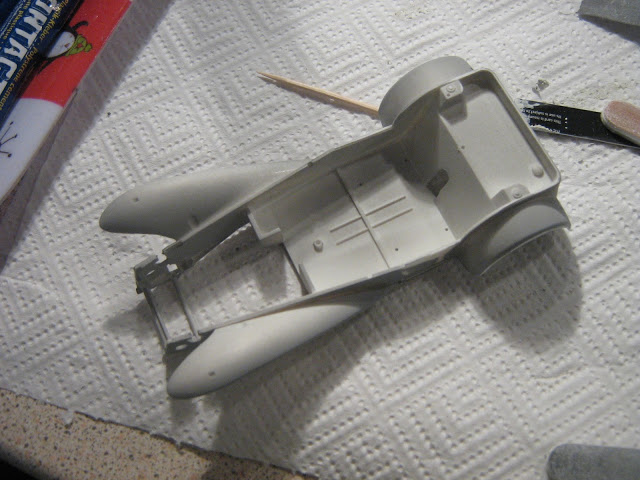
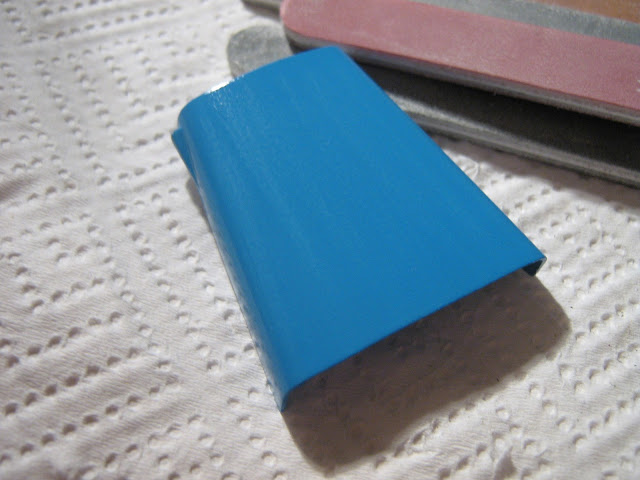
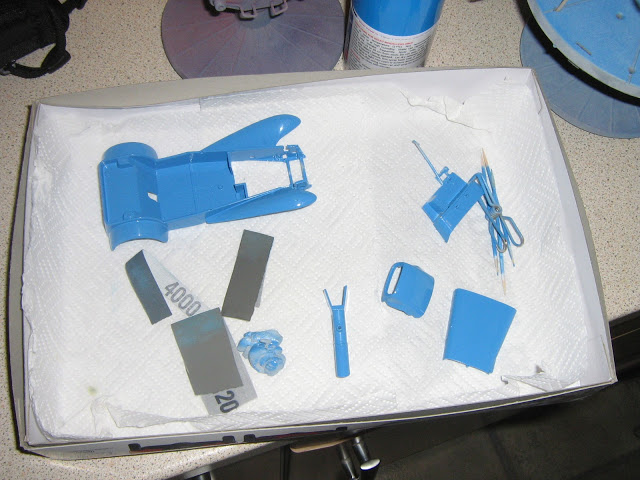
Body parts are DONE apart from polishing - this and the clear coat will be done after all the aluminum is painted on the bottom and interior is done as it is one piece. You can see at the bottom i have started to prime some of the suspension parts ready to go on after aluminum
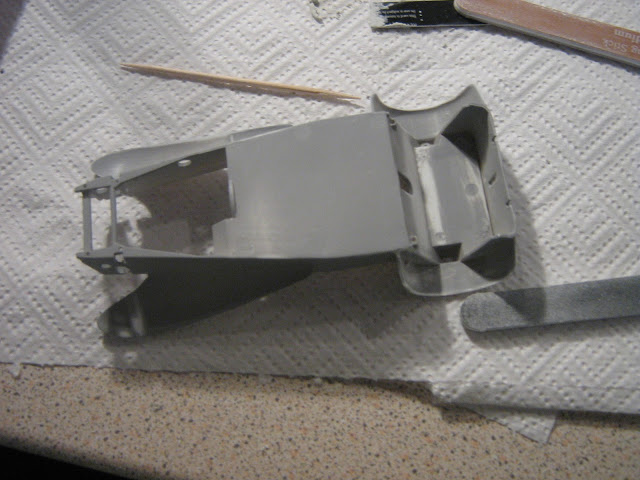
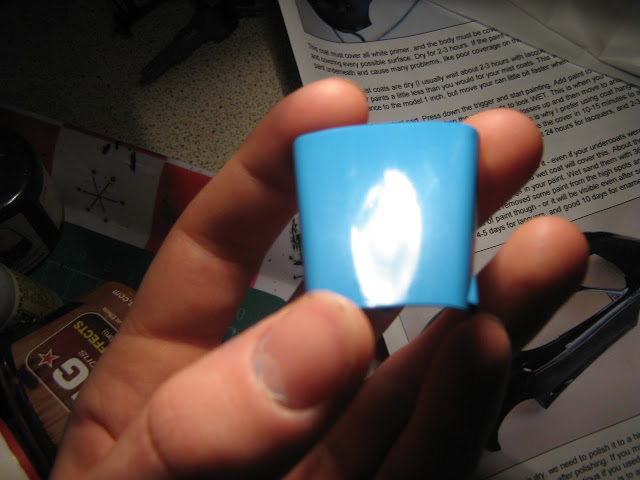
Straight into light, just to give you an idea of what the surface of the model is like
Body piece as it is, would've liked it sightly shinier

Suspension parts primer, still got brake disks to prime
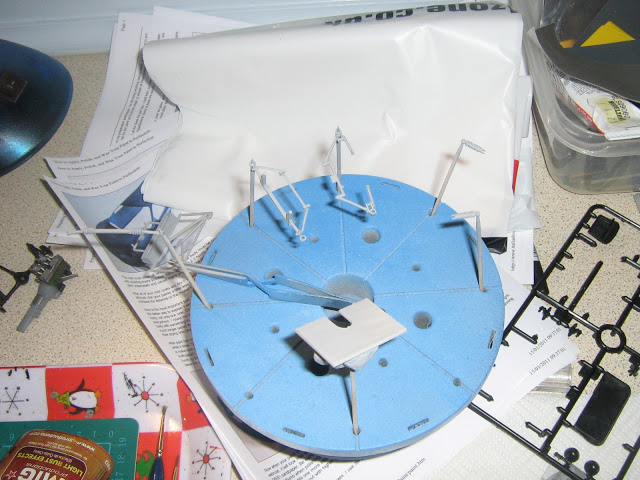
The big part at the forefront is the seat
Thats it until the weekend, unless i can sneak a few sprays of semi-gloss black for the suspension inbetween homework, sport etc
AS you can see a lot of Aluminum....
 Credit for this image
It's weird that photographers spend years or even a whole lifetime, trying to capture moments that added together, don't even amount to a couple of hours.
~James Lalropui Keivom
VISIT MY SITE ------>
Illinois, United States
Joined: August 30, 2005
KitMaker: 3,289 posts
Auto Modeler: 1,620 posts
Posted: Monday, January 17, 2011 - 03:04 PM UTC
Looks pretty darn glossy to me! If you wanted to go for the mile deep finish then just add about 3 good coats of clear lacquer over that blue and wet sand and polish..but it looms good to me.
What color are you doing for the interior?
-I say I have two kids- one son & one daughter...my wife says she has three- one son ,one daughter and one husband.
...and don't tell yourself you can't do it....it'll just take longer then
England - South West, United Kingdom
Joined: August 20, 2007
KitMaker: 409 posts
Auto Modeler: 87 posts
Posted: Monday, January 17, 2011 - 06:09 PM UTC
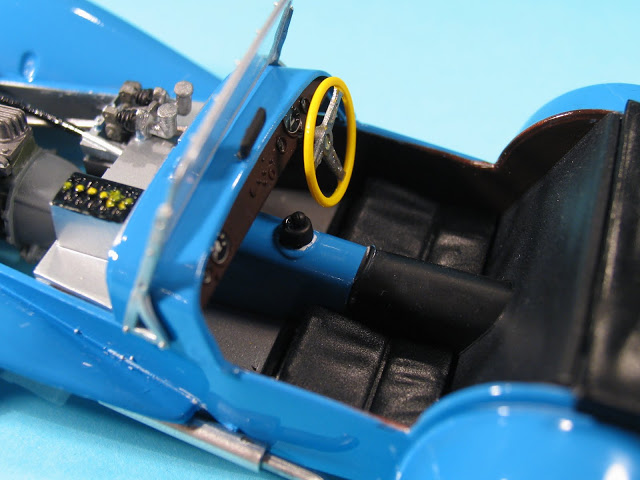
The interior colour is as follows for a blue: Aluminum floor engine bay underside etc, black seats and a Hull red+Black for the actual interior colour. All that will be done then the clear coats and polishing using the tamiya compounds
It's weird that photographers spend years or even a whole lifetime, trying to capture moments that added together, don't even amount to a couple of hours.
~James Lalropui Keivom
VISIT MY SITE ------>
England - South West, United Kingdom
Joined: August 20, 2007
KitMaker: 409 posts
Auto Modeler: 87 posts
Posted: Saturday, January 22, 2011 - 05:59 AM UTC
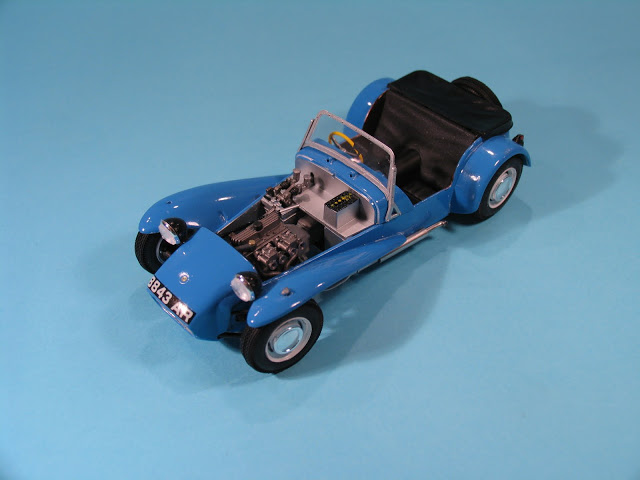
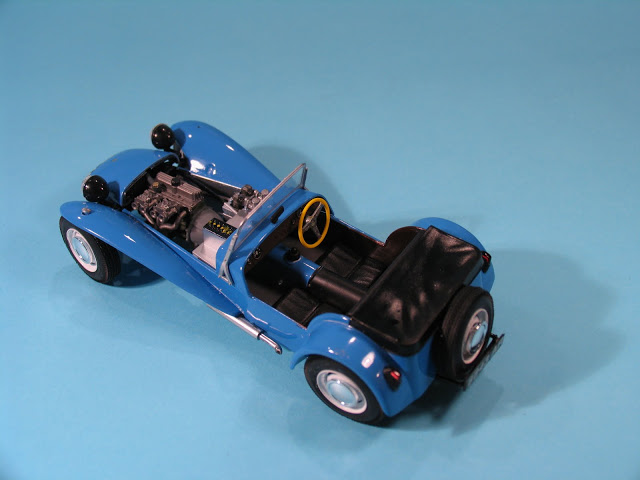
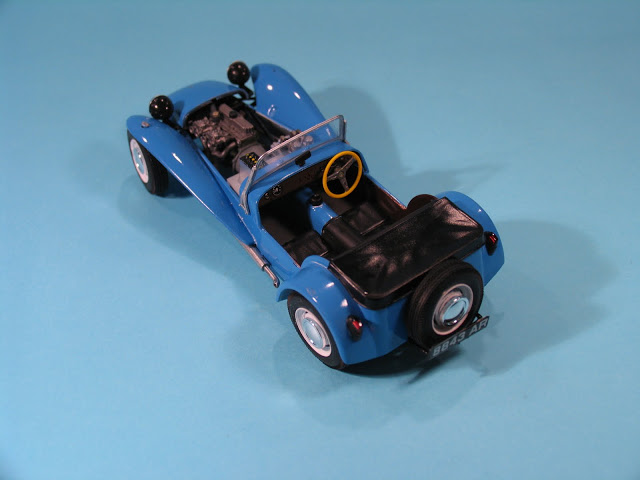
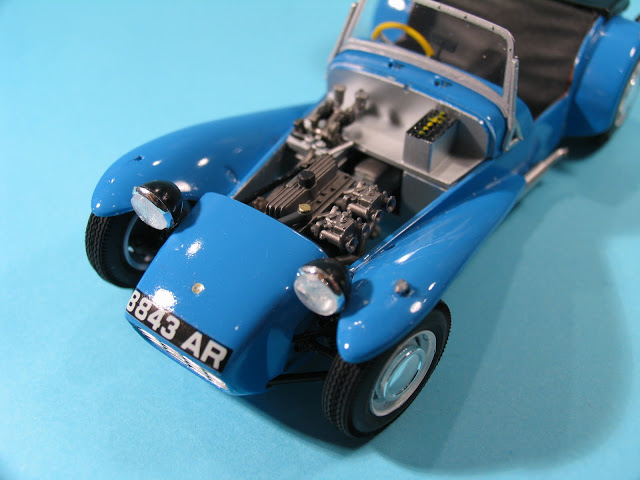
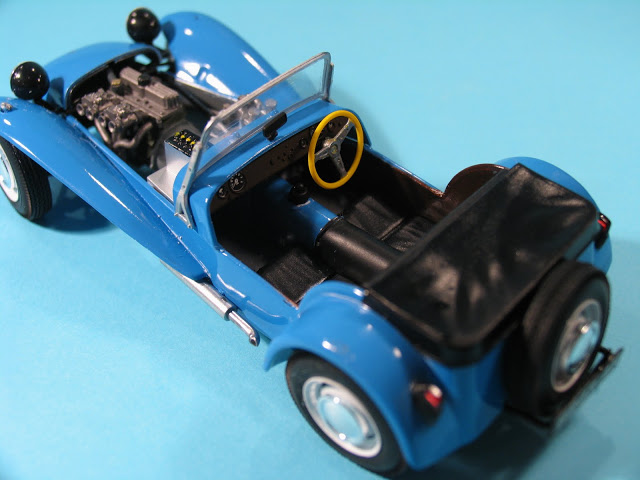
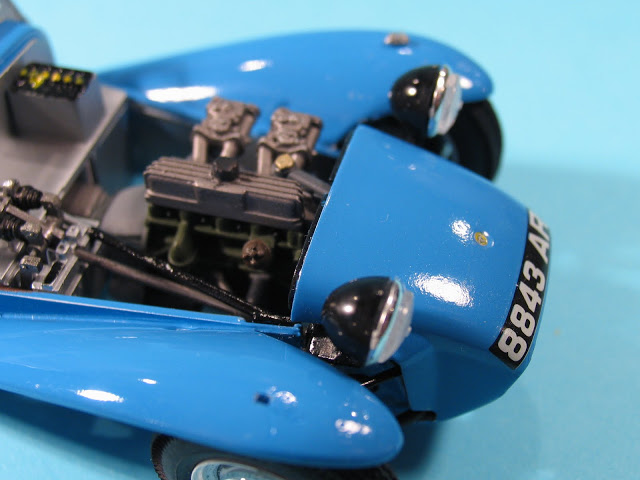
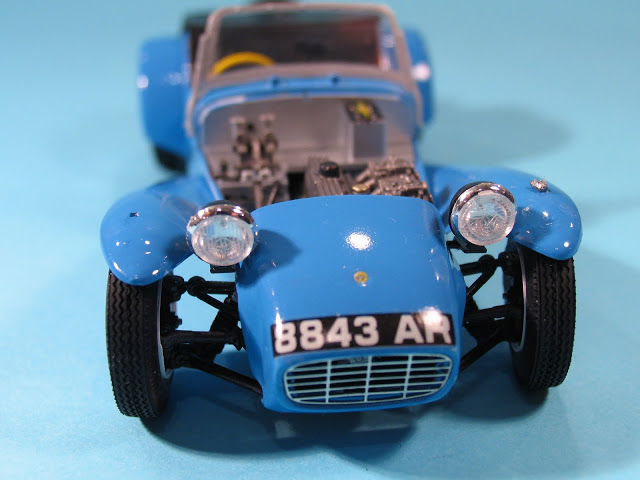
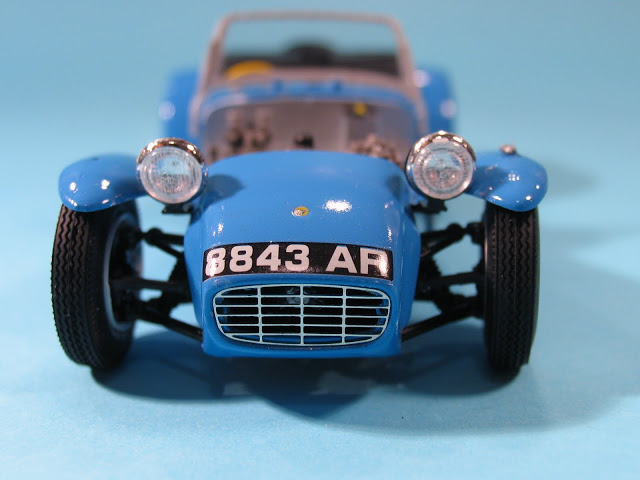
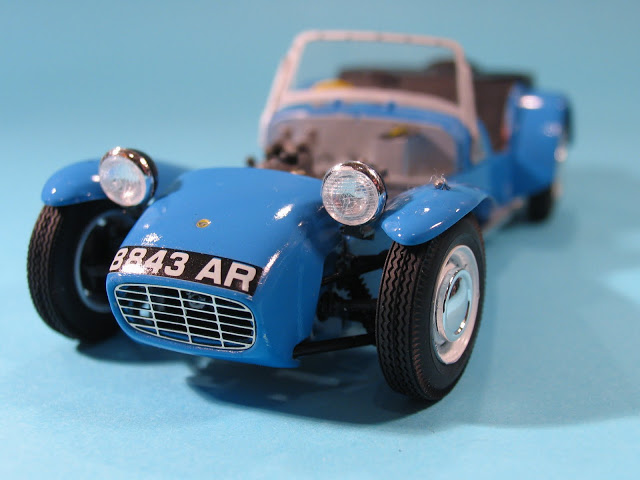
Rightyyy ho, Clear coat DONE, Polishing DONE, needs waxing, now i am just putting suspension pieces and interior, engine etc into the body looking good for a finish tomorrow, pics up later...
It's weird that photographers spend years or even a whole lifetime, trying to capture moments that added together, don't even amount to a couple of hours.
~James Lalropui Keivom
VISIT MY SITE ------>
England - South West, United Kingdom
Joined: August 20, 2007
KitMaker: 409 posts
Auto Modeler: 87 posts
Posted: Sunday, January 23, 2011 - 05:53 AM UTC
It's weird that photographers spend years or even a whole lifetime, trying to capture moments that added together, don't even amount to a couple of hours.
~James Lalropui Keivom
VISIT MY SITE ------>
Kobenhavn, Denmark
Joined: June 29, 2004
KitMaker: 6,760 posts
Auto Modeler: 2,182 posts
Posted: Sunday, January 23, 2011 - 11:15 PM UTC
Excellent piece of work Lewis.
One of the turnsignals seems to be missing?
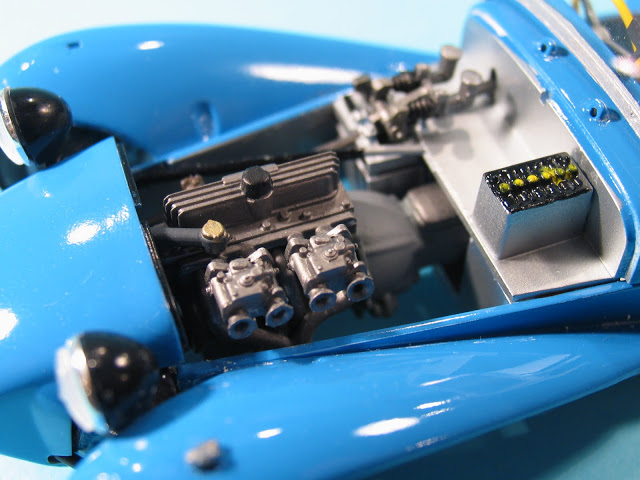
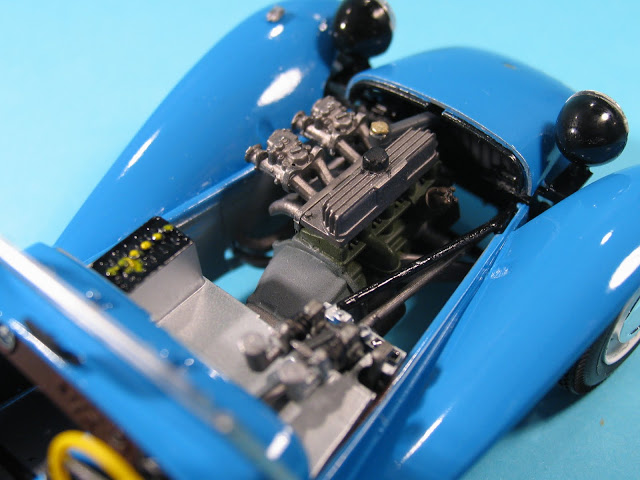
What colors did you use for the valvcover?
On the workbench:
MPC: 1972 Pontiac GTO
Revell: 1965 Mustang
Verlinden 120mm guard of the marine.
Revell: 2010 Camaro
Monogram: 1931 Rolls Royce
Italeri: LVT2 Amtrac
England - South West, United Kingdom
Joined: August 20, 2007
KitMaker: 409 posts
Auto Modeler: 87 posts
Posted: Monday, January 24, 2011 - 04:50 AM UTC
Yes the run signal was eaten my the carpet monster

I think semi gloss black if we are talking about the same thing?
It's weird that photographers spend years or even a whole lifetime, trying to capture moments that added together, don't even amount to a couple of hours.
~James Lalropui Keivom
VISIT MY SITE ------>
Kobenhavn, Denmark
Joined: June 29, 2004
KitMaker: 6,760 posts
Auto Modeler: 2,182 posts
Posted: Monday, January 24, 2011 - 11:02 PM UTC
D... that carpet monster.
It's the metalic cover underneath the semi gloss black cap. Looks kind of anthracite colored.
On the workbench:
MPC: 1972 Pontiac GTO
Revell: 1965 Mustang
Verlinden 120mm guard of the marine.
Revell: 2010 Camaro
Monogram: 1931 Rolls Royce
Italeri: LVT2 Amtrac