New York, United States
Joined: August 25, 2006
KitMaker: 2,539 posts
Auto Modeler: 1,405 posts
Posted: Tuesday, March 29, 2011 - 10:18 AM UTC
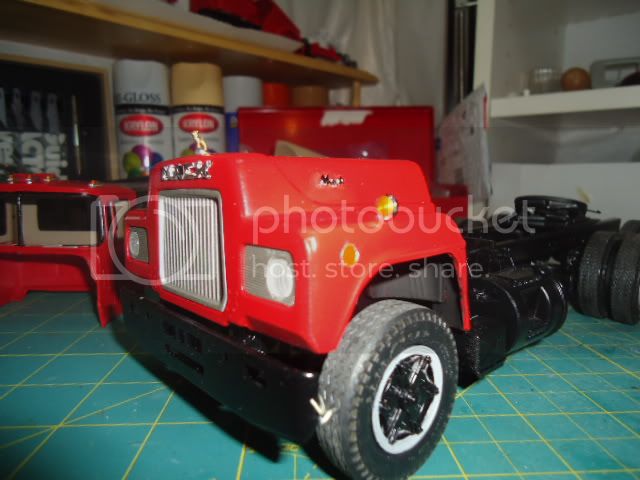
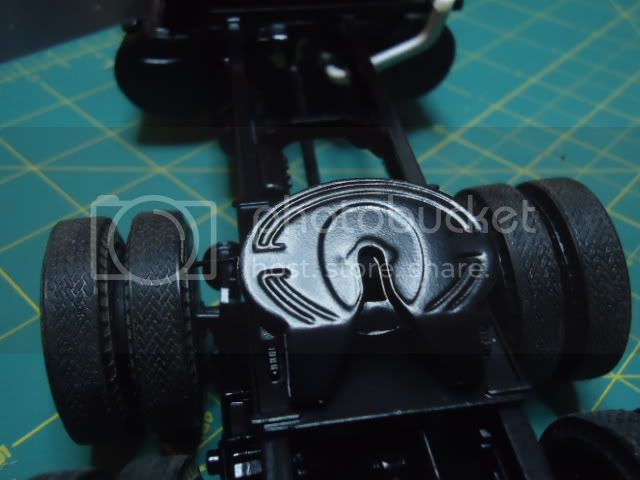
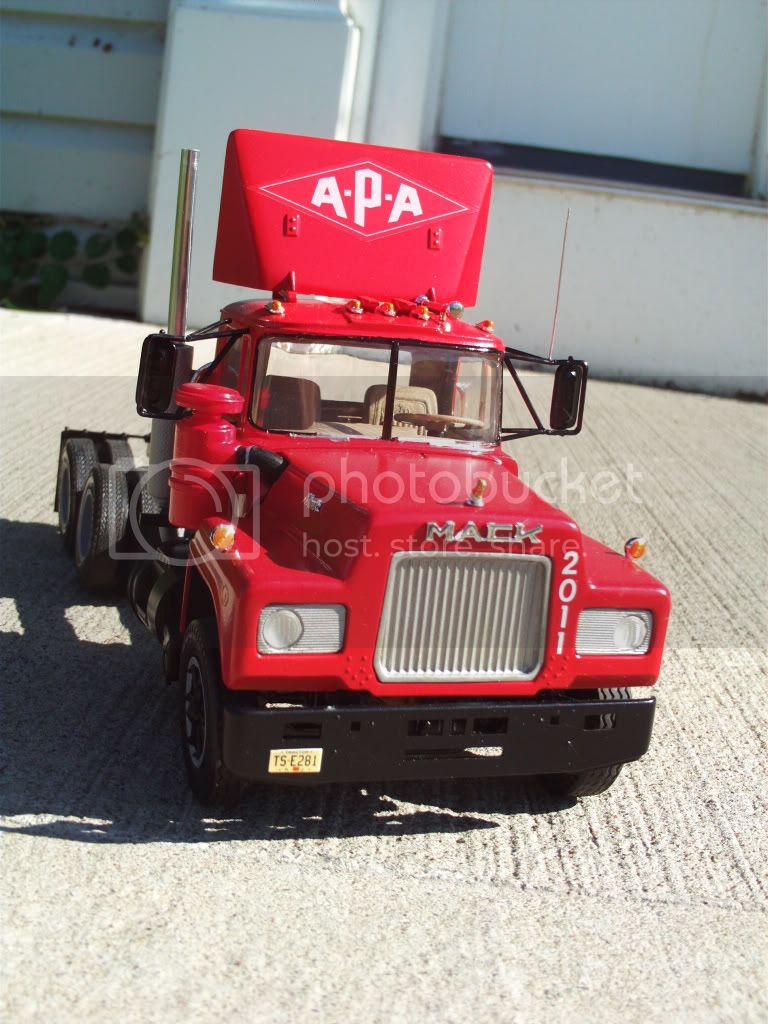
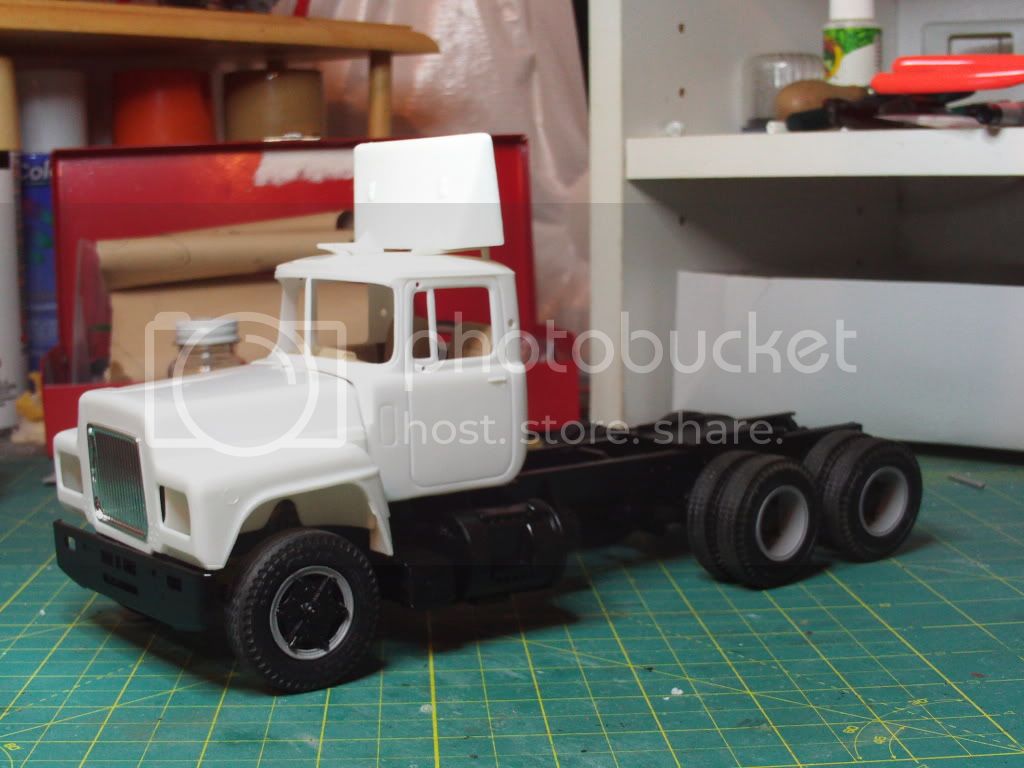
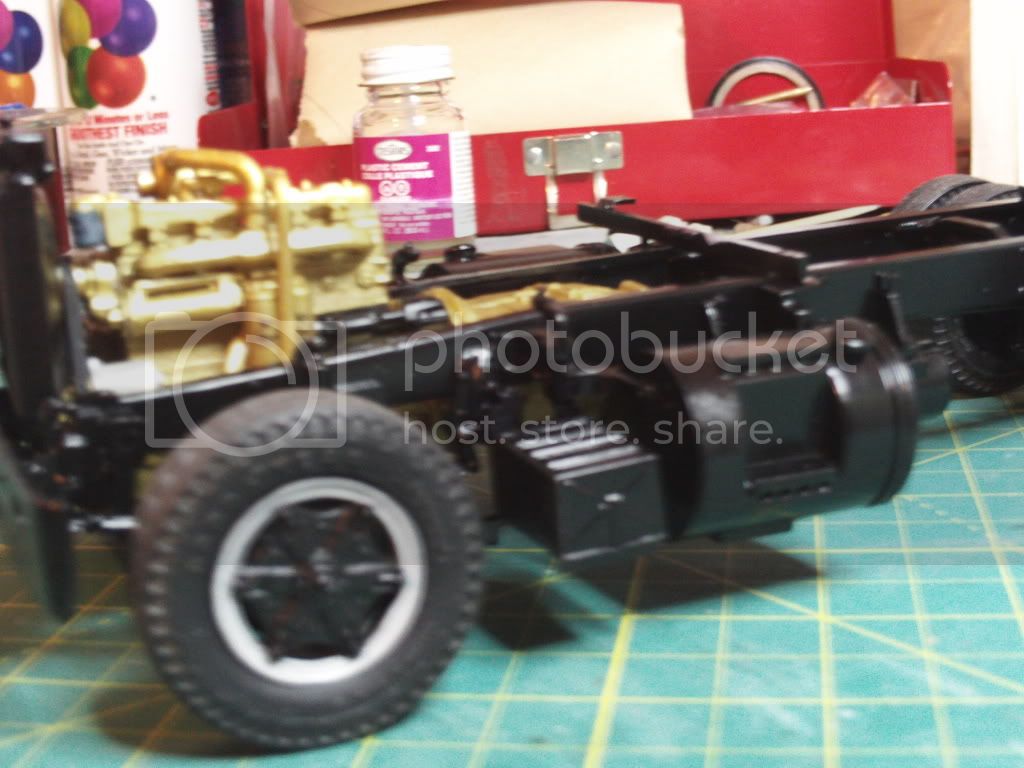
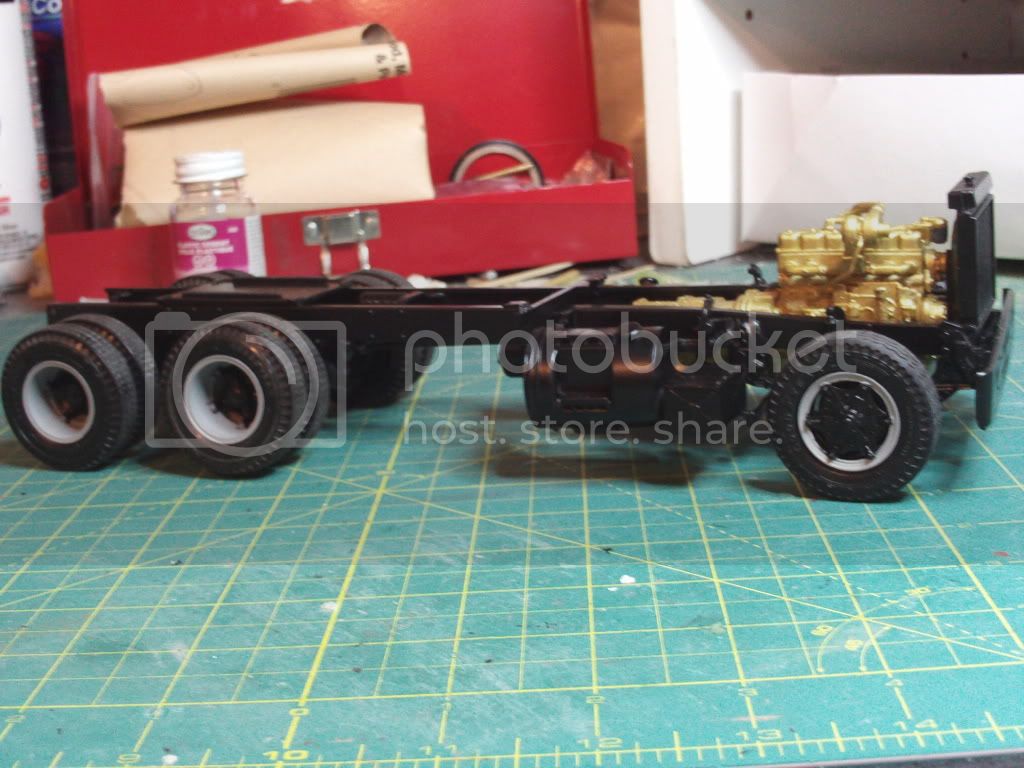
Here are a couple of pics of my 1975 APA Mack R685ST. There were a couple of days last month were it was warm enough to paint, so I managed to get the frame & wheels painted. The wheels are Mack spokes from Plaskit. Hopefully it will warm up enough here in the next couple of weeks so I can get the cab & hood painted.
Jim
"Socialism is a philosophy of failure, the creed of ignorance, and the gospel of envy, its inherent virtue is the equal sharing of misery." ---- Winston Churchill
Dublin, Ireland
Joined: January 24, 2008
KitMaker: 4 posts
Auto Modeler: 2 posts
Posted: Sunday, April 03, 2011 - 12:43 PM UTC
I love those big American "chunky" trucks - even in miniature they look so big! Yes I know what you meant about the painting - I've also been cleaning up and prepping many kits during the cold weather so that I have a great stock of stuff ready to spray now that the days are getting warmer!
Good luck with the build and the weather!
cheers,
Paul
New York, United States
Joined: August 25, 2006
KitMaker: 2,539 posts
Auto Modeler: 1,405 posts
Posted: Monday, April 04, 2011 - 01:18 AM UTC
Thanks, Paul. I had to correct a minor setback with the radiator, but that's all fixed now. Hopefully the weather will cooperate this week so I can at least get some paint on the hood.
I know what you mean about chunky trucks. The US trucks of the 1970s were't the most areodynamic looking, but they sure got the job done. There aren't may trucks that really scream "1970s fleet truck" more than a Freightliner WFT 7564T or a single stack Mack!
Jim
"Socialism is a philosophy of failure, the creed of ignorance, and the gospel of envy, its inherent virtue is the equal sharing of misery." ---- Winston Churchill
New York, United States
Joined: August 25, 2006
KitMaker: 2,539 posts
Auto Modeler: 1,405 posts
Posted: Tuesday, April 26, 2011 - 06:06 AM UTC
"Socialism is a philosophy of failure, the creed of ignorance, and the gospel of envy, its inherent virtue is the equal sharing of misery." ---- Winston Churchill
New York, United States
Joined: August 25, 2006
KitMaker: 2,539 posts
Auto Modeler: 1,405 posts
Posted: Wednesday, May 18, 2011 - 03:10 PM UTC
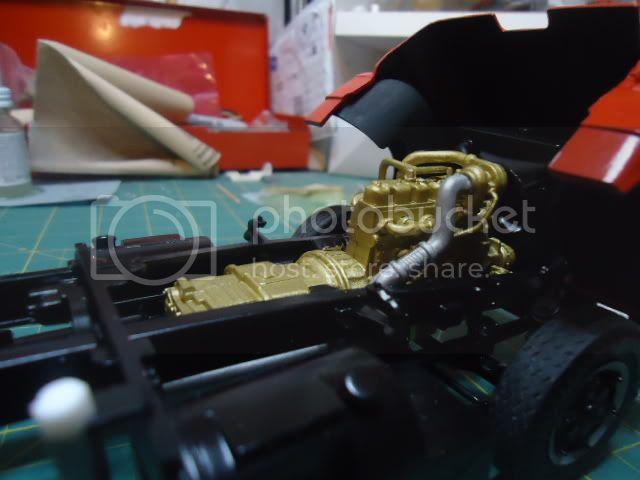
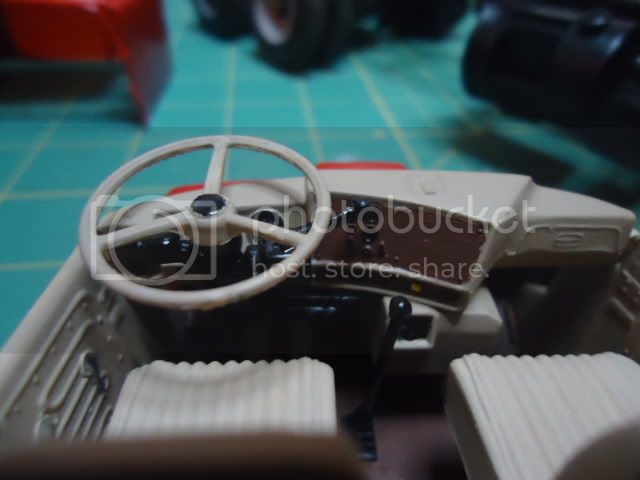
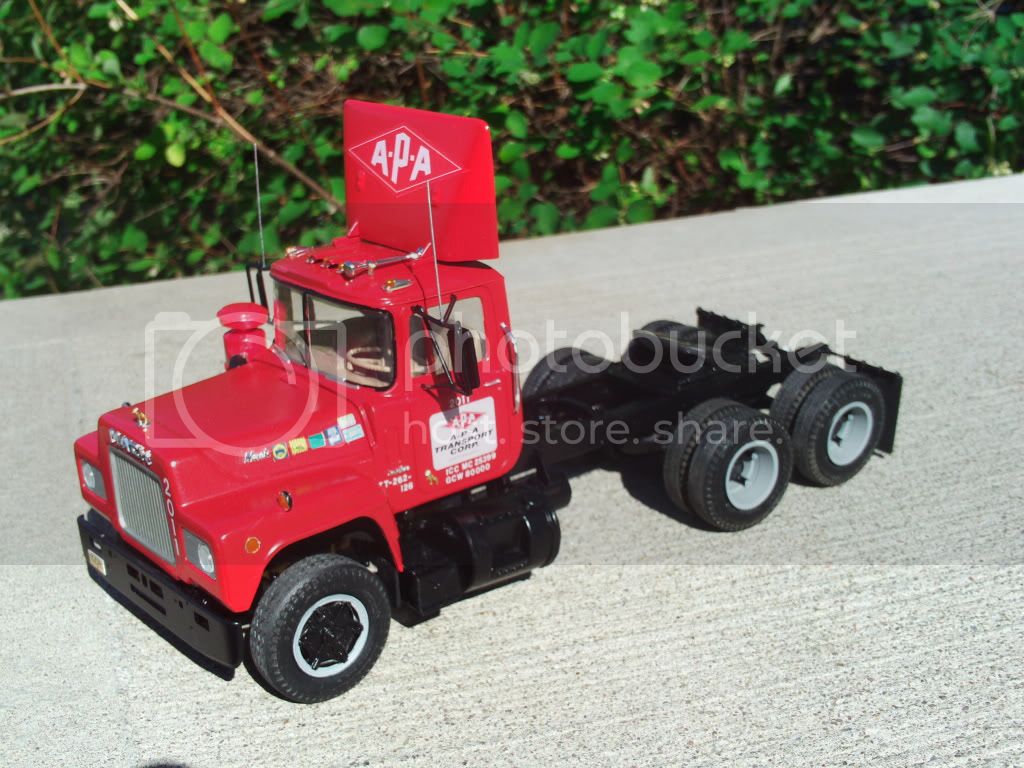
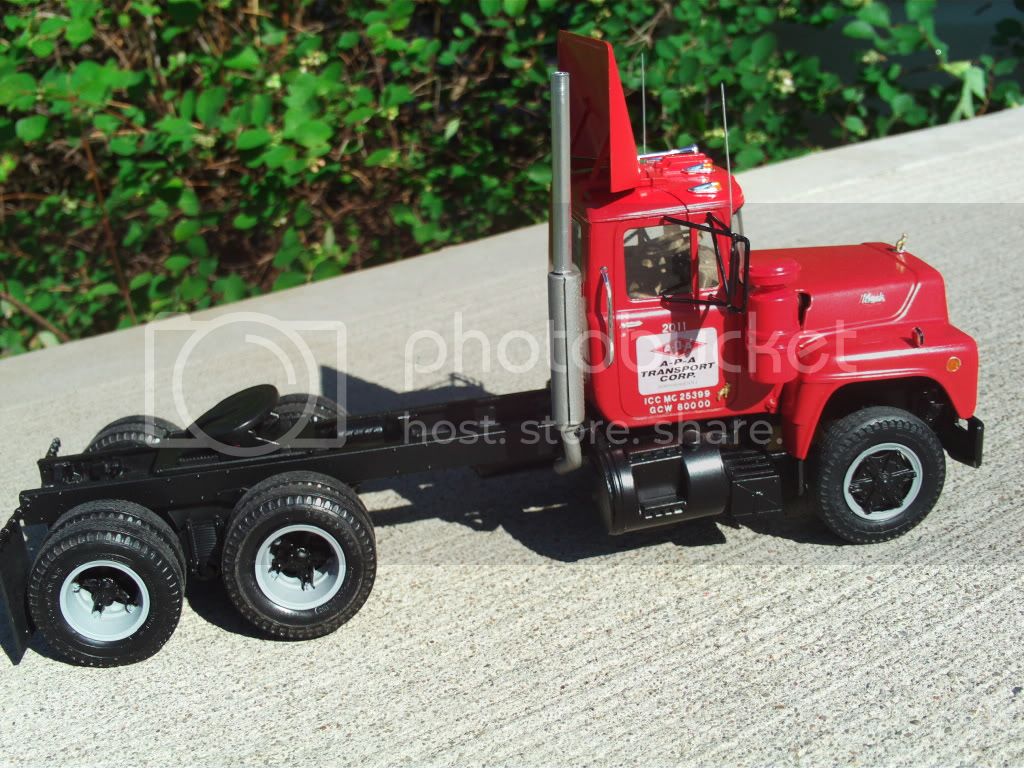
So I managed to get a little more done on the APA Mack. Mostly decaling. I added the door decals from the Model Truckin' APA sheet, and I added the ICC MC Number, "GCW 80000", & Unit Number to the doors; and the New York State Throughway ID (TT-262-126) to the cowl. These numbers were added with Micro-Scale letters & numbers. I also added some fuel stickers to the hood from the AMT Kenworth T600 decal sheet. I also added a Unit Number to the front of the hood.
Now I just have to figure out how to get the air intake piping from the aircleaner to the turbo. Doesn't seem to fit!


Jim
"Socialism is a philosophy of failure, the creed of ignorance, and the gospel of envy, its inherent virtue is the equal sharing of misery." ---- Winston Churchill
Ontario, Canada
Joined: January 05, 2005
KitMaker: 347 posts
Auto Modeler: 55 posts
Posted: Friday, May 20, 2011 - 11:50 AM UTC
Good work on the Mack. Last time I built one (20+ yrs ago), I used a piece of flexible drinking straw to extend the air intake to the turbo. Give it a shot, creative modelling some
times works wonders.
Art
Incoming fire always has the right of way, friendly fire - isn't, and always remember, your weapon was probably made by the contractor with the lowest bid.
New York, United States
Joined: August 25, 2006
KitMaker: 2,539 posts
Auto Modeler: 1,405 posts
Posted: Friday, May 20, 2011 - 02:29 PM UTC
Thanks for the compliment.
That's a pretty good idea. I'll either do something like that or use a piece of Evergeeen tubing.
Jim
"Socialism is a philosophy of failure, the creed of ignorance, and the gospel of envy, its inherent virtue is the equal sharing of misery." ---- Winston Churchill
Illinois, United States
Joined: August 30, 2005
KitMaker: 3,289 posts
Auto Modeler: 1,620 posts
Posted: Saturday, May 21, 2011 - 02:36 AM UTC
Looking good...got a pick of the problem piece/area?
-I say I have two kids- one son & one daughter...my wife says she has three- one son ,one daughter and one husband.
...and don't tell yourself you can't do it....it'll just take longer then
New York, United States
Joined: August 25, 2006
KitMaker: 2,539 posts
Auto Modeler: 1,405 posts
Posted: Monday, May 23, 2011 - 05:09 AM UTC
No, no pic of the problem area. I decided to do a lillte slicing to see if I could get it to fit. I'll let you know how that works out.
Jim
"Socialism is a philosophy of failure, the creed of ignorance, and the gospel of envy, its inherent virtue is the equal sharing of misery." ---- Winston Churchill
New York, United States
Joined: August 25, 2006
KitMaker: 2,539 posts
Auto Modeler: 1,405 posts
Posted: Wednesday, July 13, 2011 - 03:06 PM UTC
"Socialism is a philosophy of failure, the creed of ignorance, and the gospel of envy, its inherent virtue is the equal sharing of misery." ---- Winston Churchill
Illinois, United States
Joined: August 30, 2005
KitMaker: 3,289 posts
Auto Modeler: 1,620 posts
Posted: Saturday, July 23, 2011 - 02:21 PM UTC
She looks good Jim!
As for that tube, might I suggest shooting it carefully with a semi-gloss or flat to tone it down if it bothers you that much...lay some really thin material around the cab and frame and shoot it with a rattlecan. I got this satin like material from Johan frabrics{I was like the only guy there} and it was cheap - I used it for photo backdrops for a very short while before building my photo box.
Your not the only one who dislikes those tubing cutters so I went with an old sock in my miter box to cut aluminum tubing on to keep it from getting scratched and then sand the end of the cut with a sanding stick to flatten it.
-I say I have two kids- one son & one daughter...my wife says she has three- one son ,one daughter and one husband.
...and don't tell yourself you can't do it....it'll just take longer then
New York, United States
Joined: August 25, 2006
KitMaker: 2,539 posts
Auto Modeler: 1,405 posts
Posted: Saturday, July 23, 2011 - 02:53 PM UTC
Thanks, Bob. A friend of mine suggested that I use a Scotch-brite pad to dull it up. The tube isn't glued onto the stack, so it can slide right off. I try something eventually.
Jim
"Socialism is a philosophy of failure, the creed of ignorance, and the gospel of envy, its inherent virtue is the equal sharing of misery." ---- Winston Churchill
Illinois, United States
Joined: August 30, 2005
KitMaker: 3,289 posts
Auto Modeler: 1,620 posts
Posted: Monday, July 25, 2011 - 01:32 PM UTC
Quoted Text
Thanks, Bob. A friend of mine suggested that I use a Scotch-brite pad to dull it up. The tube isn't glued onto the stack, so it can slide right off. I try something eventually.
Jim
Hmmmm, be prepared for scoring marks from the pad my friend...maybe some 1500 or 1000 grit sand paper and wet sand it?.......maybe toothpaste?
-I say I have two kids- one son & one daughter...my wife says she has three- one son ,one daughter and one husband.
...and don't tell yourself you can't do it....it'll just take longer then
New York, United States
Joined: August 25, 2006
KitMaker: 2,539 posts
Auto Modeler: 1,405 posts
Posted: Tuesday, July 26, 2011 - 12:49 AM UTC
That is a possibility. Good thing I have a spare piece I can experiment on.
Jim
"Socialism is a philosophy of failure, the creed of ignorance, and the gospel of envy, its inherent virtue is the equal sharing of misery." ---- Winston Churchill
AussieReg
 Associate Editor
#007
Victoria, Australia
Joined: June 09, 2009
KitMaker: 8,156 posts
Auto Modeler: 2,953 posts
Posted: Tuesday, July 26, 2011 - 01:50 AM UTC
Very nice job Jim. I started out in the hobby building trucks with my Dad 35 years ago and seeing you guys with your builds here brings back some great memories.
Thinking my next stash investment might be a big rig.
Cheers, D
ON the bench
Revell 1/24 '53 Corvette (building as '54)
Revell 1/24 BMW 507 Coupe and Cabrio
Italeri 1/48 Me262 B-1a/U1 Nightfighter
Monogram 1/24 '57 Chevy Nomad
Dragon 1/350 USS Frank Knox DD-742
New York, United States
Joined: August 25, 2006
KitMaker: 2,539 posts
Auto Modeler: 1,405 posts
Posted: Tuesday, July 26, 2011 - 03:56 AM UTC
Thanks, Damian. I've heard that truck models are a little hard to come by down there.
Here's a site that might interest you:
Australian Model Truck & Construction Forum Jim
"Socialism is a philosophy of failure, the creed of ignorance, and the gospel of envy, its inherent virtue is the equal sharing of misery." ---- Winston Churchill
Illinois, United States
Joined: August 30, 2005
KitMaker: 3,289 posts
Auto Modeler: 1,620 posts
Posted: Tuesday, July 26, 2011 - 10:35 AM UTC
Quoted Text
Very nice job Jim. I started out in the hobby building trucks with my Dad 35 years ago and seeing you guys with your builds here brings back some great memories.
Thinking my next stash investment might be a big rig.
Cheers, D
Well, there's a couple of "Dodges" out there, but somehow I seem to imagine yours will have a bowtie on it...I don't know why?...

....Jump in D, the truck building water is fine!
-I say I have two kids- one son & one daughter...my wife says she has three- one son ,one daughter and one husband.
...and don't tell yourself you can't do it....it'll just take longer then