

Recovery St Wrecksville, nice touch Grubby.
Great to see you in the boards again, and really good to see this build approaching completion. You have done an awesome job on the build so far.
One question, how did you apply the Mr Surfacer?
Cheers, D


Go to automodeler.com for the current dynamic site!
Trucks
Scale truck modeling topics.
Scale truck modeling topics.
Hosted by Jim Starkweather
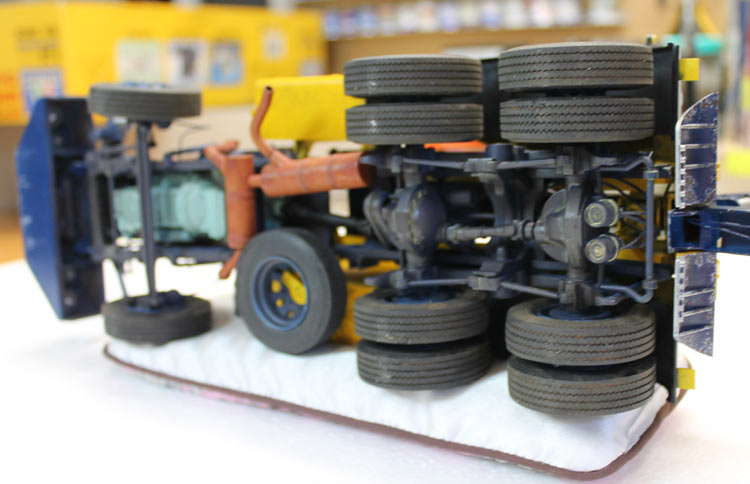
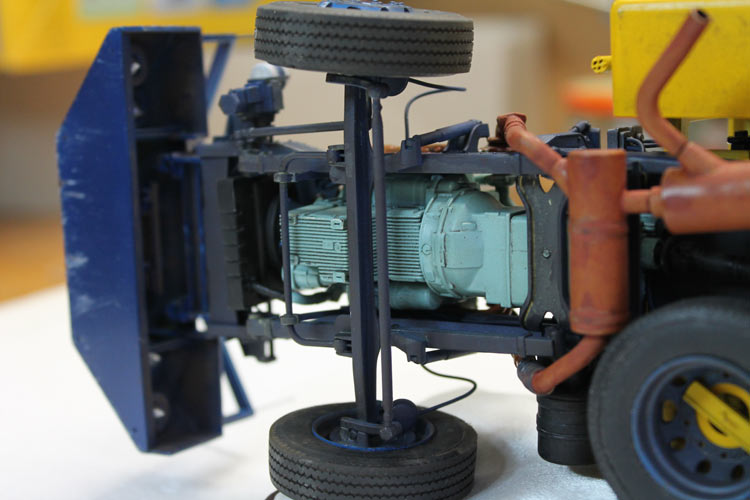
Italeri Wrecker Build-up

AussieReg

#007

Joined: June 09, 2009
KitMaker: 8,156 posts
Auto Modeler: 2,953 posts

Posted: Sunday, April 07, 2013 - 01:06 AM UTC


SHarjacek

Joined: January 29, 2011
KitMaker: 977 posts
Auto Modeler: 53 posts

Posted: Sunday, April 07, 2013 - 02:55 AM UTC
Wonderful work so far Graeme !

KoSprueOne

Joined: March 05, 2004
KitMaker: 4,011 posts
Auto Modeler: 851 posts

Posted: Sunday, April 07, 2013 - 07:17 AM UTC
Very realistic progress at that. I dig that scratch built spare tire hoist


grubbyfingers
Joined: September 07, 2007
KitMaker: 404 posts
Auto Modeler: 60 posts

Posted: Sunday, April 07, 2013 - 10:45 AM UTC
Thanks for the comments, guys. Damien, the Mr Surfacer was sprayed from a rattle can.
Grubby.
Grubby.

AussieReg
#007
Joined: June 09, 2009
KitMaker: 8,156 posts
Auto Modeler: 2,953 posts
Posted: Sunday, April 07, 2013 - 01:54 PM UTC
Thanks Graeme. I have played around with 500 and 1000 thinned with lacquer thinner through the airbrush with mixed results. Gotta keep playing with the air pressure to get a consistent pattern.
Cheers, D
Cheers, D
grubbyfingers
Joined: September 07, 2007
KitMaker: 404 posts
Auto Modeler: 60 posts
Posted: Sunday, April 07, 2013 - 02:43 PM UTC
I just hosed it on out of the can and gave it a swipe with wet 600 grade sanding pad. That seemed to knock most of the bits off it.
grubbyfingers
Joined: September 07, 2007
KitMaker: 404 posts
Auto Modeler: 60 posts
Posted: Saturday, May 18, 2013 - 05:40 PM UTC
Umm ... I kind of finished and now realise I didn't take any more photos. I'll take some more now and go back over the processes.
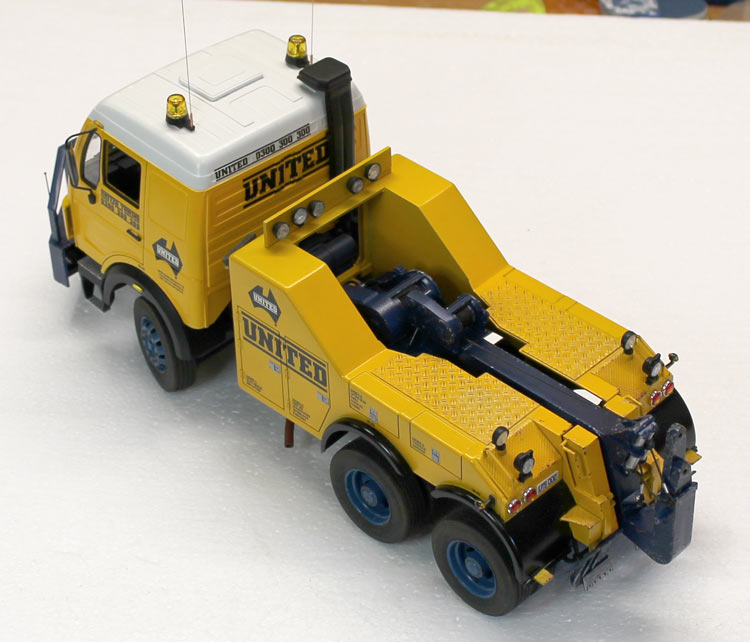
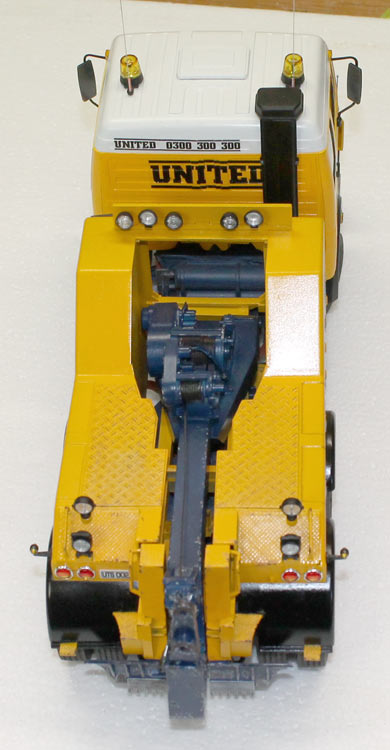
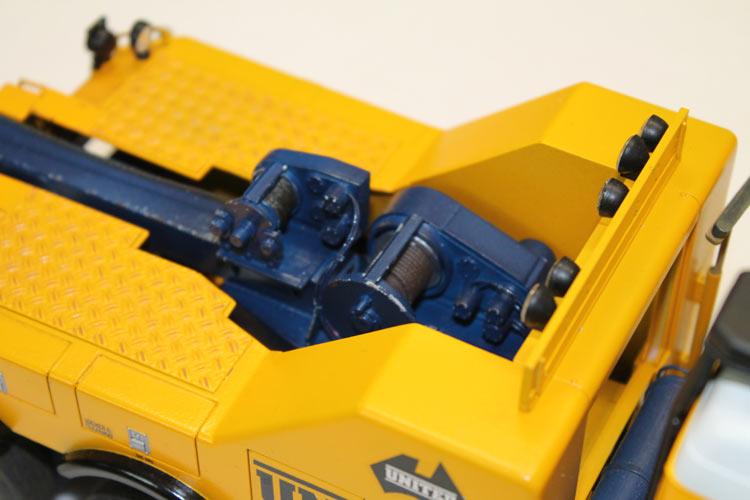
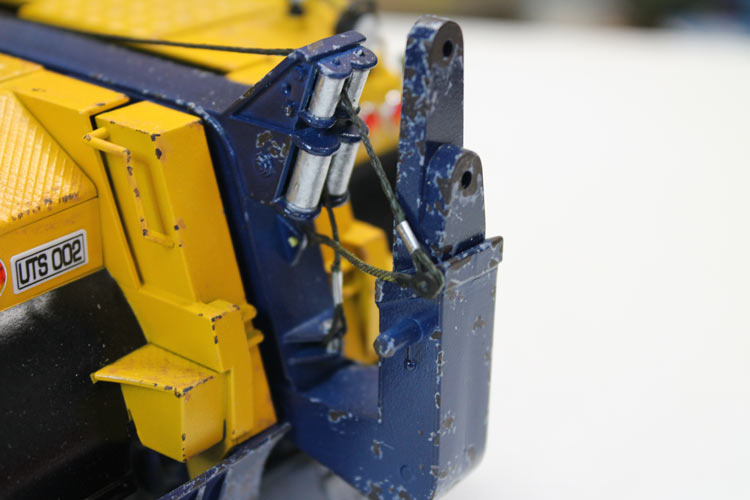
Winch cable.
I replaced the moulded kit winch cable with some braided fishing line from K-Mart. I've got enough now to do several hundred tow trucks. The ends were looped over and glued together with CA. Once that was set, I cut a strip of aluminium sheet from a Milo tin seal and glued one end to the join. Once that was set, I wrapped the balance of the strip around the join in the cable to secure it and make it look like a ferule.
I then fed that cable back through the beam and attached it to the winch drum with more CA. A wash of burnt umber gave it a nice metallic colur. 
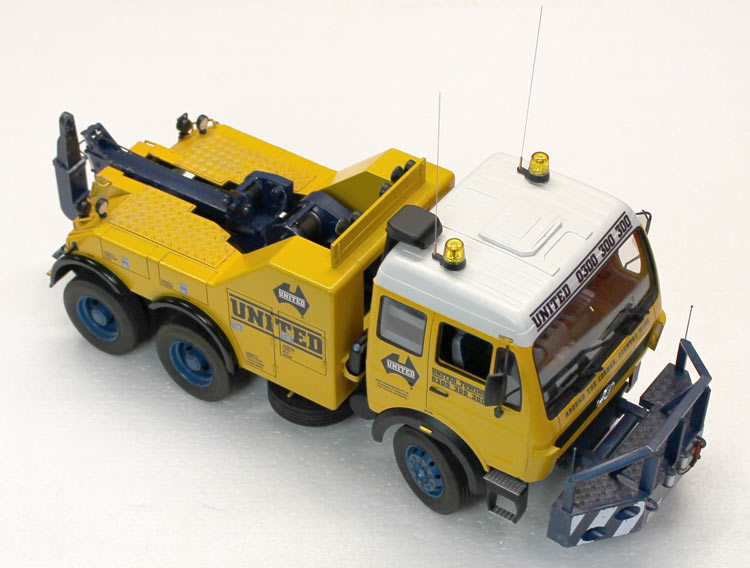
Antennae and lights.
The kit parts for the rotating beacons are supplied in clear plastic. I gave these a couple of coats of Tamiya clear yellow tint them appropriately. The antennae are accupuncture needles with both ends trimmed off. They come with nice brass windings around the handle end that look convincingly like springs. Be careful with these, they are designed to pierce the skin!
The indicators were, again, supplied as clear, so they got the same two coats of clear yellow. In order to give the indicators some level of reflectivity, I glued small rectangles of chrome mylar to the back of each. This gives them a nice glow effect.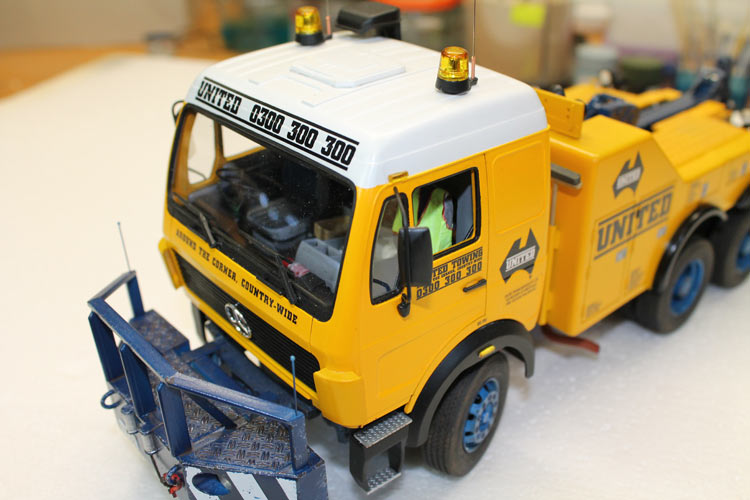
Cab interior.
The cab interior went together with a bit of fettling. I had to trim off some of the edges of the interior bucket to get everything to settle in place nicely. I think there was some interference with the top of the cab interior and the strngthening I added earlier. Anyway, I got it all together in such a way that none of the joints are stressed. Ther's not much much I dislike more than having a seam pop at the end of a build.
Glazing went in without a hitch. I did have to add the steering wheel through the side window after everything else was in place as it fouled the dash when I slid the interior into place.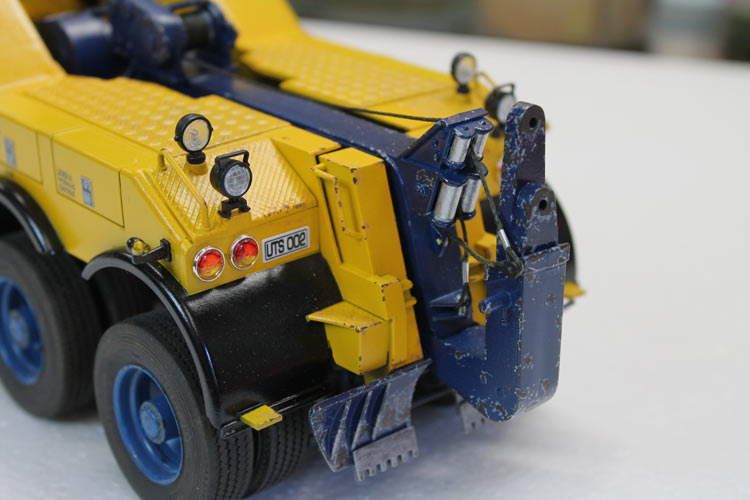
Tail-end
The rear indicator/brake light lenses were clear, too, so they were hit with transluent yellow and red and then glued to the chrome bases with PVA.
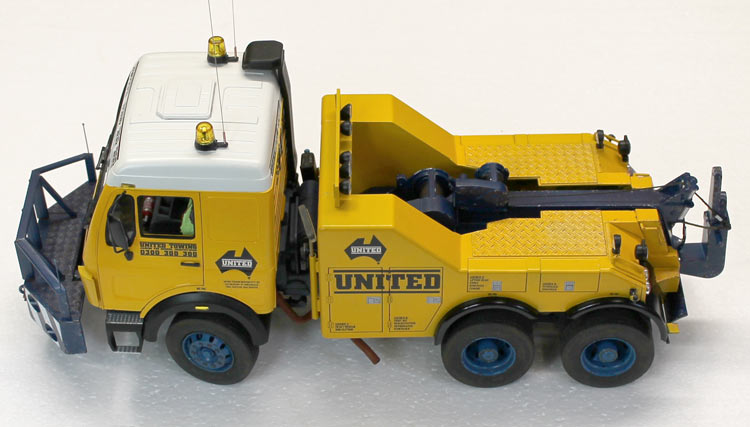
Summary
This was a thoroughly enjoyable, relaxing build. I think mainly because I just tackled one small job at a time and considered each a model in itself. That way I didn't have half-finished tasks hanging around that nagged at me until I would come back and rush just to get them out of the way. It was also very satisfying to try new techniques. As a result of this build I have now added about ten trucks and trailers to my stash and I'm also almost encouraged enough to restart my stalled Diamond Reo project!
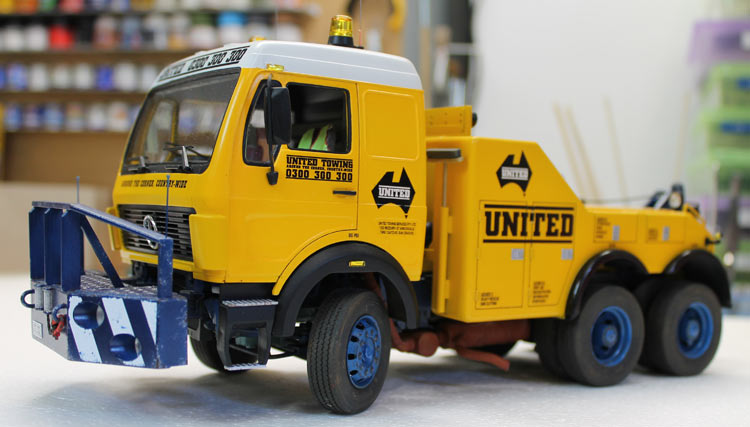
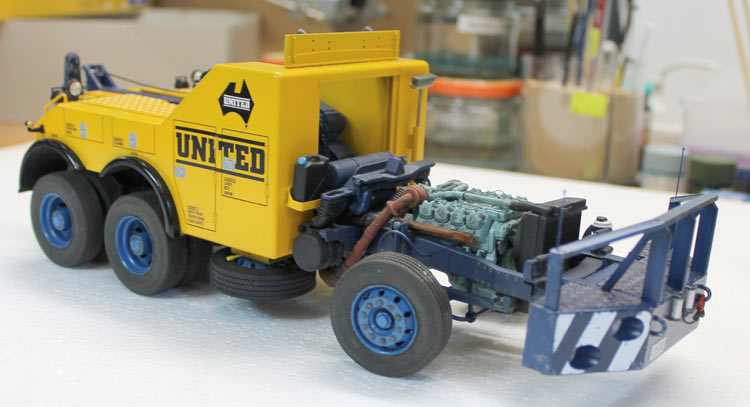
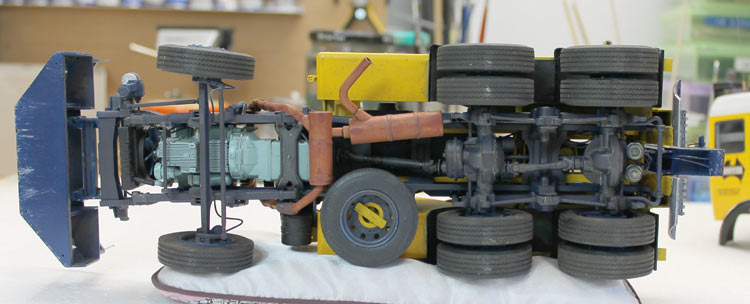
Hhere are a few pics of the final result: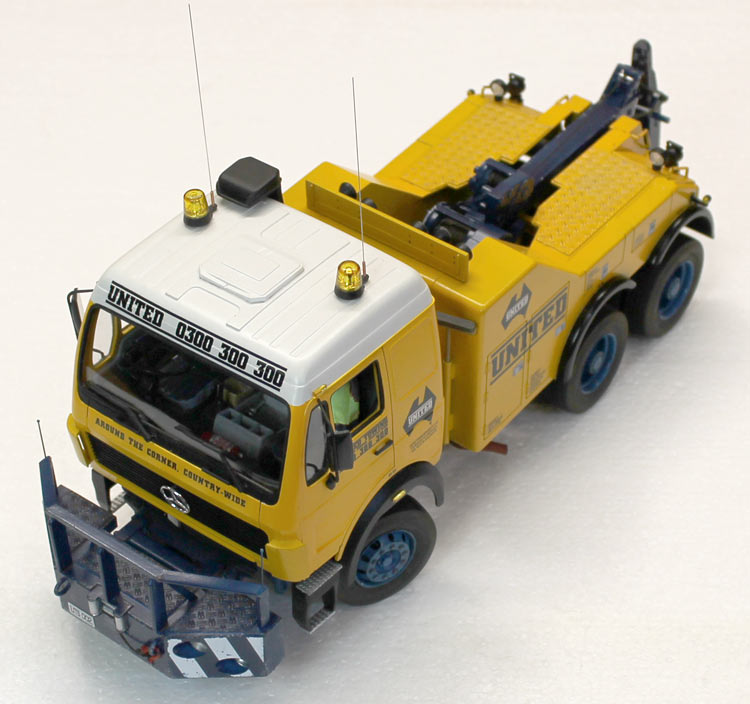


AussieReg
#007
Joined: June 09, 2009
KitMaker: 8,156 posts
Auto Modeler: 2,953 posts
Posted: Saturday, May 18, 2013 - 06:56 PM UTC
Awesome job Grubby, I love it. Thanks for sharing so much detail with us, your scratch building and detailing techniques produce great results. I will be bookmarking this thread for tips for my big 57 chev project.
Cheers, D
Cheers, D
KoSprueOne
Joined: March 05, 2004
KitMaker: 4,011 posts
Auto Modeler: 851 posts
Posted: Sunday, May 19, 2013 - 03:21 AM UTC
^ Yes, what he said
Awesome finish!
Awesome finish!
 |

WEB HOSTING BY


Copyright ©2021 Auto Modeler and Kitmaker Network, a subsidiary of Silver Star Enterprises
All Rights Reserved. Please read our Conditions of Use and Privacy Policy.
All Rights Reserved. Please read our Conditions of Use and Privacy Policy.