_GOTOBOTTOM
Cars
Discuss all types of automotive modeling here.
Chevrolet Fleetmaster Coupé - 1/25 by Galaxie
elmarriachi
_VISITCOMMUNITY
Baden-Württemberg, Germany
Joined: December 26, 2009
KitMaker: 813 posts
Auto Modeler: 146 posts
Posted: Sunday, March 13, 2016 - 04:08 PM UTC
Hello,

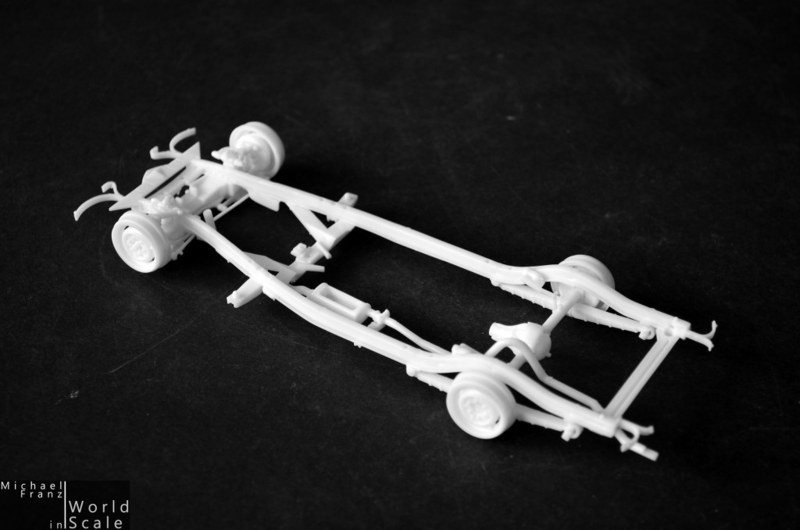
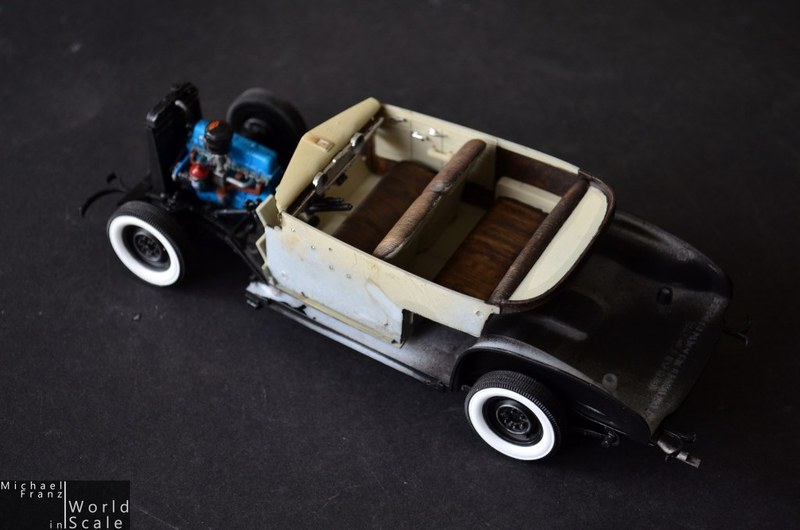
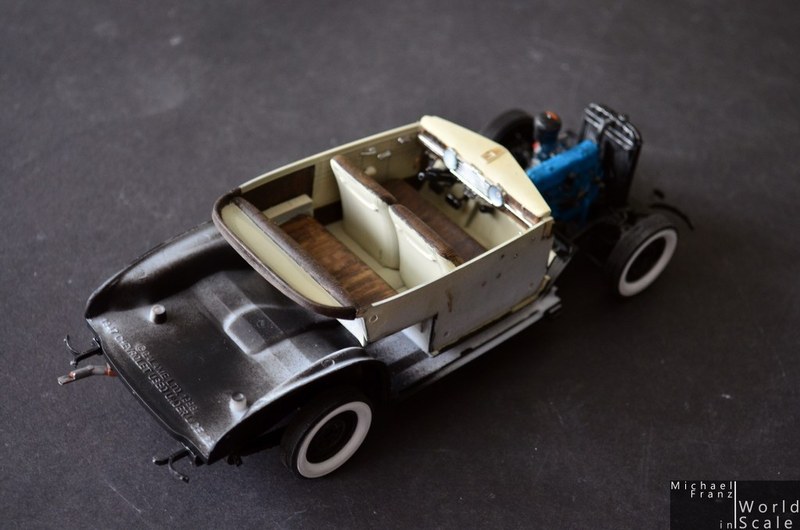
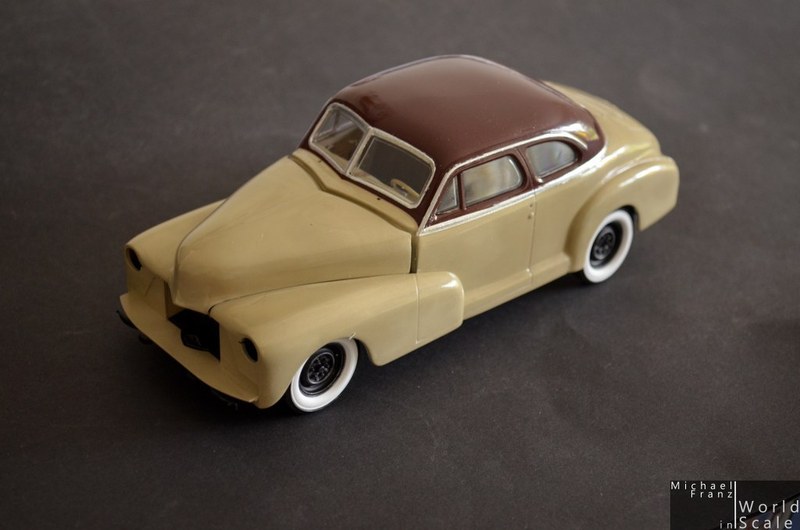
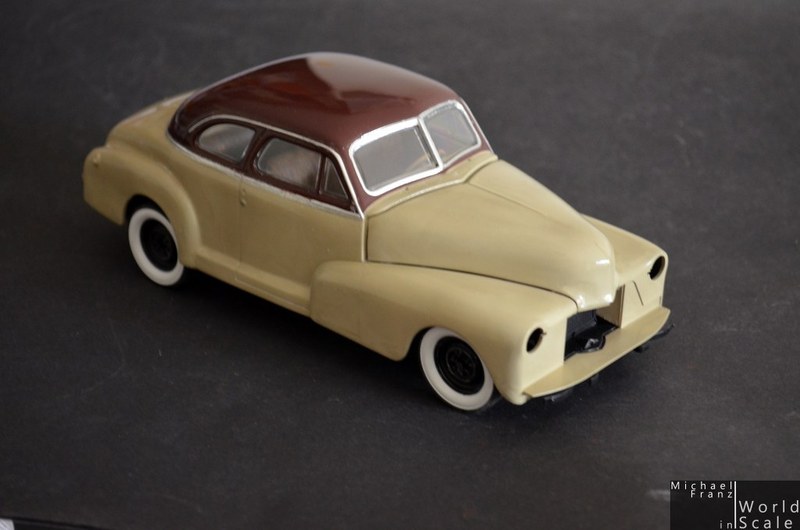
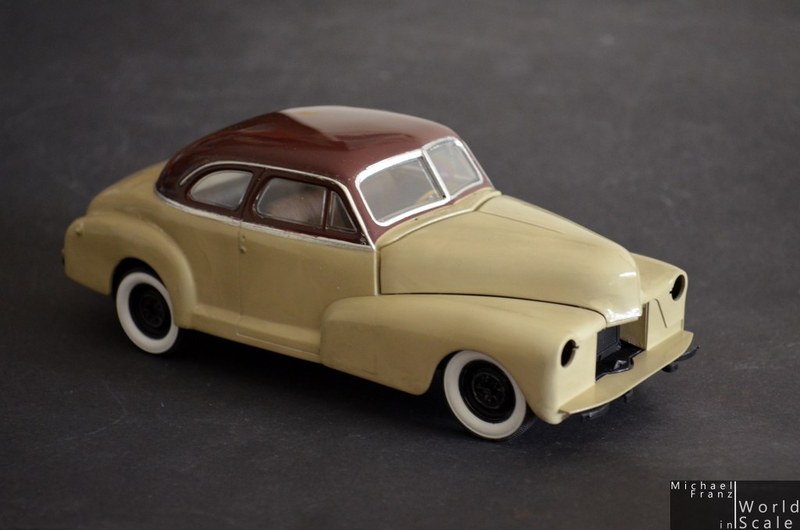
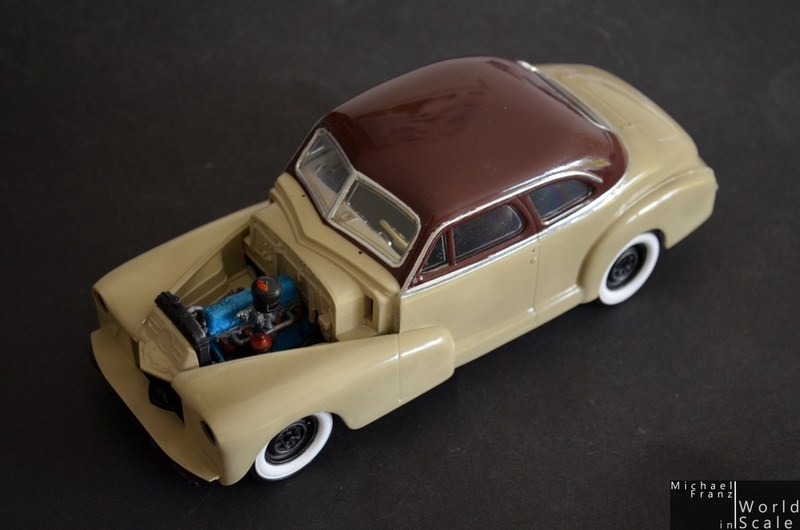
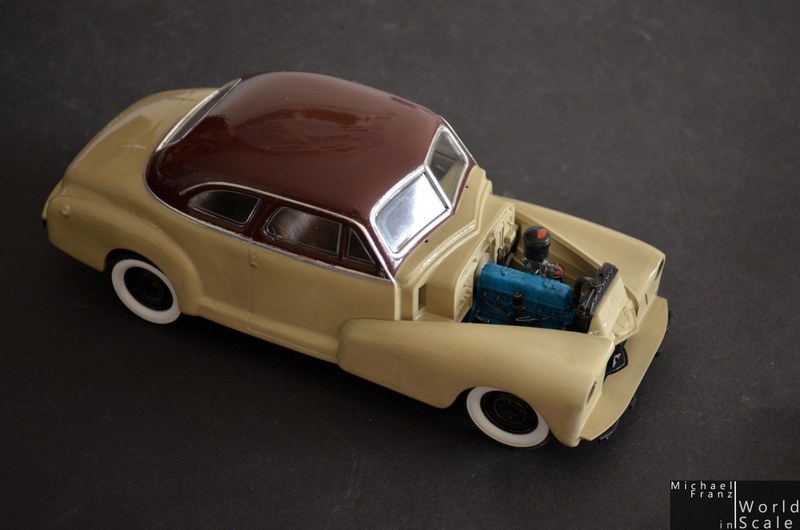
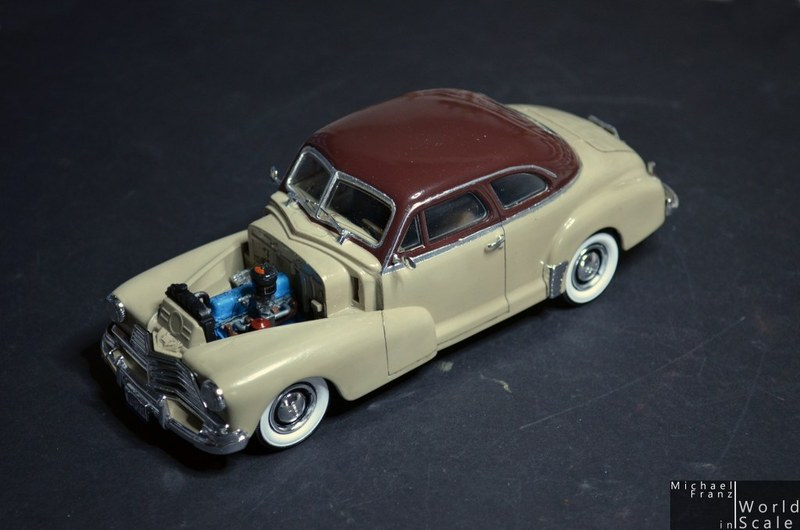
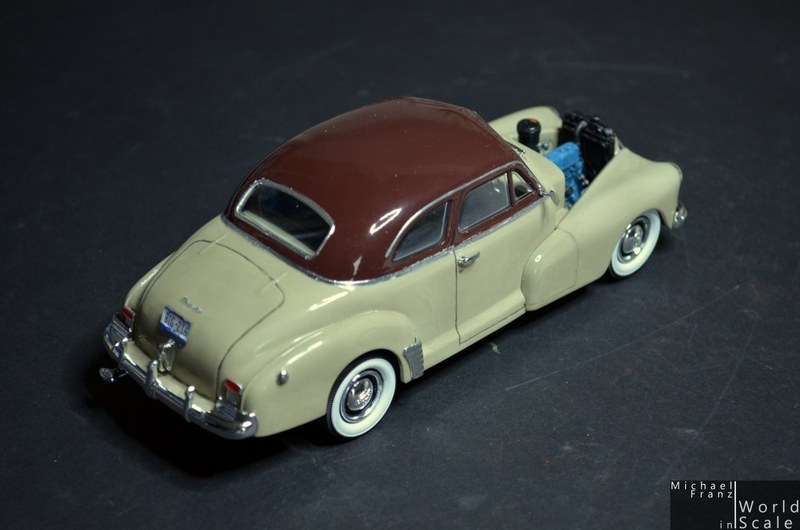
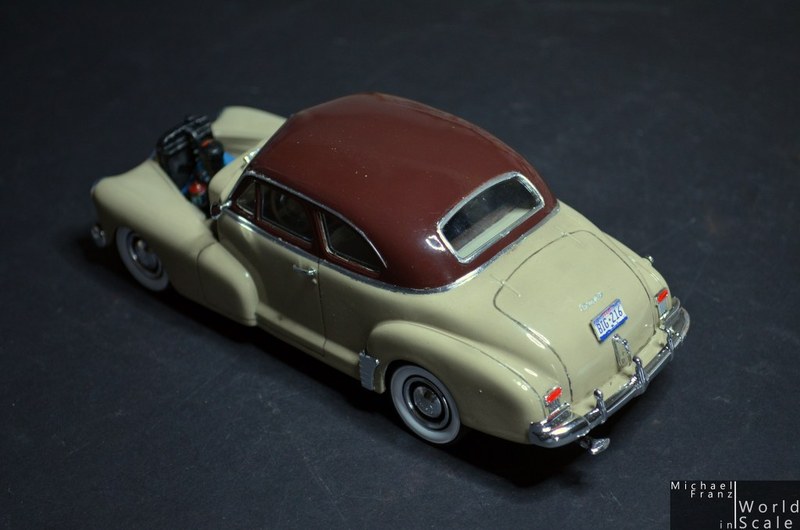
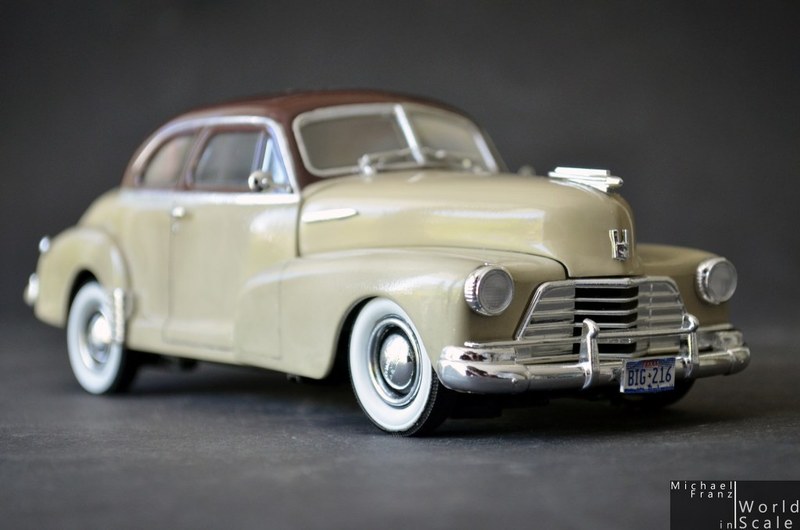
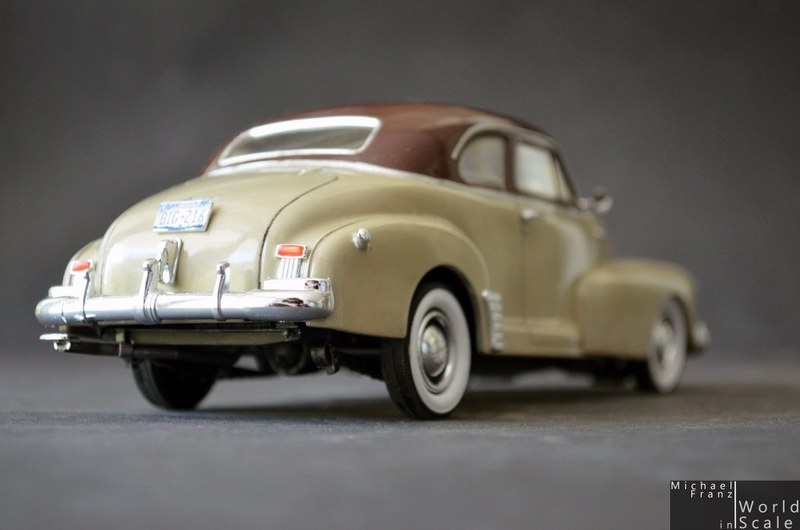
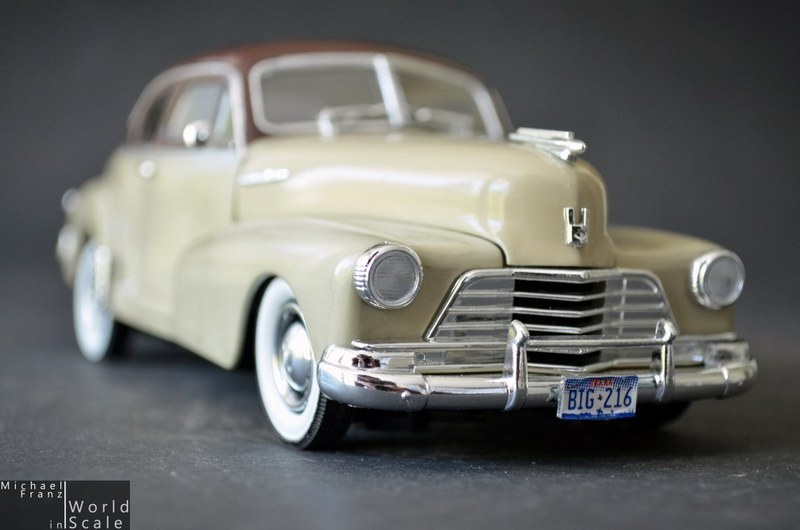
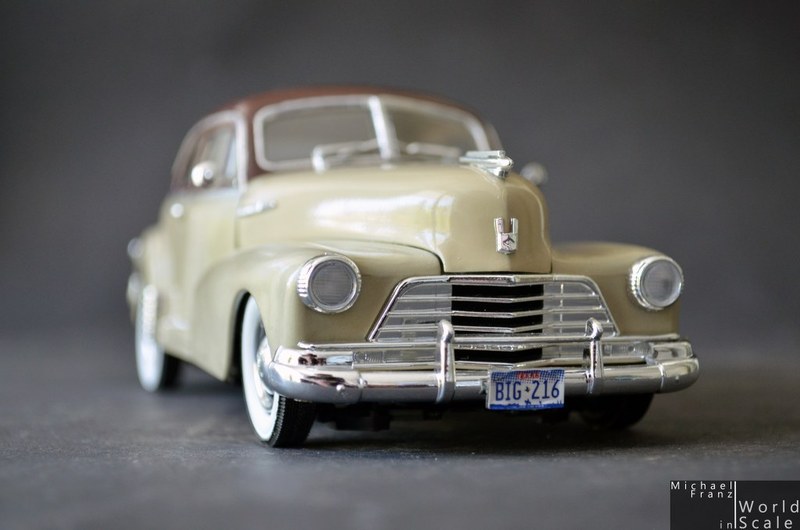
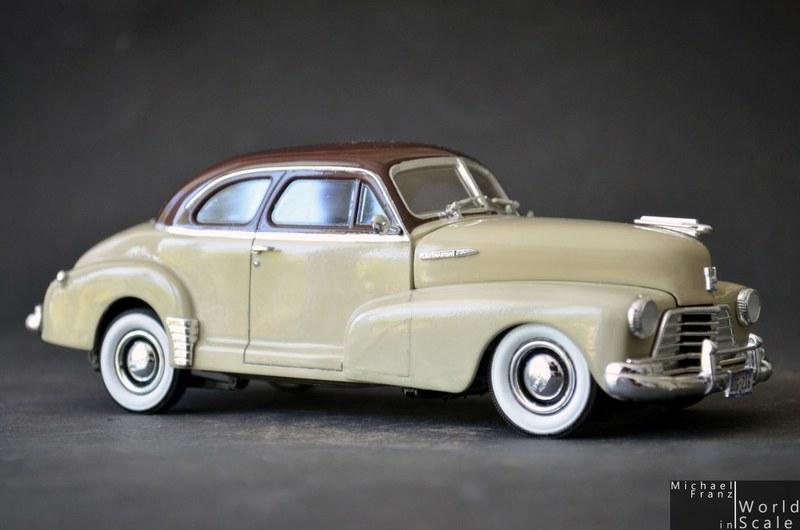
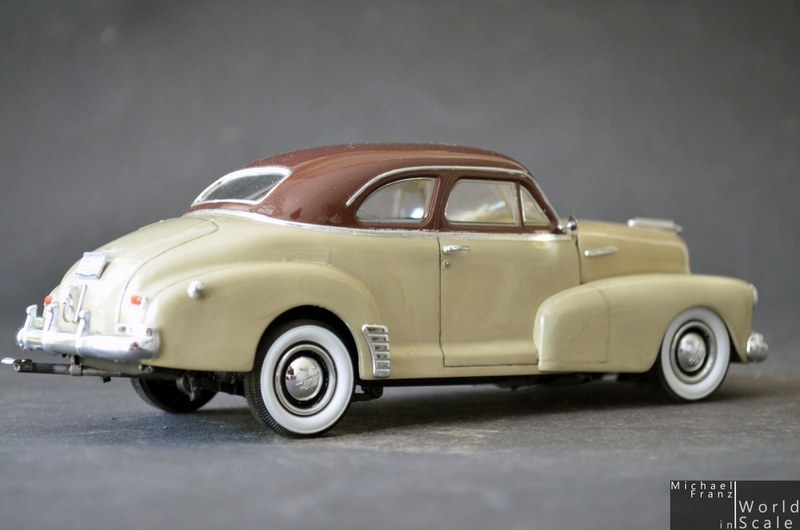
and the next one.... the wonderful Chevrolet Fleetmaster Coupé in scale 1/25 by Galaxie LImited Models. A wonderful detailed kit, hard to find in Germany yet...

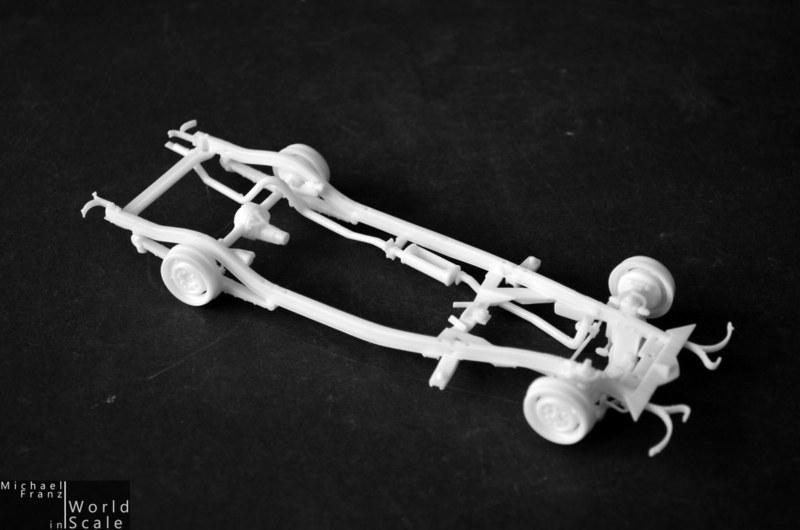
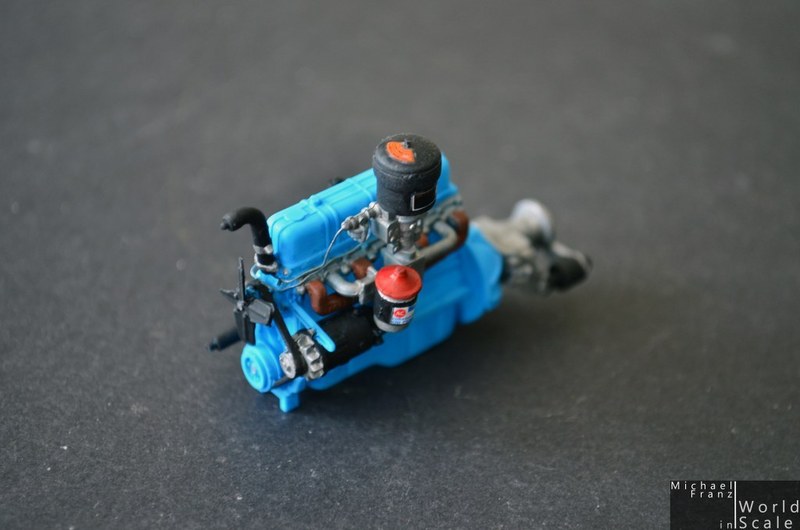
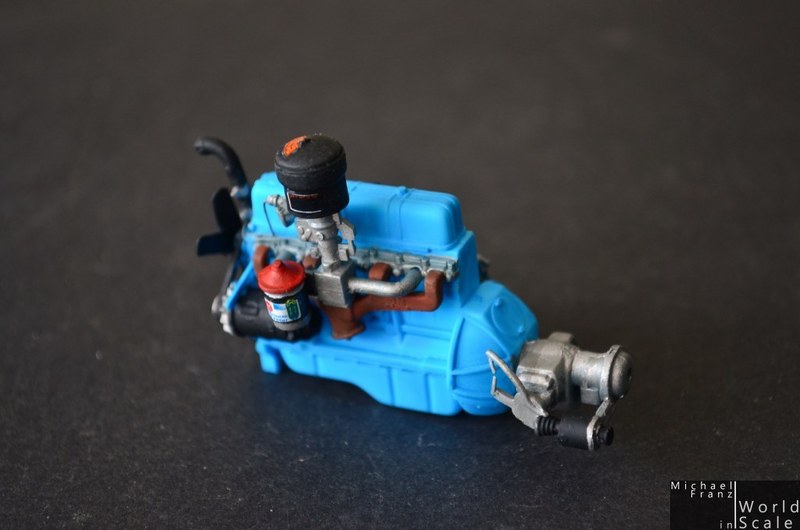
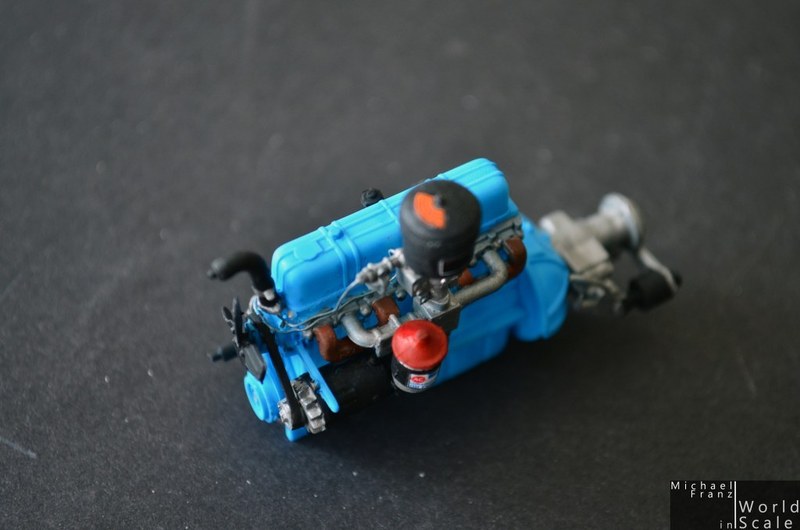
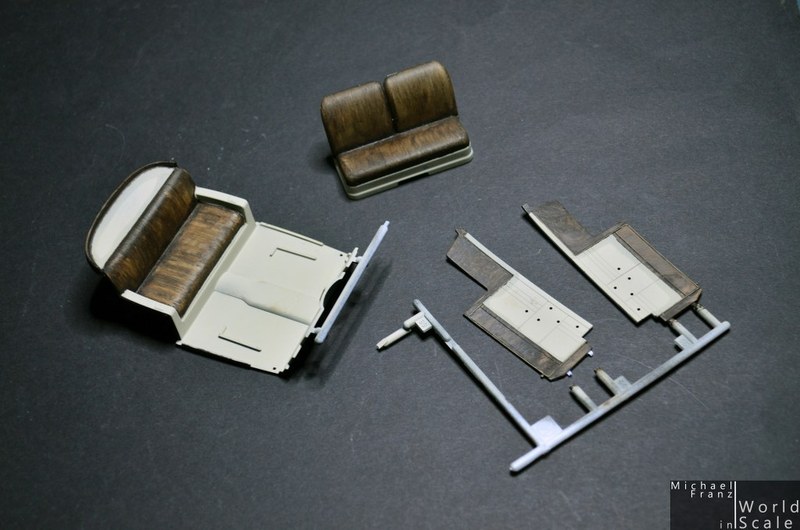
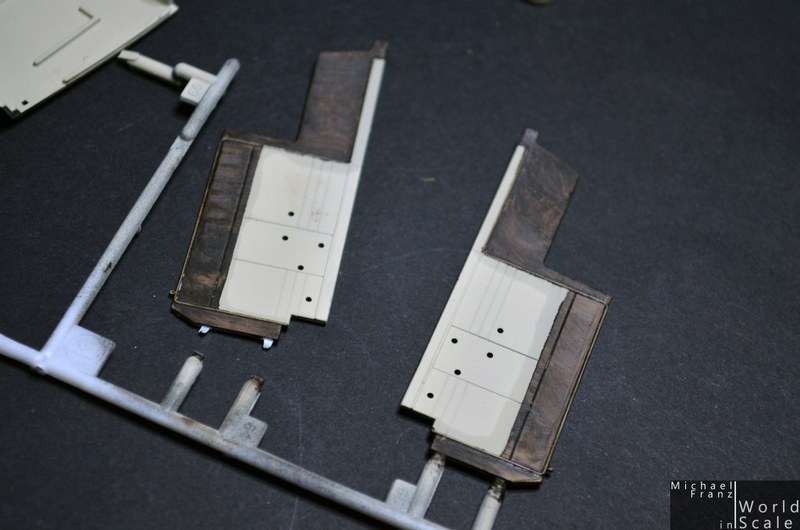
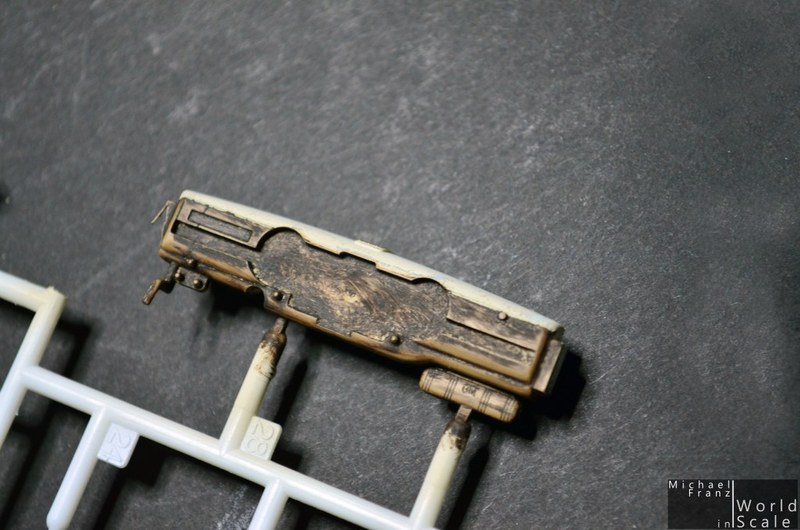
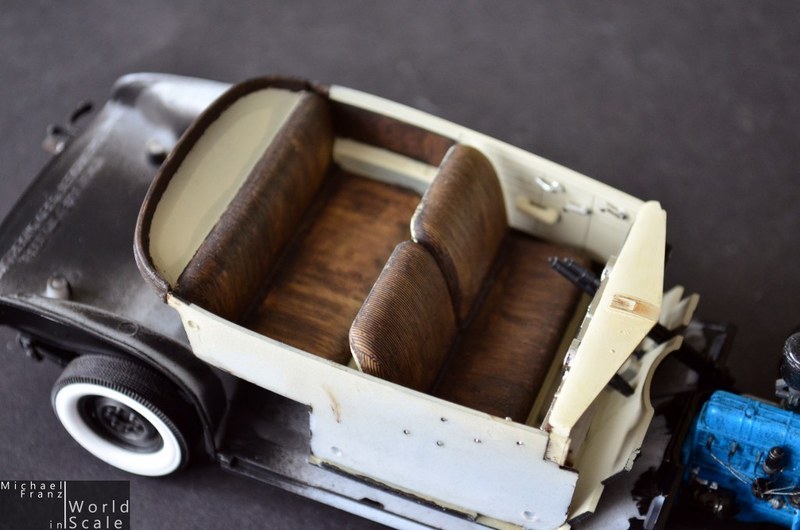
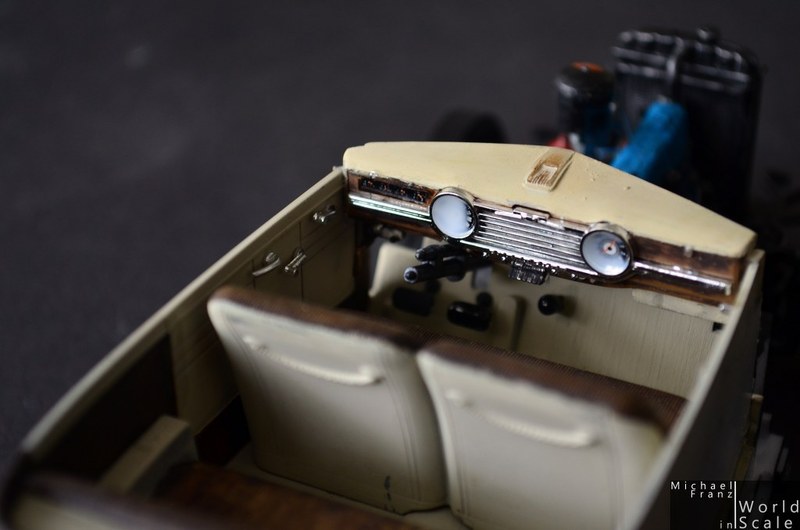
The kit consists of lot of parts on white sprues ... very detailed engine (so many parts only for the engine, very fine parts with smallest details on it), some chrome parts, clear parts, clear red lights, 3-piece body, frame and floor.
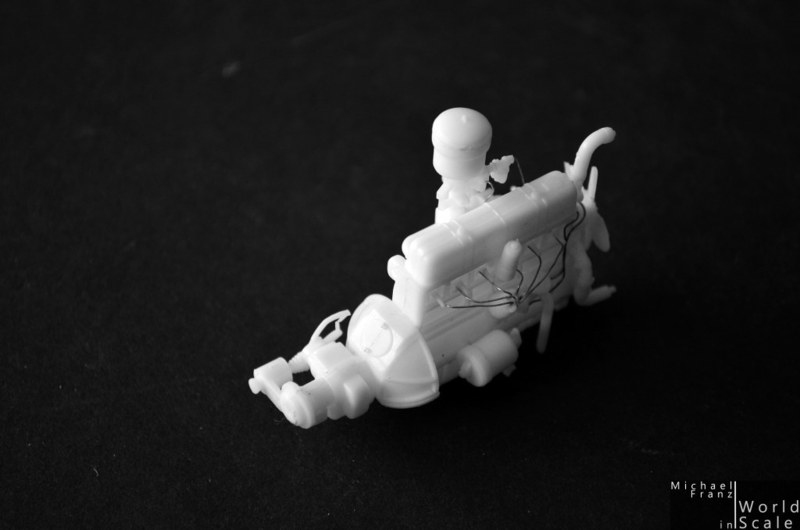
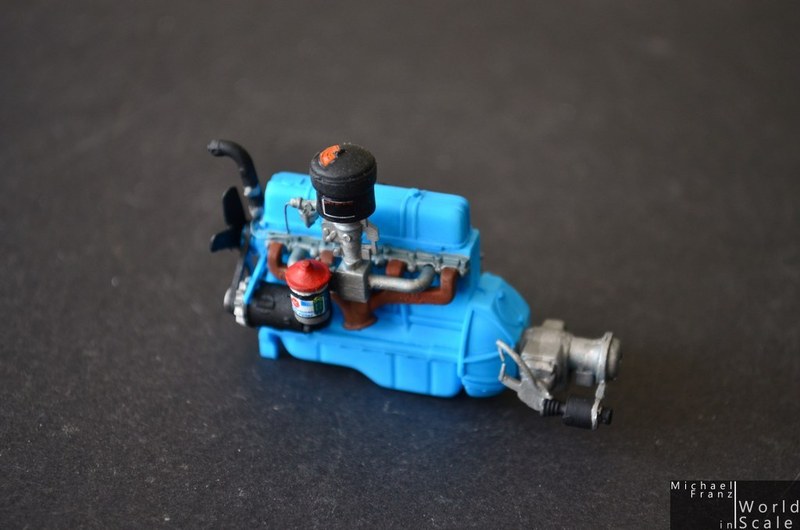
The engine invites to add some wiring .... let's see if I will do so.... I prefer closing the engine hood, but maybe it would be interesting to add some wirings here.

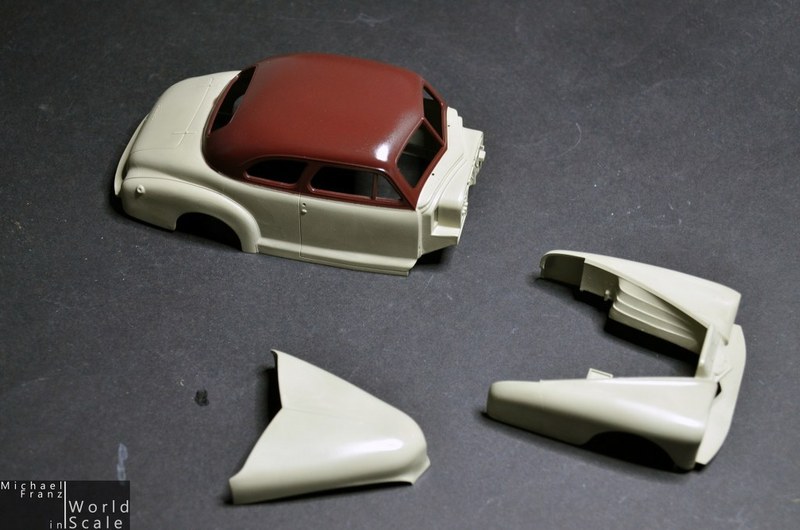
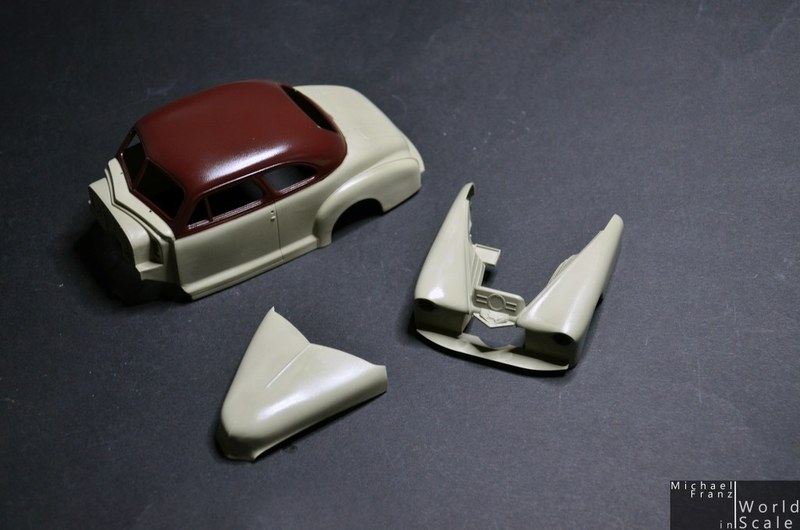
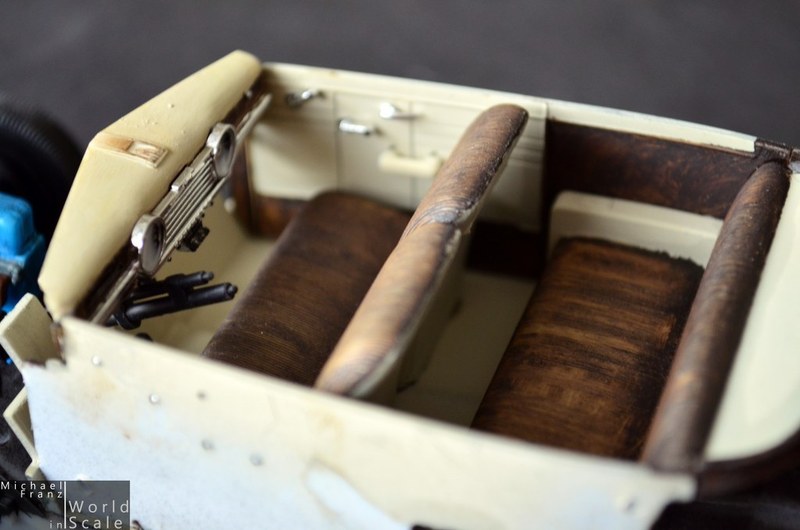
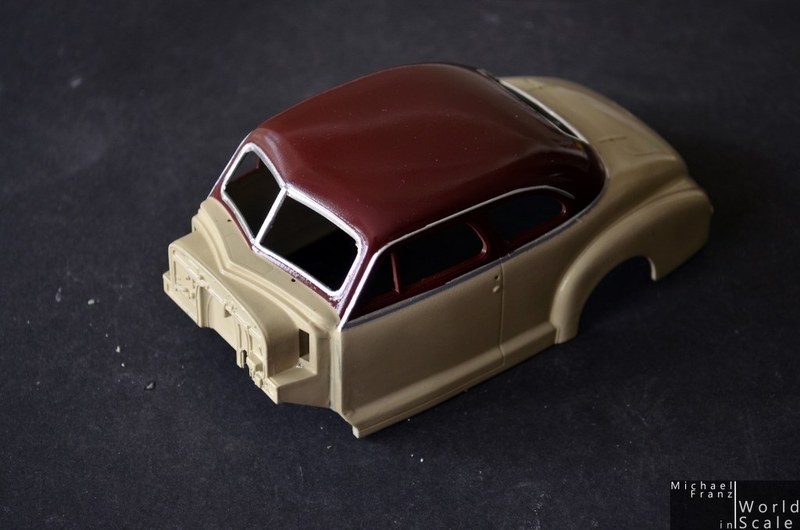
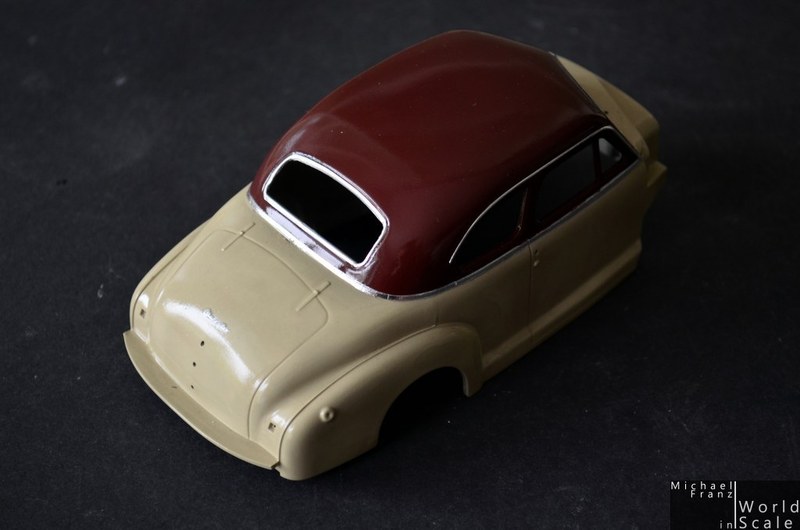
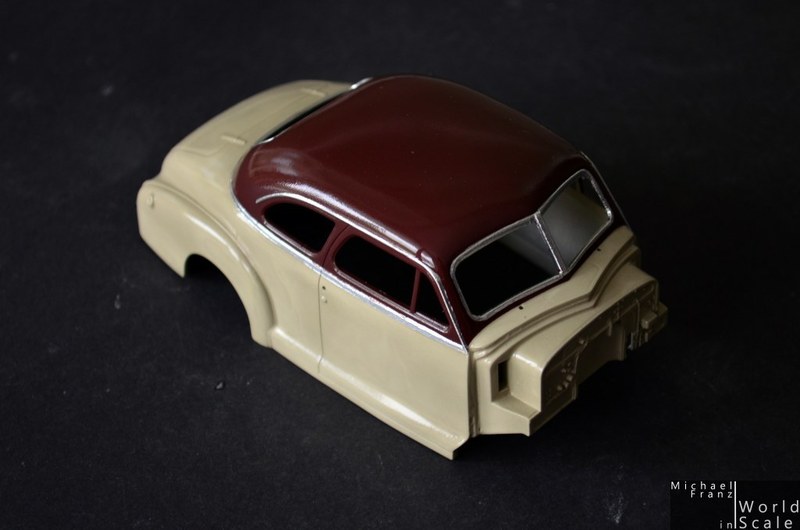
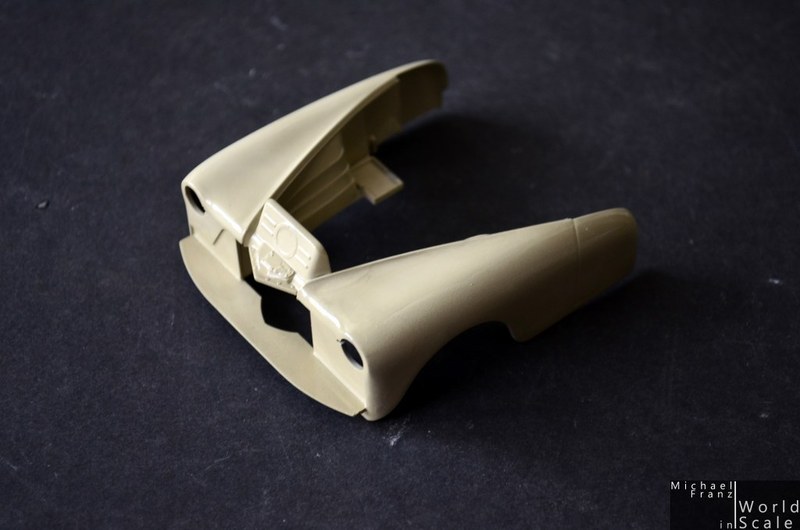
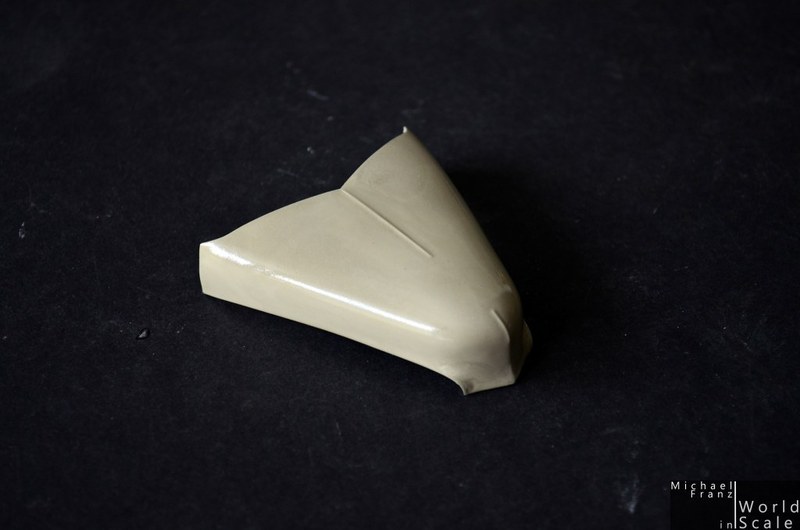
Some first pictures of the body parts... after having sanded some seams on it ...


The engine .... added all parts of the kit now... ready for painting .... or ready for wiring .... Some thin tweezers are necessary to add all these small parts without damaging it.... and it is not so easy to hold the engine with all these small stuff ....


Cheers
Micha
Grumpyoldman
Staff Member_ADVISOR
KITMAKER NETWORK
_VISITCOMMUNITY
Florida, United States
Joined: October 17, 2003
KitMaker: 15,338 posts
Auto Modeler: 203 posts
Posted: Sunday, March 13, 2016 - 07:12 PM UTC
Looking good so far.
Joel_W
Staff MemberAssociate Editor
AUTOMODELER
_VISITCOMMUNITY
New York, United States
Joined: December 04, 2010
KitMaker: 11,666 posts
Auto Modeler: 2,974 posts
Posted: Monday, March 14, 2016 - 03:52 AM UTC
Michael,
Nice start with the body prep, and the engine. I'm not familiar with the maker of the kit, but the engine detail looks exceptional.

I'll be following right along to your conclusion of the build.
Joel
Hwa-Rang
_VISITCOMMUNITY
Kobenhavn, Denmark
Joined: June 29, 2004
KitMaker: 6,760 posts
Auto Modeler: 2,182 posts
Posted: Monday, March 14, 2016 - 12:27 PM UTC
You're of to a good start there Michael.
Szmann
_VISITCOMMUNITY
Netherlands Antilles
Joined: September 02, 2014
KitMaker: 1,977 posts
Auto Modeler: 1,371 posts
Posted: Thursday, March 17, 2016 - 06:03 PM UTC
Michael, good job with the tiny parts.
If I can suggest something, I think the best way to paint these compkicated assemblies is "paint as you go". If you assembly everything first, it will be a nightmare to paint under the exhaust manifold, let say.

Usually I break the greater assembly in sub-assemblies based on the base color, whenever possible or I never put together the distribution belt and pulleys, for instance, before being painted in difficult to reach areas.

As for wiring the engine, I am always shy miself - I just didn't figure out a method good enough for me. Jesper is a master at it, if you need some good advice.

Cheers, Gabriel
elmarriachi
_VISITCOMMUNITY
Baden-Württemberg, Germany
Joined: December 26, 2009
KitMaker: 813 posts
Auto Modeler: 146 posts
Posted: Sunday, March 20, 2016 - 02:35 PM UTC
*** UPDATE ***

The frame of the car was finished, the leaf spings installed and the axles added. The steering is not workable.
The engine received some wiring, was painted in light blue/green after that. All the details are worked out with a fine brush in black, silver, iron and red.
Once the decals were added, a layer of clear coat saved the painting.


Next step - weathering of the engine with oil colors ... Painting the frame ....

Cheers
Micha
Szmann
_VISITCOMMUNITY
Netherlands Antilles
Joined: September 02, 2014
KitMaker: 1,977 posts
Auto Modeler: 1,371 posts
Posted: Sunday, March 20, 2016 - 08:02 PM UTC
So far so good Micha.
Waiting for next upate.
Cheers!
Gabriel
AussieReg
Staff MemberAssociate Editor
AUTOMODELER
#007
_VISITCOMMUNITY
Victoria, Australia
Joined: June 09, 2009
KitMaker: 8,156 posts
Auto Modeler: 2,953 posts
Posted: Monday, March 21, 2016 - 02:51 AM UTC
Looking good, nice neat detail work.

Cheers, D
Hwa-Rang
_VISITCOMMUNITY
Kobenhavn, Denmark
Joined: June 29, 2004
KitMaker: 6,760 posts
Auto Modeler: 2,182 posts
Posted: Monday, March 21, 2016 - 11:45 AM UTC
Looks great Michael.
elmarriachi
_VISITCOMMUNITY
Baden-Württemberg, Germany
Joined: December 26, 2009
KitMaker: 813 posts
Auto Modeler: 146 posts
Posted: Monday, March 28, 2016 - 02:31 PM UTC
*** UPDATE ***

The frame was drybrushed with iron colour, then the engine washed with dark brown and black oil color, then installed in the frame, rusty exhaust followed.

The rubber tires were installed on the rims, the white (airbrushed) rings glued inside with super glue.


Now I will start airbrushing the body of the car. Light beige with a dark red/brown roof. Then clear coat, then bare metal foil for the window frames and clear coat again .... the interior in beige/dark brown...

Cheers
Micha
elmarriachi
_VISITCOMMUNITY
Baden-Württemberg, Germany
Joined: December 26, 2009
KitMaker: 813 posts
Auto Modeler: 146 posts
Posted: Wednesday, March 30, 2016 - 03:42 PM UTC
*** UPDATE ***

Seats, parts of the doors, dashboard painted in light beige first, then masked and partly painted with dark brown oil color. After some minutes od drying, wished the colour away with a Q-Tip... Next will be chrome applications and other smaller paintings.


The body was first primered with Valleyo Black Primer in several thin layers, some sanding under water followed to get a smooth surface.
The beige colur was painted then with the airbrush also in several thin layers, wet sanding between each layer. The beige is Tamiya "Deck Tan".
Once the beige was finished I have masked it and brushed the rooftop and the window area in Tamiya "Hull Red". It is not important if the masking is 100% accurate as there will be a chrome trim all around the car at the line between beige and red.
A first layer of glossy clear coat on the matt Tamiya colours avoids damages on the paint during the applying of the Bare Metal Foil.


Next steps - bare metal foil at the windows and some chrome trim around the body, then several layers of glossy clear coat and wet sanding follow, then polishing.

Cheers
Micha
elmarriachi
_VISITCOMMUNITY
Baden-Württemberg, Germany
Joined: December 26, 2009
KitMaker: 813 posts
Auto Modeler: 146 posts
Posted: Sunday, April 03, 2016 - 03:15 AM UTC
*** UPDATE ***

The interior. Some more parts added, some parts glued together.... missing some clear coat, some repairing in the maint, steering wheel... ...


The body.... the chrome trim parts added with Bare Metal Foil, one layer clear coat to protect it. Now some days drying, then one more clear coat, then drying, then polishing ...


Cheers
Micha
Hwa-Rang
_VISITCOMMUNITY
Kobenhavn, Denmark
Joined: June 29, 2004
KitMaker: 6,760 posts
Auto Modeler: 2,182 posts
Posted: Sunday, April 03, 2016 - 11:47 AM UTC
Love the color combo.
Szmann
_VISITCOMMUNITY
Netherlands Antilles
Joined: September 02, 2014
KitMaker: 1,977 posts
Auto Modeler: 1,371 posts
Posted: Sunday, April 03, 2016 - 09:22 PM UTC

Quoted Text

Love the color combo.


Very elegant, indeed. I have it in mind since long time for a Ford '40... whenever I'll be able to get it started...

Good job, Micha.

Cheers!
Gabriel
elmarriachi
_VISITCOMMUNITY
Baden-Württemberg, Germany
Joined: December 26, 2009
KitMaker: 813 posts
Auto Modeler: 146 posts
Posted: Saturday, April 09, 2016 - 10:06 PM UTC
*** UPDATE ***

One the windows were installed with white glue, then the main body was installed to the frame, then once dried the front part added.
Now the problem came .... and I do not know why this happend. Both parts of the body sit perfectly in their mounting points... but the engine hood is a little bit too short as it seems... I have no idea why.... I tried whatever I could, but I could not fix that problem .....


Now.... next step. Gluing some plastic stripes at the engine hood.... then putty... then sanding... then painting the full engine hood once again ...

Cheers
Micha
Joel_W
Staff MemberAssociate Editor
AUTOMODELER
_VISITCOMMUNITY
New York, United States
Joined: December 04, 2010
KitMaker: 11,666 posts
Auto Modeler: 2,974 posts
Posted: Monday, April 11, 2016 - 12:34 AM UTC
Micha,
I just had a chance to catch up on your build thread. The engine and chassis came out perfectly. As for the hood issue, from the pictures I'm not sure if the rear wheels line up dead center or not in the wells, but in some of the pictures it looks like the body may be off center towards the rear.
The hood lines up perfectly with the front clip, so that's certainly isn't the problem.

Looking forward to seeing your correction. I'm betting it turns out perfectly.

Joel
elmarriachi
_VISITCOMMUNITY
Baden-Württemberg, Germany
Joined: December 26, 2009
KitMaker: 813 posts
Auto Modeler: 146 posts
Posted: Monday, April 25, 2016 - 01:10 PM UTC
*** UPDATE ***

The engine hood is extended and „in the paintshop“ at the moment. In the meantime I have added the chrome parts to the body of the car as well as the licence plates (Texas). The seams at the doors and at the trunk received a fine black line.


Cheers
Micha
Hwa-Rang
_VISITCOMMUNITY
Kobenhavn, Denmark
Joined: June 29, 2004
KitMaker: 6,760 posts
Auto Modeler: 2,182 posts
Posted: Monday, April 25, 2016 - 03:08 PM UTC
Looks beautiful Michael.
AussieReg
Staff MemberAssociate Editor
AUTOMODELER
#007
_VISITCOMMUNITY
Victoria, Australia
Joined: June 09, 2009
KitMaker: 8,156 posts
Auto Modeler: 2,953 posts
Posted: Monday, April 25, 2016 - 08:19 PM UTC
Looking great Micha, love the colour combination!

I have just had to do exactly the same thing on my '67 GTO build, extend the hood at the windscreen end by a couple of mm to close the gap. Not a major exercise but quite frustrating to get a clean build.

Keep up the great work.

Cheers, D
KoSprueOne
_VISITCOMMUNITY
Myanmar
Joined: March 05, 2004
KitMaker: 4,011 posts
Auto Modeler: 851 posts
Posted: Saturday, April 30, 2016 - 10:05 PM UTC
I really like the paint effects you've creating. The seats, underside, tires


elmarriachi
_VISITCOMMUNITY
Baden-Württemberg, Germany
Joined: December 26, 2009
KitMaker: 813 posts
Auto Modeler: 146 posts
Posted: Monday, May 09, 2016 - 02:13 AM UTC
**** FINISHED ****

Chevrolet Fleetmaster Coupé - 1/25 by Galaxy Limited ....


Not 100% happy ... but ok ....

Cheers
Micha
AussieReg
Staff MemberAssociate Editor
AUTOMODELER
#007
_VISITCOMMUNITY
Victoria, Australia
Joined: June 09, 2009
KitMaker: 8,156 posts
Auto Modeler: 2,953 posts
Posted: Monday, May 09, 2016 - 02:36 AM UTC
Very nice build Michael. Your fix on the hood came out very well, and the colour combo is great.

Cheers, D
Hwa-Rang
_VISITCOMMUNITY
Kobenhavn, Denmark
Joined: June 29, 2004
KitMaker: 6,760 posts
Auto Modeler: 2,182 posts
Posted: Monday, May 09, 2016 - 10:39 AM UTC
You've done a beautiful job on this one Michael.
 _GOTOTOP