_GOTOBOTTOM
Motorcycles
Scale motorcycle modeling topics.
THE KNUCK
krow113
_VISITCOMMUNITY
British Columbia, Canada
Joined: March 16, 2010
KitMaker: 473 posts
Auto Modeler: 257 posts
Posted: Wednesday, January 23, 2019 - 01:46 PM UTC
MFH 1/9 1940 or 1947 Harley-Davidson EL, 61 cu. in. , OHV kit.

Reference:

Contents:


I have separated the 10 frame components and will be making an attempt to assemble the entire frame and get it stabilized for a soldering session. As some of these early Harley frames were sweat brazed together in the first place , a real cool start to the model.
Admin: I buggered up the original thread , sorry!
AussieReg
Staff MemberAssociate Editor
AUTOMODELER
#007
_VISITCOMMUNITY
Victoria, Australia
Joined: June 09, 2009
KitMaker: 8,156 posts
Auto Modeler: 2,953 posts
Posted: Wednesday, January 23, 2019 - 02:59 PM UTC
Steve, you're a braver man than I, that's for certain! That is one awesome looking bundle of parts to try to make sense of.

This should be a really fascinating build to follow, best of luck with it.

Cheers, D
krow113
_VISITCOMMUNITY
British Columbia, Canada
Joined: March 16, 2010
KitMaker: 473 posts
Auto Modeler: 257 posts
Posted: Wednesday, January 23, 2019 - 04:34 PM UTC
Thanks Damian.
My industry experience afforded me first hand and hands on of some of these bikes. The frames especially , me being lucky enough to work for a world renowned Harley frame straightening shop. I fell in love with the frames , they re the genesis of chopper building.
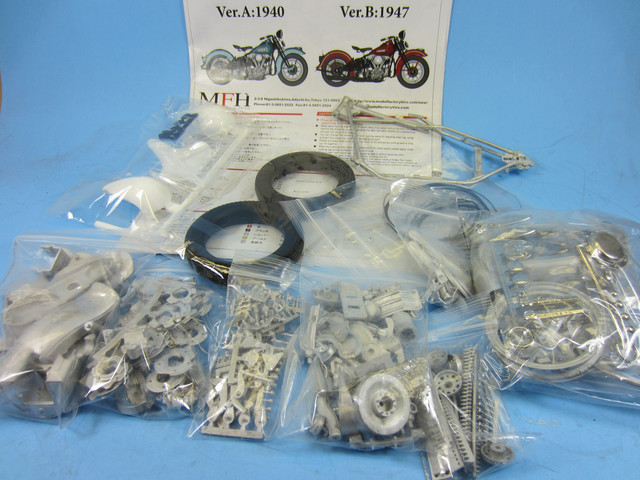
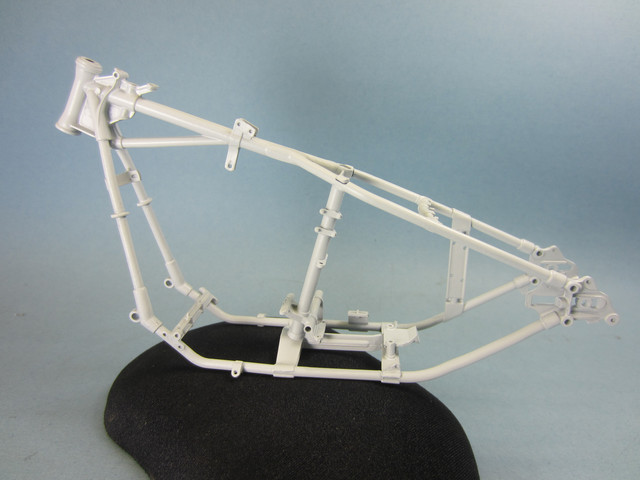
However that not being the case here as this will be a stocker.
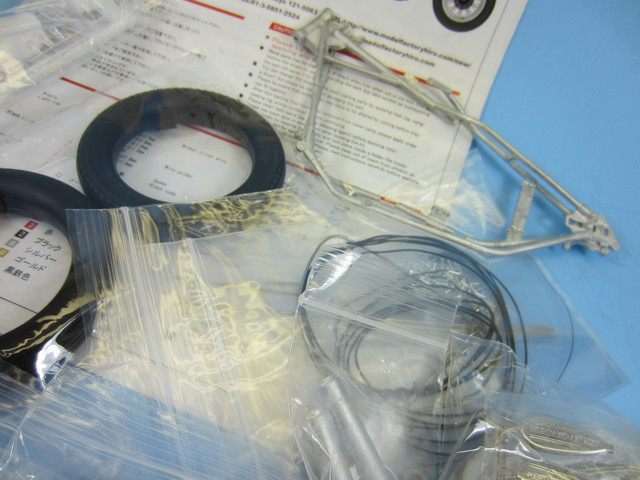
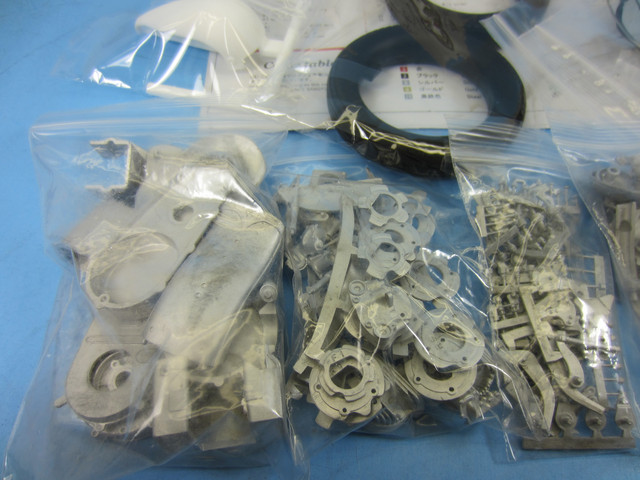
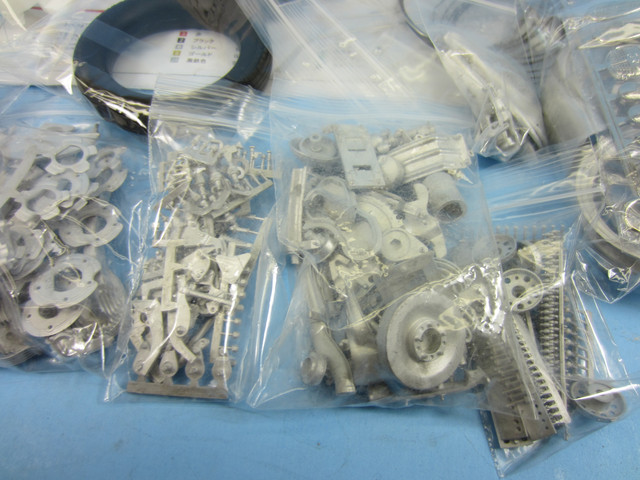
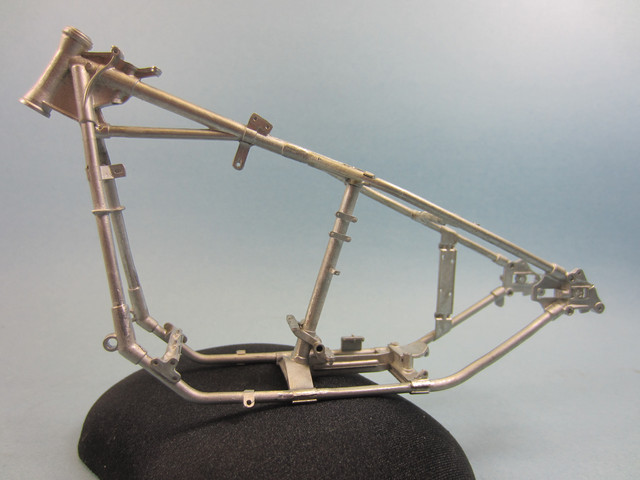
The frame presents some of the most difficult part of this model. The parts breakdown is excellent , going by the real components themselves. The probs occur in the way that the main frame rails are cast to accept the components. My best advice is to not handle the frame at all until yer gonna build it. I did and put it outta kilter.
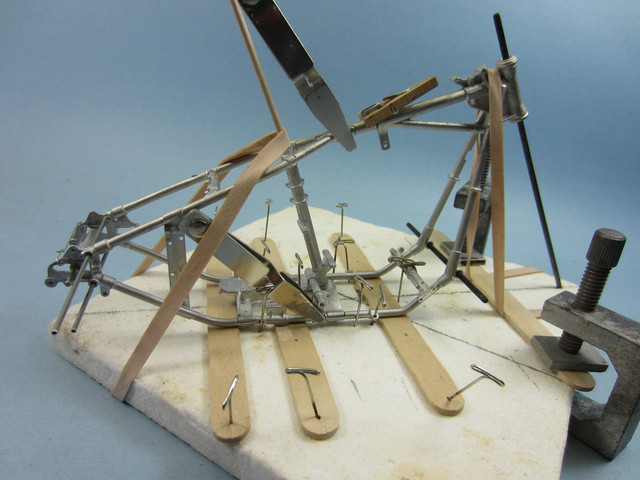
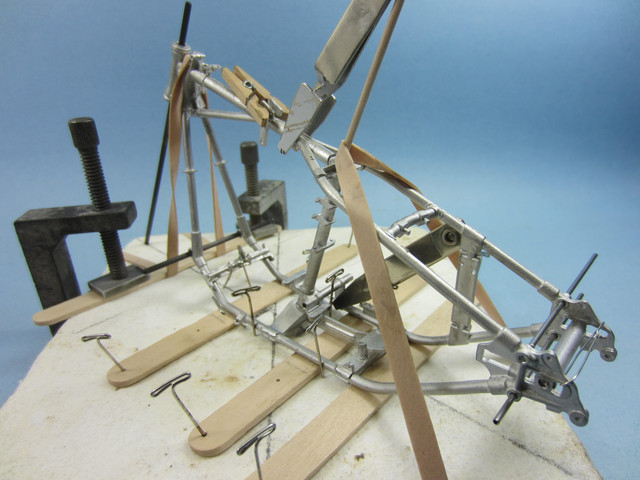
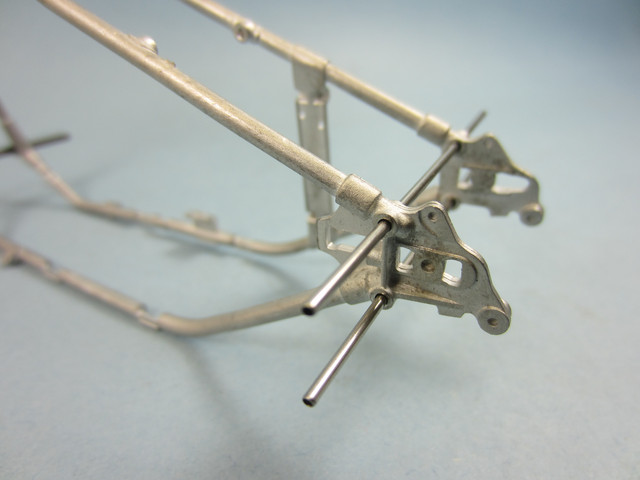
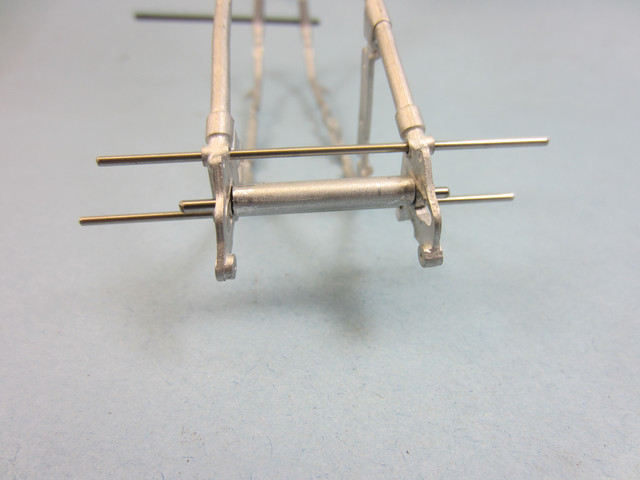
Here the frame has been drilled as an existing one would be and rods inserted to align the parts:

BOOM! Pretty much aligned as it would have been at the factory.

2mm carbon rod and .050 " s/s tube:


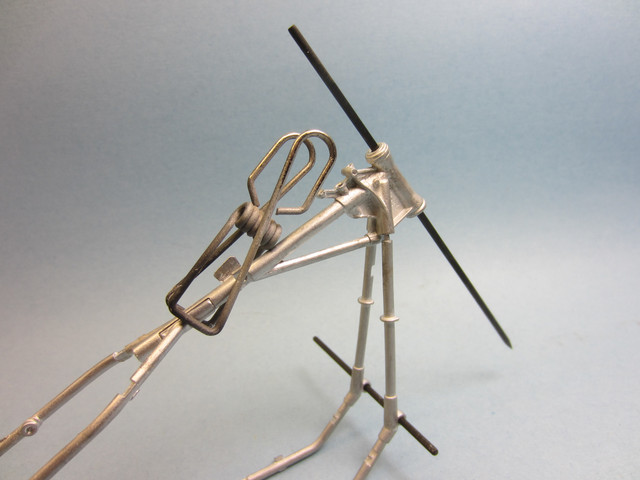
I made a neck alignment tool for S&G's.
Also a flat jig on the soldering pad gets some work:

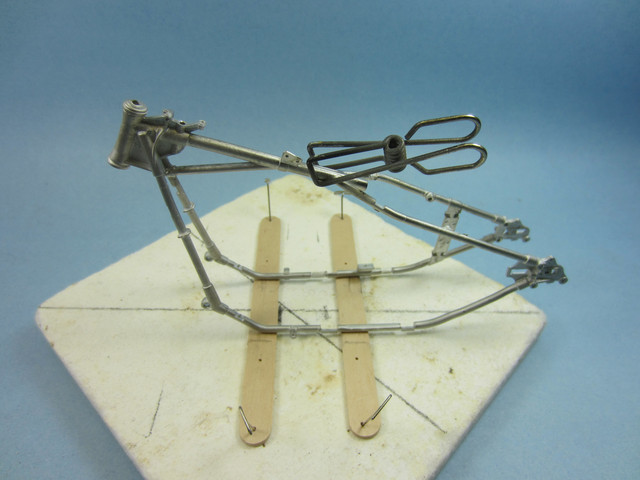
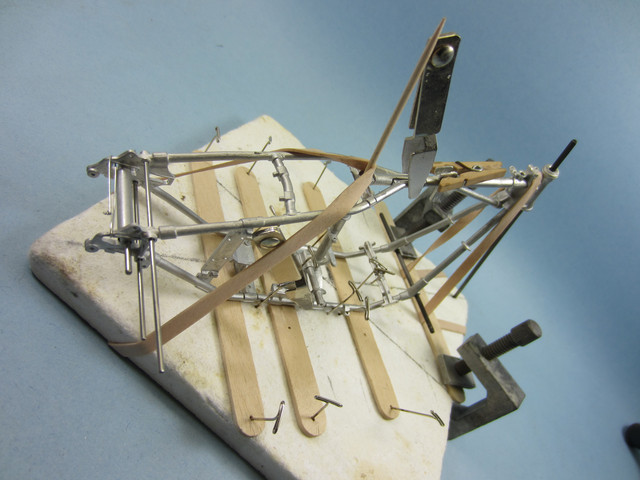
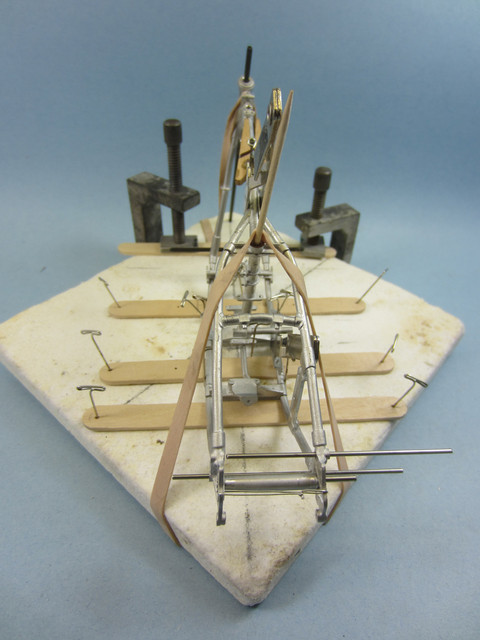
Final work stabilizing the rear of the frame. There is no way this is gonna move or de-align as the frame gets jigged:

A piece of tube cut to the width of the wheel components as a spacer and a 1/16 s/s tig rod piece for an 'axle'.
Heavy concentration here , but no gluing. I tested some of the metal and it can be soldered, that's where we are going here.


Hwa-Rang
_VISITCOMMUNITY
Kobenhavn, Denmark
Joined: June 29, 2004
KitMaker: 6,760 posts
Auto Modeler: 2,182 posts
Posted: Wednesday, January 23, 2019 - 06:24 PM UTC
Very cool project Steve. Don't think I have ever seen one of these being build. Looking forward to seeing it evolve.
krow113
_VISITCOMMUNITY
British Columbia, Canada
Joined: March 16, 2010
KitMaker: 473 posts
Auto Modeler: 257 posts
Posted: Thursday, January 24, 2019 - 07:01 AM UTC
Thanks Jesper.
And evolve it will. Cleaned up frame parts get jigged. Constant checking and alignment as I added the components . This is 9 out of 10 frame pieces:


Huge opportunity's to get things out of line. I know where these parts go and their alignment with the other parts , having said that , I think this could be a really tricky assy for some guys.
I don't know if I can even solder this with alla the stuff in the way! I'll be looking at the assy for a while to figure out a procedure. The frame is tight and held nicely for the work , that's the main thing. Visual cues are easily checked with the neck alignment tool and some pencil lines drawn on the soldering pad. The biggest prob was thebottom of the frame held tight while the top was able to swing 7-8 degrees off center either way. As I added parts the frame stiffened up:

AussieReg
Staff MemberAssociate Editor
AUTOMODELER
#007
_VISITCOMMUNITY
Victoria, Australia
Joined: June 09, 2009
KitMaker: 8,156 posts
Auto Modeler: 2,953 posts
Posted: Thursday, January 24, 2019 - 09:33 AM UTC
Yep, that's just a little bit beyond our traditional modelling methods and requirements! I don't think I've ever seen a combination of ice-cream sticks, toothpicks, clothes pegs, rubber bands, G-clamps, foam sheet scraps, pencils, push pins and steel rod used with such flair. You are hereby awarded the inaugural Automodeler Macguyver Award for Improvisation, congratulations.

Cheers, D
krow113
_VISITCOMMUNITY
British Columbia, Canada
Joined: March 16, 2010
KitMaker: 473 posts
Auto Modeler: 257 posts
Posted: Thursday, January 24, 2019 - 05:53 PM UTC
LOL!
And alla those cool buzzwords , like 'carbon fibre' , s/s (stainless steel ) , and 'spacer'.
Thanks for commenting Damian , i'm not big on awards....

Alla the rods now move freely in their holes , a good sign things are lining up.
Stickframe
#362
_VISITCOMMUNITY
California, United States
Joined: December 01, 2013
KitMaker: 1,661 posts
Auto Modeler: 431 posts
Posted: Friday, January 25, 2019 - 02:20 PM UTC
Hi Steve - nice to see this is underway - the subject is really interesting and I’ve always been curious about how MFH kits go together - coupled with your skill with bikes, this should be a great build!

Cheers
Nick
krow113
_VISITCOMMUNITY
British Columbia, Canada
Joined: March 16, 2010
KitMaker: 473 posts
Auto Modeler: 257 posts
Posted: Friday, January 25, 2019 - 06:42 PM UTC
Thanks Nick.
Best advice: Don't solder your frame!
I managed to pull it off , with the 8 main components held nicely I went about it in a methodical fashion. A few probs but gaining knowledge of the material from scrap tests helped.
So a really nice 10 piece 1/9 scale '39 - '47 EL Harley-Davidson rigid frame:

Metal is really soft , blends well with solder , soldering was easy as pie with the correct rhythm , fine brush to surgically apply flux , butane torch easily handled the heating , but I have a lot of experience joining metals.
2002hummer
#257
_VISITCOMMUNITY
Ontario, Canada
Joined: October 11, 2011
KitMaker: 812 posts
Auto Modeler: 108 posts
Posted: Saturday, January 26, 2019 - 10:13 AM UTC
Just found this build. Even though I am not a Harley fan this build I will follow with interest. The techniques are amazing. Keep up the fantastic. I do think you deserve the award.
krow113
_VISITCOMMUNITY
British Columbia, Canada
Joined: March 16, 2010
KitMaker: 473 posts
Auto Modeler: 257 posts
Posted: Saturday, January 26, 2019 - 04:11 PM UTC
Thanks Darrell.
Went on to clean some of the mould lines off the tubing parts of the frame and blew on some white primer surfacer:

Frame is strong and straight.
 _GOTOTOP