_GOTOBOTTOM
Cars
Discuss all types of automotive modeling here.
"La Déesse" - Citroën DS 21
Cosimodo
#335
_VISITCOMMUNITY
Auckland, New Zealand
Joined: September 03, 2013
KitMaker: 1,808 posts
Auto Modeler: 701 posts
Posted: Monday, July 01, 2019 - 08:39 PM UTC
This is a build of Ebbro's Citroen DS 21, the title being a play on the French pronunciation of DS, which in French means Goddess.
I have written an inbox review of this kit so I won't detail the parts here, but will need to add a postscript to the review some time due to a better understanding now of what's in the box.

First up I wanted to check the panel fit for the opening parts and the roof. So I detached them from the sprues and taped them in place to see how they looked.


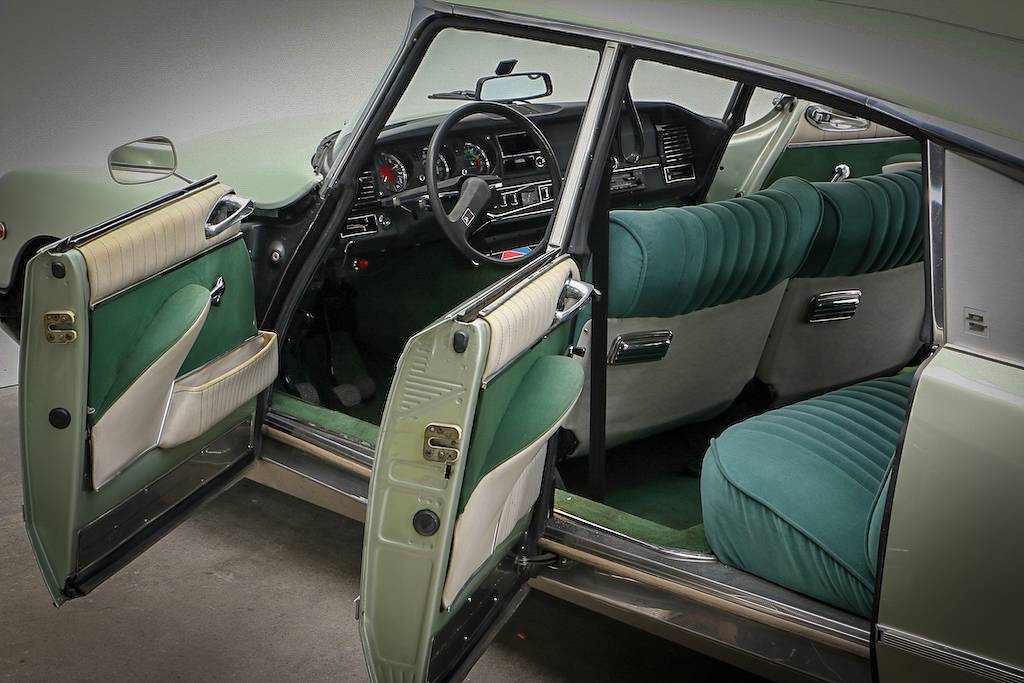
The fit and shut lines are all very good and there is no doubt this looks like DS.
So on to the build. Early steps focus on the engine which looks well detailed but not without some issues.


Ignoring the bluetac holding everything together for the pictures, the second photo shows a large gap in the two halves of the engine block which is how it is. The header also needed a quite a bit of trimming to fit in place. Not great but not irreparable, which is what I did.
The engine and gear box gave me a chance to use my array of Alclad metal colours, some of which I think may be past it.

The engine should be good for a bit of wiring and plumbing if I knew what I was doing, so some research will be required for that.
Here's the engine, still with bits of bluetac, in case I put some extras on.

One small enhancement was to drill out the end of the air intake


and in situ


there's a lot more to go in the engine bay but in following the instructions the firewall and dash are up next.

cheers
Michael
Hwa-Rang
_VISITCOMMUNITY
Kobenhavn, Denmark
Joined: June 29, 2004
KitMaker: 6,760 posts
Auto Modeler: 2,182 posts
Posted: Monday, July 01, 2019 - 09:57 PM UTC
That is a beautiful little engine.
AussieReg
Staff MemberAssociate Editor
AUTOMODELER
#007
_VISITCOMMUNITY
Victoria, Australia
Joined: June 09, 2009
KitMaker: 8,156 posts
Auto Modeler: 2,953 posts
Posted: Monday, July 01, 2019 - 11:13 PM UTC
Nice neat work so far Micheal, looks great! It’s really good to see a variety of uncommon subject matter in the forum like we have now (apart from my tribe of Chevies).

Cheers, D
Joel_W
Staff MemberAssociate Editor
AUTOMODELER
_VISITCOMMUNITY
New York, United States
Joined: December 04, 2010
KitMaker: 11,666 posts
Auto Modeler: 2,974 posts
Posted: Tuesday, July 02, 2019 - 05:03 AM UTC
Michael,
Will be following your build till it's complete and in the books.

Nice job on the engine with those various shades of Alcad. You just gotta add spark plug wires as Ebbro has molded in the top of the plugs so they really stand out.

Joel
Cosimodo
#335
_VISITCOMMUNITY
Auckland, New Zealand
Joined: September 03, 2013
KitMaker: 1,808 posts
Auto Modeler: 701 posts
Posted: Tuesday, July 02, 2019 - 06:52 PM UTC

Quoted Text

That is a beautiful little engine.


Thanks Jesper. It does build into a neat rendition. I just need to do more research on how to bring out the best in it.

cheers
Michael
Cosimodo
#335
_VISITCOMMUNITY
Auckland, New Zealand
Joined: September 03, 2013
KitMaker: 1,808 posts
Auto Modeler: 701 posts
Posted: Tuesday, July 02, 2019 - 06:55 PM UTC

Quoted Text

Nice neat work so far Micheal, looks great! It’s really good to see a variety of uncommon subject matter in the forum like we have now (apart from my tribe of Chevies).

Cheers, D


Cheers Damian. I like quirky in cars and if I had the money I would buy one of these, but restored versions are pretty pricey these days.

thanks Michael
Cosimodo
#335
_VISITCOMMUNITY
Auckland, New Zealand
Joined: September 03, 2013
KitMaker: 1,808 posts
Auto Modeler: 701 posts
Posted: Tuesday, July 02, 2019 - 07:00 PM UTC

Quoted Text

Michael,
Will be following your build till it's complete and in the books.

Nice job on the engine with those various shades of Alcad. You just gotta add spark plug wires as Ebbro has molded in the top of the plugs so they really stand out.

Joel


Hi Joel,
Glad to have some company along for the drive. The ride should be pretty smooth with the hydraulics in this car, the build, maybe not so much.
The spark plug wiring is definitely on the cars. Unfortunately I don't know much about engines. I am not even sure there is a distributor cap in this build. I need some decent close ups to figure out where everything goes so more Googling to sort it all out.

cheers
Michael
Joel_W
Staff MemberAssociate Editor
AUTOMODELER
_VISITCOMMUNITY
New York, United States
Joined: December 04, 2010
KitMaker: 11,666 posts
Auto Modeler: 2,974 posts
Posted: Wednesday, July 03, 2019 - 02:15 AM UTC
Michael,
I googled it, and the distributor is located on the same side of the block as the carb and just to it's rear. From the pictures you posted, they didn't mold one. Easy enough to scratch out as it's only a 4 banger plus the ignition coil wire that's also not molded from what I can see.

Joel
Cosimodo
#335
_VISITCOMMUNITY
Auckland, New Zealand
Joined: September 03, 2013
KitMaker: 1,808 posts
Auto Modeler: 701 posts
Posted: Wednesday, July 03, 2019 - 12:43 PM UTC

Quoted Text

Michael,
I googled it, and the distributor is located on the same side of the block as the carb and just to it's rear. From the pictures you posted, they didn't mold one. Easy enough to scratch out as it's only a 4 banger plus the ignition coil wire that's also not molded from what I can see.

Joel


Hi Joel,
They molded it now I look at the pictures. I's not been applied yet. It just didn't look like the caps I am use to seeing. I will do some experimentation on this and see how it looks.

cheers
Michael
Joel_W
Staff MemberAssociate Editor
AUTOMODELER
_VISITCOMMUNITY
New York, United States
Joined: December 04, 2010
KitMaker: 11,666 posts
Auto Modeler: 2,974 posts
Posted: Thursday, July 04, 2019 - 01:36 AM UTC

Quoted Text


Quoted Text

Michael,
I googled it, and the distributor is located on the same side of the block as the carb and just to it's rear. From the pictures you posted, they didn't mold one. Easy enough to scratch out as it's only a 4 banger plus the ignition coil wire that's also not molded from what I can see.

Joel


Hi Joel,
They molded it now I look at the pictures. I's not been applied yet. It just didn't look like the caps I am use to seeing. I will do some experimentation on this and see how it looks.

cheers
Michael


Michael,
that's good news. Looking forward to your engine wiring.

Joel
RussellE
#306
_VISITCOMMUNITY
Victoria, Australia
Joined: June 27, 2010
KitMaker: 3,959 posts
Auto Modeler: 495 posts
Posted: Monday, July 08, 2019 - 11:32 PM UTC
Well, this looks really great Michael

Following along with interest!

Nice start on the motor
Szmann
_VISITCOMMUNITY
Netherlands Antilles
Joined: September 02, 2014
KitMaker: 1,977 posts
Auto Modeler: 1,371 posts
Posted: Tuesday, July 09, 2019 - 01:24 AM UTC
Looking good so far, Michael!

I just caught up with your build, and I am hooked!

Following it.

Gabriel
Mechworker
_VISITCOMMUNITY
Ontario, Canada
Joined: September 20, 2013
KitMaker: 352 posts
Auto Modeler: 135 posts
Posted: Tuesday, July 16, 2019 - 10:40 AM UTC
Now there's something you don't see every day! What a neat kit, and an absolutely gorgeous job on the engine!

Fantastic work, man!
Cosimodo
#335
_VISITCOMMUNITY
Auckland, New Zealand
Joined: September 03, 2013
KitMaker: 1,808 posts
Auto Modeler: 701 posts
Posted: Tuesday, July 16, 2019 - 07:36 PM UTC
Russ, Gabriel and Adam
Thanks for all the supportive comments, they're much appreciated and glad your enjoying the build.

cheers
Michael
Cosimodo
#335
_VISITCOMMUNITY
Auckland, New Zealand
Joined: September 03, 2013
KitMaker: 1,808 posts
Auto Modeler: 701 posts
Posted: Tuesday, July 16, 2019 - 07:48 PM UTC
Well here's an odd thing, and quite surprising for a manufacturer of Ebbro's quality.


Four internal door panels, only three armrests! If you look at the second panel from the right, the driver's door, it doesn't even have the same indentation and holes the others have to accept an armrest. Even in the instructions it's ignored. This being the upmarket version, the Pallas, I haven't found any photos that shows Citroen didn't think the driver didn't deserve an armrest. I will try and make one out of Milliput.
Despite that setback, I have completed the dashboard.

and with the iconic one spoke wheel

And I have started the paint process for the body. I have used the Gravity primer which is good but it does have drawback of being very light grey and painting a white body shell it is very difficult to see the coverage. next time I will use Joel's primer recommendation.


External colour reveal soon, a classic Citroen blue.

cheers
Michael
RussellE
#306
_VISITCOMMUNITY
Victoria, Australia
Joined: June 27, 2010
KitMaker: 3,959 posts
Auto Modeler: 495 posts
Posted: Tuesday, July 16, 2019 - 09:59 PM UTC
Well, that's really weird Michael! Only 3 armrests!

Maybe it was a really early variant?

Nonetheless that dashboard assembly looks great!
Joel_W
Staff MemberAssociate Editor
AUTOMODELER
_VISITCOMMUNITY
New York, United States
Joined: December 04, 2010
KitMaker: 11,666 posts
Auto Modeler: 2,974 posts
Posted: Wednesday, July 17, 2019 - 01:58 AM UTC
Michael,
Excellent job on the instrument panel. I've always wondered why they went with just one spoke. There doesn't seem a safe way to grasp the wheel when one jams on the brakes or heaven forbid hits something head on. Seems to me that the wheel will just twist and make it all that much harder to maintain control.

I've never used Gravity's Gray Primer as yet. Right now I'm still using Mr. Hobby's 1500 Gray primer which is a light gray compared to Tamiya's Gray primer sealer, but lets you apply white paint without any issues. Makes life a lot easier for us half blind old guys.

As for the missing driver's armrest, that's sure a weird issue. Since Ebbro didn't include one, nor the 3 mounting holes, and the recess does look shallower, maybe their example didn't have one. But if any one needs an arm rest, I would think it would be the driver.

Joel
Cosimodo
#335
_VISITCOMMUNITY
Auckland, New Zealand
Joined: September 03, 2013
KitMaker: 1,808 posts
Auto Modeler: 701 posts
Posted: Wednesday, July 17, 2019 - 07:40 PM UTC

Quoted Text

Well, that's really weird Michael! Only 3 armrests!

Maybe it was a really early variant?

Nonetheless that dashboard assembly looks great!


I like that! Positive thinking. Could be, the French had some quirky designs, none more so than Citroen.

cheers
Michael
Cosimodo
#335
_VISITCOMMUNITY
Auckland, New Zealand
Joined: September 03, 2013
KitMaker: 1,808 posts
Auto Modeler: 701 posts
Posted: Wednesday, July 17, 2019 - 07:43 PM UTC

Quoted Text

Michael,
Excellent job on the instrument panel. I've always wondered why they went with just one spoke. There doesn't seem a safe way to grasp the wheel when one jams on the brakes or heaven forbid hits something head on. Seems to me that the wheel will just twist and make it all that much harder to maintain control.

I've never used Gravity's Gray Primer as yet. Right now I'm still using Mr. Hobby's 1500 Gray primer which is a light gray compared to Tamiya's Gray primer sealer, but lets you apply white paint without any issues. Makes life a lot easier for us half blind old guys.

As for the missing driver's armrest, that's sure a weird issue. Since Ebbro didn't include one, nor the 3 mounting holes, and the recess does look shallower, maybe their example didn't have one. But if any one needs an arm rest, I would think it would be the driver.

Joel


I am definitely in with the Mr Hobby gray 1500. I bought some on the weekend, so next car gets it.
I think I will send an email to Ebbro to see if they have any thoughts on the arm rest conundrum.

cheers
Michael
Cosimodo
#335
_VISITCOMMUNITY
Auckland, New Zealand
Joined: September 03, 2013
KitMaker: 1,808 posts
Auto Modeler: 701 posts
Posted: Wednesday, July 17, 2019 - 07:44 PM UTC
And last night's work.


cheers
Michael
Joel_W
Staff MemberAssociate Editor
AUTOMODELER
_VISITCOMMUNITY
New York, United States
Joined: December 04, 2010
KitMaker: 11,666 posts
Auto Modeler: 2,974 posts
Posted: Thursday, July 18, 2019 - 01:01 AM UTC
Michael,
Very nice progress on the body.

As for the Mr. Hobby 1500 Finishing Surfacer, it's pretty thin as is. My usual thinning of 1:1 for either the Tamiya or Mr. Hobby's 1,200 thinners didn't work well with the 1,500 as it was just to thin to do it's job. So I tried 3 parts 1,500 to 2 parts thinner, and it worked perfectly for me.

Joel
AussieReg
Staff MemberAssociate Editor
AUTOMODELER
#007
_VISITCOMMUNITY
Victoria, Australia
Joined: June 09, 2009
KitMaker: 8,156 posts
Auto Modeler: 2,953 posts
Posted: Thursday, July 18, 2019 - 02:29 AM UTC
Michael, excellent finish on the colour coat there, very impressive!

Interesting regarding the "missing" armrest. I did some Google searches on the model kit to see if anybody else had raised this issue but found nothing. There is a good OOB video review linked on the Scalemates page for this kit HERE but the reviewer doesn't seem to pick up on the fact that there are only 3 armrests on the sprue. I did notice however that there is a good picture of the open drivers door on the side of the box and it clearly shows that there is no armrest there. Very curious indeed. All of the images I could find of 1:1 car interiors clearly showed an armrest on the drivers door.

Looking forward to more progress.

Cheers, D
RussellE
#306
_VISITCOMMUNITY
Victoria, Australia
Joined: June 27, 2010
KitMaker: 3,959 posts
Auto Modeler: 495 posts
Posted: Thursday, July 18, 2019 - 09:43 AM UTC

Quoted Text

Michael, excellent finish on the colour coat there, very impressive!

Interesting regarding the "missing" armrest. I did some Google searches on the model kit to see if anybody else had raised this issue but found nothing. There is a good OOB video review linked on the Scalemates page for this kit HERE but the reviewer doesn't seem to pick up on the fact that there are only 3 armrests on the sprue. I did notice however that there is a good picture of the open drivers door on the side of the box and it clearly shows that there is no armrest there. Very curious indeed. All of the images I could find of 1:1 car interiors clearly showed an armrest on the drivers door.

Looking forward to more progress.

Cheers, D


Hmm... the plot thickens!

One thought that comes to minds is that maybe Ebbro worked off the original prototype/plans for the car but maybe Citroen realized early on that customers wanted a driver's armrest and rectified it quickly after the car's introduction?

Meanwhile, looking very nice Micheal
Joel_W
Staff MemberAssociate Editor
AUTOMODELER
_VISITCOMMUNITY
New York, United States
Joined: December 04, 2010
KitMaker: 11,666 posts
Auto Modeler: 2,974 posts
Posted: Friday, July 19, 2019 - 01:13 AM UTC
Michael,
I've got to admit that the issue of the drivers door arm rest is so unusual that I decided to see what I could dig up for you. Google searchers as usual led to dozens of pictures that when enlarged so that I could read the subject line, was more often then not, Not a DS21, but for some strange reason a DS23. So I went a different route and Headed on over to Hemmings auction site.

Hemmings had a listing for a 1972 Citroen DS21 IE PALLAS for just $45,000 and located in Germany. I checked out the pictures and there were a few of the interior. Here's one of the drivers door that clearly shows an armrest.


the challenge now is to actually find a picture or two of a driver's door without the armrest.

Joel
AussieReg
Staff MemberAssociate Editor
AUTOMODELER
#007
_VISITCOMMUNITY
Victoria, Australia
Joined: June 09, 2009
KitMaker: 8,156 posts
Auto Modeler: 2,953 posts
Posted: Friday, July 19, 2019 - 03:03 AM UTC

Quoted Text

the challenge now is to actually find a picture or two of a driver's door without the armrest.


Quite a challenge. I cannot possibly imaging why the drivers door, or any door for that matter, would be the 1 door without an armrest. I suspect that this is simply an error by Ebbro which will be rectified in future production runs, and possibly an offer of an extra part for those who have purchased this boxing.

Cheers, D
 _GOTOTOP