


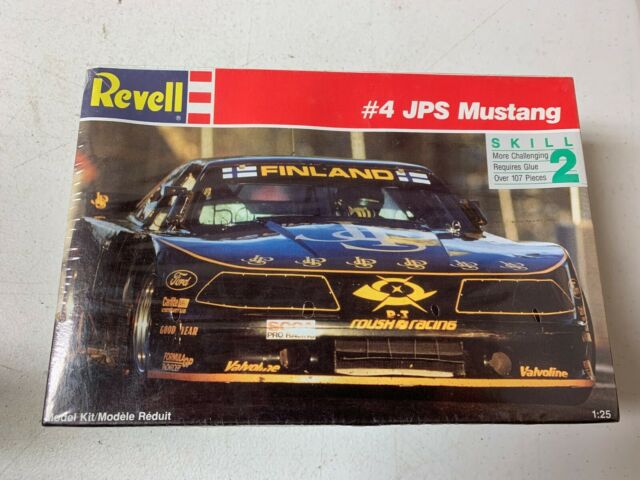
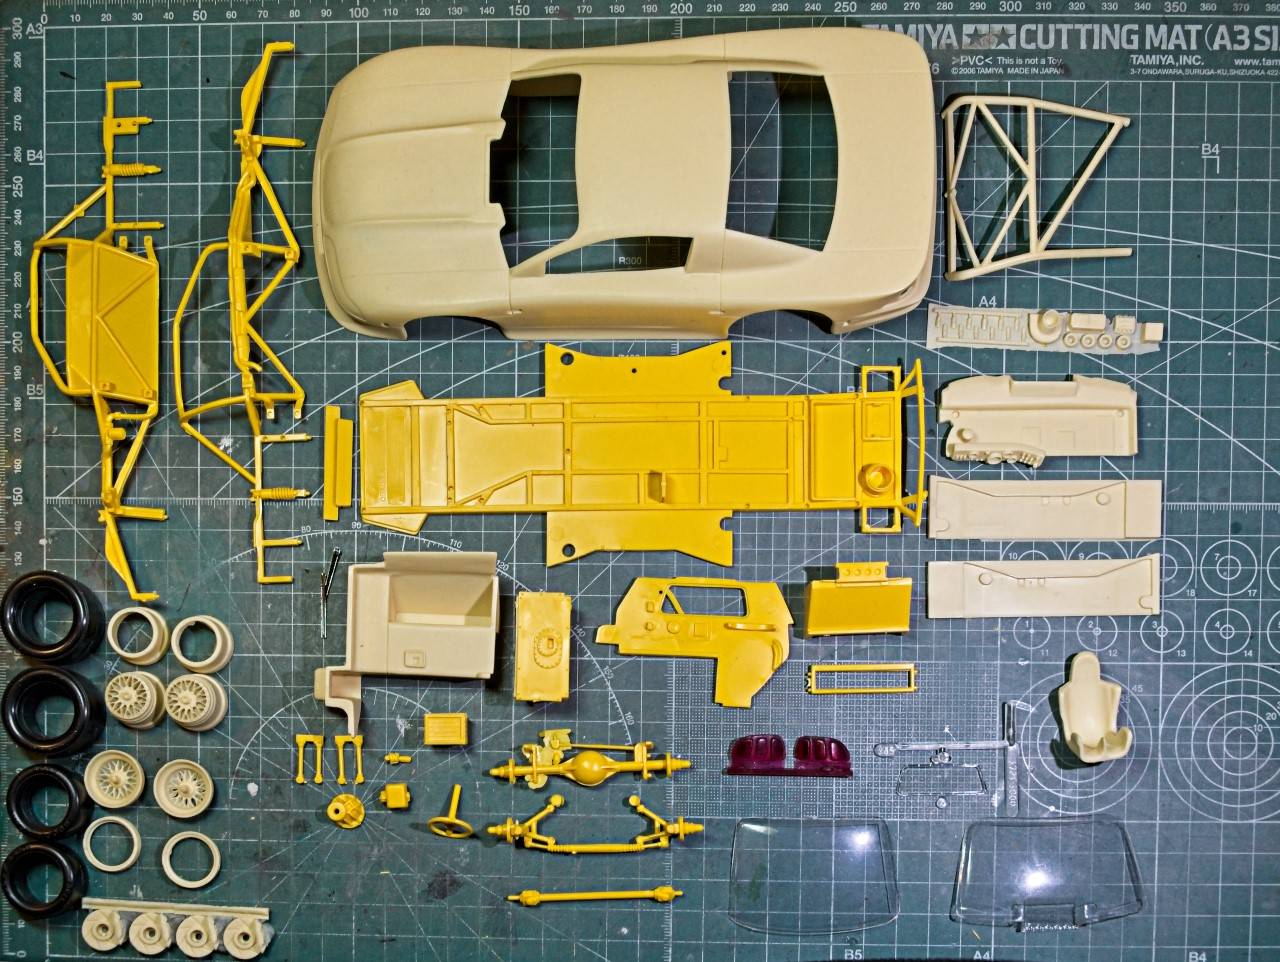
A modeling buddy from another model racing car list had been one of the designers of the BHP 1997 Trans Am Mustang Conversion kit. He asked me if I wanted one as he has a few still left just gathering dust on a closet shelf, as he had already built several of them. I jumped at the offer. Of course it never occured to me that I needed a donor Revell kit. Fortunately for me, Bill (my buddy) also sent me all the kit parts needed as he had quite a few of these donor kits, one for each of the rest of the transkits. He's the full transkit. The lighter color parts are the resin parts. The tires are from the kit, but the wheels will be a combination of both kits or just the transkit. All depends on how wheel I can pull of the modifications.
Since the GB rules will only award you a single ribbon no matter how many builds you finish, I decided that I'd save the Revell kit for that, and start the Transkit now.
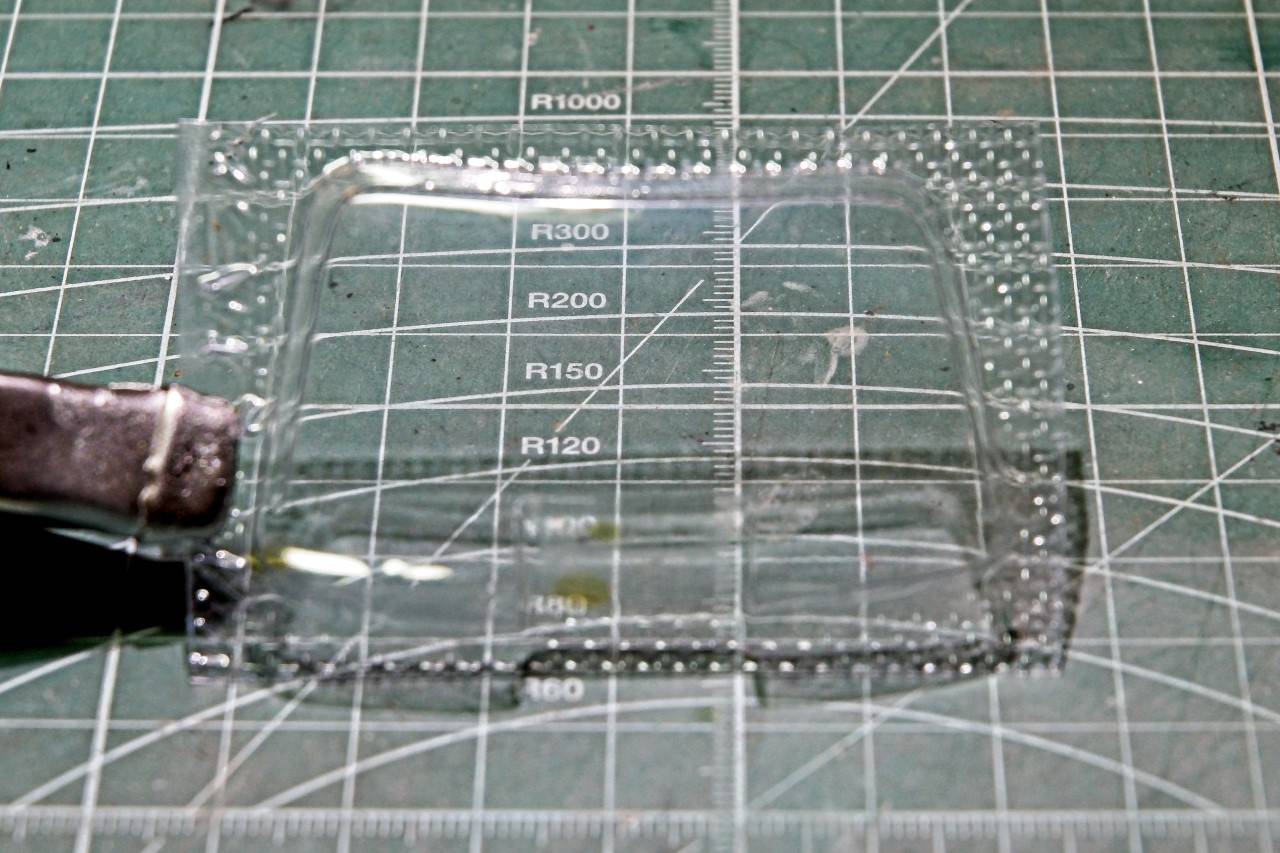
Now lets keep in mind that I've never built a transkit, nor even worked with a resin body either for cars nor aircraft. All I've ever done is struggle cutting off of their blocks a few rotary engines, and nearly screwed those up. Bill also informed me that there was no kit glass, but rather the front and rear glass was clear vacuform parts. OH NO, another major issue. I've never successfully got one to fit aircraft builds after trying a few times, and eventually just gave up trying. So my Mojo and confidence levels was rapidly taking a nose dive to nearly 0!! But still, out of respect and thanks to Bill, I was going to give it my best shot.
I started the Transkit with major issue #1, the front and rear vac glass. Literally I had no idea of how to accomplish this where both would fit and look the part. Here's what the rear glass looks like:
And the front glass just to make it a little more interesting has the carb intake molded in. That's going to be a whole new experience working with sheet plastic to simulate the Aluminum ducting within the vac glass.
Well, I cut each side off about an 1/8 of an inch from what looked like the actual window part, then fit snip test, fit snip test, what seemed like hours. But eventually I actually got the rear glass to fit pretty good. It still needs some final work but I'm home free there.
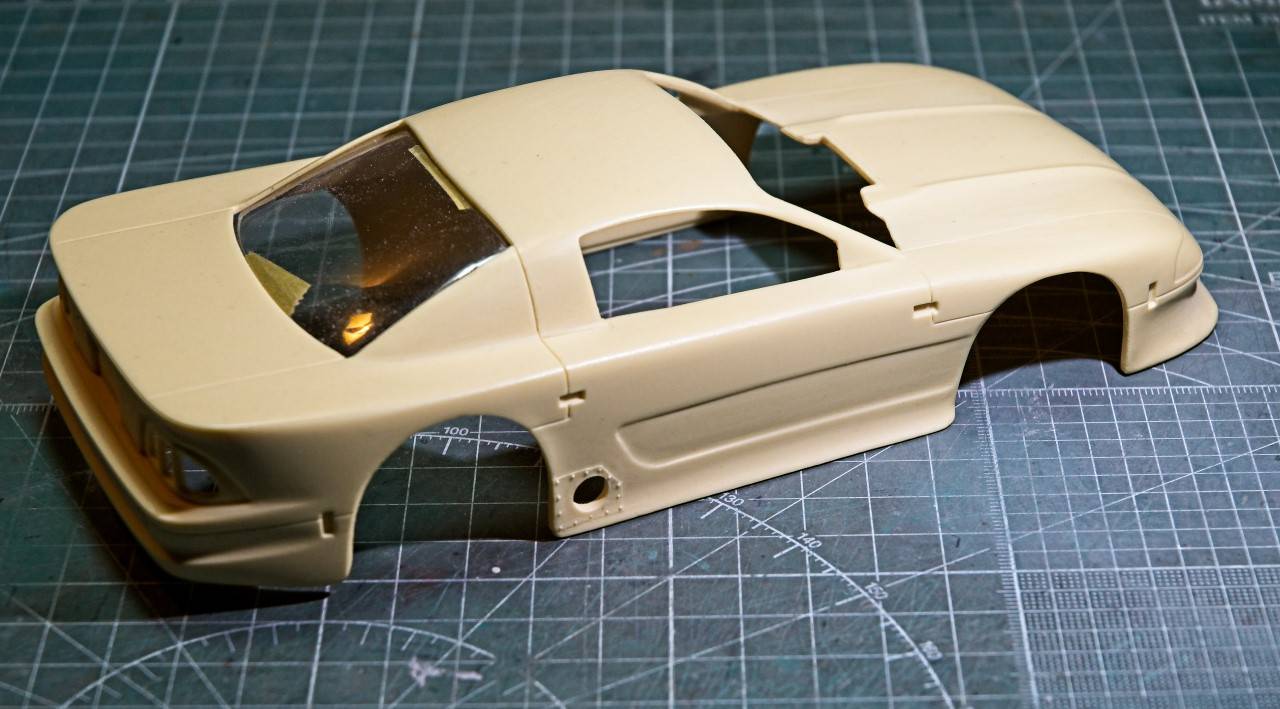
Then I went to work on the front windshield. Same method, but more time needed for the duct. I also got that to fit pretty good, but more finessing is going to be needed as well. Sorry but in all my excitment I forgot to take a picture of it taped into place. But you'll see it soon enough.
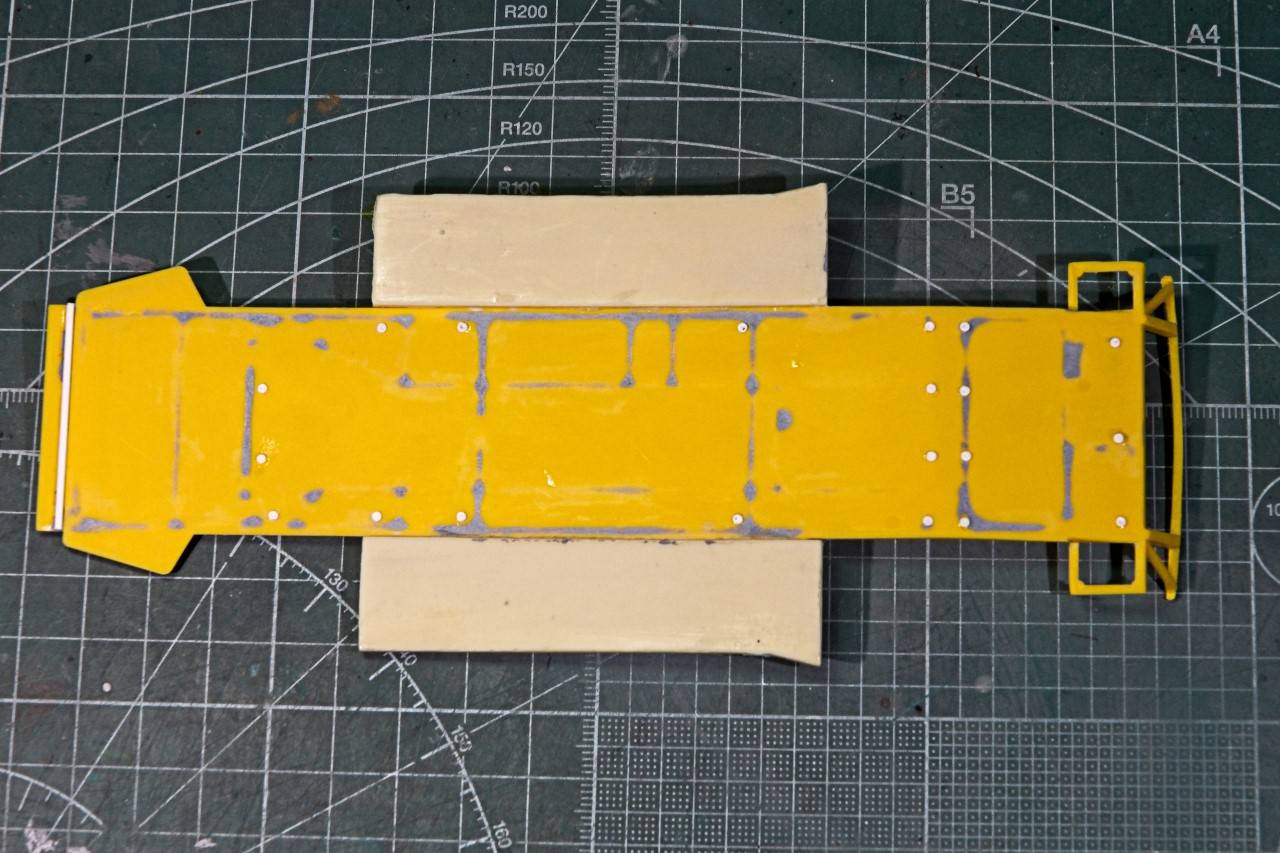
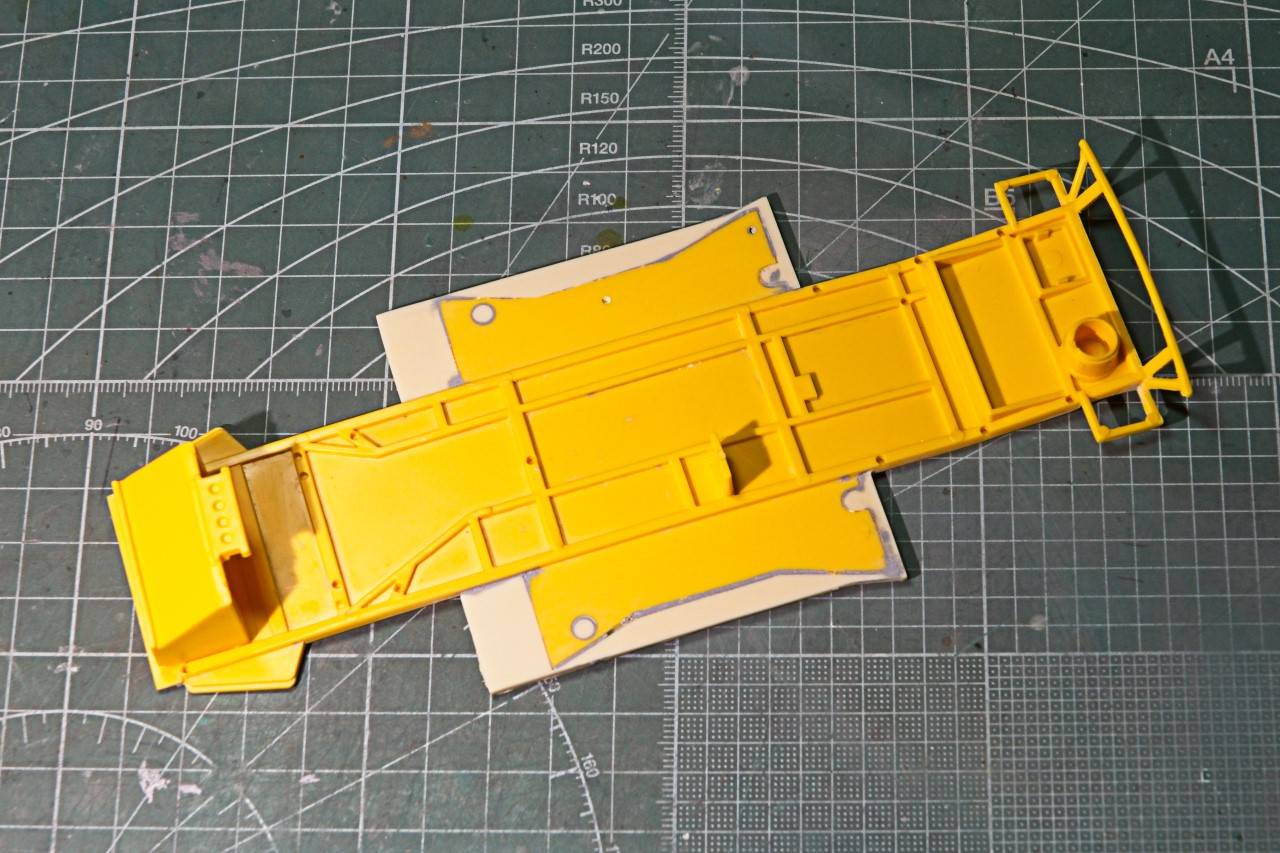
Next up was dealing with the chassis and the resin parts that are added to it. The Revell pan had huge sink channels on the bottom side that ran opposite the molded on chassis rails on the topside. Never seen that before. I used several coats of Tamiya Gray filler sanding in between applications till I got it filled and smooth. Of course I still need to seal all the filler as it's porous to even my poor eyesight. In the process of sanding I managed to remove all the molded on Dzus fasteners which really don't make much sense to me as why they're there in the 1st place. But since I didn't have a single picture of the bottom of the pan, I made new ones out of punched out .010 sheet plastic. I also managed to completely sand off the support plate at the front of the chassis for the mounting bracket from the kit. So that was made from plastic strip.
Now I had to deal with my 1st resin parts. the extensions of the lower pan that is the attachment points to the body shell. Well, one fit ok, and the other wasn't close. So on with the respirator, and sand, check, sand check, etc. till it fit. Well, I was a little to agressive in places, so after gluing both sides into position with CA Gorilla glue and taping. The following day came filling the main gaps with CA Gel, letting it dry for several hours, then a coat of Tamiya filler. The following work session I sanded, and polished both sides. For some reason the resin sides are thicker then the molded pan, but again I have no references to prove that right or wrong, so I left it that way.
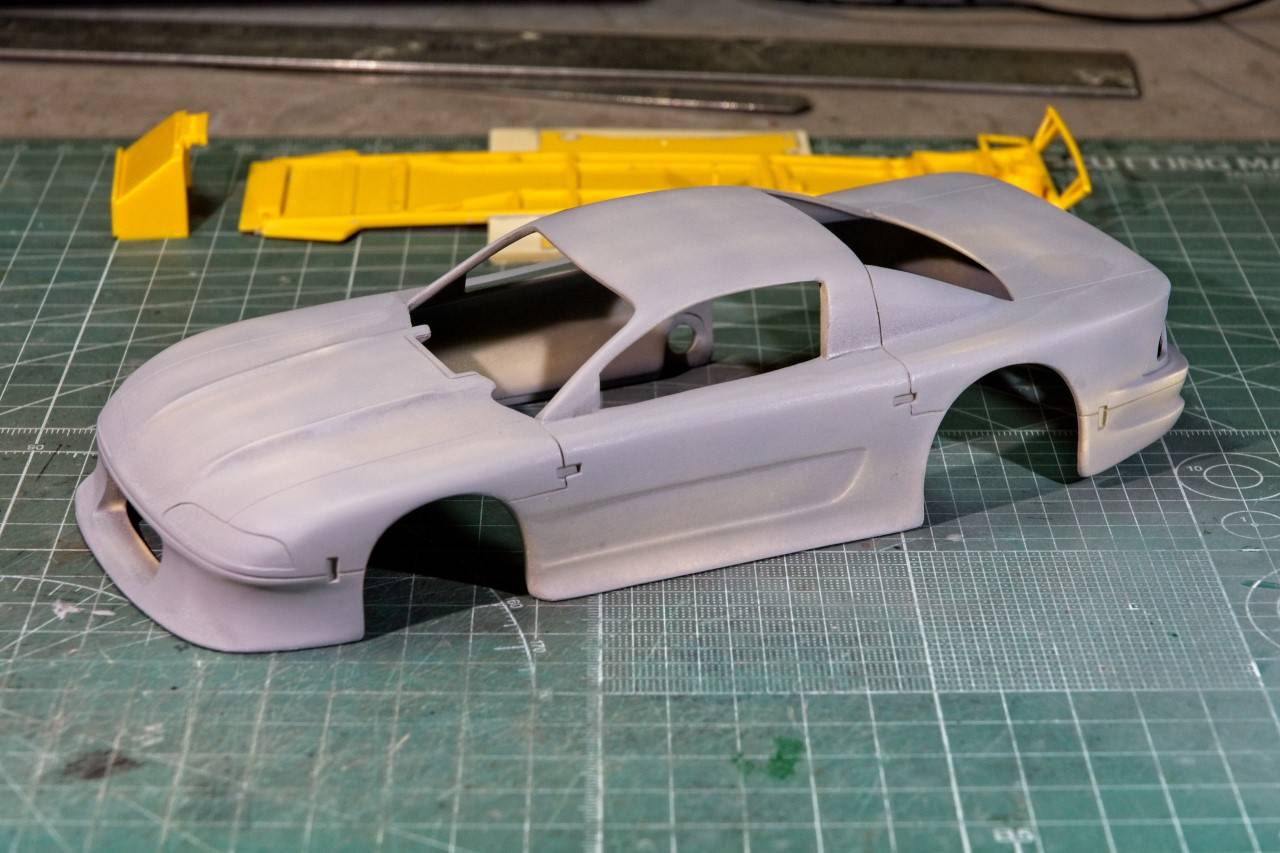
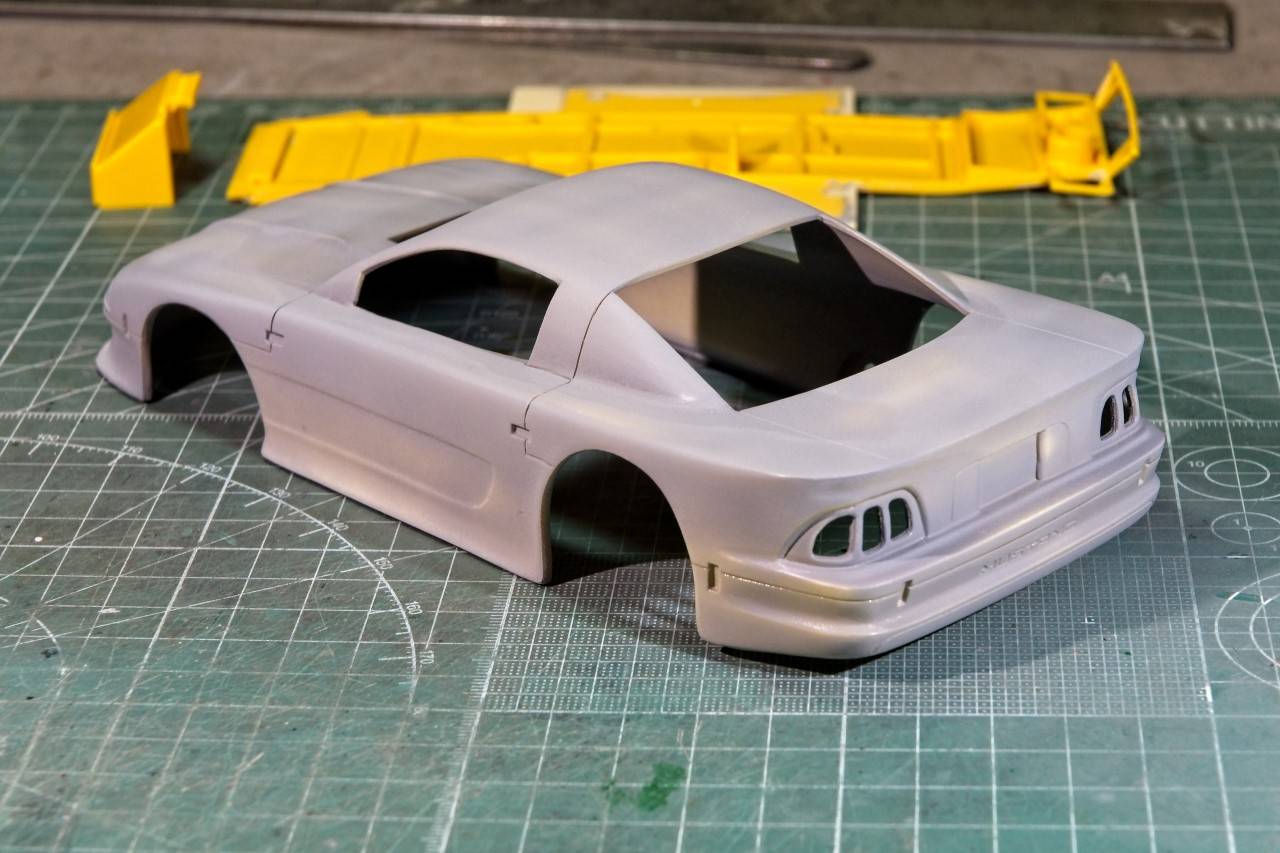
As per my usual build method, I like to do the body shell 1st for a closed wheel car. So I had to decided on exactly what car I was going to do. Well, it wasn't to hard to figure out. Tommy Kendall, one of my all time favorite Trans Am drivers, drove the 1997 All Sport Roush Cobra Mustang. Bill has also sent me Slixx decals for Kendalls car, so it's a double plus. The car is Black with a molten Greenish trim, so I went with a light Gray primer. I had decided to test out MCW pre-thinned primer and had bought two bottles when I bought the correct colors needed for the Folgers car, and the Valvoline March Indy car that Little Al drove (a build for this winter).
My usual primers have always been Mr. Hobby's #1500 Gray & Black, and Tamiya's White while I use their gray as a brushed on filler like the putty work above. I mix the #1500 1:1 and it's pretty thin but not like the MCW primer, it's like water. But I went with it as a lot of the pre-mixed lacquer primers are like that.
I used my Grex AB/.5mm setup with a flow rate of 16 psi and a moderate amount of paint for the tack coats. What always was just two coats, 4 were needed with about 5 min between coats. Then I usually apply 2 wet coats. I also needed 4 good wet coats. I also did the inside of the shell as that's the color the fiberglass is in my references. I ended up using nearly a full bottle, I'm sure that Zero's primer is the same. Come to think of it, these primers are the same consistancy as their paints, which I do love. So I'm sure it's just me. But honestly, for a primer, it's just to expensive using theirs. I can always thin #1500 a little more, but I do prefer the 1:1 thinning ratio for ease of use.
I gave the shell a full day to dry and cure. With all the primer I applied, the surfaces were certainly more then a little rough. So I wet sanded as usual, but it needed a lot more sanding. The end result is just right for the color coats.
So far so good. My confidence and Mojo levels are rising with each job completed. I just might actually get this model across the finish line.
Joel


