


Quoted Text
hotel room size fridge
I read that all wrong for the first 5-10 times.


hotel room size fridge

 Just glad I didn't post hotel sized fridge. ROTFLMYAO


 Really shows well, thanks for sharing the technique. Usta feed the baby Pedialite, rice and oatmeal when those things happened.


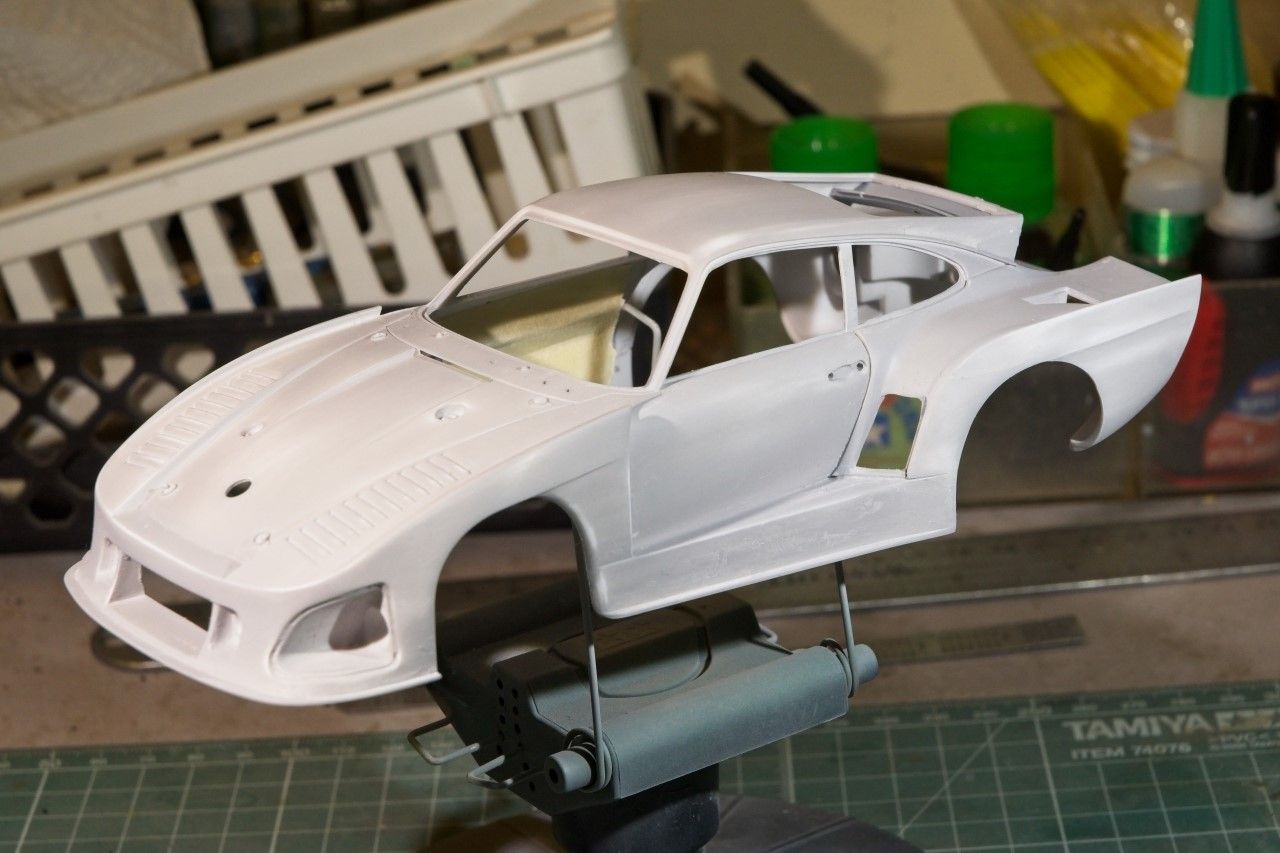
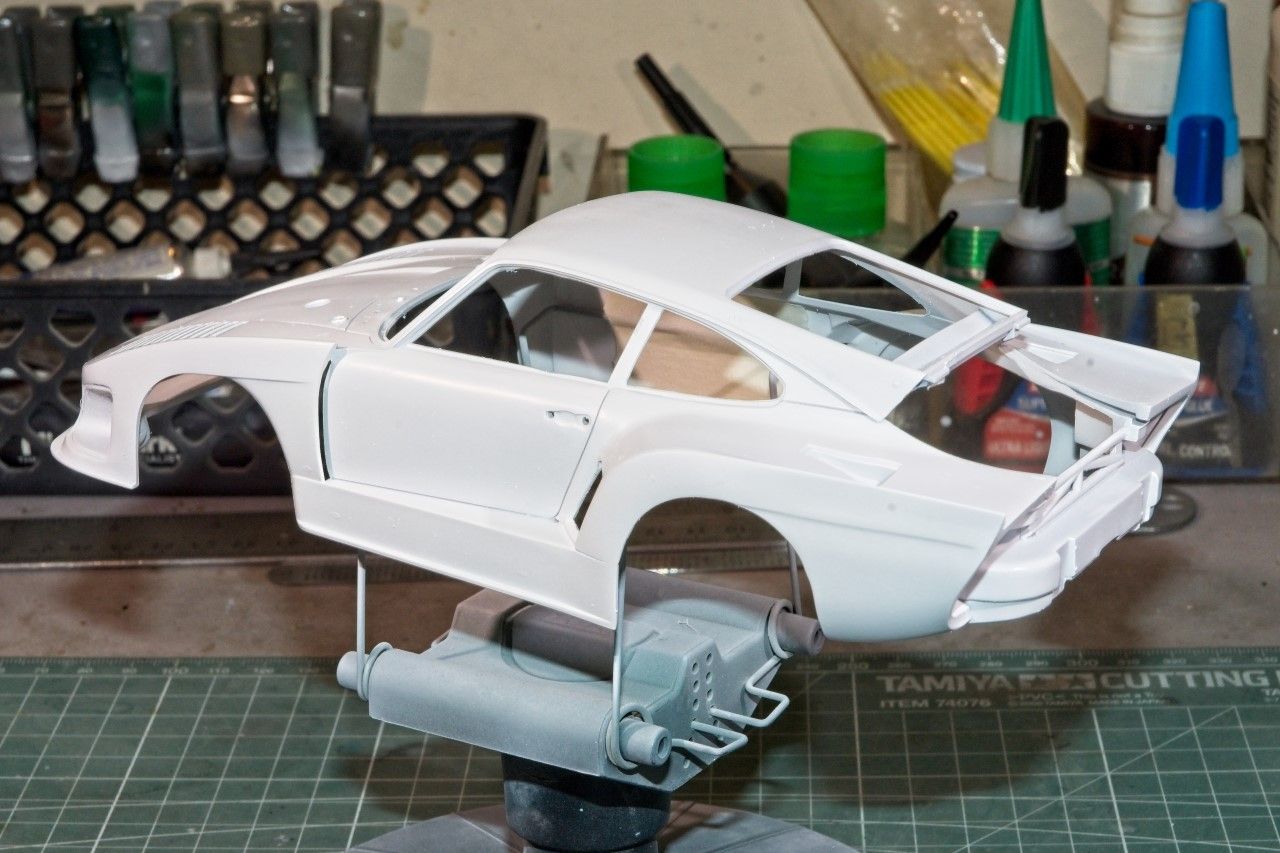
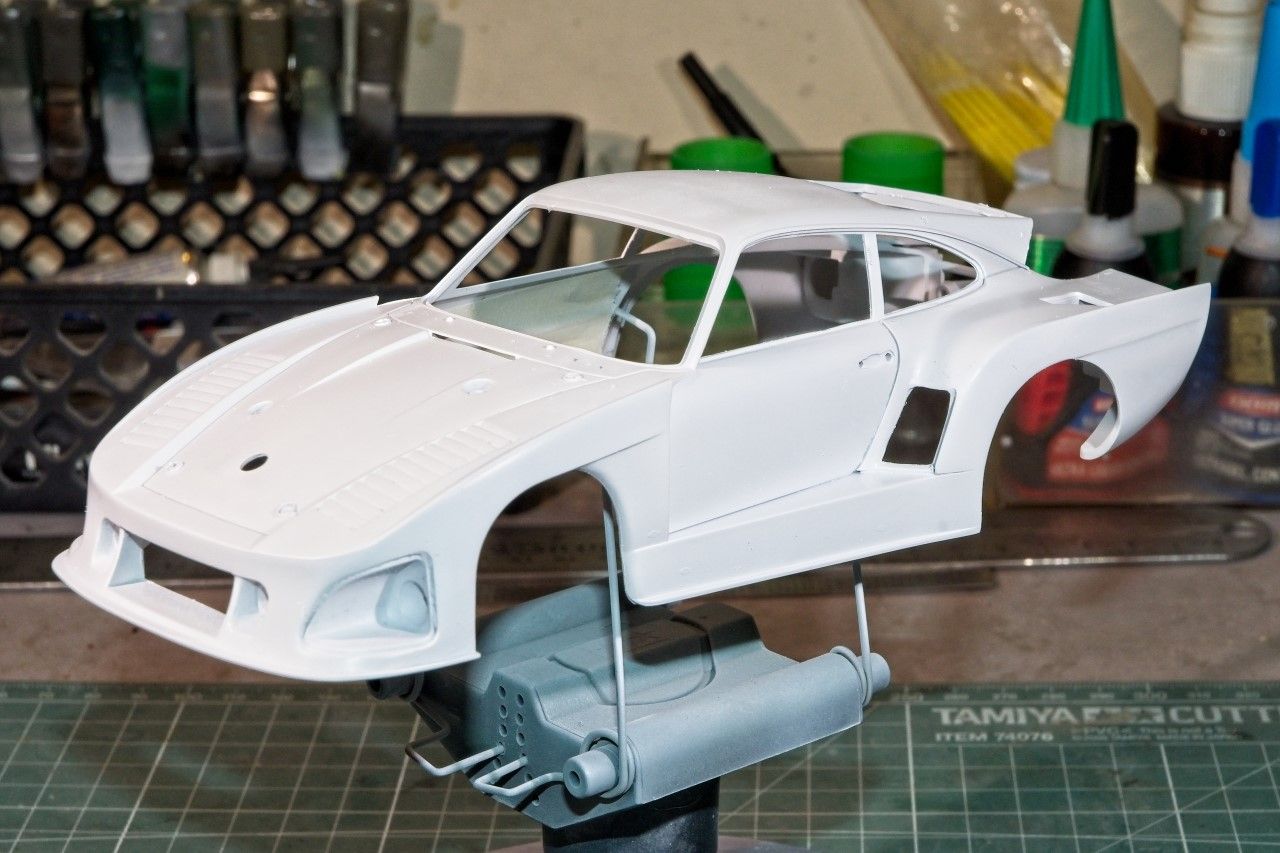
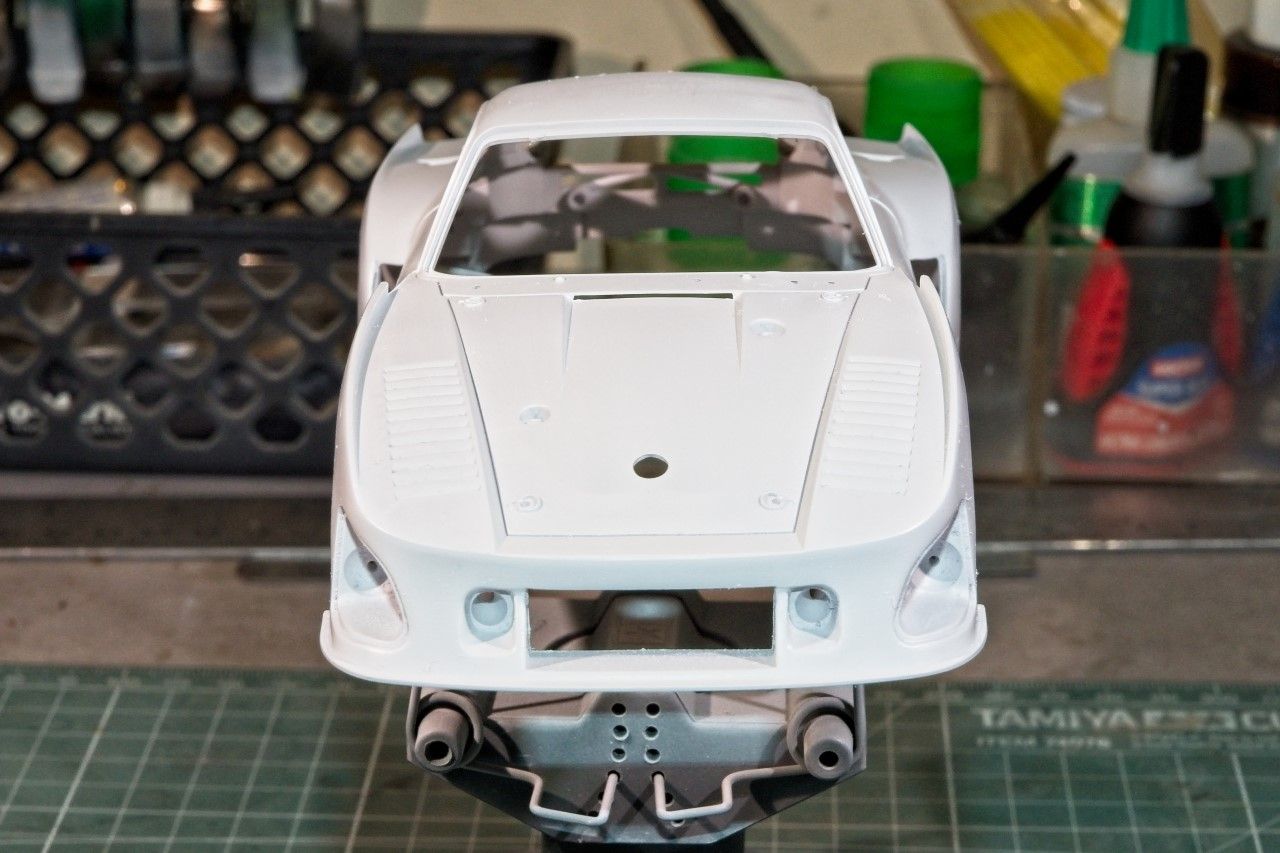
Great 3P's (prep, primer and paint) job on the shell Joel, it certainly won't take much effort to get it really shining now!
Cheers, D


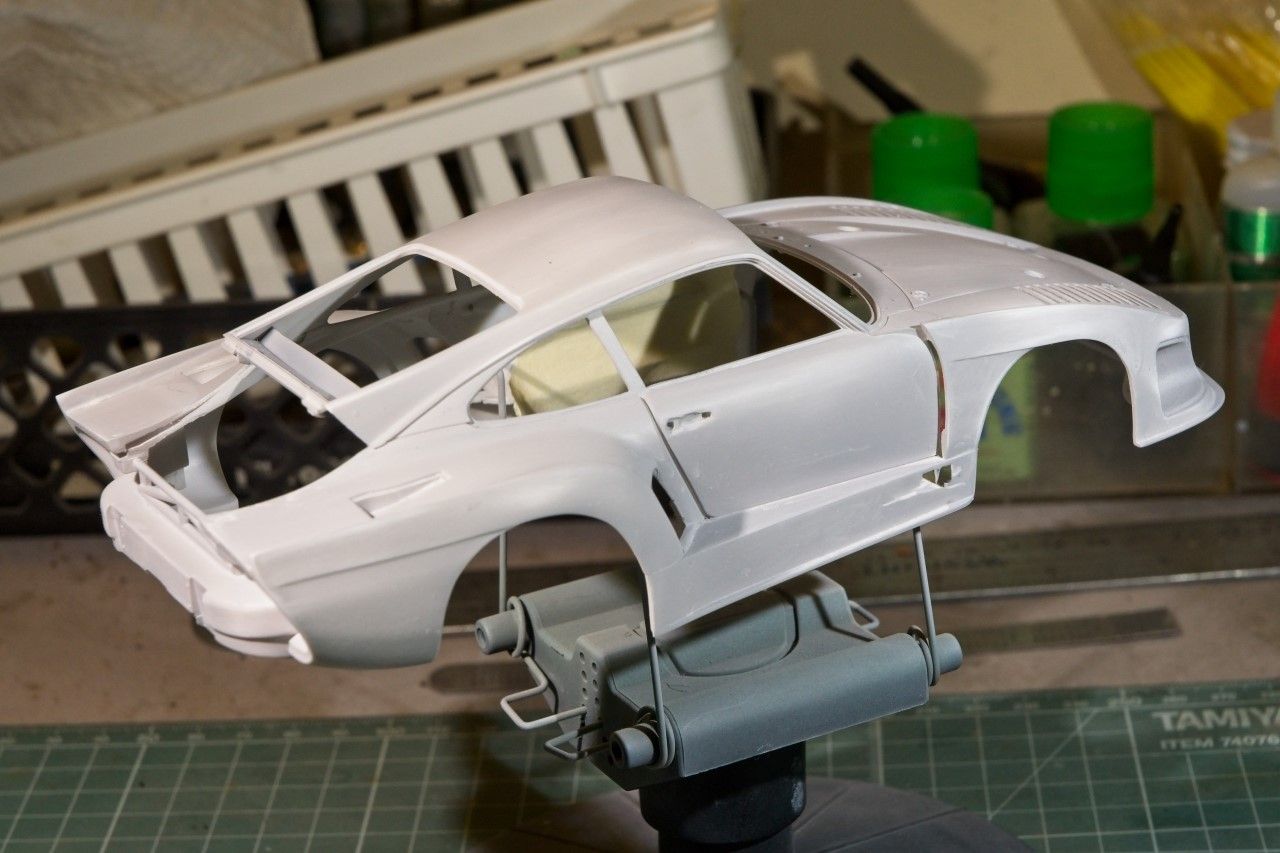
 I have seen it actually since a few days, since I started re-posting, but I knew I have to take my time over it and read it properly. And this morning I had the time and the mindset to go over it, sipping my coffee and satisfying my other bad habit (besides modelling, of course) A bad spraying session can be easily fixed (unless it is a badly botched 2K session), but bad preparation cannot be fixed unless the model is stripped back to bare plastic and many modelers (including myself) just don't have the guts to do it.


 - this is going to be a stunner!
  - but the challenge is try to replicate the results; I used to brush-paint flawless gloss coats that I wouldn't dare attempt nowadays without an airbrush.
 Rowan ...When You see the pictures of the 935 K3, you be a convert too.
Joel
 ).
). 

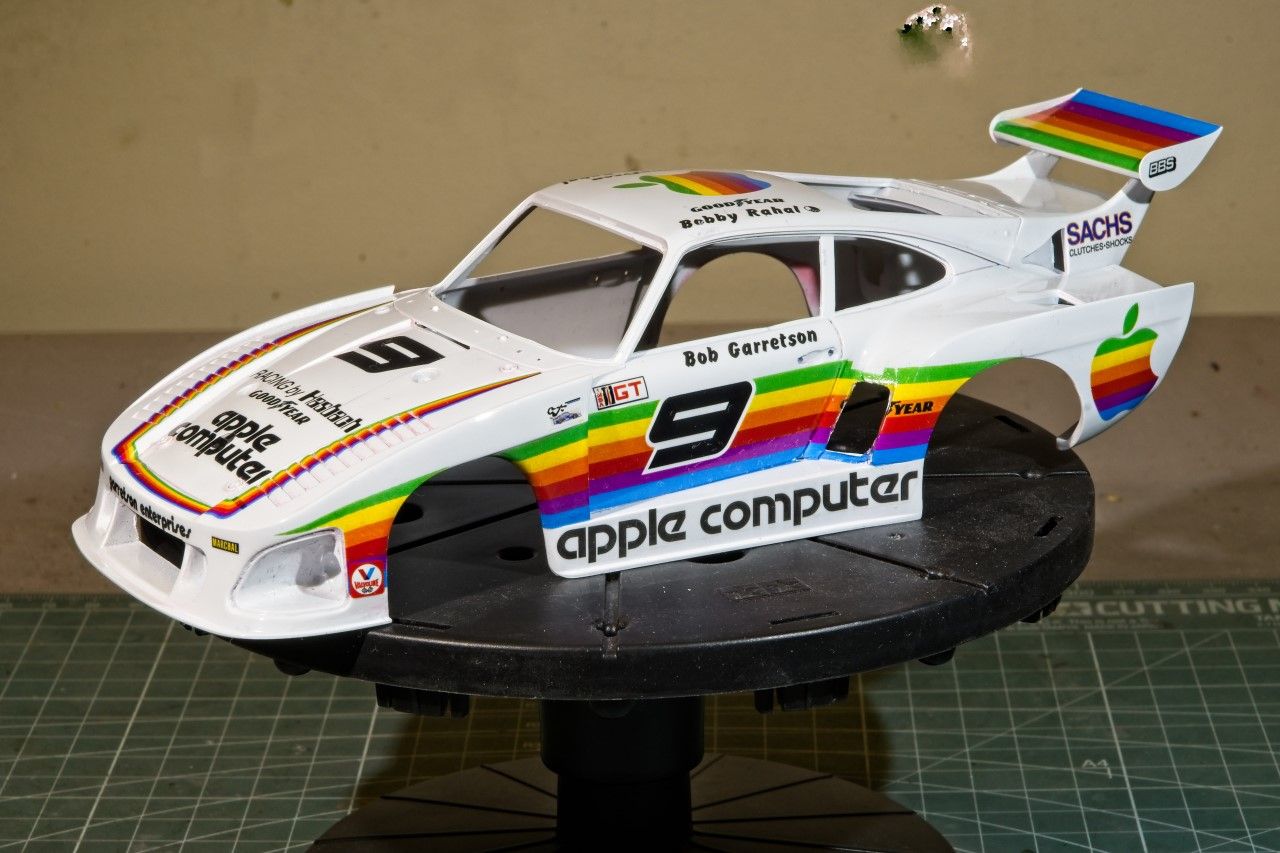
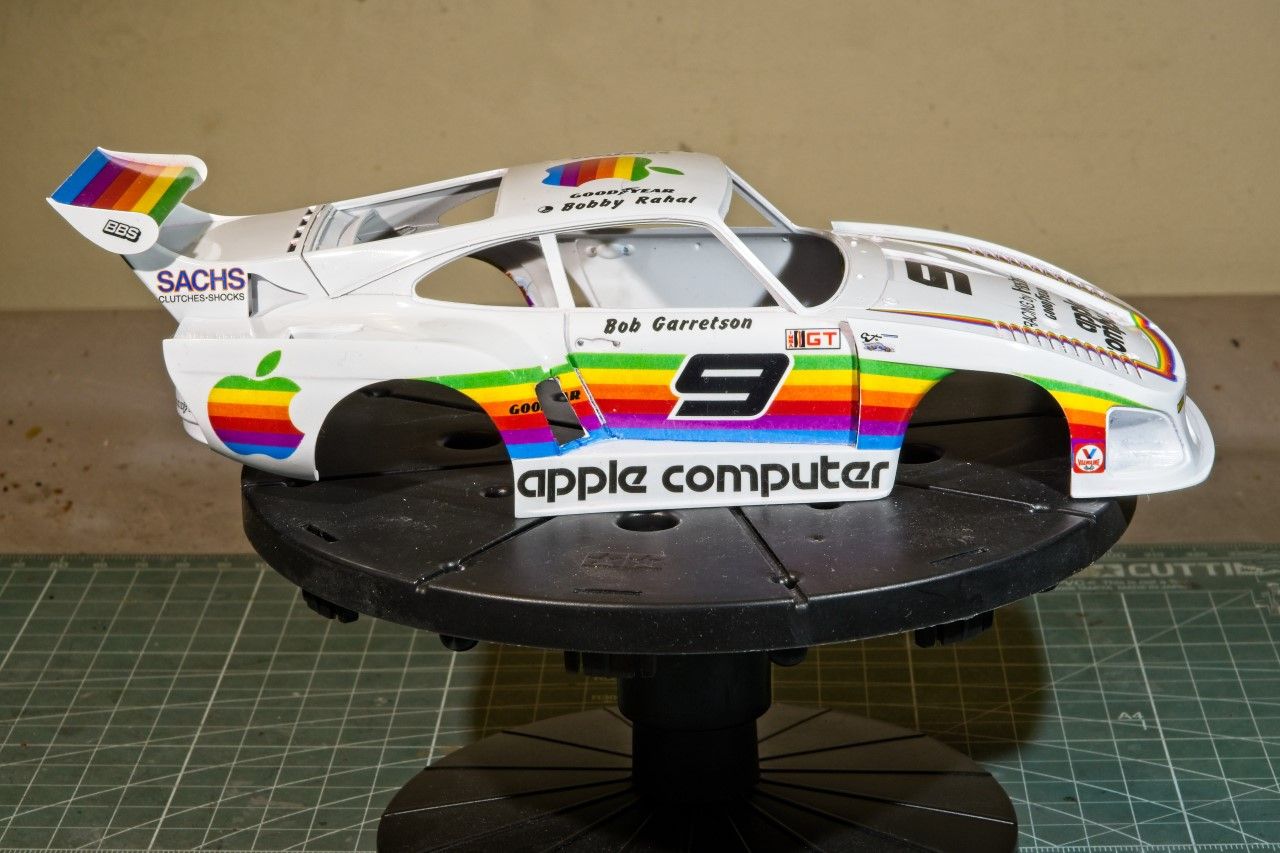
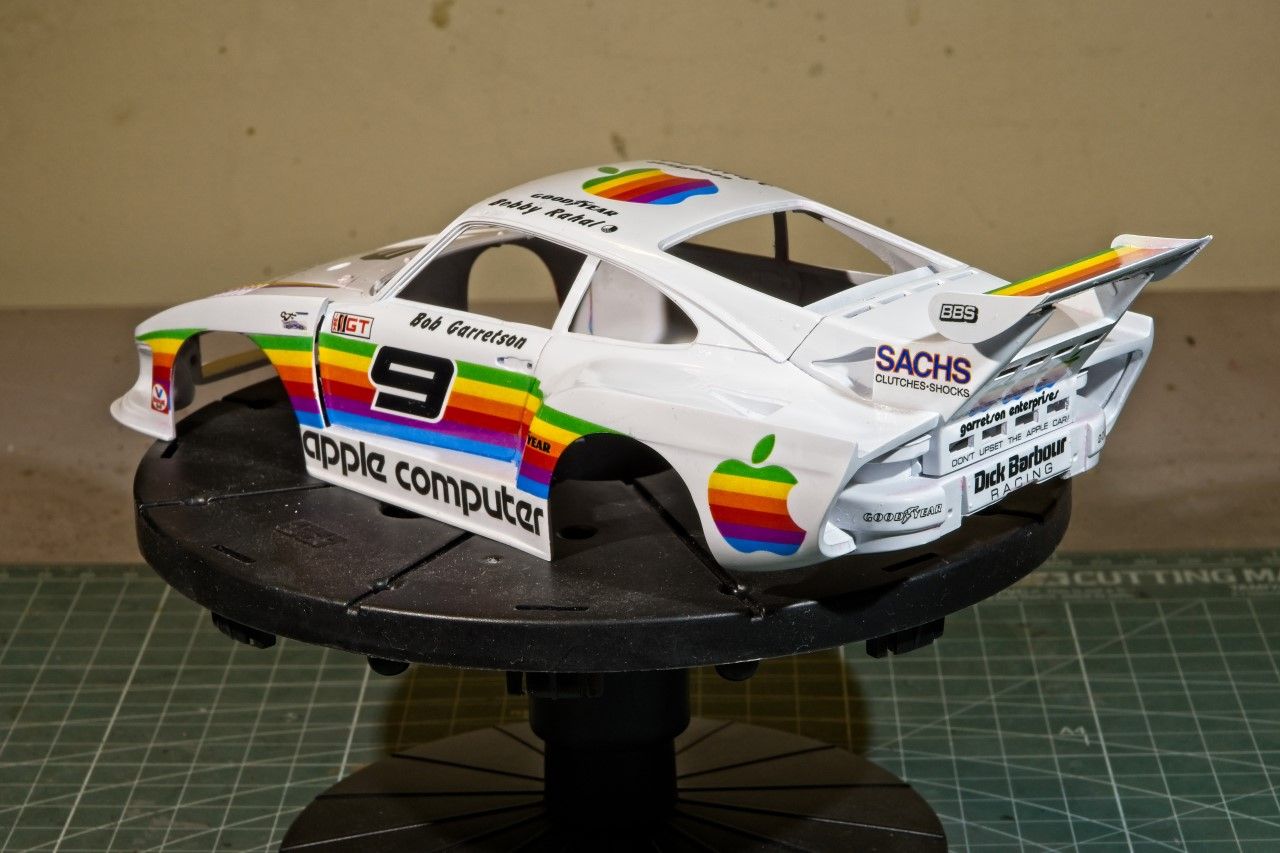
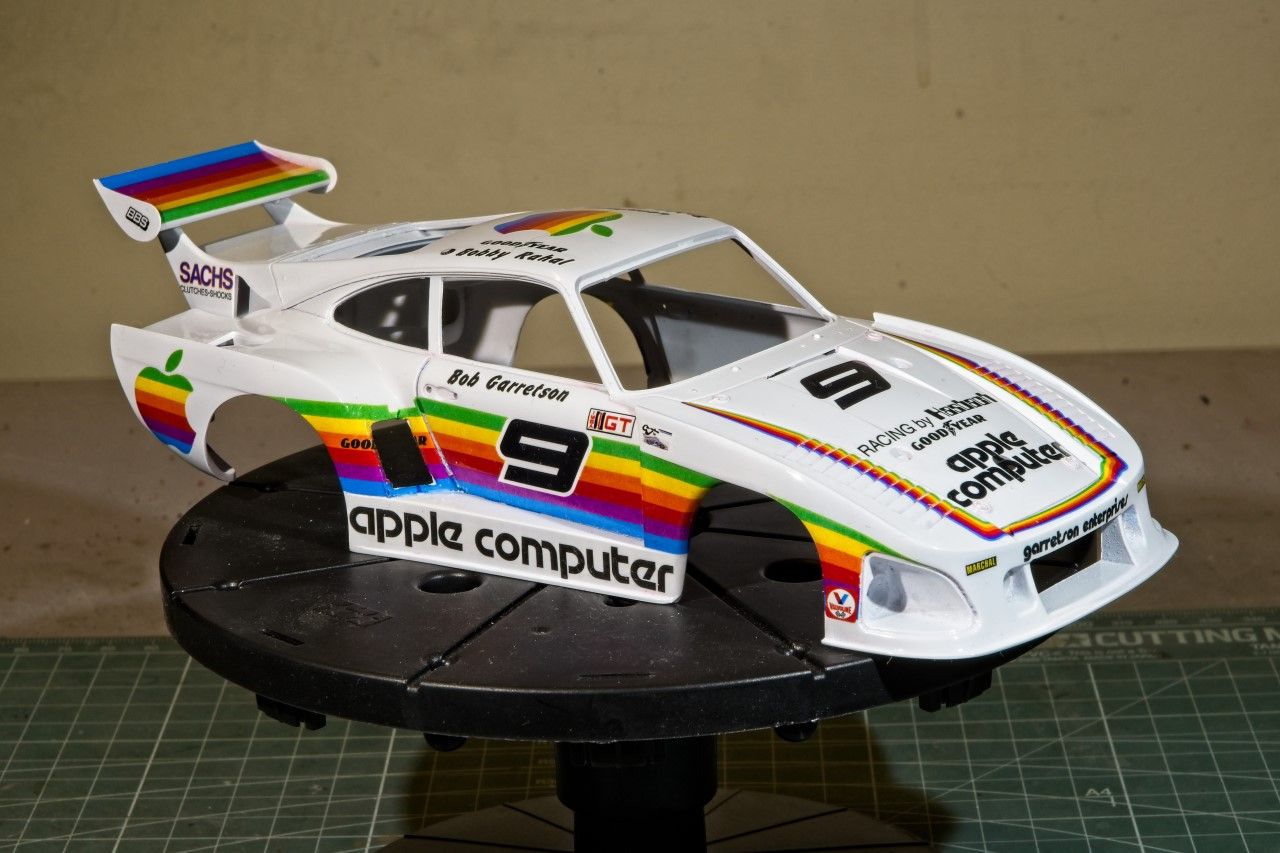
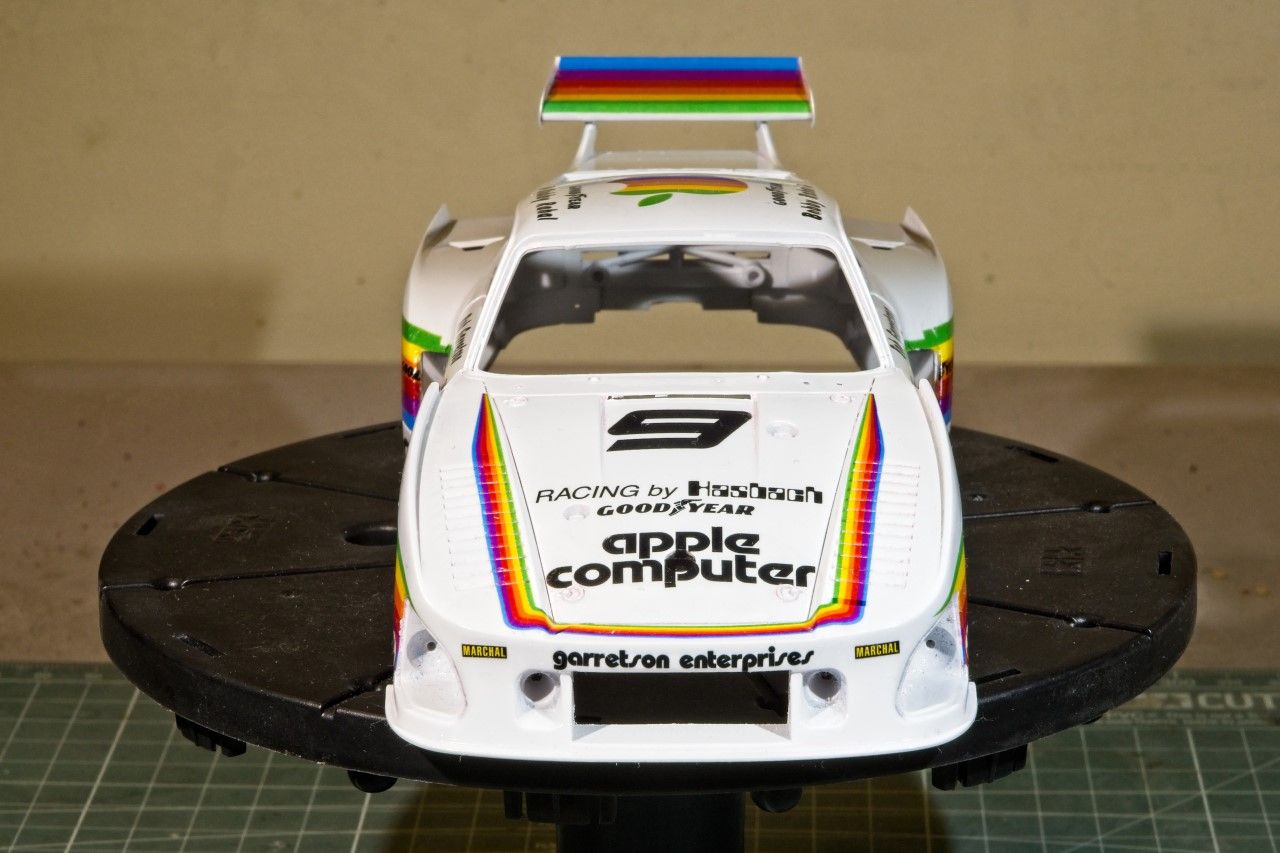
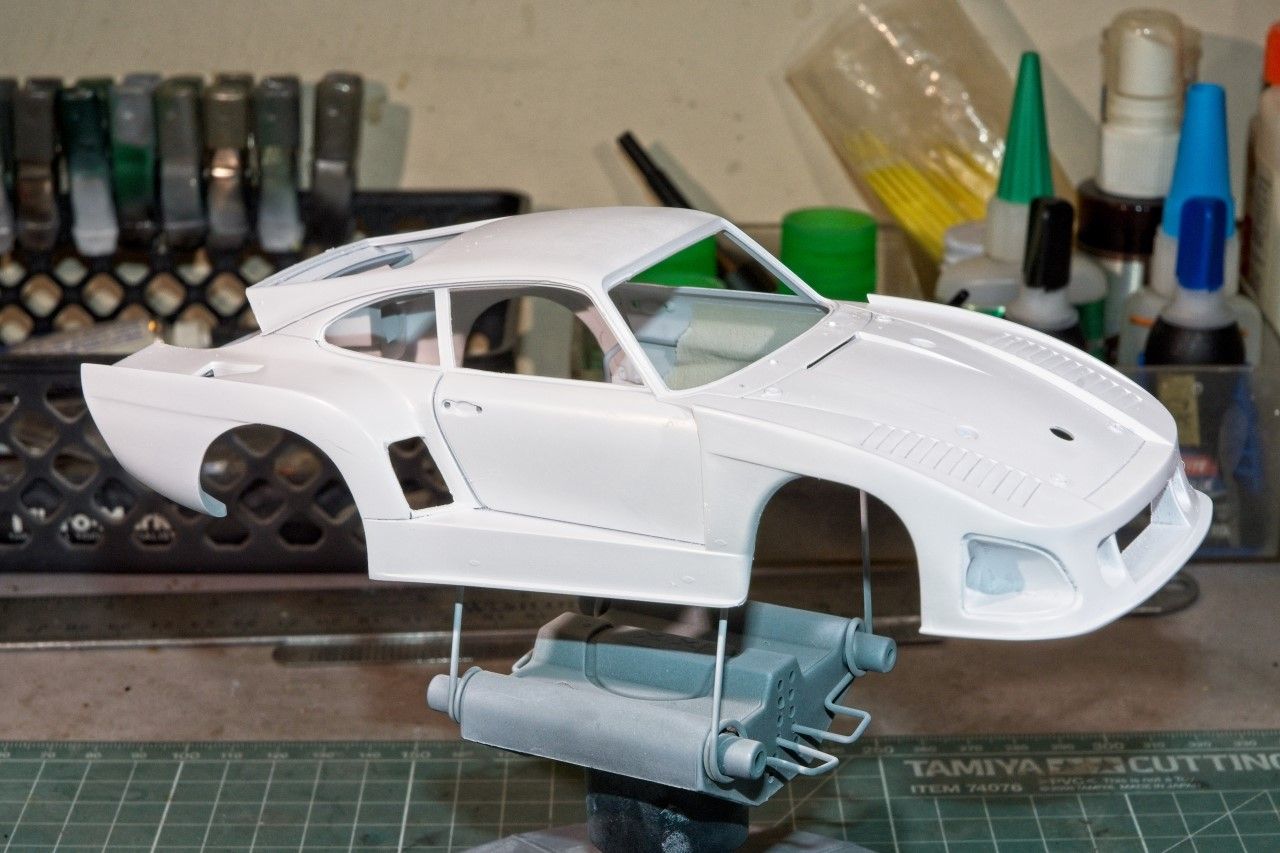
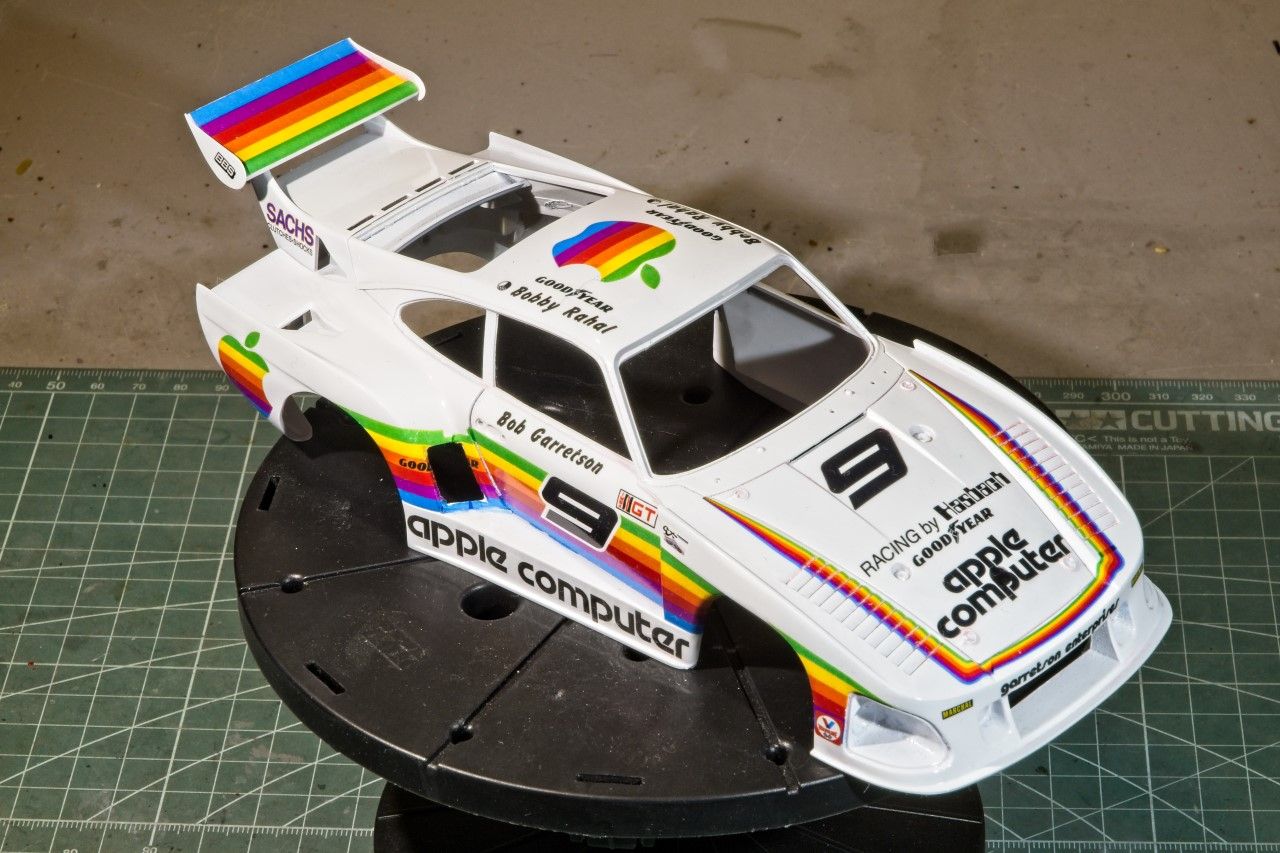 The decals have basically gone on beautifully. As you say, the vent openings might need a little touching in with paint (maybe the wheel arches and the rear edge of the wing too, for the icing on the cake), but it's almost asking the impossible to expect any decals to do everything without at least a little help. I've got to say I'm really impressed at how well the decals have snuggled down over such a complex shape.
 Hi Joel
That is looking really sweet!
All the best
Rowan
 |


