_GOTOBOTTOM
Trucks
Scale truck modeling topics.
AMT Ford LNT-8000 Day Cab
Dixon66
_VISITCOMMUNITY
New Hampshire, United States
Joined: December 12, 2002
KitMaker: 1,500 posts
Auto Modeler: 645 posts
Posted: Thursday, September 03, 2020 - 04:41 AM UTC
As stated in the Big Rigs GB thread I started on an AMT kit as a precursor/warm up to the BG for next year.

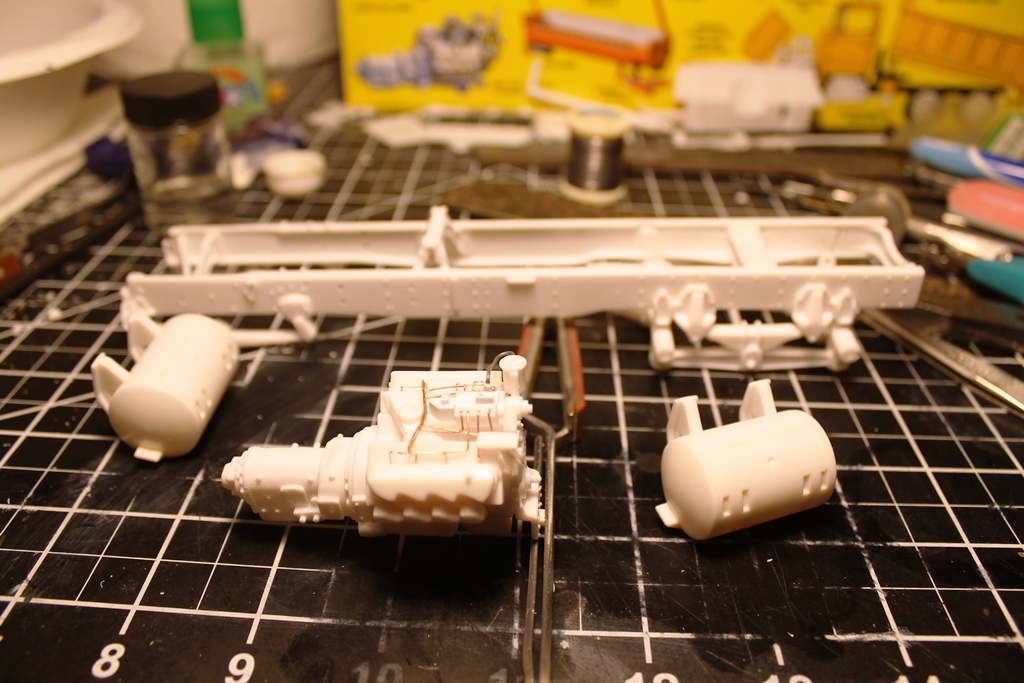
The kit is the AMT Ford LNT-8000 Snow Plow Dump Truck, but is being built as a semi day cab instead.

Most of it will be box stock (there are a lot of unmentioned options in the box) with some minor additions along the way.

Been cleaning parts for several days as I was waiting for some supplies to show up. As with any of these old kits there is a lot of flash and mold misalignment to deal with. Cleaning parts is the therapeutic portion of build for me. Lots of styrene dust and bits all over the desk and me is relaxing. LOL

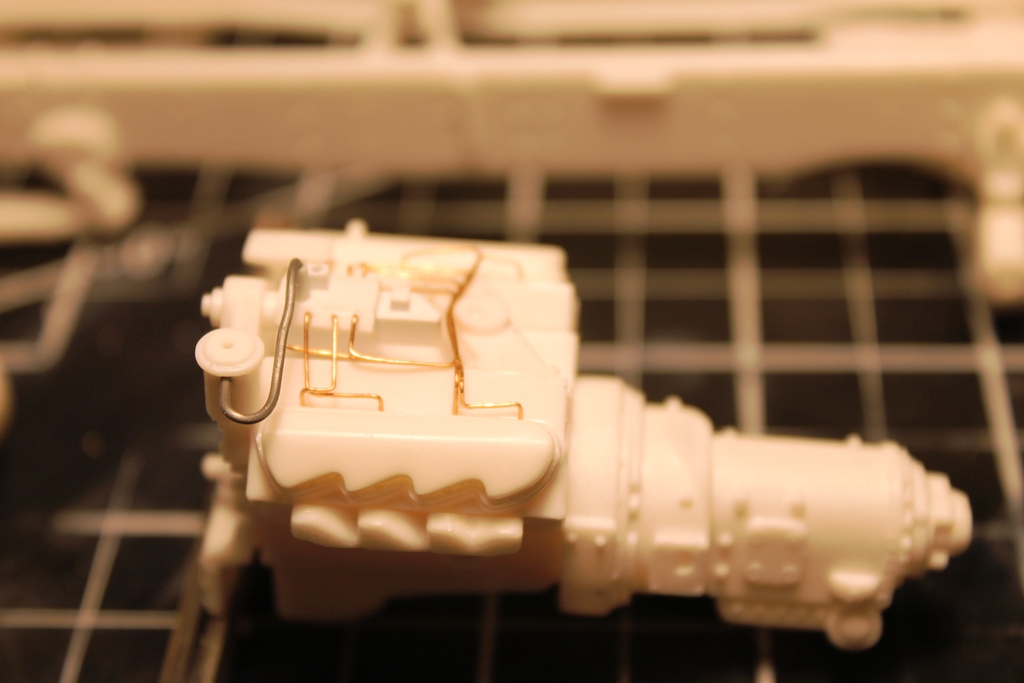
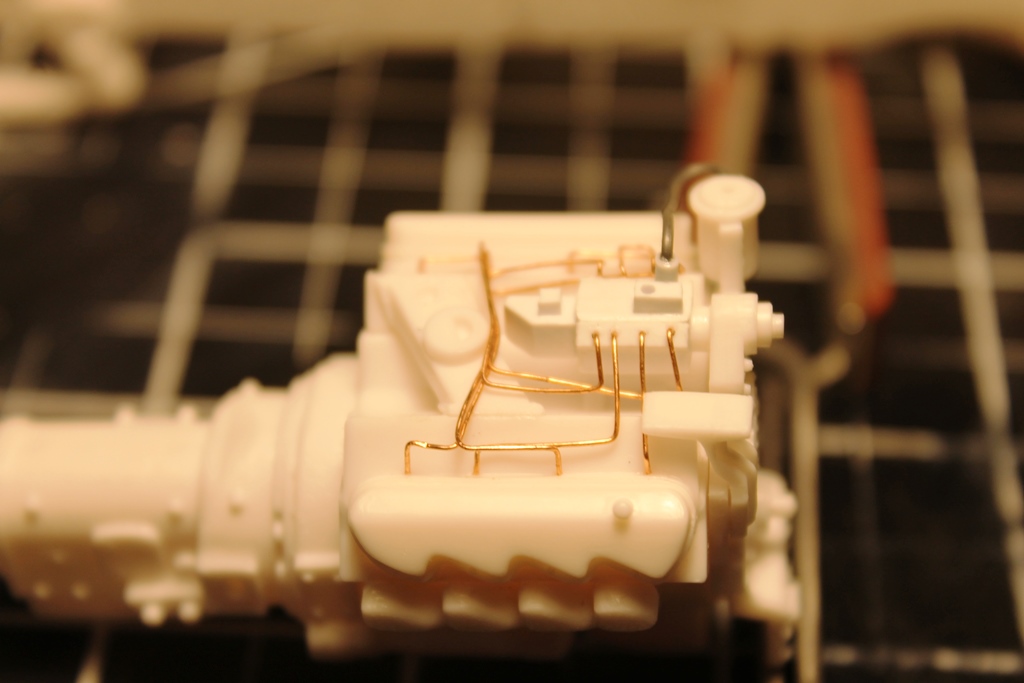
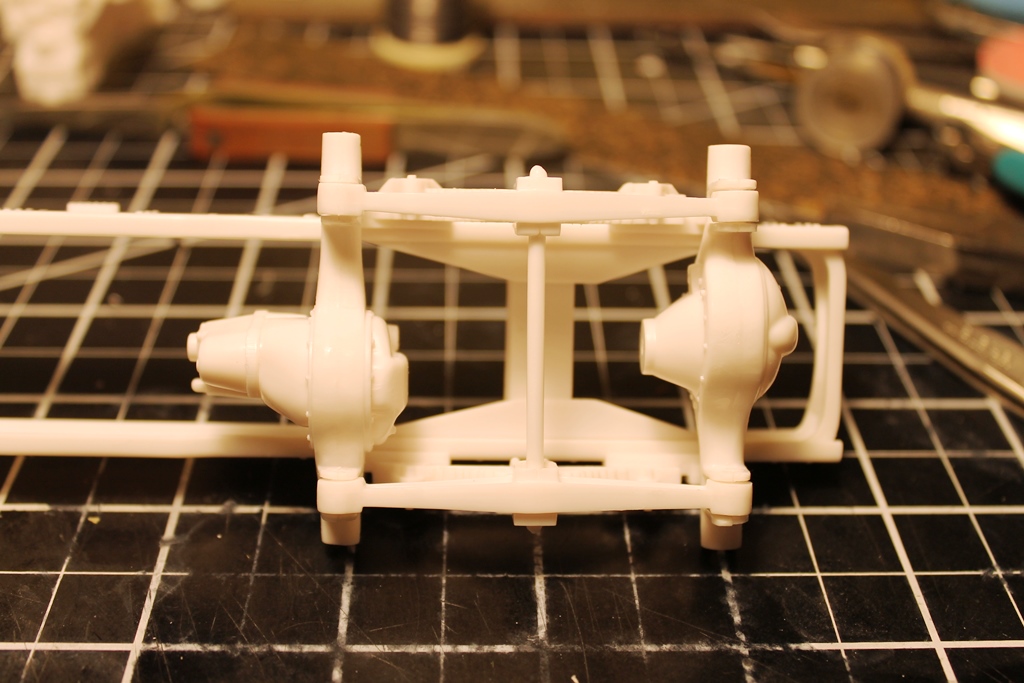
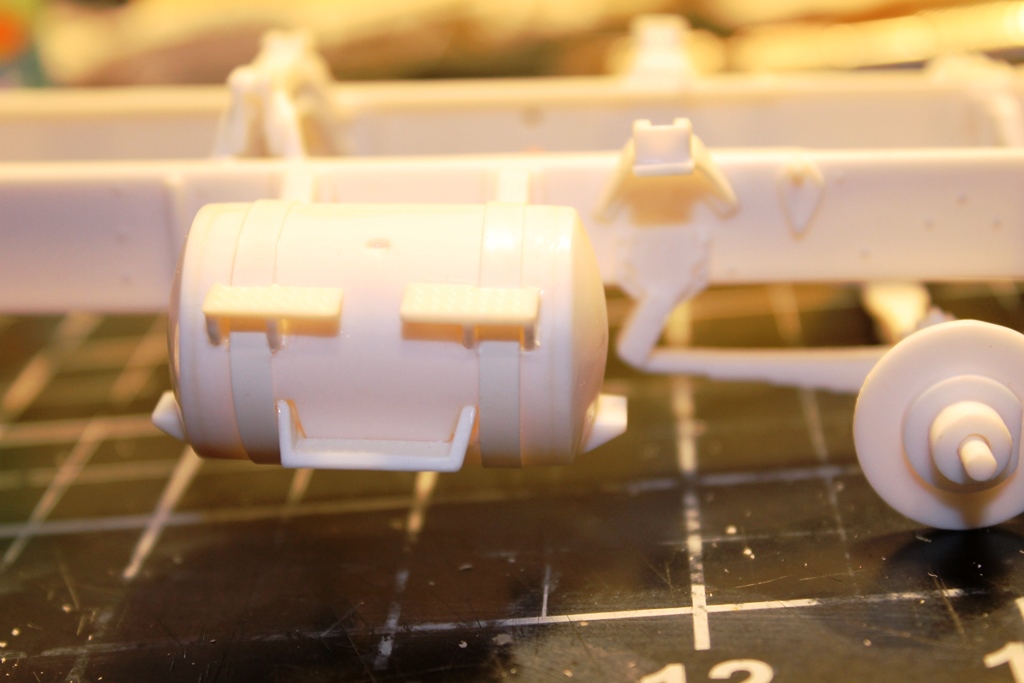
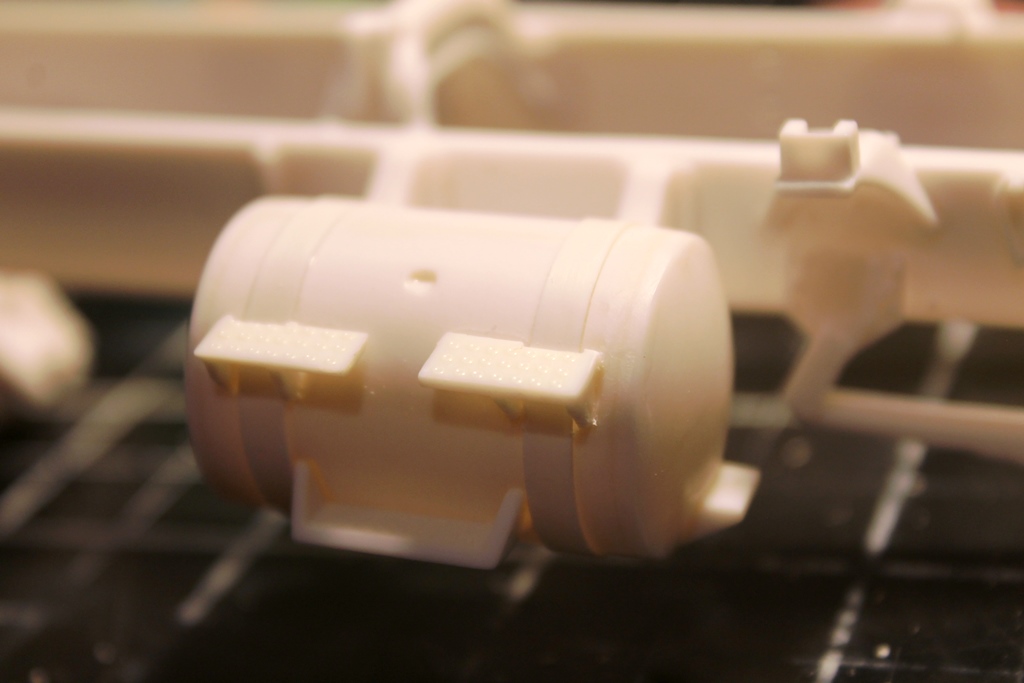
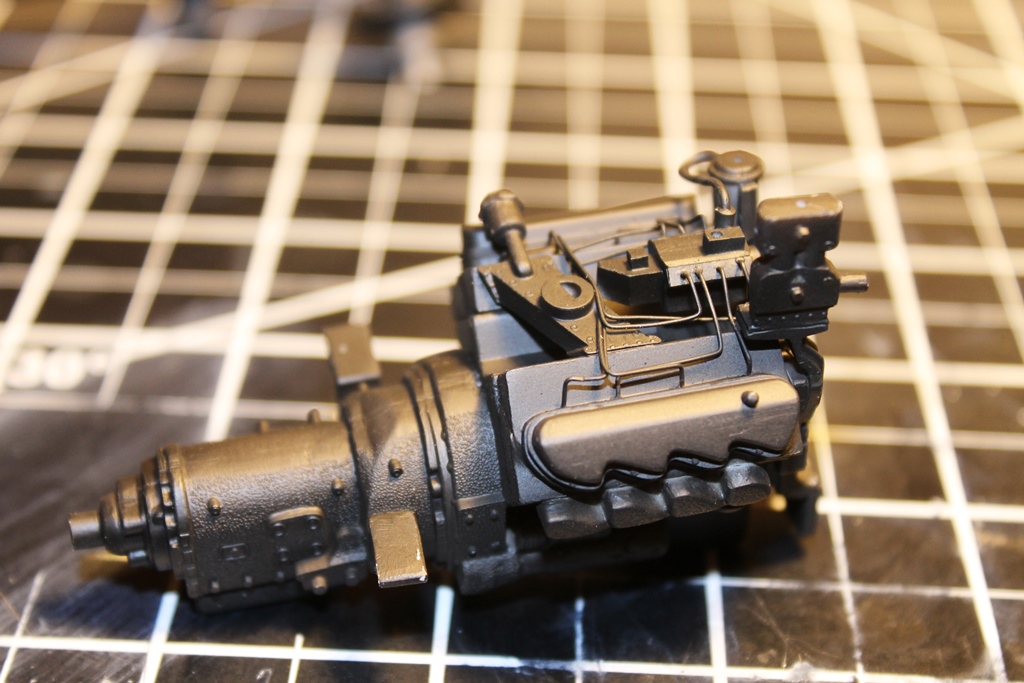
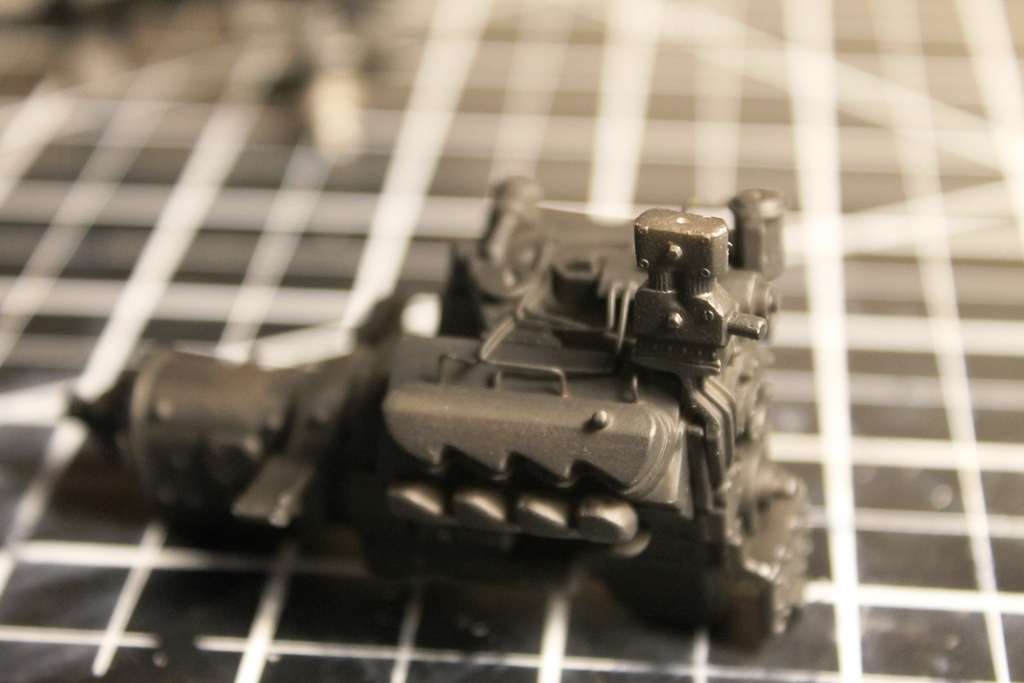
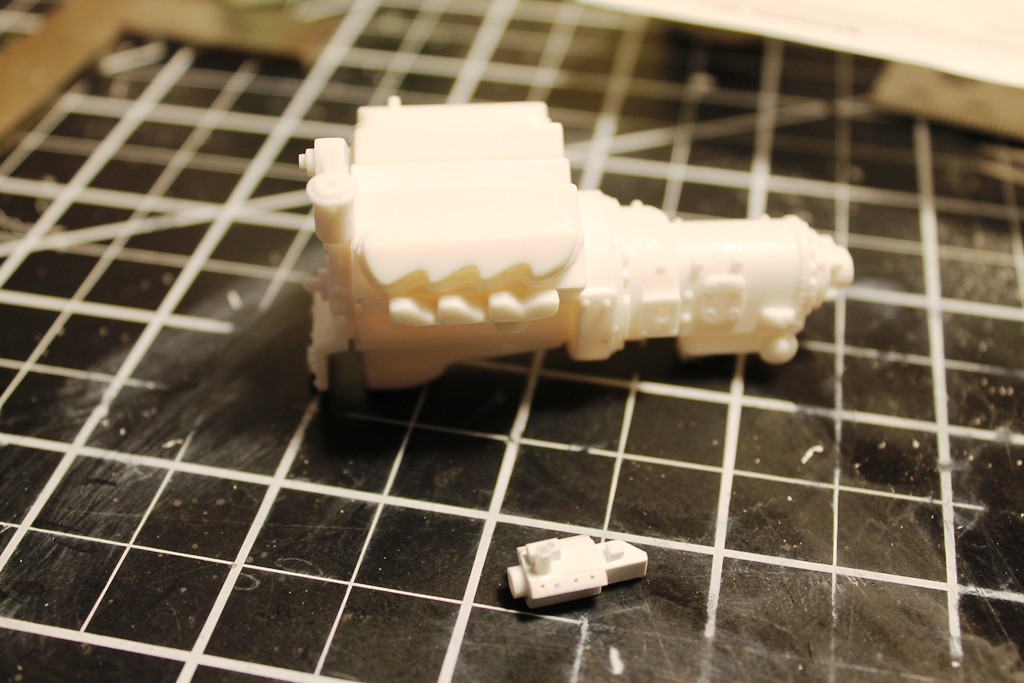
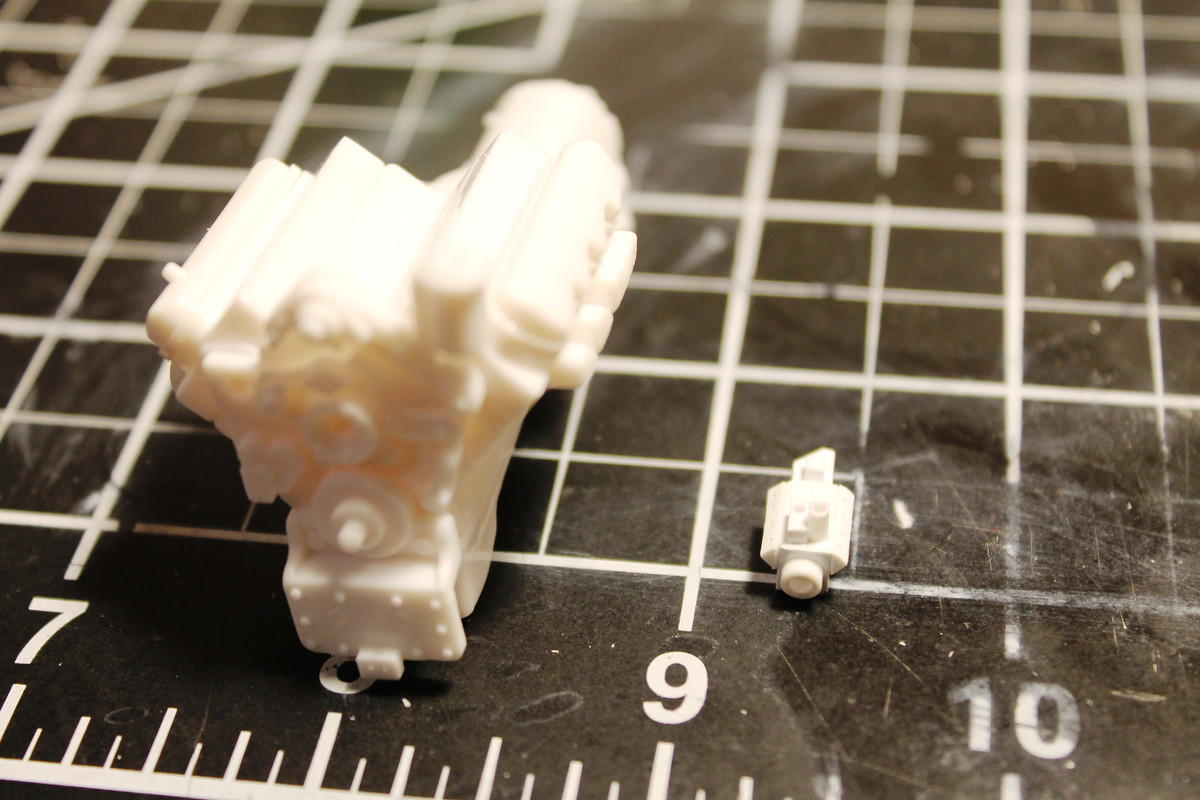
Other than the fuel tanks, I've only really assembled the engine so far.

While searching for references on the Ford V225/Cat 3208 I ran across Jim B's posting on another site of his Ryder box truck from 13 years ago where he mentioned accurizing the engine from a Ken Smith article. Thanks to Jim I was able to find both Ken's article and a German magazine article as well.

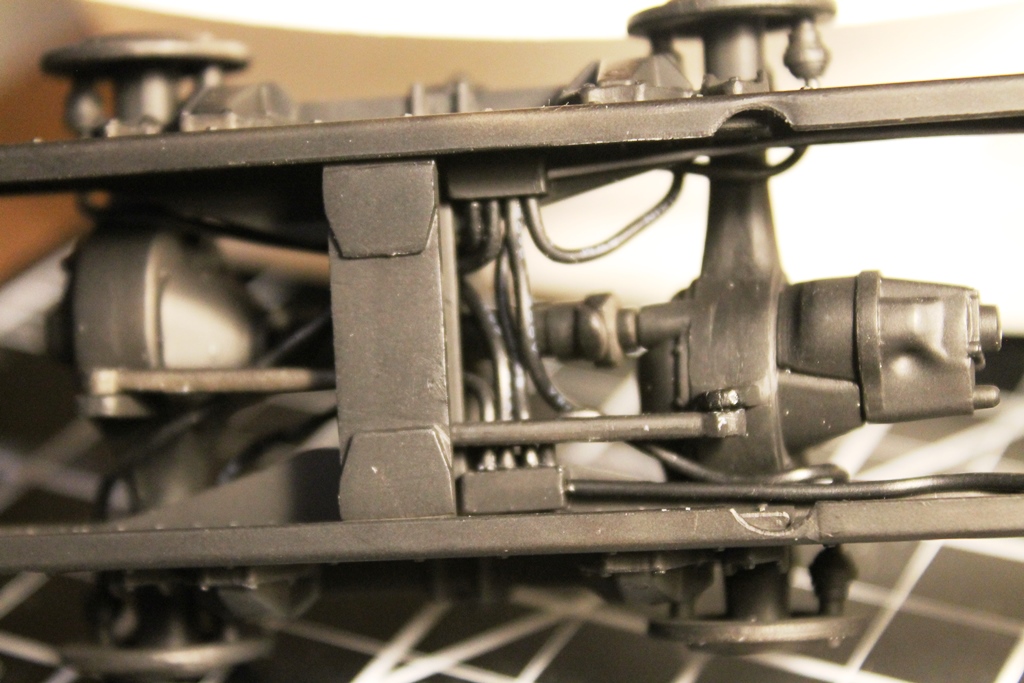
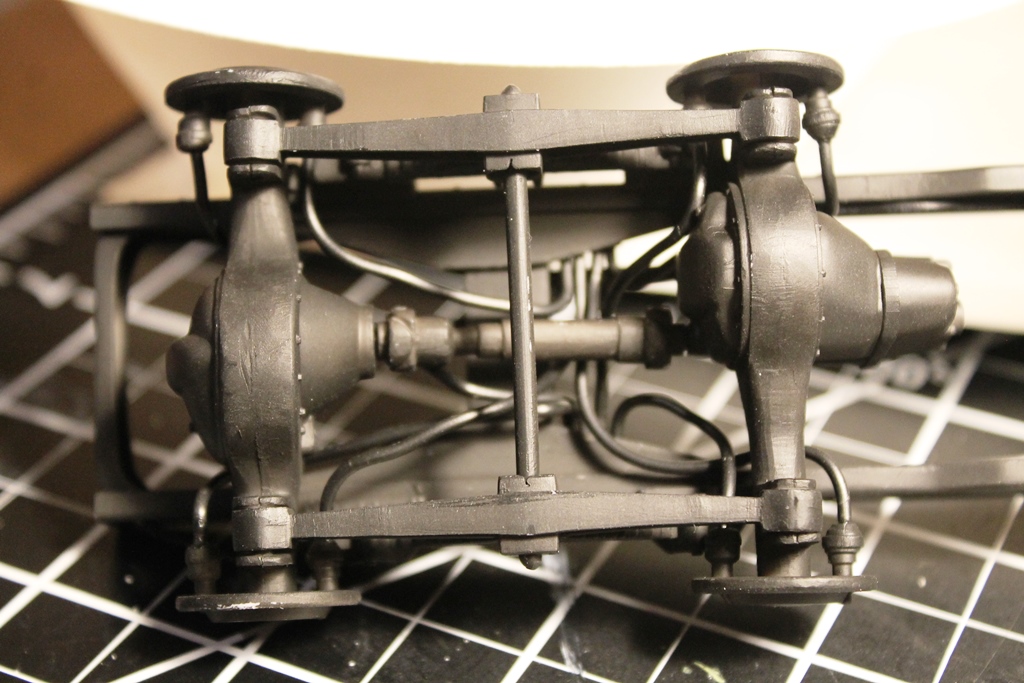
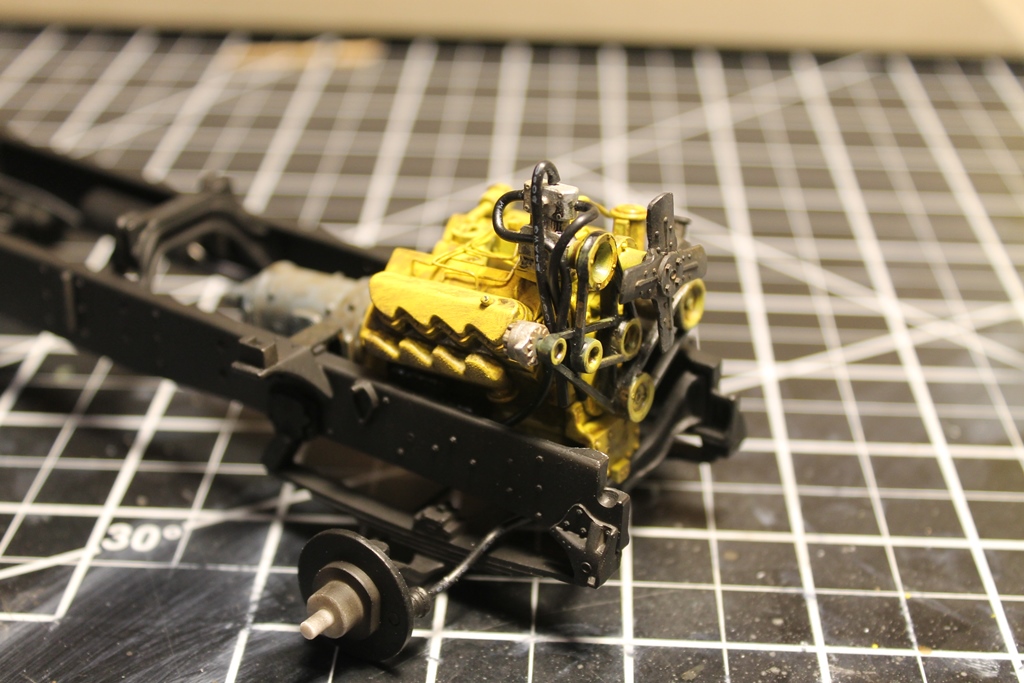
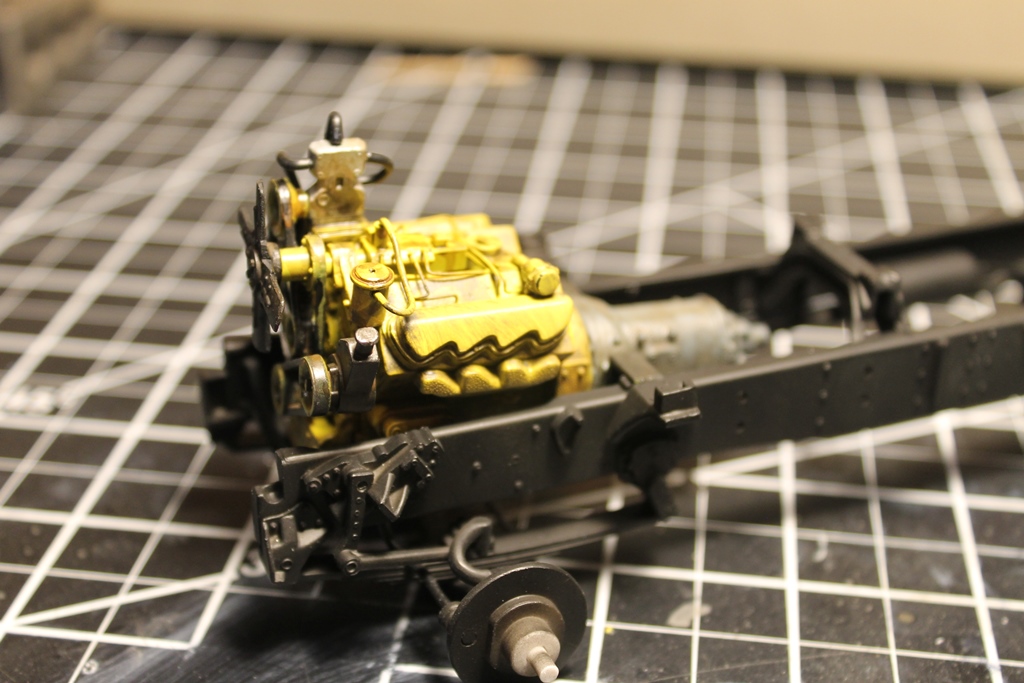
I scratch built the fuel pump and will be plumbing most of the engine. The fuel pump looks like a mini V8. LOL


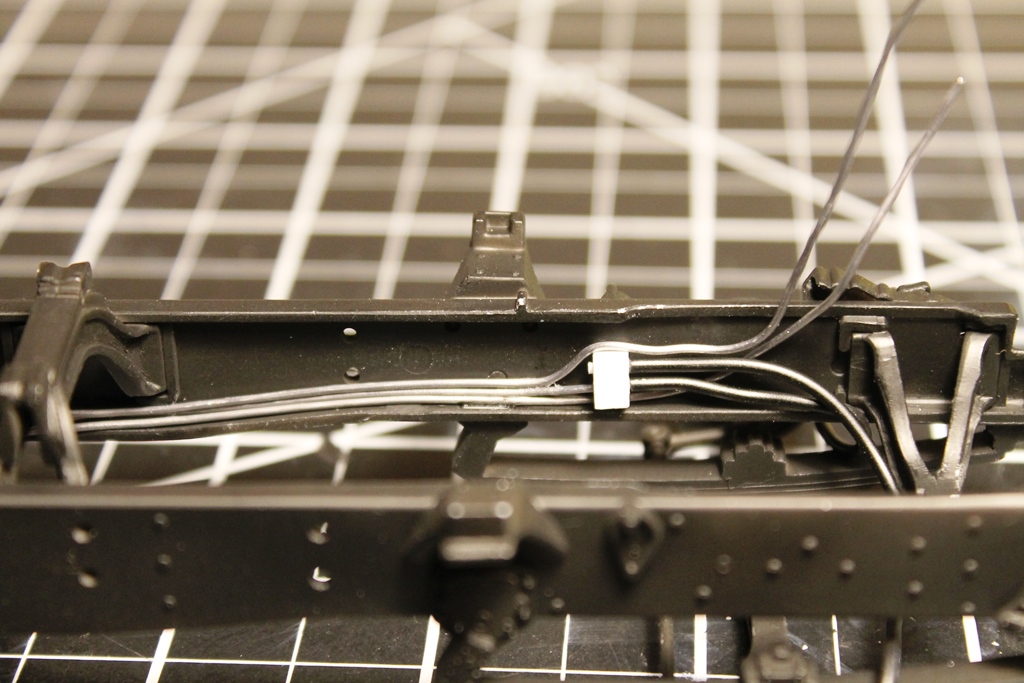
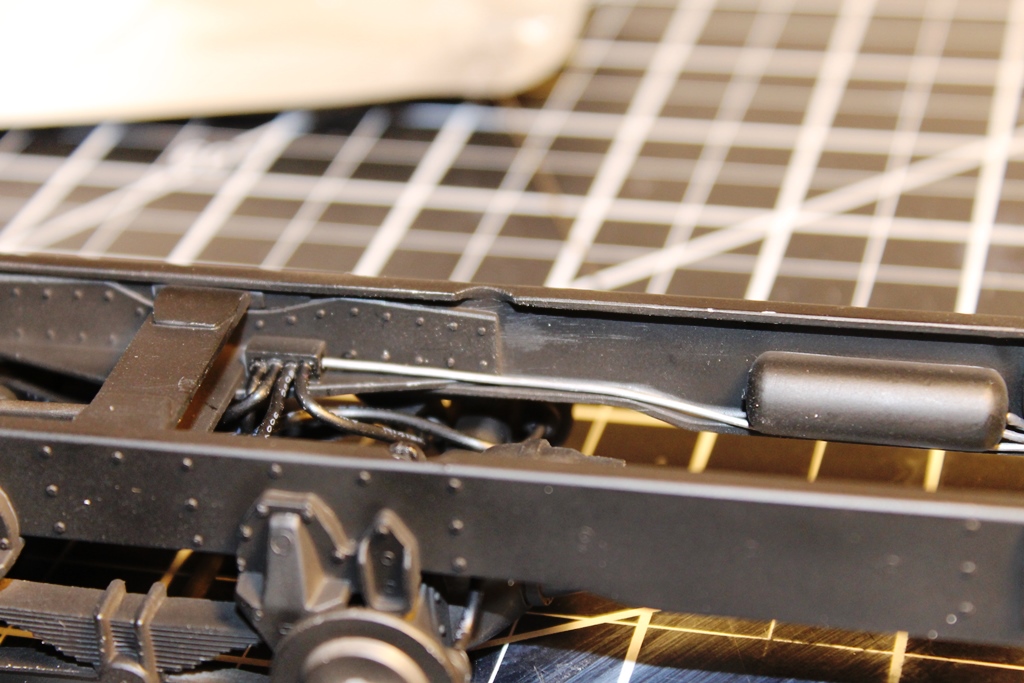
I'm going to use .015" solder for the injector lines and .035" for the fuel feed and air lines.

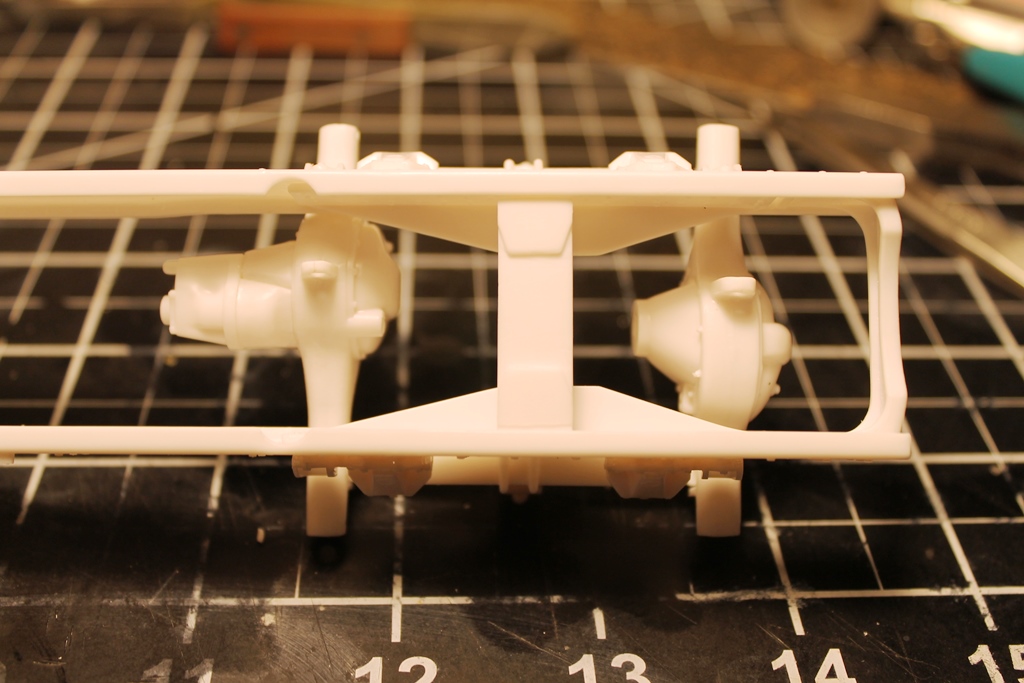
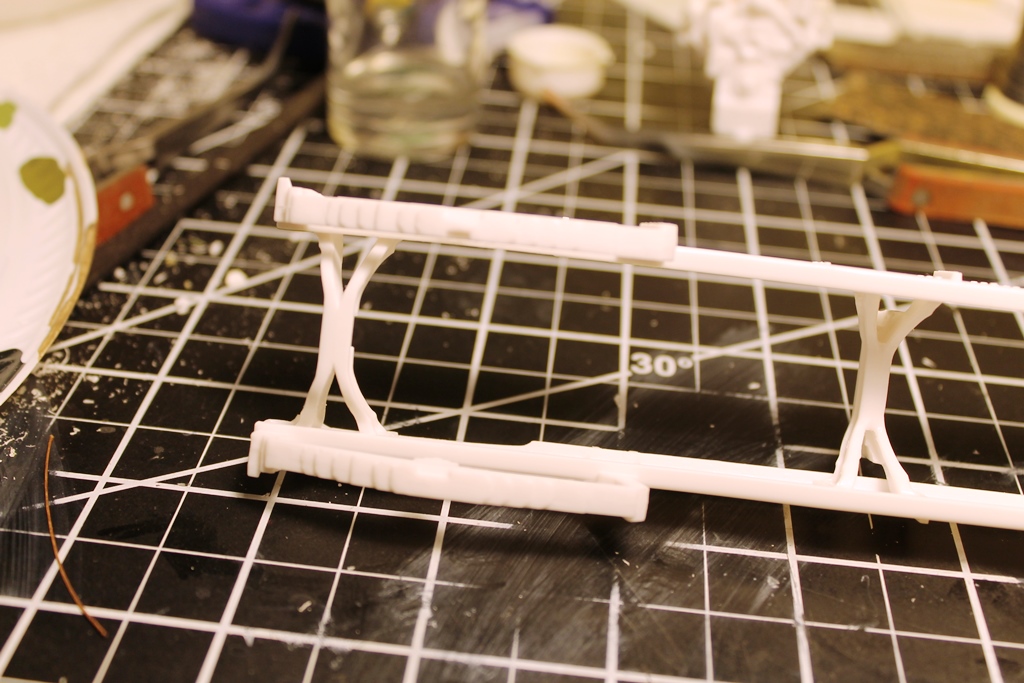
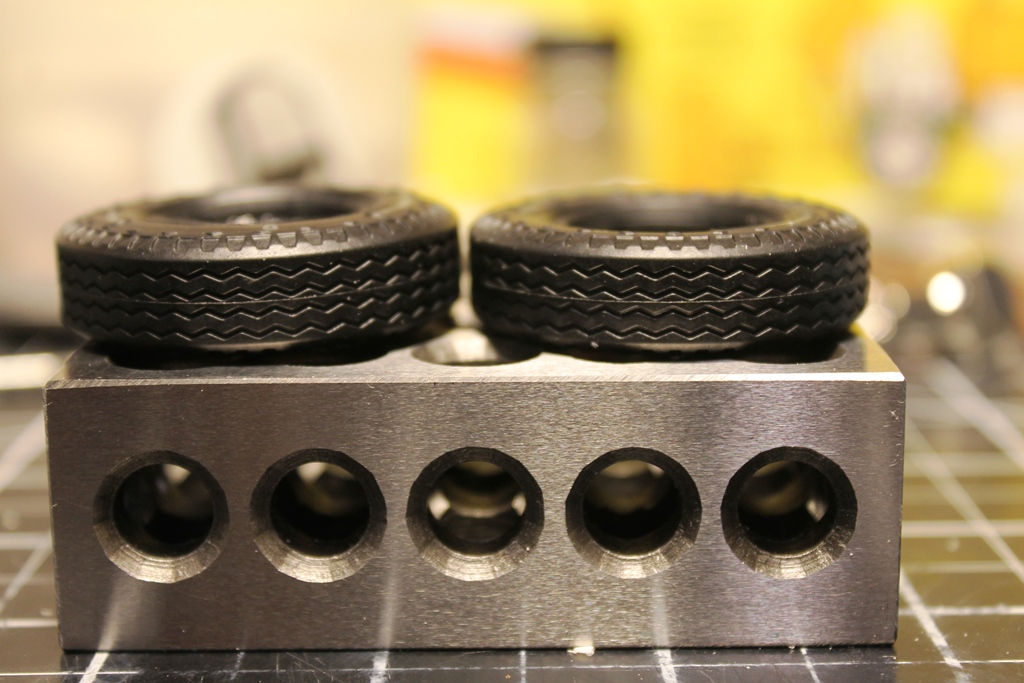
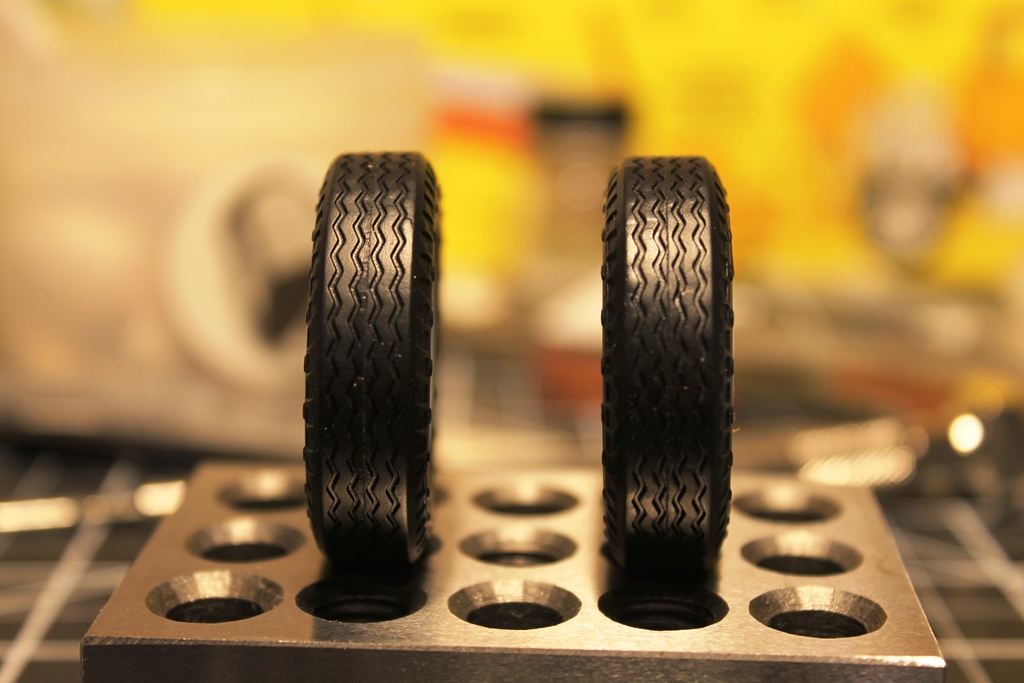
My new 1-2-3 blocks will be here later today so I can use them to align and glue the chassis.

Paint scheme is still TBD, but I'm kind of leaning towards a green body with a semigloss black chassis and aluminum tanks. Homemade trucking company decals most likely as well.

AussieReg
Staff MemberAssociate Editor
AUTOMODELER
#007
_VISITCOMMUNITY
Victoria, Australia
Joined: June 09, 2009
KitMaker: 8,156 posts
Auto Modeler: 2,953 posts
Posted: Thursday, September 03, 2020 - 11:20 AM UTC
Great to see another truck build hitting the bench!


Quoted Text

Been cleaning parts for several days as I was waiting for some supplies to show up. As with any of these old kits there is a lot of flash and mold misalignment to deal with. Cleaning parts is the therapeutic portion of build for me. Lots of styrene dust and bits all over the desk and me is relaxing. LOL


I'm with you there David, it is definitely great to sit and work through the sprues, cutting and cleaning parts, test fitting, and planning the build. Having a bit of music or a podcast running, and a drop of your preferred nectar, and the whole thing becomes the best therapy!

Cheers, D
Dixon66
_VISITCOMMUNITY
New Hampshire, United States
Joined: December 12, 2002
KitMaker: 1,500 posts
Auto Modeler: 645 posts
Posted: Thursday, September 03, 2020 - 12:08 PM UTC

Quoted Text

Great to see another truck build hitting the bench!


Quoted Text

Been cleaning parts for several days as I was waiting for some supplies to show up. As with any of these old kits there is a lot of flash and mold misalignment to deal with. Cleaning parts is the therapeutic portion of build for me. Lots of styrene dust and bits all over the desk and me is relaxing. LOL


I'm with you there David, it is definitely great to sit and work through the sprues, cutting and cleaning parts, test fitting, and planning the build. Having a bit of music or a podcast running, and a drop of your preferred nectar, and the whole thing becomes the best therapy!

Cheers, D


It's funny, I don't usually listen to music or even have a beverage of any kind. I find the beverage just sits there and doesn't get touched (and there is nothing worse than single malt Scotch with styrene in it, LOL). I focus in and the modeling is my distraction.


Szmann
_VISITCOMMUNITY
Netherlands Antilles
Joined: September 02, 2014
KitMaker: 1,977 posts
Auto Modeler: 1,371 posts
Posted: Thursday, September 03, 2020 - 02:07 PM UTC

Quoted Text


Quoted Text

Great to see another truck build hitting the bench!


Quoted Text

Been cleaning parts for several days as I was waiting for some supplies to show up. As with any of these old kits there is a lot of flash and mold misalignment to deal with. Cleaning parts is the therapeutic portion of build for me. Lots of styrene dust and bits all over the desk and me is relaxing. LOL


I'm with you there David, it is definitely great to sit and work through the sprues, cutting and cleaning parts, test fitting, and planning the build. Having a bit of music or a podcast running, and a drop of your preferred nectar, and the whole thing becomes the best therapy!

Cheers, D


It's funny, I don't usually listen to music or even have a beverage of any kind. I find the beverage just sits there and doesn't get touched (and there is nothing worse than single malt Scotch with styrene in it, LOL). I focus in and the modeling is my distraction.


Almost same like D. except my "nectar" is bitter. I am also a tobacco smoker but I never-ever smoke by my bench. I take a cigarette break when planning a build's steps. (I know, it is a bad and disgusting habit - I'm not advertising it).

Gabriel
Dixon66
_VISITCOMMUNITY
New Hampshire, United States
Joined: December 12, 2002
KitMaker: 1,500 posts
Auto Modeler: 645 posts
Posted: Thursday, September 03, 2020 - 11:56 PM UTC
Photos later today. Chassis assembled during the day yesterday and cured overnight. The rear springs did not fit very well, the alignment pins needed to be cut off and positioned by measurements. The front springs went on without issue.

I'm on vacation next week and plan on getting as much bench time in as I can.


jimb
_VISITCOMMUNITY
New York, United States
Joined: August 25, 2006
KitMaker: 2,539 posts
Auto Modeler: 1,405 posts
Posted: Friday, September 04, 2020 - 07:39 AM UTC
Nice looking engine. Are you planning on Ford Blue or Cat Yellow?

Jim
Dixon66
_VISITCOMMUNITY
New Hampshire, United States
Joined: December 12, 2002
KitMaker: 1,500 posts
Auto Modeler: 645 posts
Posted: Friday, September 04, 2020 - 11:44 AM UTC

Quoted Text

Nice looking engine. Are you planning on Ford Blue or Cat Yellow?

Jim


Cat Yellow

As I warned earlier, some WIP photos.

Injector and pump feed lines in place.


Chassis, tanks and rear axles. Still debating if I'm going to add some straps to the tanks.


That's all for now.
2002hummer
#257
_VISITCOMMUNITY
Ontario, Canada
Joined: October 11, 2011
KitMaker: 812 posts
Auto Modeler: 108 posts
Posted: Friday, September 04, 2020 - 12:03 PM UTC
Will be following this build, looks interesting.
Cosimodo
#335
_VISITCOMMUNITY
Auckland, New Zealand
Joined: September 03, 2013
KitMaker: 1,808 posts
Auto Modeler: 701 posts
Posted: Friday, September 04, 2020 - 03:16 PM UTC
Nice detailing on the engine David. Should look good when it's painted.

cheers
Michael
jimb
_VISITCOMMUNITY
New York, United States
Joined: August 25, 2006
KitMaker: 2,539 posts
Auto Modeler: 1,405 posts
Posted: Saturday, September 05, 2020 - 02:21 AM UTC
Nice looking engine & frame. It's really coming along. Kind of makes me want to pull my LNT8000 back out.

Jim
Szmann
_VISITCOMMUNITY
Netherlands Antilles
Joined: September 02, 2014
KitMaker: 1,977 posts
Auto Modeler: 1,371 posts
Posted: Saturday, September 05, 2020 - 04:24 PM UTC
It's getting interesting here, David. Plumbing the injection pump seems to be a relatively simple and very effective detailing trick. Saved to the cloud!

Gabriel
Stickframe
#362
_VISITCOMMUNITY
California, United States
Joined: December 01, 2013
KitMaker: 1,661 posts
Auto Modeler: 431 posts
Posted: Saturday, September 05, 2020 - 04:37 PM UTC
Hi David,

All is looking good! The tubing on the engine looks the part too.

Funny you'd mention frustration with assembling the chassis and setting the springs correctly - I always struggle with that. It shouldn't be that hard, but it clearly challenges me, and what's a real bummer is sometimes, you really can't tell if the alignment is wrong until the wheels and tires are on, and you can or can't see light below the tires! I usually see light! haha -

Yours looks right - looking forward to seeing your next update -

Cheers
Nick
Dixon66
_VISITCOMMUNITY
New Hampshire, United States
Joined: December 12, 2002
KitMaker: 1,500 posts
Auto Modeler: 645 posts
Posted: Sunday, September 06, 2020 - 12:02 AM UTC
Thanks Jim and Gabriel, I'm pretty sure I'm now going to have to scratchbuilt the intake plumbing from the filter as the intake is now a bit further back. One modification causes the next. LOL


Quoted Text

Hi David,

All is looking good! The tubing on the engine looks the part too.

Funny you'd mention frustration with assembling the chassis and setting the springs correctly - I always struggle with that. It shouldn't be that hard, but it clearly challenges me, and what's a real bummer is sometimes, you really can't tell if the alignment is wrong until the wheels and tires are on, and you can or can't see light below the tires! I usually see light! haha -

Yours looks right - looking forward to seeing your next update -

Cheers
Nick


Thanks Nick, It was obvious in the dryfit stage that the rear springs were off. On one side the lip that runs against the bottom of the chassis was about a millimeter away from the rail, on the other side it was about .5mm short of making it to the bottom of the rail when using the alignment holes.

What I did was measure from the back of the rear spring hanger to the back of the rail and match that on both sides after the pins were cut off. Without the axles on, that seemed to give me a correct setup.

No work on it yesterday as we went to one of my brothers' place all day.

Yard work today and then some workshop time tonight hopefully. Going to tackle the steps and straps on the fuel tanks next.
Dixon66
_VISITCOMMUNITY
New Hampshire, United States
Joined: December 12, 2002
KitMaker: 1,500 posts
Auto Modeler: 645 posts
Posted: Wednesday, September 09, 2020 - 11:02 AM UTC
The tires/tyres in AMT kits used to be some of the worst to get aligned and keep aligned on the wheels, too narrow and to large of a diameter compared to the wheels.

Well, AMT fixed that issue, in this release at least. However, I still stuffed them with 3/8"/10mm backer rod which is a closed cell foam that is used to fill gaps behind caulking.

New tires with and and without the foam inside. I used a 3.5" long piece in each one. It gives a nice hefty appearance to the assemblies.

Some comparison shots with and without the foam insert.
Laser printed lettering on the tires.


One of the fuel tanks finished and mocked into place.


A few more parts to clean still and then I hope to start laying primer before the end of the weekend. Black primer on the frame, white on the wheels and gray primer on the cab.

Also, had a strange occurrence when stripping the chrome on this kit. Some of the sprue sections had an over abundance of lacquer under the chrome that would not come off and left goop in recesses, etc. 91% Iso and more oven cleaner would not remove the goop.

AussieReg
Staff MemberAssociate Editor
AUTOMODELER
#007
_VISITCOMMUNITY
Victoria, Australia
Joined: June 09, 2009
KitMaker: 8,156 posts
Auto Modeler: 2,953 posts
Posted: Wednesday, September 09, 2020 - 11:15 AM UTC
Great idea with the backer rod, it really does bulk out the tyres and give them more presence!

I think I remember reading that the "goop" under the chrome plating is a lacquer based clear primer, maybe try a bit of lacquer thinner on a brush in a safe spot to see if it moves. Hopefully it hasn't filled the surface details too much!

Making good progress, it looks very neat.

Cheers, D
Dixon66
_VISITCOMMUNITY
New Hampshire, United States
Joined: December 12, 2002
KitMaker: 1,500 posts
Auto Modeler: 645 posts
Posted: Wednesday, September 09, 2020 - 01:02 PM UTC

Quoted Text

Great idea with the backer rod, it really does bulk out the tyres and give them more presence!

I think I remember reading that the "goop" under the chrome plating is a lacquer based clear primer, maybe try a bit of lacquer thinner on a brush in a safe spot to see if it moves. Hopefully it hasn't filled the surface details too much!

Making good progress, it looks very neat.

Cheers, D


Thanks Damian, I'll try MLT first and then the straight LT.


Edit to add. MLT had nearly no effect on the lacquer, straight LT softened it to the point it would smear. Not going to take a further chance with it at this time.
Damian, Thank you for the suggestion though.
Dixon66
_VISITCOMMUNITY
New Hampshire, United States
Joined: December 12, 2002
KitMaker: 1,500 posts
Auto Modeler: 645 posts
Posted: Sunday, September 13, 2020 - 10:19 AM UTC
White 1500 primer coat on the backsides of the wheels and Black 1500 on the chassis, engine, suspension and various other parts laid down between this morning and evening.

Airlines and another coat of black primer after that.

I'm going to use MM Bright Yellow over the black to replicate the Cat Yellow.
Stickframe
#362
_VISITCOMMUNITY
California, United States
Joined: December 01, 2013
KitMaker: 1,661 posts
Auto Modeler: 431 posts
Posted: Sunday, September 13, 2020 - 02:41 PM UTC
Looking good David - As I mentioned before, I have a hard time building square truck chassis - almost harder for me to do than scratch building! Yours seems to be going together as it should! I like your trick with the tires -

Cheers
Nick
Tank1812
_VISITCOMMUNITY
North Carolina, United States
Joined: April 29, 2014
KitMaker: 1,112 posts
Auto Modeler: 25 posts
Posted: Sunday, September 13, 2020 - 08:36 PM UTC
Looking good. I like the backer rod trick, I kept wondering why I hadn’t returned my package after a remodel. This is why.

I have seen a film under the chrome before, I strip my chrome using Simple Green. That layer or remnants are easily removed with water and old toothbrush.


Quoted Text

Looking good David - As I mentioned before, I have a hard time building square truck chassis - almost harder for me to do than scratch building! Yours seems to be going together as it should! I like your trick with the tires -

Cheers
Nick


I have picked up this with extra magnets, I have found it to be a helpful tool to greatly improve my building. You probably make your own but us mortals are not as gifted.
https://www.micromark.com/Magnetic-Gluing-Jig-10-1-4-Inch-Square
Dixon66
_VISITCOMMUNITY
New Hampshire, United States
Joined: December 12, 2002
KitMaker: 1,500 posts
Auto Modeler: 645 posts
Posted: Monday, September 14, 2020 - 12:07 AM UTC

Quoted Text

Looking good. I like the backer rod trick, I kept wondering why I hadn’t returned my package after a remodel. This is why.

I have seen a film under the chrome before, I strip my chrome using Simple Green. That layer or remnants are easily removed with water and old toothbrush.


Quoted Text

Looking good David - As I mentioned before, I have a hard time building square truck chassis - almost harder for me to do than scratch building! Yours seems to be going together as it should! I like your trick with the tires -

Cheers
Nick


I have picked up this with extra magnets, I have found it to be a helpful tool to greatly improve my building. You probably make your own but us mortals are not as gifted.
https://www.micromark.com/Magnetic-Gluing-Jig-10-1-4-Inch-Square


Ryan, this lacquer laughed at the Simple Green and purple cleaner as well. I hit it with everything I could and it just wouldn't go away without resorting to scraping.
Tank1812
_VISITCOMMUNITY
North Carolina, United States
Joined: April 29, 2014
KitMaker: 1,112 posts
Auto Modeler: 25 posts
Posted: Monday, September 14, 2020 - 01:38 AM UTC

Quoted Text

Ryan, this lacquer laughed at the Simple Green and purple cleaner as well. I hit it with everything I could and it just wouldn't go away without resorting to scraping.


Well that stinks. I had seen AMT kits work differently before, here is another example to add to the list.
Dixon66
_VISITCOMMUNITY
New Hampshire, United States
Joined: December 12, 2002
KitMaker: 1,500 posts
Auto Modeler: 645 posts
Posted: Monday, September 14, 2020 - 10:44 AM UTC
Had a long lunch today and spent some time in the basement doing some plumbing. The AMT supplied vinyl tubing is pretty hard to keep in the shape you want as is has no core. I used some solid core 24 gauge wire that had an overall outside diameter of .055"/1.4mm. Worked very well and kept the shape it was bent to. The other lines are .035"/.89mm solder to replicate the hard lines.

In this case, I used artistic license as the relay valves would be hidden by the fifth wheel plate and I just made up some manifolds instead to give them a place to go.

The rear service brakes are fed down one side through a tank into the manifold and then to the forward actuators. The parking brakes are the solder line feeding under the front brake air tank and onto the manifold then to the rear actuators. There is a solder feed line into the front brake tank and forward to the manifold then the wire lines to the front brake actuators. Sounds complicated, but it took less than an hour to plumb it all.


Engine in primer.

AussieReg
Staff MemberAssociate Editor
AUTOMODELER
#007
_VISITCOMMUNITY
Victoria, Australia
Joined: June 09, 2009
KitMaker: 8,156 posts
Auto Modeler: 2,953 posts
Posted: Monday, September 14, 2020 - 11:45 AM UTC
Gotta love a long lunch within reach of the workbench!

Very nice progress on the detailing David, this build is shaping up beautifully.

Cheers, D
Dixon66
_VISITCOMMUNITY
New Hampshire, United States
Joined: December 12, 2002
KitMaker: 1,500 posts
Auto Modeler: 645 posts
Posted: Monday, September 14, 2020 - 01:49 PM UTC
Thanks D. I've been working from home for more than 4 years, so a quick trip to the basement is easily accomplished if my phone stays quiet.

Can't wait to see how it all comes together, but I still haven't decided on a main color. Leaning towards Italian Red at this moment.
Dixon66
_VISITCOMMUNITY
New Hampshire, United States
Joined: December 12, 2002
KitMaker: 1,500 posts
Auto Modeler: 645 posts
Posted: Friday, September 18, 2020 - 08:48 AM UTC
While still waffling on the main body color I managed to get the engine painted and weathered. The MM Bright Yellow over MSP 1500 Black looks just about right to me.


Engine is just mocked into the chassis as I still need to finish rusting the exhaust manifolds.

The rest of the parts, including the body, are in primer.

 _GOTOTOP