_GOTOBOTTOM
Cars: Muscle Cars
60's & 70's Classics
Revell/Monogram Corvette C6 1/25 WIP
Snowhand
_VISITCOMMUNITY
Zuid-Holland, Netherlands
Joined: January 08, 2005
KitMaker: 1,066 posts
Auto Modeler: 234 posts
Posted: Saturday, July 22, 2006 - 05:34 PM UTC
A lovely kit it is
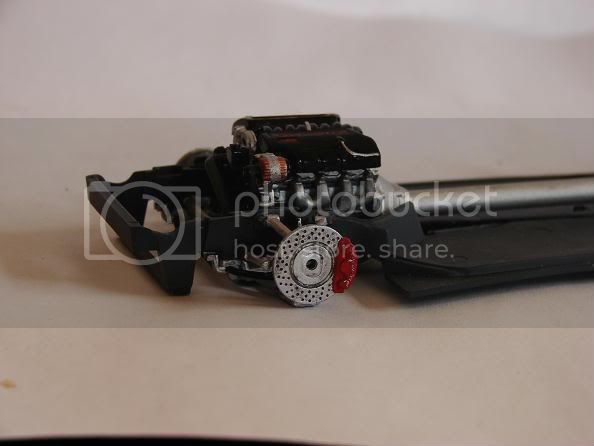
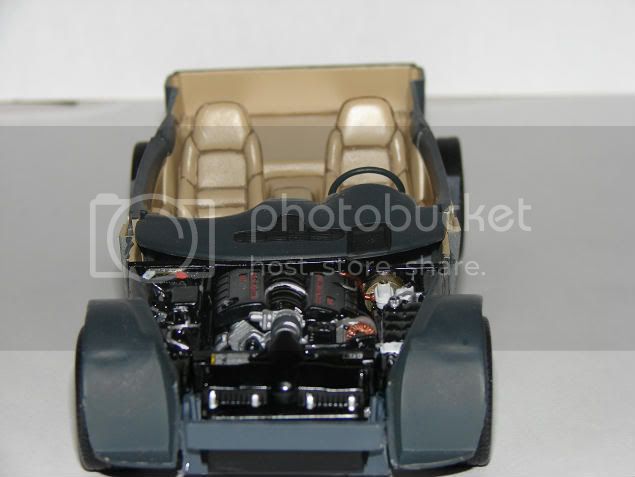
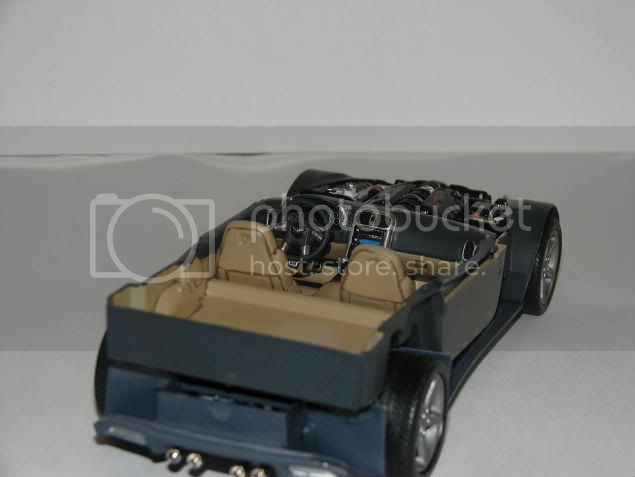
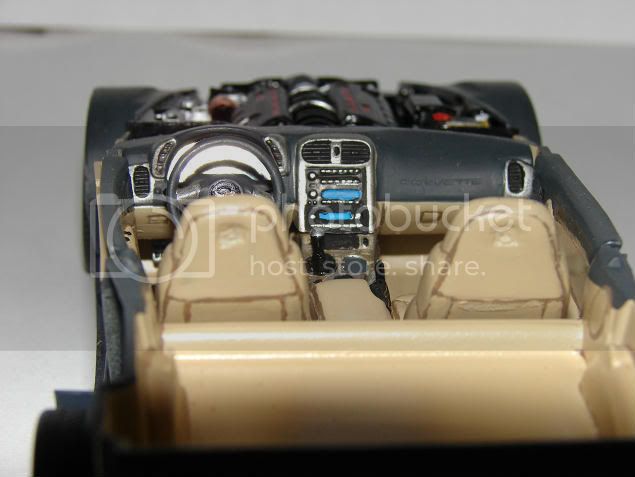
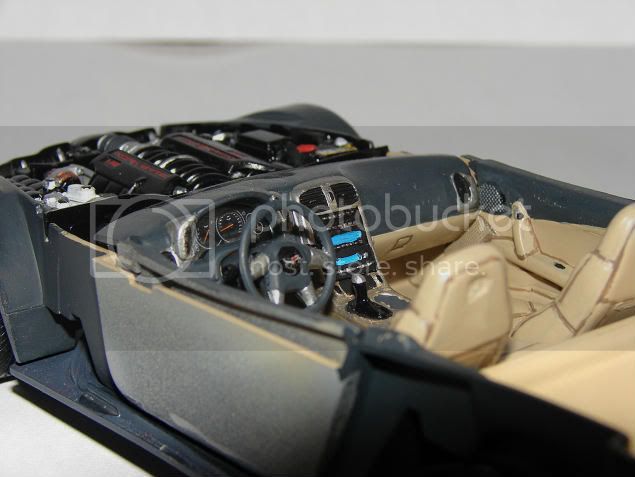
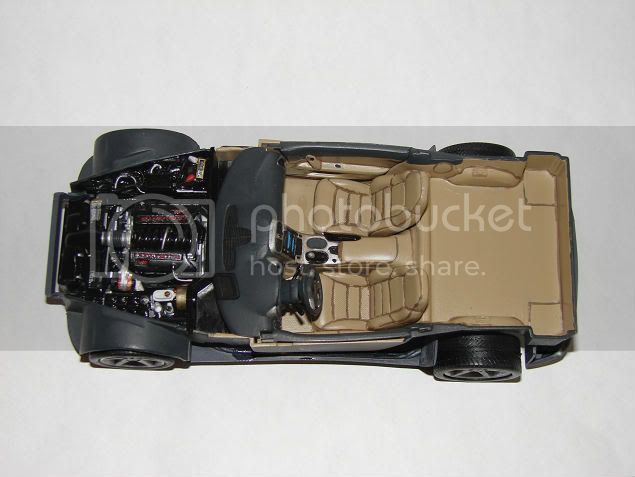
Just finished the engine/ drivetrain assembly, and here is what it's looking like now:


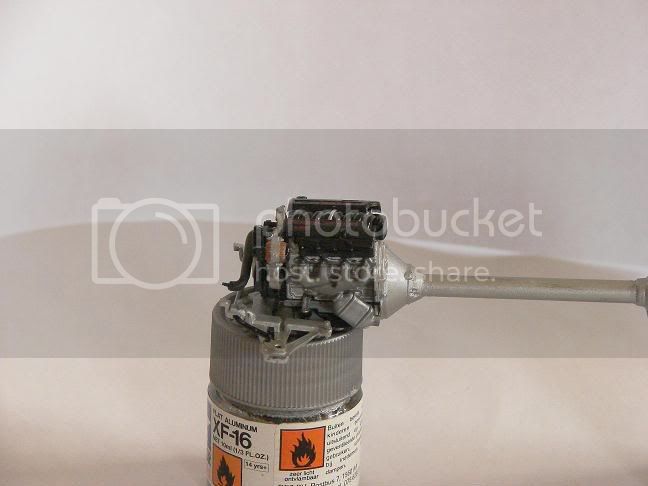
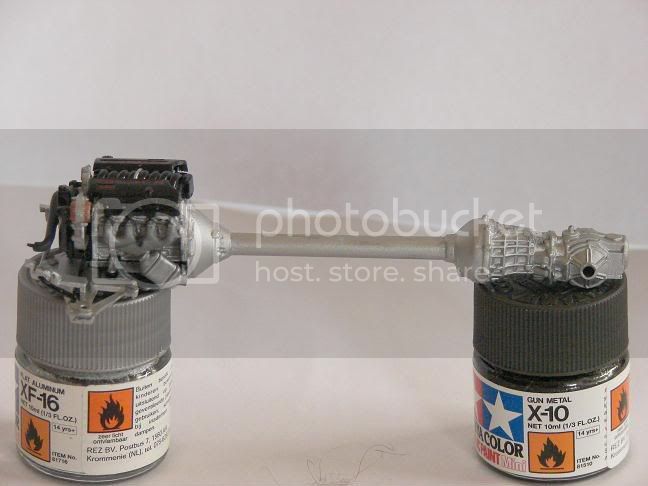
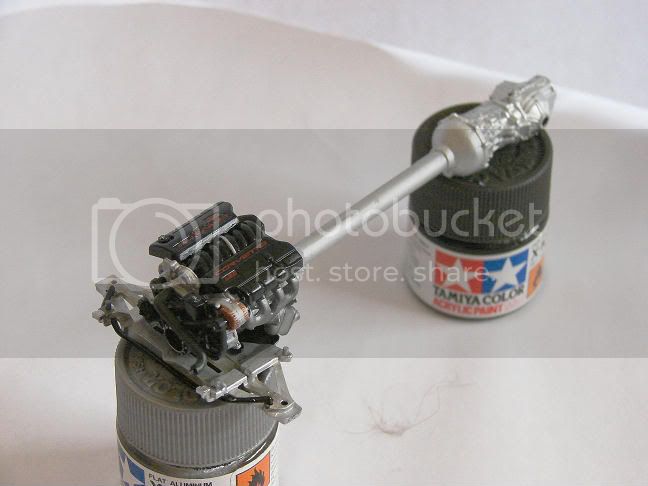
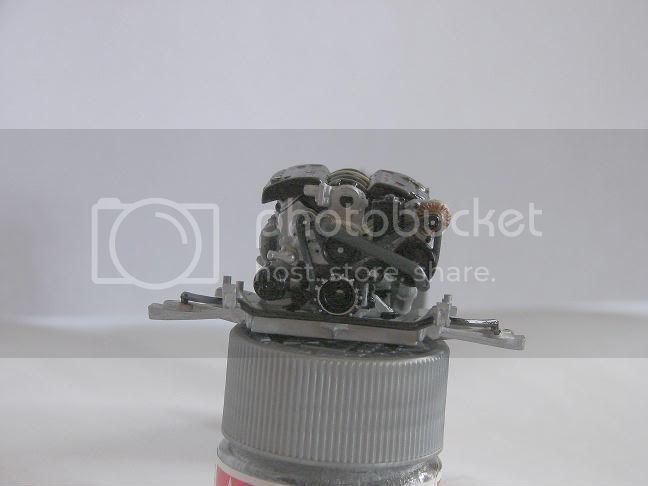
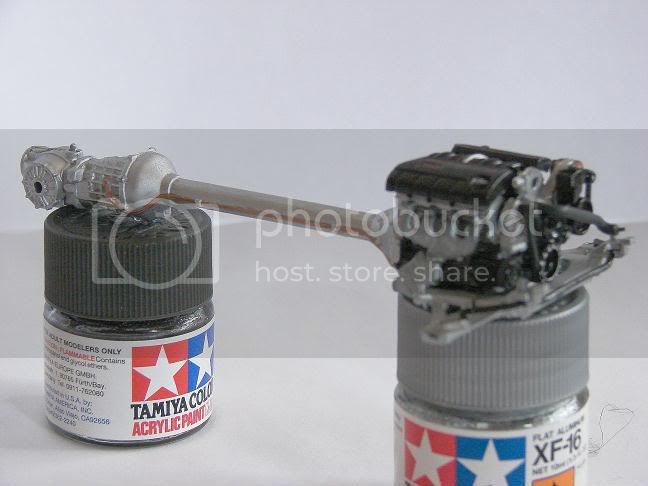
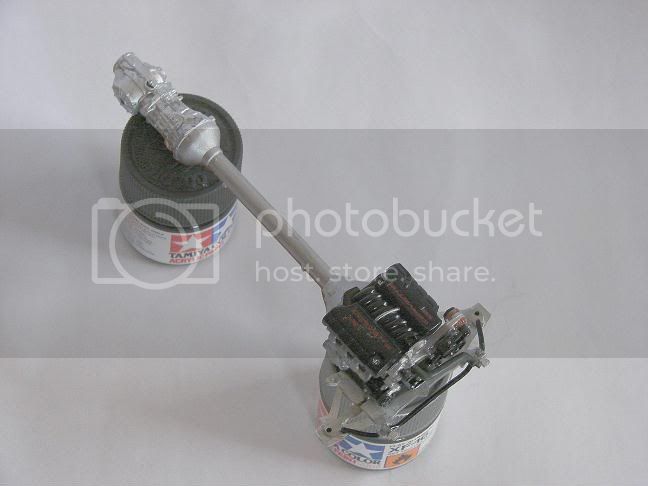
Done with Tamiya, Vallejo and Testors metalizer paints.

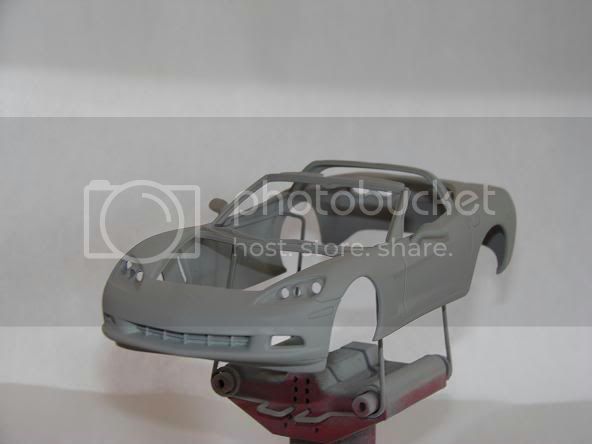
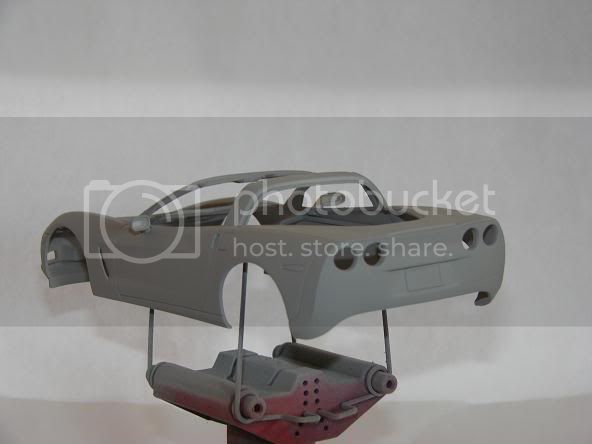
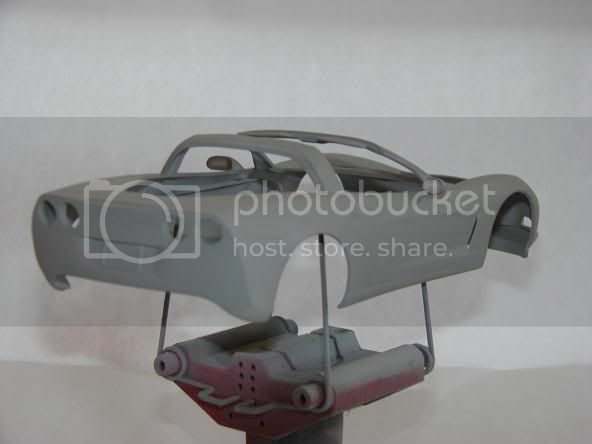
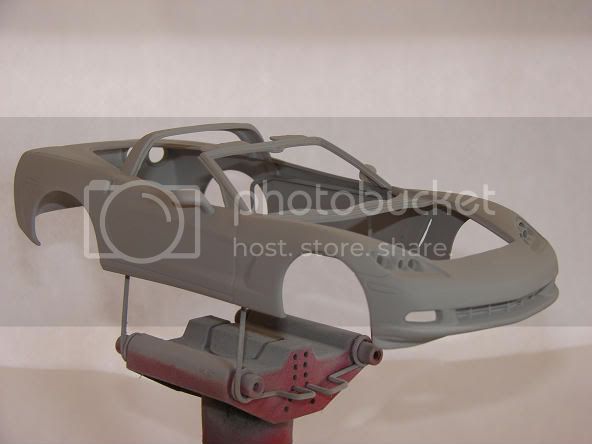
Whilst I type this, both chassis and body have been primed ( and are drying ).

The chassis will recieve a final coat of Tamiya TS 48 Gunship grey ( which should be the same as the revell color 74 ), the interior will be done in Tamiya TS4 German grey and the body color call out was revell 12 yellow, which I will replace with the much better looking TS39 Mica red.

As for the rims: in the kit, they are chrome plated, but I have decided to do them with Testors Magnesium metallizer

Comments/ remarks/ critiques welcome.

rv1963
_VISITCOMMUNITY
New York, United States
Joined: December 07, 2004
KitMaker: 1,888 posts
Auto Modeler: 806 posts
Posted: Saturday, July 22, 2006 - 07:40 PM UTC
Richard your engine trans combo looks good, and your idea to repaint the rims with a natural metal finish should look more realistic than the chrome plating.
cb1000f
Joined: July 03, 2004
KitMaker: 386 posts
Auto Modeler: 345 posts
Posted: Sunday, July 23, 2006 - 01:43 AM UTC
looking nice!!
Hwa-Rang
_VISITCOMMUNITY
Kobenhavn, Denmark
Joined: June 29, 2004
KitMaker: 6,760 posts
Auto Modeler: 2,182 posts
Posted: Tuesday, July 25, 2006 - 02:57 PM UTC
Looking good so far Richard. I'm sure the Magnesium wheels will look great.
Keep us posted.
Snowhand
_VISITCOMMUNITY
Zuid-Holland, Netherlands
Joined: January 08, 2005
KitMaker: 1,066 posts
Auto Modeler: 234 posts
Posted: Saturday, August 26, 2006 - 11:39 PM UTC
Lots done since last I posted:

Suspension and brakes built up, chassis added and painted, and the bodywork topcoat is drying as I write this.


The exhaust has been covered with Testors metalizer aluminum, highlighted with some Tamiya X11 chrome silver

Brakes: first coat: Tamiya XF 53 metallic grey, washed with Vallejo flat black, highlighted with Tamiya X11 chrome silver, brake calipers done with Vallejo scarlet, Tamiya X7 red topcoat, text in X11 chrome silver.

Suspension parts: Tamiya XF16 flat aluminum, with some X31 titanium silver highlights.

Bodywork: 2 coats of Tamiya grey primer, followed by a coat of Tamiya TS49 bright red, final coat of Tamiya TS39 mica red ( though the pics show the bodywork after primer stage )

more to come
slodder
_VISITCOMMUNITY
North Carolina, United States
Joined: February 22, 2002
KitMaker: 11,718 posts
Auto Modeler: 408 posts
Posted: Saturday, August 26, 2006 - 11:43 PM UTC
Looking very good. I would add a bit of a black pin wash in a few of tight nooks and crannies of the gear box/transmission (?)
Hwa-Rang
_VISITCOMMUNITY
Kobenhavn, Denmark
Joined: June 29, 2004
KitMaker: 6,760 posts
Auto Modeler: 2,182 posts
Posted: Saturday, August 26, 2006 - 11:57 PM UTC
I really like what I'm seeing here. Great work Richard. Love the color of the exaust pipes.
Snowhand
_VISITCOMMUNITY
Zuid-Holland, Netherlands
Joined: January 08, 2005
KitMaker: 1,066 posts
Auto Modeler: 234 posts
Posted: Sunday, August 27, 2006 - 12:07 AM UTC
I have been considering that, but in the end, the whole transmission/ gearbox won't be visible much, if at all.

So, I will leave it as it is for now.
Snowhand
_VISITCOMMUNITY
Zuid-Holland, Netherlands
Joined: January 08, 2005
KitMaker: 1,066 posts
Auto Modeler: 234 posts
Posted: Saturday, September 23, 2006 - 02:29 AM UTC
Update :


Inspite of the instructions, I decided to do the interior 2 tone ( which matches the images I have in my corvette brochure (oh yes, I went to get one, the chevy dealer was very helpfull... thank you for that ). )

So I used Vallejo black grey for the grey and Tamiya TS 46 light sand for the tan. Then used Vallejo field drab to enhance some of the panel lines.

I matched all the metal plated panels in the interior to images from the brochure, and alternating between semigloss black, titanium silver and aluminum, I think it looks the business

slodder
_VISITCOMMUNITY
North Carolina, United States
Joined: February 22, 2002
KitMaker: 11,718 posts
Auto Modeler: 408 posts
Posted: Saturday, September 23, 2006 - 02:55 AM UTC
I like the color scheme and the engine looks good.
The shadows or trim on the leather is a bit rough.
I would use a very fine brush and try to even out the darker trim color on the leather. Then I would make a wash of the tan leather color and go over the whole thing again for one uniform treatment to even very thing out.
rv1963
_VISITCOMMUNITY
New York, United States
Joined: December 07, 2004
KitMaker: 1,888 posts
Auto Modeler: 806 posts
Posted: Saturday, September 23, 2006 - 08:57 AM UTC
Wow Richard the engine compartment looks very realistic well done, the interior looks good but i think i would tone done the dark areas of the leather a little still it looks good, i am waiting for pics of the painted body. This looks like a good kit how was the fit of the parts what is the over all quality.
Snowhand
_VISITCOMMUNITY
Zuid-Holland, Netherlands
Joined: January 08, 2005
KitMaker: 1,066 posts
Auto Modeler: 234 posts
Posted: Sunday, September 24, 2006 - 12:32 AM UTC
The quality is good, allthough my copy suffers from a somewhat bent chassis.

Everything you see is OOB, so that should give you some idea.

The paint instructions are not the best though.. leaving out a lot of the details, or sometimes being completely wrong. It helps to view a lot of images, and have some reference material handy.

As for the body.. well.. er.. i am stripping the 4 layers that are on it right now.. something went terribly wrong with the last coat. (trapped bubbles )

For what it's worth.. the Tamiya Mica red rattle can does look awesome on this kit though.
 _GOTOTOP