Mopar vs Chevy practice build
Illinois, United States
Joined: August 30, 2005
KitMaker: 3,289 posts
Auto Modeler: 1,620 posts
Posted: Sunday, June 27, 2010 - 03:14 AM UTC
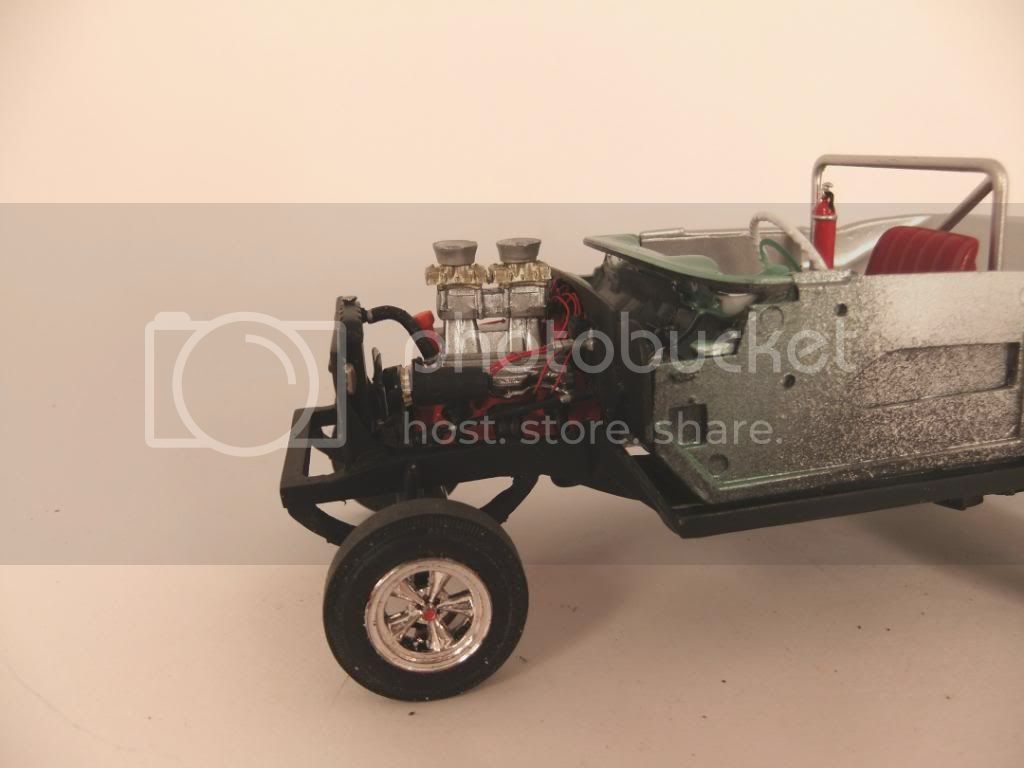
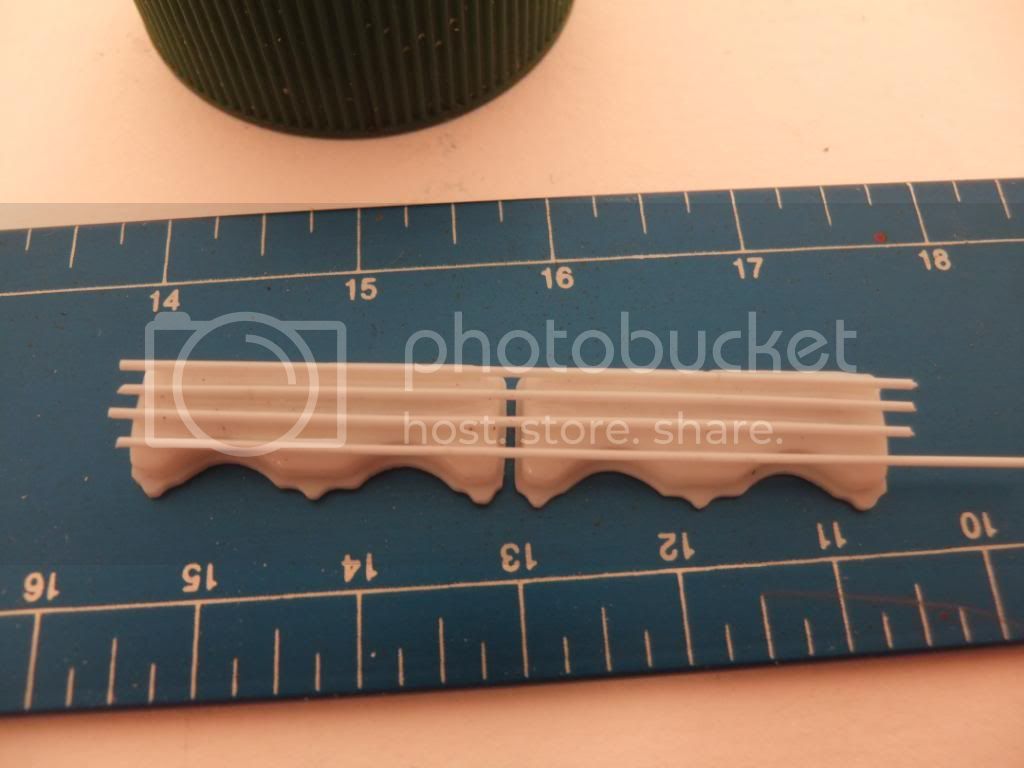
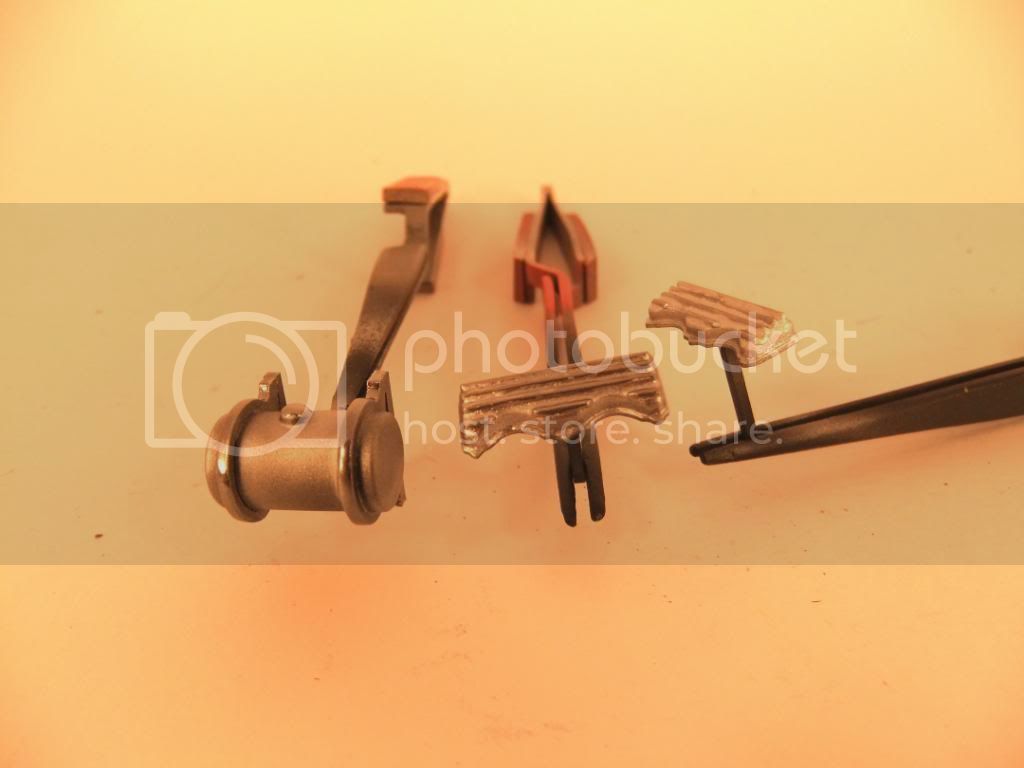
While I'm working on the interior I decided to play with this...finned valve covers. Took the kit valve covers and sanded off the lil 409 badge and added .020 rod stock in 4 pieces each to replicate the fins....how's it look? To do it again I'd try and find .010 or .015 rod stock or square stock to give it a less chunky look.
I put the valve covers up against a wooden stick to keep them straight and added the rods as shown here-
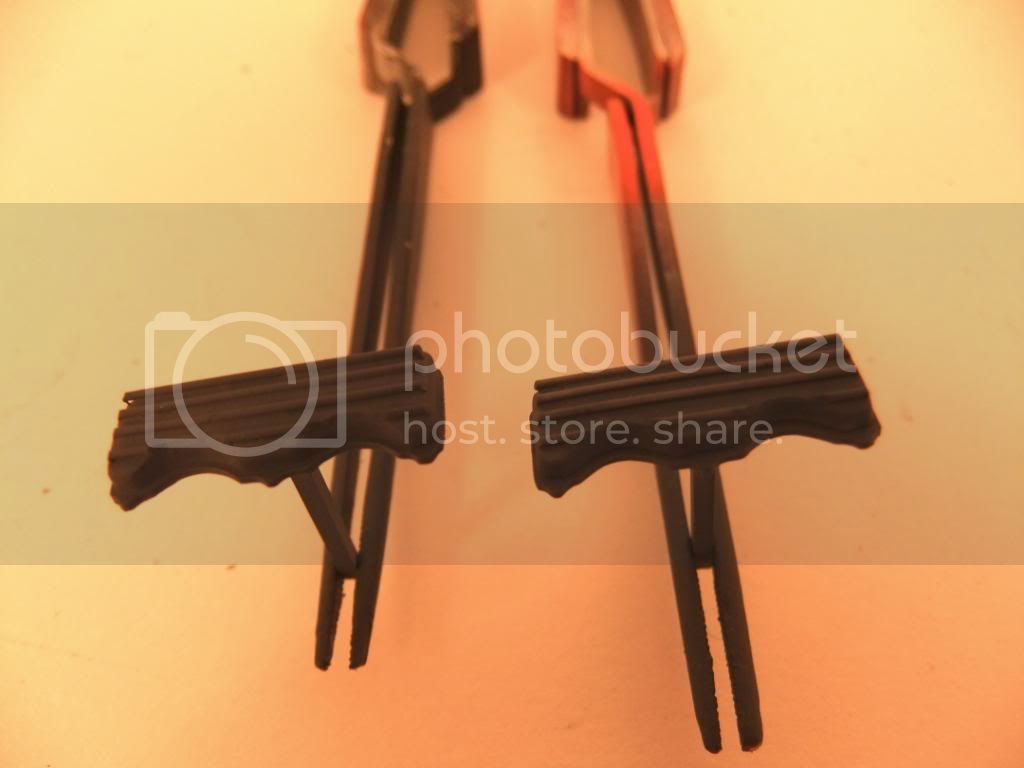
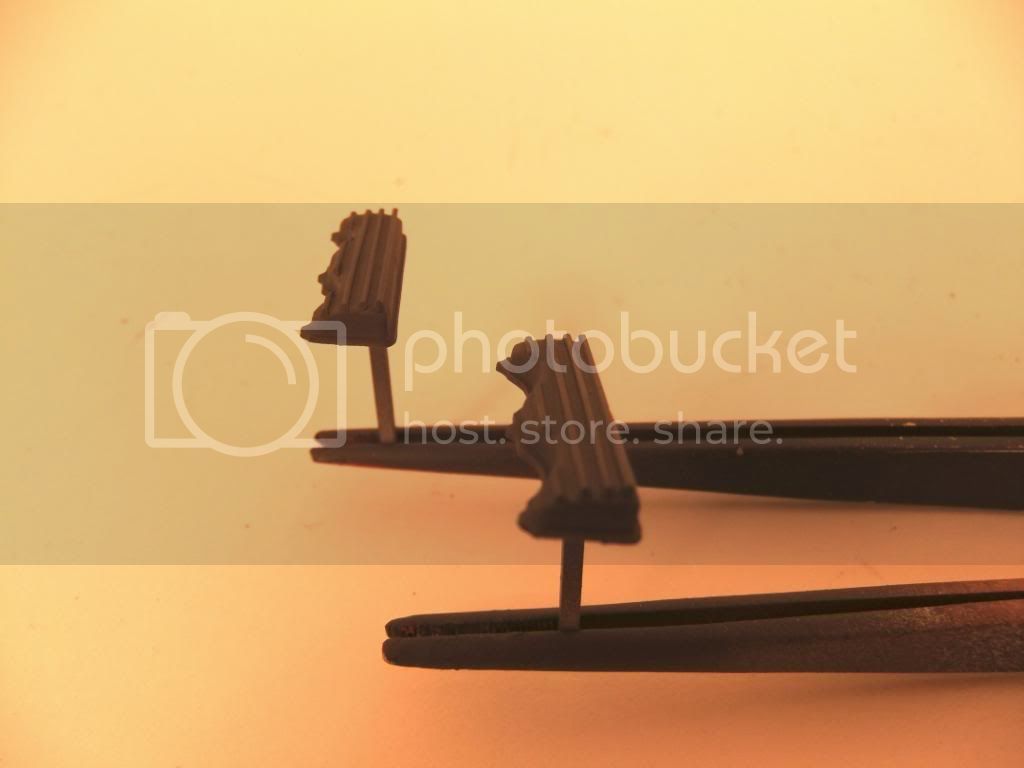
Here they are trimmed up and primed, ready for an aluminum or alcad chrome painting{haven't decided yet}-
What do you think?...
-I say I have two kids- one son & one daughter...my wife says she has three- one son ,one daughter and one husband.
...and don't tell yourself you can't do it....it'll just take longer then
AussieReg
 Associate Editor
#007
Victoria, Australia
Joined: June 09, 2009
KitMaker: 8,156 posts
Auto Modeler: 2,953 posts
Posted: Sunday, June 27, 2010 - 03:22 AM UTC
Very nice touch Bob. It's amazing what a few little mods like that can add to an engine bay !
Cheers, D
ON the bench
Revell 1/24 '53 Corvette (building as '54)
Revell 1/24 BMW 507 Coupe and Cabrio
Italeri 1/48 Me262 B-1a/U1 Nightfighter
Monogram 1/24 '57 Chevy Nomad
Dragon 1/350 USS Frank Knox DD-742
Illinois, United States
Joined: August 30, 2005
KitMaker: 3,289 posts
Auto Modeler: 1,620 posts
Posted: Sunday, June 27, 2010 - 06:47 AM UTC
Quoted Text
Very nice touch Bob. It's amazing what a few little mods like that can add to an engine bay !
Cheers, D
Thanks...I think next time it'll be square stock used.
-I say I have two kids- one son & one daughter...my wife says she has three- one son ,one daughter and one husband.
...and don't tell yourself you can't do it....it'll just take longer then
Washington, United States
Joined: September 20, 2007
KitMaker: 861 posts
Auto Modeler: 339 posts
Posted: Sunday, June 27, 2010 - 09:03 AM UTC
Looks good, Bob.
You mentioned using square stock in the future for this sort of detail. Have you thought about using a medium or fine sanding stick to flatten the tops of the rod (to make them squared off) and perhaps introduce a gentle curve to the ends? You can obviously do this in place, now that everything is glued up. Just a thought.
-YL
Illinois, United States
Joined: August 30, 2005
KitMaker: 3,289 posts
Auto Modeler: 1,620 posts
Posted: Monday, June 28, 2010 - 06:40 AM UTC
Correct, but wrong end bud...with the round stock there's a "pucker" inside of each run/length...minor, but I filled them in with thin CA to fill them in better...think side view on the surface - round vs square.
Got a coat of alclad chrome on them earlier with a twist. Alclad chrome requests a glossy black base and as I've done before the base was flat black to tone the shine but this time I took some gloss black and painted the gas cap and the bands on the moon gas tank and gloss blacked the top of the fins on the valve covers...lets see if it yields any real difference.
-I say I have two kids- one son & one daughter...my wife says she has three- one son ,one daughter and one husband.
...and don't tell yourself you can't do it....it'll just take longer then
Illinois, United States
Joined: August 30, 2005
KitMaker: 3,289 posts
Auto Modeler: 1,620 posts
Posted: Monday, June 28, 2010 - 08:34 AM UTC
Here's the tank and valve covers in two coats of the alclad chrome..the tank shows the difference in flat back base and gloss black bands...the valve covers - not so much but I had to try!
-I say I have two kids- one son & one daughter...my wife says she has three- one son ,one daughter and one husband.
...and don't tell yourself you can't do it....it'll just take longer then
Washington, United States
Joined: September 20, 2007
KitMaker: 861 posts
Auto Modeler: 339 posts
Posted: Monday, June 28, 2010 - 09:30 AM UTC
Interesting. You can really see the difference on the tank. From the pics it looks like the Alclad produces a matt finish over the flat black, similar to unpolished aluminum (or perhaps dull chrome?).
-YL
Illinois, United States
Joined: August 30, 2005
KitMaker: 3,289 posts
Auto Modeler: 1,620 posts
Posted: Monday, June 28, 2010 - 02:55 PM UTC
Quoted Text
Interesting. You can really see the difference on the tank. From the pics it looks like the Alclad produces a matt finish over the flat black, similar to unpolished aluminum (or perhaps dull chrome?).
-YL
..well...somebody has to try this stuff I guess - I got a 3oz bottle of chrome that says I can!

-I say I have two kids- one son & one daughter...my wife says she has three- one son ,one daughter and one husband.
...and don't tell yourself you can't do it....it'll just take longer then
Illinois, United States
Joined: August 30, 2005
KitMaker: 3,289 posts
Auto Modeler: 1,620 posts
Posted: Thursday, July 01, 2010 - 11:23 PM UTC
-I say I have two kids- one son & one daughter...my wife says she has three- one son ,one daughter and one husband.
...and don't tell yourself you can't do it....it'll just take longer then
Illinois, United States
Joined: August 30, 2005
KitMaker: 3,289 posts
Auto Modeler: 1,620 posts
Posted: Thursday, July 08, 2010 - 03:29 PM UTC
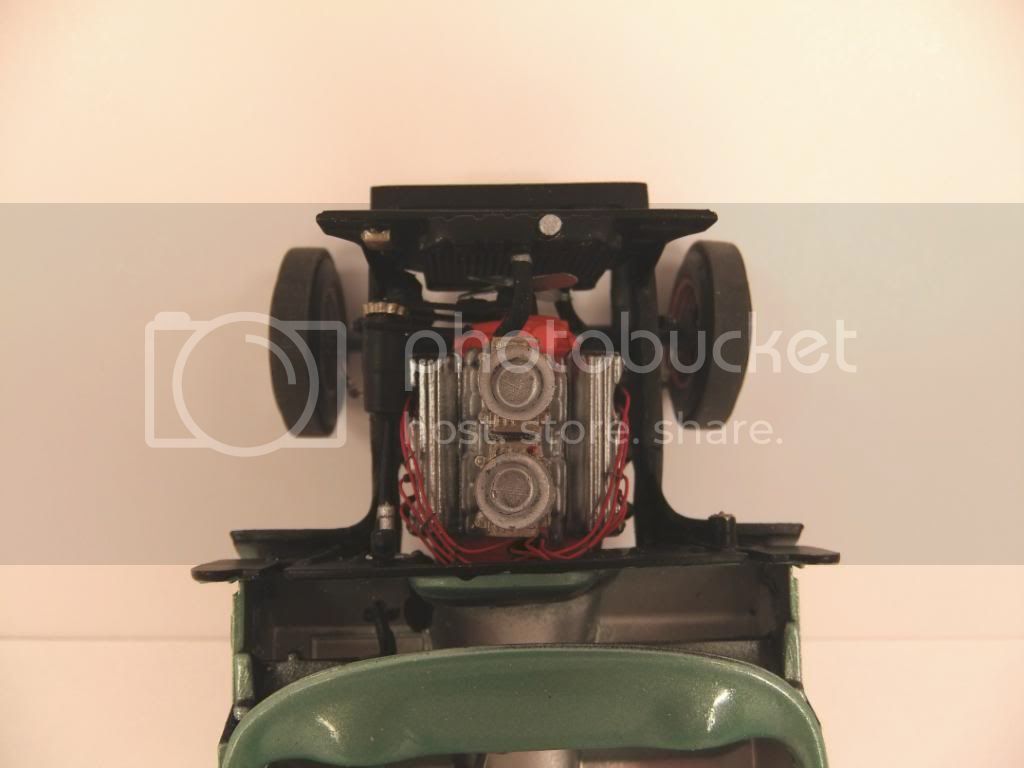
Maaaaaaan.....practise is right! 5 hrs later I finally got the plug wires done{yeah, my 1st time doing this}. Don't know if I have room in there for the coil lead to get thru!
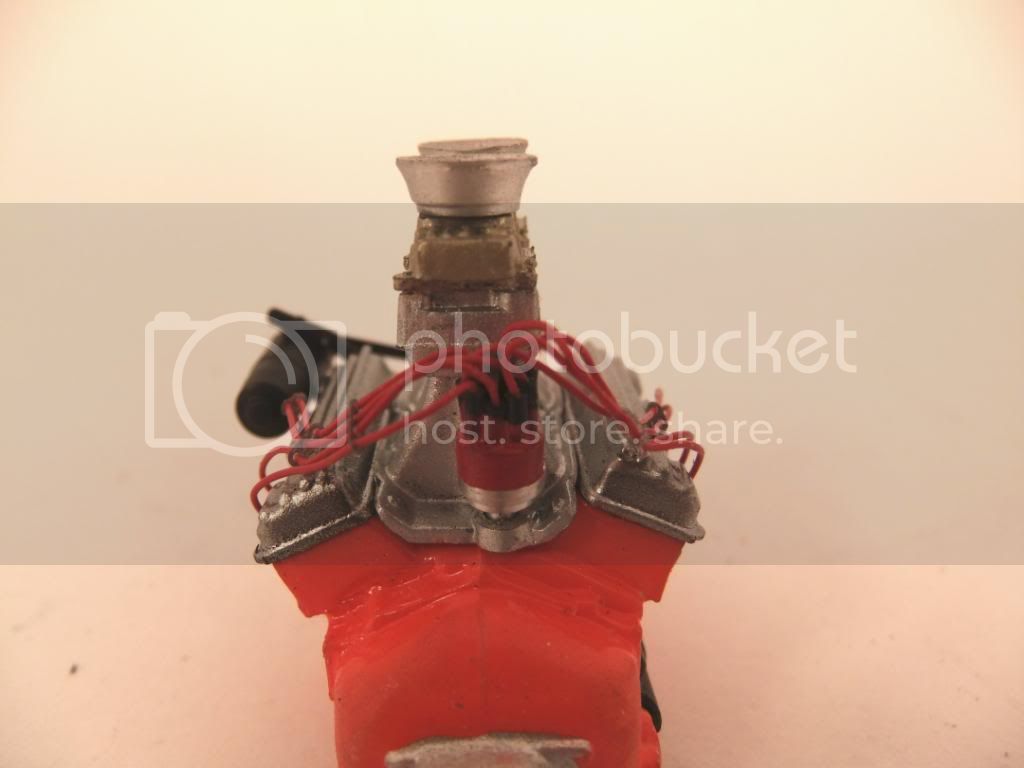
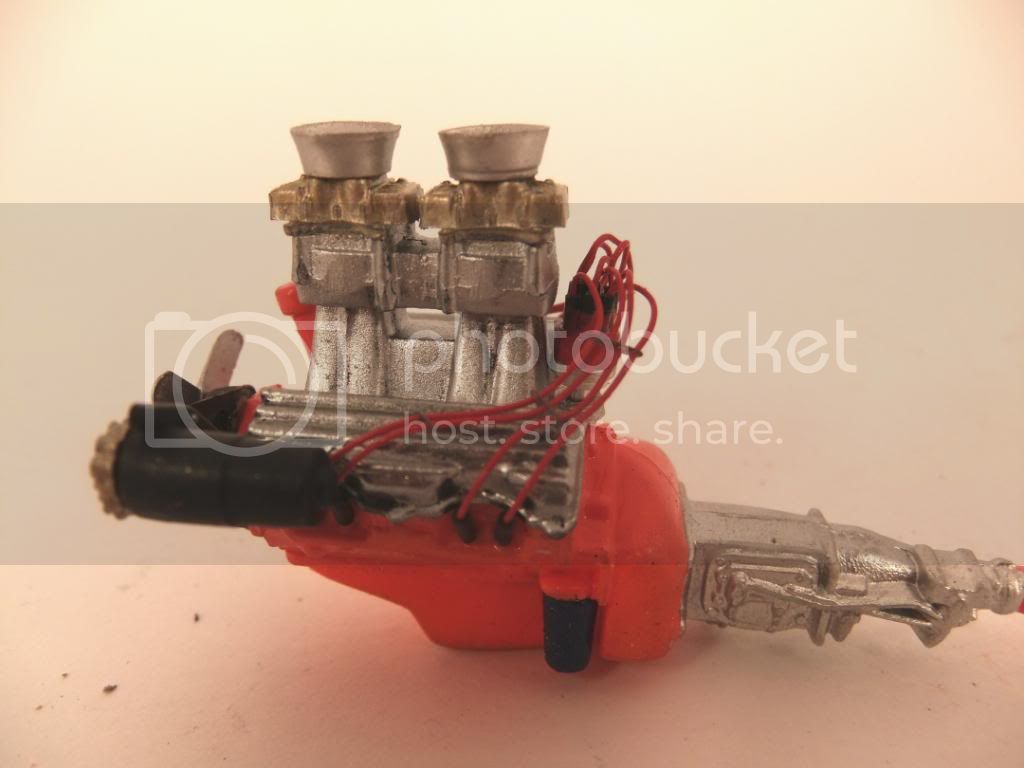
Nice, but that's more work than wiring a real one from scratch...I don't know how you guys do it as well as the rest of the lines! My hats off to those who have!
...and to think, I still have the headers to scratch !
-I say I have two kids- one son & one daughter...my wife says she has three- one son ,one daughter and one husband.
...and don't tell yourself you can't do it....it'll just take longer then
Washington, United States
Joined: September 20, 2007
KitMaker: 861 posts
Auto Modeler: 339 posts
Posted: Friday, July 09, 2010 - 05:50 AM UTC
For your first time, that's a pretty sweet job of wiring. You have spark plug boots on both ends, and some nifty wire looms, too - nice job!
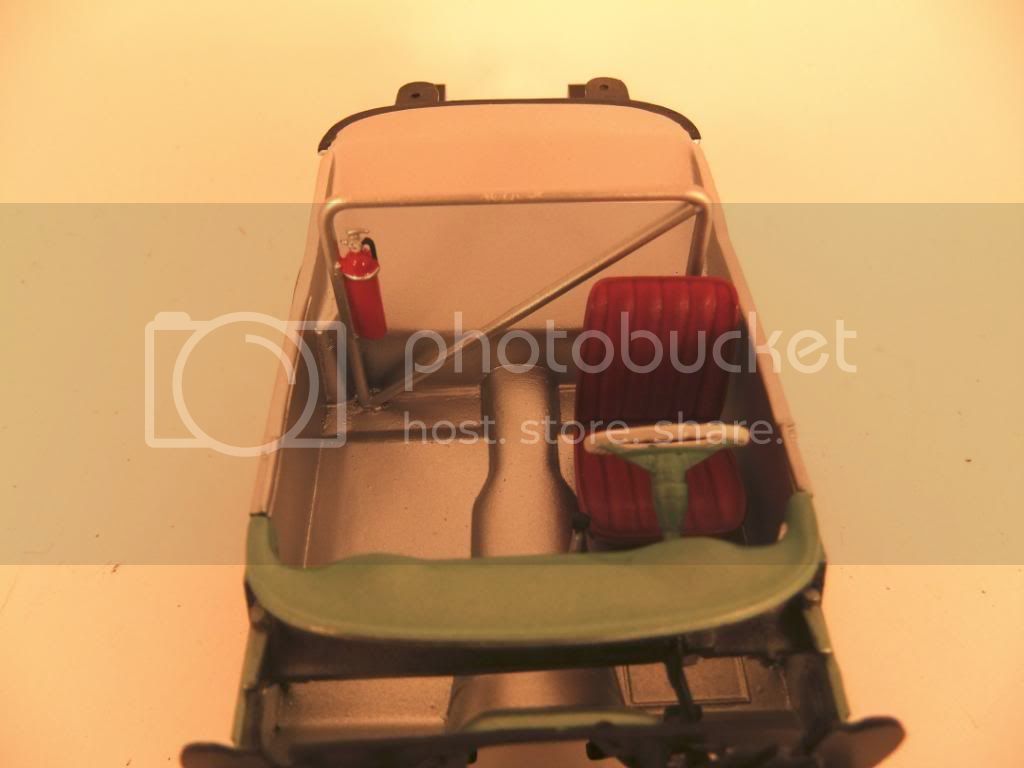
BTW, I'm still digging the red driver's seat.
-YL
Illinois, United States
Joined: August 30, 2005
KitMaker: 3,289 posts
Auto Modeler: 1,620 posts
Posted: Friday, July 09, 2010 - 07:13 AM UTC
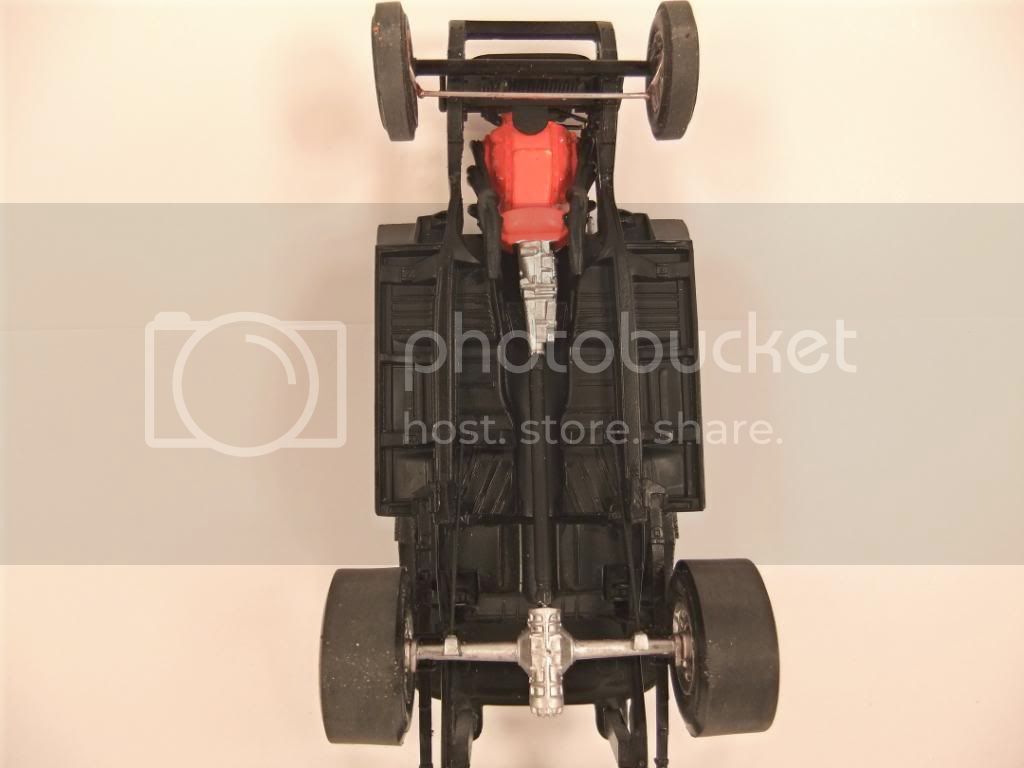
Well, I can't say I didn't see this one coming - the cross member wasn't playing very nicely with the build...got in the way of the headers so I have a solution-
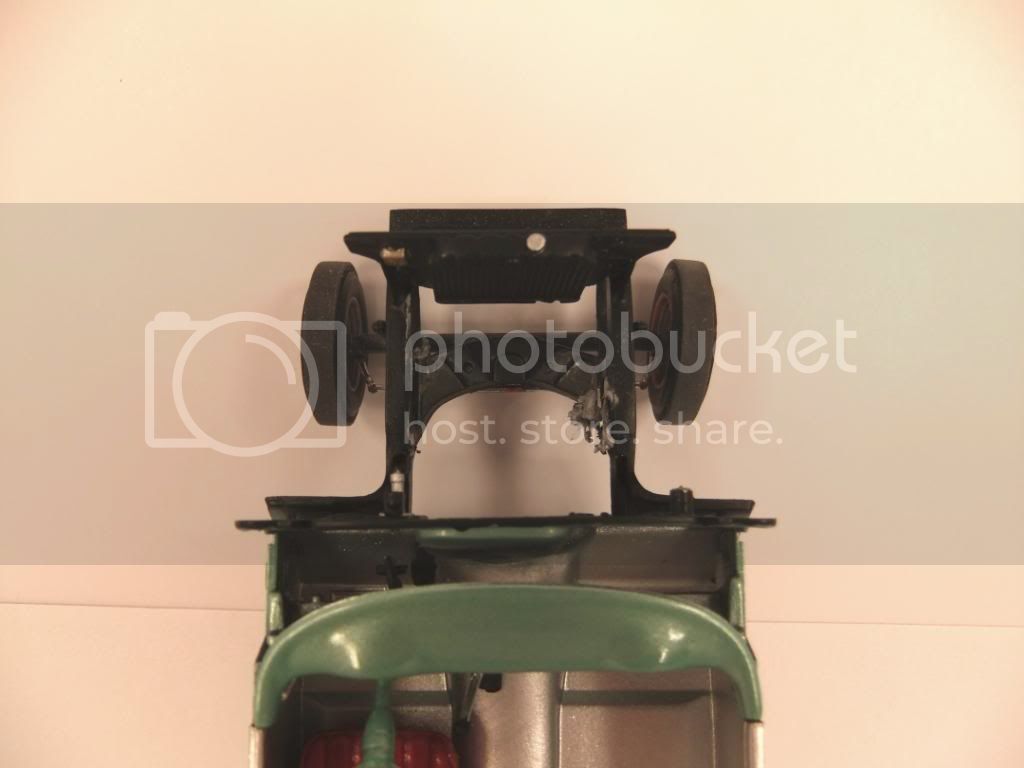
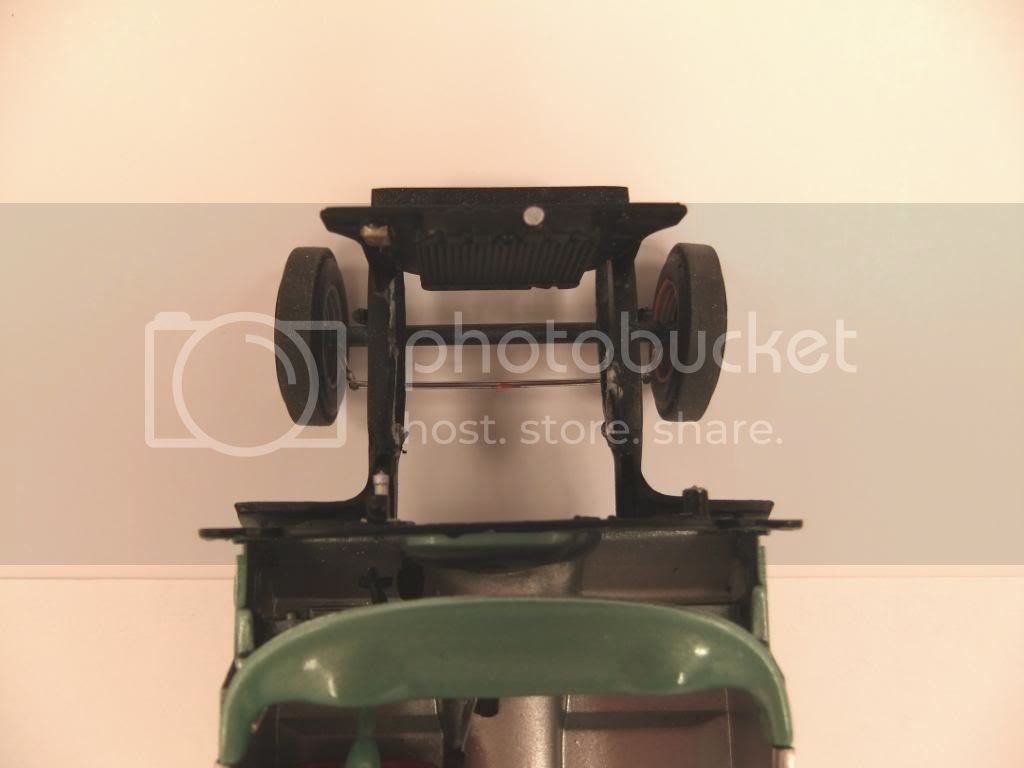
...say goodbye to the cross member! My options are now 3 fold, 1) new tubular mount cross member, 2) new regular side engine mounts or 3) a solid engine plate...alittle too late for that one so it's between #1 and #2..where's a coin?!
I already removed the steering box so now it's time to clean up the frame and go put a coat of paint on the headers...
-I say I have two kids- one son & one daughter...my wife says she has three- one son ,one daughter and one husband.
...and don't tell yourself you can't do it....it'll just take longer then
North Carolina, United States
Joined: November 28, 2005
KitMaker: 2,216 posts
Auto Modeler: 522 posts
Posted: Friday, July 09, 2010 - 01:57 PM UTC
Bob, you spent more hours in one day on those plug wires than I've had at the workbench in 4 weeks.

Looking really sweet as usual. One trick I picked up a while back on engines is to use multiple shades of metallics. I like MM titanium on transmitions because it's a bit darker (looks like road grime and a leaking rear main has had an effect).
Hermon

"Those who would give up Essential Liberty
to purchase a little Temporary Safety,
deserve neither Liberty nor Safety."
Benjamin Franklin
Illinois, United States
Joined: August 30, 2005
KitMaker: 3,289 posts
Auto Modeler: 1,620 posts
Posted: Saturday, July 10, 2010 - 01:40 AM UTC
Quoted Text
For your first time, that's a pretty sweet job of wiring. You have spark plug boots on both ends, and some nifty wire looms, too - nice job!
BTW, I'm still digging the red driver's seat.
-YL
Thanks...the plug kit states adding the black boots to both ends but said make the ones on the cap shorter..I made them alitle longer and painted the bottoms red like the cap to simulate the towers where the wires go on since the cap is dead flat...I'm working on a coil now.
-I say I have two kids- one son & one daughter...my wife says she has three- one son ,one daughter and one husband.
...and don't tell yourself you can't do it....it'll just take longer then
Illinois, United States
Joined: August 30, 2005
KitMaker: 3,289 posts
Auto Modeler: 1,620 posts
Posted: Saturday, July 10, 2010 - 01:42 AM UTC
Quoted Text
Bob, you spent more hours in one day on those plug wires than I've had at the workbench in 4 weeks.
Looking really sweet as usual. One trick I picked up a while back on engines is to use multiple shades of metallics. I like MM titanium on transmitions because it's a bit darker (looks like road grime and a leaking rear main has had an effect).
Hermon
Thanks chief...I have other shades of silver, just got alittle lazy this build with all that's been going on...speaking of which I need to upload some pics real soon of the recent progress.
-I say I have two kids- one son & one daughter...my wife says she has three- one son ,one daughter and one husband.
...and don't tell yourself you can't do it....it'll just take longer then
Illinois, United States
Joined: August 30, 2005
KitMaker: 3,289 posts
Auto Modeler: 1,620 posts
Posted: Saturday, July 10, 2010 - 01:57 AM UTC
-I say I have two kids- one son & one daughter...my wife says she has three- one son ,one daughter and one husband.
...and don't tell yourself you can't do it....it'll just take longer then
Antwerpen, Belgium
Joined: August 25, 2006
KitMaker: 794 posts
Auto Modeler: 179 posts
Posted: Saturday, July 10, 2010 - 03:17 AM UTC
There are more planes in the ocean than submarines in the sky.
BR 52 on the work bench
Leopold Railway gun in progress.
VW Käfer 1/16
AussieReg
Associate Editor #007
Victoria, Australia
Joined: June 09, 2009
KitMaker: 8,156 posts
Auto Modeler: 2,953 posts
Posted: Saturday, July 10, 2010 - 02:05 PM UTC
ON the bench
Revell 1/24 '53 Corvette (building as '54)
Revell 1/24 BMW 507 Coupe and Cabrio
Italeri 1/48 Me262 B-1a/U1 Nightfighter
Monogram 1/24 '57 Chevy Nomad
Dragon 1/350 USS Frank Knox DD-742
Illinois, United States
Joined: August 30, 2005
KitMaker: 3,289 posts
Auto Modeler: 1,620 posts
Posted: Thursday, November 18, 2010 - 04:26 PM UTC
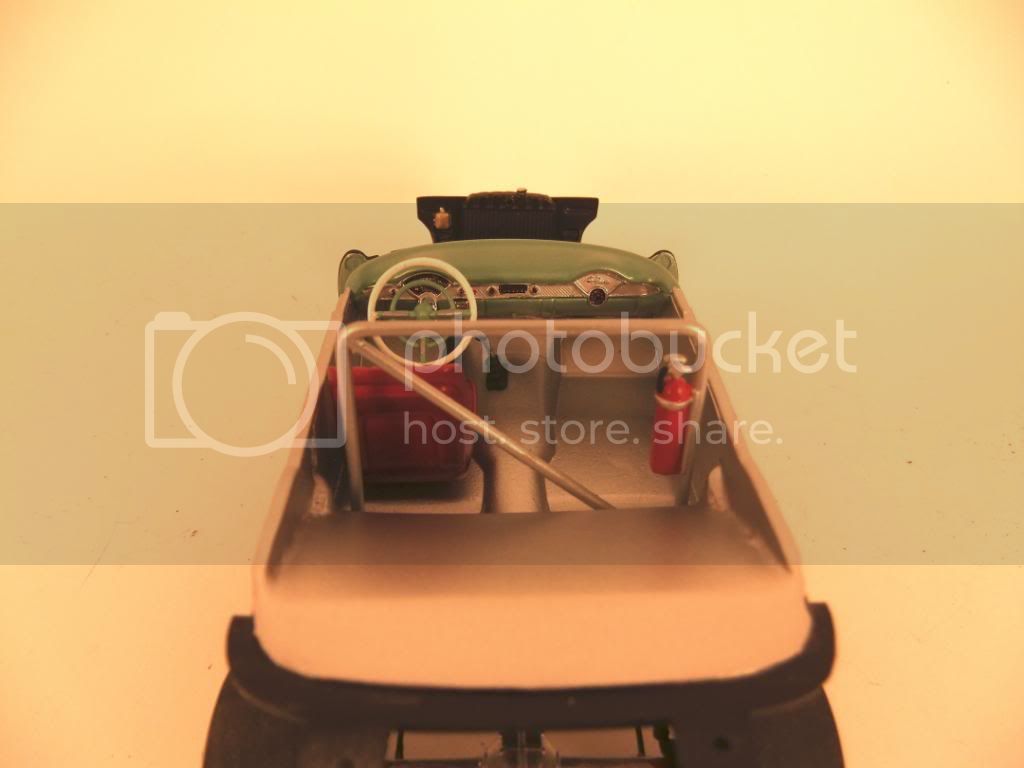
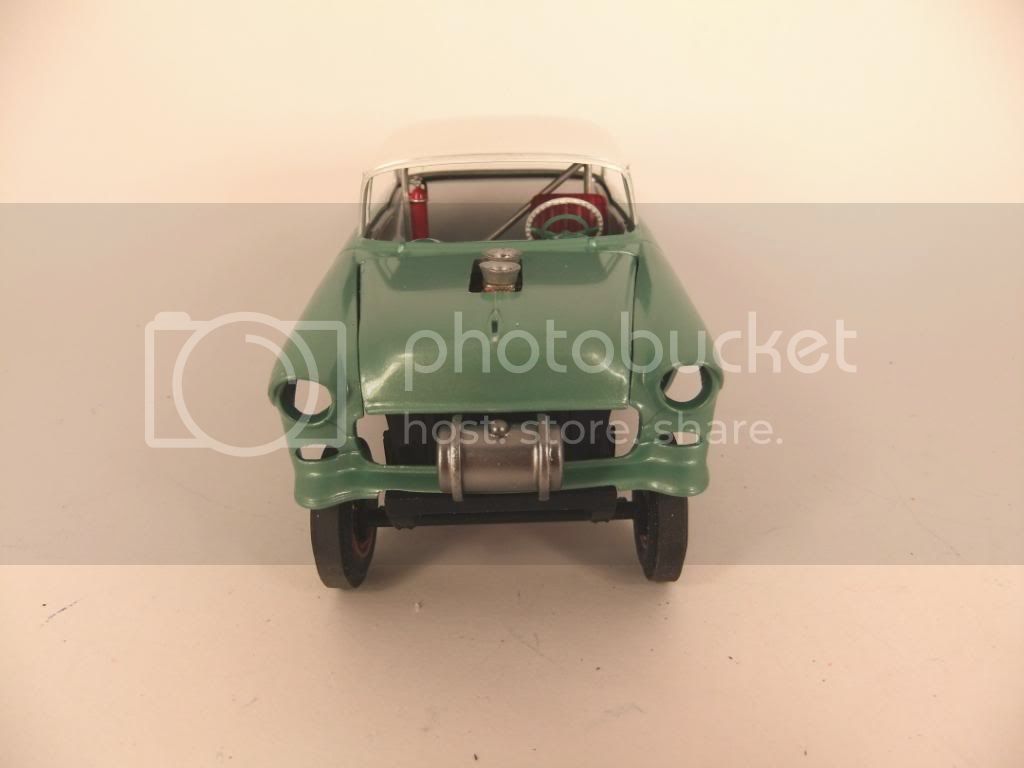
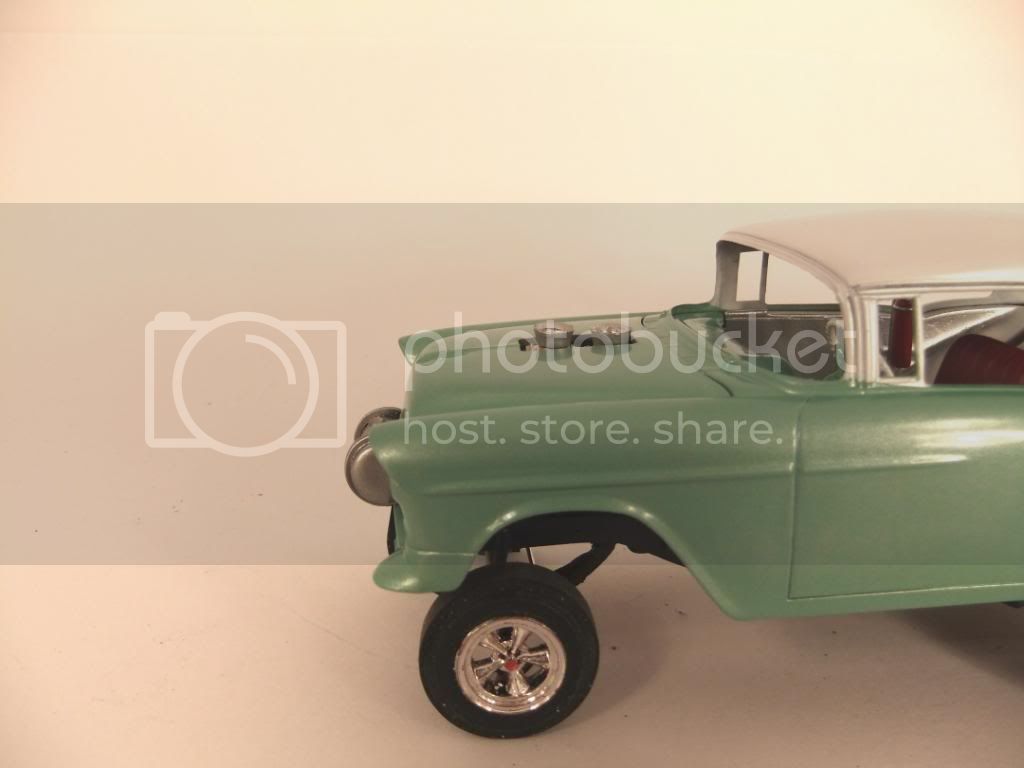
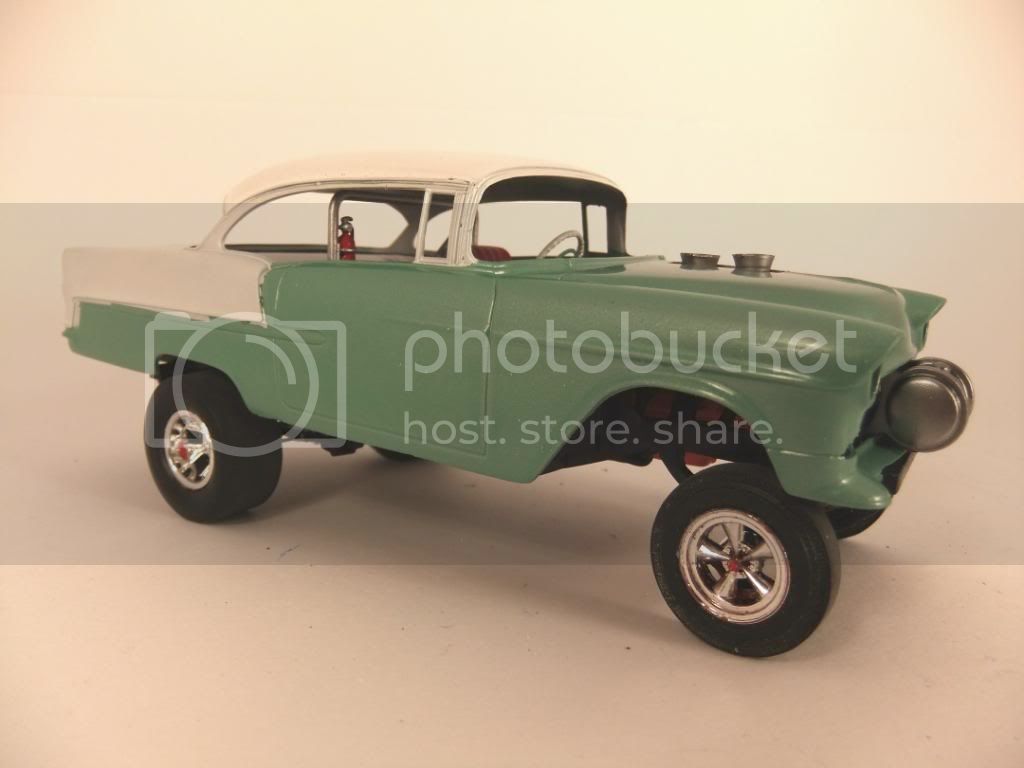
Knocked the dust off of this one and installed the rear window...a green tinted and vented rear window- neat!

...not much to do now and she's all done.
-I say I have two kids- one son & one daughter...my wife says she has three- one son ,one daughter and one husband.
...and don't tell yourself you can't do it....it'll just take longer then
Kobenhavn, Denmark
Joined: June 29, 2004
KitMaker: 6,760 posts
Auto Modeler: 2,182 posts
Posted: Sunday, November 21, 2010 - 11:14 PM UTC
Looking good Bob. The tinted/vented rearwindow is a nice touch.
On the workbench:
MPC: 1972 Pontiac GTO
Revell: 1965 Mustang
Verlinden 120mm guard of the marine.
Revell: 2010 Camaro
Monogram: 1931 Rolls Royce
Italeri: LVT2 Amtrac