

Go to automodeler.com for the current dynamic site!


Hosted by Jim Starkweather
67 GTO vs 67 Charger Dual Build

Hwa-Rang

Joined: June 29, 2004
KitMaker: 6,760 posts
Auto Modeler: 2,182 posts

Posted: Wednesday, August 05, 2020 - 06:46 PM UTC
NO! NO! NO!, that really S....

AussieReg

#007

Joined: June 09, 2009
KitMaker: 8,156 posts
Auto Modeler: 2,953 posts

Posted: Wednesday, August 05, 2020 - 09:19 PM UTC
Quoted Text
NO! NO! NO!, that really S....
Well, the chrome bottom trim that I masked up for turned out ok

I keep telling myself, if this is the worst thing that happens to me today, I'm going to be ok!
Cheers, D

Hwa-Rang
Joined: June 29, 2004
KitMaker: 6,760 posts
Auto Modeler: 2,182 posts
Posted: Wednesday, August 05, 2020 - 10:25 PM UTC
Quoted Text
I keep telling myself, if this is the worst thing that happens to me today, I'm going to be ok!
Yeah, keep it positive mate


RussellE

#306
Joined: June 27, 2010
KitMaker: 3,959 posts
Auto Modeler: 495 posts
Posted: Wednesday, August 05, 2020 - 10:43 PM UTC
aaaaaaaaaaaaaarrrrrrrrrrrrrrghhhhh! That beautiful finish, gone! 


Joel_W

Joined: December 04, 2010
KitMaker: 11,666 posts
Auto Modeler: 2,974 posts

Posted: Thursday, August 06, 2020 - 12:15 AM UTC
D,
As the old American saying goes, excuse my English, but that really sucks To be completely honest about it, I'm not a huge fan of how Alcad2 instructions are. Now I love their Metallics and never mask over the super shiny ones as they recommend, but when it comes to priming, I'm just not following their recommendations.
Paint needs a surface to bite into so that there's a foundation to build on that won't pull up at the slightest touch, and for me that's primer. And the primer also needs to plastic surface ready to accept it, and that's a good thing, a light rubbing with 600 or 800 grit. Today's model plastics are just to smooth to really be a direct home for our paints.
After several years of screw ups, I ended up following just two auto modelers painting procedures that works for me. One thing that's universal is that each coat (not layers) gets a very light rubbing to smooth out the surface some. Primer, color, and then the clear which gets the full Monty.
I'm betting that you'll nail the repaint to a Perfect T this time for sure.
What also amazes me is your composure. Honestly, I'd have flipped, uttered a good dozen or so choice words, and then just boxed up the kit for the short run. But you took it in stride, came up with a plan, and just carried on forward. To me, that's amazing.
Just one question, why a black primer? Under a Silver base I'd have opted for either white or a light Gray.
Joel
As the old American saying goes, excuse my English, but that really sucks
To be completely honest about it, I'm not a huge fan of how Alcad2 instructions are. Now I love their Metallics and never mask over the super shiny ones as they recommend, but when it comes to priming, I'm just not following their recommendations. Paint needs a surface to bite into so that there's a foundation to build on that won't pull up at the slightest touch, and for me that's primer. And the primer also needs to plastic surface ready to accept it, and that's a good thing, a light rubbing with 600 or 800 grit. Today's model plastics are just to smooth to really be a direct home for our paints.
After several years of screw ups, I ended up following just two auto modelers painting procedures that works for me. One thing that's universal is that each coat (not layers) gets a very light rubbing to smooth out the surface some. Primer, color, and then the clear which gets the full Monty.
I'm betting that you'll nail the repaint to a Perfect T this time for sure.
What also amazes me is your composure. Honestly, I'd have flipped, uttered a good dozen or so choice words, and then just boxed up the kit for the short run. But you took it in stride, came up with a plan, and just carried on forward. To me, that's amazing.
Just one question, why a black primer? Under a Silver base I'd have opted for either white or a light Gray.
Joel


Dixon66
Joined: December 12, 2002
KitMaker: 1,500 posts
Auto Modeler: 645 posts

Posted: Thursday, August 06, 2020 - 12:35 AM UTC
Awww, D., man that really sucks. Best of luck on the repaint.
AussieReg
#007
Joined: June 09, 2009
KitMaker: 8,156 posts
Auto Modeler: 2,953 posts
Posted: Friday, August 07, 2020 - 12:58 PM UTC
Thanks for the compassion guys, I'm sure we've all been through this stage a number of times!
I prefer black base under silver so that I can see the consistency of the coverage. I find that spraying silver over grey or white is more difficult to get that nice even finish.
Cheers, D
Quoted Text
Just one question, why a black primer? Under a Silver base I'd have opted for either white or a light Gray.
I prefer black base under silver so that I can see the consistency of the coverage. I find that spraying silver over grey or white is more difficult to get that nice even finish.
Cheers, D

Cosimodo
#335

Joined: September 03, 2013
KitMaker: 1,808 posts
Auto Modeler: 701 posts

Posted: Friday, August 07, 2020 - 02:23 PM UTC
That's a bummer!
I use Alclad a fair bit. Most of the metallics on the Porsche are Alclad. What I can say there is little consistency between the way there lacquers react to masking tape. I now know some must be painted last because you won't be able to mask it, others are very robust. I can understand your frustration and impressed by your zen like calmness in the face of the modelling gremlins.
Cheers
Michael

Stickframe
#362
Joined: December 01, 2013
KitMaker: 1,661 posts
Auto Modeler: 431 posts

Posted: Friday, August 07, 2020 - 04:49 PM UTC
I guess me not being too creative with a condolence - that is a bummer. I always quietly worry that it will happen. I had something similar happen on a resin body - nobodys fault but mine. I didnt wash it first, something I usually dont do, guess that finally caught up with me.
Obviously youve had success (aside from this random mishap) so Ill wait to see it looking shiny when youre done!
Cheers,
Nick
Obviously youve had success (aside from this random mishap) so Ill wait to see it looking shiny when youre done!
Cheers,
Nick
AussieReg
#007
Joined: June 09, 2009
KitMaker: 8,156 posts
Auto Modeler: 2,953 posts
Posted: Wednesday, August 12, 2020 - 01:53 PM UTC
It's funny how something that literally fell off the car body with masking tape took a bit of work to remove with chemicals and scrubbing! Well, here we are right back where we were 5 years ago!

I still need to clean a bit of paint out from the surface details, I will do that with a fine paintbrush and some lacquer thinner.
I'm actually having second thoughts about the Alclad system getting a second shot here, I might go with some SMS lacquer instead, shoot the body with black primer then Super Silver, then I can just mask off the silver areas that I want to keep as chrome and shoot the rest with clear red.
I shall let this sit for a couple of days and ponder further.
Cheers, D
Joel_W
Joined: December 04, 2010
KitMaker: 11,666 posts
Auto Modeler: 2,974 posts
Posted: Thursday, August 13, 2020 - 01:57 AM UTC
D,
Nice job on removing all the paint and primer. It's one job in modeling that I truly hate.
Joel
Nice job on removing all the paint and primer. It's one job in modeling that I truly hate.
Joel
RussellE
#306
Joined: June 27, 2010
KitMaker: 3,959 posts
Auto Modeler: 495 posts
Posted: Sunday, August 16, 2020 - 08:17 PM UTC
Stripped! 
AussieReg
#007
Joined: June 09, 2009
KitMaker: 8,156 posts
Auto Modeler: 2,953 posts
Posted: Sunday, August 16, 2020 - 10:23 PM UTC
Thanks for looking in Joel, Russ.
It's interesting that the red top coat either bled right through or reactivated the silver base coat to the point where it has stained the kit plastic.
The more I think about it, the less inclined I am to try the Alclad Candy system again on this build. I think I will go with the tried and true MS1500 and SMS combination.
Cheers, D
Joel_W
Joined: December 04, 2010
KitMaker: 11,666 posts
Auto Modeler: 2,974 posts
Posted: Monday, August 17, 2020 - 01:56 AM UTC
D,
I don't think that the plastic staining was caused by the Red paint bleeding through the Silver nor primer coats. Rather that in using Lacquer thinner as a striping agent, it will soften and react with the plastic. The LC now gets a reddish hue that stains the white plastic, not the original paint.
joel
AussieReg
#007
Joined: June 09, 2009
KitMaker: 8,156 posts
Auto Modeler: 2,953 posts
Posted: Friday, August 21, 2020 - 09:46 PM UTC
The GTO looks really evil in satin black (primer)!
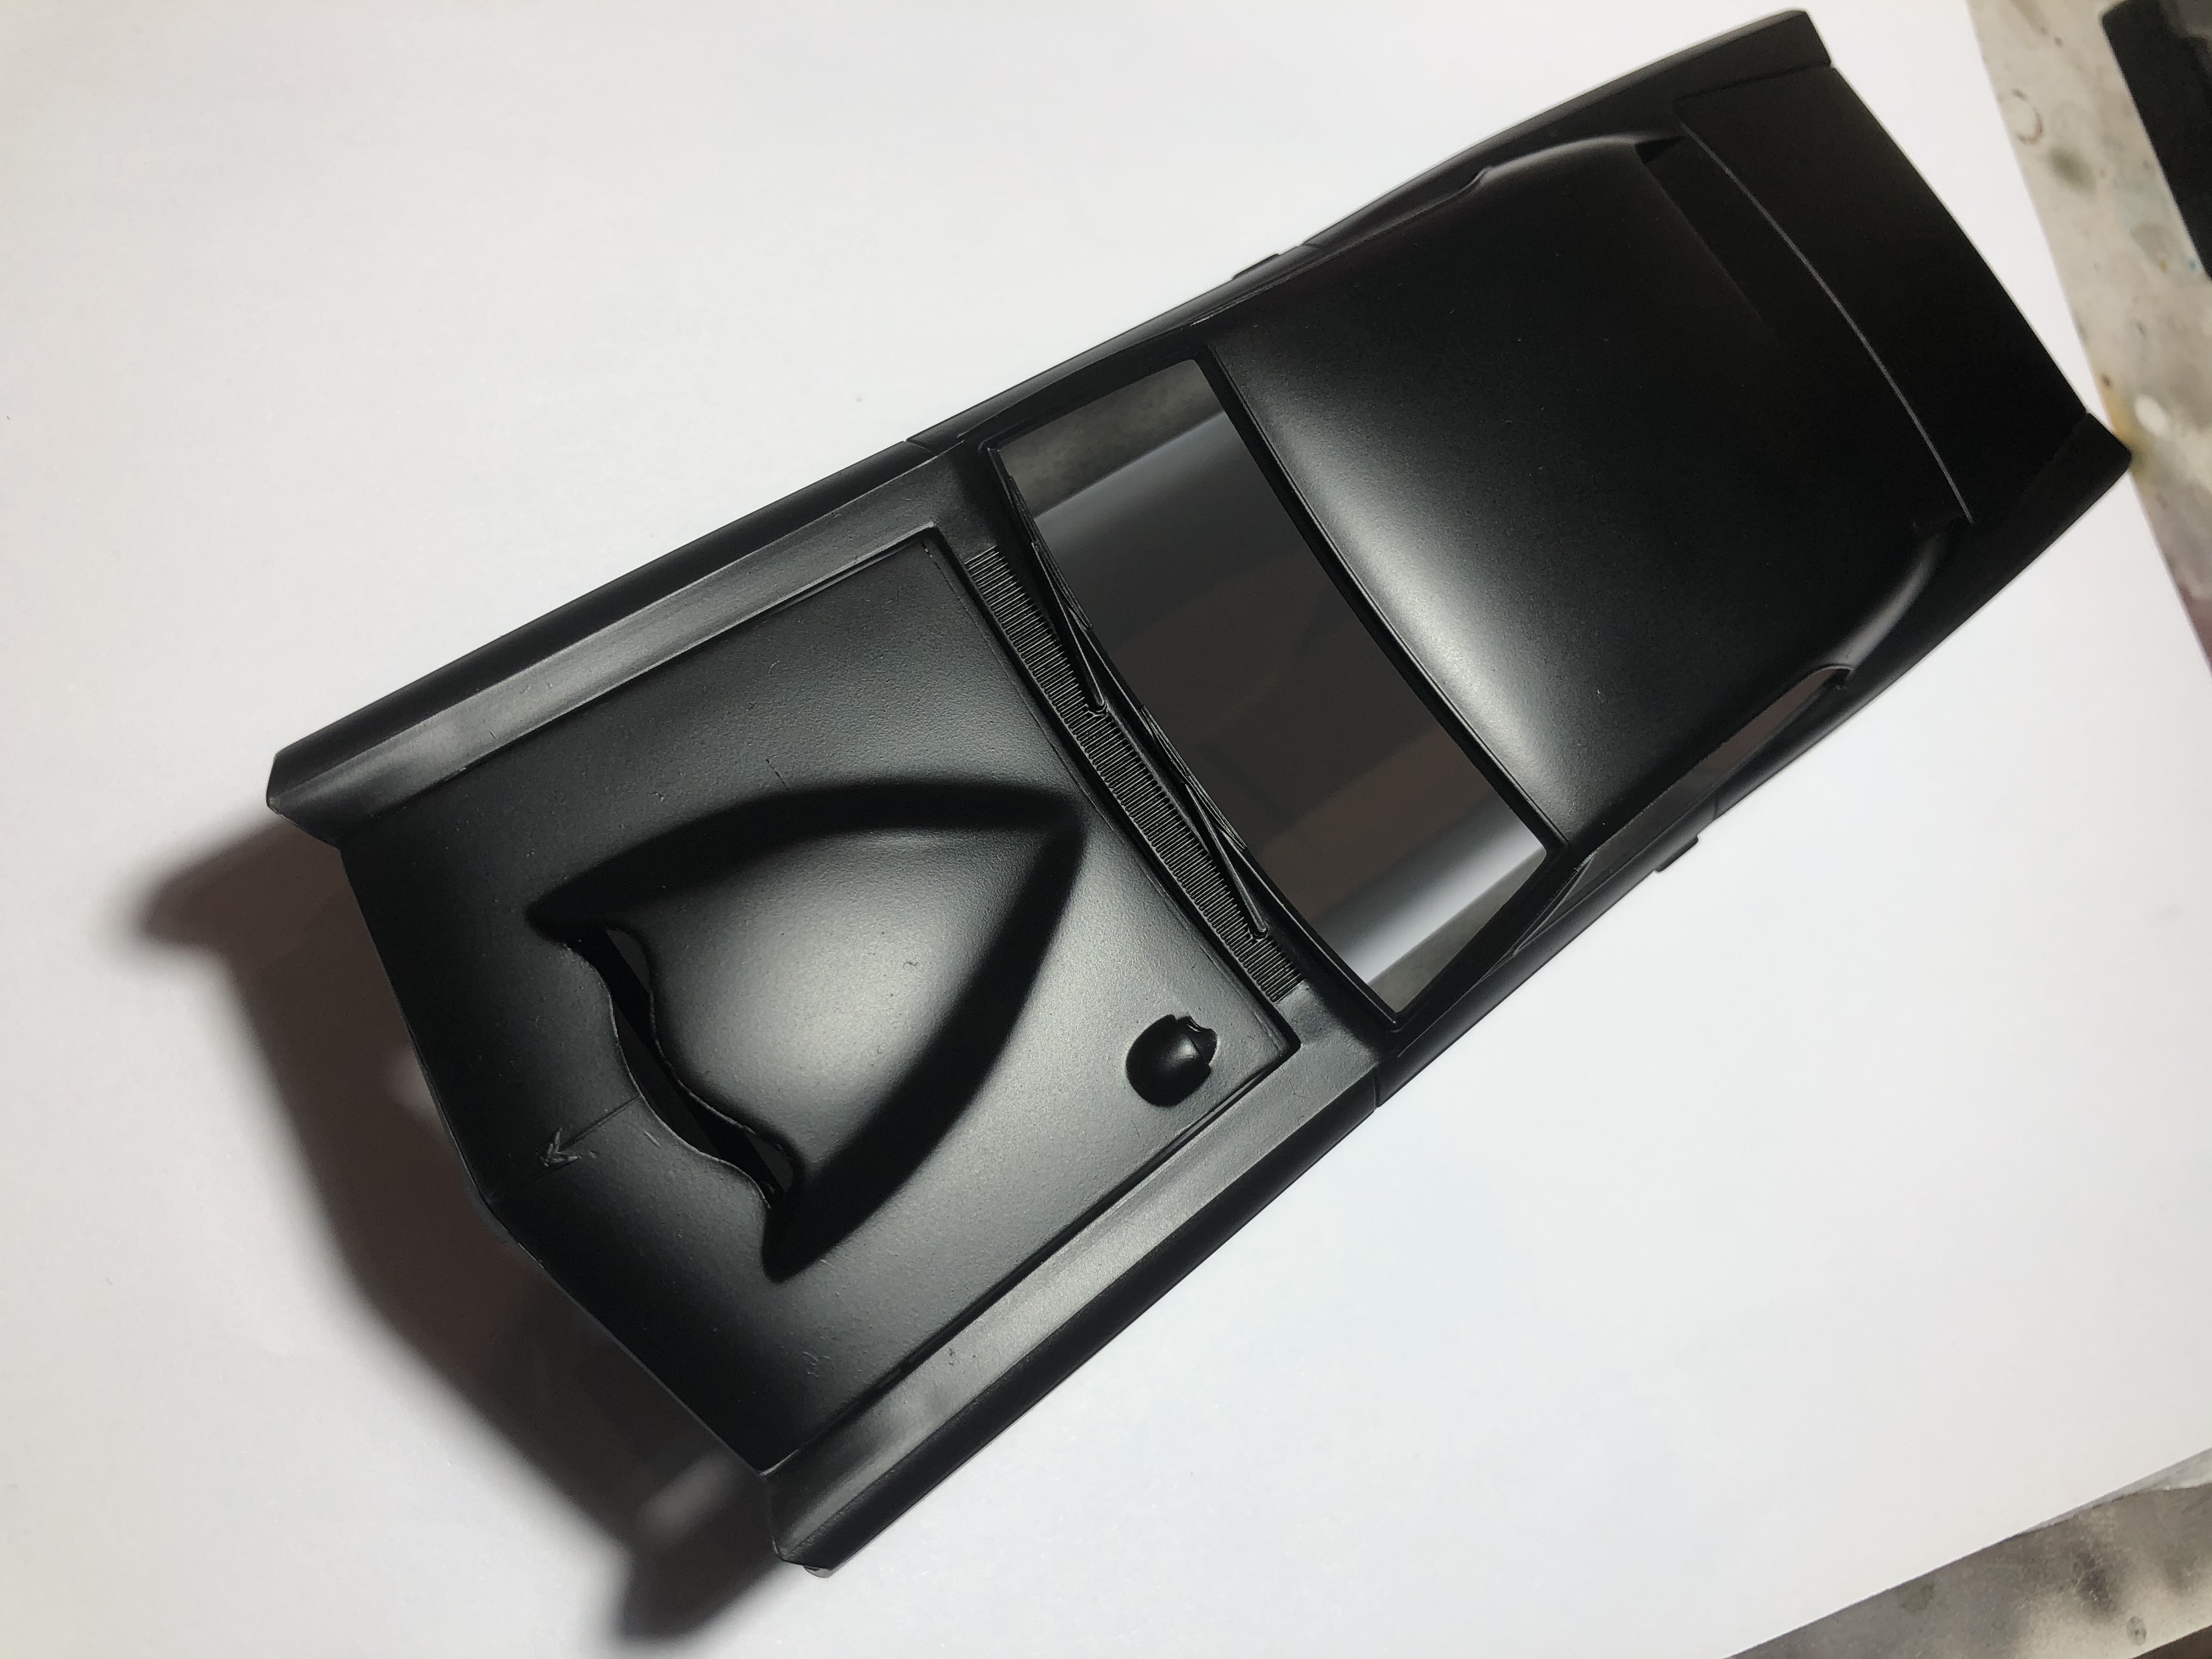
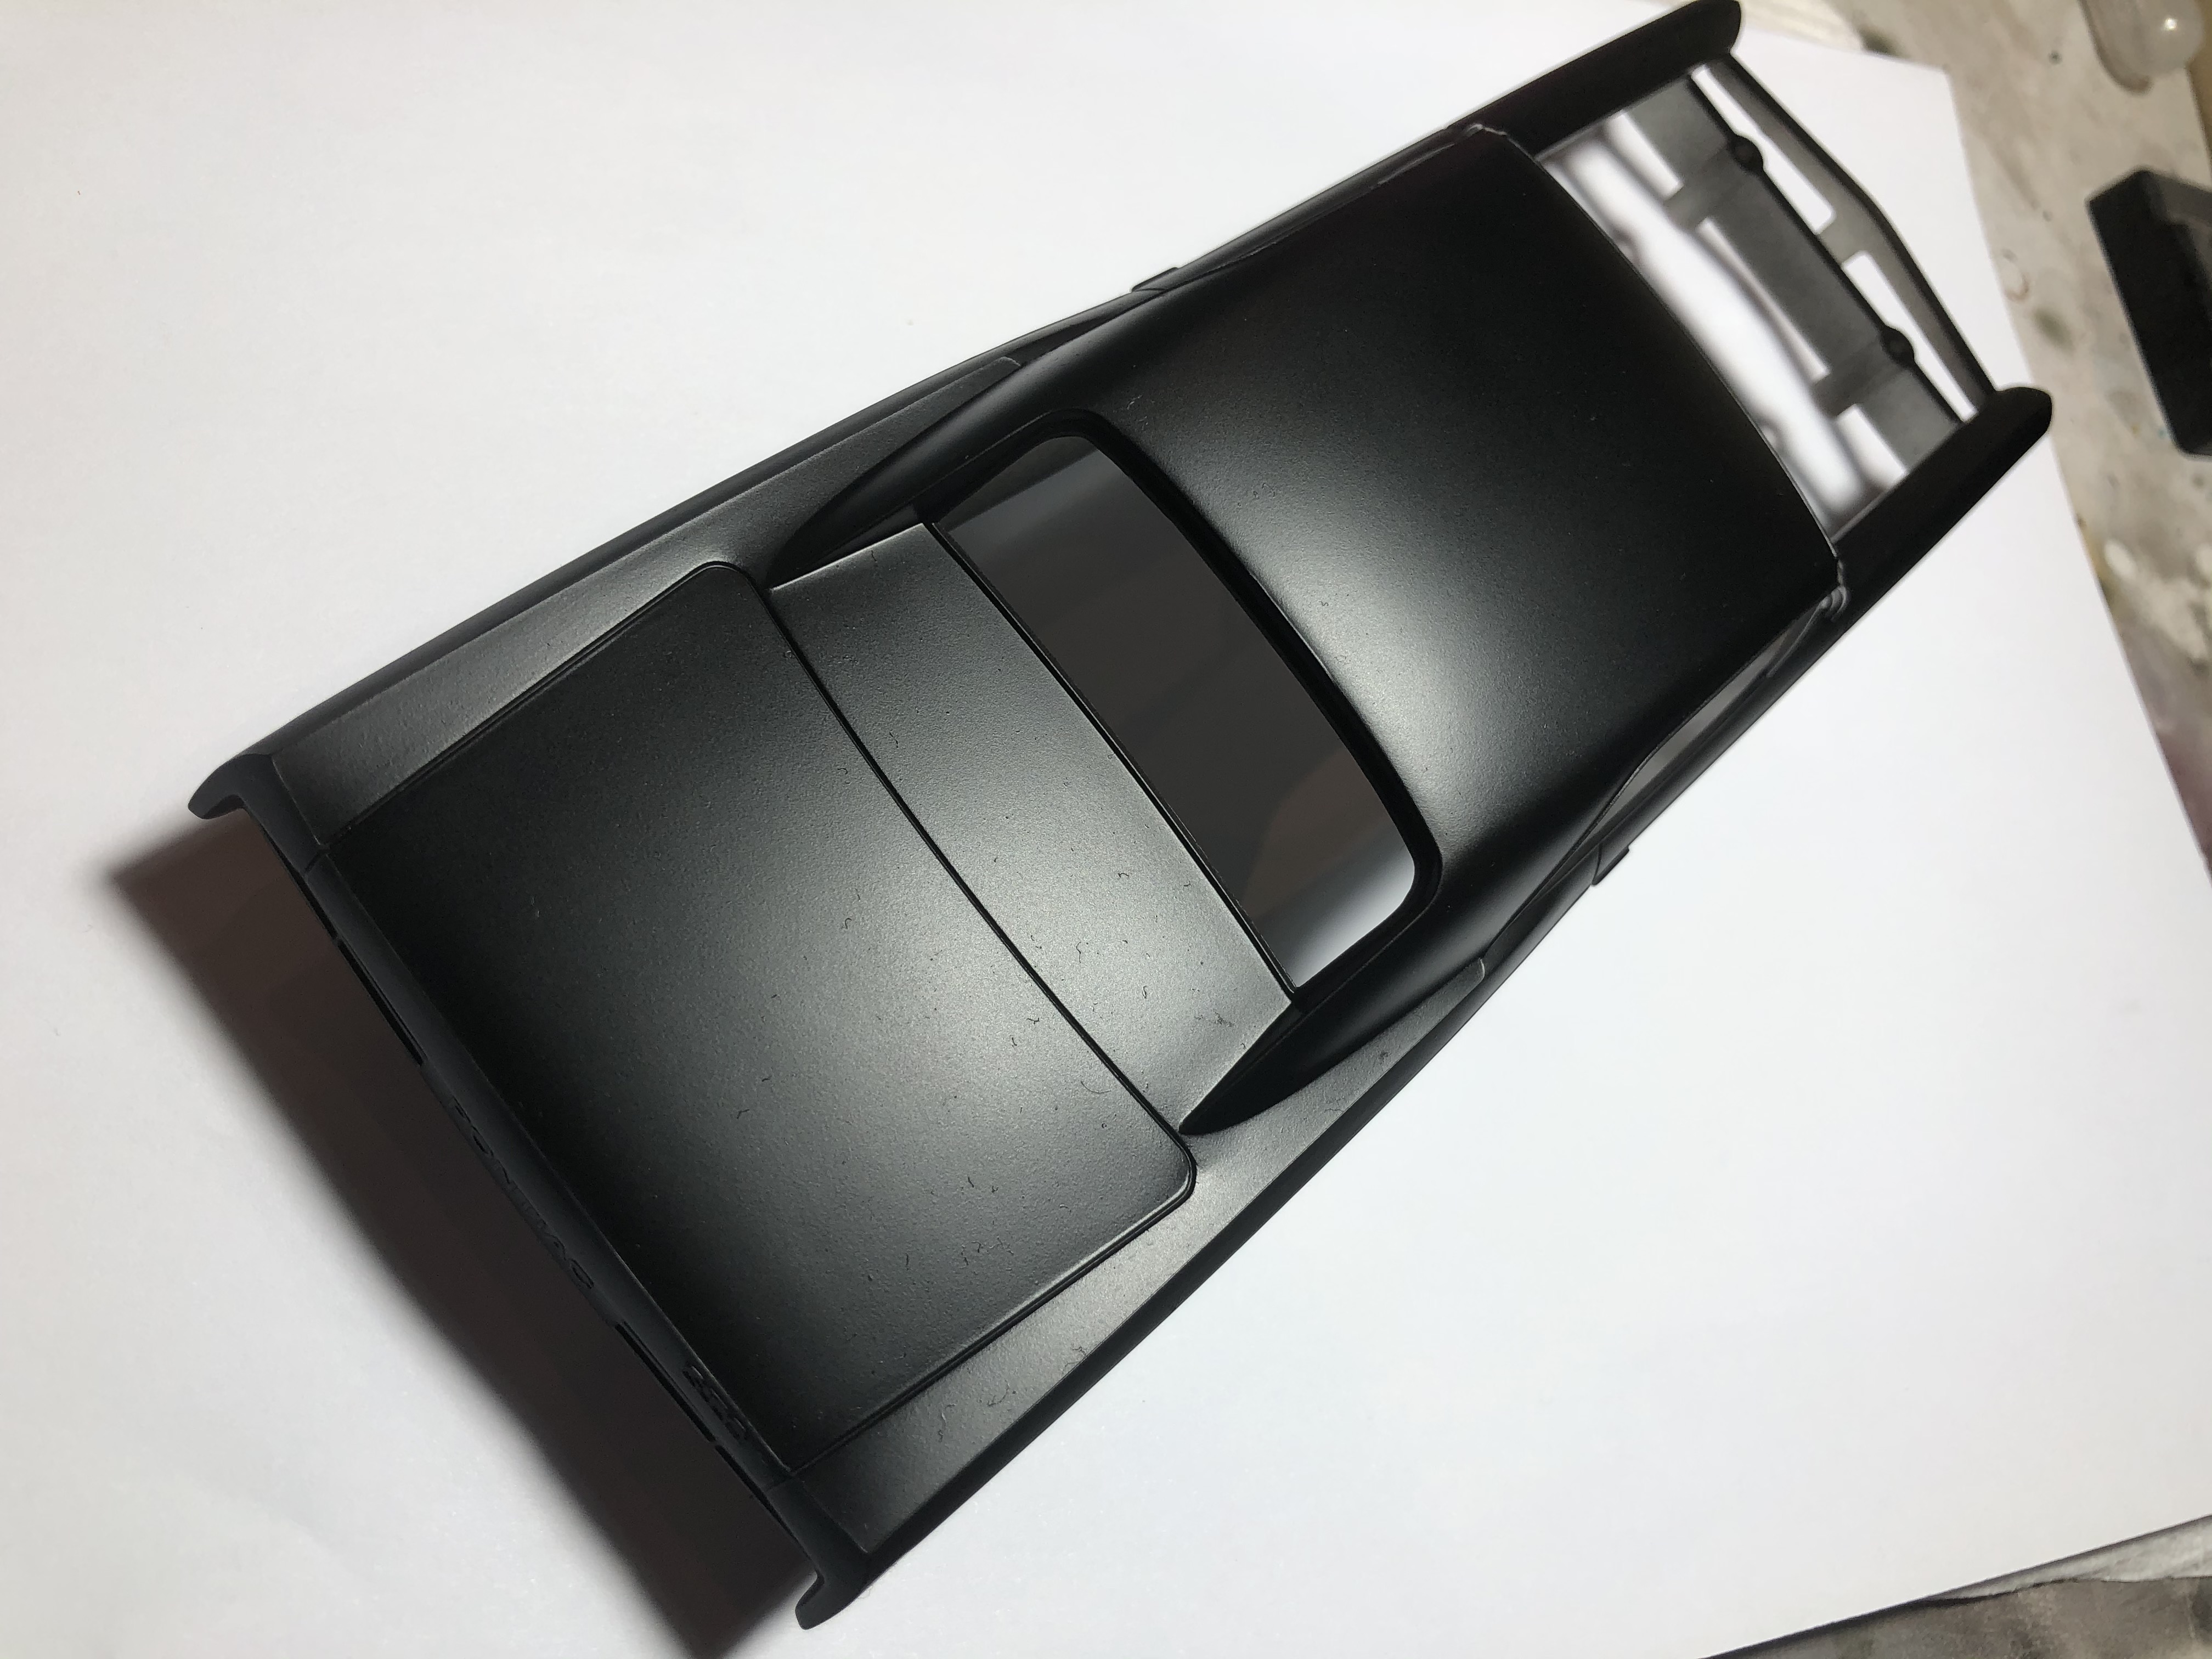
There is some crud on the boot lid that needs a sand out, then some spot priming and a fine wet sand and on with the silver base!
Cheers, D
There is some crud on the boot lid that needs a sand out, then some spot priming and a fine wet sand and on with the silver base!
Cheers, D

Szmann

Joined: September 02, 2014
KitMaker: 1,977 posts
Auto Modeler: 1,371 posts

Posted: Saturday, August 22, 2020 - 01:12 AM UTC
Evil she looks, indeed. Great work, D.!
That crud needs just a little touch with a 2000 grit - it is very easy to remove if the primer is properly dry. That is the result of air turbulences and is not "integrated" into the paint coat, it is just stuck on the surface. Lately I am spraying my car bodies from the top down to avoid this problem. It works somewhat - depends from case to case.
KUTGW!
Gabriel
RussellE
#306
Joined: June 27, 2010
KitMaker: 3,959 posts
Auto Modeler: 495 posts
Posted: Sunday, August 23, 2020 - 11:49 PM UTC
Quoted Text
The GTO looks really evil in satin black (primer)!
Cheers, D
Would look really cool if you went with a satin black finish D!

Cosimodo
#335
Joined: September 03, 2013
KitMaker: 1,808 posts
Auto Modeler: 701 posts
Posted: Monday, August 24, 2020 - 06:54 PM UTC
I agree, the black looks good. Just need some tinted windows and cool boots and this could be a badass car!
Hwa-Rang
Joined: June 29, 2004
KitMaker: 6,760 posts
Auto Modeler: 2,182 posts
Posted: Monday, August 24, 2020 - 11:02 PM UTC
I would certainly be tempted to keep the semi gloss black color.
AussieReg
#007
Joined: June 09, 2009
KitMaker: 8,156 posts
Auto Modeler: 2,953 posts
Posted: Monday, August 24, 2020 - 11:23 PM UTC
Believe me guys, I was very tempted to just roll with the black primer, it really does look great!
Too late now though!

I am determined to get a nice candy red on this one, but just in case the next attempt goes haywire I'm just going to do the bonnet first. This is SMS Super Silver, with a very light fine wet sand. SMS Clear red will go on in the next day or two.
Cheers, D
Too late now though!
I am determined to get a nice candy red on this one, but just in case the next attempt goes haywire I'm just going to do the bonnet first. This is SMS Super Silver, with a very light fine wet sand. SMS Clear red will go on in the next day or two.
Cheers, D
MoramarthT

Joined: June 30, 2020
KitMaker: 4 posts
Auto Modeler: 1 posts
Posted: Monday, August 24, 2020 - 11:26 PM UTC
Forgive my butting in with a pretty pointless post, I'm new around here. You mentioned the two vehicles chosen had significance for you because of your birth year: for me the significance is they were the first two American Muscle Car kits I ever bought. They were both MPC kits in Airfix boxings and were brand new in '67. At the time I can't recall having seen a real-life American car and was accustomed to building 1:32nd cars which were only bog stock. I was blown away by the size of the vehicles and the range of options. Sadly, my lack of skills and a total absence of references meant the only bits of the finished item which bore any resemblance to reality was what could be gleaned from the box art. The Goat underwent several rebuilds as I was anxious to try out the alternatives and I couldn't afford a second one. It was finally destroyed when I attempted an option which is no longer in your boxing, a mid-engined Funny Car. I see from your sprue shots the kit retains some parts (e.g. the blower, and the roll cage) and I suspect the chassis pan still retains the "cut here" engraving for the area to accommodate the relocated motor, and the location for the single bucket seat. The interior tub was omitted and replaced by side panels for the body interior with front and rear bulkheads. The stock hood was cemented in place and a long scoop was attached which projected back through a cut-out in an alternative windshield. It never received a repaint and oddly enough in it's last previous incarnation had been painted matt black...
The custom hood ended up on the Charger, with a little reshaping at the front.
Regards,
M
The custom hood ended up on the Charger, with a little reshaping at the front.
Regards,
M
AussieReg
#007
Joined: June 09, 2009
KitMaker: 8,156 posts
Auto Modeler: 2,953 posts
Posted: Tuesday, August 25, 2020 - 03:04 AM UTC
Tony, no need to apologise, I welcome all discussions in my threads. It sounds like your first two kits had quite a history as you honed your skills!
Welcome to the Kitmaker Network, I'm sure you will enjoy your time here, please feel free to comment as you wish. Even better, join in on one of our Group Builds with a new project!
I'm looking forward to seeing some of your work here.
Cheers, D
Welcome to the Kitmaker Network, I'm sure you will enjoy your time here, please feel free to comment as you wish. Even better, join in on one of our Group Builds with a new project!
I'm looking forward to seeing some of your work here.
Cheers, D
Joel_W
Joined: December 04, 2010
KitMaker: 11,666 posts
Auto Modeler: 2,974 posts
Posted: Tuesday, August 25, 2020 - 05:35 AM UTC
D,
The Goat does indeed look pretty mean in that Satin Black. It's certainly a present day color. Even Verstappen's F1 Red Bull is in that color and finish.
Just one question of concern. I was taught right from the start of car painting to paint all the body, and separate parts at the same time as to insure that they get the exact same paint/thinner, shot the same way, in the same conditions to insure that the final look of the color coat is exactly the same on every panel, and shell. Have you done this before with the expected results?
Joel
AussieReg
#007
Joined: June 09, 2009
KitMaker: 8,156 posts
Auto Modeler: 2,953 posts
Posted: Tuesday, August 25, 2020 - 01:17 PM UTC
Quoted Text
Just one question of concern. I was taught right from the start of car painting to paint all the body, and separate parts at the same time as to insure that they get the exact same paint/thinner, shot the same way, in the same conditions to insure that the final look of the color coat is exactly the same on every panel, and shell. Have you done this before with the expected results? Joel
Joel, I have considered this, but to be honest this build has now become more of a test bed for products than a show piece. I will be very happy if I can get a decent result with the SMS paints, and not worried if there is a bit of inconsistency between the body and bonnet.
If the Candy Red comes up nicely, then I will have this plus the satin black as proven options for future builds.
Cheers, D
AussieReg
#007
Joined: June 09, 2009
KitMaker: 8,156 posts
Auto Modeler: 2,953 posts
Posted: Thursday, August 27, 2020 - 12:51 AM UTC
Ok, Candy Time! The silver base coat go a very light fine sand, then I shot a light coat of SMS Clear Red neat from the bottle. After about 10 minutes I shot a second light coat thinned about 50/50 with MLT, then after a further 10 minutes a mist coat of straight MLT.
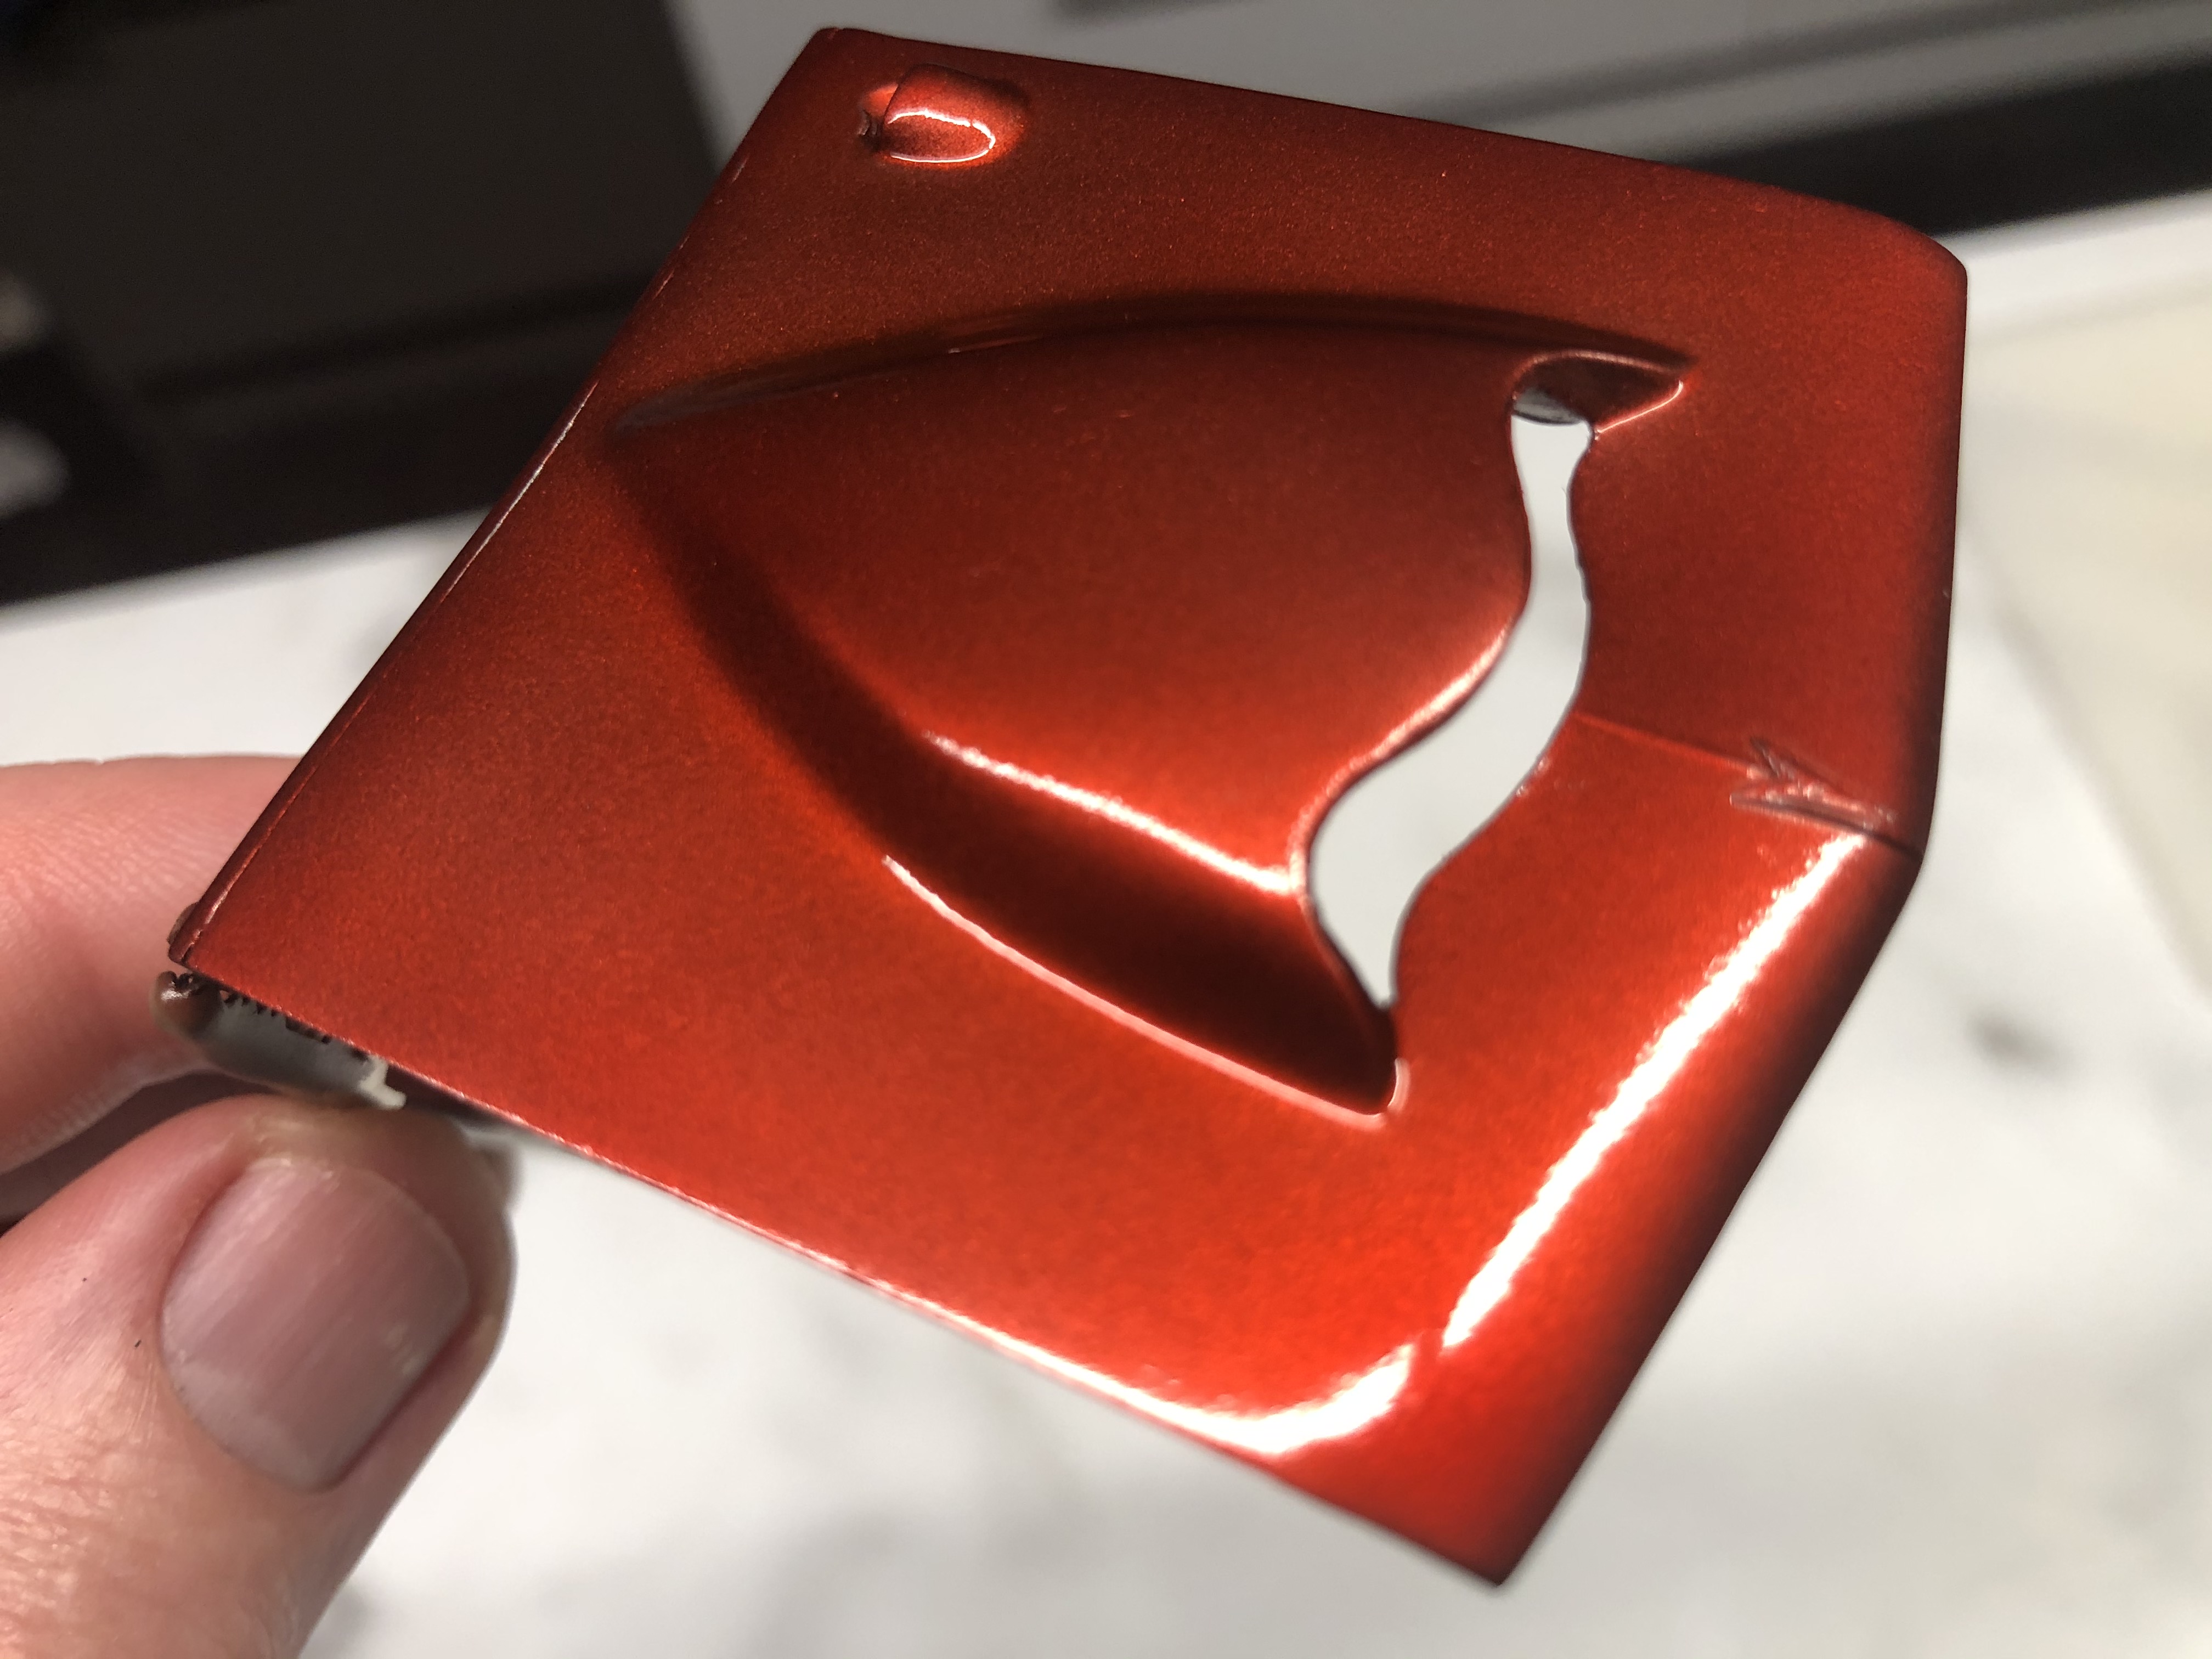
There's a bit of dust to sand out but I think with a clear gloss this will be ok.
Cheers, D
There's a bit of dust to sand out but I think with a clear gloss this will be ok.
Cheers, D
 |

WEB HOSTING BY


Copyright ©2021 Auto Modeler and Kitmaker Network, a subsidiary of Silver Star Enterprises
All Rights Reserved. Please read our Conditions of Use and Privacy Policy.
All Rights Reserved. Please read our Conditions of Use and Privacy Policy.