_GOTOBOTTOM
Cars: Other Racing
For automotive racing topics not already covered.
Tamiya 1/24 scale Porsche 956
Joel_W
Staff MemberAssociate Editor
AUTOMODELER
_VISITCOMMUNITY
New York, United States
Joined: December 04, 2010
KitMaker: 11,666 posts
Auto Modeler: 2,974 posts
Posted: Monday, November 26, 2018 - 06:32 AM UTC
Finally, I've gotten enough done for my 1st update on the tamiya 1/24 scale Porsche 956 that I'm building for the Porsche campaign.

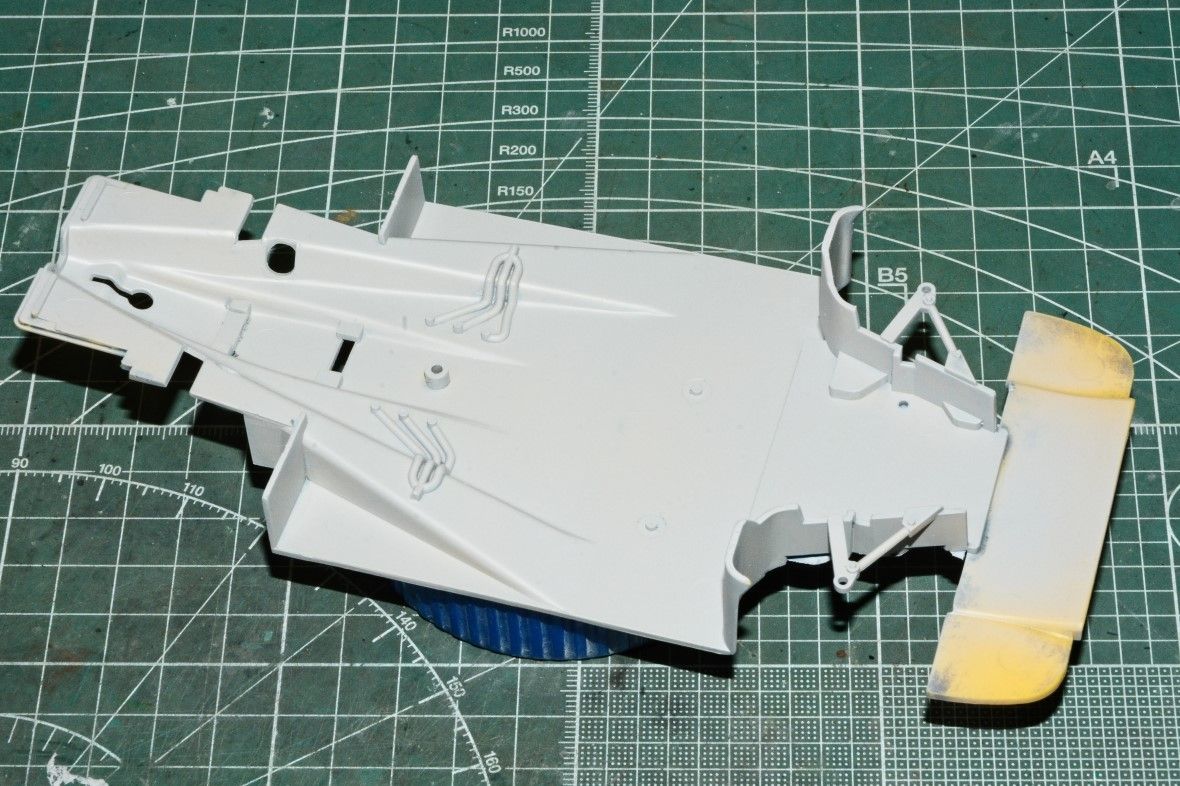
Usually I start with the shell, but as with the Ferrari 330 P4, I decided to 1st concentrate on the Engine/Transmission/suspension/chassis/cockpit, and leave the shell for the end of the build.

While the kit comes with a nicely detailed engine/transmission, I've found some issues that seem some what strange to me, but once I realized that this kit was 1ct molded in 1984, things were certainly done differently back then, and I have to every once in a while remind myself of that fact.

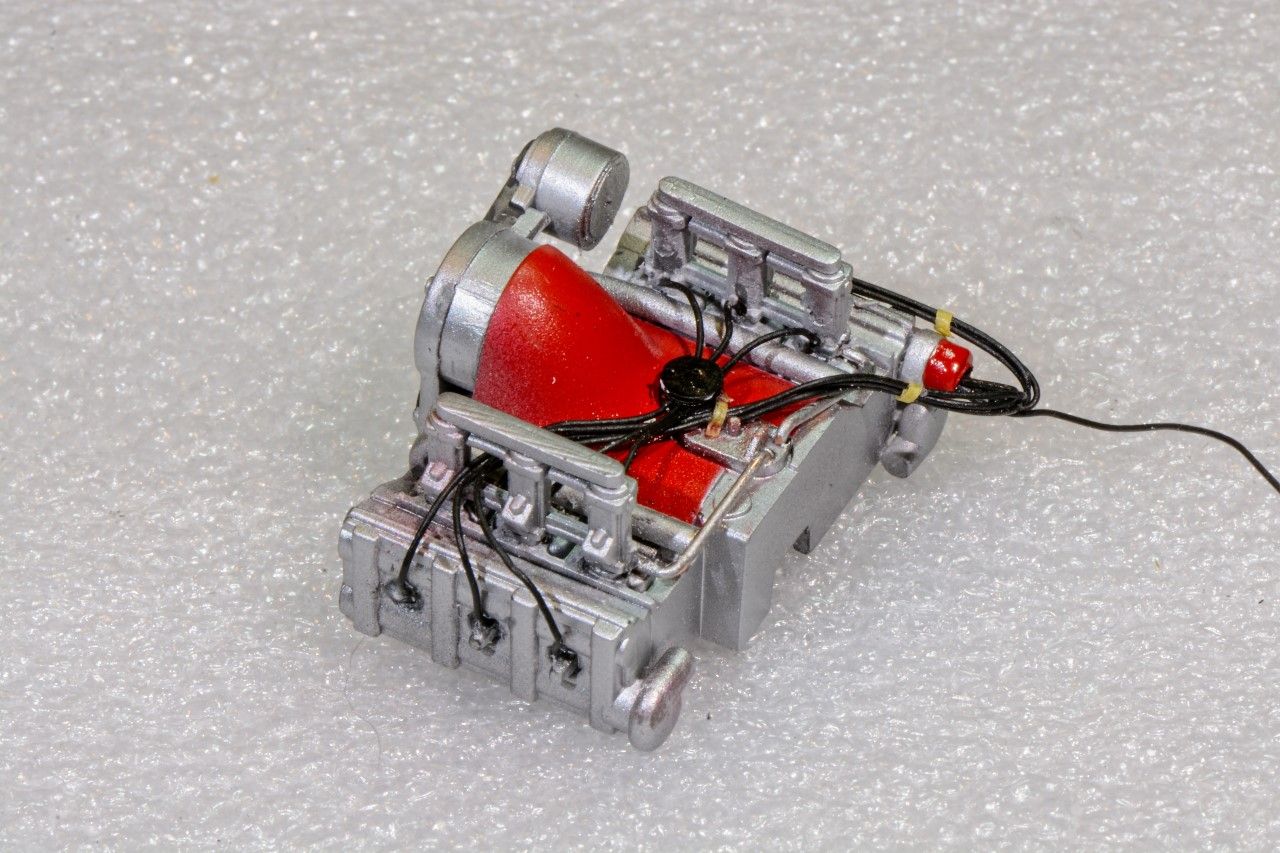
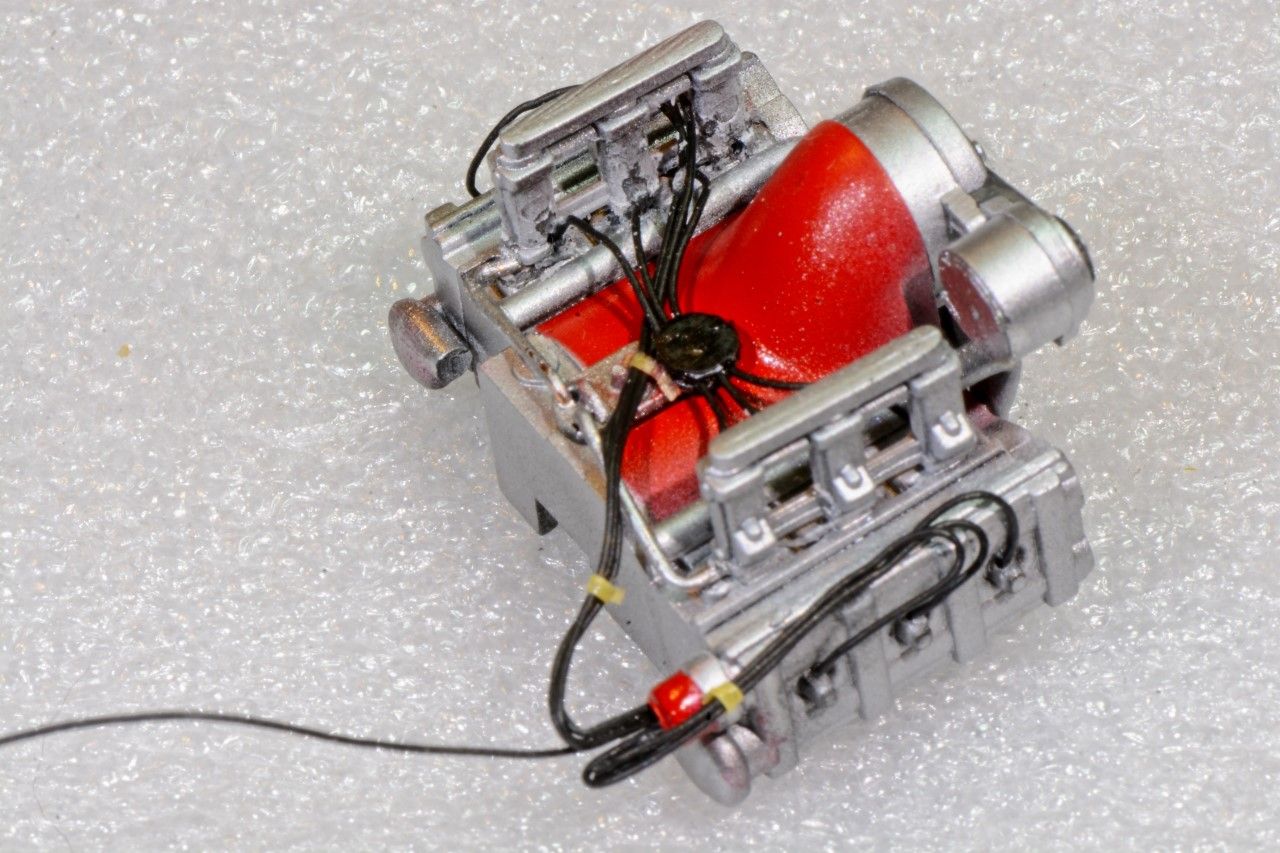
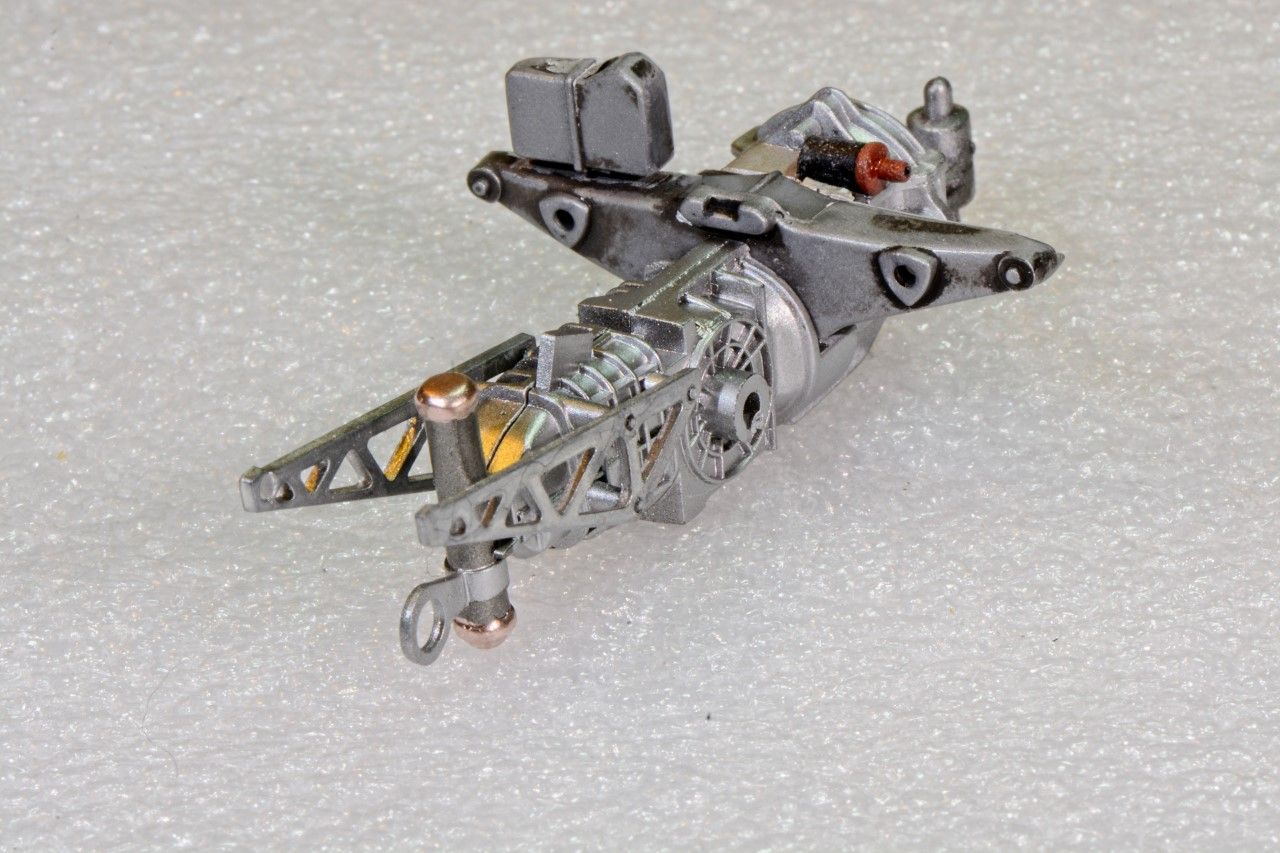
I started my build on Nov 9th with the Porsche twin turbo flat 6. It's the same engine that powered the 936 in the FIA class 6 enduracne races. The only change was with the addtion of a Bosch fuel injection metering system. I primed all the engine parts with Ammo Mig Black primer, then a few various shades of Alcad metalizers, with Flat Aluminum as the basic color. I followed this up with 1st masking off the top of the engine, and then air brusing it with Tamiya Gloss Red Acrylic paint.

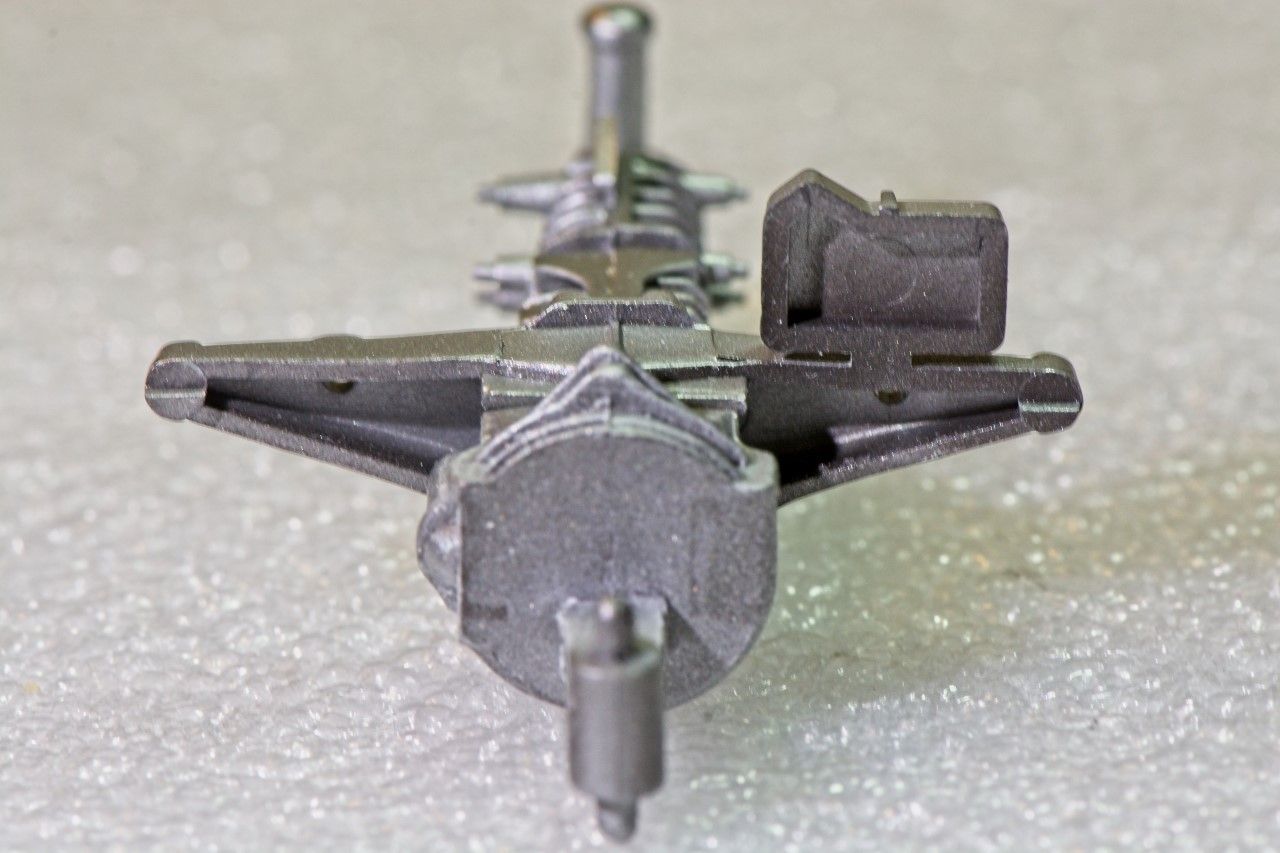
I then drilled out the distributor cap and glued in 7 black wires, 6 for the sparks plugs. The 7th will be attached to the coil that is located on the front top of the gearbox. Next up I scratched out using round pieces of .020 sheet plastic the basic unit for the fuel injection lines, which in all my reference materials are black, and ran them to the injectors. I added two alumiumin lines from the fuel injection unit to the base of both injector banks. Finally I glued on two sheet plastic discs to close up the back of the Alternator. I couldn't find my Aluminum tape that I use for wire ties, so temp. I used some masking tape till I can get to my local hardware store. As you can see, they're already coming apart.


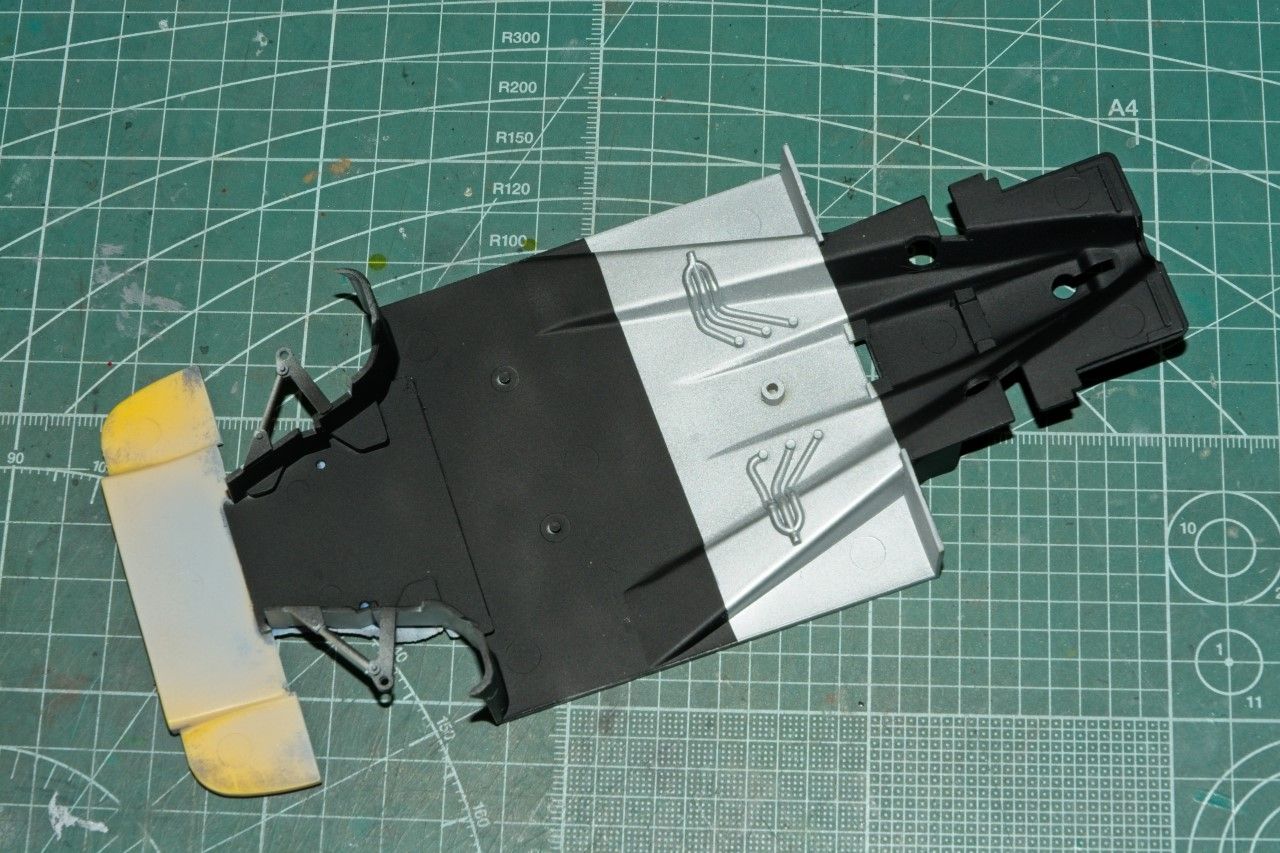
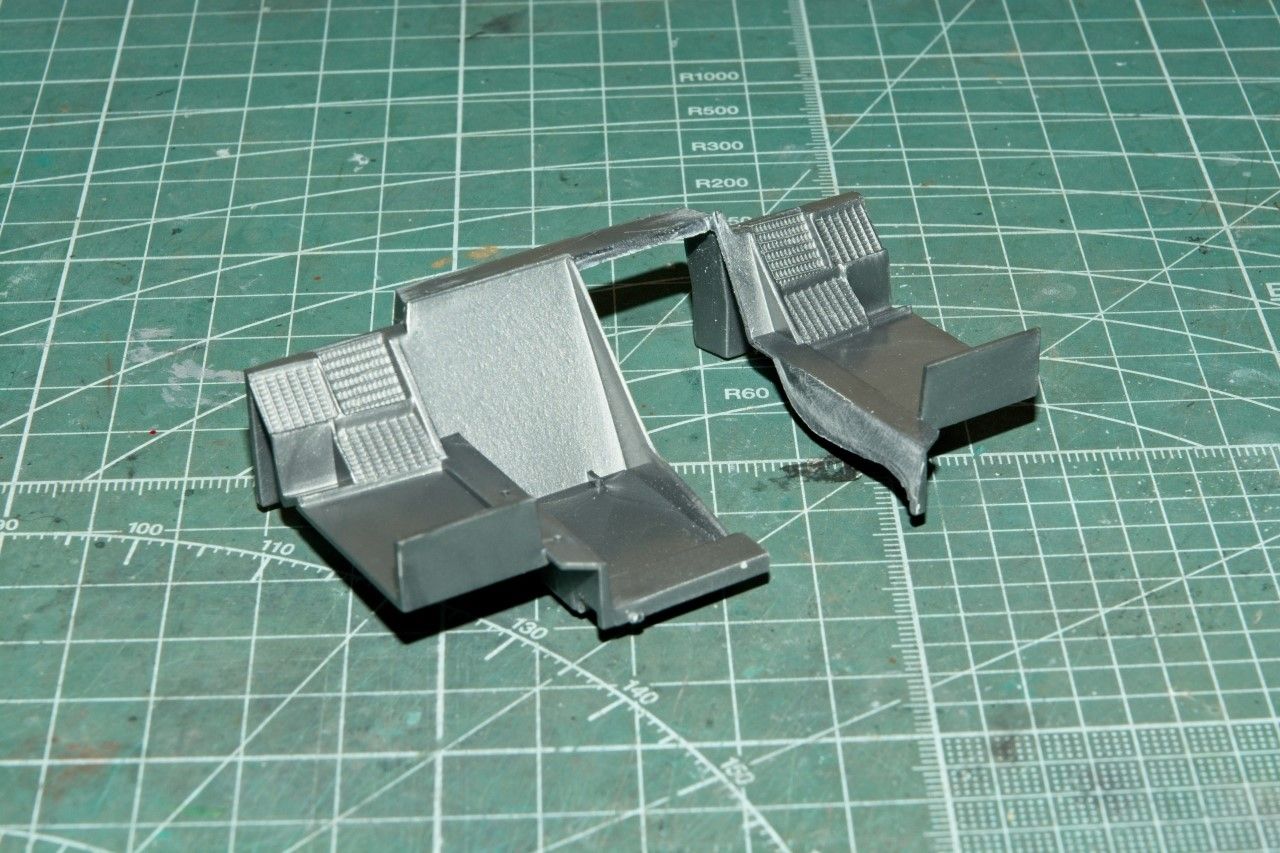
Now I built up the Transmission and painted it along with the main rear suspension arm Ammo Mig Black Primer, then various shades of Alcad. And yes, being lazy, I totally forgot to mask off the overflow catch tank.


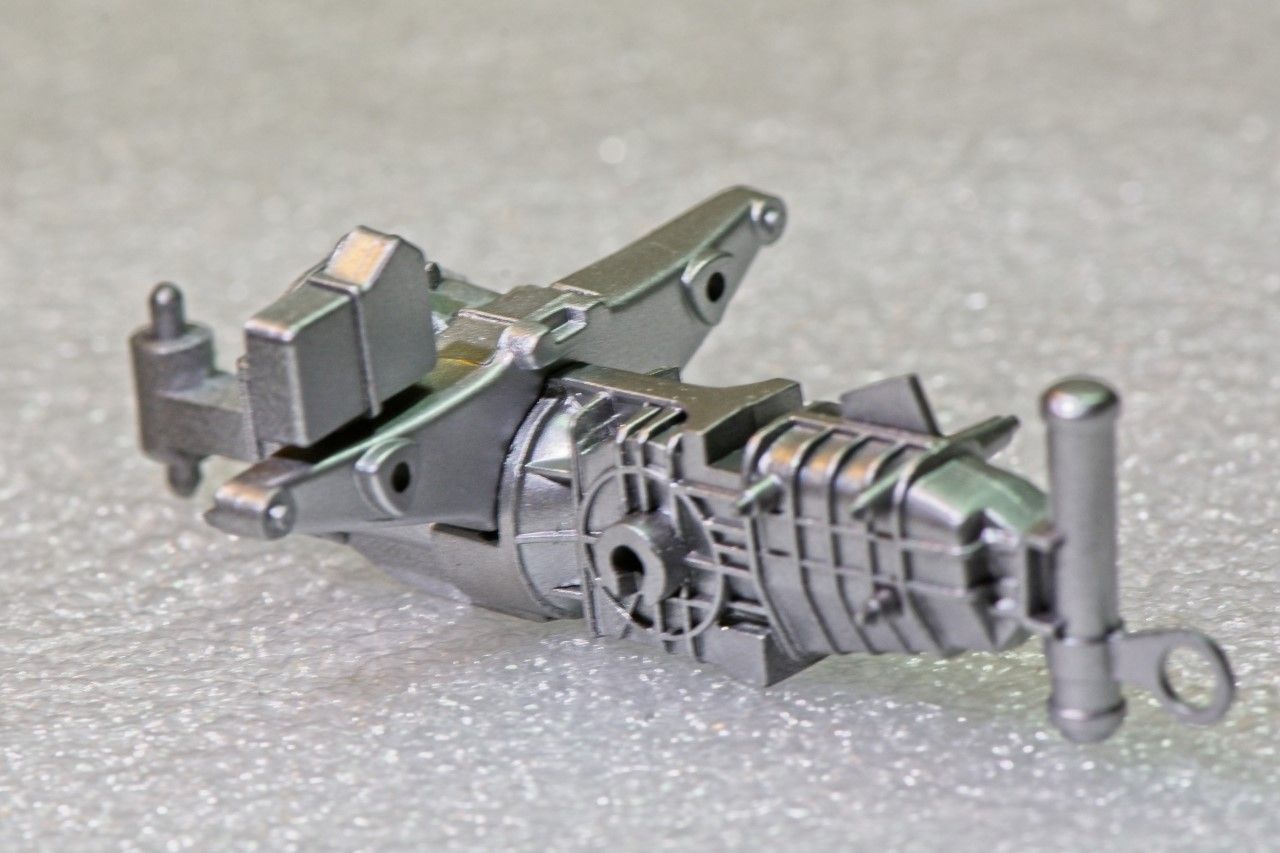
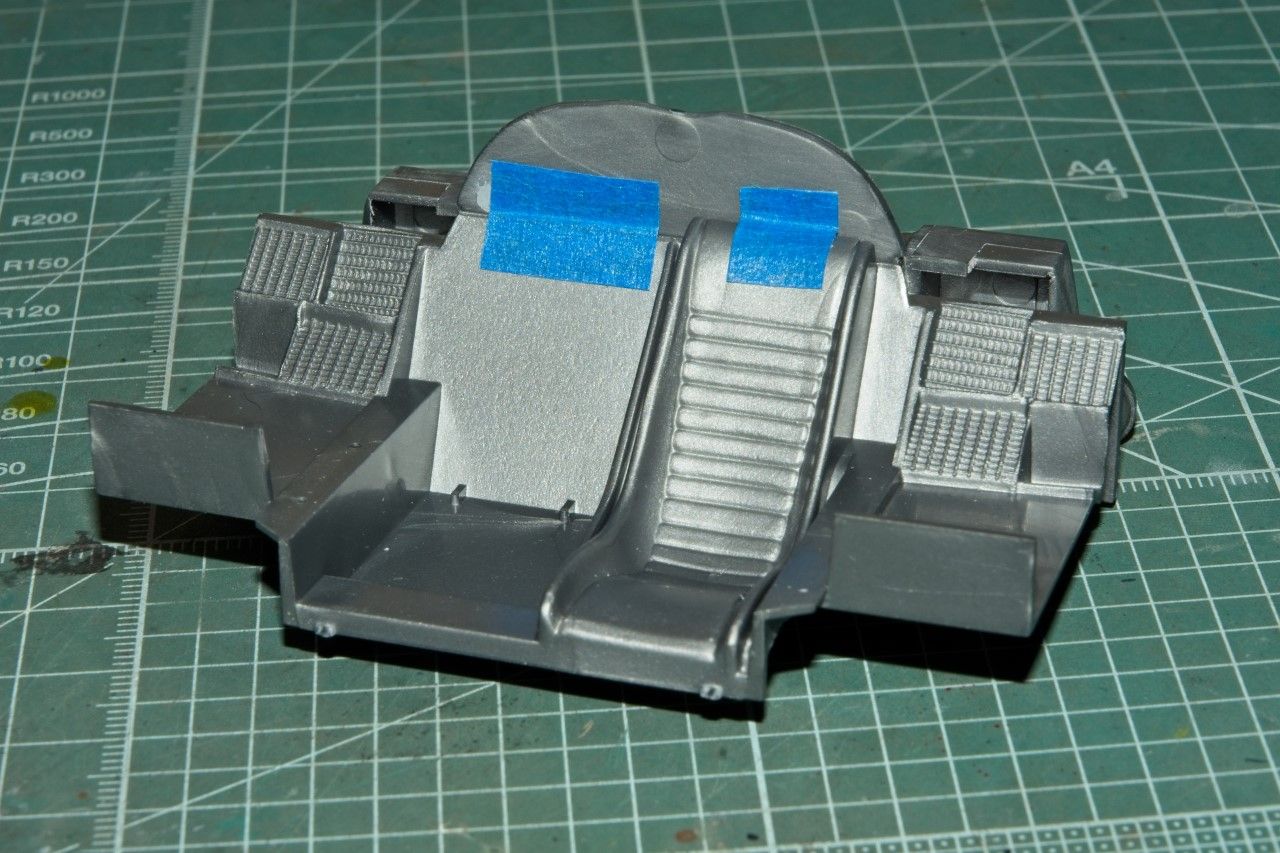
Everything looked pretty good till I turned it around. The back of that massive suspension arm was hollow!! 1st 1984 issue that I needed to deal with.


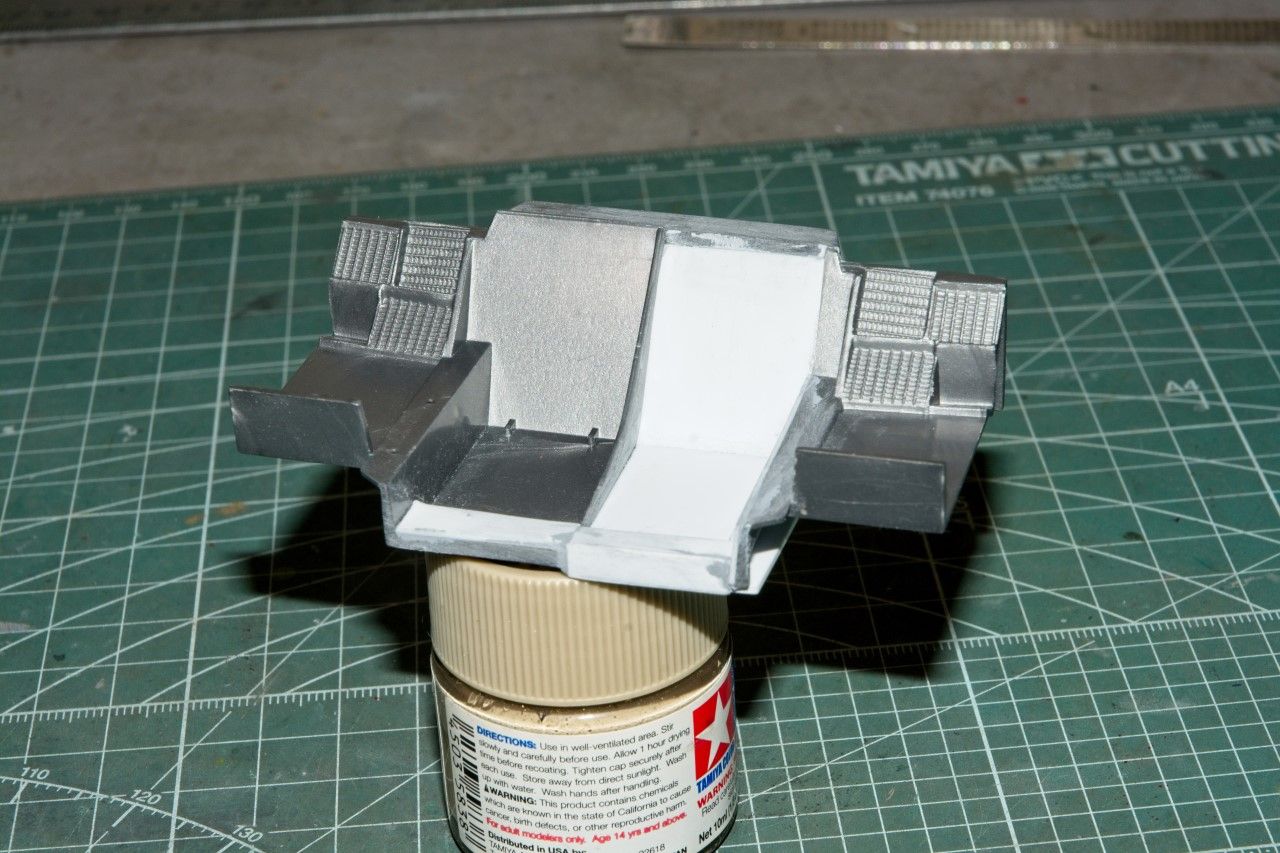
So I ended up stripping off all the Alcad and Primer, then using .020 sheet plastic, I covered all three sections.


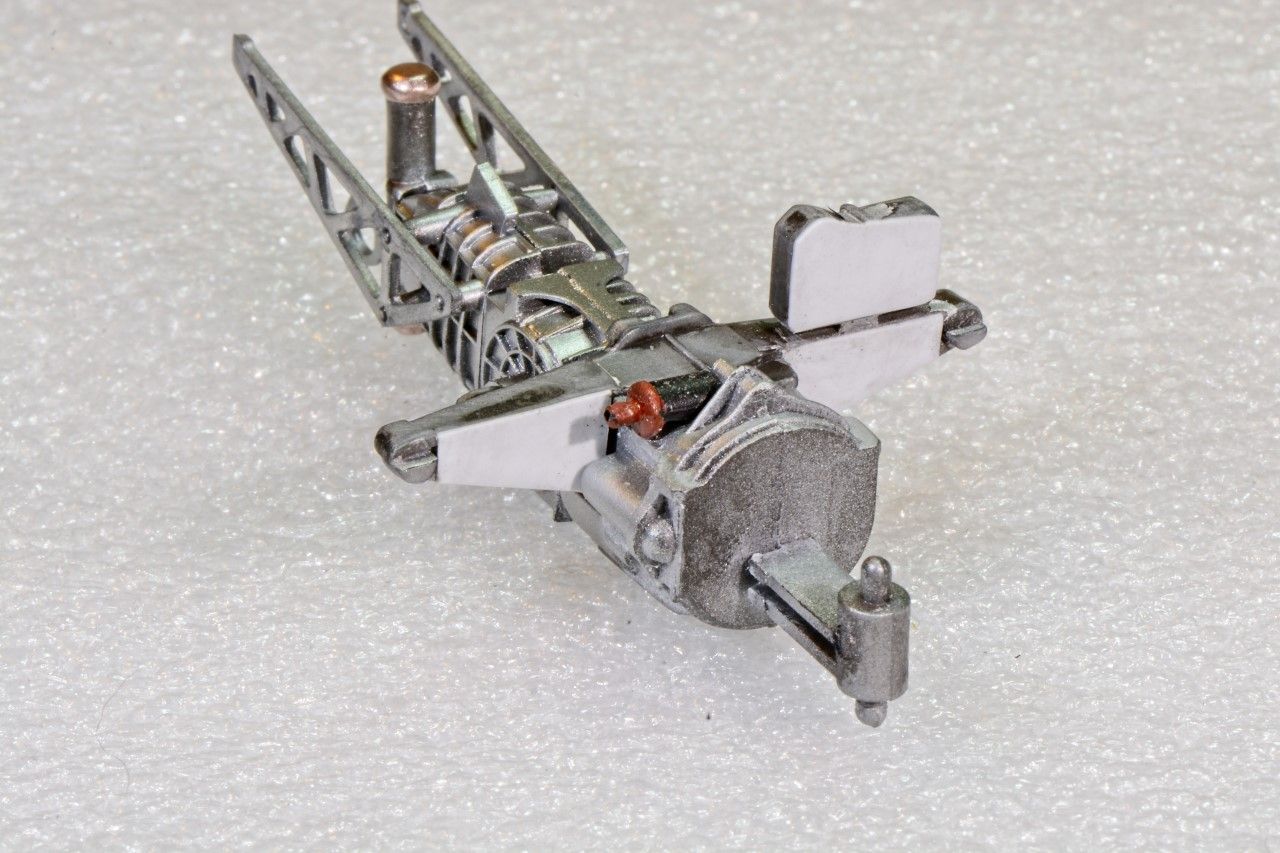
And yes, I still have to re-Alcad the suspension member, and paint the over flow tank.

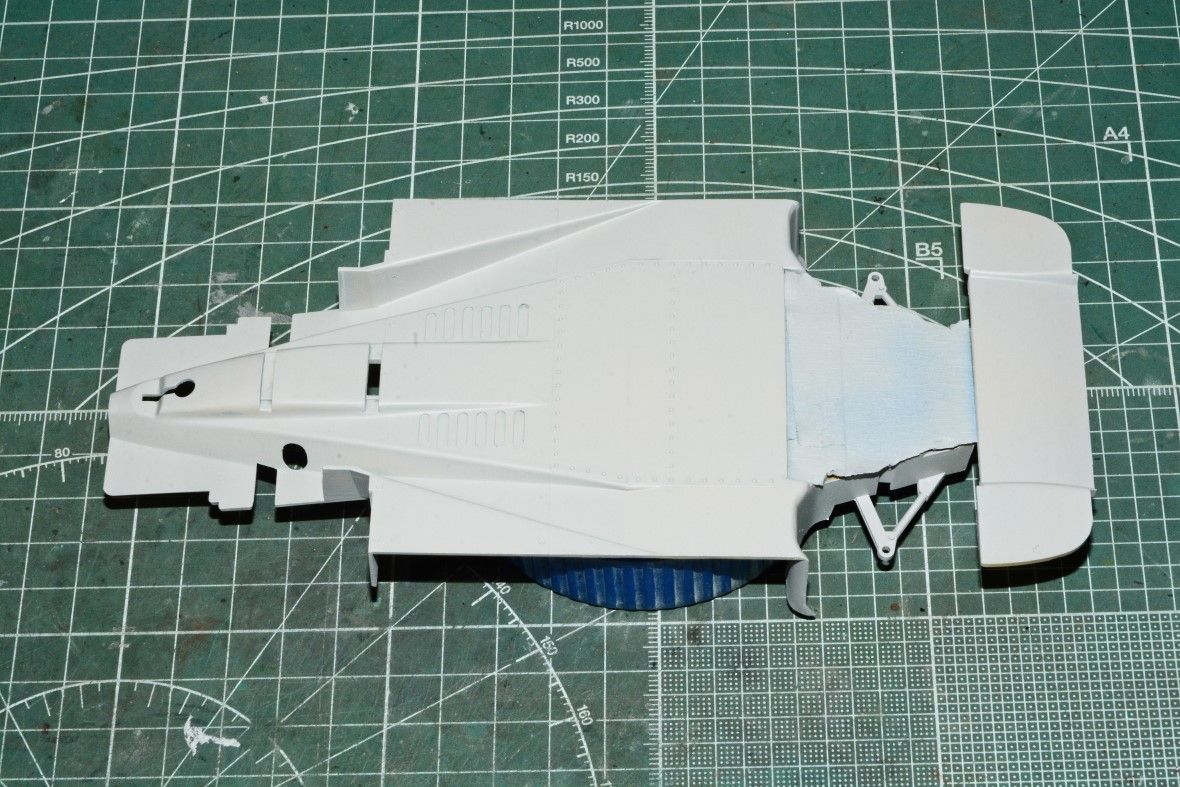
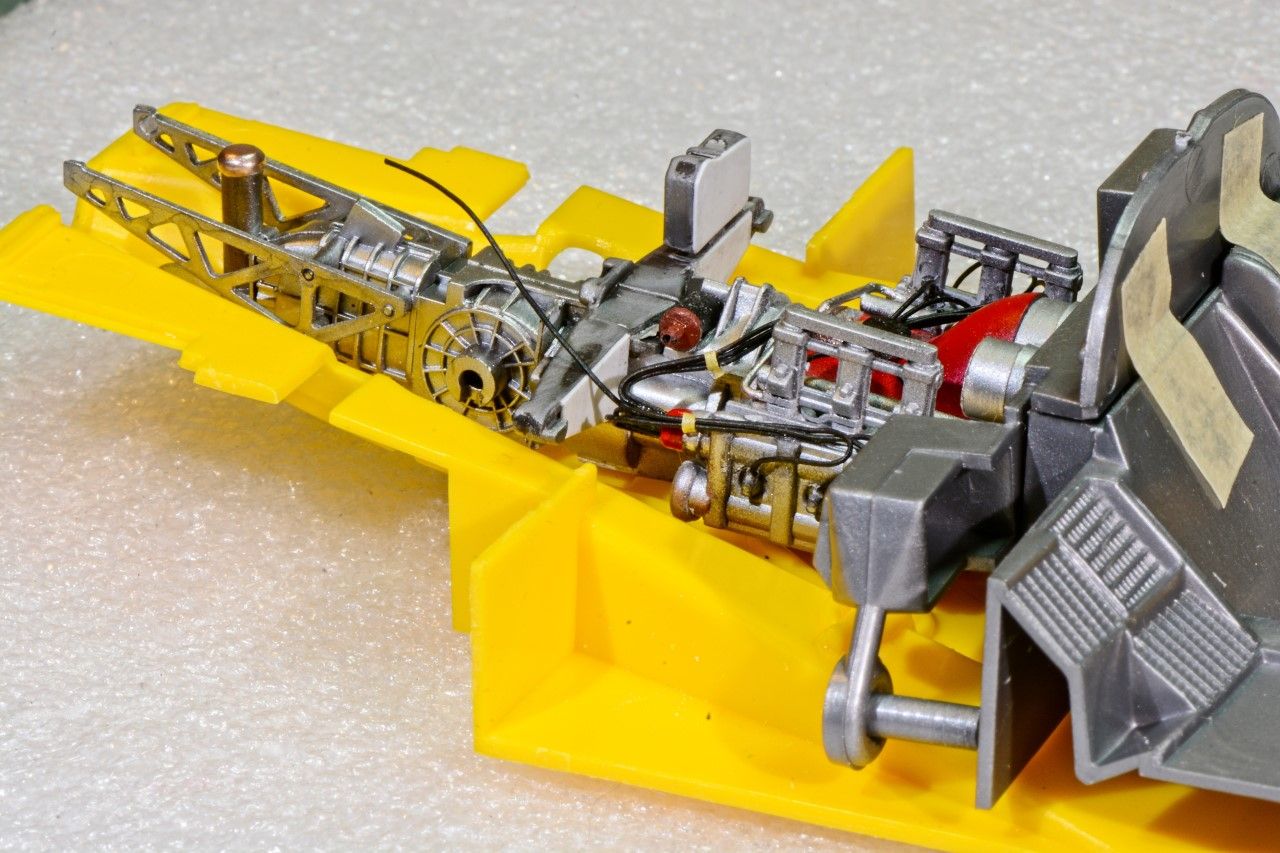
I decided to test fit the enginer engine/transmission unit into the rear of the chassis just to make sure everything fit. And so far so good.


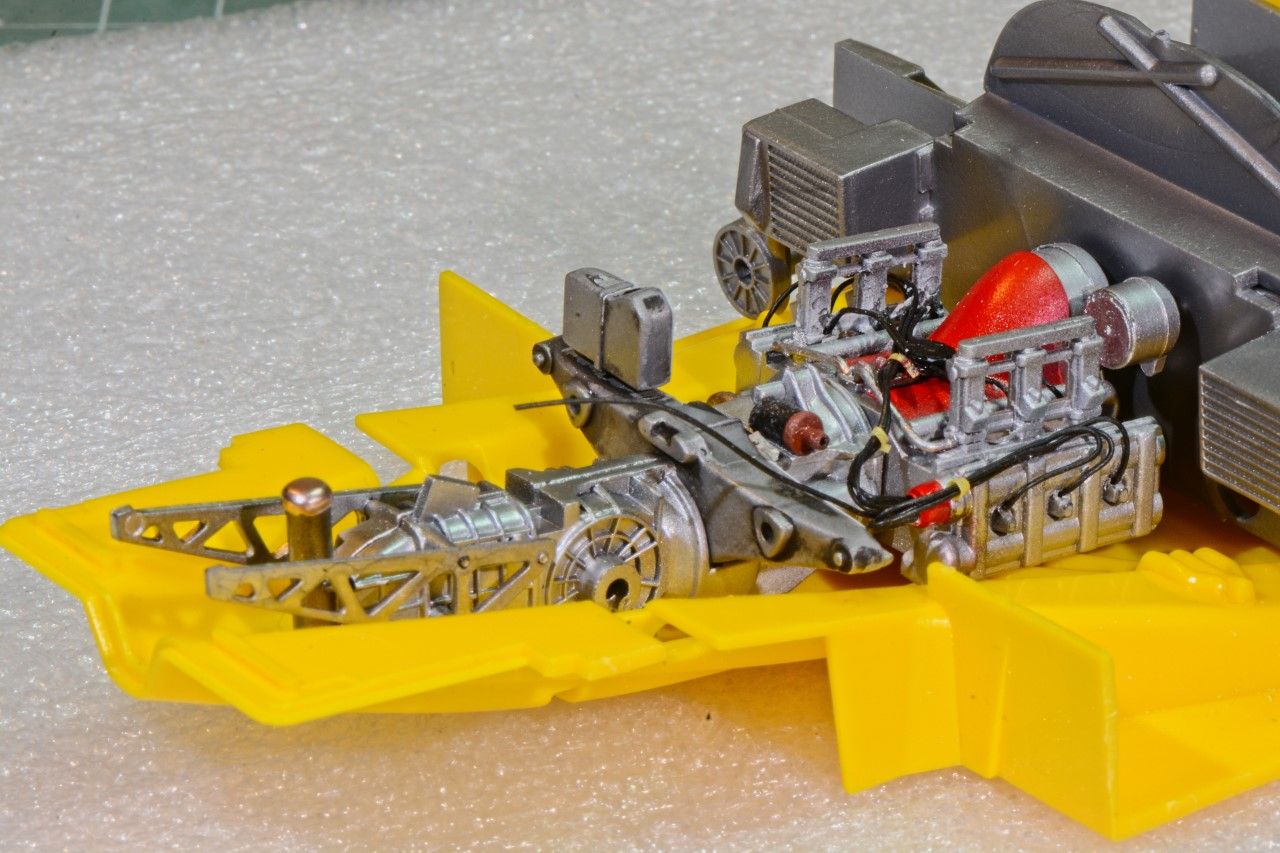
And this is as far as I've gotten to date.

Joel


Szmann
_VISITCOMMUNITY
Netherlands Antilles
Joined: September 02, 2014
KitMaker: 1,977 posts
Auto Modeler: 1,371 posts
Posted: Monday, November 26, 2018 - 07:38 AM UTC
I'm here, following!

Gabriel
Joel_W
Staff MemberAssociate Editor
AUTOMODELER
_VISITCOMMUNITY
New York, United States
Joined: December 04, 2010
KitMaker: 11,666 posts
Auto Modeler: 2,974 posts
Posted: Monday, November 26, 2018 - 09:54 AM UTC

Quoted Text

I'm here, following!

Gabriel


Gabriel,
Glad you see that you're along for the ride. But don't worry, I'll always have a short update in the campaign thread about the latest update.

Joel
RussellE
#306
_VISITCOMMUNITY
Victoria, Australia
Joined: June 27, 2010
KitMaker: 3,959 posts
Auto Modeler: 495 posts
Posted: Monday, November 26, 2018 - 03:49 PM UTC
buckled up and ready for the ride
Hwa-Rang
_VISITCOMMUNITY
Kobenhavn, Denmark
Joined: June 29, 2004
KitMaker: 6,760 posts
Auto Modeler: 2,182 posts
Posted: Monday, November 26, 2018 - 06:12 PM UTC
Yeah, I too bought a ticket Looks good Joel.
Joel_W
Staff MemberAssociate Editor
AUTOMODELER
_VISITCOMMUNITY
New York, United States
Joined: December 04, 2010
KitMaker: 11,666 posts
Auto Modeler: 2,974 posts
Posted: Tuesday, November 27, 2018 - 01:34 AM UTC

Quoted Text

buckled up and ready for the ride


Russell,
Looking forward to having you along for the ride.

Joel
Joel_W
Staff MemberAssociate Editor
AUTOMODELER
_VISITCOMMUNITY
New York, United States
Joined: December 04, 2010
KitMaker: 11,666 posts
Auto Modeler: 2,974 posts
Posted: Tuesday, November 27, 2018 - 01:35 AM UTC

Quoted Text

Yeah, I too bought a ticket Looks good Joel.


Jesper,
Looks like the gang will be along for the ride once again. Glad you're going to be here as well.

Joel
Joel_W
Staff MemberAssociate Editor
AUTOMODELER
_VISITCOMMUNITY
New York, United States
Joined: December 04, 2010
KitMaker: 11,666 posts
Auto Modeler: 2,974 posts
Posted: Saturday, December 01, 2018 - 02:40 AM UTC
No real Update to post as I really screwed up due to nothing other then a bad case of stupidity, and just not following my usual painting procedures.

I needed to stop working on the engine detailing, and paint the chassis so I could install the engine, transmission, turbo charges, radiators, etc., then continue with more detailing. I thought that I could take a few short cuts and paint the black undercoating for the White Aluminum Alcad2 with the same matt black that I was using for the rest of the chassis except for where the white gloss color is used, as there I would use a Mr. Hobby Gray 1,000 primer.

I primed the entire chassis with Mig Ammo Black Acrylic primer. Really good stuff, but even thinned out 50/50 with Tamiya yellow cap 50/50 was a little grainy looking, and the chassis tub doesn't lend it self to polishing all that well. While it would work just fine with the Matt Black areas, I wasn't to sure how the Alcad Aluminum would look over it.

I spent a few hours masking the chassis, then I air brushed on the Alcad2. Two major issues popped right up . One was the grainy effect on the Alcad finish which just wouldn't do, and some damn small Cat hairs and some dust. I totally forgot to wipe down the chassis with a tack cloth . So that was major issue and mistake #2.

Just looking at all the convex and concave shaped made trying to rub out the Alcad useless, and then dust and Cat hairs ( two small ones) made it completely unacceptable. So I decided to strip off all the paint & primer and start over again.

For stripping paint I've found that Denatured Alcohol will remove just about anything from plastic and won't harm the plastic. Good thing I keep a full qt on hand for these type of screw ups. Took a good hour of soaking and scrubbing with a old toothbrush, but I got it 95% clean. Those Nooks & Crannies can be really hard to completely clean.

Ok, time to re-prime, only this time lets do it the right way. I primed the chassis with Mr. Hobby Primer Sealer 1,000 thinned 50/50 with Mr. Hobby/Mr. Color Leveling Thinner 400. The end result is a smooth and very consistent base to work with.

The nose is not painted as it can't been seen once the cockpit and shell are glued into place.


the masked area just behind the nose is unpainted as there is a base plate with the lower suspension arms that will be glued there.


Joel

Szmann
_VISITCOMMUNITY
Netherlands Antilles
Joined: September 02, 2014
KitMaker: 1,977 posts
Auto Modeler: 1,371 posts
Posted: Sunday, December 02, 2018 - 05:08 AM UTC
Joel, it's funny sometimes how even experienced modelers go wrong against all they know - it happens to me a lot!
Alclad II are super-sensitive to undercoat and the final result depends actually more on the under-surface than on the Alclad self. I have developed a new method - maybe you might want to try it. I spray a single wet coat of gloss black enamel, followed shortly after by Alclad. I pause just to remove the black from the a/b and reload. In this manner, the Alclad fuses better to undercoat and some of the "powdery" effect is prevented. But maximum two coats of Alclad are recommended, in immediate succession - on simpler surfaces one coat should be enough!

I'm glad you sorted out the problem and after all it's just a speed bump and not a car crash! Looking fine so far!

P.S. I put the denaturated alcohol on my shopping list - the lacquer thinner proved almost fatal on my last paint stripping experience.

Cheers!
Gabriel
RussellE
#306
_VISITCOMMUNITY
Victoria, Australia
Joined: June 27, 2010
KitMaker: 3,959 posts
Auto Modeler: 495 posts
Posted: Sunday, December 02, 2018 - 09:08 AM UTC
nice save Joel!

Hopefully you're back on track now (excuse the pun )
Joel_W
Staff MemberAssociate Editor
AUTOMODELER
_VISITCOMMUNITY
New York, United States
Joined: December 04, 2010
KitMaker: 11,666 posts
Auto Modeler: 2,974 posts
Posted: Sunday, December 02, 2018 - 09:37 AM UTC

Quoted Text

Joel, it's funny sometimes how even experienced modelers go wrong against all they know - it happens to me a lot!
Alclad II are super-sensitive to undercoat and the final result depends actually more on the under-surface than on the Alclad self. I have developed a new method - maybe you might want to try it. I spray a single wet coat of gloss black enamel, followed shortly after by Alclad. I pause just to remove the black from the a/b and reload. In this manner, the Alclad fuses better to undercoat and some of the "powdery" effect is prevented. But maximum two coats of Alclad are recommended, in immediate succession - on simpler surfaces one coat should be enough!

I'm glad you sorted out the problem and after all it's just a speed bump and not a car crash! Looking fine so far!

P.S. I put the denaturated alcohol on my shopping list - the lacquer thinner proved almost fatal on my last paint stripping experience.

Cheers!
Gabriel


Gabriel,

If I'm using either a Acrylic or lacquer based primer coat whether it's gray, semi gloss black or gloss black, I only give it enough time for me to do a fast flushing of the air brush then I AB on the Alcad II. I've stopped using enamels as they take forever to dry. But if I need to mask the primer coat, then I'll always use a lacquer based primer, as I can mask it in 10-15 min as a general rule with detacked Tamiya tape.

Over the last two days I've reprimed as I posted, AB'd both the top and bottom of the chassis with both the Matt Black and the White Aluminum Alcad II. All that's left to do is the gloss white of the Venturi Tunnels, which naturally will take a lot of masking, which I'll do this week.

I was planning on tomorrow, but my son and his significant other will be visiting us over the next several days, and we haven't seen him in over a year.


Joel
Joel_W
Staff MemberAssociate Editor
AUTOMODELER
_VISITCOMMUNITY
New York, United States
Joined: December 04, 2010
KitMaker: 11,666 posts
Auto Modeler: 2,974 posts
Posted: Sunday, December 02, 2018 - 09:43 AM UTC

Quoted Text

nice save Joel!

Hopefully you're back on track now (excuse the pun )


Russell,

Actually I love the pun

As I just posted, I'm almost done with the complex paint work on the chassis. One more day should do it.

Joel
Szmann
_VISITCOMMUNITY
Netherlands Antilles
Joined: September 02, 2014
KitMaker: 1,977 posts
Auto Modeler: 1,371 posts
Posted: Sunday, December 02, 2018 - 02:23 PM UTC

Quoted Text


Gabriel,

If I'm using either a Acrylic or lacquer based primer coat whether it's gray, semi gloss black or gloss black, I only give it enough time for me to do a fast flushing of the air brush then I AB on the Alcad II. I've stopped using enamels as they take forever to dry. But if I need to mask the primer coat, then I'll always use a lacquer based primer, as I can mask it in 10-15 min as a general rule with detacked Tamiya tape.


Very interesting, Joel! Basically you describe the same method with own words! Both of us have reach by experiencing to the same conclusions and this says something!
I am the fiercest enemy of acrylic primers - I had only bad experiences with them! But if for you work, then is good. I completely agree with you about the lacquer based primers - in my books Mr. Surfacer 1500 is the best primer invented yet. I have used enamel primers for many years, first from Testors, then home-brewed to specific tasks from Rust-oleum enamels. You're right again, they dry slowly, but they are the smoothest when correctly applied thanks to oils incorporated in their formula. The same oils slow down the drying / curing time though...

Gabriel
Cosimodo
#335
_VISITCOMMUNITY
Auckland, New Zealand
Joined: September 03, 2013
KitMaker: 1,808 posts
Auto Modeler: 701 posts
Posted: Sunday, December 02, 2018 - 09:58 PM UTC
Hi Joel,
In a modern world we don't make mistakes, we just have learning opportunities!
Nice recovery though and I admire your patience in dealing with it with quickly.
When I stripped down the Ferrari I used Tamiya paint remover which is nice because it is pretty much odourless but no doubt more expensive than denatured alcohol. I will have to find some. No doubt I will need it for future builds.

cheers
Michael
rdt1953
_VISITCOMMUNITY
New Jersey, United States
Joined: February 06, 2015
KitMaker: 1,098 posts
Auto Modeler: 52 posts
Posted: Monday, December 03, 2018 - 11:20 AM UTC
Hi Buddy !
You know that I know about paint screw ups because your denatured alcohol tip saved my backside a while back . Nice save ! No matter how much we may know it doesn't do much good when we forget it !
Cheers - Richard
Joel_W
Staff MemberAssociate Editor
AUTOMODELER
_VISITCOMMUNITY
New York, United States
Joined: December 04, 2010
KitMaker: 11,666 posts
Auto Modeler: 2,974 posts
Posted: Monday, December 03, 2018 - 01:13 PM UTC

Quoted Text


Quoted Text


Gabriel,

If I'm using either a Acrylic or lacquer based primer coat whether it's gray, semi gloss black or gloss black, I only give it enough time for me to do a fast flushing of the air brush then I AB on the Alcad II. I've stopped using enamels as they take forever to dry. But if I need to mask the primer coat, then I'll always use a lacquer based primer, as I can mask it in 10-15 min as a general rule with detacked Tamiya tape.


Very interesting, Joel! Basically you describe the same method with own words! Both of us have reach by experiencing to the same conclusions and this says something!
I am the fiercest enemy of acrylic primers - I had only bad experiences with them! But if for you work, then is good. I completely agree with you about the lacquer based primers - in my books Mr. Surfacer 1500 is the best primer invented yet. I have used enamel primers for many years, first from Testors, then home-brewed to specific tasks from Rust-oleum enamels. You're right again, they dry slowly, but they are the smoothest when correctly applied thanks to oils incorporated in their formula. The same oils slow down the drying / curing time though...

Gabriel


Gabriel,
As a general rule I won't use any acrylic primers as they don't stick to plastic any better then mot acrylic paints. But the acceptation to the rule for me is Mig Ammo primers and paints. They work as well as Tamiya acrylic paints but are water based. I thin them with Tamiya X-20A or even Tamiya Yellow cap. I've tried Life Color, & Vallejo brands and I tossed out every single bottle.

As for Mr. Hobby #1,500 primer sealer, it's on my list after I finish my two bottles of #1,000 primer sealer. I'm still very fond of Tamiya's Gray and White Primer sealers. As long as you really thin them out, they work just as well INHO as the Mr. Hobby primers.

Joel
Joel_W
Staff MemberAssociate Editor
AUTOMODELER
_VISITCOMMUNITY
New York, United States
Joined: December 04, 2010
KitMaker: 11,666 posts
Auto Modeler: 2,974 posts
Posted: Monday, December 03, 2018 - 01:15 PM UTC

Quoted Text

Hi Joel,
In a modern world we don't make mistakes, we just have learning opportunities!
Nice recovery though and I admire your patience in dealing with it with quickly.
When I stripped down the Ferrari I used Tamiya paint remover which is nice because it is pretty much odourless but no doubt more expensive than denatured alcohol. I will have to find some. No doubt I will need it for future builds.

cheers
Michael


Michael,
I didn't even know that Tamiya makes a paint stripper. As for the Denatured Alcohol, I buy it in my local big box Hardware store.

Joel
Joel_W
Staff MemberAssociate Editor
AUTOMODELER
_VISITCOMMUNITY
New York, United States
Joined: December 04, 2010
KitMaker: 11,666 posts
Auto Modeler: 2,974 posts
Posted: Monday, December 03, 2018 - 01:16 PM UTC

Quoted Text

Hi Buddy !
You know that I know about paint screw ups because your denatured alcohol tip saved my backside a while back . Nice save ! No matter how much we may know it doesn't do much good when we forget it !
Cheers - Richard


Richard
Great to see you. With the cold weather starting tomorrow, are you close to starting your 1/12 scale bike? I'm really looking forward to it.

As for the Denatured Alcohol, like you, it's saved my butt more times then I care to admit.

Joel
Joel_W
Staff MemberAssociate Editor
AUTOMODELER
_VISITCOMMUNITY
New York, United States
Joined: December 04, 2010
KitMaker: 11,666 posts
Auto Modeler: 2,974 posts
Posted: Sunday, December 09, 2018 - 08:44 AM UTC
Another week, and just barely enough work accomplished to post an update.

I finished up over 3 painting sessions painting the top and bottom of the chassis. The topside of the nose isn't painted as I couldn't see any reason to waste the expensive Gravity paint on a area that can't be seen once the shell is glued in place. I've also left the molded on exhaust headers as so little of them will be seen verses, trying to make the pair from scratch, which seems more likely as I continue to see how they're going to look once painted and weathered.


And the chassis bottom. I also masked the area where the front suspension plate will be glued to.


I thought for a change of pace I'd start to work on the cockpit. Tamiya did what I thought was a rather nicely detailed pit until I compared it to the real deal. Here's the Tamiya basic pit.


You'll notice that Tamiya molded in a left hand passenger seat. The drivers seat will go on the right side as it's a separate part. the issue is that there is no seat on the left side, and a lot of the electronics are missing.


So I had to decide how to modify the cockpit. 1st job was to cut out the seat and replace it with some sheet plastic.


Next up is to prime and check how everything looks.

Thanks to all for stopping by and checking out my progress to date.

Joel


RussellE
#306
_VISITCOMMUNITY
Victoria, Australia
Joined: June 27, 2010
KitMaker: 3,959 posts
Auto Modeler: 495 posts
Posted: Sunday, December 09, 2018 - 11:37 PM UTC
The chassis looks real good Joel

Unusual for Tamiya to get something as large as the cockpit so far out from reality. Nice work to rectify it
Joel_W
Staff MemberAssociate Editor
AUTOMODELER
_VISITCOMMUNITY
New York, United States
Joined: December 04, 2010
KitMaker: 11,666 posts
Auto Modeler: 2,974 posts
Posted: Monday, December 10, 2018 - 01:15 AM UTC

Quoted Text

The chassis looks real good Joel

Unusual for Tamiya to get something as large as the cockpit so far out from reality. Nice work to rectify it


Russell,
Thanks my friend for stopping by and checking out my update, it's much appreciated.

Agreed 100% that Tamiya usually gets the details pretty darn close, but we have to keep in mind that this kit was released way back in 1984, so I'm guessing that the photographing and measuring took place in 1982. I'm pretty sure that back then there was no scanning into computer programs, and basically no computer programs to do so. So just about everything was done by hand.

Still, it's really hard to believe that whatever 956 they used had a two seat interior, but it's possible if it was lets say a test mule where a engineer had to ride along.

Joel
Szmann
_VISITCOMMUNITY
Netherlands Antilles
Joined: September 02, 2014
KitMaker: 1,977 posts
Auto Modeler: 1,371 posts
Posted: Monday, December 10, 2018 - 02:13 AM UTC
Joel, very nice approach to the problem. Tamiya is known for simplifying (sometimes over-simplifying) details for easy to assembly. I see it in your case more like a blessing though, since you are one of the few "complete" modelers, enjoying scratch-building as much as painting phase of the build.

Looking nice so far and waiting to see with what you're gonna come and fill up the blanks.

Gabriel
Joel_W
Staff MemberAssociate Editor
AUTOMODELER
_VISITCOMMUNITY
New York, United States
Joined: December 04, 2010
KitMaker: 11,666 posts
Auto Modeler: 2,974 posts
Posted: Monday, December 10, 2018 - 02:58 AM UTC

Quoted Text

Joel, very nice approach to the problem. Tamiya is known for simplifying (sometimes over-simplifying) details for easy to assembly. I see it in your case more like a blessing though, since you are one of the few "complete" modelers, enjoying scratch-building as much as painting phase of the build.

Looking nice so far and waiting to see with what you're gonna come and fill up the blanks.

Gabriel


This all started with the simple intention of just adding a little extra to the pit. But as usual once I started to compare the Tamiya pit to the Porsche pit, it was like day & night. Now I'm into this sub assembly as though it's a separate build.

Still, the main focus of my detailing efforts will be the engine compartment as I intend to display the model with the rear deck off, as well as enter it in two contests this coming year. That is if I ever cross the finish line with it.

Joel
Merlin
Staff MemberSenior Editor
AEROSCALE
#017
_VISITCOMMUNITY
United Kingdom
Joined: June 11, 2003
KitMaker: 17,582 posts
Auto Modeler: 388 posts
Posted: Monday, December 10, 2018 - 09:23 AM UTC
Hi Joel

Of course you'll cross the finish line!

You hooked me with your aircraft builds... and dagnabbit, you've done it with your cars too! (I knew I'd have an excuse to get a Deputy Dawg expression into a post if I spent long enough on Kitmaker.)

All the best

Rowan
Joel_W
Staff MemberAssociate Editor
AUTOMODELER
_VISITCOMMUNITY
New York, United States
Joined: December 04, 2010
KitMaker: 11,666 posts
Auto Modeler: 2,974 posts
Posted: Monday, December 10, 2018 - 10:26 AM UTC

Quoted Text

Hi Joel

Of course you'll cross the finish line!

You hooked me with your aircraft builds... and dagnabbit, you've done it with your cars too! (I knew I'd have an excuse to get a Deputy Dawg expression into a post if I spent long enough on Kitmaker.)

All the best

Rowan


Rowan,
I loved the Deputy Dawg cartoons.

I'll get to the finish line, but when is the big question.

Joel
 _GOTOTOP