


Go to automodeler.com for the current dynamic site!
Hosted by Jim Starkweather
SCCA T2 2006 Mustang GT conversion

KoSprueOne

Joined: March 05, 2004
KitMaker: 4,011 posts
Auto Modeler: 851 posts

Posted: Monday, May 11, 2020 - 01:16 PM UTC
Excellent recovery! Can't even tell that there was any problems in the first place.

Szmann

Joined: September 02, 2014
KitMaker: 1,977 posts
Auto Modeler: 1,371 posts

Posted: Monday, May 11, 2020 - 02:25 PM UTC
David, glad to see you solved the dashboard issue and it looks pretty good now, with all the mods.
Thank you for the fire extinguisher offer, but I don't think it worths the effort - I will find one - I can rob the Lotus right now, since more likely it will be a regular Europa and not the stupid "wing" thing.
I agree with Damian that the quality of the builds have raised seriously lately - from the ongoing builds, there is none I can skip right now!
Transmission and engine look also good. You're doing s superb job there!
Gabriel


Dixon66

Joined: December 12, 2002
KitMaker: 1,500 posts
Auto Modeler: 645 posts

Posted: Monday, May 11, 2020 - 02:25 PM UTC
Thanks Robert and KSO.
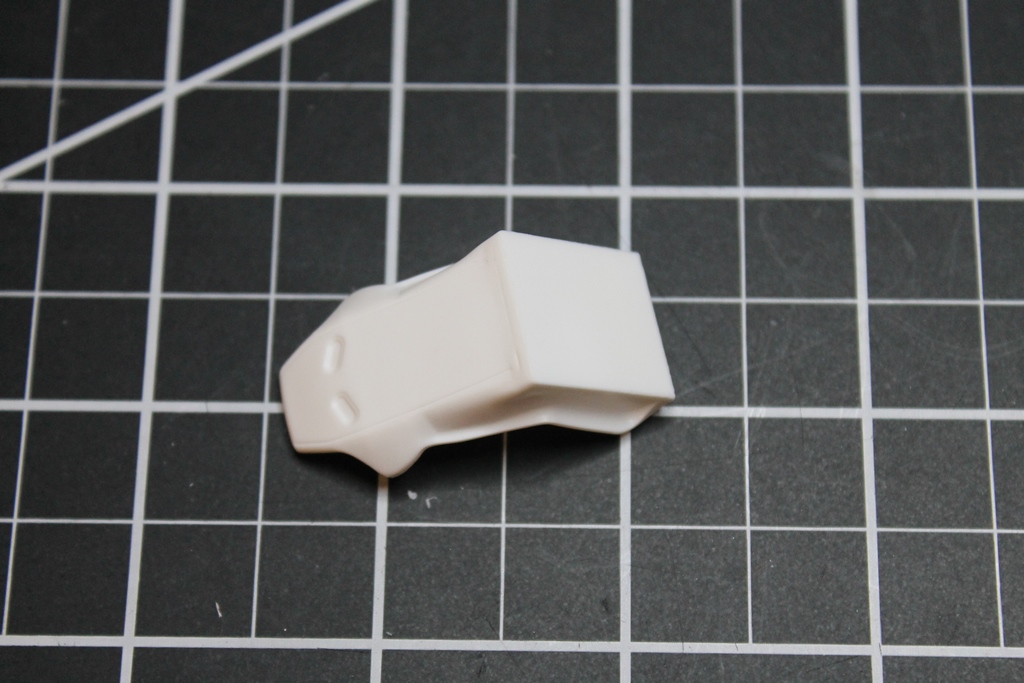
The cut off section was about 1mm deep at the side where the center stack meets the left side of the dash. It tapered down towards the bottom. I think most of the putty is behind the switch panel.
The cut off section was about 1mm deep at the side where the center stack meets the left side of the dash. It tapered down towards the bottom. I think most of the putty is behind the switch panel.
Dixon66
Joined: December 12, 2002
KitMaker: 1,500 posts
Auto Modeler: 645 posts
Posted: Sunday, May 17, 2020 - 05:46 AM UTC
Resin seat, fire bottle and steering wheel arrived yesterday, but I haven't been able to unbox them to look at them yet.
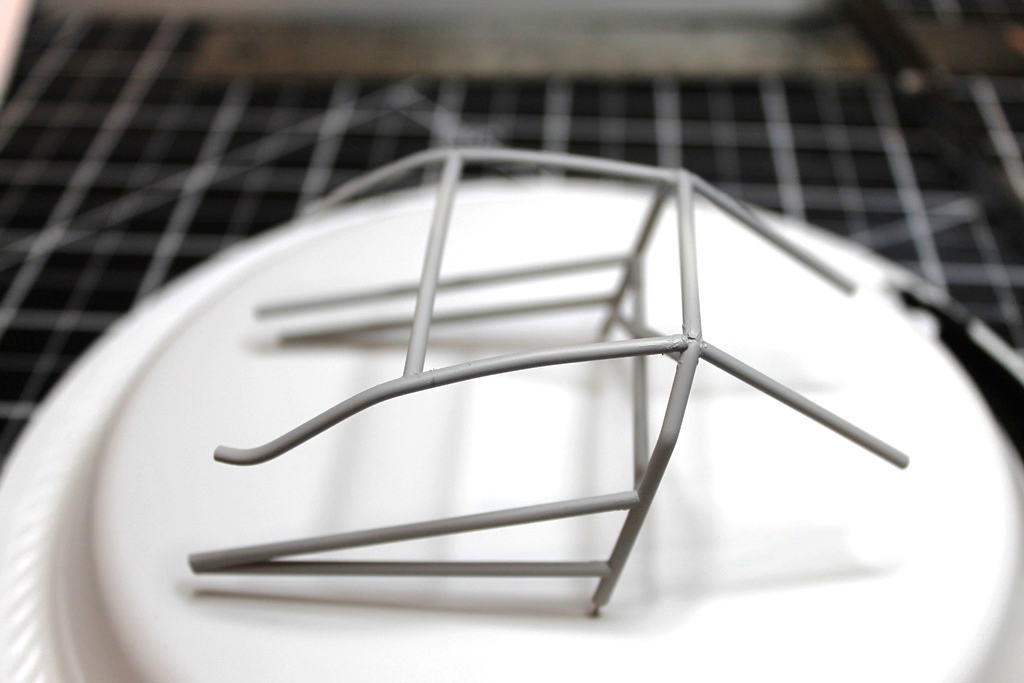
Been struggling on the main hoop for the roll cage, scrapped two attempts so far. I'm going to try using bare 12 gauge electric wire to make a bend template. Both previous attempts were too wide.
Ordered a generic racing numbers sheet too. I figured the white circles would be easier than trying to cut my own from white decal sheet.
Hoping to get down into the workshop later today.
Dixon66
Joined: December 12, 2002
KitMaker: 1,500 posts
Auto Modeler: 645 posts
Posted: Monday, May 18, 2020 - 03:43 AM UTC
Last night I had time to open the box from a new to me resin caster. Ron Coon Resins, wow, I am impressed. He specializes in circle track, but sometimes racing is racing when it comes to parts.
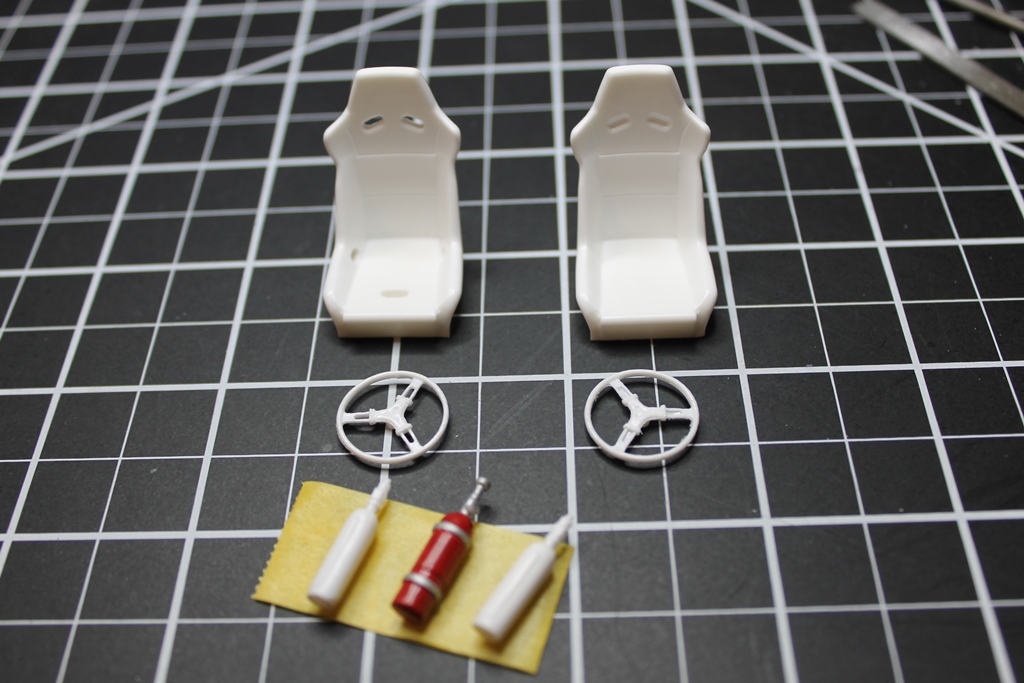
1/25 Racing Seat as it came out of the bag. The bottom of the seat is completely flat and square to the seat. No clean up or sanding needed. Only the upright portion of the seat is marked for where to drill out. Front of seat and back of seat marks were very well aligned.
20 minutes with a pin vise, X-Acto and round file and both the seat and the steering wheel were drilled out to my satisfaction. Shown with unmodified spares I ordered and the fire extinguishers as well, the painted one is an AMT NASCAR one from 15-20 years ago.
Gabriel, PM me your address if you still need one of the fire extinguishers.
BTW, his prices are reasonable, all 6 items and a bonus modern helmet with a side vent were less than $13.50 USD including shipping!
Got some of the hardest bits of the roll cage sorted but not ready for pictures yet, everything is locked in place with tape and blue tac while the TET sets.
Szmann
Joined: September 02, 2014
KitMaker: 1,977 posts
Auto Modeler: 1,371 posts
Posted: Wednesday, May 20, 2020 - 04:28 AM UTC
Seats looking good, David.
Thanks. Actually I can design and print my own 3D objects. I retrieved a fire extinguisher from another kit - but the build it is sidelined now, because of the contracted builds. However, you made me ambitious about the seats and I just had a look to some authentic Sparcos. I can print them with the holes open and with the logo on them, if I put a little effort. I also added some belts to my last order, with photo-etched buckles.
Gabriel
Quoted Text
Gabriel, PM me your address if you still need one of the fire extinguishers.
Thanks. Actually I can design and print my own 3D objects. I retrieved a fire extinguisher from another kit - but the build it is sidelined now, because of the contracted builds. However, you made me ambitious about the seats and I just had a look to some authentic Sparcos. I can print them with the holes open and with the logo on them, if I put a little effort. I also added some belts to my last order, with photo-etched buckles.
Gabriel
Dixon66
Joined: December 12, 2002
KitMaker: 1,500 posts
Auto Modeler: 645 posts
Posted: Wednesday, May 20, 2020 - 07:41 AM UTC
OK Gabriel.
BTW, 3D printing? I think you just became my new best friend!

Anyway, just washed all the parts and should be shooting some primer tomorrow. Roll cage came out OK, not great, but OK.
Pictures later today or tomorrow.
BTW, 3D printing? I think you just became my new best friend!
Anyway, just washed all the parts and should be shooting some primer tomorrow. Roll cage came out OK, not great, but OK.
Pictures later today or tomorrow.
Szmann
Joined: September 02, 2014
KitMaker: 1,977 posts
Auto Modeler: 1,371 posts
Posted: Wednesday, May 20, 2020 - 09:50 AM UTC
Yes, I am co-owner at https://www.bld-thega.com/. The thing is the printing facility it is located in Canada and for small items like an extinctor bottle just doesn't worth the shipping.
Whenever I'll have the time, I'll give it a try to these Sparco seats
Gabriel
Whenever I'll have the time, I'll give it a try to these Sparco seats
Gabriel
Dixon66
Joined: December 12, 2002
KitMaker: 1,500 posts
Auto Modeler: 645 posts
Posted: Wednesday, May 20, 2020 - 10:15 AM UTC
OK, now I remember going to look at the site last year when it came up then. 
Dixon66
Joined: December 12, 2002
KitMaker: 1,500 posts
Auto Modeler: 645 posts
Posted: Friday, May 22, 2020 - 06:35 AM UTC
Primer laid down on the underside and suspension parts today, Interior and body shell should be tomorrow.
Decals for the numbers arrived today.
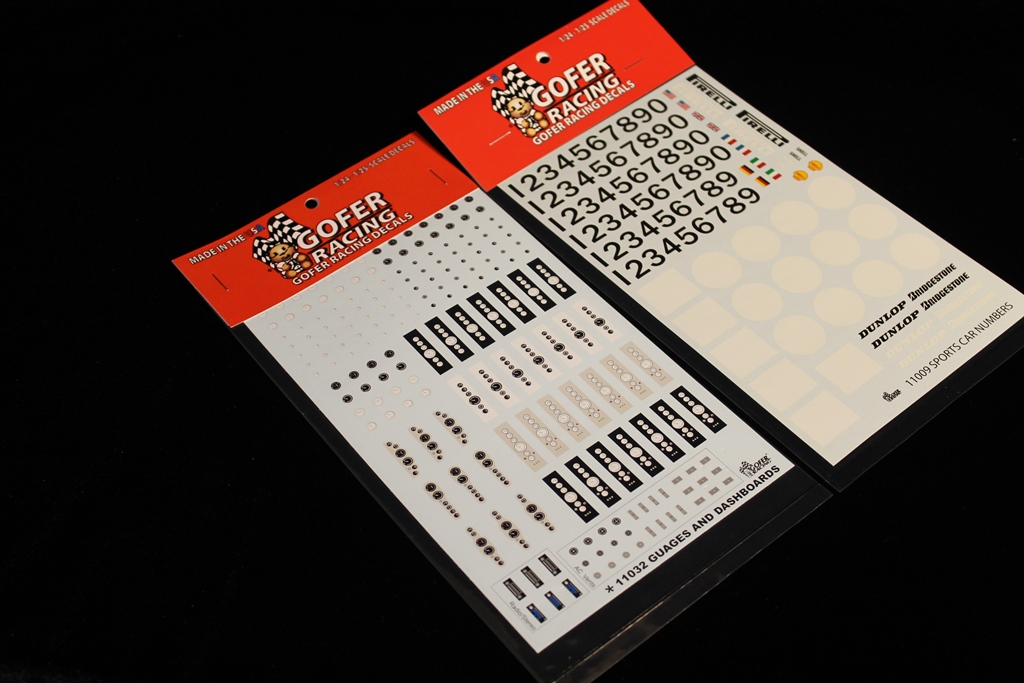
Look to be in good register from what I can see.
Decals for the numbers arrived today.
Look to be in good register from what I can see.

AussieReg

#007

Joined: June 09, 2009
KitMaker: 8,156 posts
Auto Modeler: 2,953 posts

Posted: Friday, May 29, 2020 - 12:45 PM UTC
Those decals look nice! Looking forward to some paint going down on this one David!
Cheers, D
Cheers, D

Dixon66
Joined: December 12, 2002
KitMaker: 1,500 posts
Auto Modeler: 645 posts
Posted: Sunday, May 31, 2020 - 07:18 AM UTC
Been doing a lot of small detail painting and such on the suspension and dashboard. Not really much to report. A long way to go still, and slow progress happening. Not to happy with the way my brush painting on the dash and upper door trim came out.
Plan for this week is to mask off the interior and shoot the body color on the underside and engine compartment. If the body shell primer looks good when I pull it out from under the plastic tub I have had over for the past couple weeks I'll shoot it at the same time.
Plan for this week is to mask off the interior and shoot the body color on the underside and engine compartment. If the body shell primer looks good when I pull it out from under the plastic tub I have had over for the past couple weeks I'll shoot it at the same time.
Dixon66
Joined: December 12, 2002
KitMaker: 1,500 posts
Auto Modeler: 645 posts
Posted: Monday, June 01, 2020 - 06:54 AM UTC
One step forward, three steps back.
With the failed paint job, I was looking at it and dropped it into a tupperware container and poured the last of my 91% Isopropyl over it.
Stripped, sanded with 600, 1500, 3000 and wet 3000. Dried it and already have it back under the first coat of MSP White 1500.
With the failed paint job, I was looking at it and dropped it into a tupperware container and poured the last of my 91% Isopropyl over it.
Stripped, sanded with 600, 1500, 3000 and wet 3000. Dried it and already have it back under the first coat of MSP White 1500.
AussieReg
#007
Joined: June 09, 2009
KitMaker: 8,156 posts
Auto Modeler: 2,953 posts
Posted: Tuesday, June 02, 2020 - 01:10 AM UTC
Onwards and upwards mate, we've all been there! All part of the deal on the shiny side of this game.
Looking forward to round 2 results.
Cheers, D
Looking forward to round 2 results.
Cheers, D
Dixon66
Joined: December 12, 2002
KitMaker: 1,500 posts
Auto Modeler: 645 posts
Posted: Tuesday, June 02, 2020 - 03:49 AM UTC
Thanks, that experience made me remember while I quit glossies years ago.
Second round, primer coat #2 (does that make it #4?) going on later today.
My boss called me today and I start back to work on 8 June. I guess than means I'll have to get a haircut, and no more having a beer with lunch .
.
Second round, primer coat #2 (does that make it #4?) going on later today.
My boss called me today and I start back to work on 8 June. I guess than means I'll have to get a haircut, and no more having a beer with lunch
. Dixon66
Joined: December 12, 2002
KitMaker: 1,500 posts
Auto Modeler: 645 posts
Posted: Friday, June 05, 2020 - 12:01 PM UTC
I'm still nervous to spray the body, but, I got some initial detail painting done on the chassis and in the engine bay.
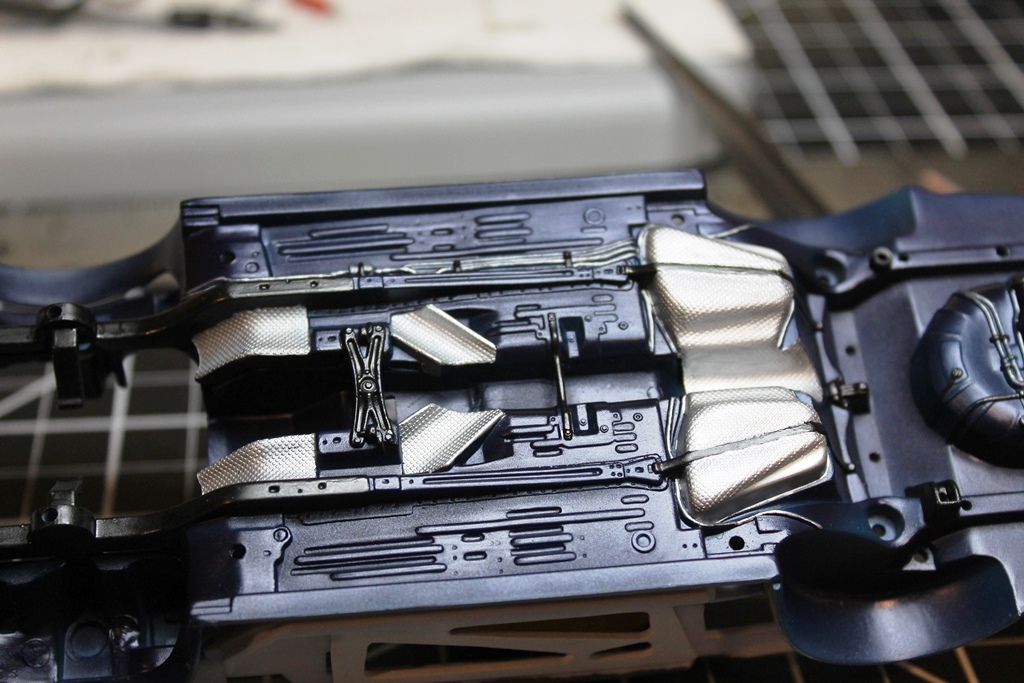
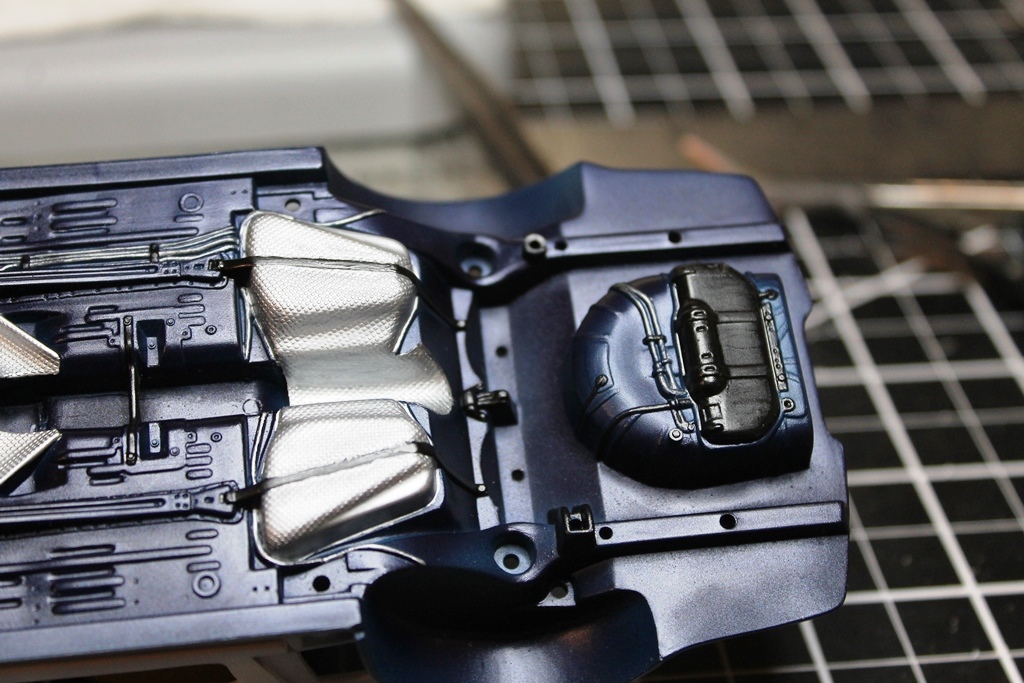
Mocked up the front and rear suspensions. Only thing that looks like it is going to need some adjustment to fit properly is the panhard bar.
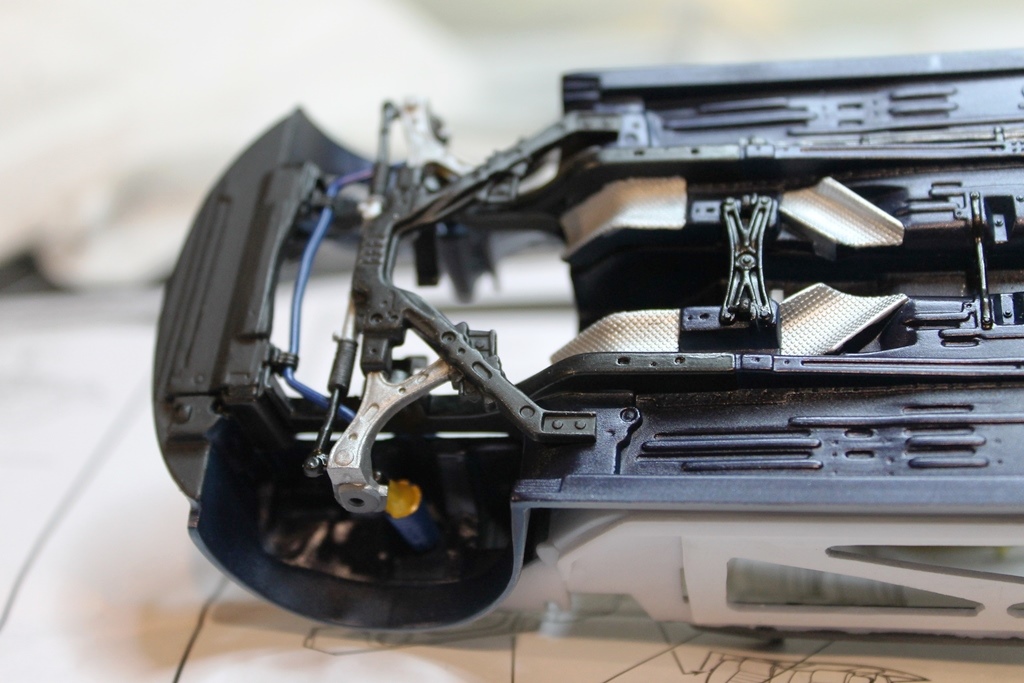
I've been sick with a migraine yesterday and most of today, hence the short replies and late post today.
Mocked up the front and rear suspensions. Only thing that looks like it is going to need some adjustment to fit properly is the panhard bar.
I've been sick with a migraine yesterday and most of today, hence the short replies and late post today.
Szmann
Joined: September 02, 2014
KitMaker: 1,977 posts
Auto Modeler: 1,371 posts
Posted: Friday, June 05, 2020 - 12:12 PM UTC
Looking good, David. Detail painting it's excellent so far!
Sorry to hear about the body painting fail, but, you know, you are not alone!
Gabriel
Sorry to hear about the body painting fail, but, you know, you are not alone!
Gabriel
Dixon66
Joined: December 12, 2002
KitMaker: 1,500 posts
Auto Modeler: 645 posts
Posted: Saturday, June 06, 2020 - 12:33 PM UTC
Thanks Gabriel, It happens to all of us at some point I guess, this model is cursed though.
Anyway, Firefly fans will understand, Two by two, hands of blue...
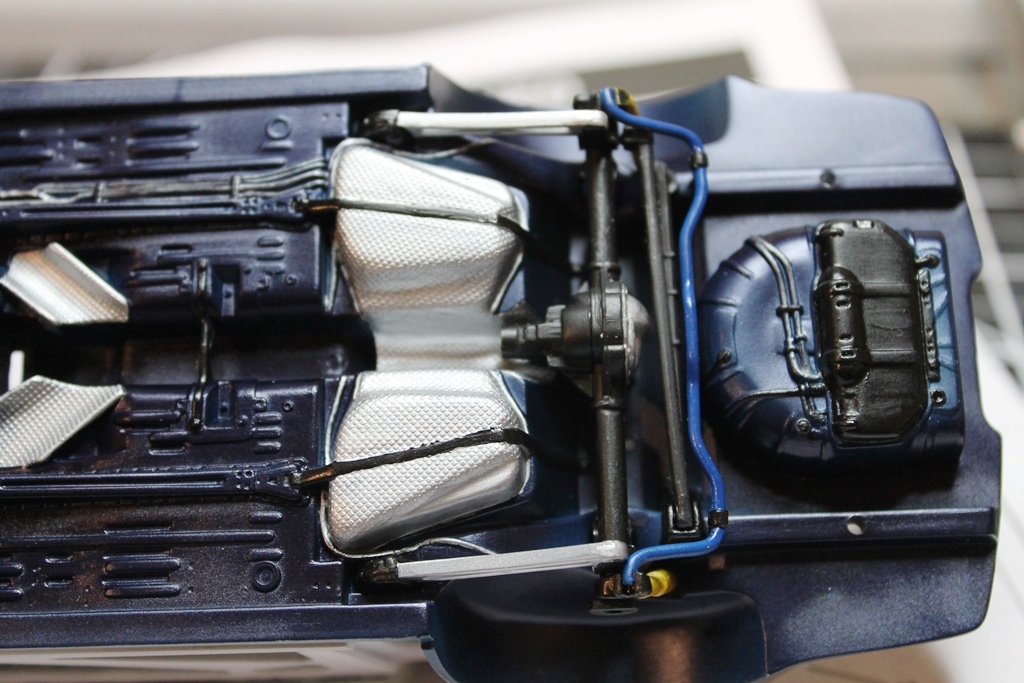
I relaid the color this evening. The results are adequate, but it was the worst personal airbrushing session I've ever had. I'm laughing about it already, but man, things just didn't want to go right. Imagine I'm wearing one blue glove on my left hand and the airbrush is in my ungloved right hand.
Shook up the paint and put it the cup of my Krome with the .3mm tip. Hit the wheel arch areas and a light mist over everything. Set my timer to 7 minutes and waited, with about 2 minutes to go, since it is a metallic paint, I began shaking the Gravity Paint bottle again to add more to the cup. What I didn't know was that the lip inside the cap had bent over and paint went all over the workshop floor and of course my right hand as well. Fill the cup and quickly lacquer thinner my hand and lay the next mist coat. Set the timer and clean the floor and fix the cap. Seven more minutes and then repeat everything for the third mist coat. While finishing the wheel wells and repositioning to work my way up the sides the upper portion of the Tamiya stand slipped in my gloved hand and instinctively the right hand with the airbrush flashed over to keep it from falling. Of course the paint in the cup splashed again all over my right hand and ruined one of my favorite pair of cargo pants. Two quarter size splotches on my right thigh. At least that was the end of the events for the night the rest of the paint coats were uneventful.
Airbrush cleaning was long since it was all over the outside and all the way back into the needle guide bushing. Full disassembly this time.
I hope you had a laugh at my expense on this.
Anyway, Firefly fans will understand, Two by two, hands of blue...
I relaid the color this evening. The results are adequate, but it was the worst personal airbrushing session I've ever had. I'm laughing about it already, but man, things just didn't want to go right. Imagine I'm wearing one blue glove on my left hand and the airbrush is in my ungloved right hand.
Shook up the paint and put it the cup of my Krome with the .3mm tip. Hit the wheel arch areas and a light mist over everything. Set my timer to 7 minutes and waited, with about 2 minutes to go, since it is a metallic paint, I began shaking the Gravity Paint bottle again to add more to the cup. What I didn't know was that the lip inside the cap had bent over and paint went all over the workshop floor and of course my right hand as well. Fill the cup and quickly lacquer thinner my hand and lay the next mist coat. Set the timer and clean the floor and fix the cap. Seven more minutes and then repeat everything for the third mist coat. While finishing the wheel wells and repositioning to work my way up the sides the upper portion of the Tamiya stand slipped in my gloved hand and instinctively the right hand with the airbrush flashed over to keep it from falling. Of course the paint in the cup splashed again all over my right hand and ruined one of my favorite pair of cargo pants. Two quarter size splotches on my right thigh. At least that was the end of the events for the night the rest of the paint coats were uneventful.
Airbrush cleaning was long since it was all over the outside and all the way back into the needle guide bushing. Full disassembly this time.
I hope you had a laugh at my expense on this.
AussieReg
#007
Joined: June 09, 2009
KitMaker: 8,156 posts
Auto Modeler: 2,953 posts
Posted: Saturday, June 06, 2020 - 02:27 PM UTC
Oh, to be a fly on the wall at that session! You might have even taught me some new, um, "phrases" shall we say
Hopefully you have just expended all of your misfortunes for this build now and the rest will just flow smoothly.
Looking forward to progress shots.
Cheers, D
Hopefully you have just expended all of your misfortunes for this build now and the rest will just flow smoothly.
Looking forward to progress shots.
Cheers, D
Dixon66
Joined: December 12, 2002
KitMaker: 1,500 posts
Auto Modeler: 645 posts
Posted: Saturday, June 06, 2020 - 02:35 PM UTC
Nope, just standard curses Damian. 

Cosimodo

#335

Joined: September 03, 2013
KitMaker: 1,808 posts
Auto Modeler: 701 posts

Posted: Saturday, June 06, 2020 - 03:14 PM UTC
Hi David,
The painting of the underside of your Mustang looks great! I am sure it's better than the paint job on your pants
The question will always be - would you trade the second time around paint job on the car if the spill had landed there instead of the pants?
cheers
Michael
The painting of the underside of your Mustang looks great! I am sure it's better than the paint job on your pants
The question will always be - would you trade the second time around paint job on the car if the spill had landed there instead of the pants?
cheers
Michael

Stickframe
#362
Joined: December 01, 2013
KitMaker: 1,661 posts
Auto Modeler: 431 posts

Posted: Saturday, June 06, 2020 - 04:06 PM UTC
Hi David,'
Your build is looking good - nice work on the undercarriage. That paint story....yeah...good times. I haven't had that exact problem, but I think you mentioned using the Krome airbrush - I use one of those too and have the annoying habit of occasionally forgetting to put the cap on the paint cup - and of course, dumping paint out while painting! on me, the model, the table, whatever. Perfect.
Looking forward to your next update
Cheers
Nick
Dixon66
Joined: December 12, 2002
KitMaker: 1,500 posts
Auto Modeler: 645 posts
Posted: Saturday, June 06, 2020 - 11:48 PM UTC
Thanks Michael and Nick.
I was lucky that the spray from the leaking bottle was way off to the right of the paint booth and also away from the section of the workbench that the rest of the kit was on. I would have cried and probably just given up if the lower chassis was splotched up with it too.
Nick, the little clear rubber cap that came with mine was sitting on the desk with the rest of the kit. With the size of the hole in it the paint still would have come out. Again, at least it stayed away from the body.
I pulled the body out from under the inverted plastic tote I use as a dust cover, I can live with the results. It isn't perfect, but there are no dust spots I can see and it is just a race car not a show car. Any imperfections can be considered prior repairs.

rv1963
Joined: December 07, 2004
KitMaker: 1,888 posts
Auto Modeler: 806 posts
Posted: Sunday, June 07, 2020 - 12:08 AM UTC
David. Good attitude we all go through this kind of stuff from time to time on our builds, looking forward to your next post to see that paint work.
Dixon66
Joined: December 12, 2002
KitMaker: 1,500 posts
Auto Modeler: 645 posts
Posted: Sunday, June 07, 2020 - 03:07 AM UTC
Thanks Robert, my wife was kind enough to remind me that at least the paint was on my hand and I didn't end up looking like a Smurf. Love that woman.
 |

WEB HOSTING BY


Copyright ©2021 Auto Modeler and Kitmaker Network, a subsidiary of Silver Star Enterprises
All Rights Reserved. Please read our Conditions of Use and Privacy Policy.
All Rights Reserved. Please read our Conditions of Use and Privacy Policy.