SCCA T2 2006 Mustang GT conversion
New Hampshire, United States
Joined: December 12, 2002
KitMaker: 1,500 posts
Auto Modeler: 645 posts
Posted: Wednesday, June 10, 2020 - 11:43 AM UTC
I love the smell of Tenax in the morning....It smells like a day off work.
I drive a Jeep, but i still bleed Ford Blue....
New York, United States
Joined: December 07, 2004
KitMaker: 1,888 posts
Auto Modeler: 806 posts
Posted: Wednesday, June 10, 2020 - 02:35 PM UTC
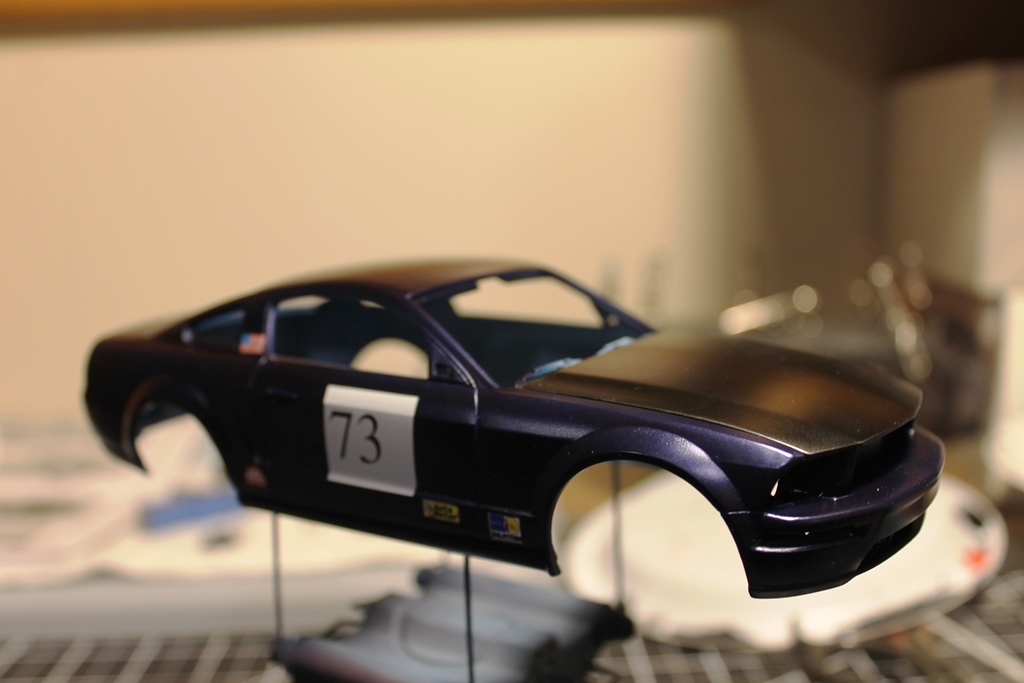
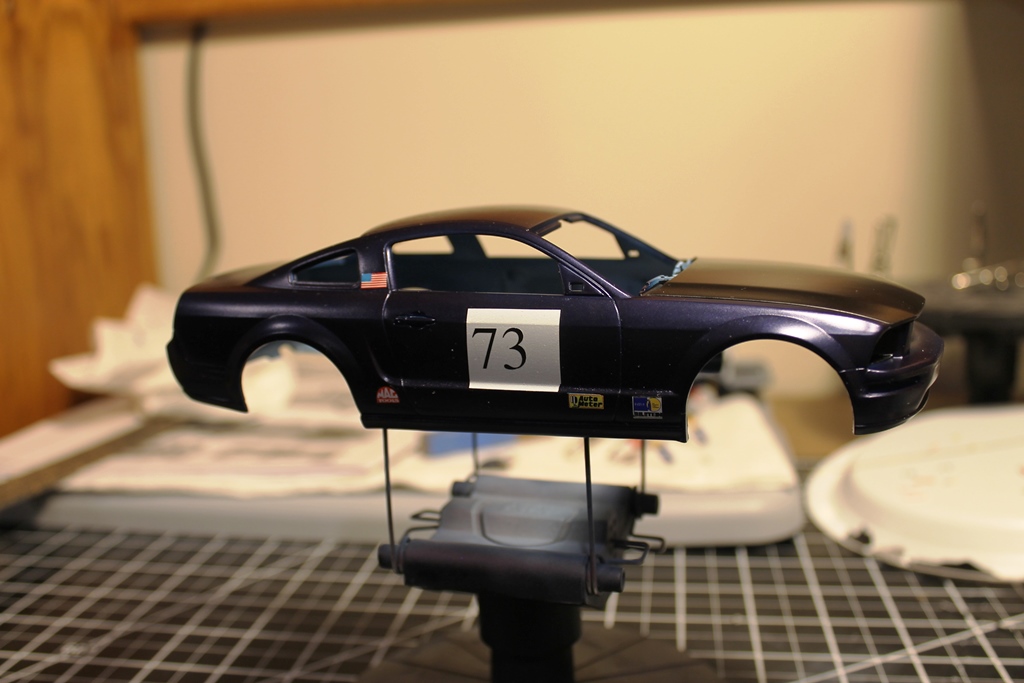
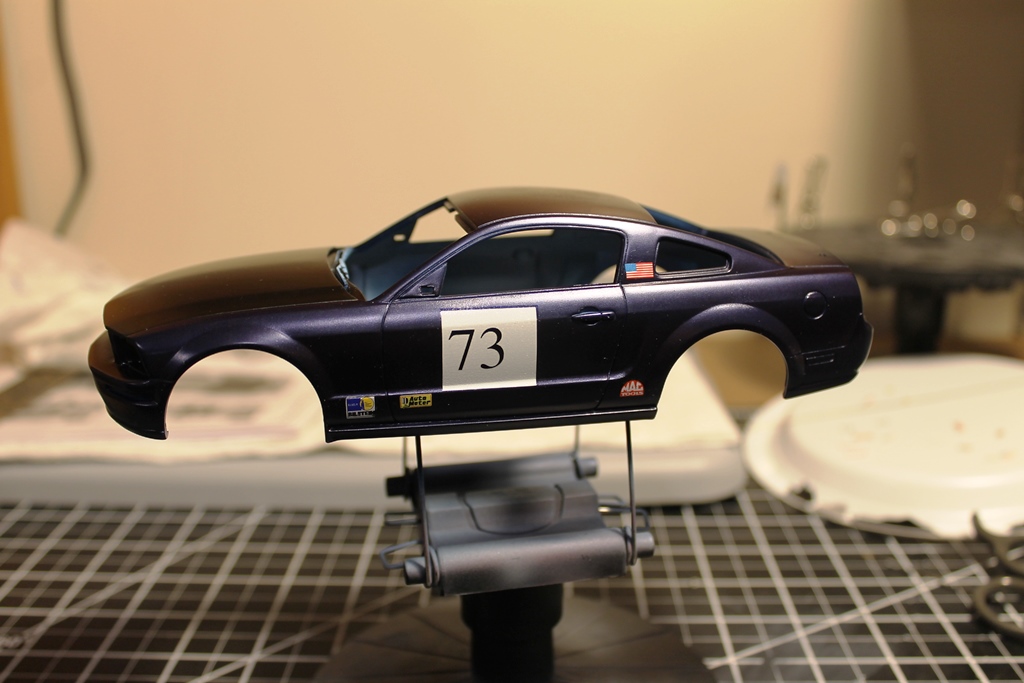
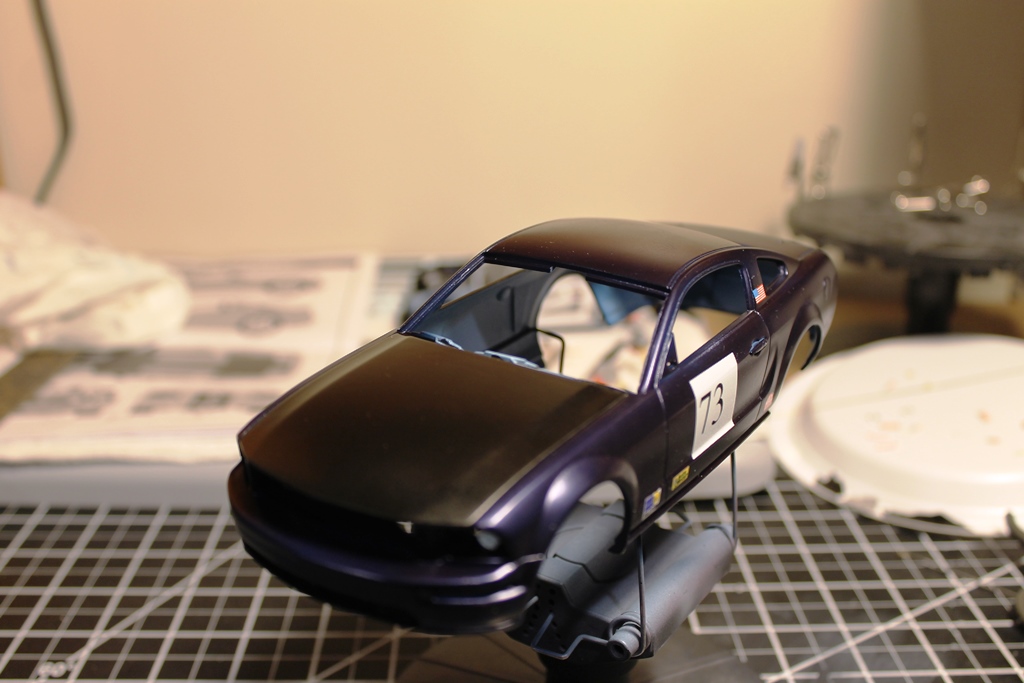
David. I really like it the paint appears to be pretty smooth, are you going to clear over the paint after you put all the decals on?

#335
Auckland, New Zealand
Joined: September 03, 2013
KitMaker: 1,808 posts
Auto Modeler: 701 posts
Posted: Wednesday, June 10, 2020 - 05:19 PM UTC
David, I agree with Robert. The paint looks pretty good. I haven't tried my hand at self made decals but they don't look to bad on the pictures.
cheers
Michael
Campaign:
Strip, Track and Trail - Porsche 917/20 - On the bench
Phantoms at 60 - F-4J Marines
Below 1000 tons - M50 minesweeper - Sailed for duty
New Hampshire, United States
Joined: December 12, 2002
KitMaker: 1,500 posts
Auto Modeler: 645 posts
Posted: Wednesday, June 10, 2020 - 11:53 PM UTC
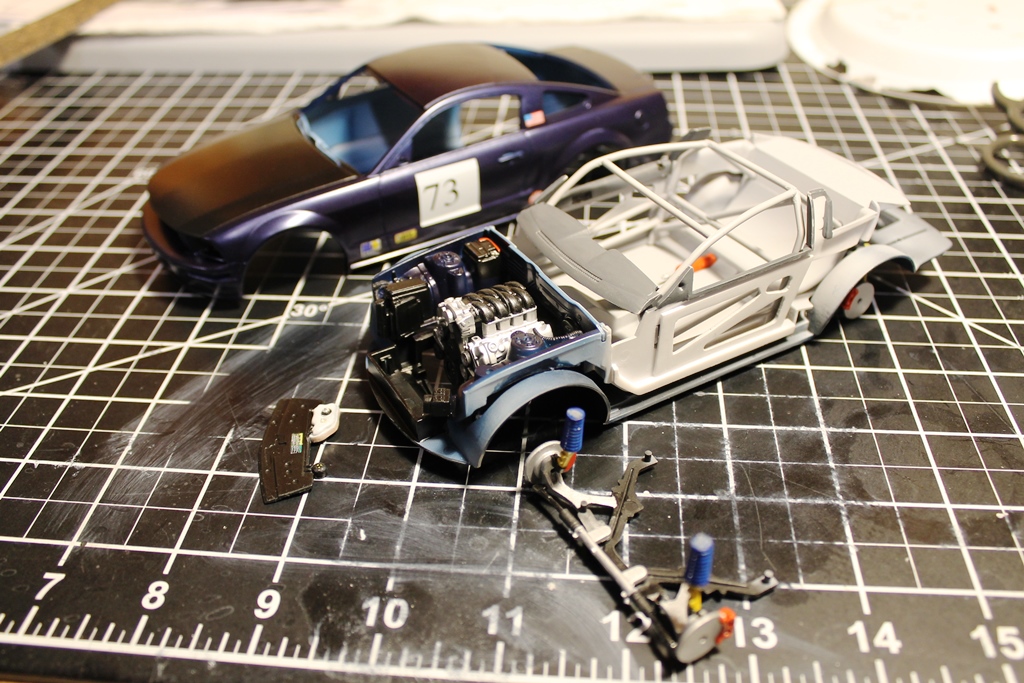
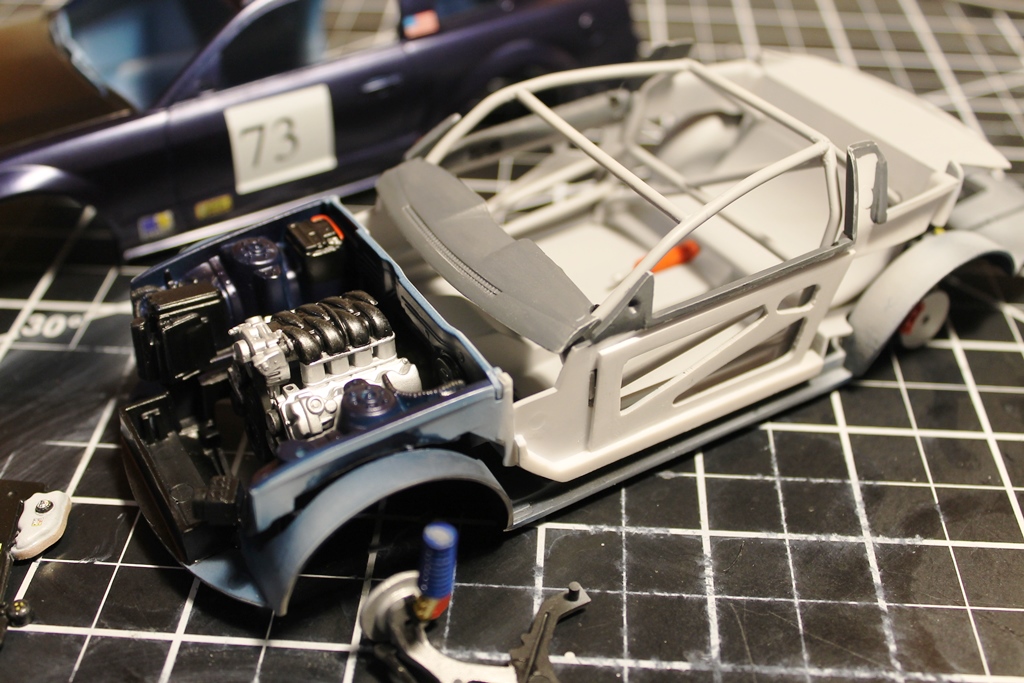
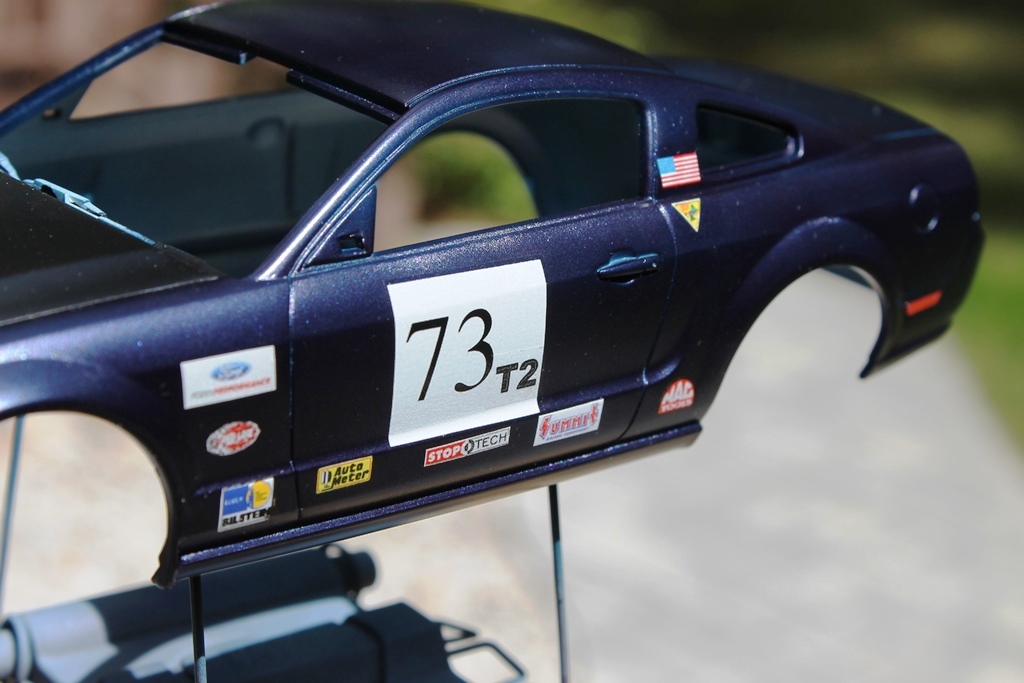
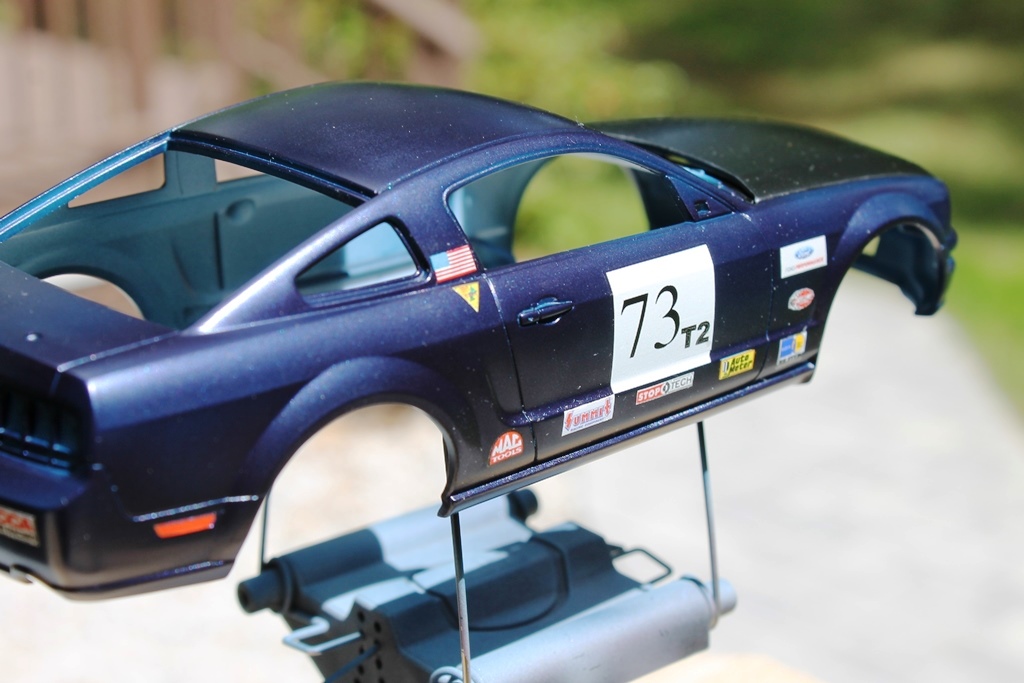
Thanks Robert and Michael. The repaint came out OK, not flawless but acceptable.
Yes, I will be clearing over the decals once done, those are AMT, Monogram and Gofer decals applied so far. I'm going to try to reprint my homemade ones during my next conference call. LOL
The inner door cards were painted last night and should get attached later today.
Still need to:
Finish the decals, not that there are a lot more going on.
Clearcoat, no polish as it should not be super shiny.
Paint window surrounds on glass and body.
Paint back panel.
Lights and glass installs.
Seat and harness.
Steering wheel.
Install front suspension.
Panel line wash the dash, engine, engine bay and undercarriage.
Make and install a shifter.
Panel wash the interior.
Button it up and attach the wheels and tires.
I think that is everything (more a mental checklist to myself).
I love the smell of Tenax in the morning....It smells like a day off work.
I drive a Jeep, but i still bleed Ford Blue....
New Hampshire, United States
Joined: December 12, 2002
KitMaker: 1,500 posts
Auto Modeler: 645 posts
Posted: Friday, June 12, 2020 - 06:48 AM UTC
I love the smell of Tenax in the morning....It smells like a day off work.
I drive a Jeep, but i still bleed Ford Blue....
AussieReg
 Associate Editor
#007
Victoria, Australia
Joined: June 09, 2009
KitMaker: 8,156 posts
Auto Modeler: 2,953 posts
Posted: Friday, June 12, 2020 - 12:30 PM UTC
Looking good David, another stage complete and checked off!
I like your "mental check list" as well. I keep a note pad on the bench and try to jot down any little thoughts that come to me during the sessions, but then the trick is to go back over the note pad to make sure I action them! I'm hopeless at that and constantly going back several steps to touch something up or install something I've overlooked. One trick I find helps is to write a note and then use a Highlighter on the actual instruction sheets, that way it's in my face!
Looking forward to the clear coats next, keep up the great progress!
Cheers, D
ON the bench
Revell 1/24 '53 Corvette (building as '54)
Revell 1/24 BMW 507 Coupe and Cabrio
Italeri 1/48 Me262 B-1a/U1 Nightfighter
Monogram 1/24 '57 Chevy Nomad
Dragon 1/350 USS Frank Knox DD-742
New Hampshire, United States
Joined: December 12, 2002
KitMaker: 1,500 posts
Auto Modeler: 645 posts
Posted: Friday, June 12, 2020 - 12:58 PM UTC
Thanks Damian,
My instruction sheets look like high school cheat sheets, color notes, options selected, order of operations, etc.
I love the smell of Tenax in the morning....It smells like a day off work.
I drive a Jeep, but i still bleed Ford Blue....
New Hampshire, United States
Joined: December 12, 2002
KitMaker: 1,500 posts
Auto Modeler: 645 posts
Posted: Sunday, June 14, 2020 - 12:40 AM UTC
Ahhh, USPS at its finest. Ordered some Tamiya panel line wash through Scale Hobbyist that shipped on June 10 from quite literally two towns over. USPS sent the package from the regional facility in that town to one the opposite direction 50 miles away in central MA the back to the same regional facility it left, it still hasn't made it to the local Post Office. This should have been a one day ship and is now going to be until at least Monday to get it.
I love the smell of Tenax in the morning....It smells like a day off work.
I drive a Jeep, but i still bleed Ford Blue....
Myanmar
Joined: March 05, 2004
KitMaker: 4,011 posts
Auto Modeler: 851 posts
Posted: Sunday, June 14, 2020 - 04:04 AM UTC
Haha, yeah I believe it.
I once mailed a small box to my buddy on the north side of my same city. It included tracking so I followed it online. First it went an hour north to a sorting facility, then 2 hours east to a regional hub, then back to our city's central main P.O. Then finally to my buddy's house, three days later.
The SCCA T2 is really shaping up. Excellent recovery and progress.

i watched a scale plastic figure crawl along the edge . . . of an exacto blade . . . that's my dream , it's my nightmare . . . . . . . crawling , slithering . . . . . along the edge . . . . . . of an exacto . . . . . blade . . . . and surviving
New Hampshire, United States
Joined: December 12, 2002
KitMaker: 1,500 posts
Auto Modeler: 645 posts
Posted: Sunday, June 14, 2020 - 05:41 AM UTC
Thanks KSO.
My USPS exploit is still not as bad as Joel's experience with it, yet.
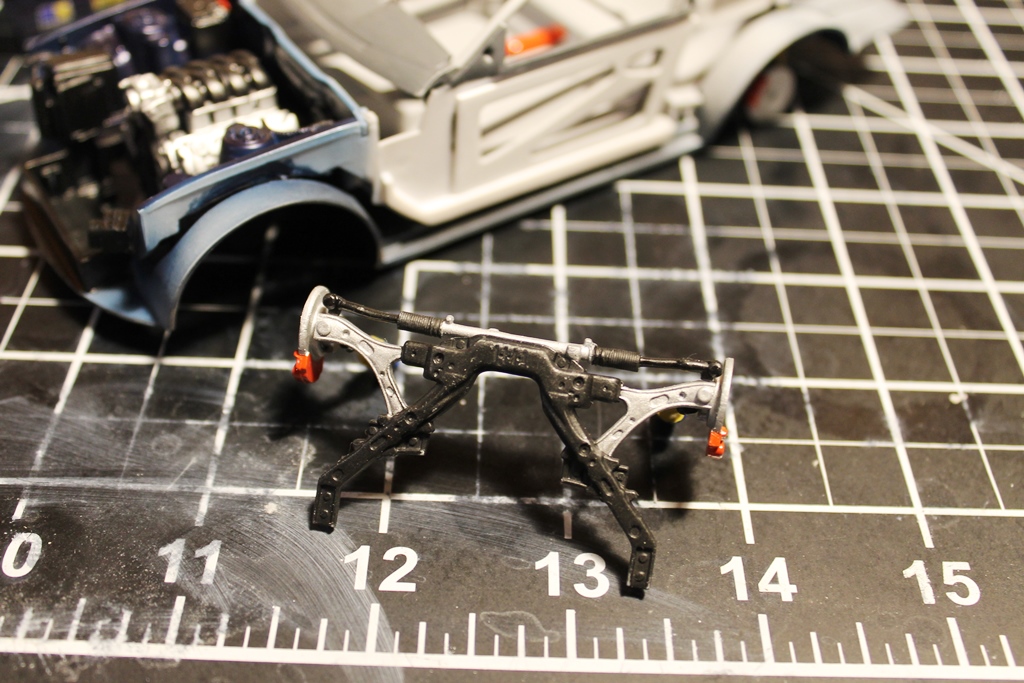
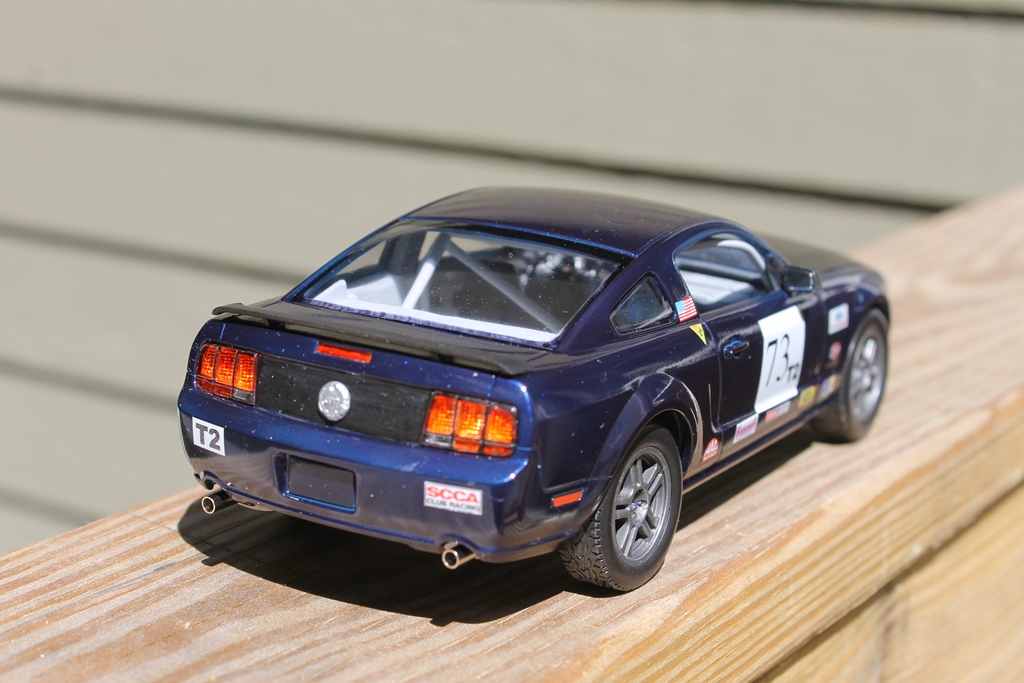
Exhausts go on before you install the rear suspension. Exhausts go on before you install the rear suspension.
Too late.........
Had to pull the entire rear apart to correct it.
I love the smell of Tenax in the morning....It smells like a day off work.
I drive a Jeep, but i still bleed Ford Blue....
New Hampshire, United States
Joined: December 12, 2002
KitMaker: 1,500 posts
Auto Modeler: 645 posts
Posted: Tuesday, June 16, 2020 - 01:43 PM UTC
On the road again, going places that I have been before.
Work called me down to our CT office to fix an Engineering test mule that they broke.
I was going to have this buttoned up this week, not sure now.
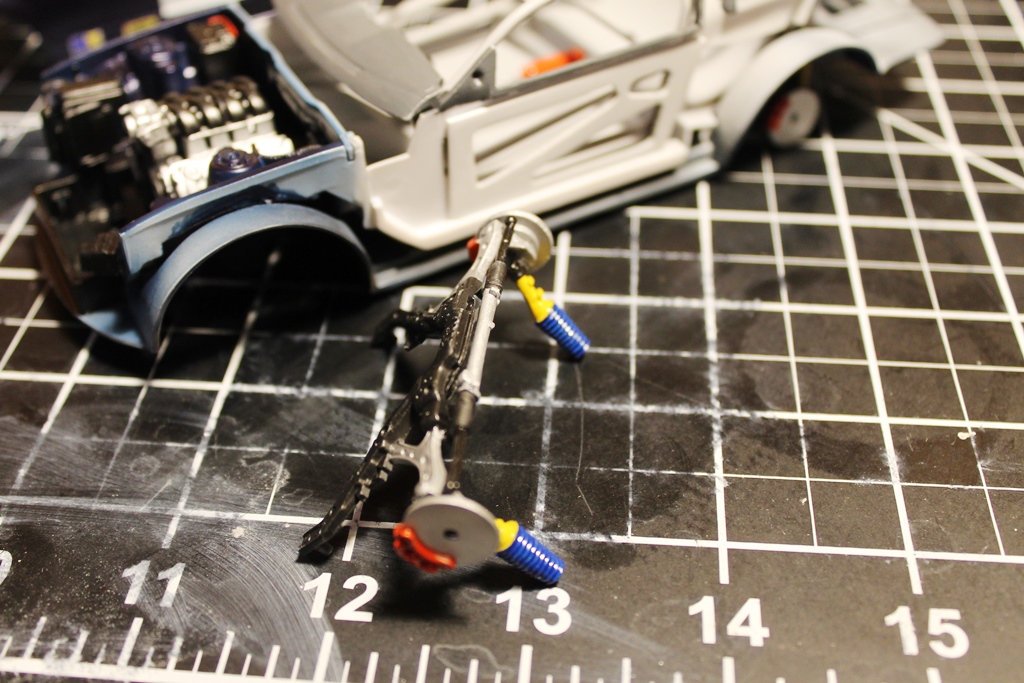
Clear coat was applied over the decals and I tried the technique of straight MLT as a final coat. Definitely slows the drying and the gloss is actually higher than I wanted on this build. I did find a dust devil on one of the rear fenders that I may or may not do anything with.
The panel line wash was used on the engine, trans and a good portion of the underside just before I hit the road.
I love the smell of Tenax in the morning....It smells like a day off work.
I drive a Jeep, but i still bleed Ford Blue....
New Hampshire, United States
Joined: December 12, 2002
KitMaker: 1,500 posts
Auto Modeler: 645 posts
Posted: Thursday, June 18, 2020 - 10:26 AM UTC
Had a few minutes at "lunch" time to hit the basement.
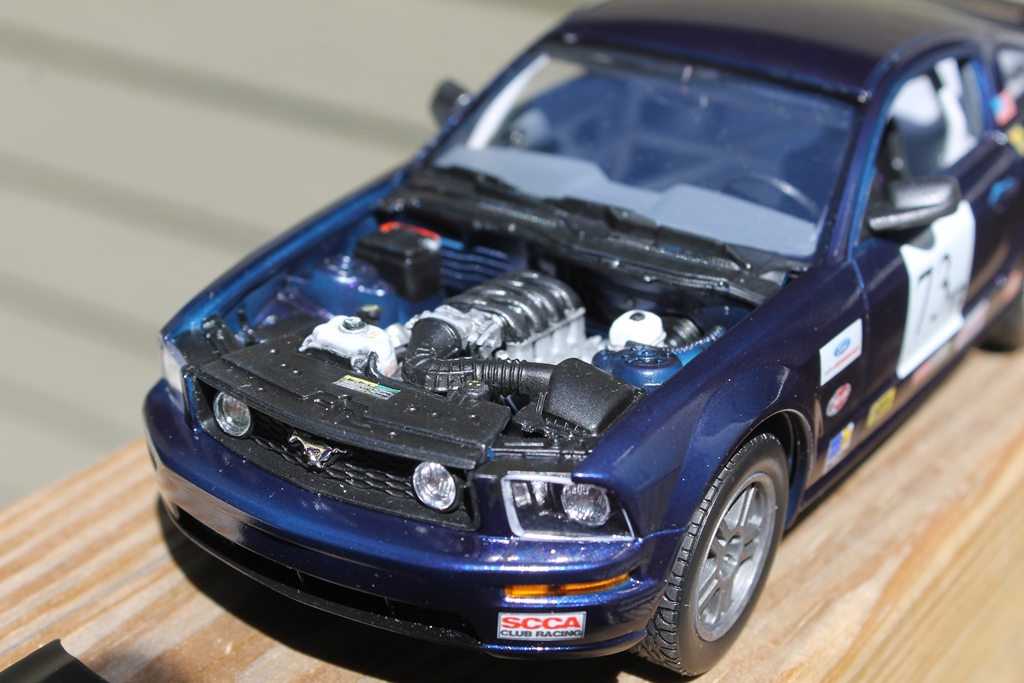
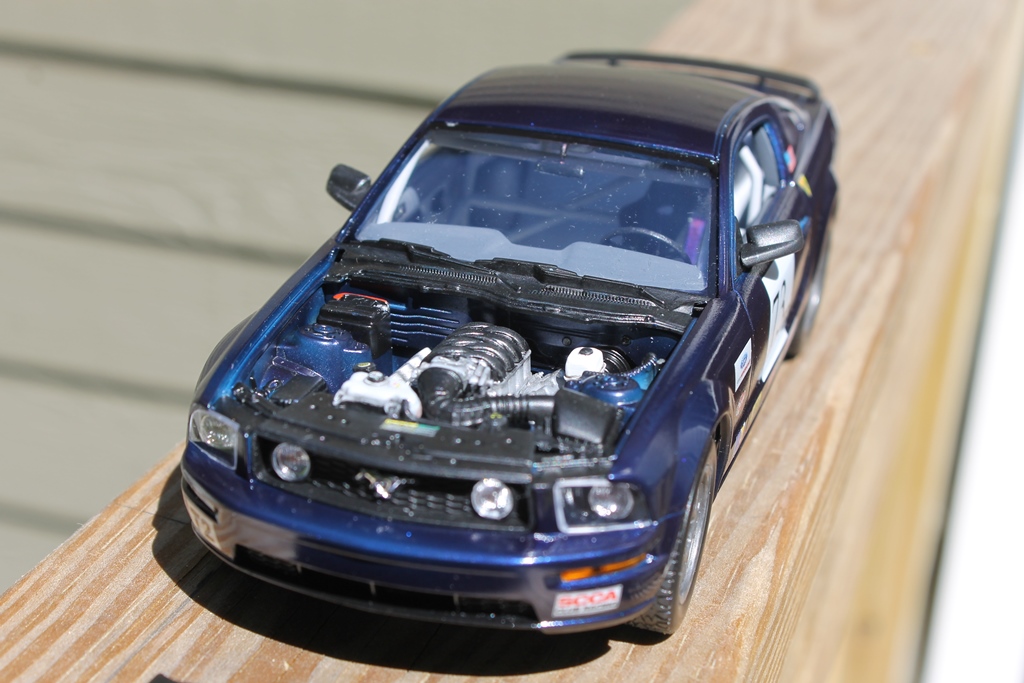
Engine, radiator (w/ hoses that actually fit first time), seat & harness, steering wheel, front suspension and a few other items were all installed to the chassis and the body fit over it. Wheels were added and and it sits flat on all four tires.
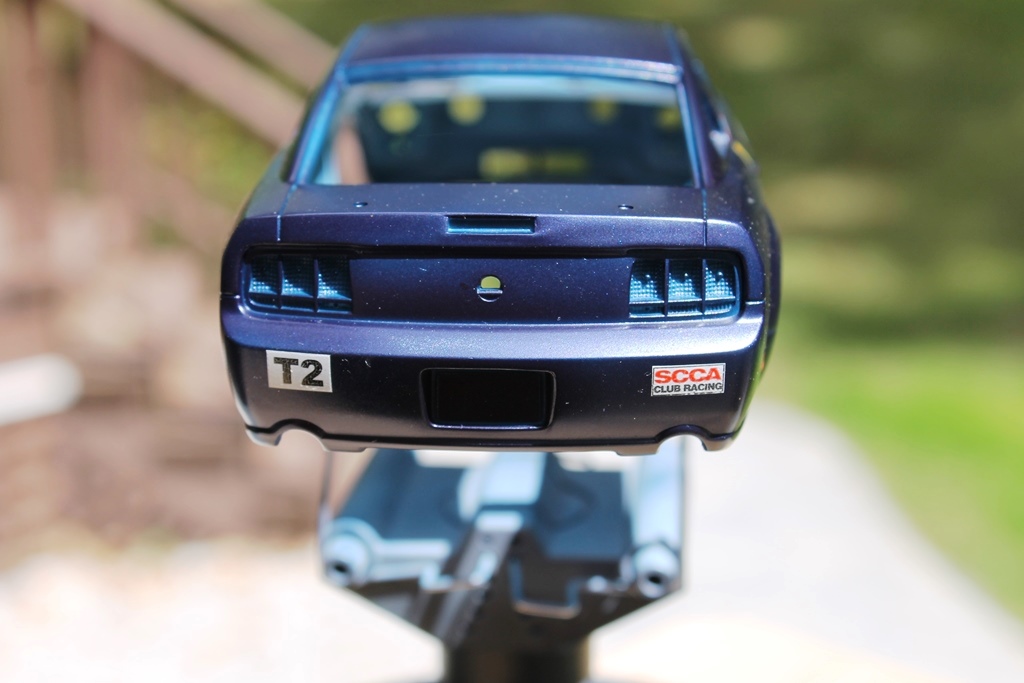
Still need to paint the tail lights and rear panel, add the grill and rear wing, paint the window surrounds and install the glass and marker lights.
Another night or two should button it all up.
I love the smell of Tenax in the morning....It smells like a day off work.
I drive a Jeep, but i still bleed Ford Blue....
AussieReg
Associate Editor #007
Victoria, Australia
Joined: June 09, 2009
KitMaker: 8,156 posts
Auto Modeler: 2,953 posts
Posted: Thursday, June 18, 2020 - 10:37 AM UTC
Quoted Text
Another night or two should button it all up.
Good news that this one is at the final turn into home straight, looking forward to the finish line photos!
Cheers, D
ON the bench
Revell 1/24 '53 Corvette (building as '54)
Revell 1/24 BMW 507 Coupe and Cabrio
Italeri 1/48 Me262 B-1a/U1 Nightfighter
Monogram 1/24 '57 Chevy Nomad
Dragon 1/350 USS Frank Knox DD-742
New Hampshire, United States
Joined: December 12, 2002
KitMaker: 1,500 posts
Auto Modeler: 645 posts
Posted: Friday, June 19, 2020 - 12:01 AM UTC
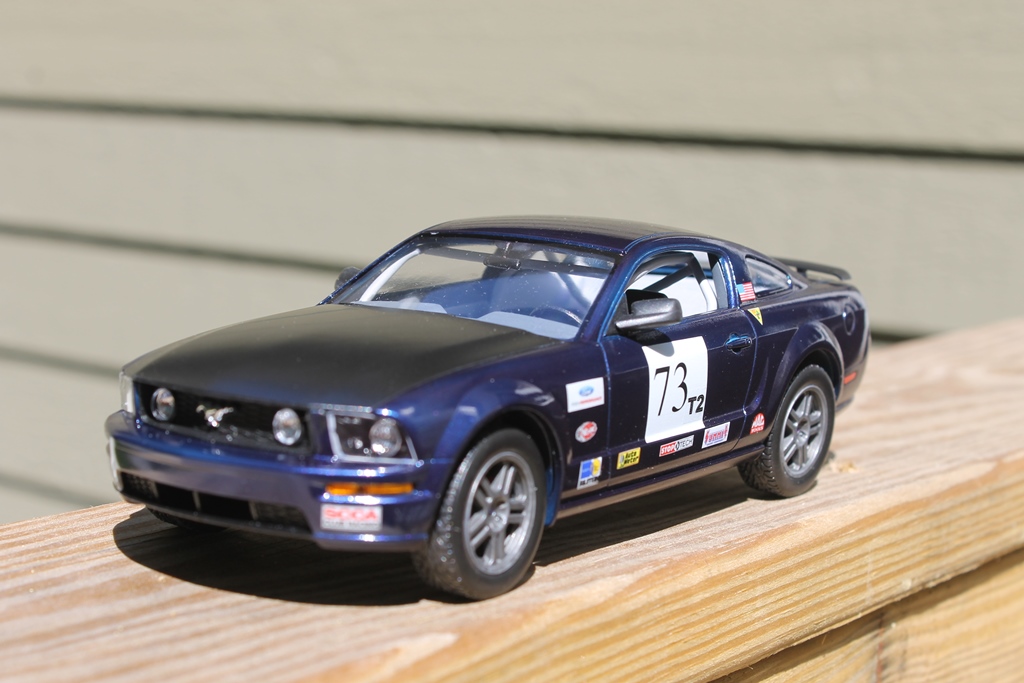
Tried something a little different, instead of brush painting or masking and spraying the window surrounds I tried a Sharpie. The areas had a slight texture as opposed to just a raised demarcation line, the ink had something to bite into and it actually worked better than expected. Filed that one away in the brain for safe keeping.
I love the smell of Tenax in the morning....It smells like a day off work.
I drive a Jeep, but i still bleed Ford Blue....
New Hampshire, United States
Joined: December 12, 2002
KitMaker: 1,500 posts
Auto Modeler: 645 posts
Posted: Saturday, June 20, 2020 - 02:32 AM UTC
I love the smell of Tenax in the morning....It smells like a day off work.
I drive a Jeep, but i still bleed Ford Blue....
#362
California, United States
Joined: December 01, 2013
KitMaker: 1,661 posts
Auto Modeler: 431 posts
Posted: Saturday, June 20, 2020 - 03:49 AM UTC
Hi David,
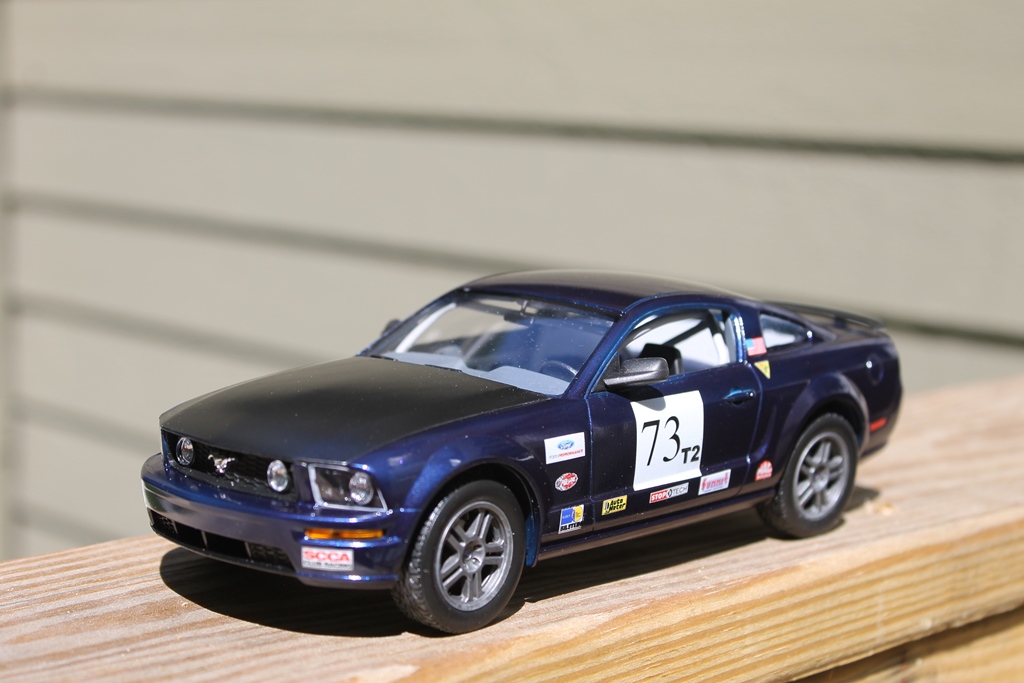
Your mustang looks great! Nice build - seems theres enough detail to make a good build but not so much to create headaches. The outdoor pictures make the colors and decals pop! and looks like the sharpie worked fine -
Cheers
Nick
Myanmar
Joined: March 05, 2004
KitMaker: 4,011 posts
Auto Modeler: 851 posts
Posted: Saturday, June 20, 2020 - 05:21 AM UTC
Excellent finish. Gloss coat looks clean. And yeah, the sharpie around the glass worked fine.
i watched a scale plastic figure crawl along the edge . . . of an exacto blade . . . that's my dream , it's my nightmare . . . . . . . crawling , slithering . . . . . along the edge . . . . . . of an exacto . . . . . blade . . . . and surviving
New Hampshire, United States
Joined: December 12, 2002
KitMaker: 1,500 posts
Auto Modeler: 645 posts
Posted: Saturday, June 20, 2020 - 06:18 AM UTC
Thanks guys, taking pictures outside really gets them dusty.
I just noticed that the headlight cover are still showing the white of the microscale clear glue before it dried. The covers don't look as bad now, several hours later.
If this was being built stock it has no real fit issues at all, a surprisingly good kit.
I love the smell of Tenax in the morning....It smells like a day off work.
I drive a Jeep, but i still bleed Ford Blue....