United Kingdom
Joined: December 20, 2013
KitMaker: 1,179 posts
Auto Modeler: 647 posts
Posted: Tuesday, June 16, 2020 - 08:51 AM UTC

#335
Auckland, New Zealand
Joined: September 03, 2013
KitMaker: 1,808 posts
Auto Modeler: 701 posts
Posted: Tuesday, June 16, 2020 - 11:53 AM UTC
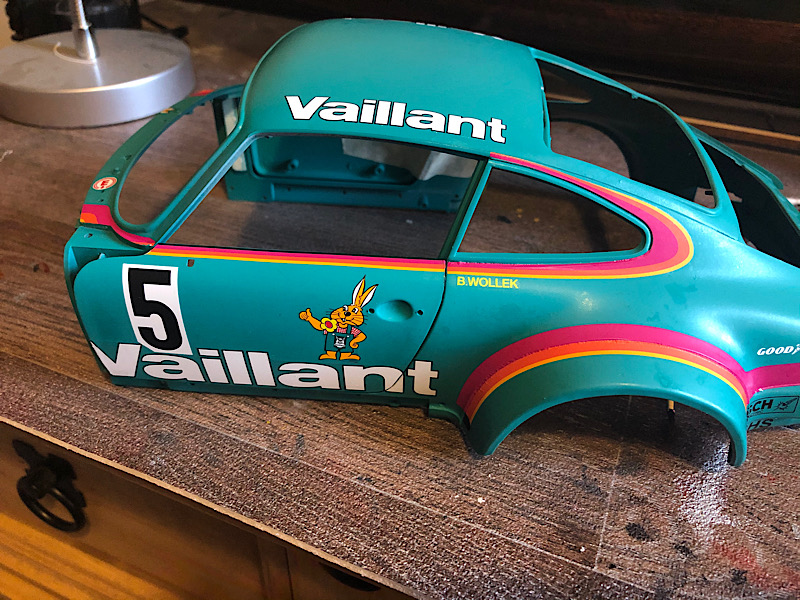
I will be watching this as I built it's 1/24scale version last year for the Porsche campaign (that didn't have an engine)and I have had it's Martini 935 sibling in 1/12 scale for many years. The good thing about this kit is that the Cartograph decals went down really well over all those complex curves.
cheers
Michael
Campaign:
Strip, Track and Trail - Porsche 917/20 - On the bench
Phantoms at 60 - F-4J Marines
Below 1000 tons - M50 minesweeper - Sailed for duty
Joel_W
 Associate Editor
New York, United States
Joined: December 04, 2010
KitMaker: 11,666 posts
Auto Modeler: 2,974 posts
Posted: Wednesday, June 17, 2020 - 12:30 AM UTC
Ken,
I'm really excited about following your build on this iconic 934 Porsche in 1/12 scale. The 934 was Porsches fuel injected race version of the 911 which was based on the actual showroom car, and the FIA has very strict rules on what a team could and couldn't do for race prep. Michael's 935 was the twin turbo version and was by the rules a full blown race car from the tube chassis up.
The Tamiya kit is quite old, so it's not up today's Tamiya super high standards, but still should build into one great kit as you've got the skills to over come any fit issues for sure.
joel
On my Workbench:
Monogram 1/24 scale 427 Shelby Cobra
Just Completed:
Beemax 1/24 scale BMW M3 E30 1992 Evolution II
AussieReg
Associate Editor #007
Victoria, Australia
Joined: June 09, 2009
KitMaker: 8,156 posts
Auto Modeler: 2,953 posts
Posted: Wednesday, June 17, 2020 - 01:37 AM UTC
Great to see you make a start on this kit Ken, and another big 1/12 scale kit hitting the boards is good to see!
Looking forward to progress reports coming in.
Cheers, D
ON the bench
Revell 1/24 '53 Corvette (building as '54)
Revell 1/24 BMW 507 Coupe and Cabrio
Italeri 1/48 Me262 B-1a/U1 Nightfighter
Monogram 1/24 '57 Chevy Nomad
Dragon 1/350 USS Frank Knox DD-742
United Kingdom
Joined: December 20, 2013
KitMaker: 1,179 posts
Auto Modeler: 647 posts
Posted: Wednesday, June 17, 2020 - 08:18 AM UTC
United Kingdom
Joined: December 20, 2013
KitMaker: 1,179 posts
Auto Modeler: 647 posts
Posted: Thursday, June 18, 2020 - 07:57 AM UTC
New Hampshire, United States
Joined: December 12, 2002
KitMaker: 1,500 posts
Auto Modeler: 645 posts
Posted: Thursday, June 18, 2020 - 10:19 AM UTC
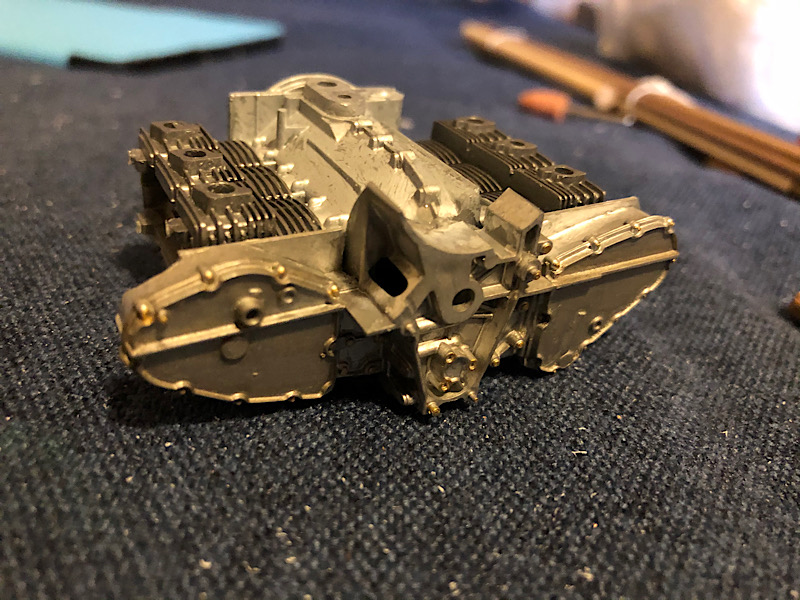
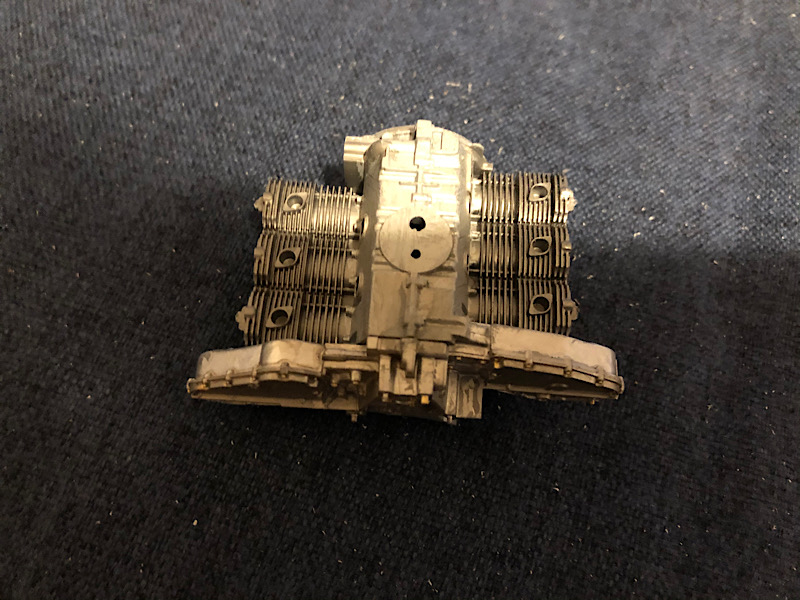
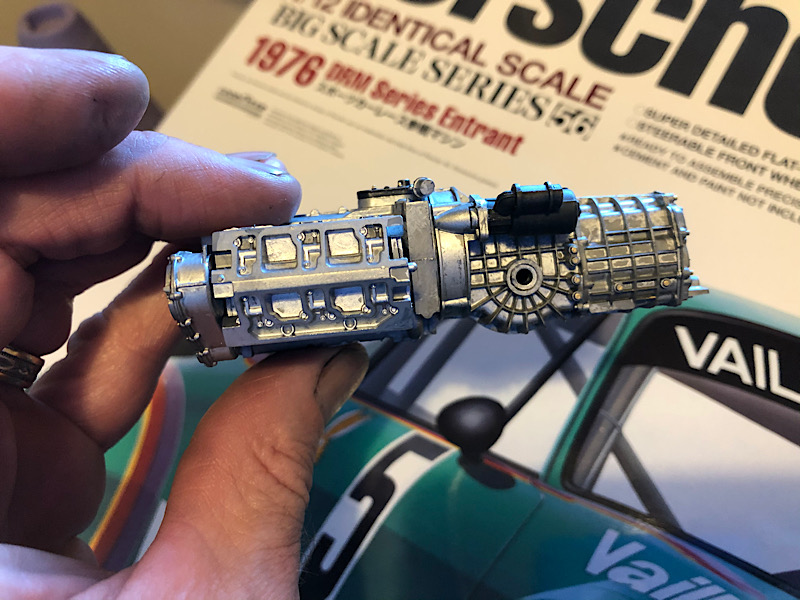
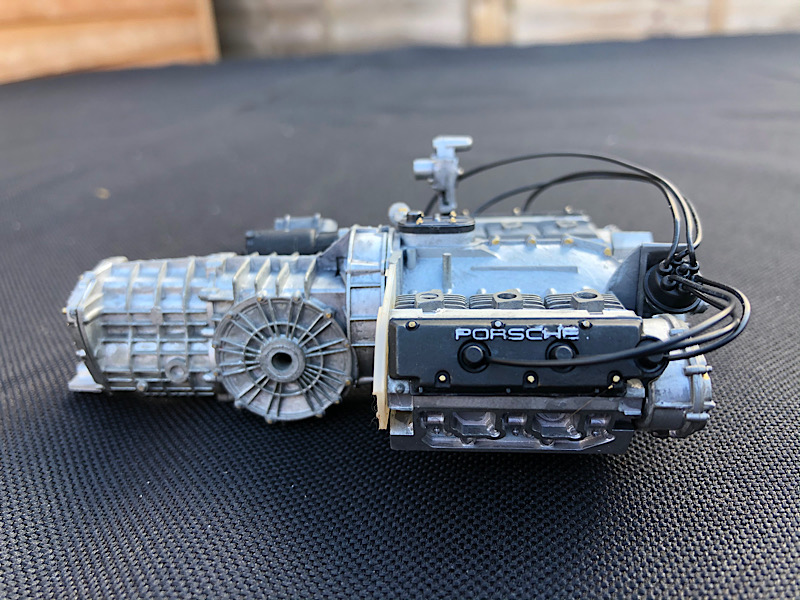
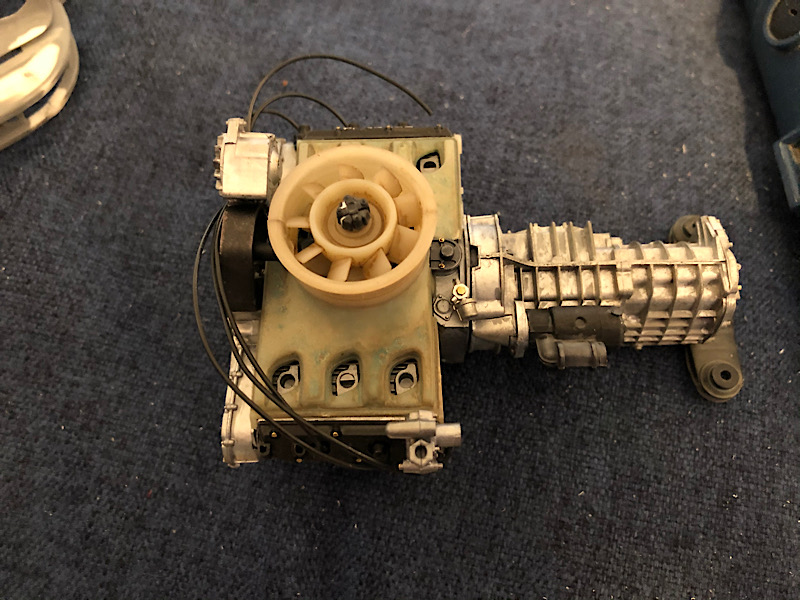
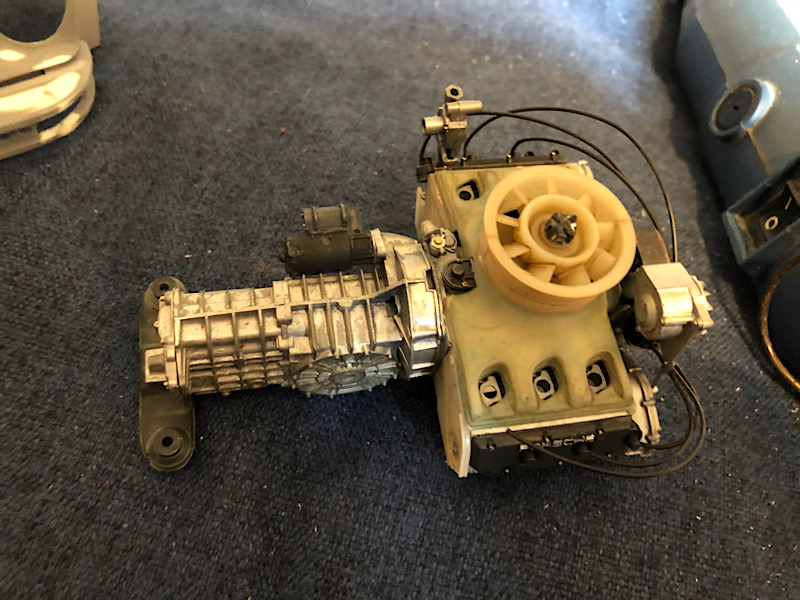
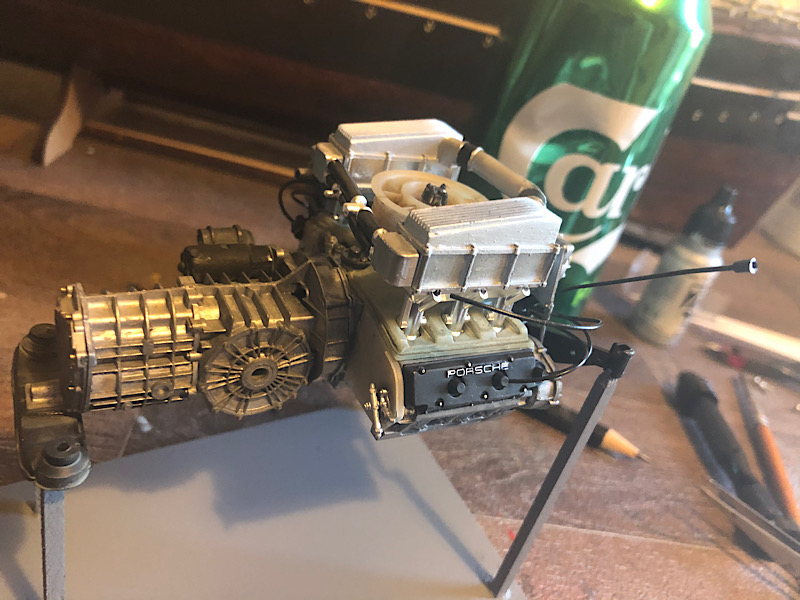
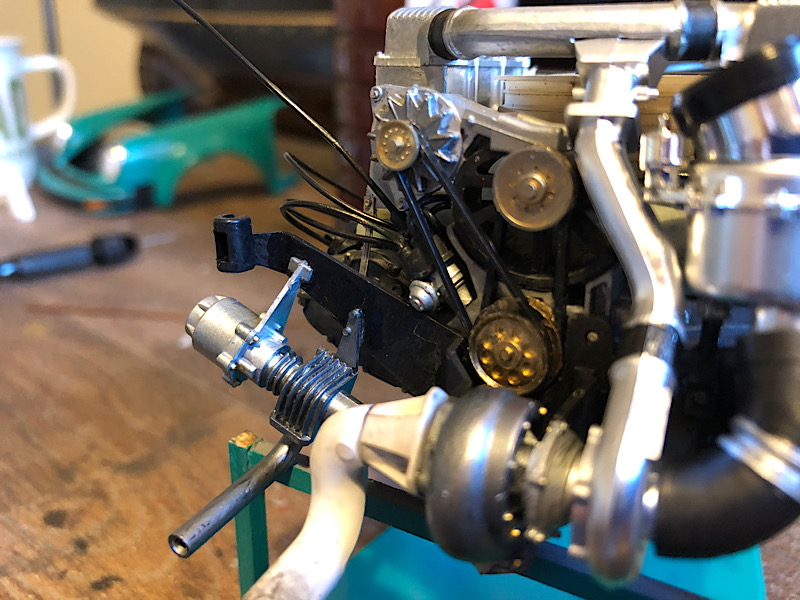
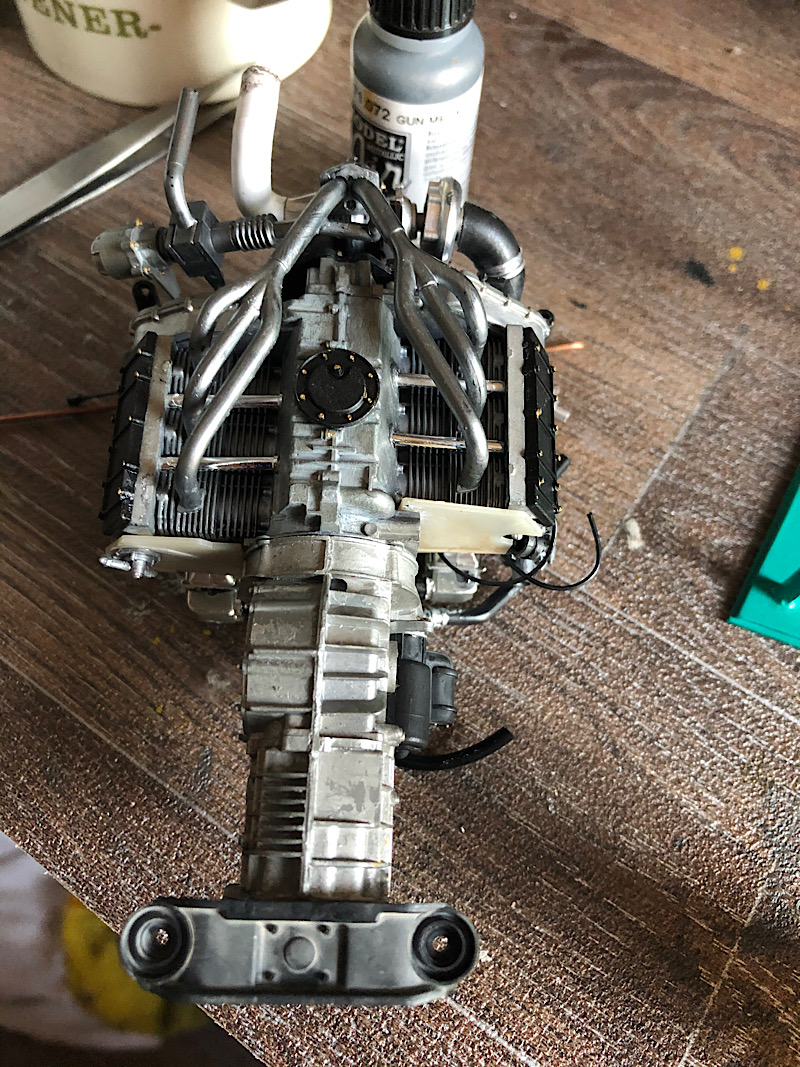
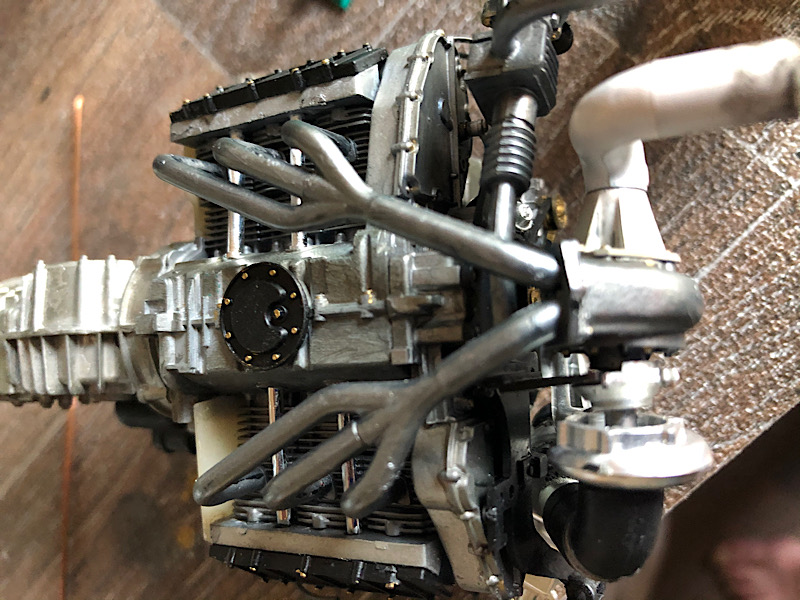
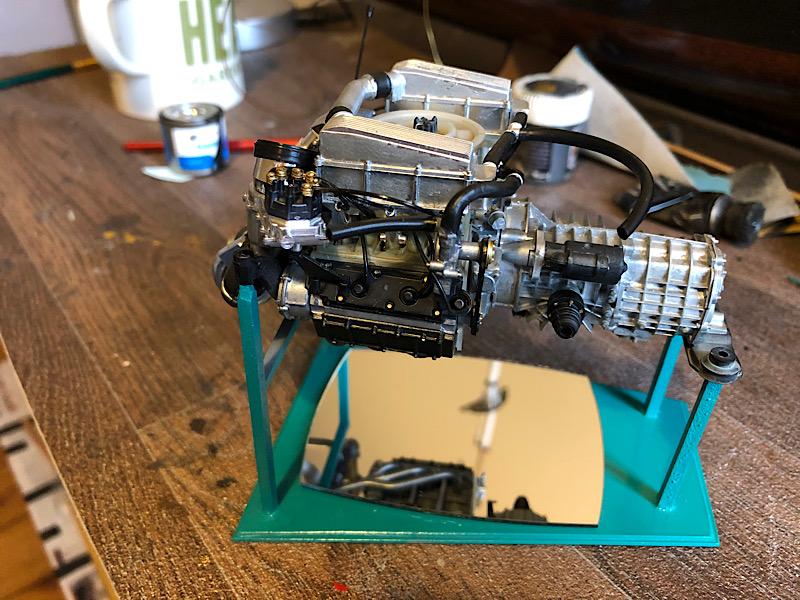
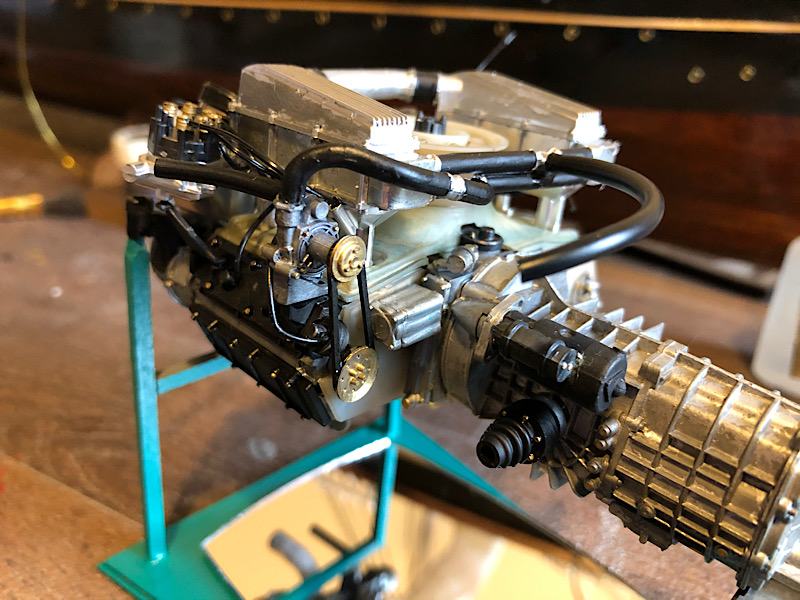
Ken, your "metal" work is phenomenal.
I love the smell of Tenax in the morning....It smells like a day off work.
I drive a Jeep, but i still bleed Ford Blue....
AussieReg
Associate Editor #007
Victoria, Australia
Joined: June 09, 2009
KitMaker: 8,156 posts
Auto Modeler: 2,953 posts
Posted: Thursday, June 18, 2020 - 10:40 AM UTC
I'm with David, excellent metallurgy!
Cheers, D
ON the bench
Revell 1/24 '53 Corvette (building as '54)
Revell 1/24 BMW 507 Coupe and Cabrio
Italeri 1/48 Me262 B-1a/U1 Nightfighter
Monogram 1/24 '57 Chevy Nomad
Dragon 1/350 USS Frank Knox DD-742
United Kingdom
Joined: December 20, 2013
KitMaker: 1,179 posts
Auto Modeler: 647 posts
Posted: Friday, June 19, 2020 - 08:08 AM UTC
#335
Auckland, New Zealand
Joined: September 03, 2013
KitMaker: 1,808 posts
Auto Modeler: 701 posts
Posted: Friday, June 19, 2020 - 04:10 PM UTC
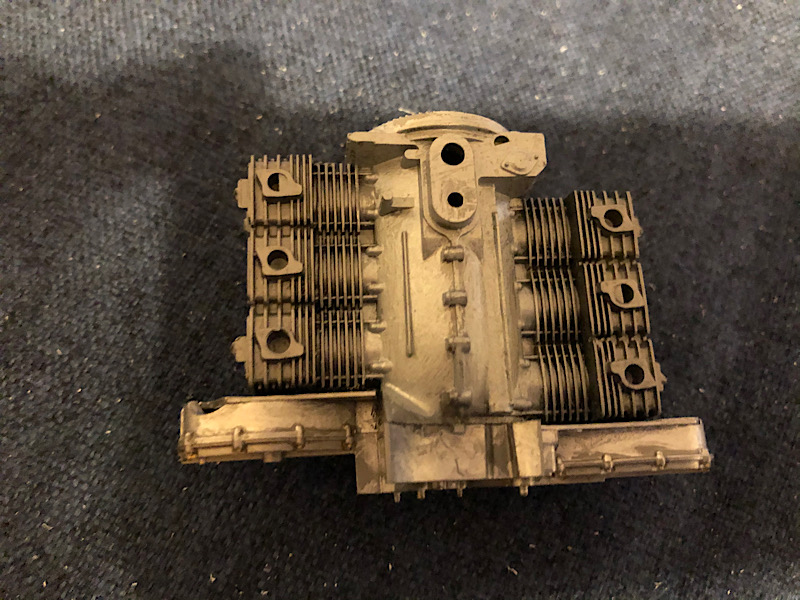
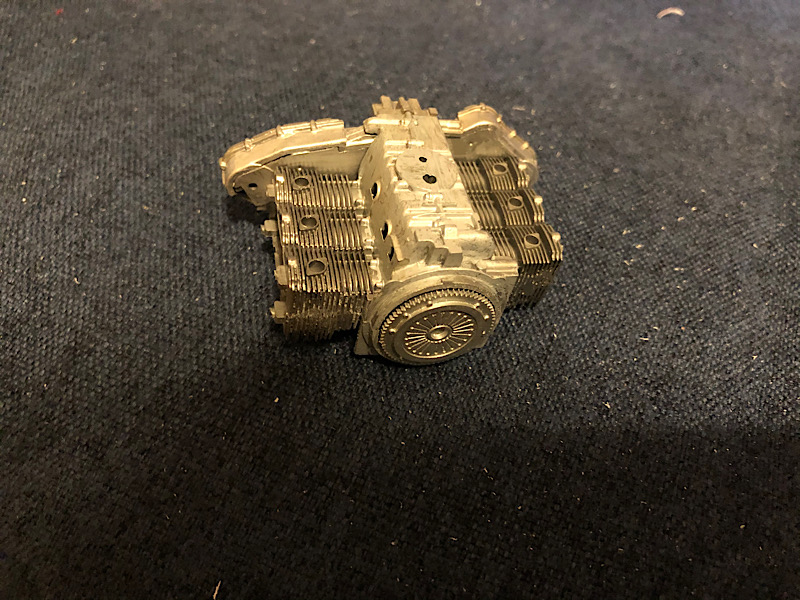
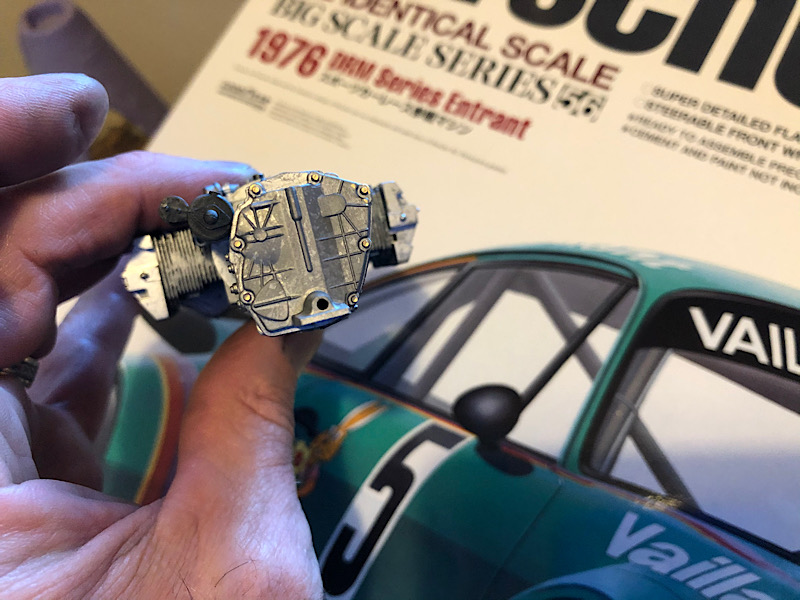
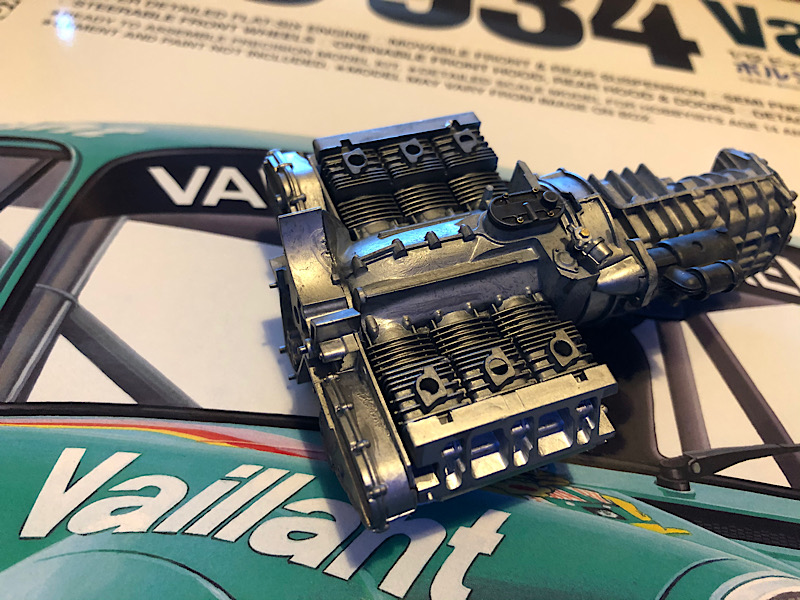
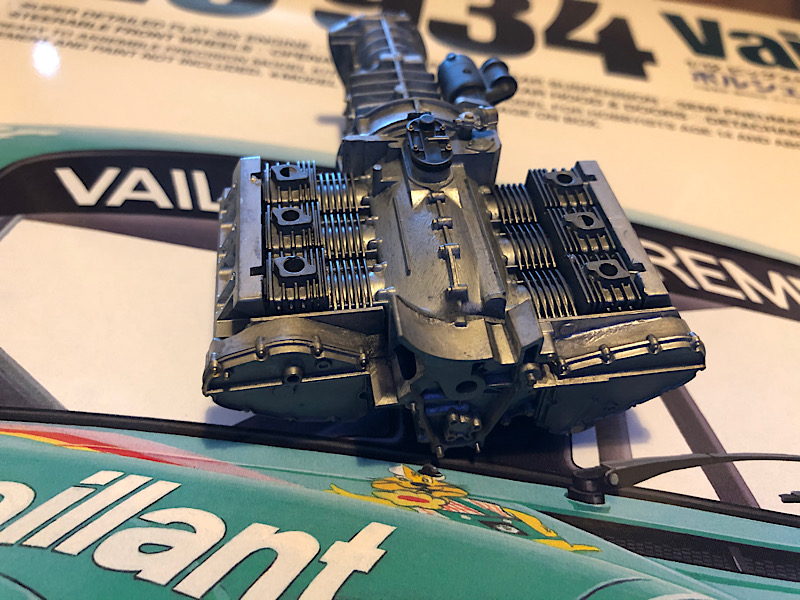
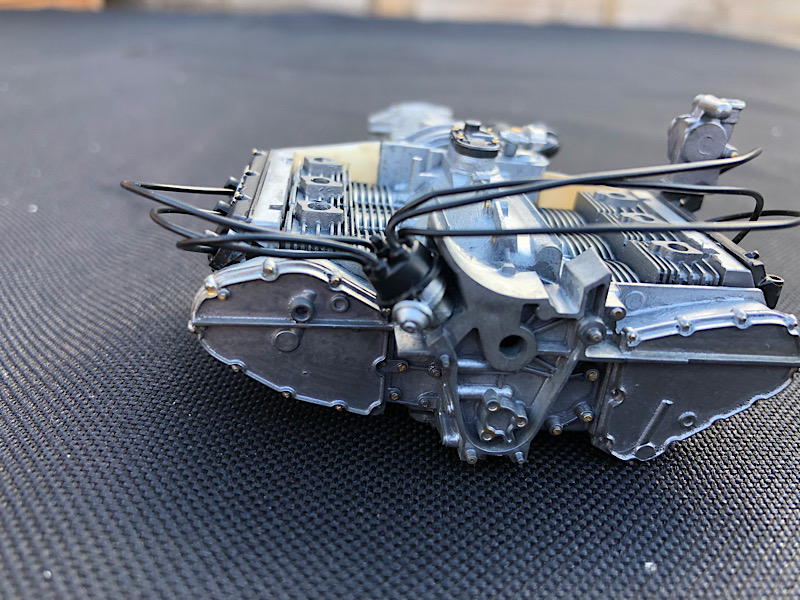
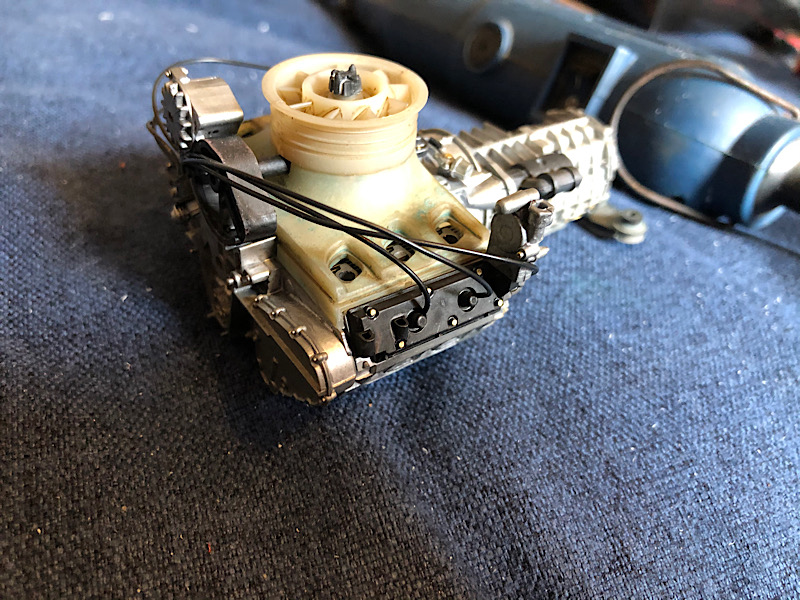
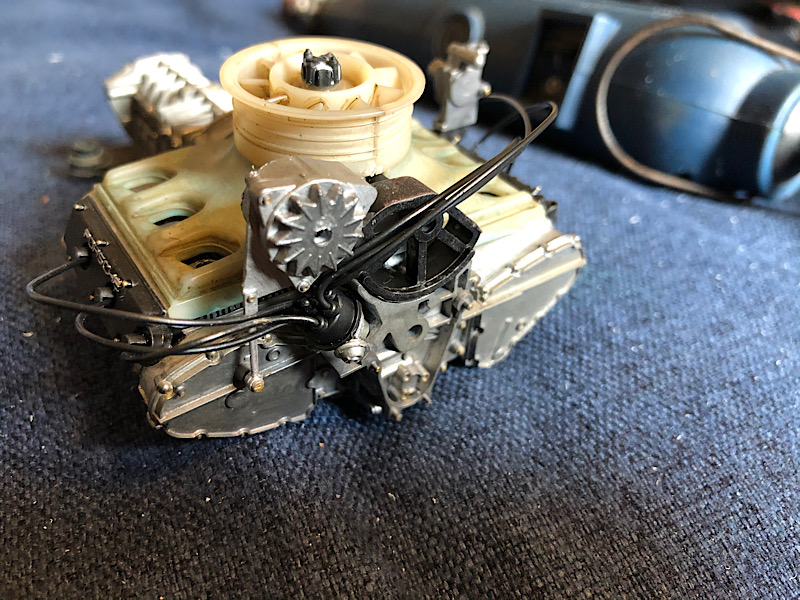
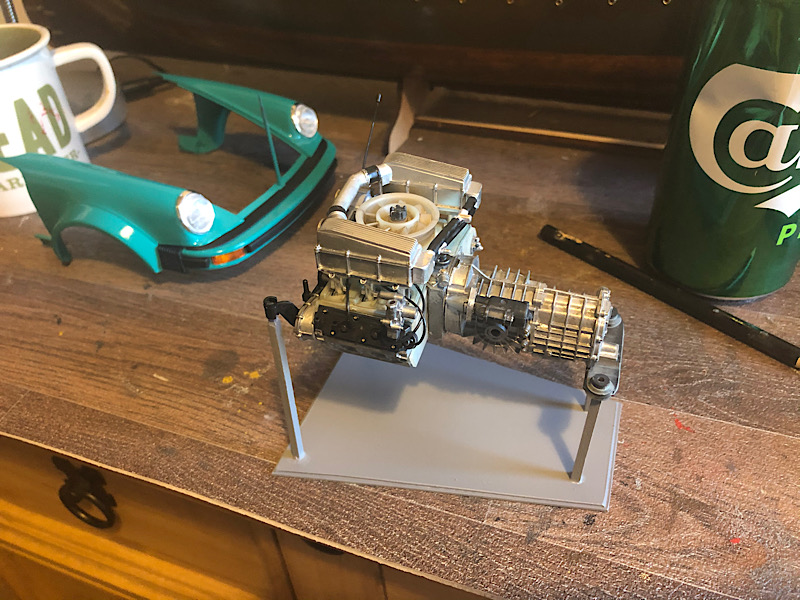
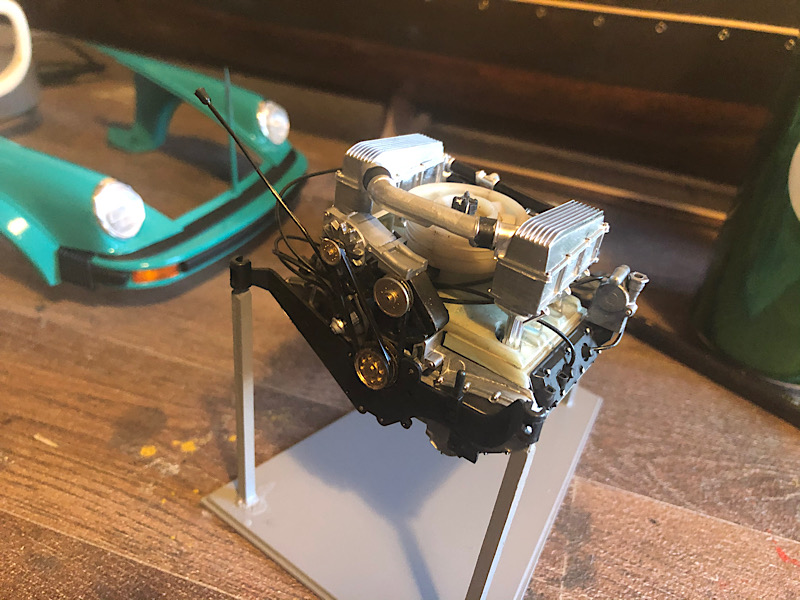
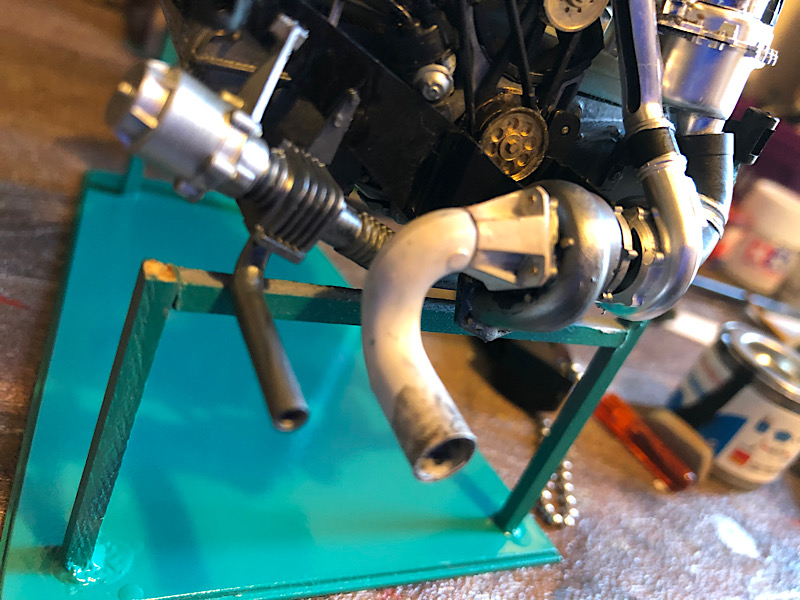
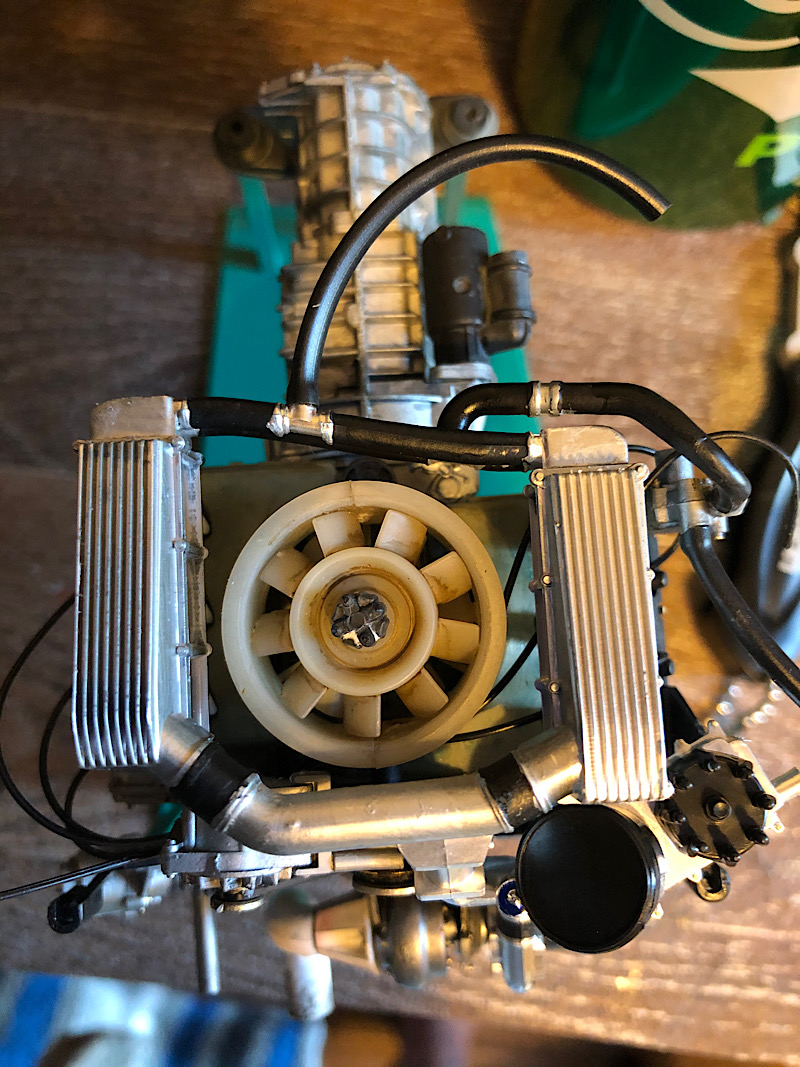
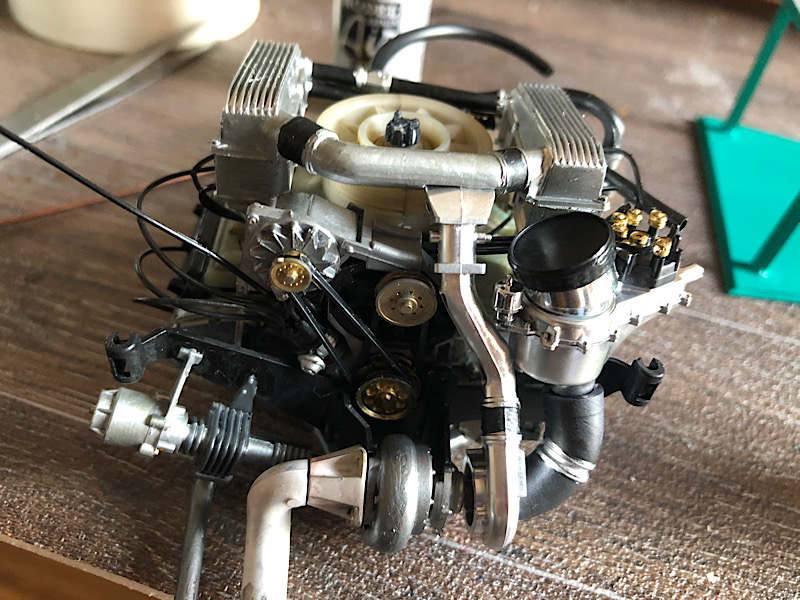
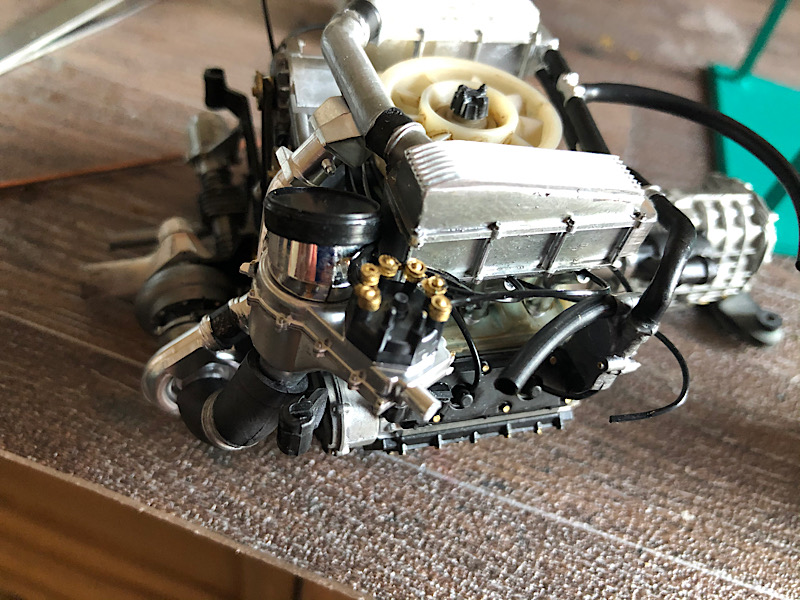
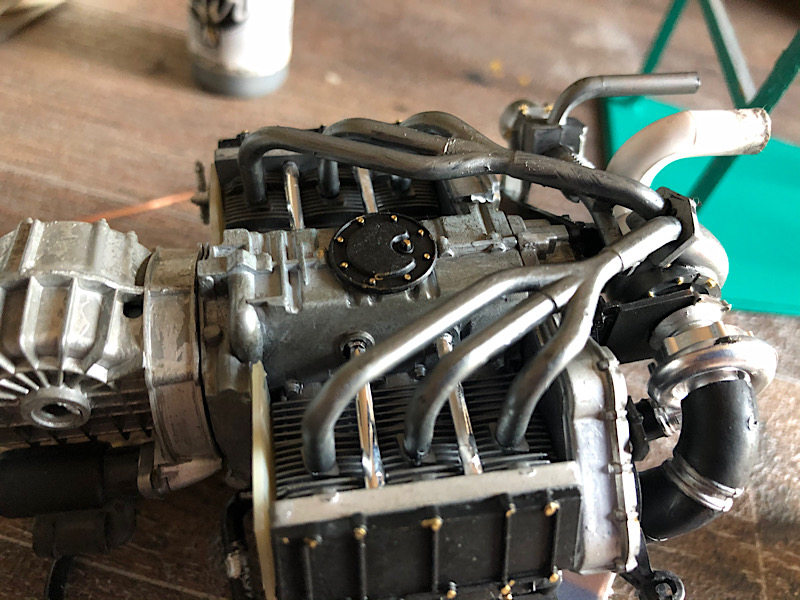
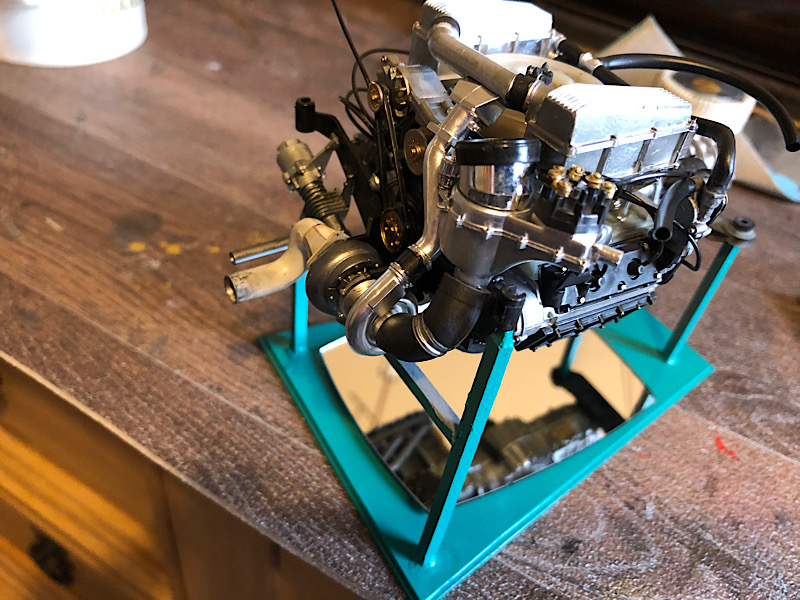
Looking very good Ken. Nice weathering on the engine too.
cheers
Michael
Campaign:
Strip, Track and Trail - Porsche 917/20 - On the bench
Phantoms at 60 - F-4J Marines
Below 1000 tons - M50 minesweeper - Sailed for duty
United Kingdom
Joined: December 20, 2013
KitMaker: 1,179 posts
Auto Modeler: 647 posts
Posted: Sunday, June 21, 2020 - 03:04 AM UTC
United Kingdom
Joined: December 20, 2013
KitMaker: 1,179 posts
Auto Modeler: 647 posts
Posted: Sunday, June 21, 2020 - 08:12 AM UTC
United Kingdom
Joined: December 20, 2013
KitMaker: 1,179 posts
Auto Modeler: 647 posts
Posted: Wednesday, June 24, 2020 - 08:41 AM UTC
New Hampshire, United States
Joined: December 12, 2002
KitMaker: 1,500 posts
Auto Modeler: 645 posts
Posted: Wednesday, June 24, 2020 - 11:55 AM UTC
I love the smell of Tenax in the morning....It smells like a day off work.
I drive a Jeep, but i still bleed Ford Blue....
#335
Auckland, New Zealand
Joined: September 03, 2013
KitMaker: 1,808 posts
Auto Modeler: 701 posts
Posted: Wednesday, June 24, 2020 - 12:18 PM UTC
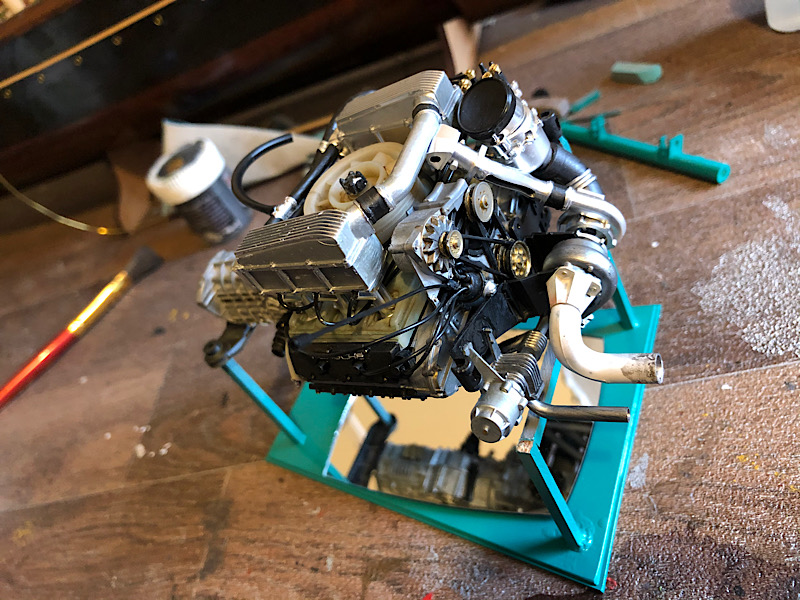
Great progress on this and looking really good.
Campaign:
Strip, Track and Trail - Porsche 917/20 - On the bench
Phantoms at 60 - F-4J Marines
Below 1000 tons - M50 minesweeper - Sailed for duty
United Kingdom
Joined: December 20, 2013
KitMaker: 1,179 posts
Auto Modeler: 647 posts
Posted: Friday, June 26, 2020 - 07:57 AM UTC
New Hampshire, United States
Joined: December 12, 2002
KitMaker: 1,500 posts
Auto Modeler: 645 posts
Posted: Friday, June 26, 2020 - 08:57 AM UTC
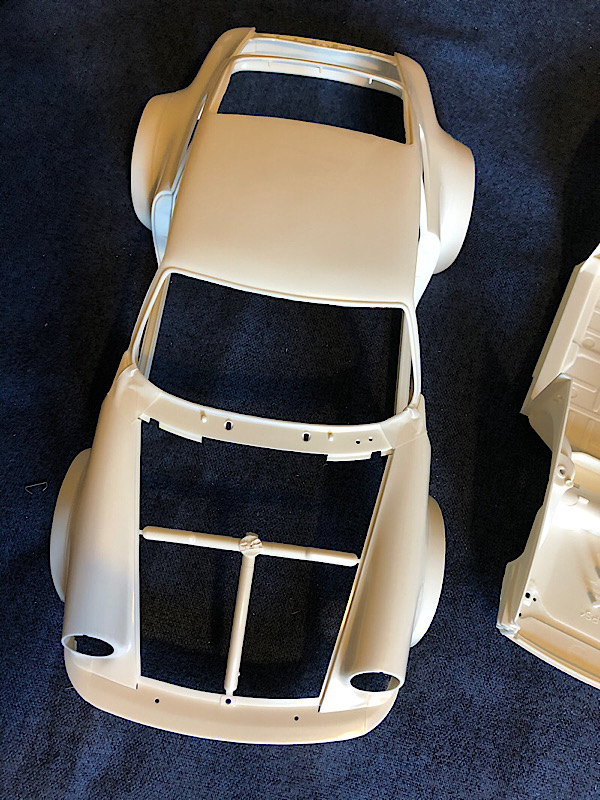
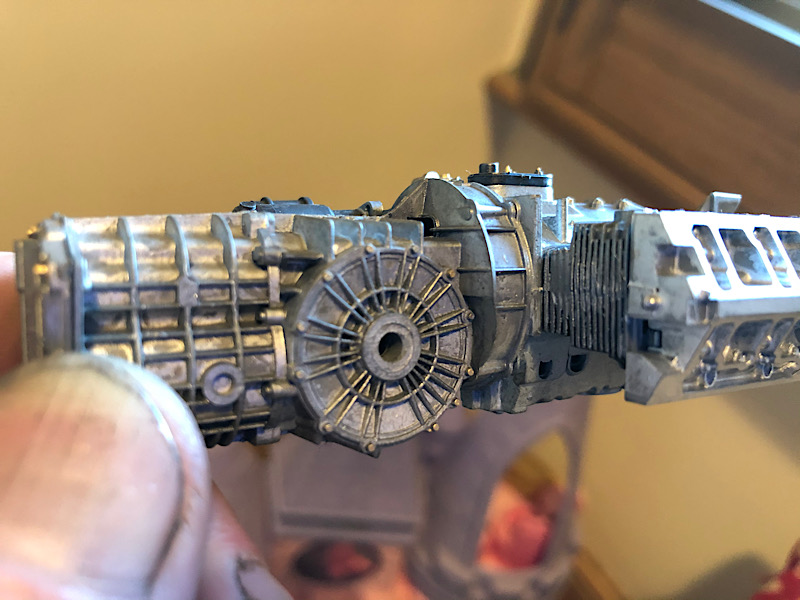
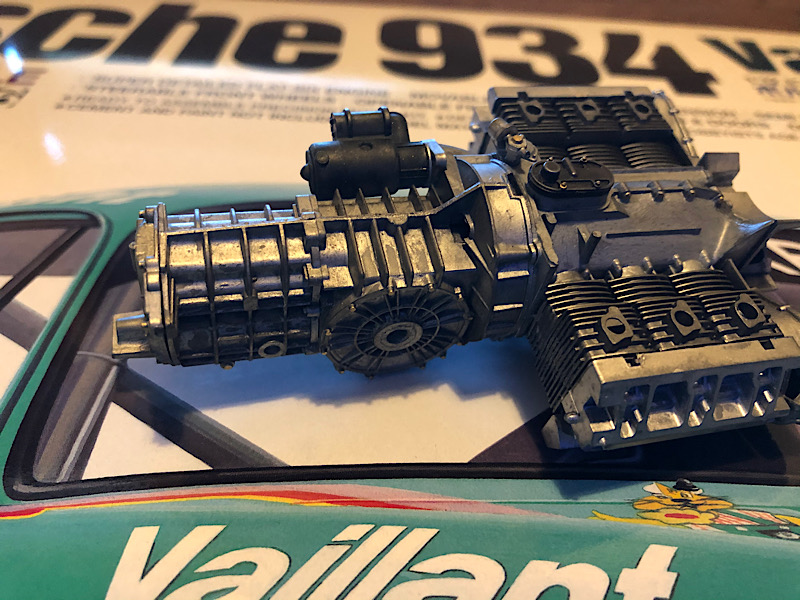
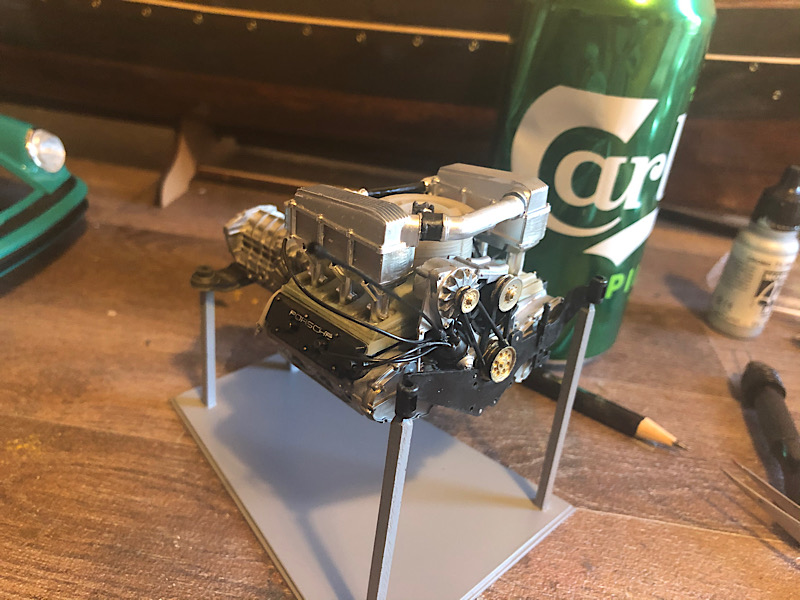
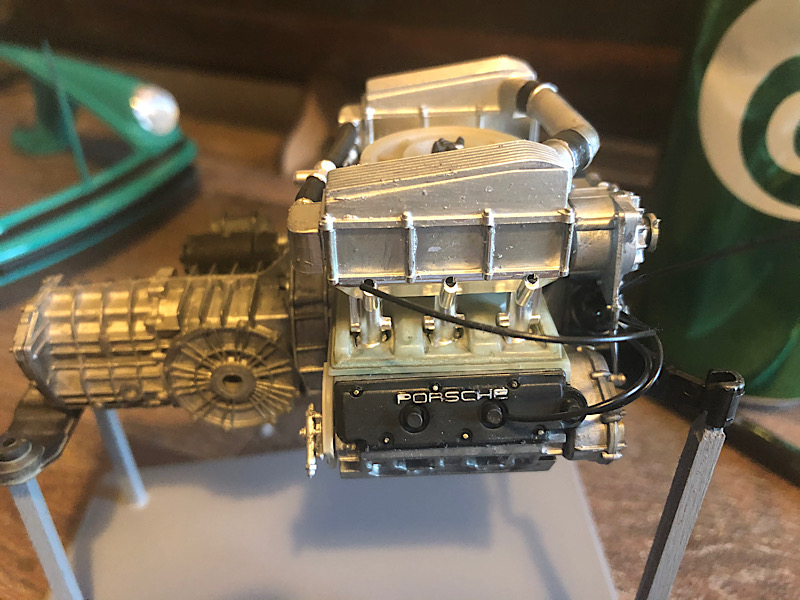
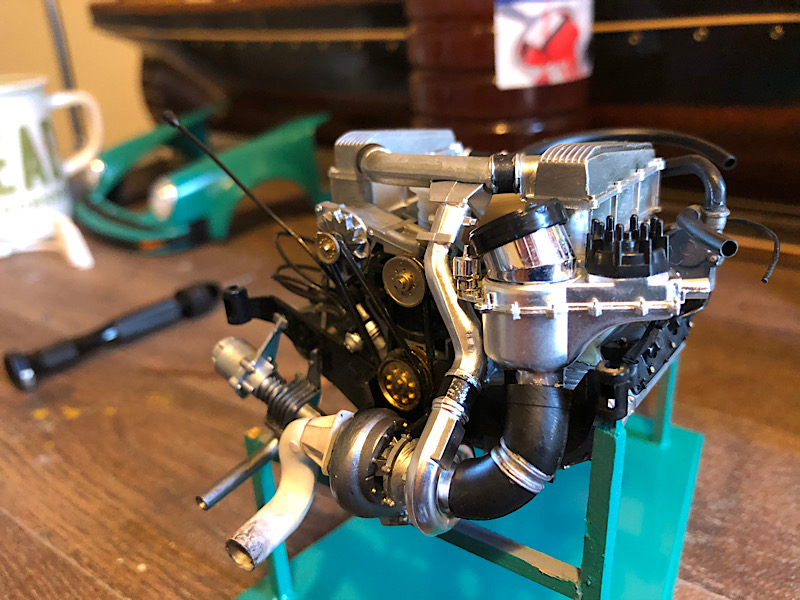
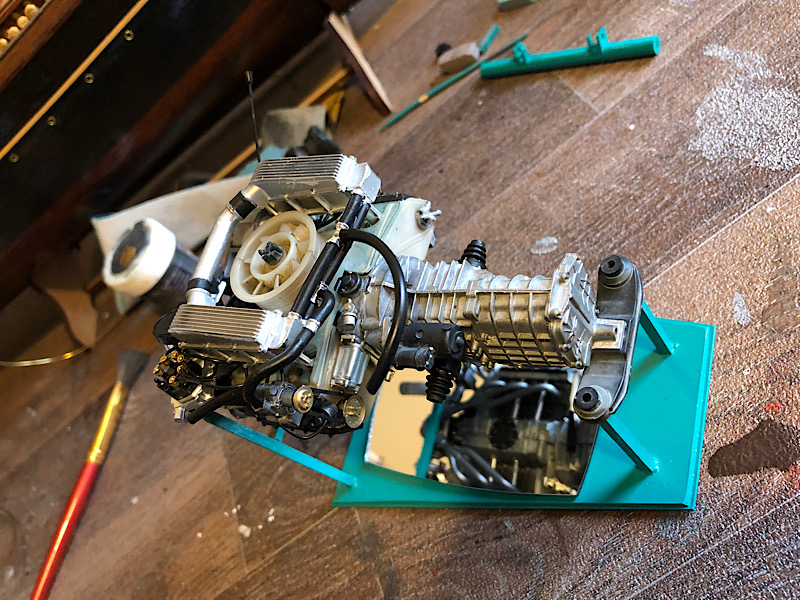
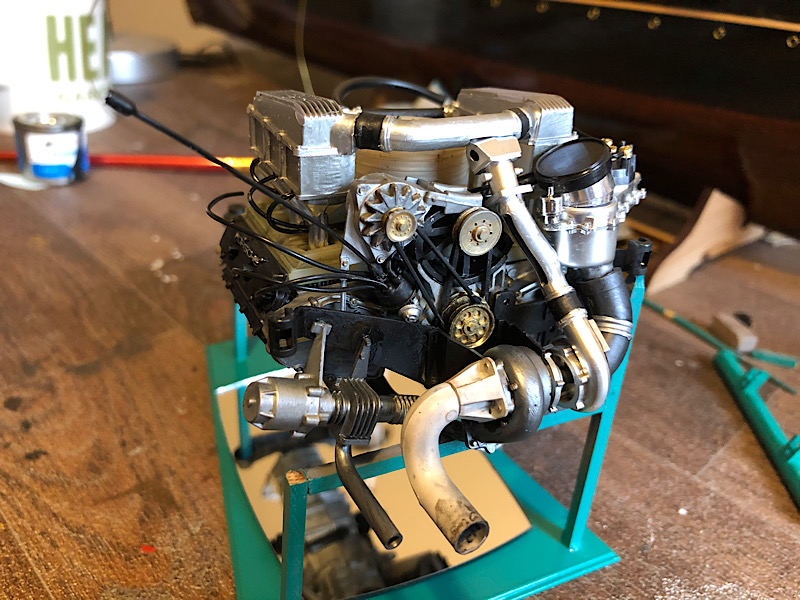
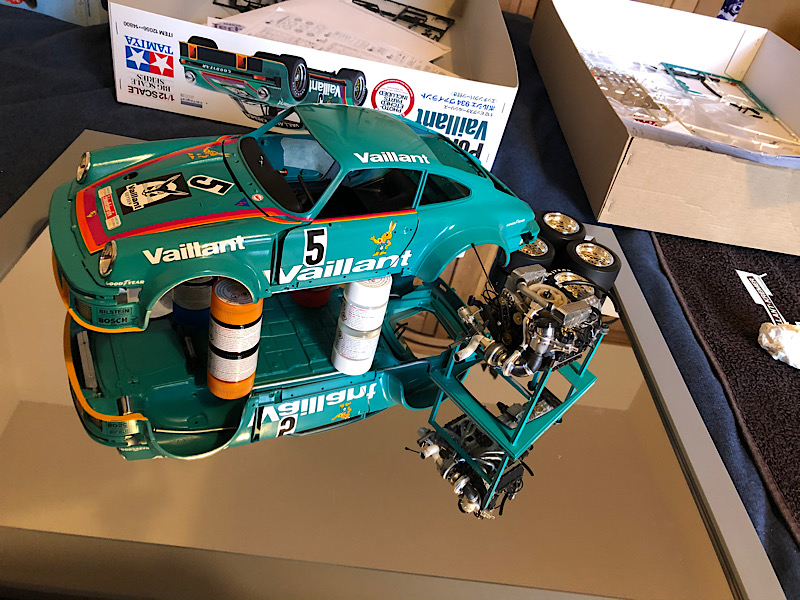
Very nice Ken, the body and the engine look great.
I love the smell of Tenax in the morning....It smells like a day off work.
I drive a Jeep, but i still bleed Ford Blue....
United Kingdom
Joined: December 20, 2013
KitMaker: 1,179 posts
Auto Modeler: 647 posts
Posted: Sunday, June 28, 2020 - 07:41 AM UTC
United Kingdom
Joined: December 20, 2013
KitMaker: 1,179 posts
Auto Modeler: 647 posts
Posted: Tuesday, June 30, 2020 - 08:28 AM UTC
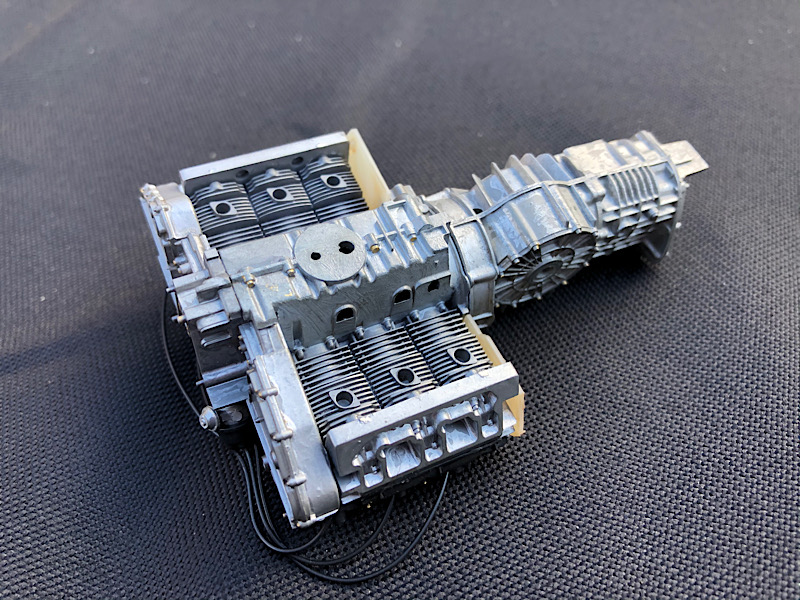
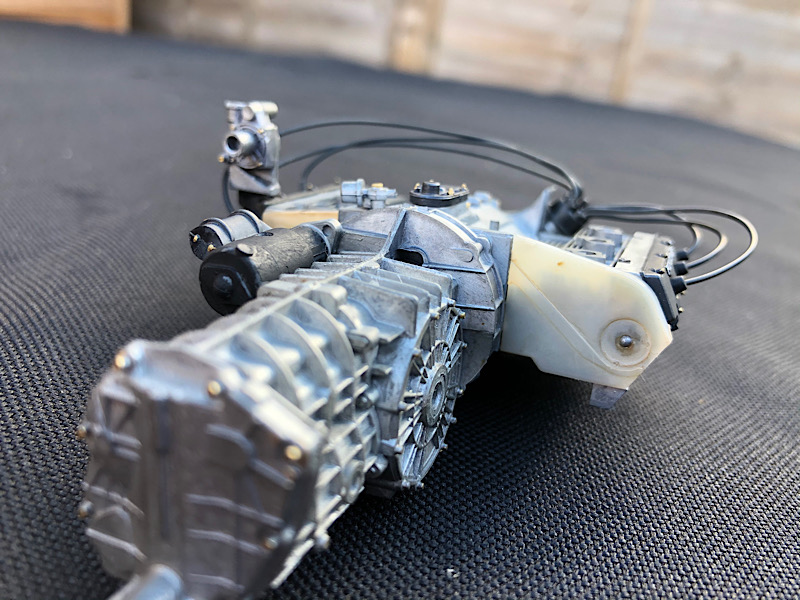
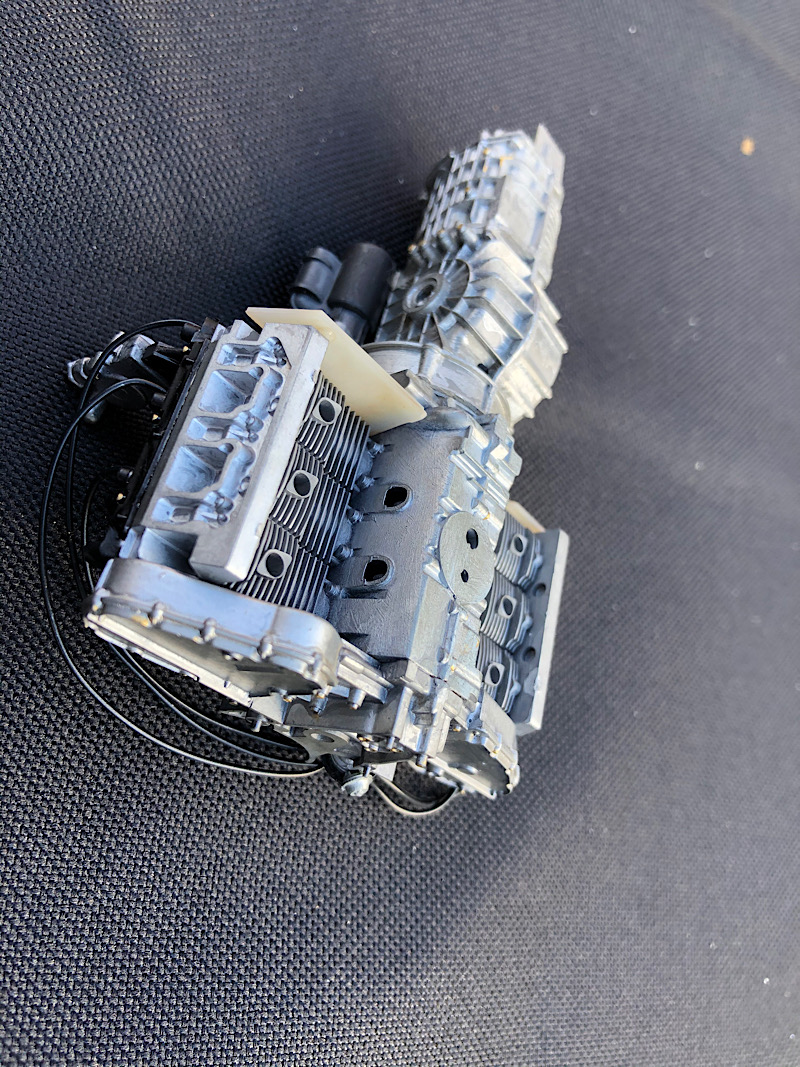
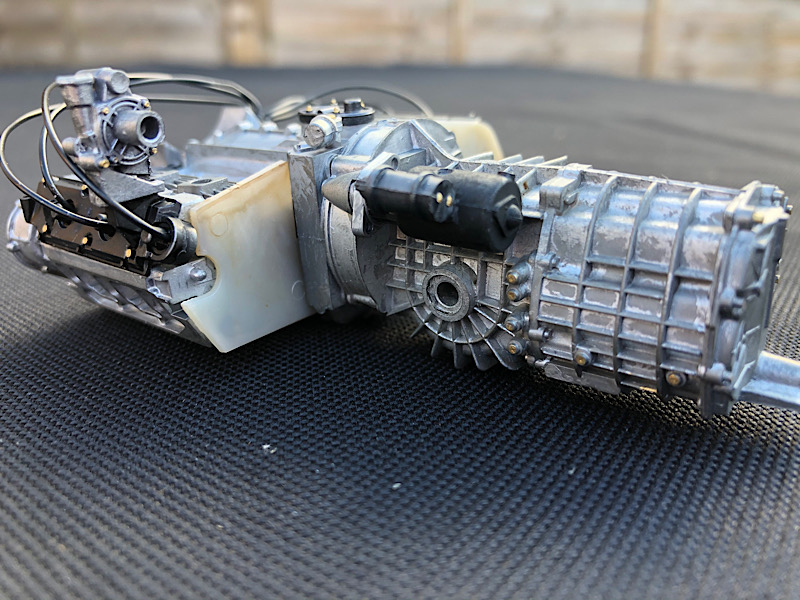
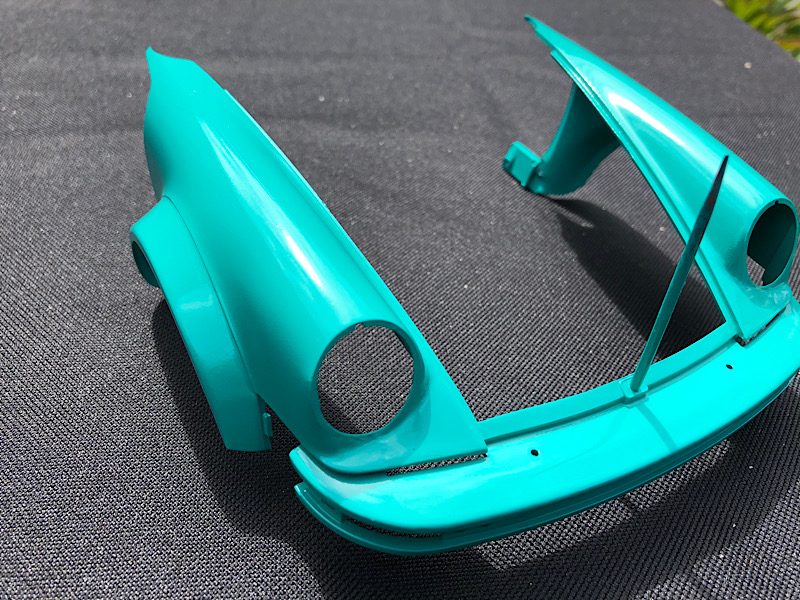
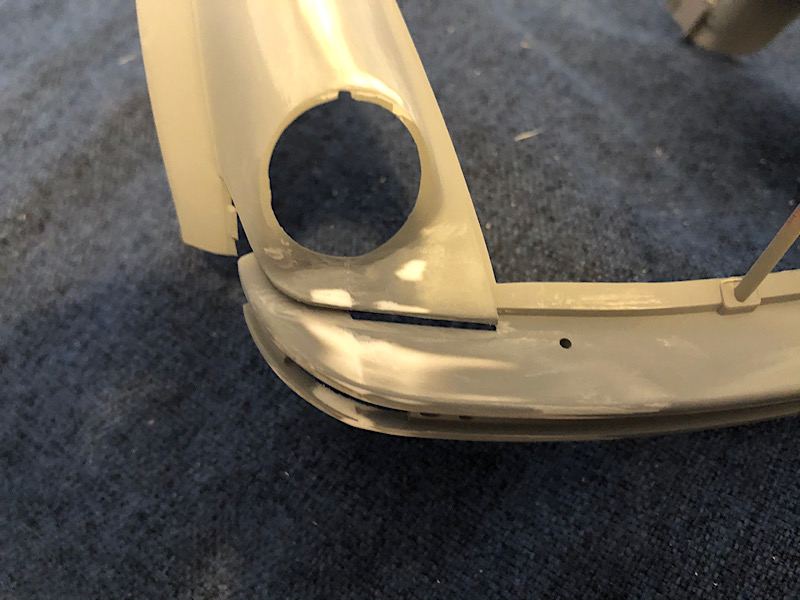
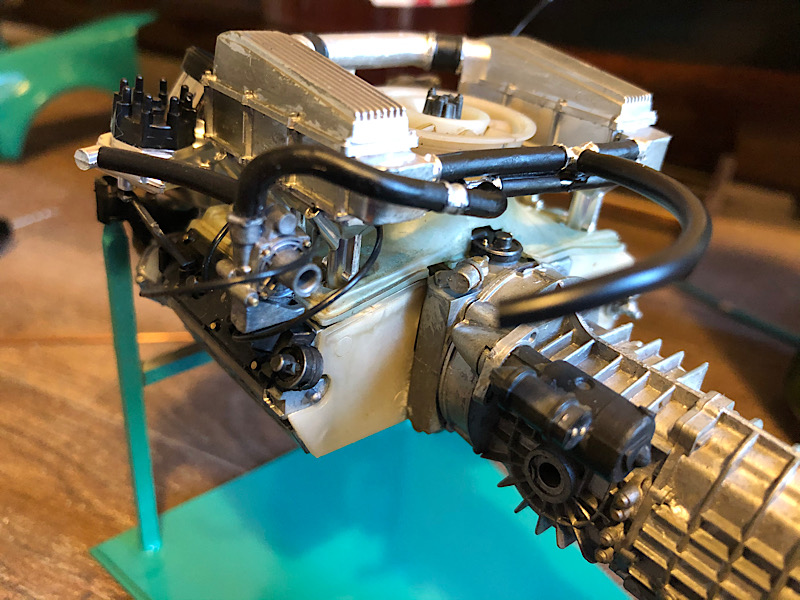
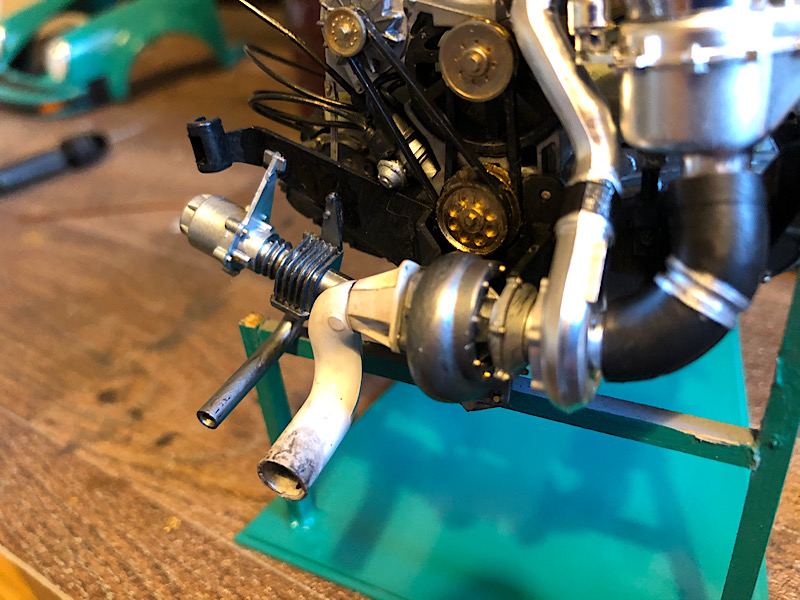
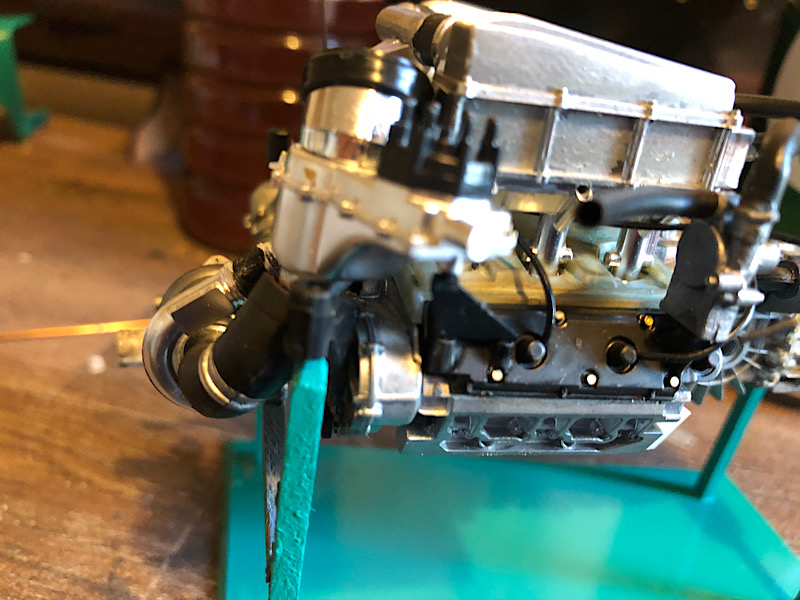
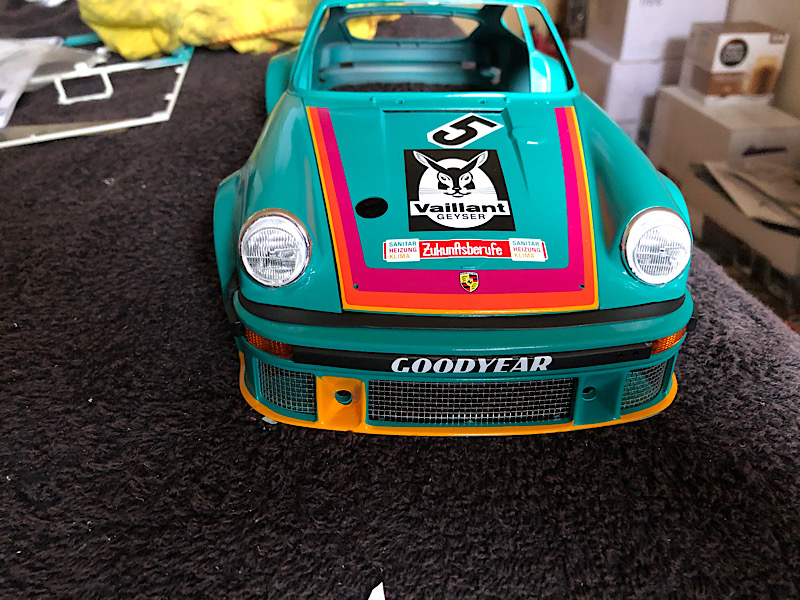
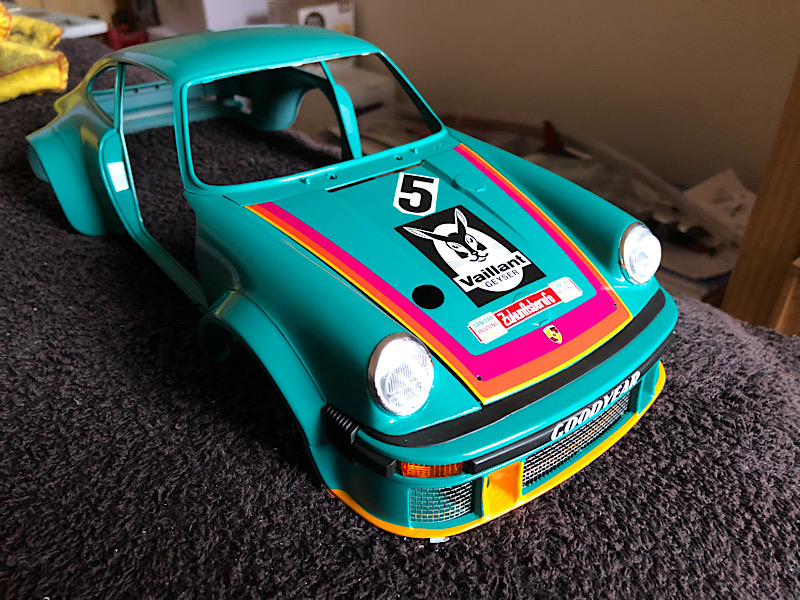
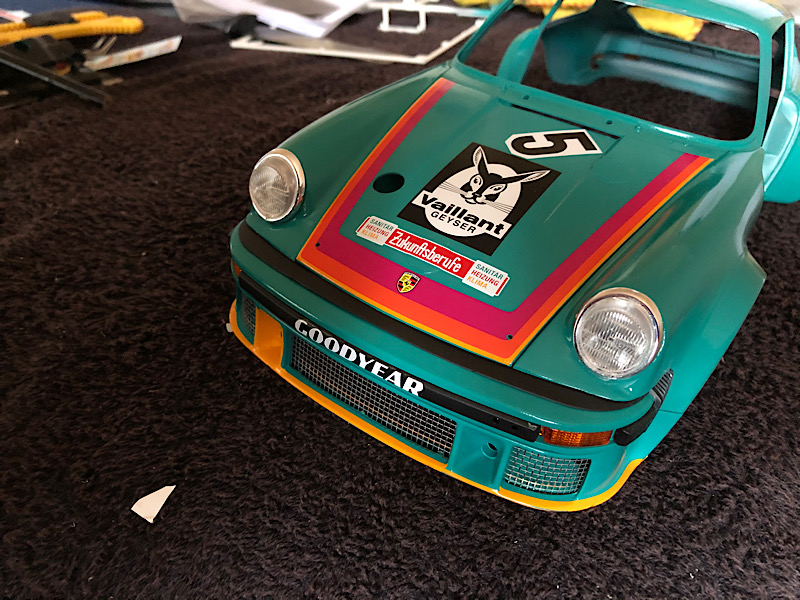
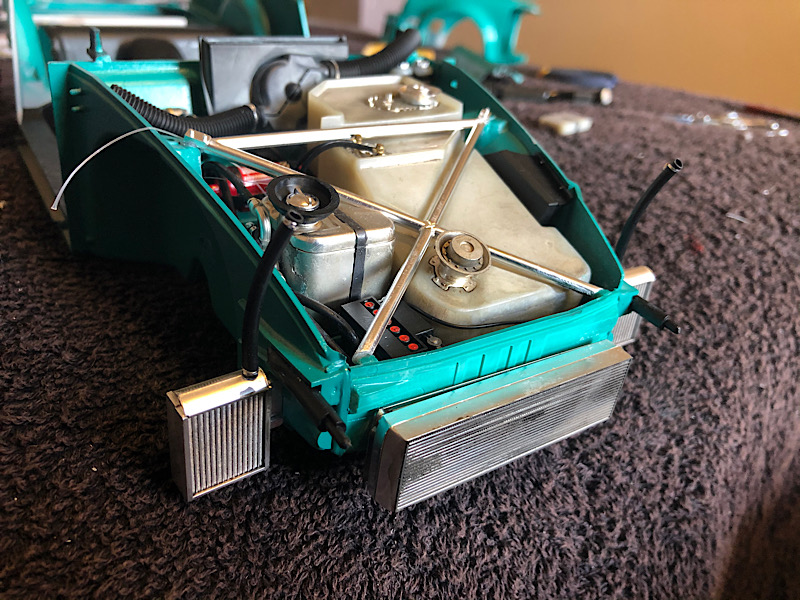
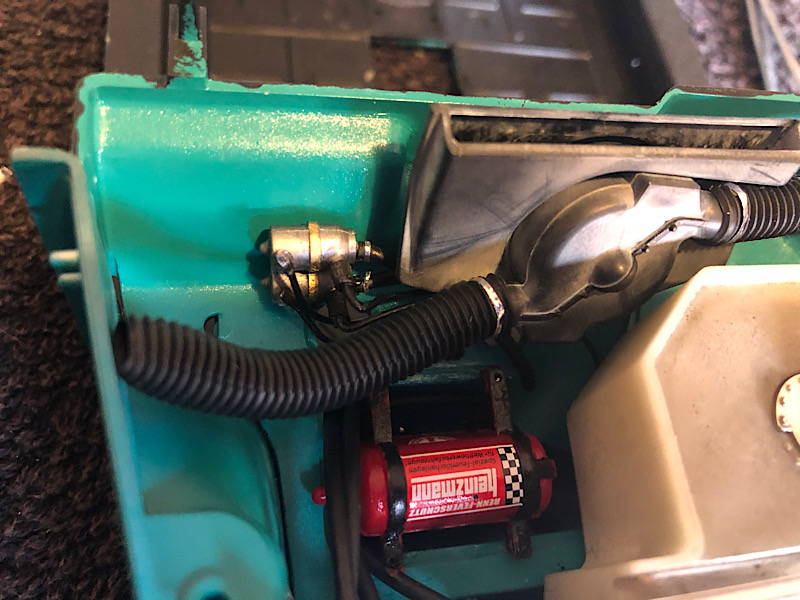
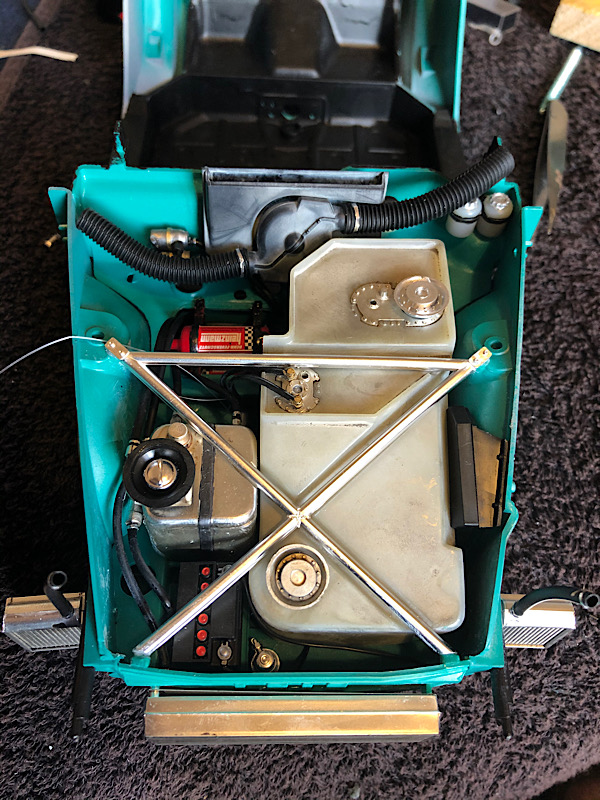
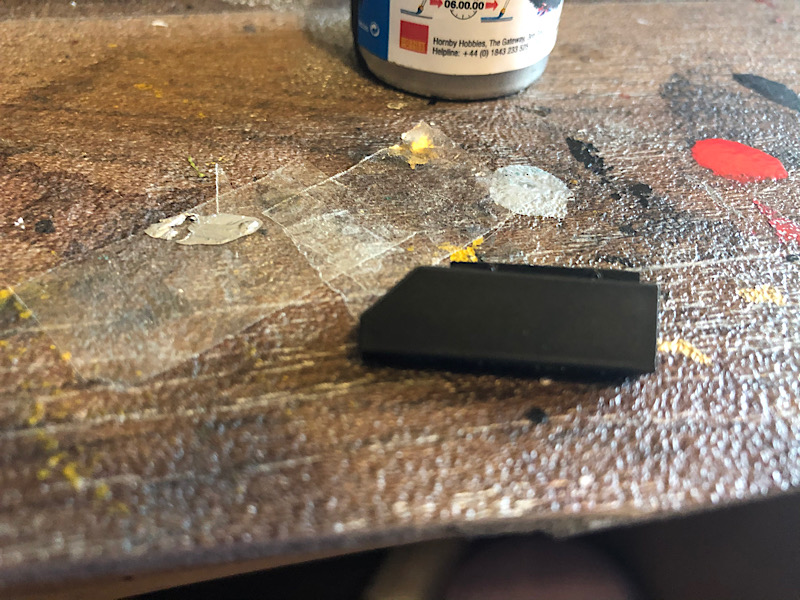
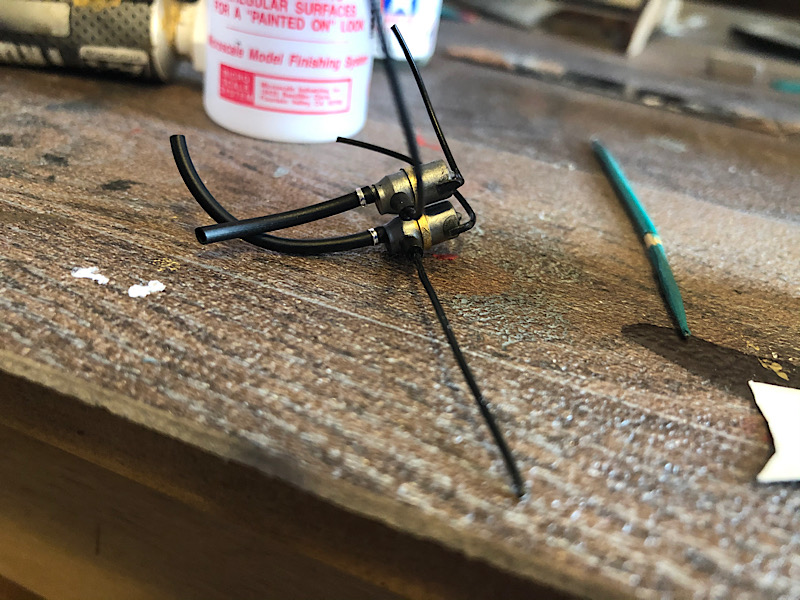
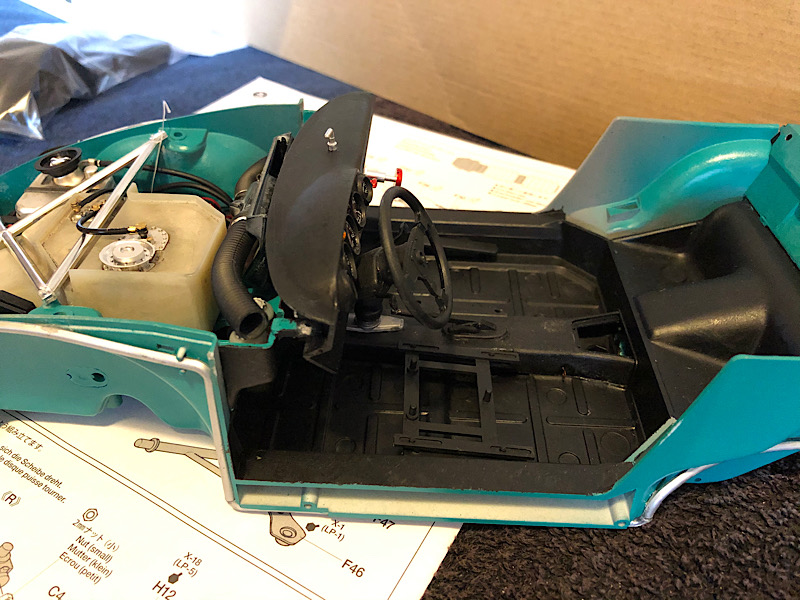
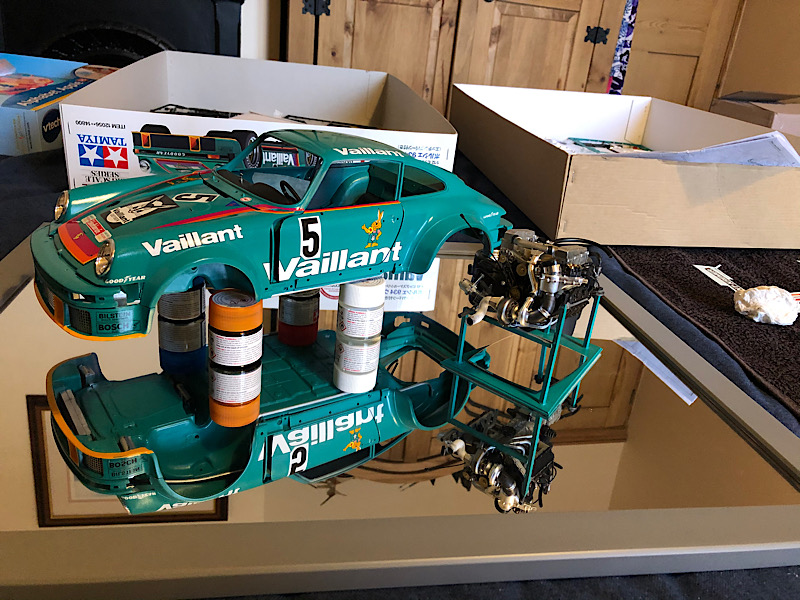
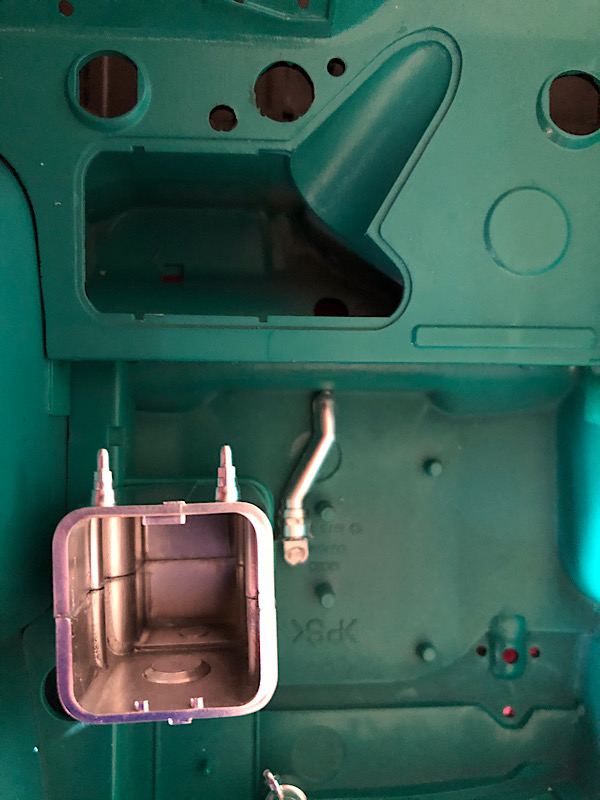
Done some work on the fuel tank. a word of caution to anyone building this kit. When it comes to mounting the oil tank, on page one of the instructions it tells you to attach the mount for the oil tank, unless you skip ahead and build the oil tank first dont attach the mount in the first picture the bracket on the left had side is for the oil tank (the shelf with the oblong rail coming out from the side.
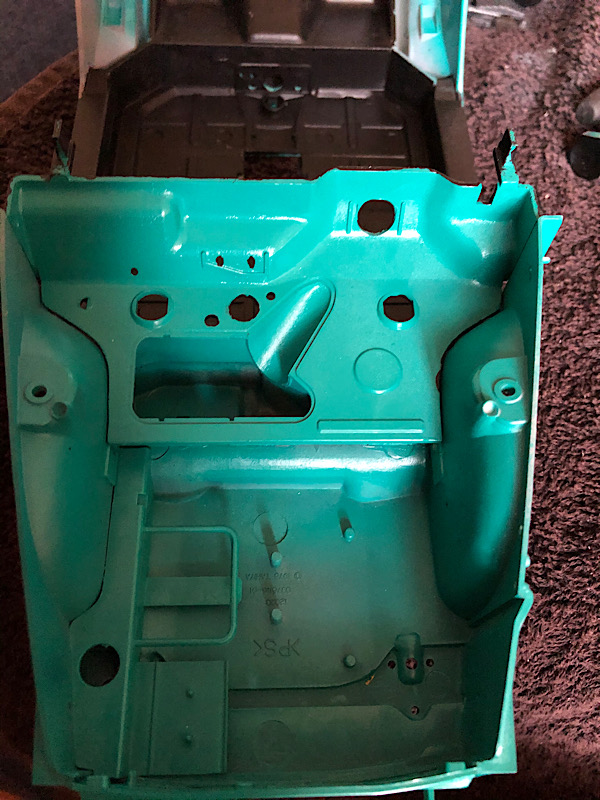
The steel pipe laying on its side next to it in the next pic goes into the tank and then into a hole in the bulkhead.
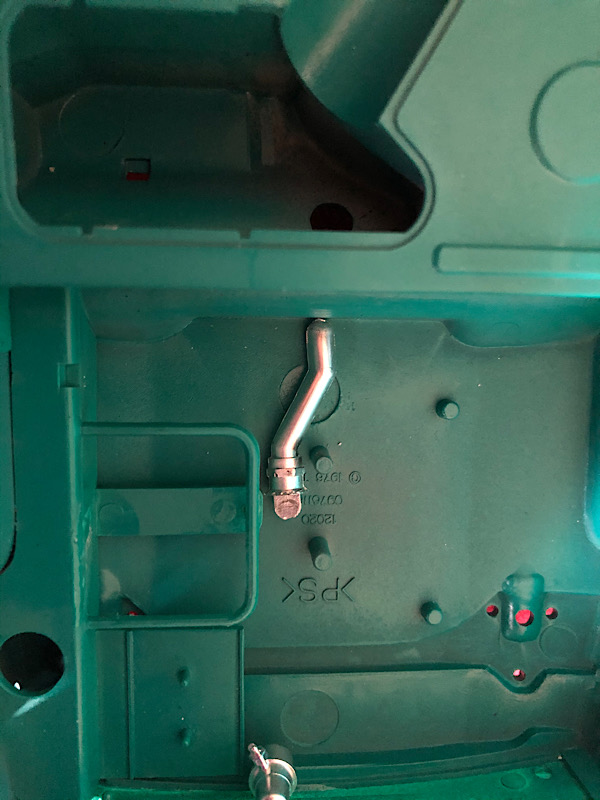
In the position of the next picture.
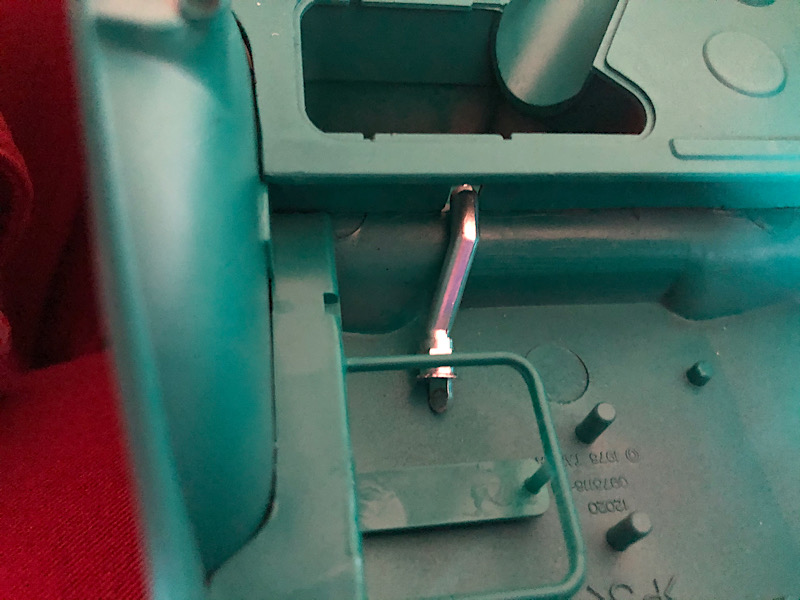
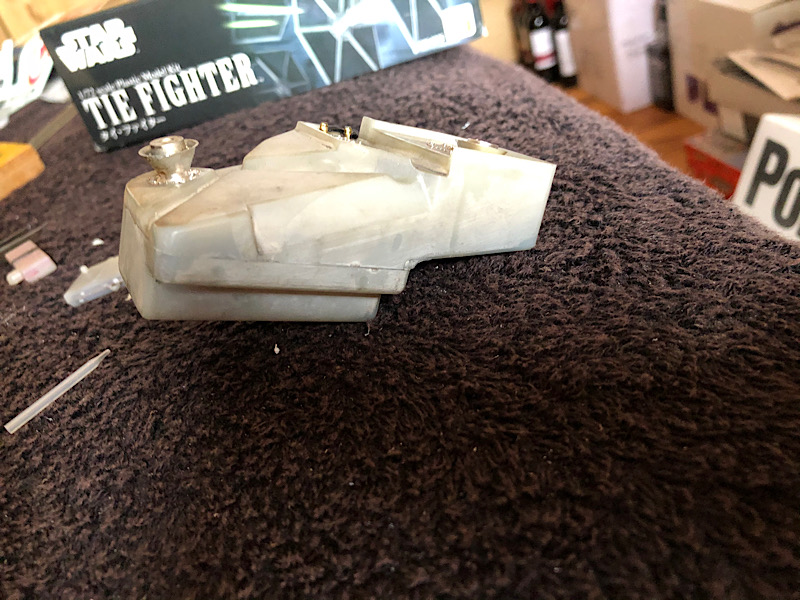
Here is a picture of the oil tank in position
Getting that pipe into the hole in the bulkhead and into the hole in the oil tank with that bracket in place is impossible (on this model of course that bracket was well and truly stuck) so I cut that rail off in order to get that pipe in then glued it back on again.
A better option would have been to attach the bracket and tank with the pipe on at the same time.
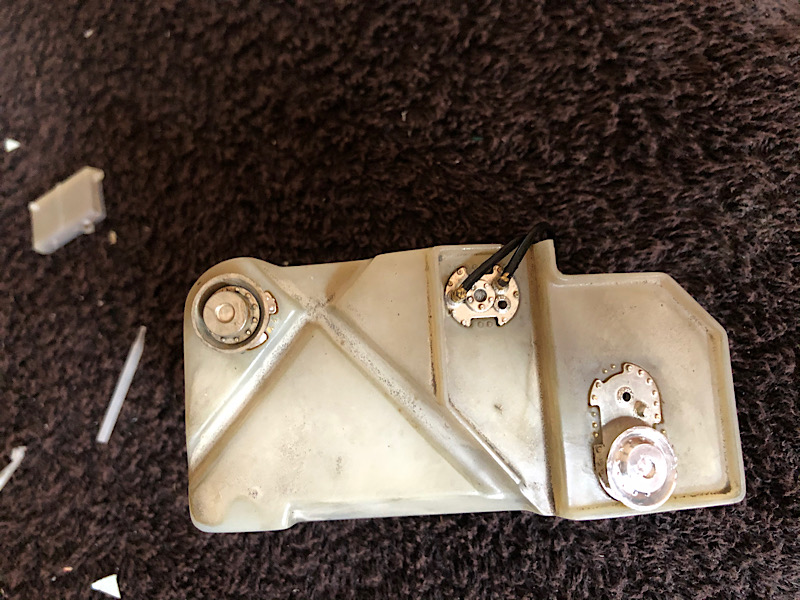
Here are some pics of the fuel tank.
United Kingdom
Joined: December 20, 2013
KitMaker: 1,179 posts
Auto Modeler: 647 posts
Posted: Wednesday, July 01, 2020 - 07:24 AM UTC
United Kingdom
Joined: December 20, 2013
KitMaker: 1,179 posts
Auto Modeler: 647 posts
Posted: Friday, July 03, 2020 - 08:02 AM UTC
New Hampshire, United States
Joined: December 12, 2002
KitMaker: 1,500 posts
Auto Modeler: 645 posts
Posted: Friday, July 03, 2020 - 11:22 PM UTC
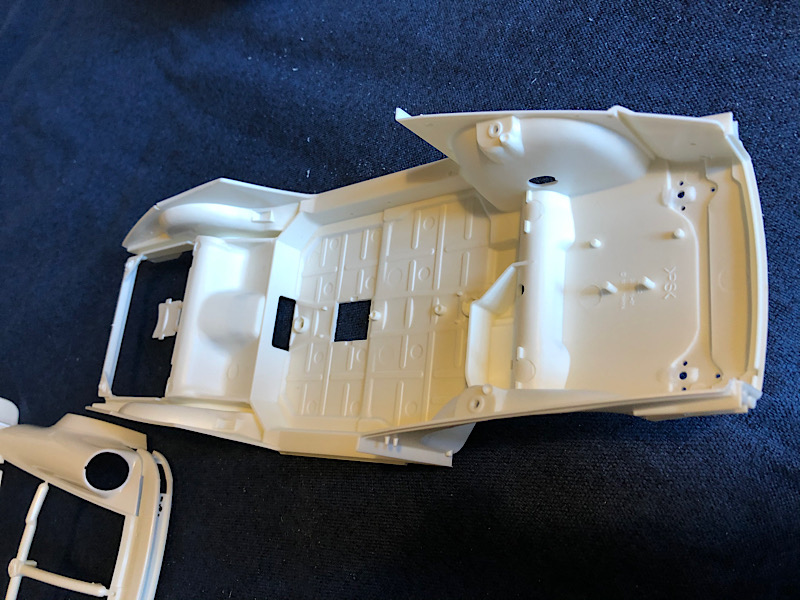
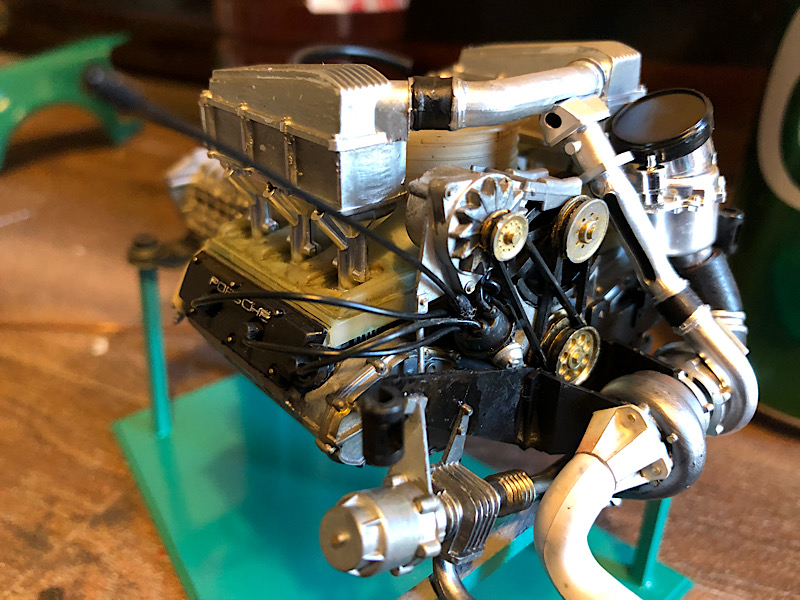
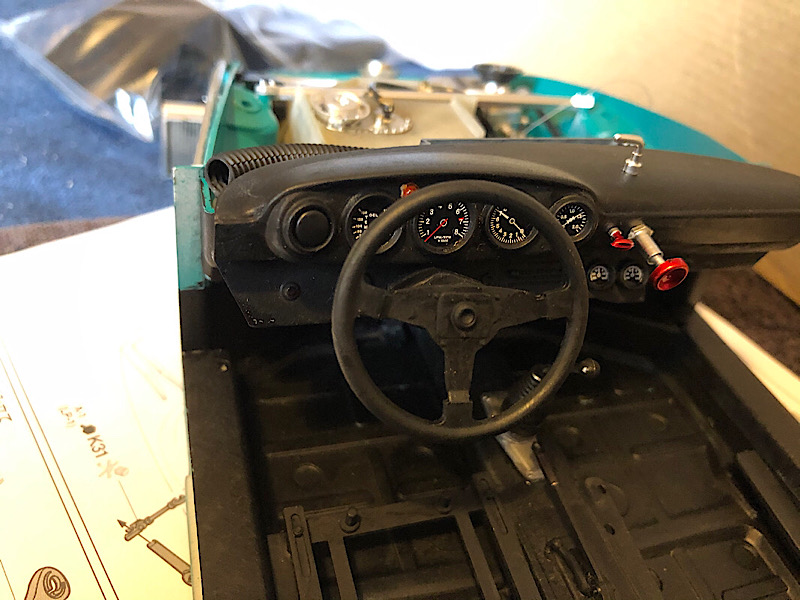
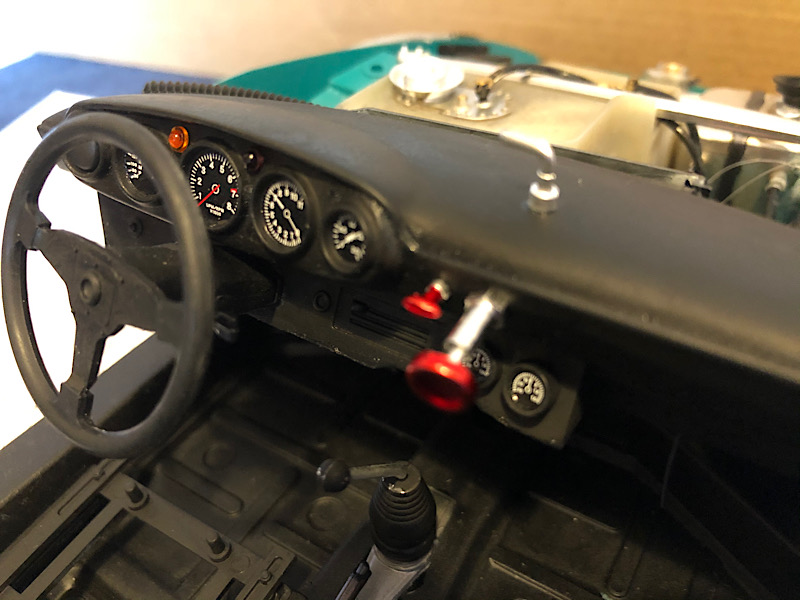
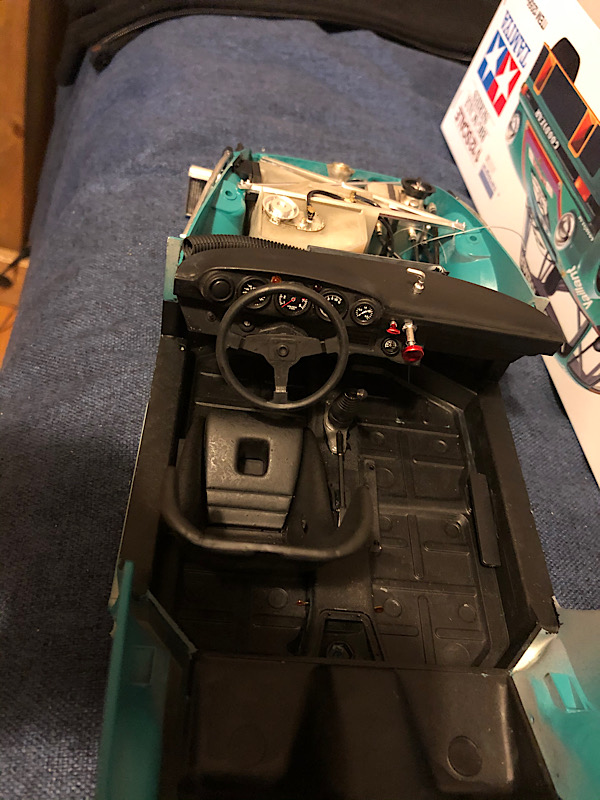
That interior really looks the business. Keep it up.
I love the smell of Tenax in the morning....It smells like a day off work.
I drive a Jeep, but i still bleed Ford Blue....
United Kingdom
Joined: December 20, 2013
KitMaker: 1,179 posts
Auto Modeler: 647 posts
Posted: Saturday, July 04, 2020 - 07:47 AM UTC
AussieReg
Associate Editor #007
Victoria, Australia
Joined: June 09, 2009
KitMaker: 8,156 posts
Auto Modeler: 2,953 posts
Posted: Saturday, July 04, 2020 - 03:47 PM UTC
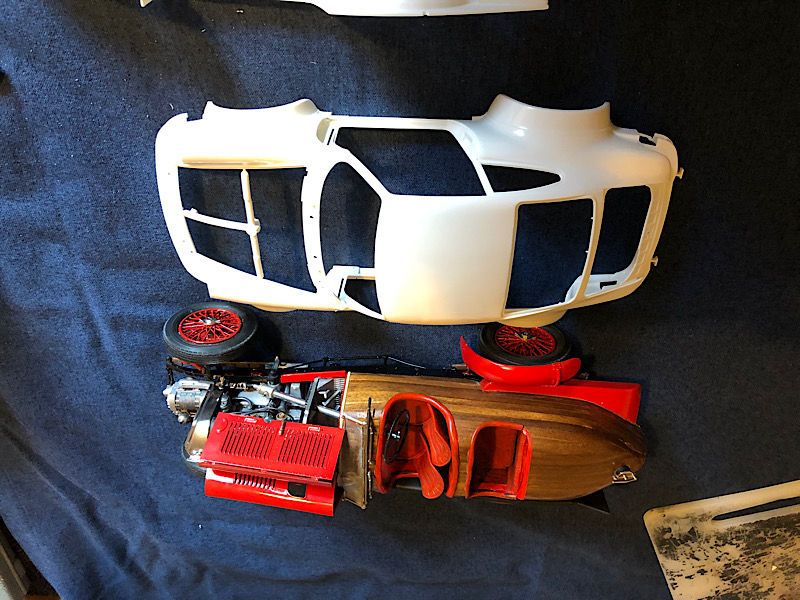
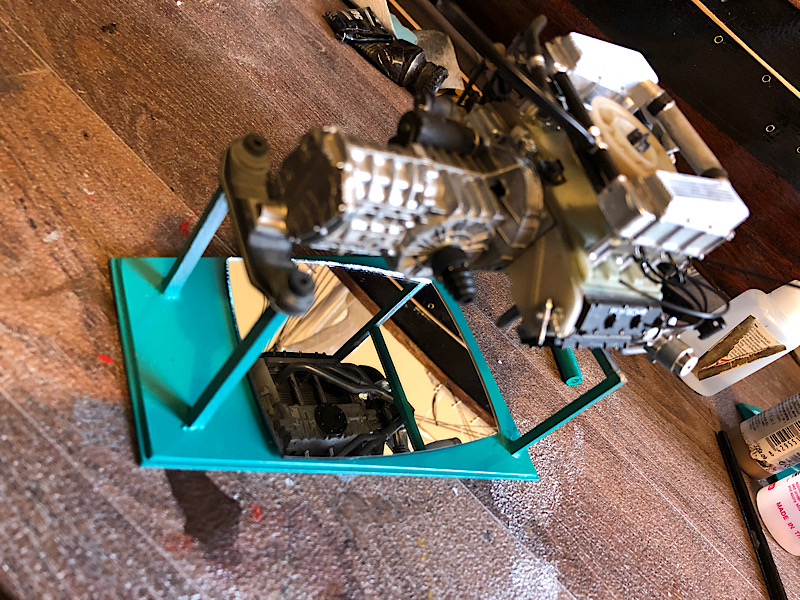
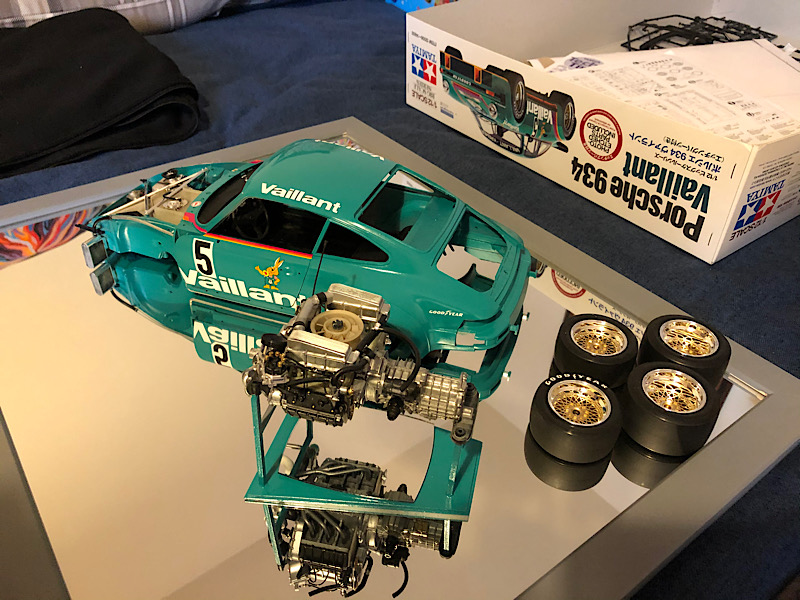
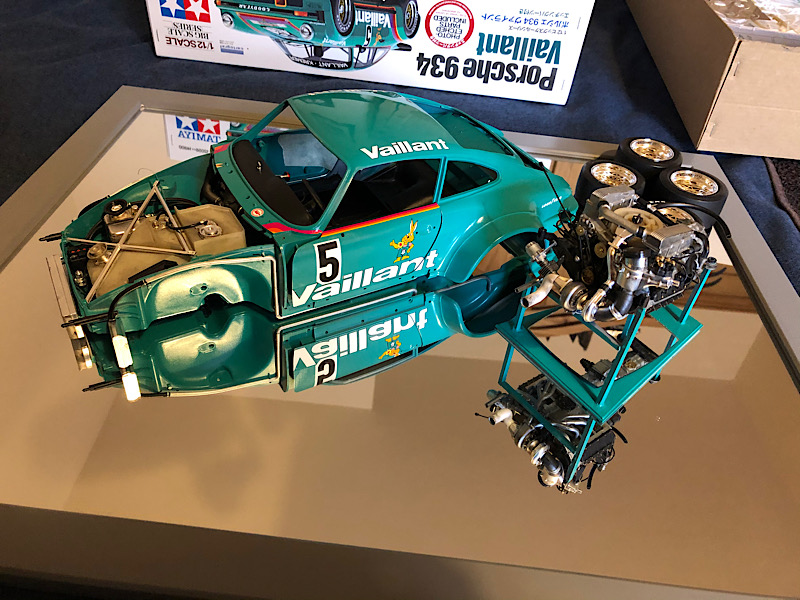
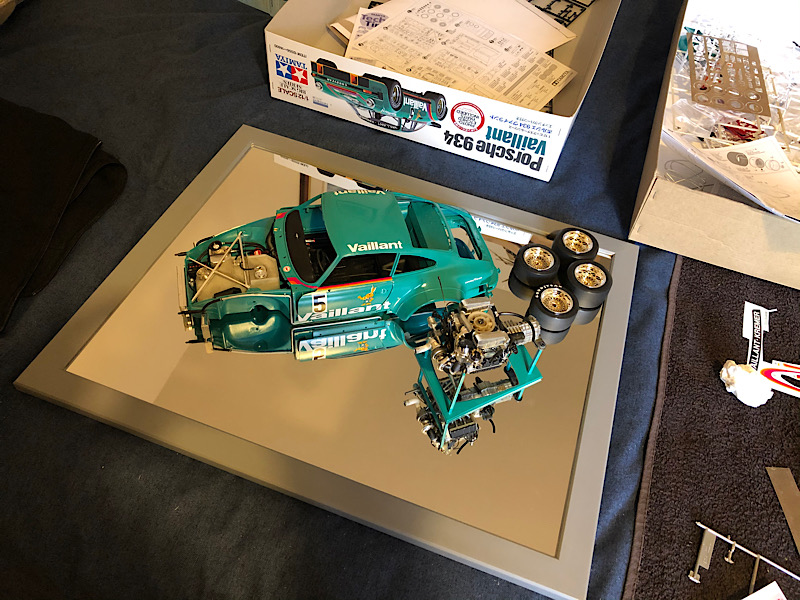
This build is coming together beautifully Ken, and the display idea is great.
I think you should try with the car more central on a diagonal, with the engine front left and a wheel at each corner ready to fit.
Whichever way you decide to go, it will be impressive!
Cheers, D
ON the bench
Revell 1/24 '53 Corvette (building as '54)
Revell 1/24 BMW 507 Coupe and Cabrio
Italeri 1/48 Me262 B-1a/U1 Nightfighter
Monogram 1/24 '57 Chevy Nomad
Dragon 1/350 USS Frank Knox DD-742
United Kingdom
Joined: December 20, 2013
KitMaker: 1,179 posts
Auto Modeler: 647 posts
Posted: Thursday, July 09, 2020 - 07:56 AM UTC