

Sure looks good D - I still can't figure out how you can do two of these at once and both keep the quality so high, and not confuse parts!! I have a hard enough time doing one at a time!
Cheers
Nick


Go to automodeler.com for the current dynamic site!
Cars
Discuss all types of automotive modeling here.
Discuss all types of automotive modeling here.
Hosted by Jim Starkweather
BMW 507 Coupe and Cabrio Dual Build

Stickframe

#362

Joined: December 01, 2013
KitMaker: 1,661 posts
Auto Modeler: 431 posts

Posted: Wednesday, August 26, 2020 - 12:44 PM UTC

AussieReg

#007

Joined: June 09, 2009
KitMaker: 8,156 posts
Auto Modeler: 2,953 posts

Posted: Thursday, August 27, 2020 - 12:02 AM UTC
Quoted Text
Sure looks good D - I still can't figure out how you can do two of these at once and both keep the quality so high, and not confuse parts!! I have a hard enough time doing one at a time!
Cheers
Nick
Yeah, but the one you're building has more bits'n'pieces than all 31 of my WIP kits put together!
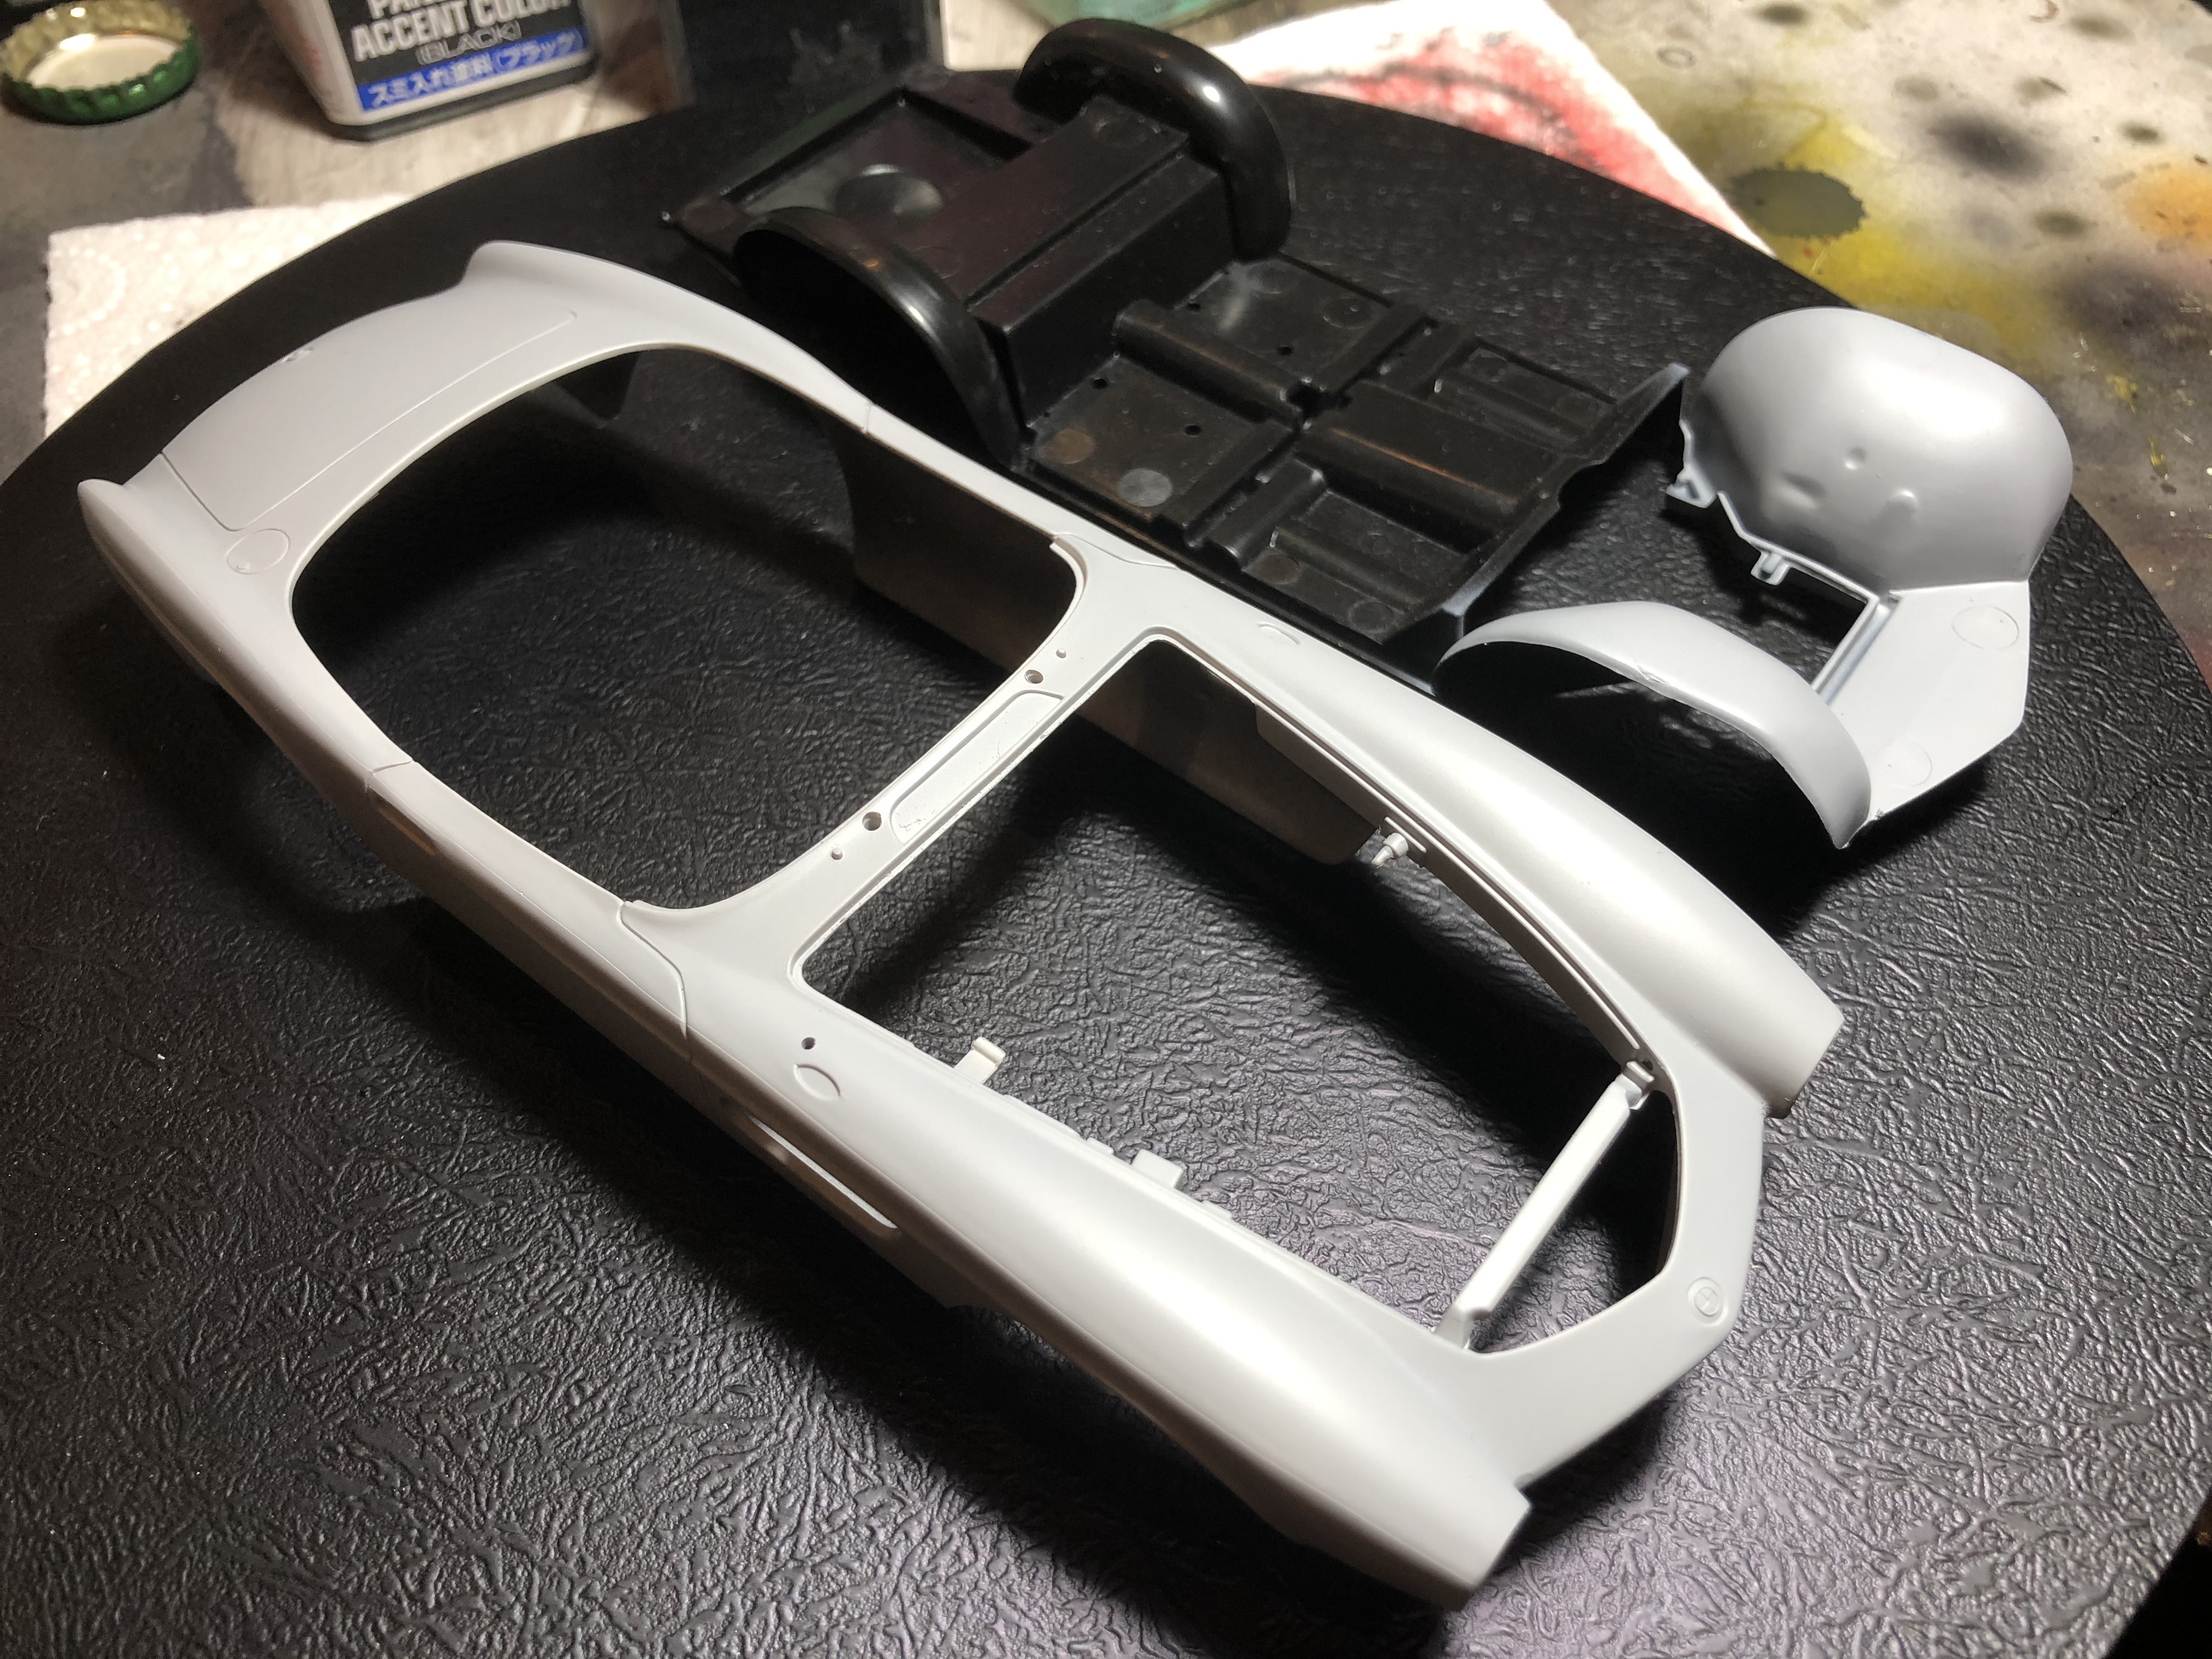
I repainted the distributor cap in Vallejo Saddle Brown, a much better colour match, and 6 of the ignition leads are done on each engine.
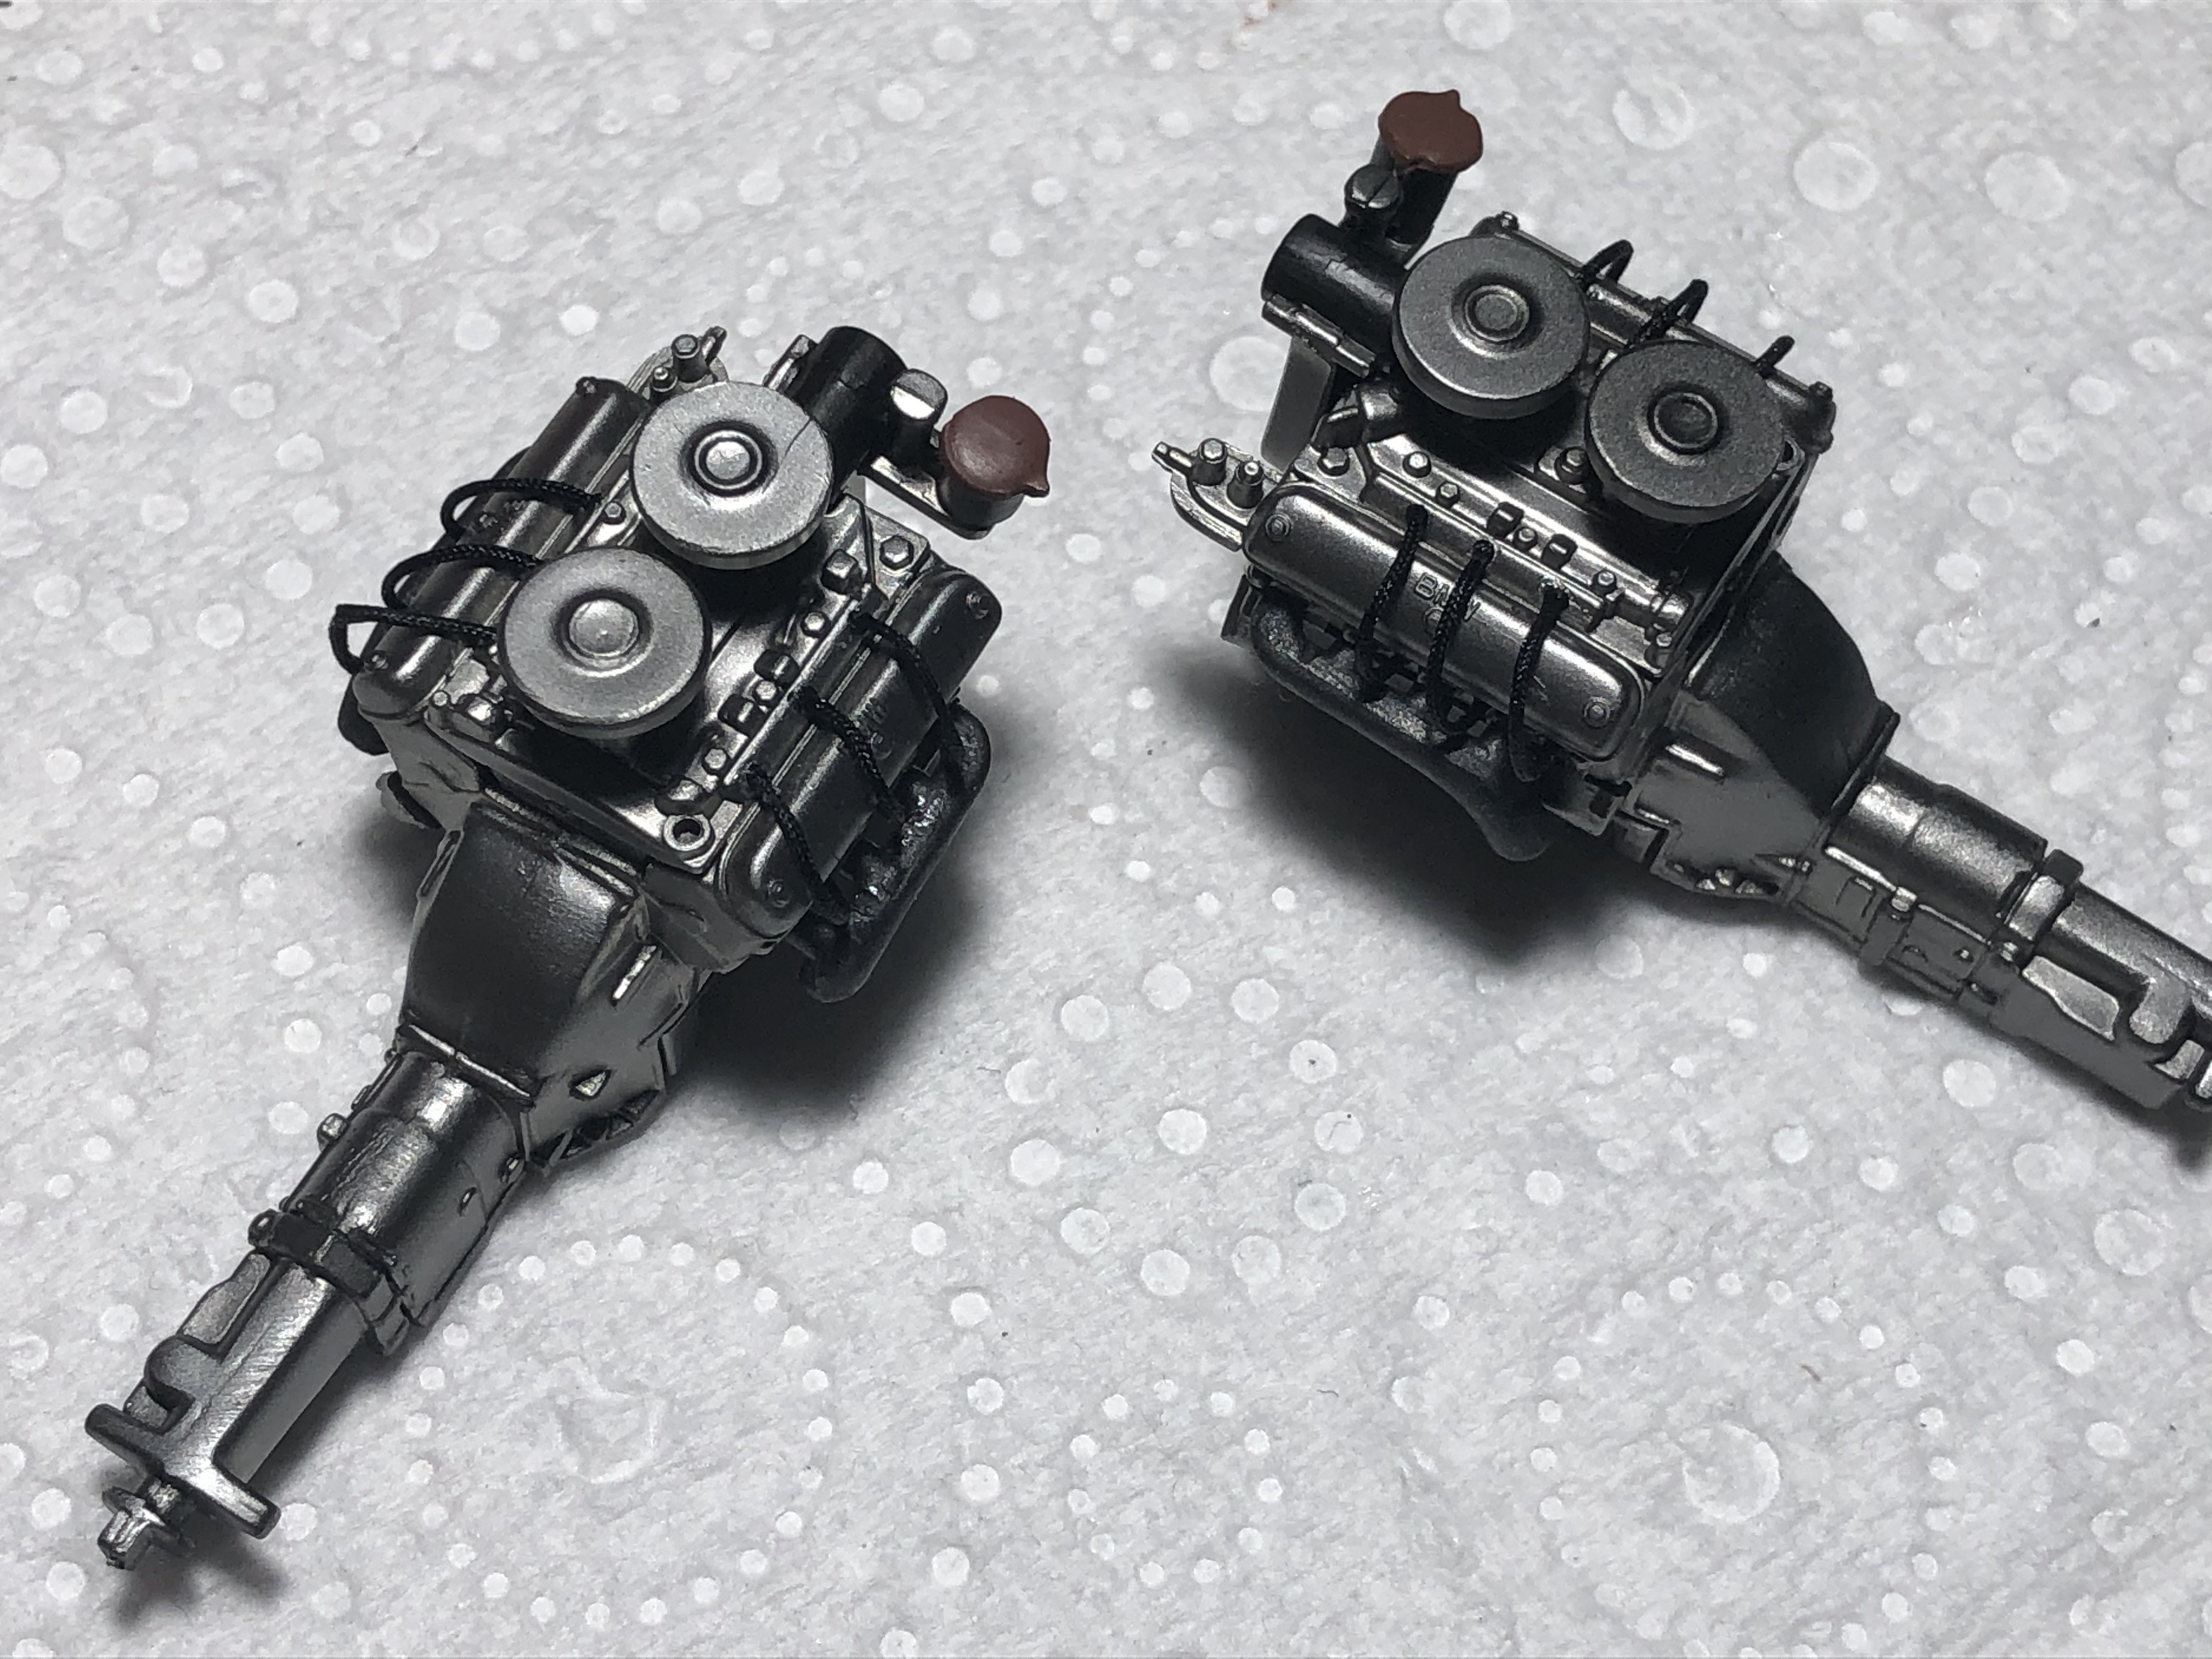
I have also stretched a bit of sprue to get a short piece of rod that I'm happy with to match the diameter of the ignition coil, so these will be painted up and added next.
Cheers, D


Szmann

Joined: September 02, 2014
KitMaker: 1,977 posts
Auto Modeler: 1,371 posts

Posted: Thursday, August 27, 2020 - 12:14 AM UTC
Distributors look "natural", D. Neat!
Haha! I have 2 (active) WIP and I'm fretting already
D., have you changed the photo conditions or the steel on the engine blocks have polished themselves to a darker tone? Not that they look bad!
Gabriel

Quoted Text
Yeah, but the one you're building has more bits'n'pieces than all 31 of my WIP kits put together!
Haha! I have 2 (active) WIP and I'm fretting already
D., have you changed the photo conditions or the steel on the engine blocks have polished themselves to a darker tone? Not that they look bad!
Gabriel

AussieReg
#007
Joined: June 09, 2009
KitMaker: 8,156 posts
Auto Modeler: 2,953 posts
Posted: Thursday, August 27, 2020 - 12:48 AM UTC
Quoted Text
D., have you changed the photo conditions or the steel on the engine blocks have polished themselves to a darker tone? Not that they look bad!
Gabriel
It's just the lighting Gabriel, 10:30pm and I just have one small incandescent globe overhead at the moment.
Cheers, D

Joel_W
Joined: December 04, 2010
KitMaker: 11,666 posts
Auto Modeler: 2,974 posts

Posted: Thursday, August 27, 2020 - 03:35 AM UTC
D,
The distributor caps doeslook a lot more realistic in Brown. One thing that will really put them over the top is to gloss them. As every distributor cap I've ever seen, and that includes at the shop way back when, was a shiny Black or Brown plastic. The wire insulators on the cap were the same color as the wires but a Matt color.
Joel
AussieReg
#007
Joined: June 09, 2009
KitMaker: 8,156 posts
Auto Modeler: 2,953 posts
Posted: Friday, August 28, 2020 - 11:06 AM UTC
A small progress report, the airbrush got another run with metallics last night.
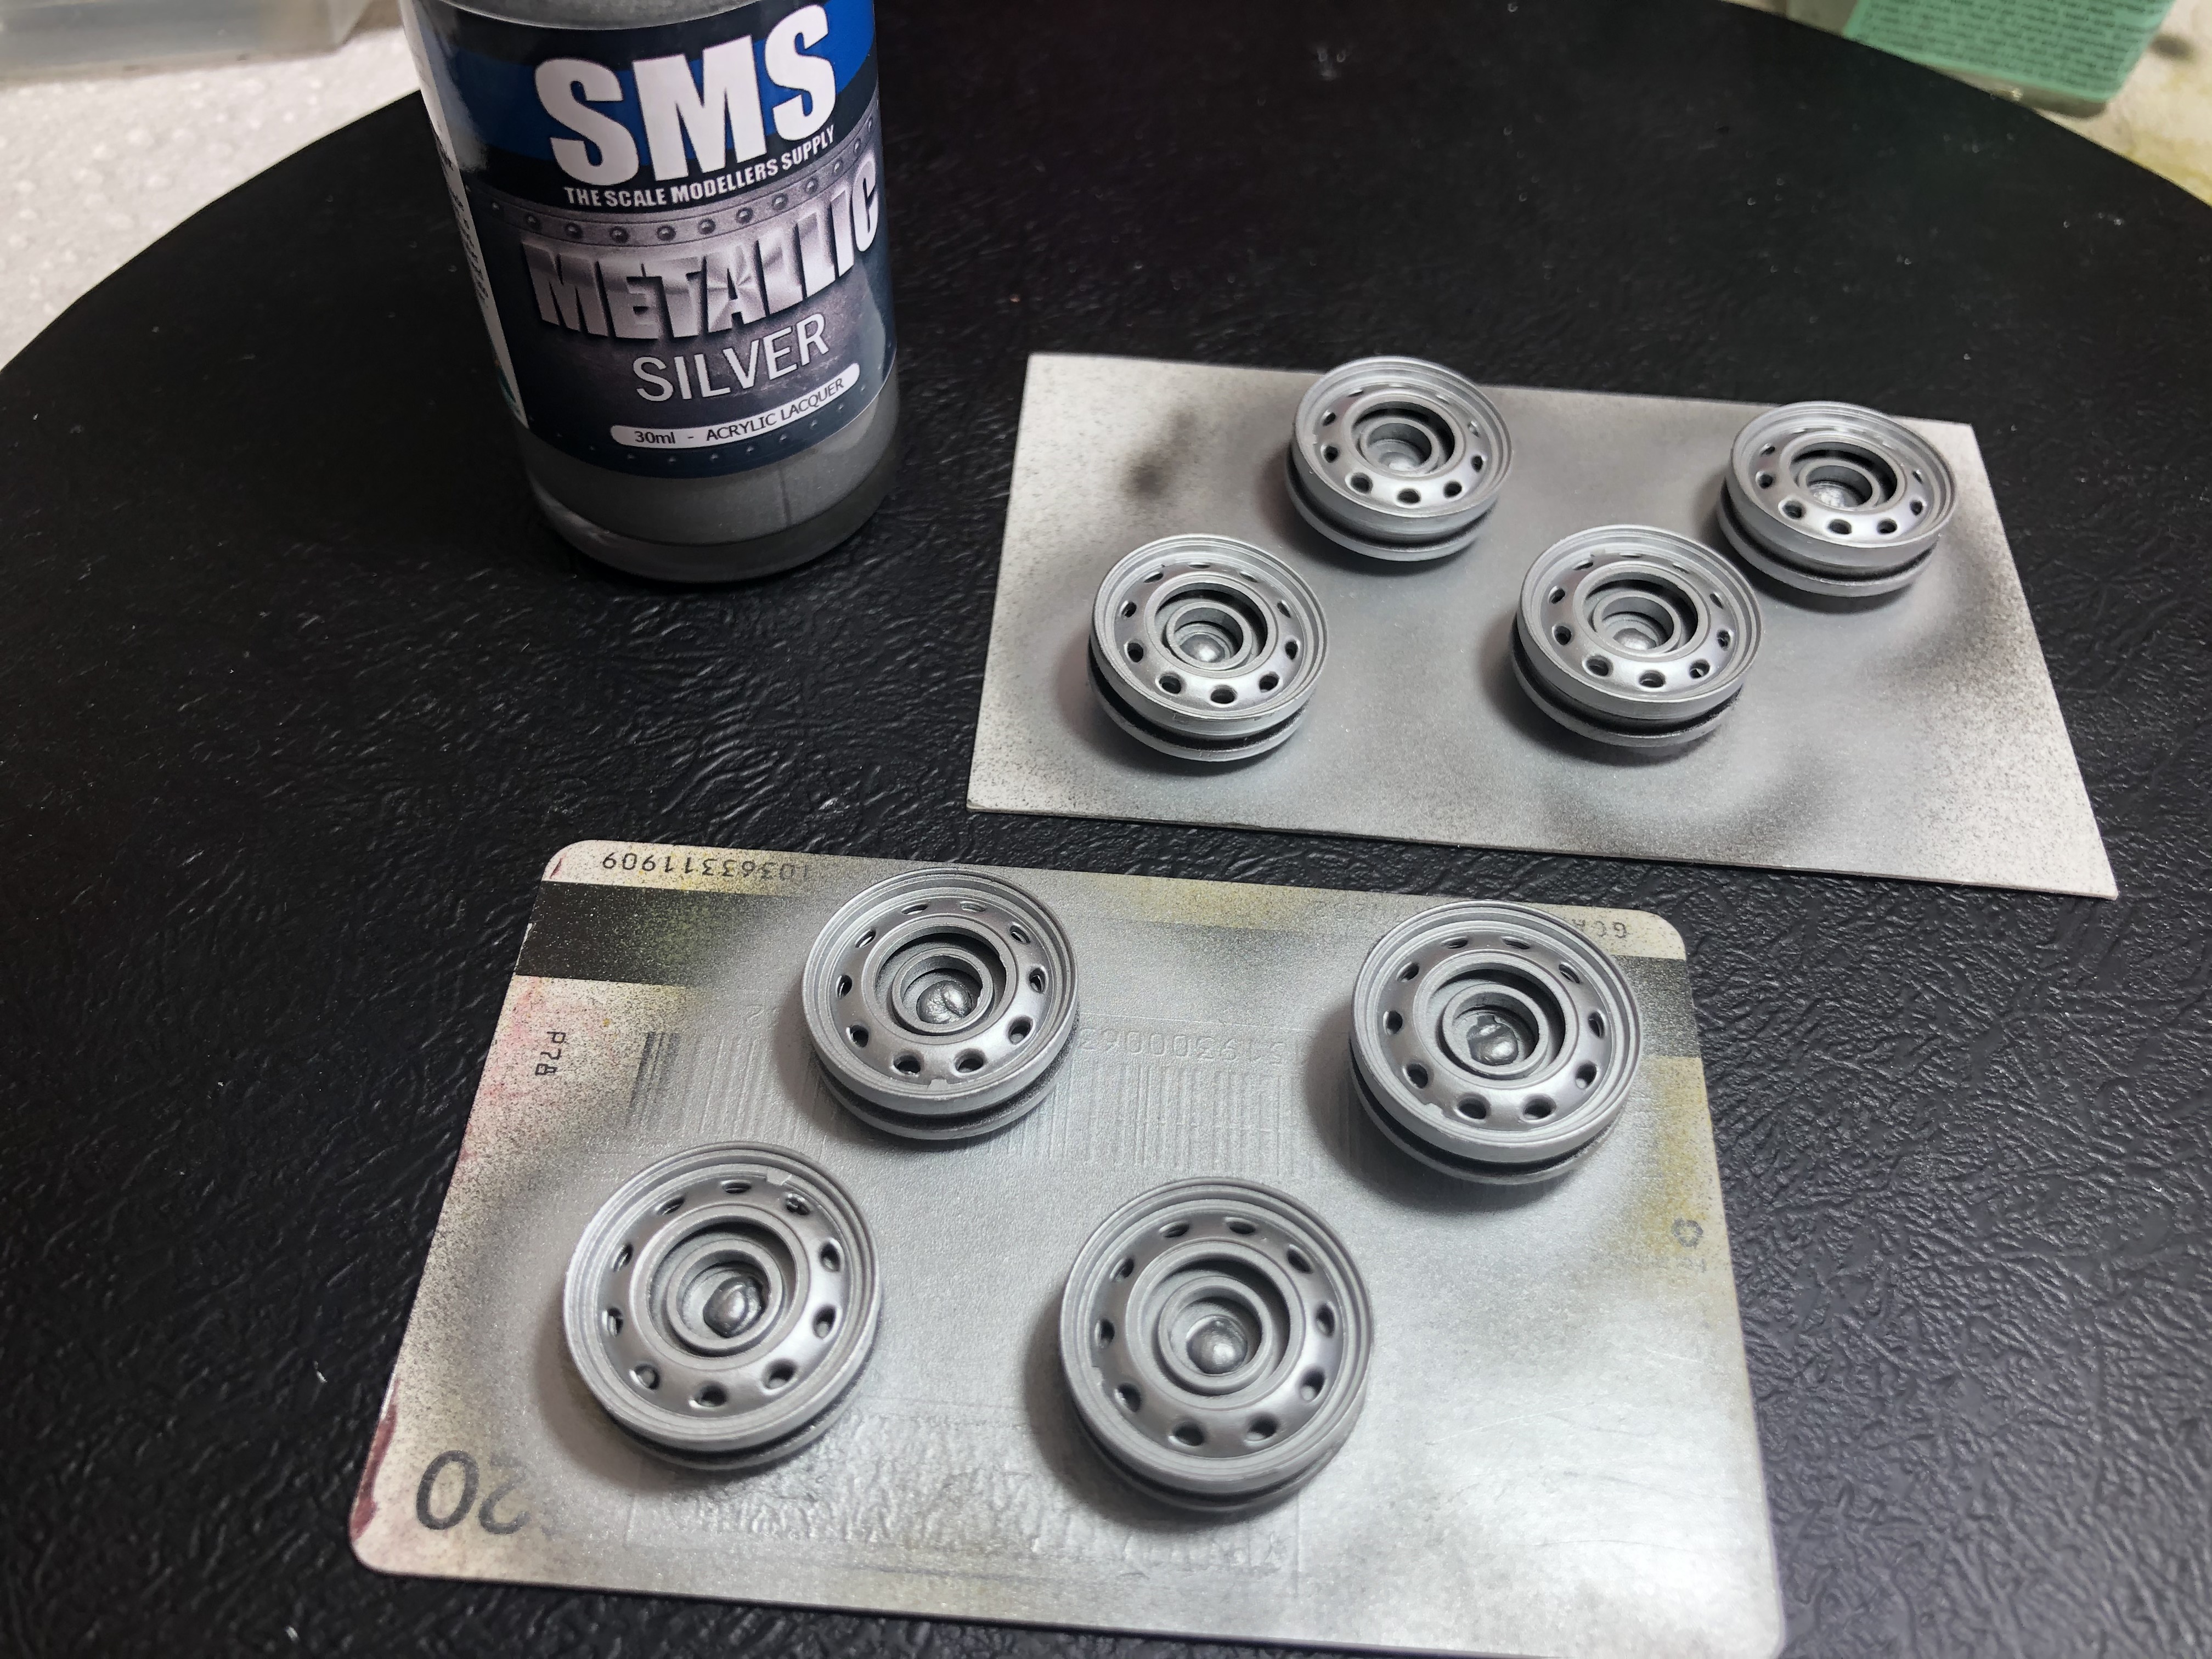
It will be fun masking the outer rim to paint the centre section
Cheers, D
It will be fun masking the outer rim to paint the centre section
Cheers, D
AussieReg
#007
Joined: June 09, 2009
KitMaker: 8,156 posts
Auto Modeler: 2,953 posts
Posted: Monday, August 31, 2020 - 01:49 AM UTC
Quoted Text
I have also stretched a bit of sprue to get a short piece of rod that I'm happy with to match the diameter of the ignition coil, so these will be painted up and added next.
And so it goes!
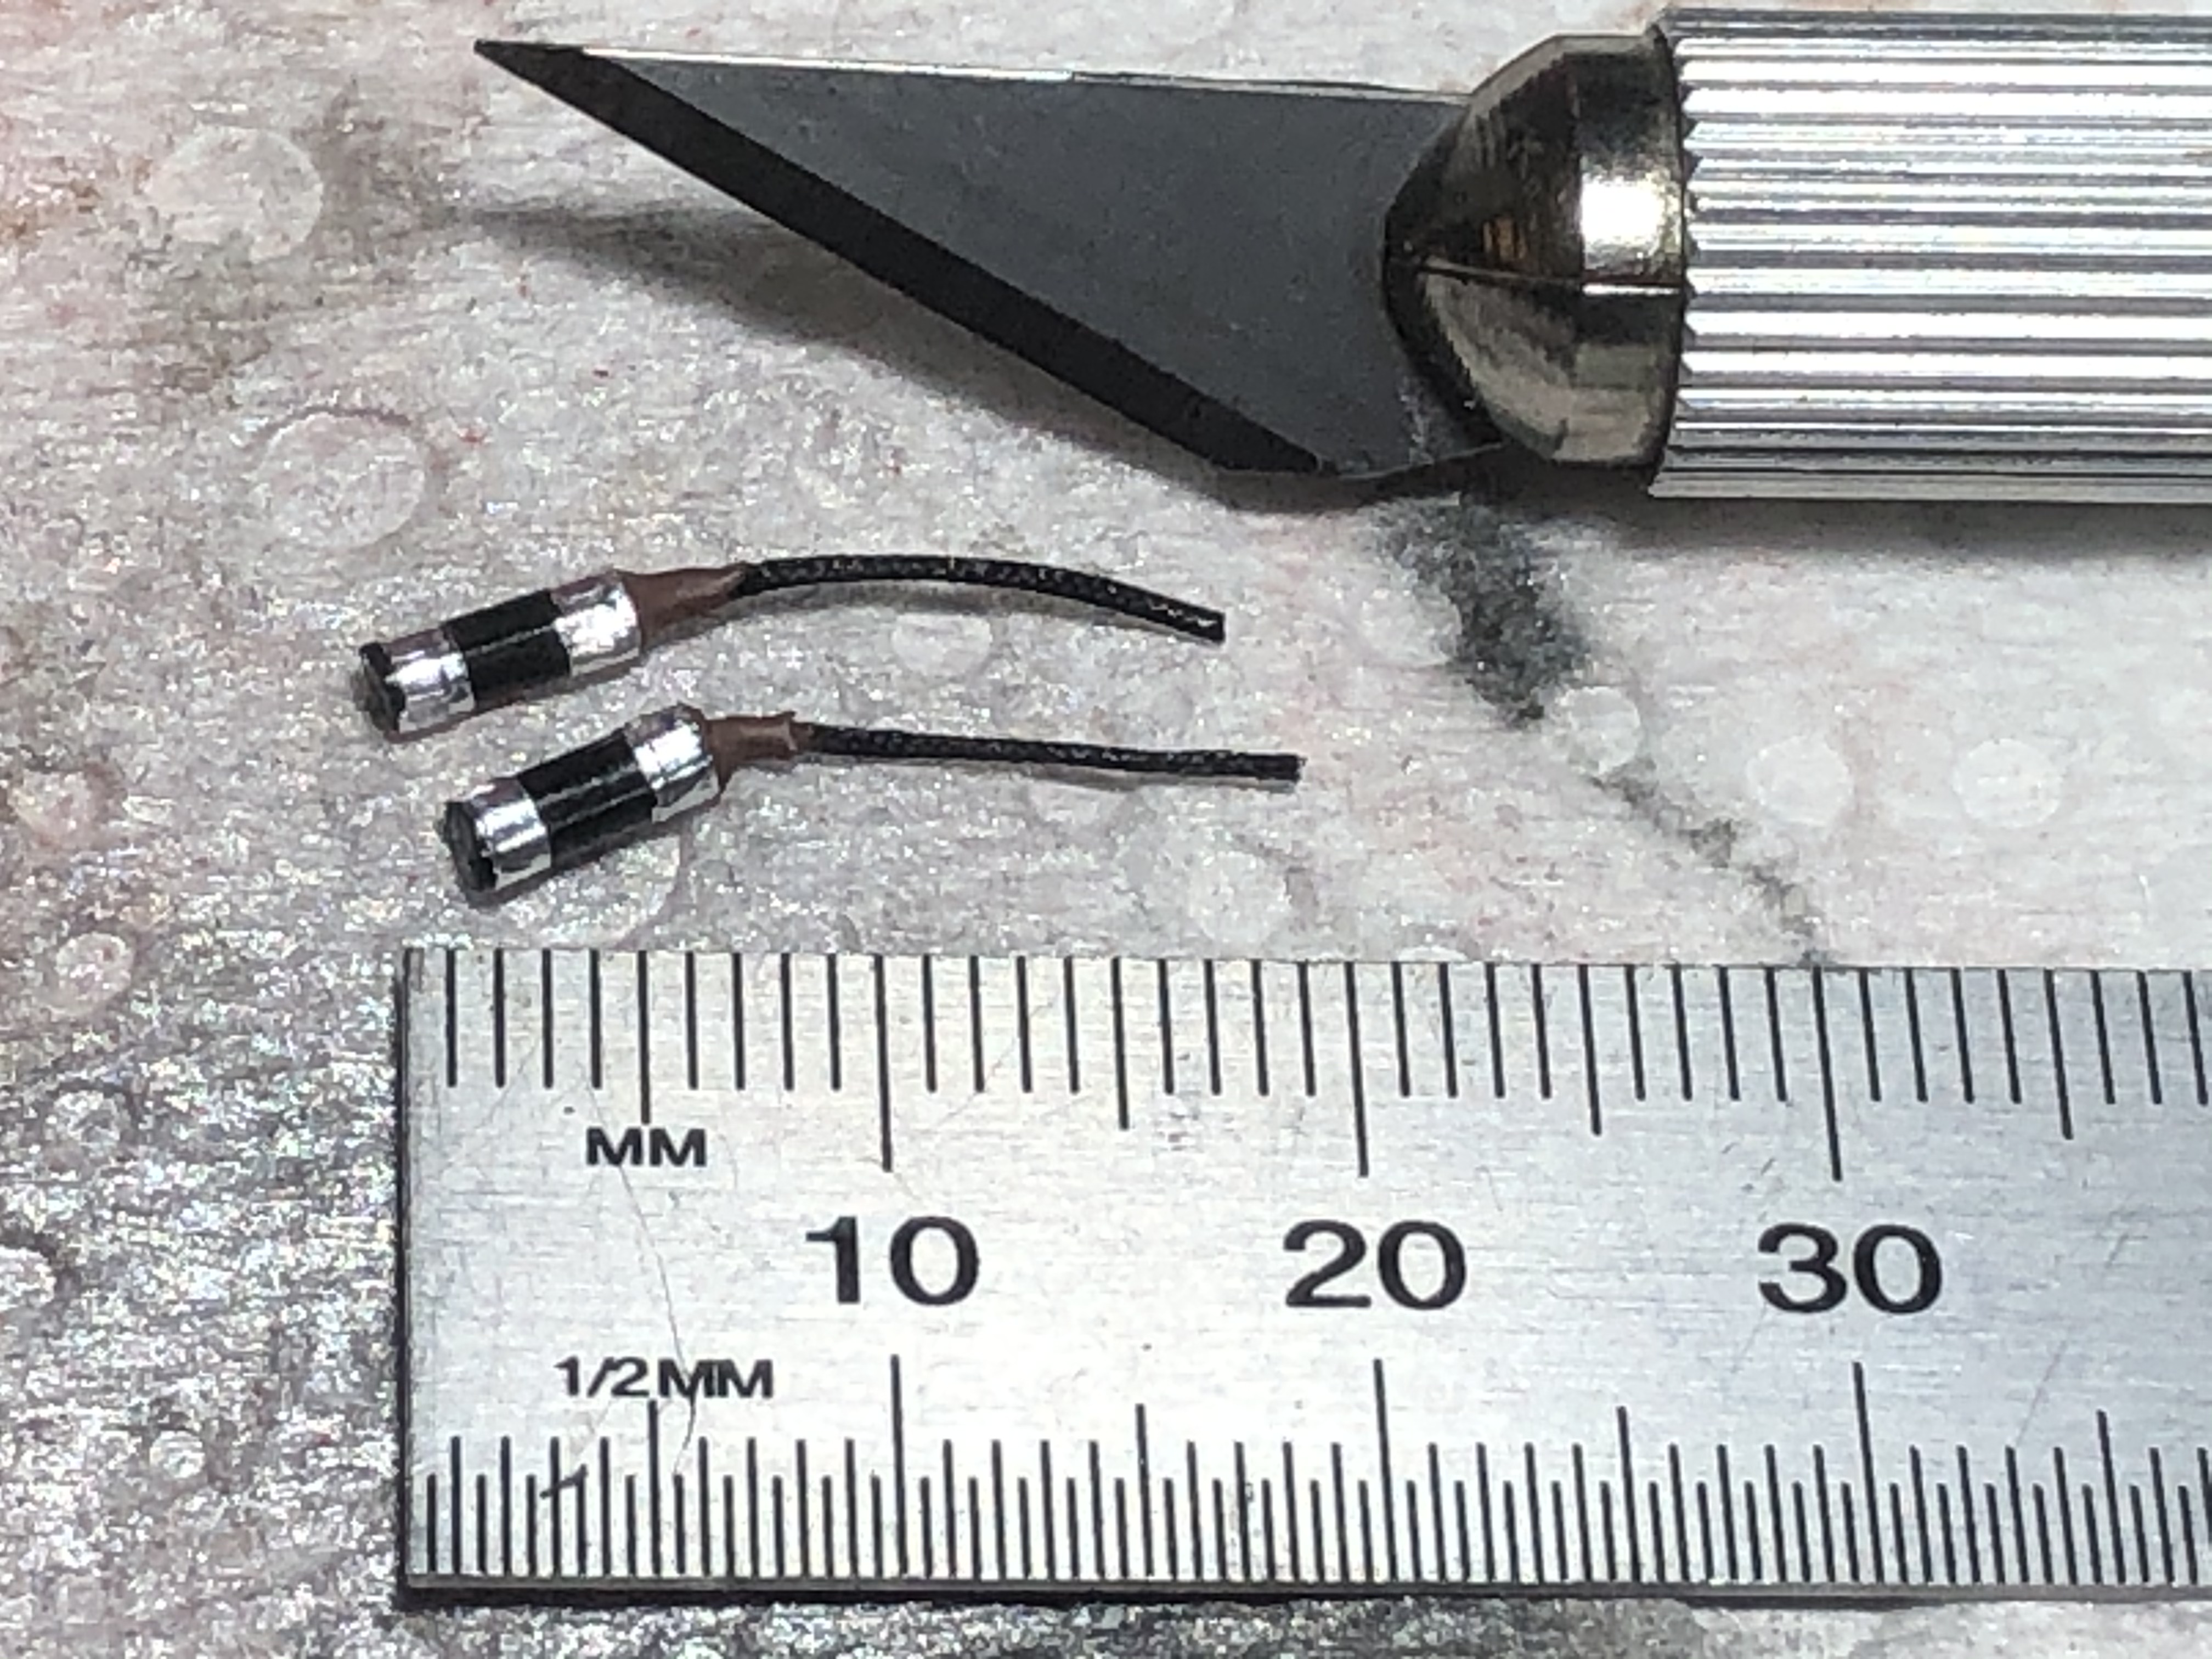
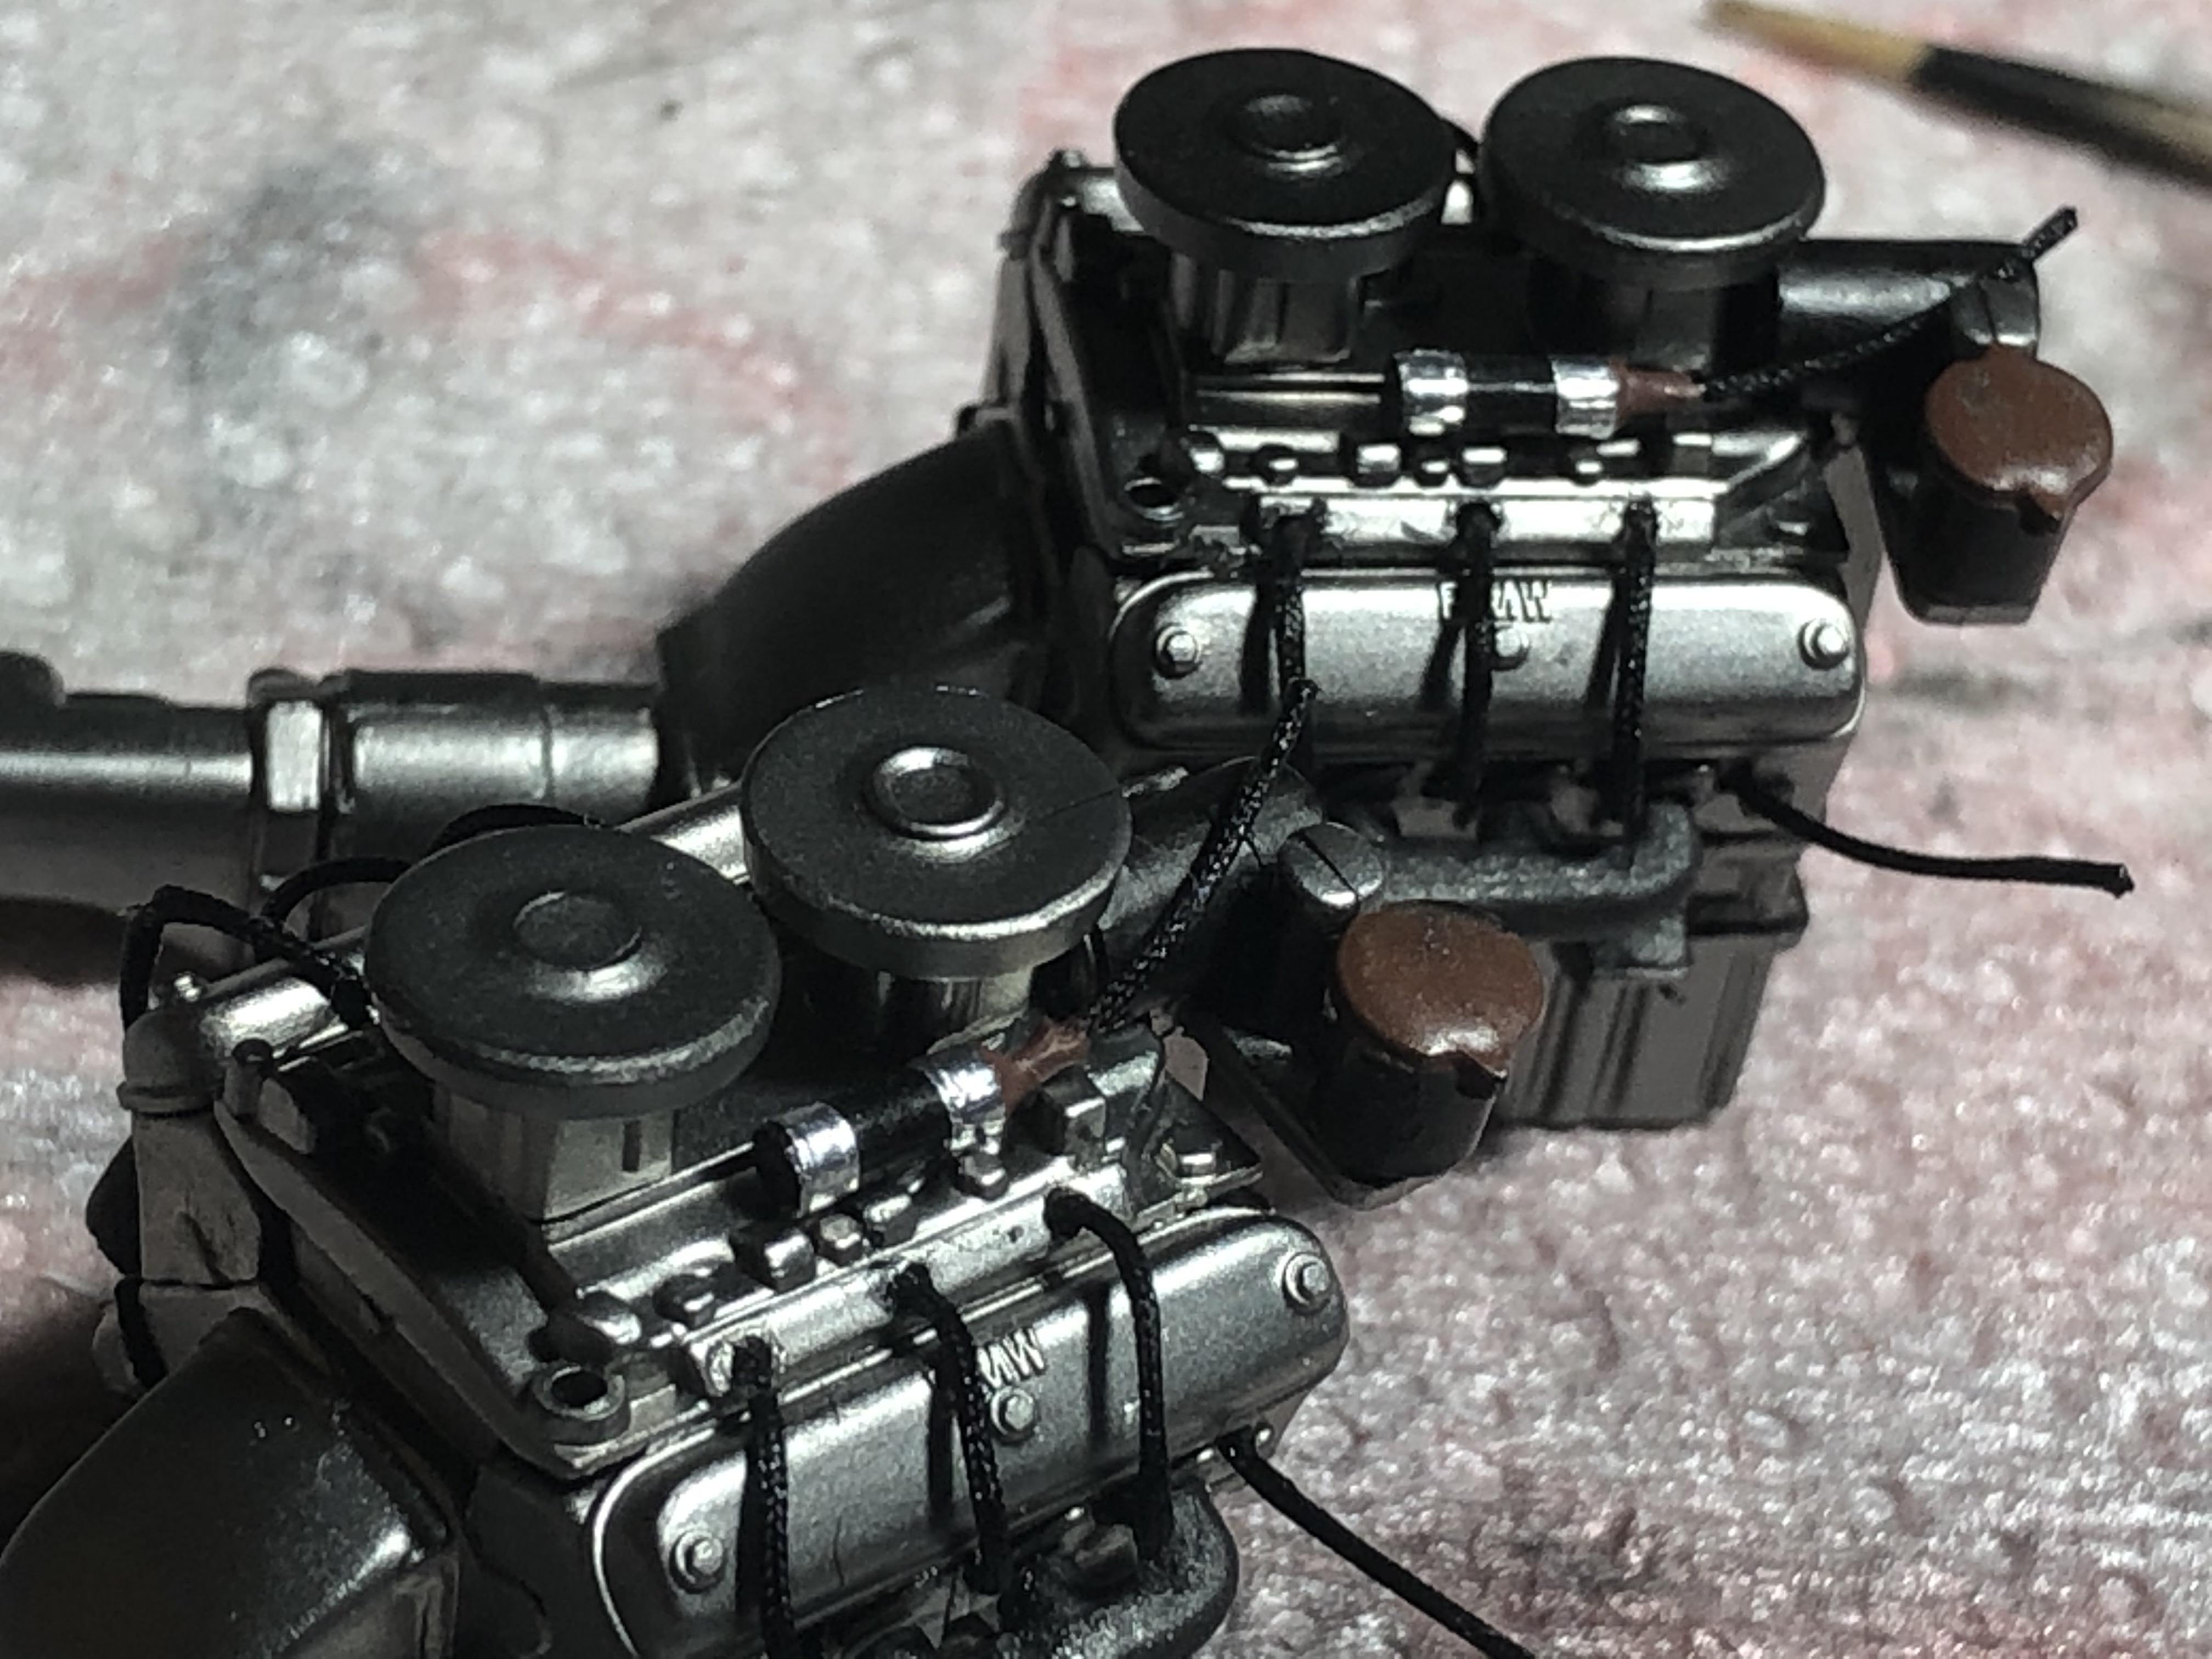
I used the white glue to form the tapered coil end and painted with the same Vallejo Saddle Brown, Tamiya enamel black on the coil itself, and some BMF wrapped around a couple of times to make the brackets. They are dry fitted at the moment, waiting for the rest of the leads to be finished off first. A very fiddly job.
Cheers, D
Joel_W
Joined: December 04, 2010
KitMaker: 11,666 posts
Auto Modeler: 2,974 posts
Posted: Monday, August 31, 2020 - 04:49 AM UTC
D,
Just great progress as those big GM V8s look G-R-E-A-T
Joel
Just great progress as those big GM V8s look G-R-E-A-T
Joel
AussieReg
#007
Joined: June 09, 2009
KitMaker: 8,156 posts
Auto Modeler: 2,953 posts
Posted: Monday, August 31, 2020 - 11:15 AM UTC
Quoted Text
D,
Just great progress as those big GM V8s look G-R-E-A-T
Joel
Joel, I don't think even I could manage to shoehorn a Chevy into these engine bays mate, these are baby 3.17 litre (193 ci) 8-pots.
I'm really happy with how they are progressing, but I need to make some compromises with the ignition wiring because there is just not enough room to run all of the LHS wires across under the alternator to the distributor.
Cheers, D
Szmann
Joined: September 02, 2014
KitMaker: 1,977 posts
Auto Modeler: 1,371 posts
Posted: Monday, August 31, 2020 - 03:13 PM UTC
Quoted Text
I'm really happy with how they are progressing, but I need to make some compromises with the ignition wiring because there is just not enough room to run all of the LHS wires across under the alternator to the distributor.
Cheers, D
You have all the reasons to be happy with the progress, D.. The assembly looks "alive"and that's the meaning of superdetailing.
Gabriel
AussieReg
#007
Joined: June 09, 2009
KitMaker: 8,156 posts
Auto Modeler: 2,953 posts
Posted: Monday, August 31, 2020 - 11:12 PM UTC
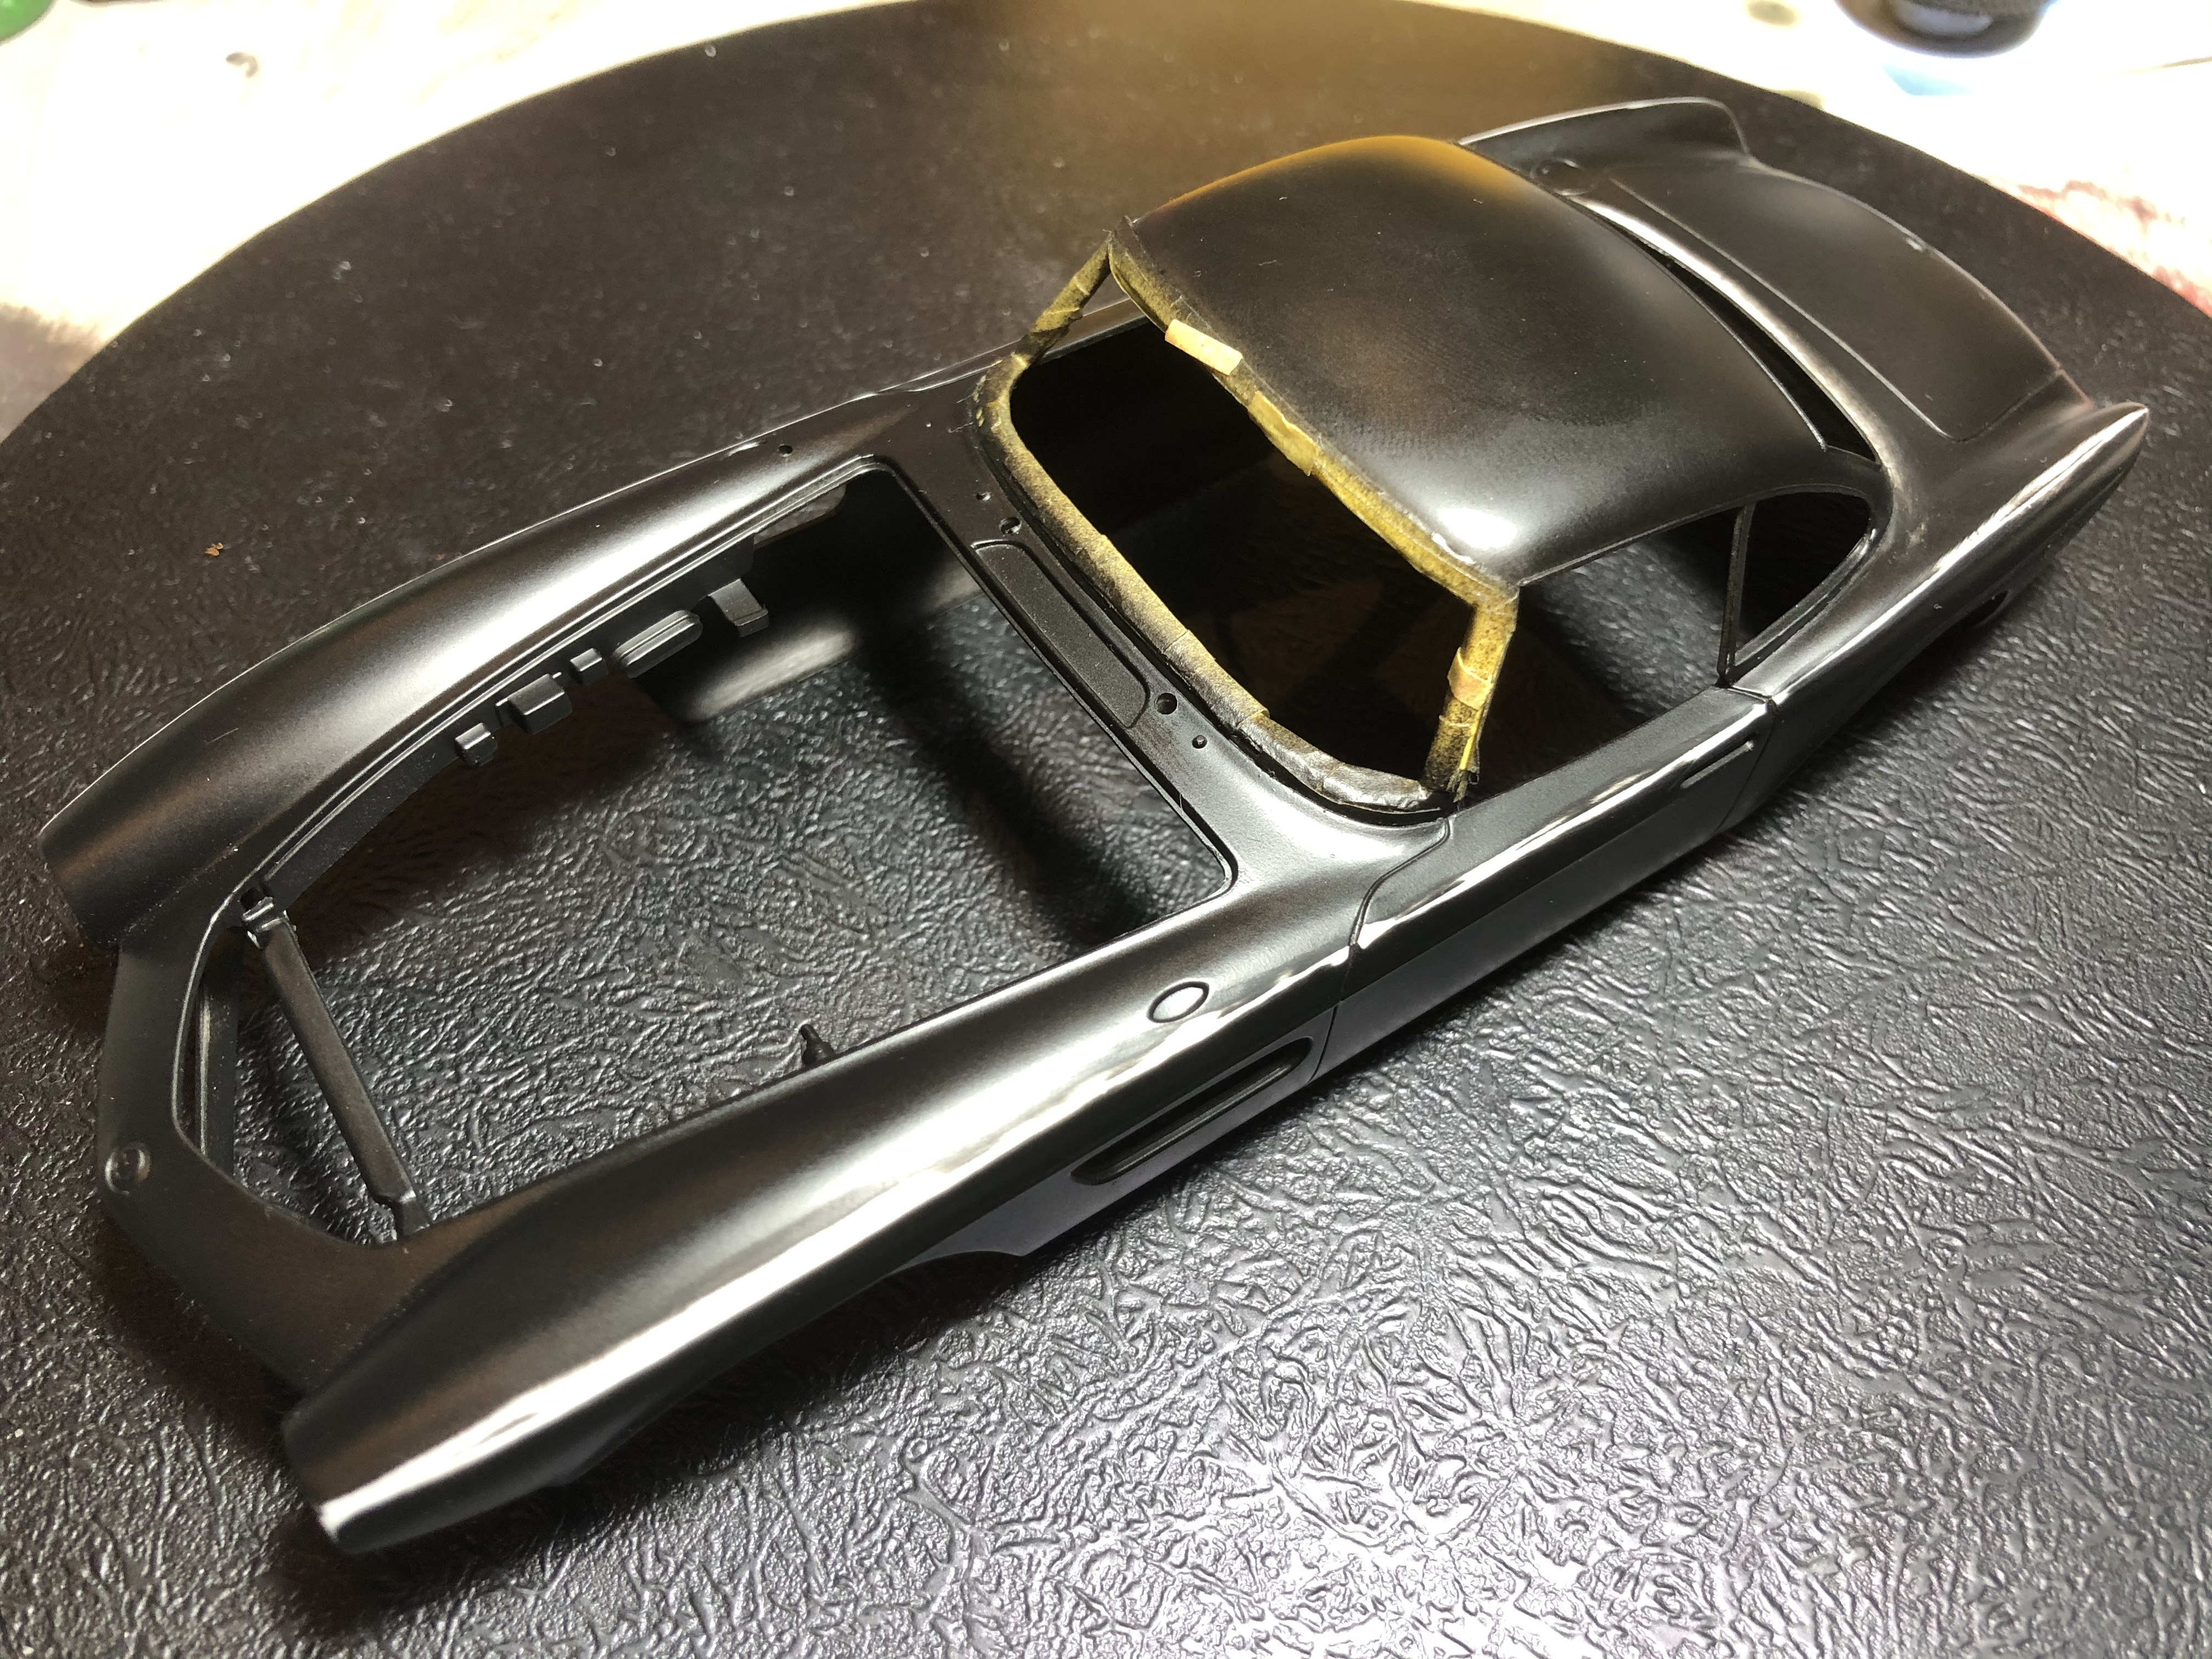
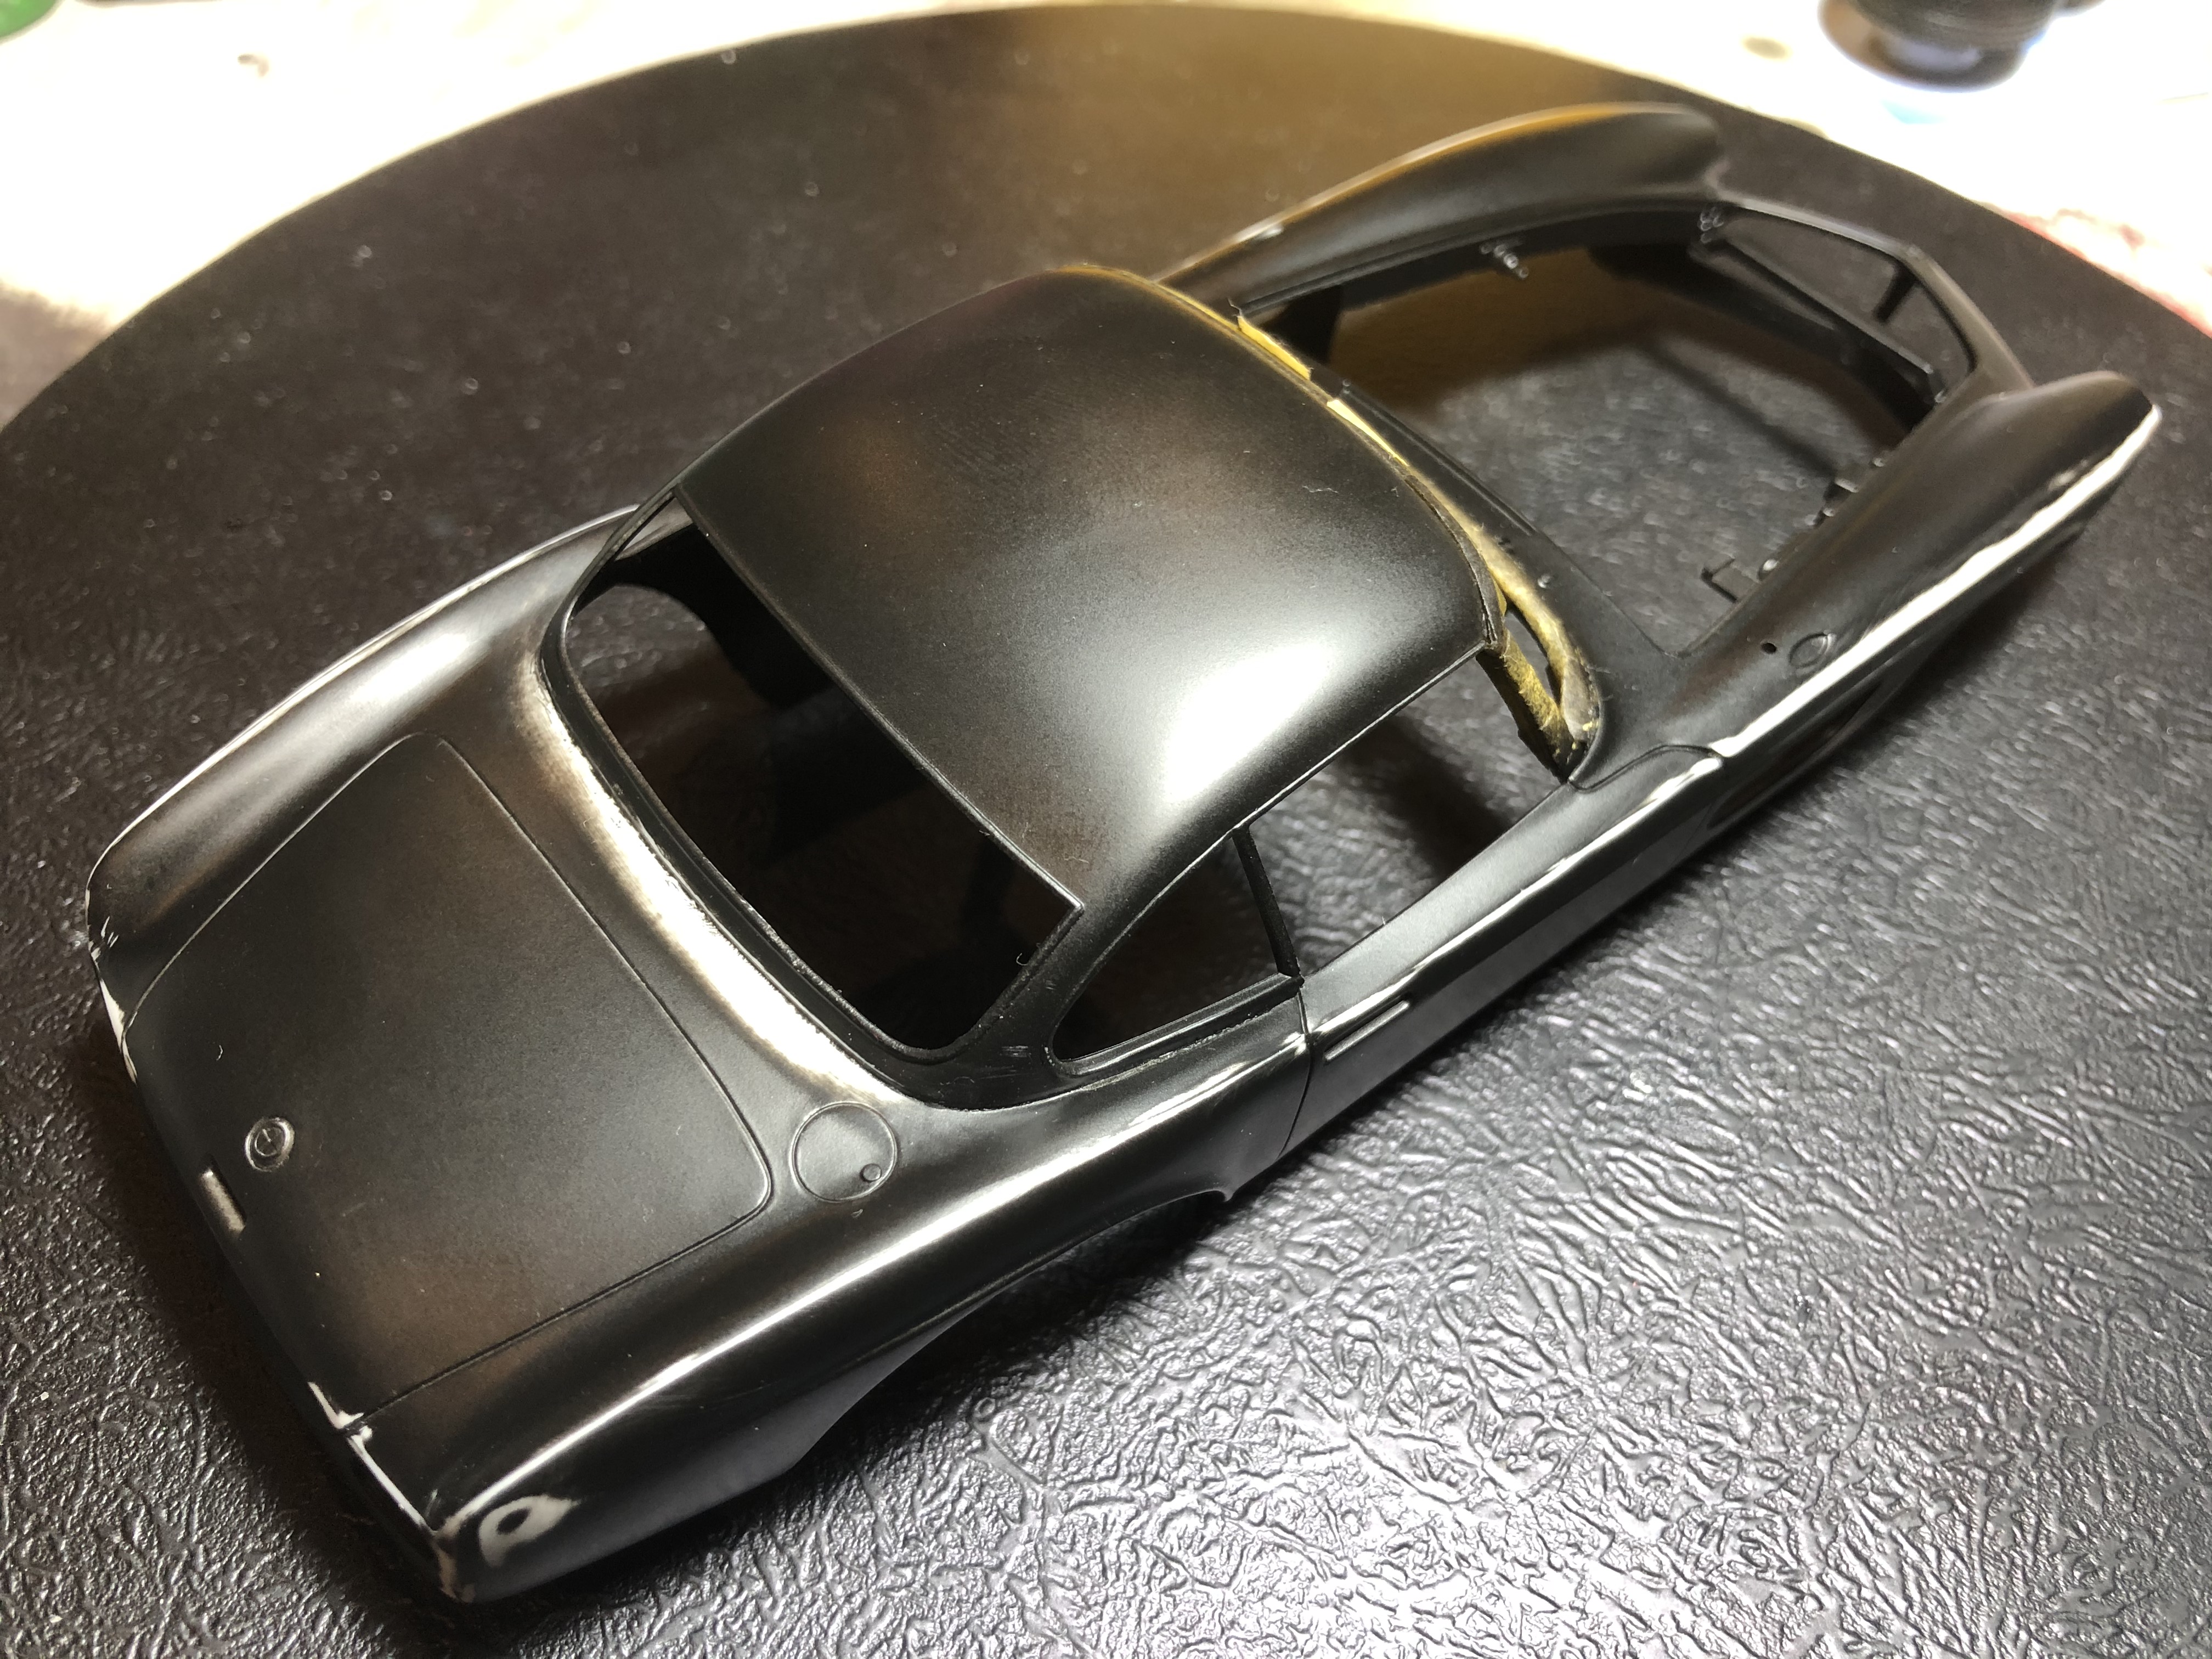
It was the turn of the Cabrio to get its body primer today. A good coat of MS1500 Grey, which I will wet sand and check for any further work needed, then a top light coat of MS1500 White as a base for the Red. The underside of the floor pan is already primed MS1500 Black, but the engine bay is body colour so the inner guards got grey primer as well.

I need to get the body and engine bay all painted before I can install the engine and drive train on both kits.
Cheers, D
I need to get the body and engine bay all painted before I can install the engine and drive train on both kits.
Cheers, D
Szmann
Joined: September 02, 2014
KitMaker: 1,977 posts
Auto Modeler: 1,371 posts
Posted: Tuesday, September 01, 2020 - 12:19 PM UTC
Damian, again, beautiful AB work!
I'm going to share your pain by trying my hand on candy colours (I know, it's a different build but you have mentioned red). Other than that, I'm looking for the next updates on the dual build.
Gabriel
I'm going to share your pain by trying my hand on candy colours (I know, it's a different build
but you have mentioned red). Other than that, I'm looking for the next updates on the dual build.Gabriel

Cosimodo
#335

Joined: September 03, 2013
KitMaker: 1,808 posts
Auto Modeler: 701 posts

Posted: Tuesday, September 01, 2020 - 04:50 PM UTC
Damian, nice work on the priming. MS1500 White over grey is what I am using for the Porsche and the pink. It worked very well for the sidepods I did.
cheers
Michael
cheers
Michael
ozmodeler
Joined: July 25, 2020
KitMaker: 5 posts
Auto Modeler: 5 posts

Posted: Tuesday, September 01, 2020 - 08:24 PM UTC
Damian, great work on the dual beemer build. Looking forward to this pair !

2002hummer
#257

Joined: October 11, 2011
KitMaker: 812 posts
Auto Modeler: 108 posts

Posted: Wednesday, September 02, 2020 - 02:59 AM UTC
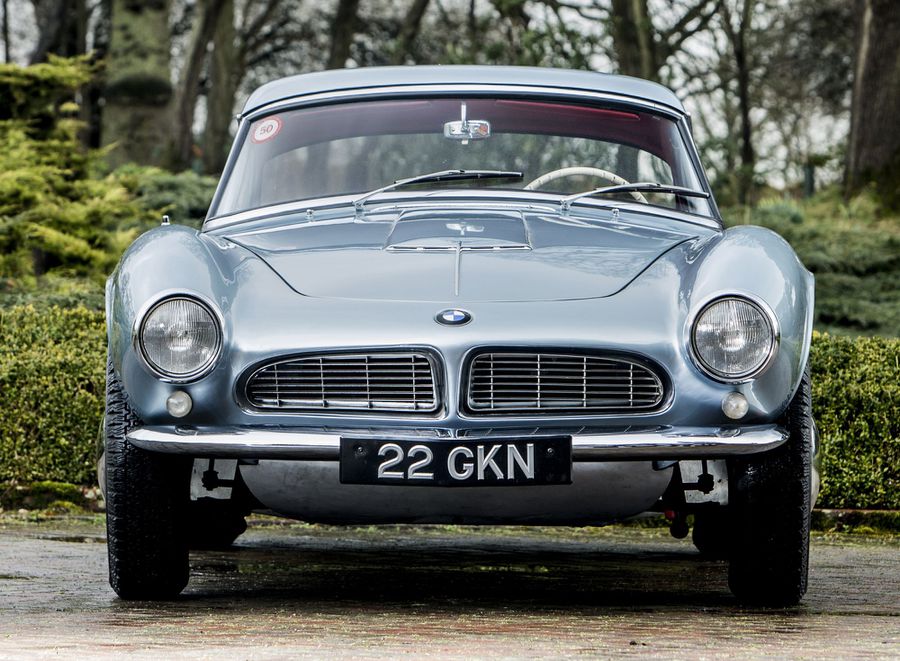
Damian The BMW 507 is one of the best looking cars ever built. I have been following this build from the start,loving it. I built the cabriolet for one of the group builds, not nearly as detailed as yours. Keep up the good work.
AussieReg
#007
Joined: June 09, 2009
KitMaker: 8,156 posts
Auto Modeler: 2,953 posts
Posted: Wednesday, September 02, 2020 - 12:29 PM UTC
Thanks for the feedback folks, very much appreciated!
Darrell, I don't recall seeing your build, do you have any photos you can share here? Which group Build was it?
EDIT - Found it! German Beauties 2013
Nice build mate, I like the effect you got on the upholstery!
I got some more primer down on a few more items last night, getting ready for some colour soon!
Cheers, D
AussieReg
#007
Joined: June 09, 2009
KitMaker: 8,156 posts
Auto Modeler: 2,953 posts
Posted: Friday, September 04, 2020 - 01:24 AM UTC
And this folks is why we prime! A very fine mould line along the top of the body line, almost invisible on the bare white plastic, but big enough to cast a shadow under primer! Time to hit the sanding sticks and sort that out, reprime tomorrow.
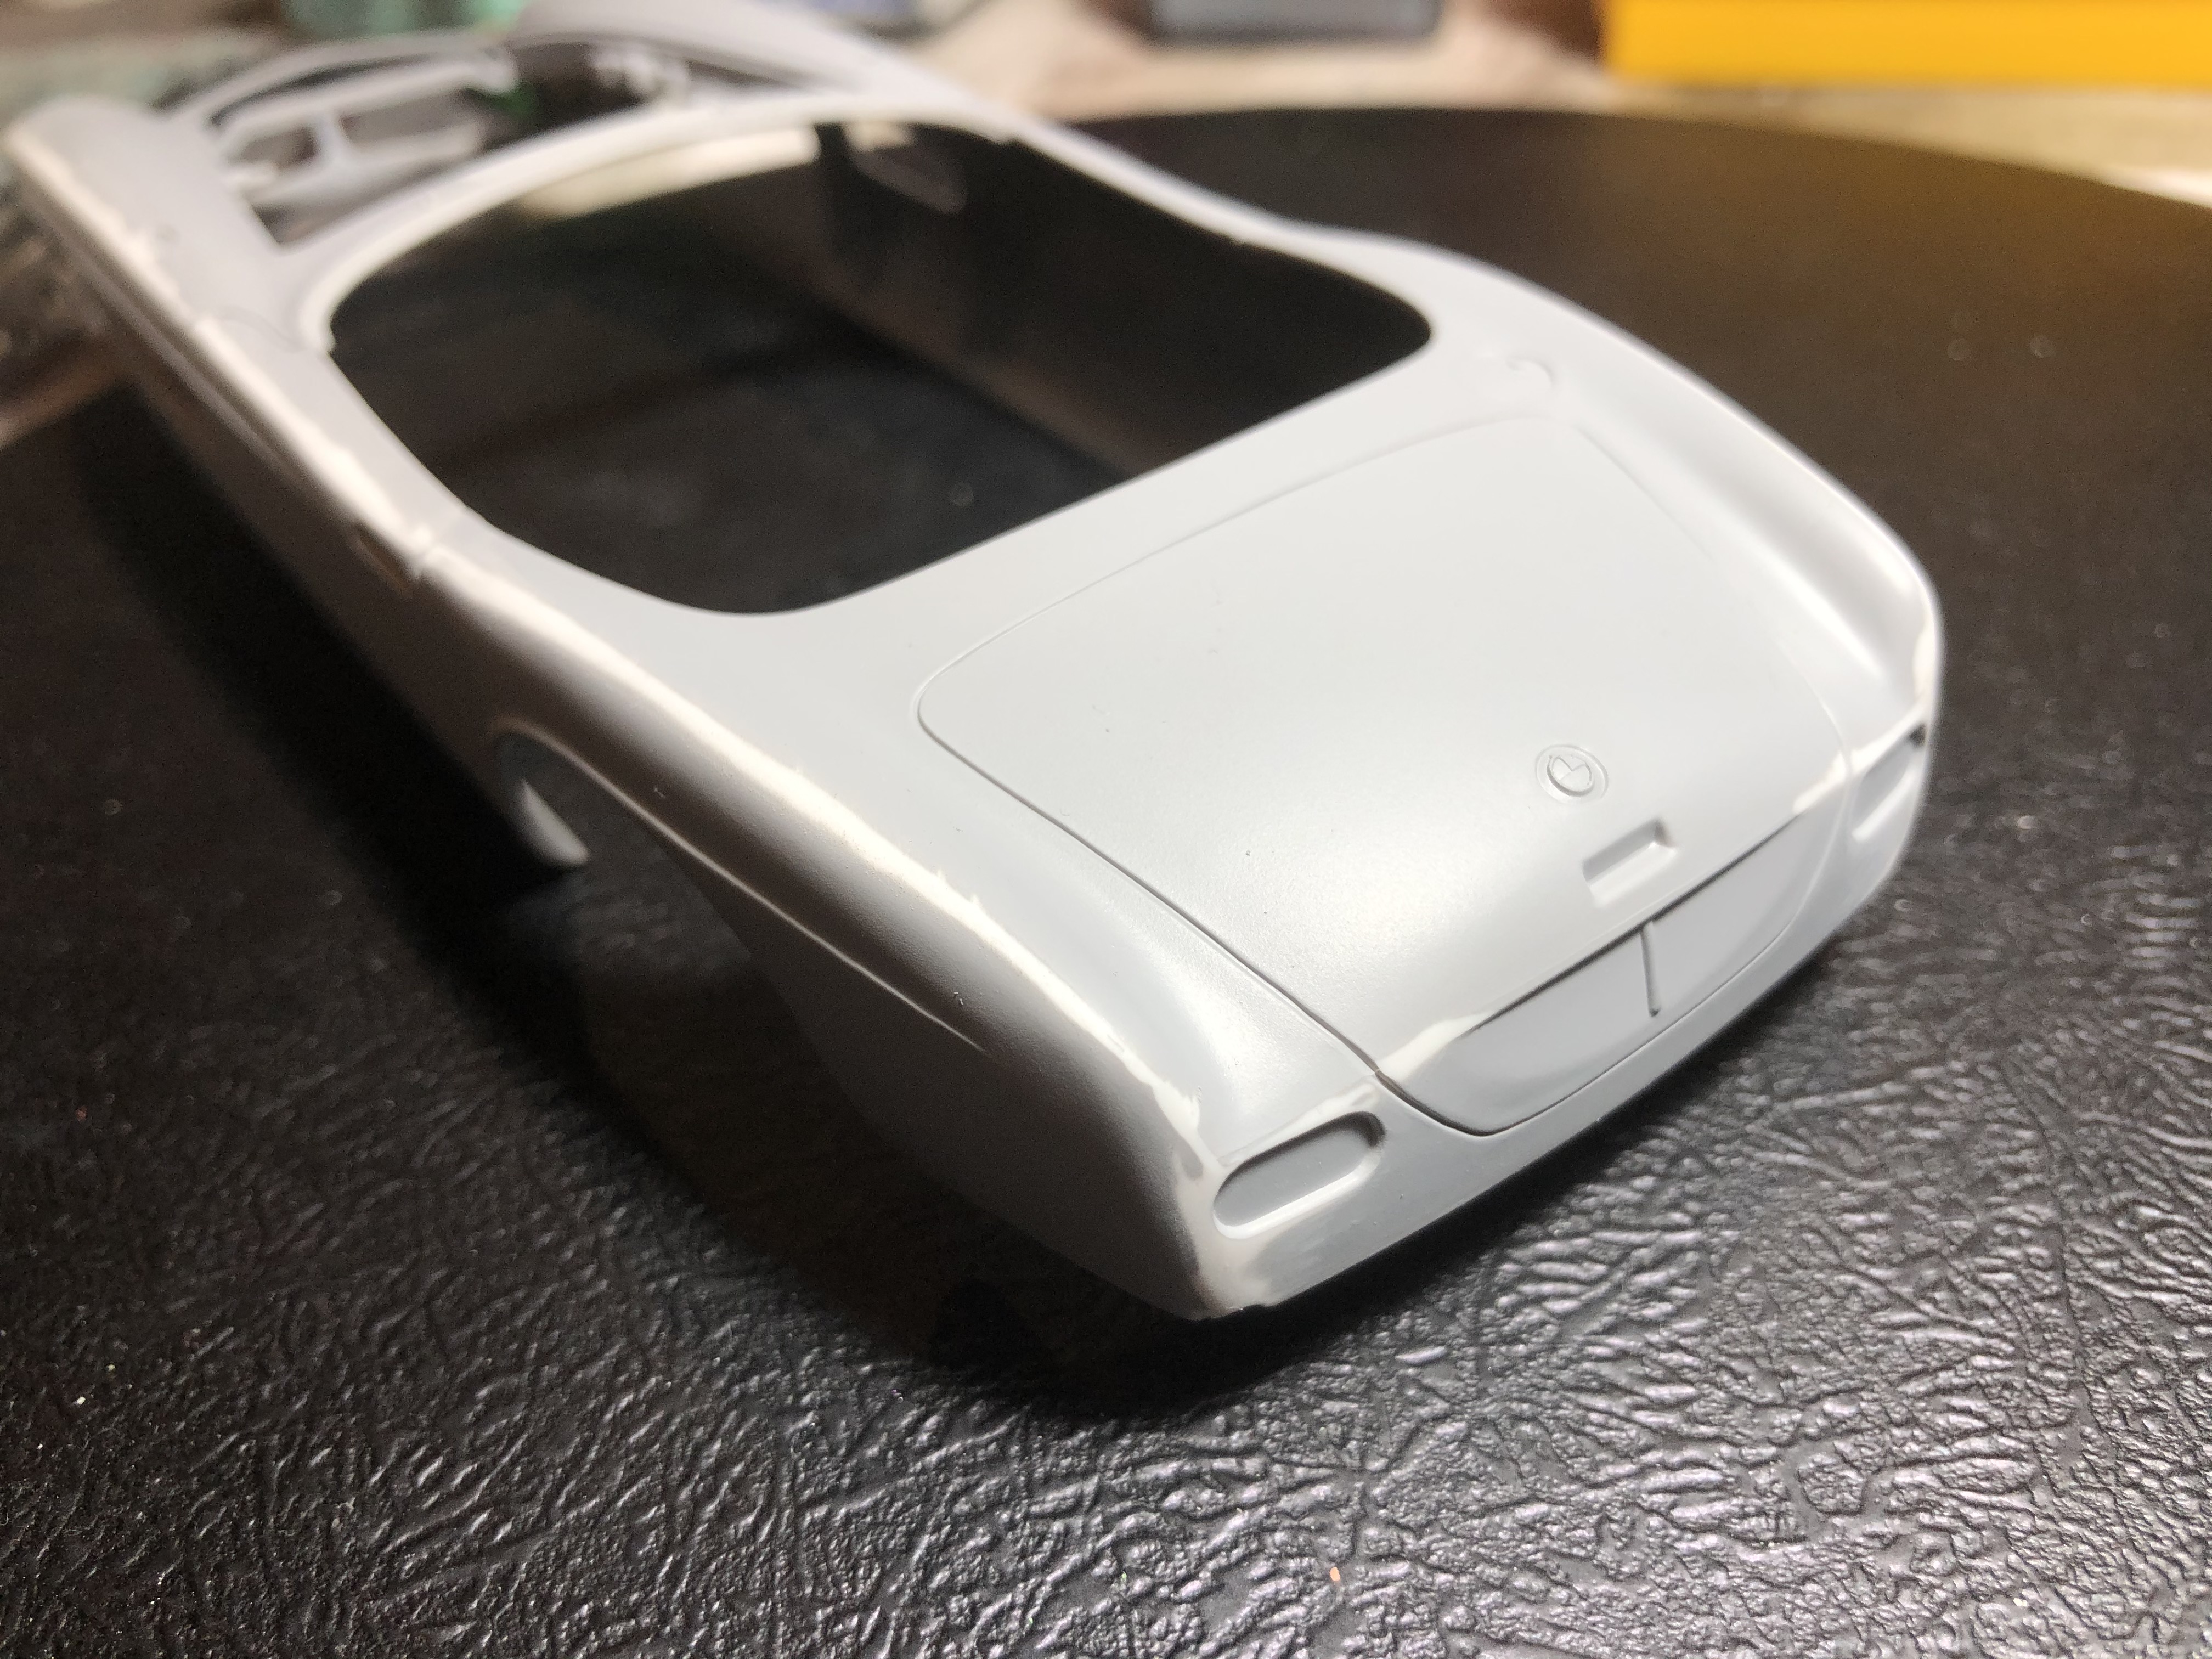

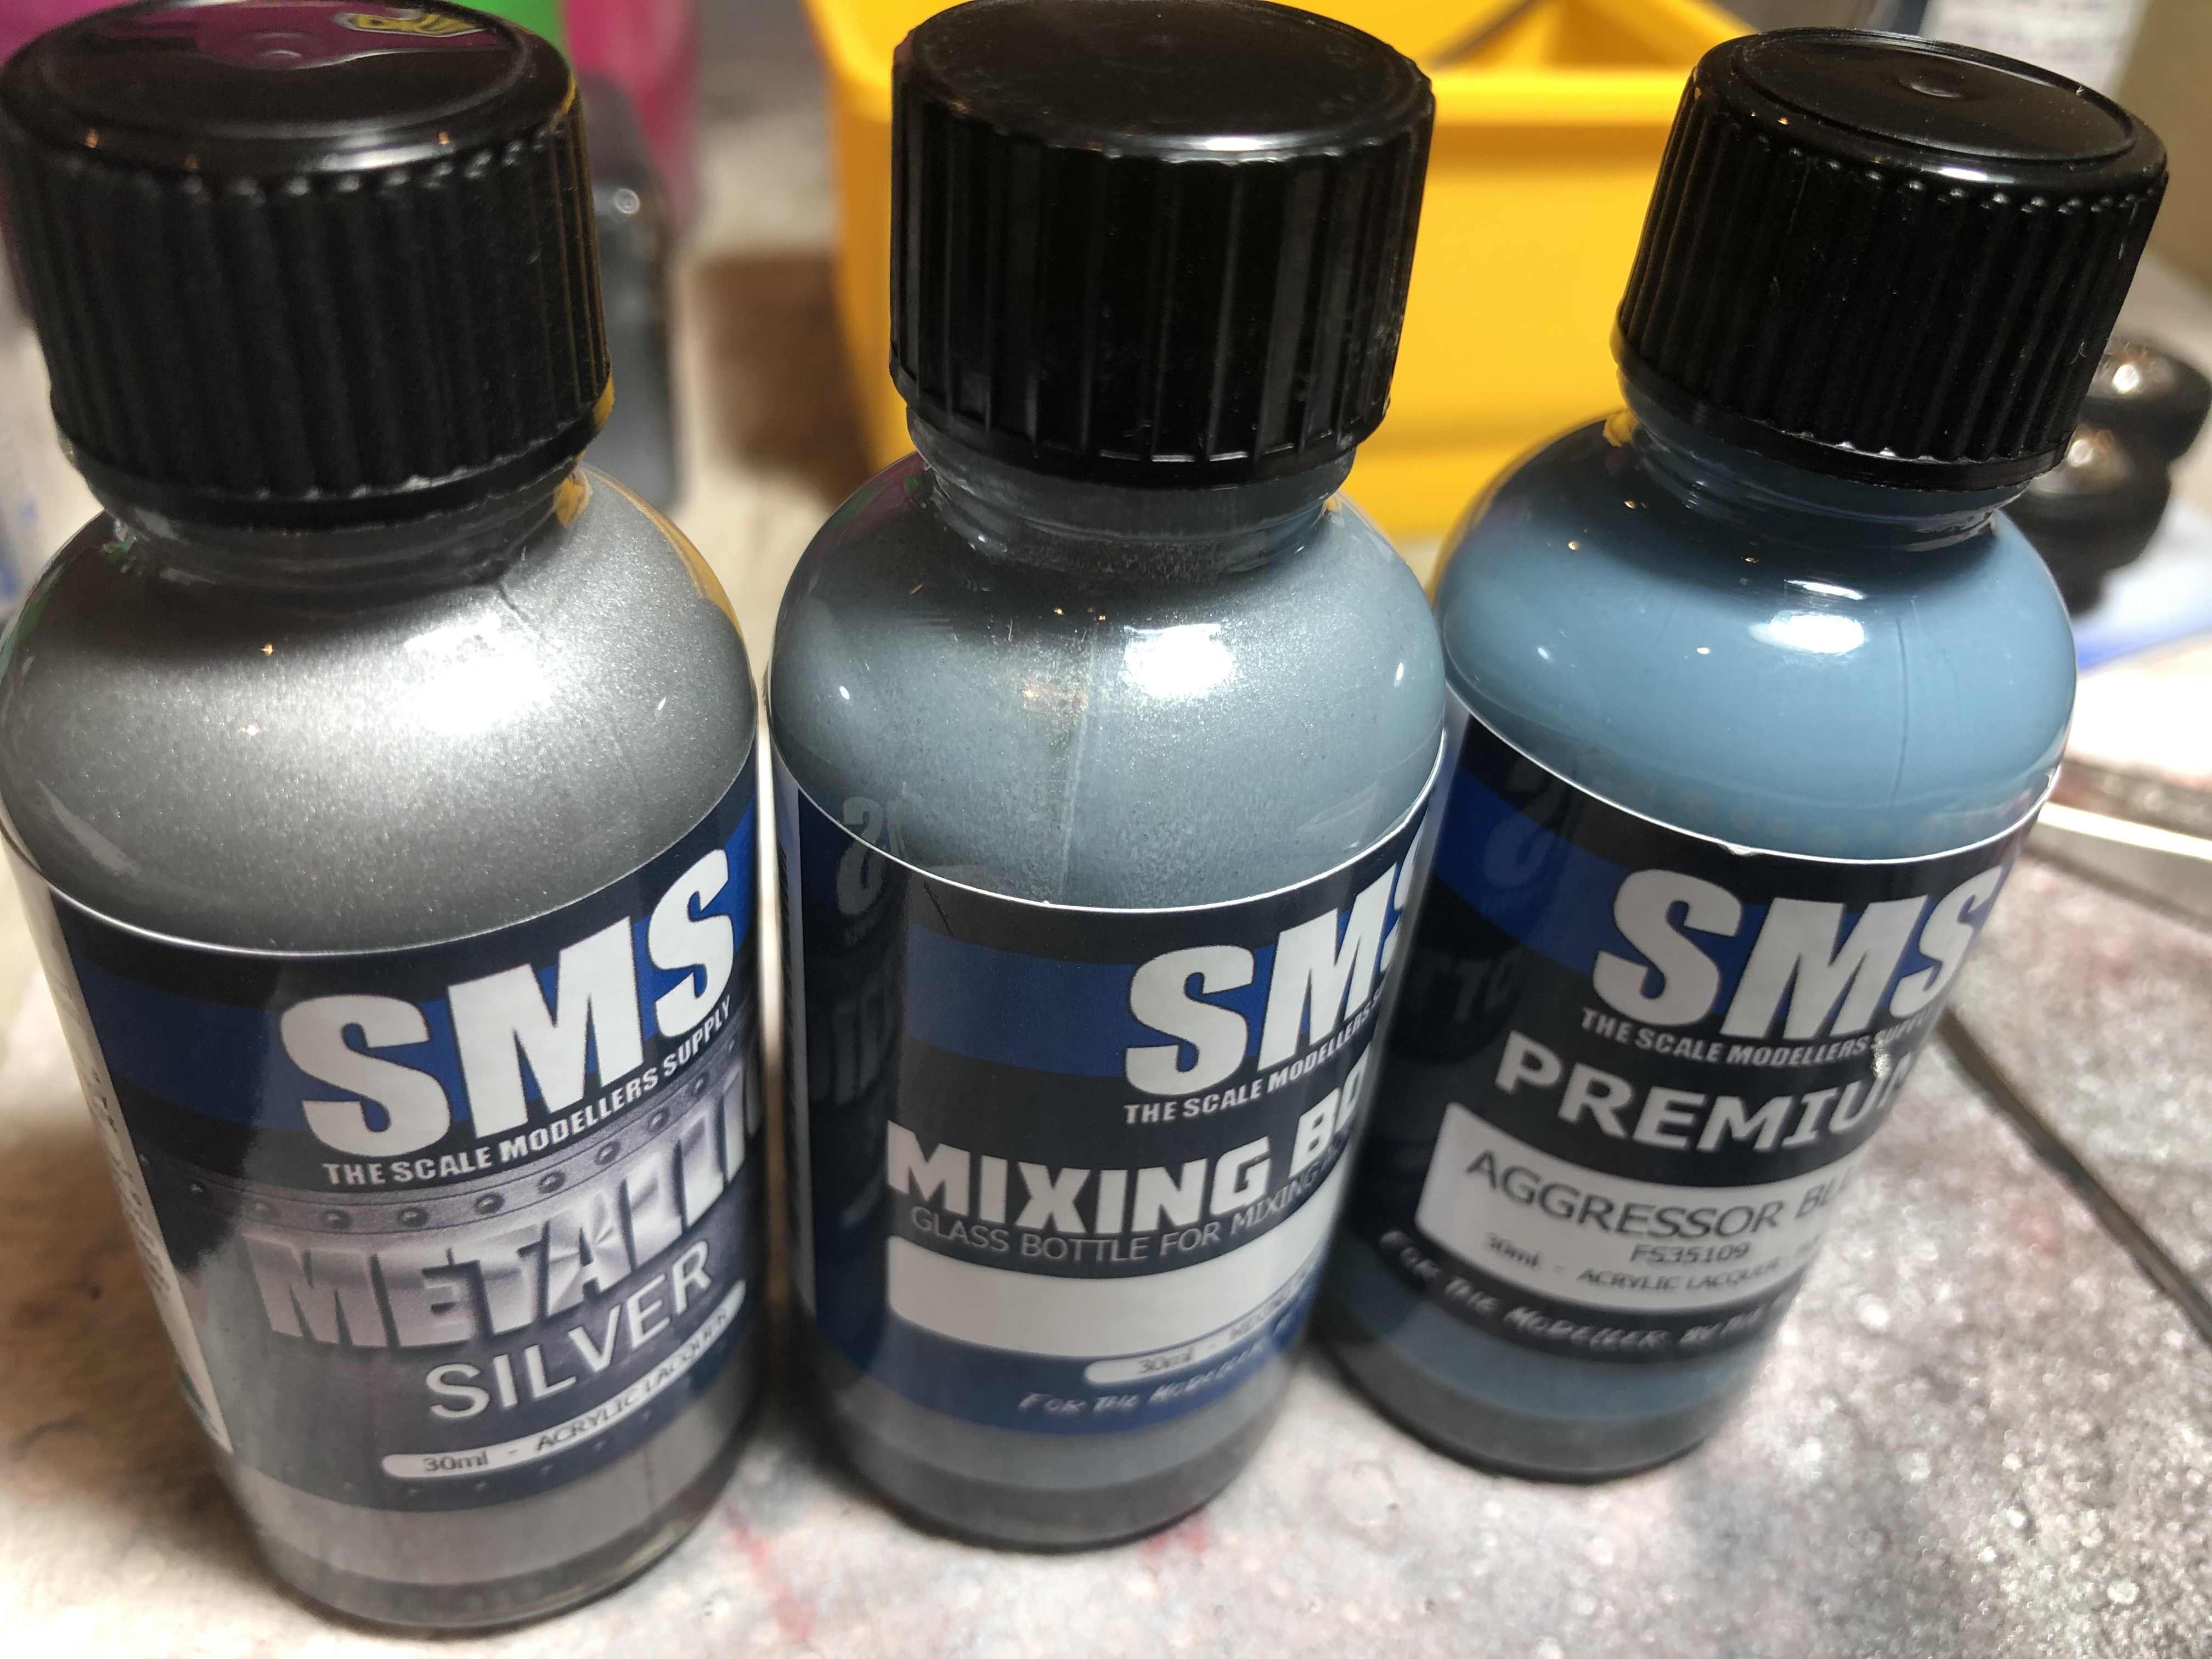
I also had a play with mixing the "Silver Grey" on the Surtees Coupe to get ready for the colour coats. I started with Silver, and added Aggressor Blue until I got to about a 75/25 mix.
Can't wait to get some colour down on these two.
Cheers, D
I also had a play with mixing the "Silver Grey" on the Surtees Coupe to get ready for the colour coats. I started with Silver, and added Aggressor Blue until I got to about a 75/25 mix.
Can't wait to get some colour down on these two.
Cheers, D
Cosimodo
#335
Joined: September 03, 2013
KitMaker: 1,808 posts
Auto Modeler: 701 posts
Posted: Friday, September 04, 2020 - 02:53 PM UTC
Damian, that's a shame about missing the mold line because that primer looked great. Looking forward to that blue going on!
cheers
Michael
cheers
Michael
Szmann
Joined: September 02, 2014
KitMaker: 1,977 posts
Auto Modeler: 1,371 posts
Posted: Saturday, September 05, 2020 - 04:20 PM UTC
D., these seam lines are fiendish indeed. I just found very small two of them between the eyes of my Beetle which I have misses even with the primer on! Now the gould finally revealed them. Fot you there was still the step back - for me wasn't
Now that "aviator blue" you have in there is a very sophisticated colour - although it looks simple. I cannot wait and see the results. My best guess is that you have a lot of sky reflection in the original's picture as well. You might need to add some "plain light gray" to your mix to keep the temperature. Popcorn ready!
Gabriel
Stickframe
#362
Joined: December 01, 2013
KitMaker: 1,661 posts
Auto Modeler: 431 posts
Posted: Saturday, September 05, 2020 - 04:44 PM UTC
Ugh! those seam lines,yes, they have to go! they can be such an unpleasant surprise. Your body work is so strong, I'm sure they'll fade away to never be seen again!
Cheers
Nick
Cheers
Nick
Joel_W
Joined: December 04, 2010
KitMaker: 11,666 posts
Auto Modeler: 2,974 posts
Posted: Sunday, September 06, 2020 - 07:42 AM UTC
D,
Glad that you caught those nasty little seam lines. They almost always sneak up on me too.
I'm really looking forward to seeing how your custom color looks on the body.
Joel
Glad that you caught those nasty little seam lines. They almost always sneak up on me too.
I'm really looking forward to seeing how your custom color looks on the body.
Joel
AussieReg
#007
Joined: June 09, 2009
KitMaker: 8,156 posts
Auto Modeler: 2,953 posts
Posted: Sunday, September 06, 2020 - 12:44 PM UTC
Thanks for the support guys, I'm very glad that I caught these little lines now and not once the metallic was down!
I've got quite a few reference mages of the Surtees Coupe in what they call "Silver Grey" and the colour looks slightly different in almost every shot. The one consistency is that light blue hint, even on the lower surfaces out of the light. I will shoot a primary coat with the colour that I have mixed and see how it looks. To be honest I'm not trying to be exact in my match here, becasue there will already be variations in the wheels and engine bay from the reference vehicle.
Mmmmmmmmmm, salted caramel, cold beer, I'm there!
Cheers, D
Quoted Text
My best guess is that you have a lot of sky reflection in the original's picture as well. You might need to add some "plain light gray" to your mix to keep the temperature.
I've got quite a few reference mages of the Surtees Coupe in what they call "Silver Grey" and the colour looks slightly different in almost every shot. The one consistency is that light blue hint, even on the lower surfaces out of the light. I will shoot a primary coat with the colour that I have mixed and see how it looks. To be honest I'm not trying to be exact in my match here, becasue there will already be variations in the wheels and engine bay from the reference vehicle.
Quoted Text
Popcorn ready! Gabriel
Mmmmmmmmmm, salted caramel, cold beer, I'm there!
Cheers, D

RussellE
#306
Joined: June 27, 2010
KitMaker: 3,959 posts
Auto Modeler: 495 posts
Posted: Tuesday, September 08, 2020 - 12:47 PM UTC
testing, testing, 1, 2, 3...

AussieReg
#007
Joined: June 09, 2009
KitMaker: 8,156 posts
Auto Modeler: 2,953 posts
Posted: Tuesday, September 08, 2020 - 12:58 PM UTC
Quoted Text
testing, testing, 1, 2, 3...
Thanks mate, notification email came through straight away.
While I'm here, nothing major to report. I resprayed the primer over the sanded areas and waiting a day or so for it to cure before I fine wet sand and then it's Colour Time!
Cheers, D
AussieReg
#007
Joined: June 09, 2009
KitMaker: 8,156 posts
Auto Modeler: 2,953 posts
Posted: Friday, September 11, 2020 - 01:14 AM UTC
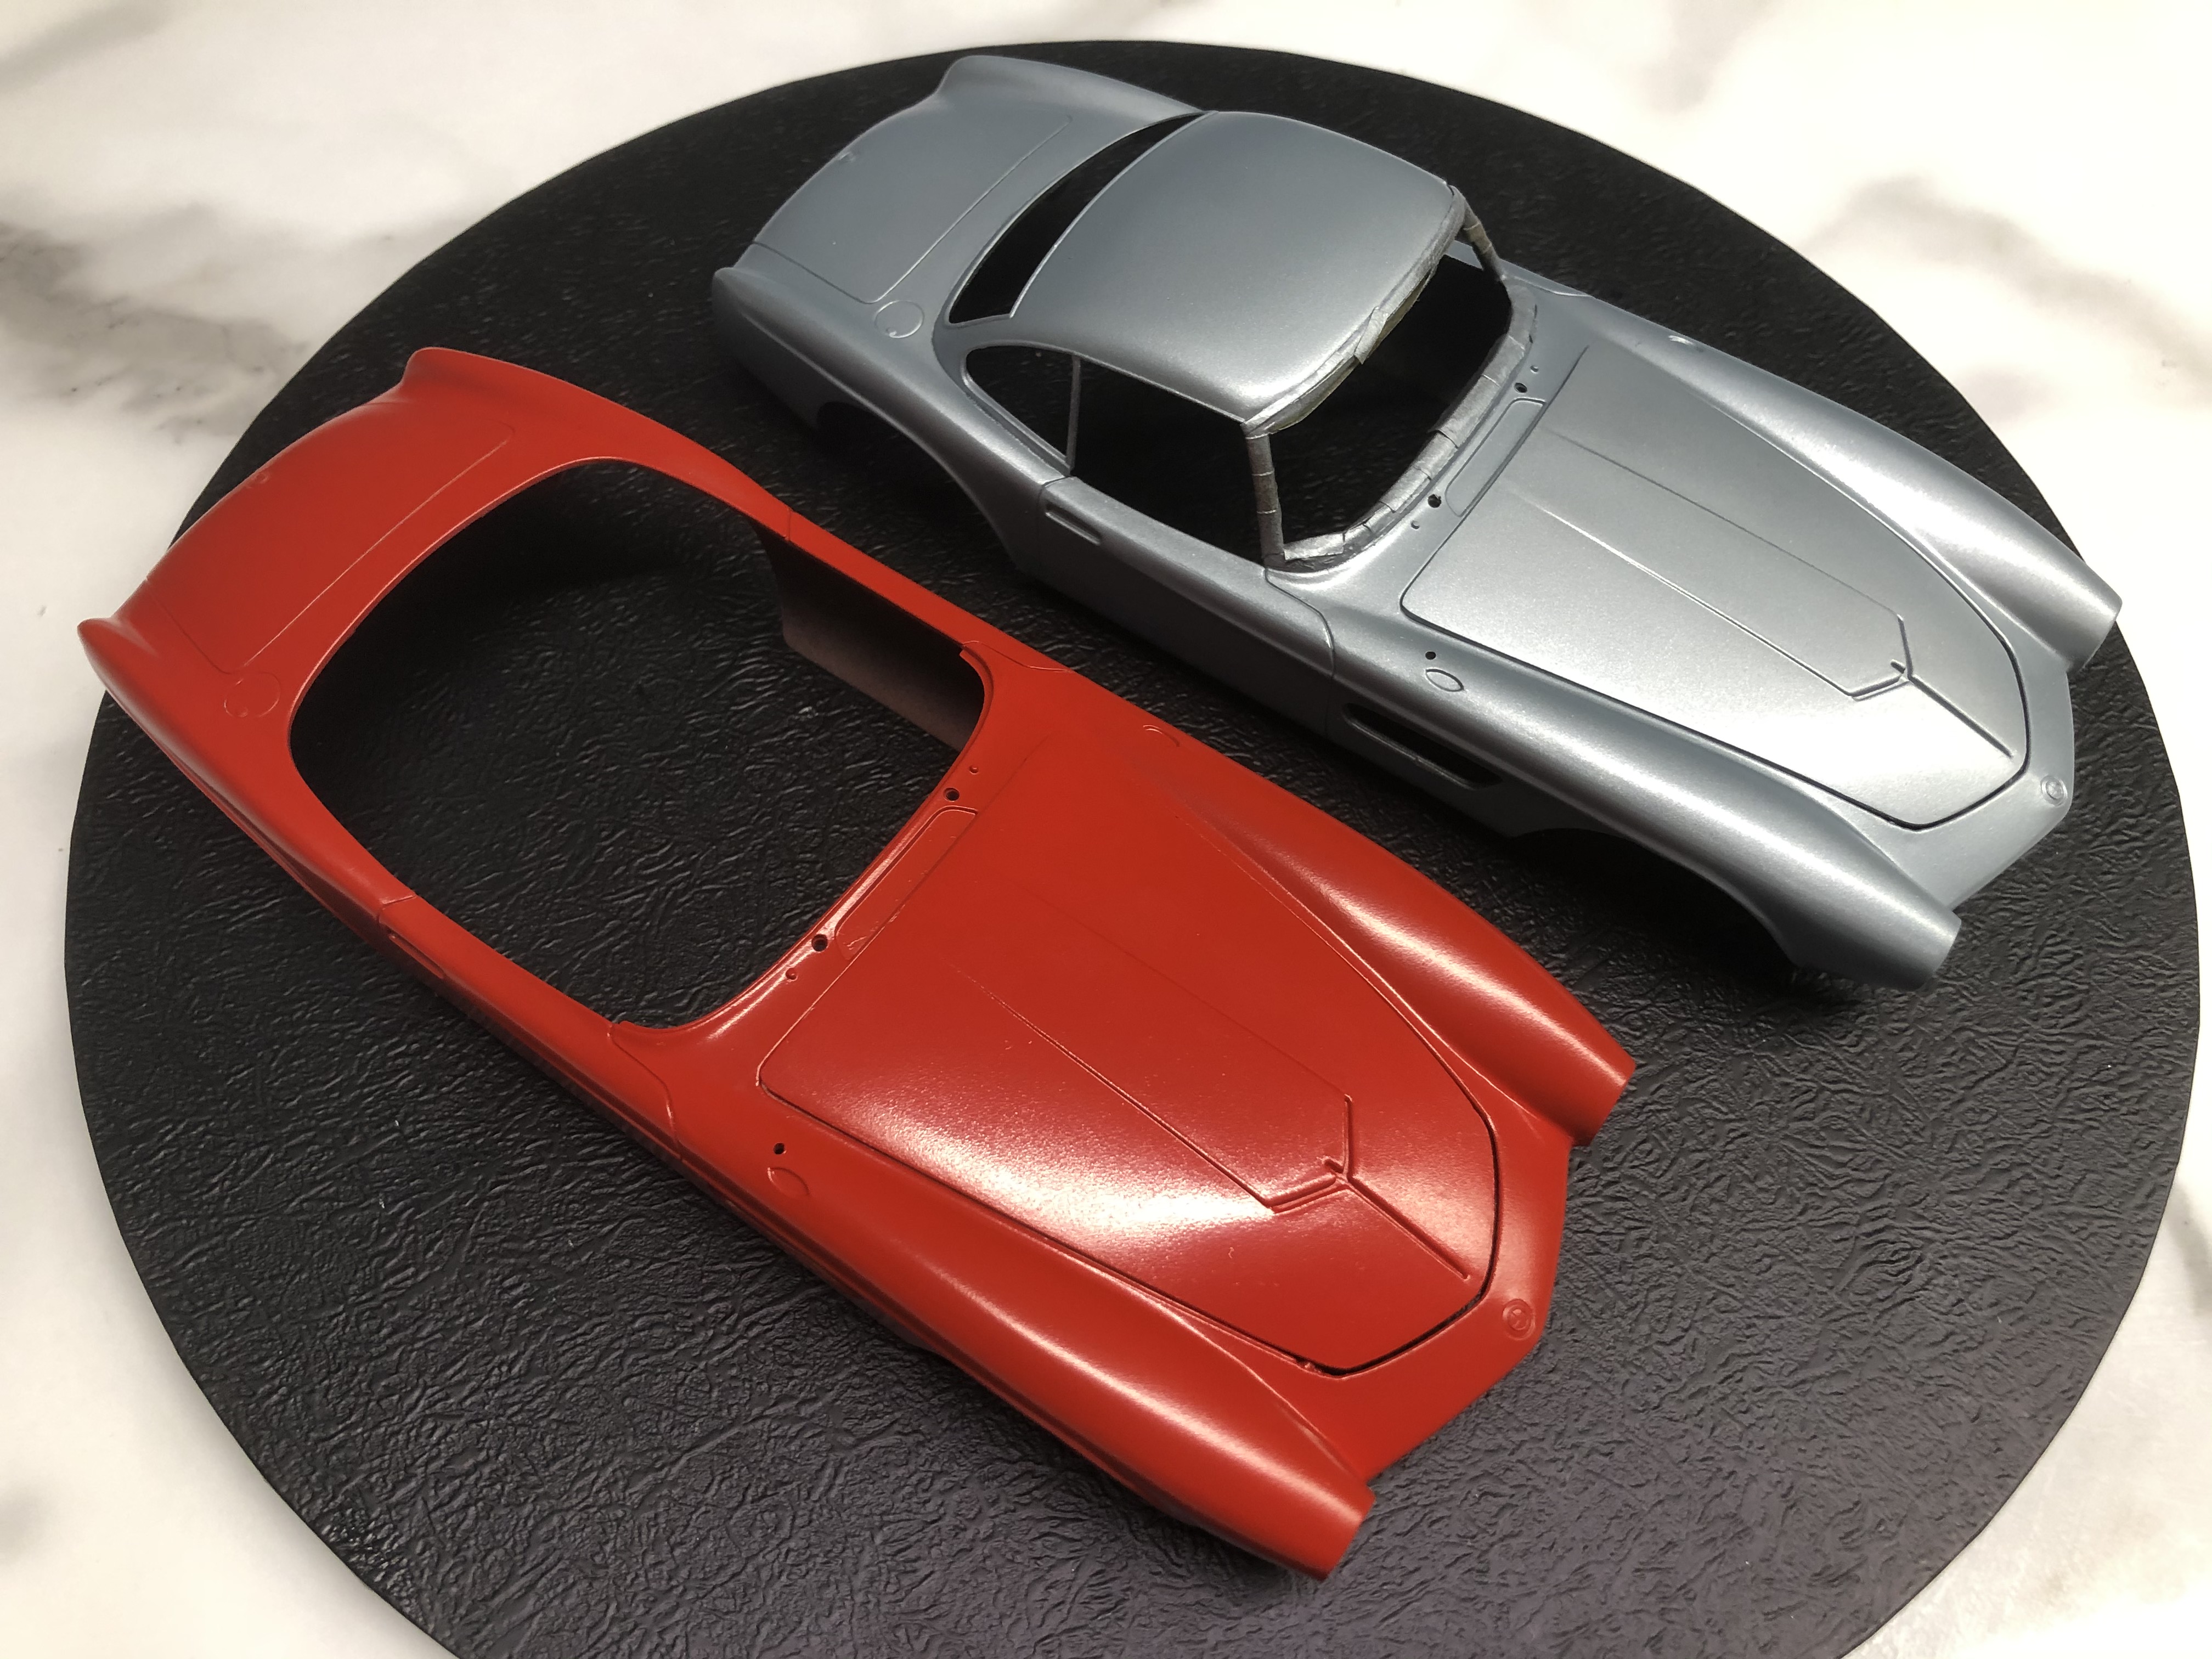
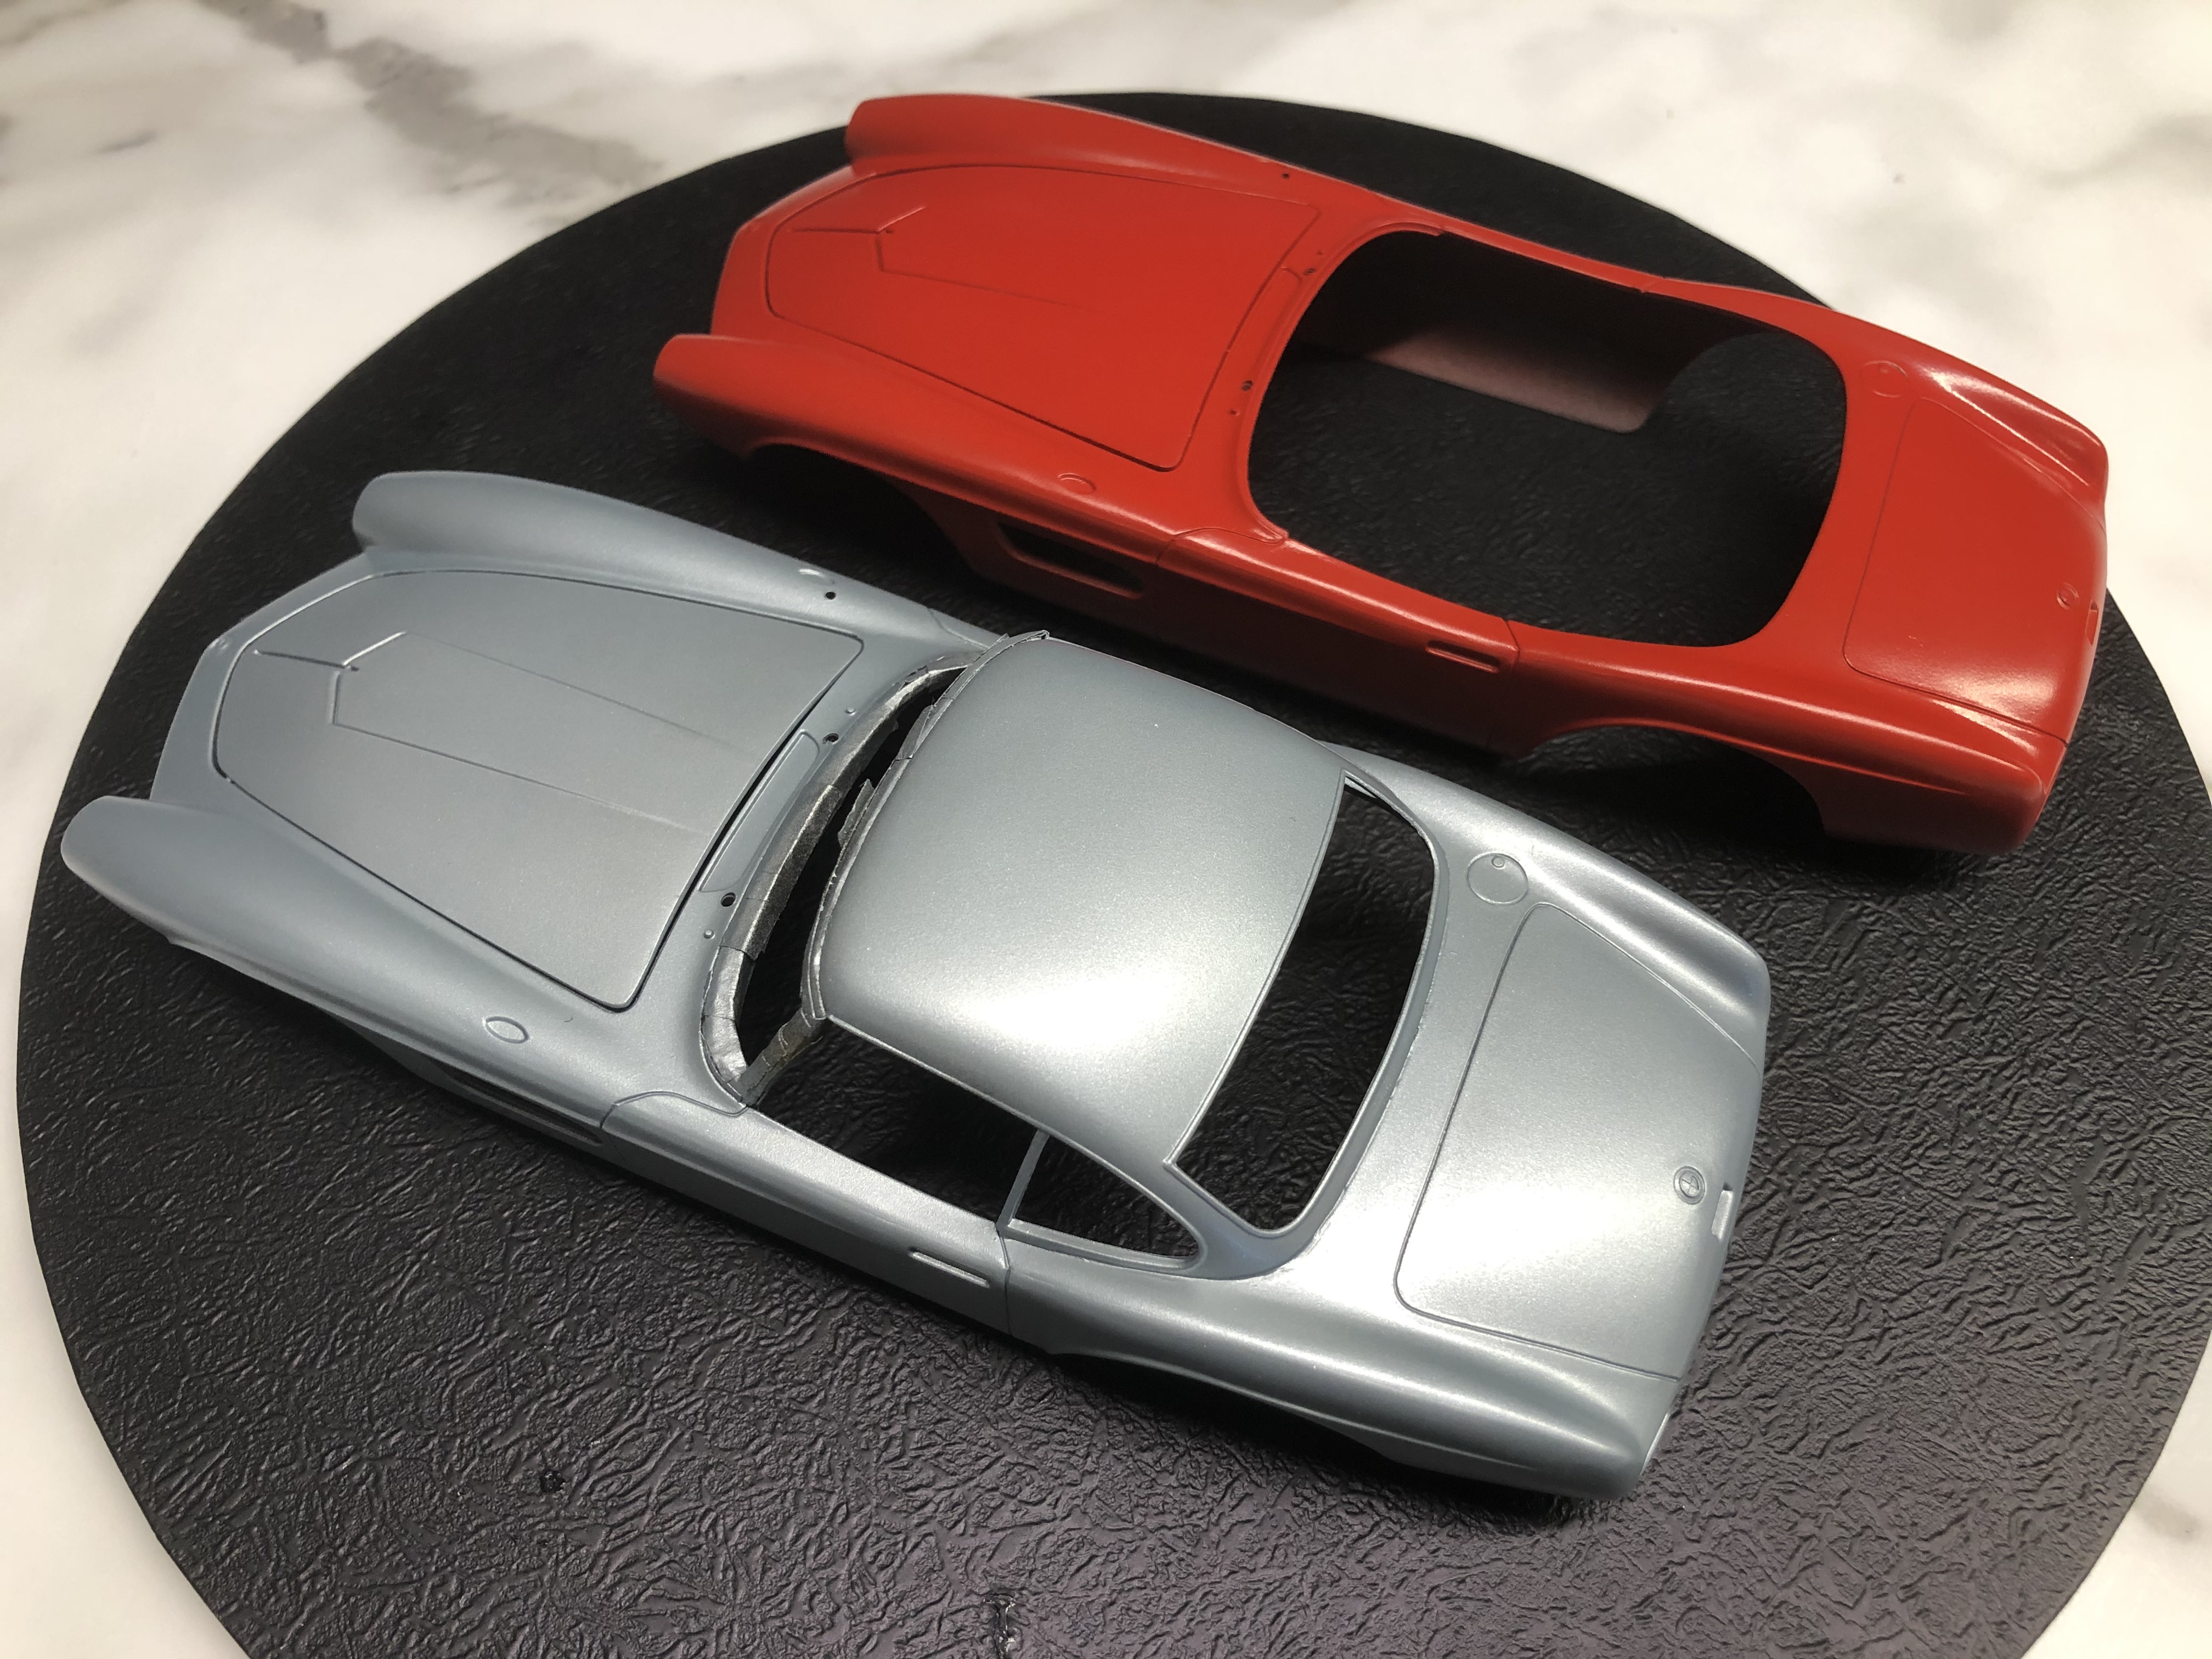
Colour time as promised.
SMS Premium Red on the Cabrio, and the custom mix of SMS Silver/Aggressor Blue (75/25) on the Coupe.
Cheers, D
SMS Premium Red on the Cabrio, and the custom mix of SMS Silver/Aggressor Blue (75/25) on the Coupe.
Cheers, D
 |

WEB HOSTING BY


Copyright ©2021 Auto Modeler and Kitmaker Network, a subsidiary of Silver Star Enterprises
All Rights Reserved. Please read our Conditions of Use and Privacy Policy.
All Rights Reserved. Please read our Conditions of Use and Privacy Policy.