The Garage
For general automotive modeling or non-modeling topics.
Dreams Are Free Official Group Build Thread
Joel_W
Staff MemberAssociate Editor
AUTOMODELER
_VISITCOMMUNITY
New York, United States
Joined: December 04, 2010
KitMaker: 11,666 posts
Auto Modeler: 2,974 posts
Posted: Tuesday, October 13, 2020 - 05:41 AM UTC
I finished the basic body shell with my usual wet rub with just 8,000 then 12,000 emery cloth. Then the Gravity trio of polishes, followed by the Gravity liquid wax. I've gotta say that this time I'm more then happy with the final results. No orange peel, the metallic Ford Guardsman Blue has just the right amount of metallic shine, and the Mr. Color Clear Gloss Lacquer laid down perfectly.

You'll also notice that I added from my spare decals two blank white number circles. At every time trial and solo event I entered with my MGB, side panel numbers were required. My usual racing number was a Black 53, but sometimes I was assigned a different number, hence the empty circles. as the numbers were always applied after registration.

Joel


md72
#439
_VISITCOMMUNITY
Washington, United States
Joined: November 05, 2005
KitMaker: 4,950 posts
Auto Modeler: 555 posts
Posted: Tuesday, October 13, 2020 - 07:16 AM UTC
I hate you Joel! you're half blind, and that body looks like you just spent a couple of hours with the power buffer on painted steel.
My grandkids are quarter midget drivers. Their car numbers are race based, i.e. position number one gets 1, position two gets 2, position ten gets 0. Different numbers for the next race. Some of their buddies are USAC drivers on other tracks. Most of these kids have a number and a letter (usually their first initial) painted on their car.
OK, now for serious questions about mu Ferrari. The engine is a flat 12 with 6 cylinders on each side. On the real car, the 6 spark plug wires leave the header and route to a distributor(?) on the end of the header and don't seem to route to any other part of the engine. On the model, there are 6 pins where the spark plugs ought to be. I can try to cut those flush and drill for wires, but the blob at the end of the header looks way too small for the 6 wires. Any hints for dressing this up to look right. Clearly I need to have red wires, any clues on the size I should be using?
tinbanger
_VISITCOMMUNITY
Ontario, Canada
Joined: February 04, 2008
KitMaker: 2,507 posts
Auto Modeler: 409 posts
Posted: Tuesday, October 13, 2020 - 09:14 AM UTC
Hi all
This will be my hot rod entry:-


This post was removed.
tinbanger
_VISITCOMMUNITY
Ontario, Canada
Joined: February 04, 2008
KitMaker: 2,507 posts
Auto Modeler: 409 posts
Posted: Tuesday, October 13, 2020 - 09:18 AM UTC
Great build Joel!
Joel_W
Staff MemberAssociate Editor
AUTOMODELER
_VISITCOMMUNITY
New York, United States
Joined: December 04, 2010
KitMaker: 11,666 posts
Auto Modeler: 2,974 posts
Posted: Tuesday, October 13, 2020 - 09:20 AM UTC
Mark,
Believe me the finish was just a lucky break. Last paint and finish job if you remember was only so so.

Interesting how they assign numbers for the various jr classes. I always picked 53 as I figured that no one would ever want a number that high. Besides, it was my football number in school. Didn't wear my jersey much as I somehow always got injured.

As far as the ignition wiring on a Ferrari Testarosa, I had to google a picture to be sure. In the picture below there's the 6 led plug wires on each side that feed directly into a separate distributor for each bank. The 7th wire goes to the ignition coil where ever that may be.

Hope that this helps some.


Joel
Removed by original poster on 10/13/20 - 21:31:08 (GMT).
tinbanger
_VISITCOMMUNITY
Ontario, Canada
Joined: February 04, 2008
KitMaker: 2,507 posts
Auto Modeler: 409 posts
Posted: Tuesday, October 13, 2020 - 09:34 AM UTC
One more try!


AussieReg
Staff MemberAssociate Editor
AUTOMODELER
#007
_VISITCOMMUNITY
Victoria, Australia
Joined: June 09, 2009
KitMaker: 8,156 posts
Auto Modeler: 2,953 posts
Posted: Tuesday, October 13, 2020 - 09:45 AM UTC

Quoted Text

I hate you Joel! you're half blind, and that body looks like you just spent a couple of hours with the power buffer on painted steel.


You got that right Mark! That finish looks wonderful Joel, great work!


Quoted Text

I can try to cut those flush and drill for wires, but the blob at the end of the header looks way too small for the 6 wires. Any hints for dressing this up to look right. Clearly I need to have red wires, any clues on the size I should be using?


Carve off the "blob" that represents the distributor and replace it with a short length of tube or a piece of sprue drilled out to fit the wires. In real life the distributor is obviously larger than the diameter of the 6 wires together and from what I see most kits undersize it. I use the following table as a sizing guide for wiring and tubing, hope it helps.


Cheers, D
Joel_W
Staff MemberAssociate Editor
AUTOMODELER
_VISITCOMMUNITY
New York, United States
Joined: December 04, 2010
KitMaker: 11,666 posts
Auto Modeler: 2,974 posts
Posted: Tuesday, October 13, 2020 - 10:15 AM UTC
Richard,
I fixed those links. Do you want me to remove any of the duplicate posts?

And btw, I'm looking forward to following your hot rod build. That Delivery truck should make for one great Hot Rod for sure.

Joel
Joel_W
Staff MemberAssociate Editor
AUTOMODELER
_VISITCOMMUNITY
New York, United States
Joined: December 04, 2010
KitMaker: 11,666 posts
Auto Modeler: 2,974 posts
Posted: Tuesday, October 13, 2020 - 10:17 AM UTC
D,
Thanks for the thumbs up on the paint job and finish. Sure hope that the rest of the build doesn't go sour on me

Joel
Cosimodo
#335
_VISITCOMMUNITY
Auckland, New Zealand
Joined: September 03, 2013
KitMaker: 1,808 posts
Auto Modeler: 701 posts
Posted: Tuesday, October 13, 2020 - 11:31 AM UTC
Joel, the Cobra looks great. Very smooth paint job. And I like the blank circles. Makes it look more like the car you'd have in your garage.

Richard, also looking forward to seeing this built. Same sort of vintage as the bus I want to build.

cheers
Michael
md72
#439
_VISITCOMMUNITY
Washington, United States
Joined: November 05, 2005
KitMaker: 4,950 posts
Auto Modeler: 555 posts
Posted: Tuesday, October 13, 2020 - 12:07 PM UTC
Here's a free standing view of the engine. I seriously doubt I'll manage to wire it that nicely.
Testarosa engine
tinbanger
_VISITCOMMUNITY
Ontario, Canada
Joined: February 04, 2008
KitMaker: 2,507 posts
Auto Modeler: 409 posts
Posted: Tuesday, October 13, 2020 - 01:11 PM UTC

Quoted Text

Richard,
I fixed those links. Do you want me to remove any of the duplicate posts?

And btw, I'm looking forward to following your hot rod build. That Delivery truck should make for one great Hot Rod for sure.

Joel


Hi Joel
Please remove the duplicate posts.
I think that I have it figured out now.
AussieReg
Staff MemberAssociate Editor
AUTOMODELER
#007
_VISITCOMMUNITY
Victoria, Australia
Joined: June 09, 2009
KitMaker: 8,156 posts
Auto Modeler: 2,953 posts
Posted: Tuesday, October 13, 2020 - 02:57 PM UTC
The joys of detailing the interior, an hour of masking for about 3 minutes of airbrushing, then tear it all off again!


Cheers, D
AussieReg
Staff MemberAssociate Editor
AUTOMODELER
#007
_VISITCOMMUNITY
Victoria, Australia
Joined: June 09, 2009
KitMaker: 8,156 posts
Auto Modeler: 2,953 posts
Posted: Wednesday, October 14, 2020 - 01:02 AM UTC
Some hand painting tonight, I did the chrome trim around the access door with Vallejo Metal Colour Chrome, then a touch of Tamiya Black PLW (which will get a second shot for depth).


I painted the door handles with the same Chrome (they are just lightly moulded on the door panels), and the floor mats and pedals with Tamiya Black Enamel.


I'm not happy with the armrest being just a painted shape, so I will carve some sprue into shape and paint it up then CA it in place. I can build up the profile of the handles with another drop of Chrome paint and they will look fine once the kit is assembled.

Cheers, D
Joel_W
Staff MemberAssociate Editor
AUTOMODELER
_VISITCOMMUNITY
New York, United States
Joined: December 04, 2010
KitMaker: 11,666 posts
Auto Modeler: 2,974 posts
Posted: Wednesday, October 14, 2020 - 01:19 AM UTC
Michael,
Thanks for checking out the Cobra paint job. Thrilled that you liked what you saw.

My parents weren't exactly thrilled with those white number circles on my Red MGB which was also my road car, so Dad issued another parental edict: Those circles came off when I wasn't heading off to a time trail or solo event over the weekend. Needless to say, I spent a near fortune on circles and numbers back in the day.

Joel
md72
#439
_VISITCOMMUNITY
Washington, United States
Joined: November 05, 2005
KitMaker: 4,950 posts
Auto Modeler: 555 posts
Posted: Thursday, October 15, 2020 - 05:31 PM UTC
Much better night at the spray booth. Got my Patriot 105 AB tuned up and blew some Alclad primer through it on the Ferrari. Much better than the rattle can the other night.
AussieReg
Staff MemberAssociate Editor
AUTOMODELER
#007
_VISITCOMMUNITY
Victoria, Australia
Joined: June 09, 2009
KitMaker: 8,156 posts
Auto Modeler: 2,953 posts
Posted: Thursday, October 15, 2020 - 11:53 PM UTC
Playing around with colours for the Nomad, it's difficult to capture the true look as the pearl paint changes so much in different light!

1. Jet Black, Pearl Strawberry Red, Super Clear
2. Jet Black, Pearl Strawberry Red, Clear Red
3. Jet Black, Pearl Strawberry Red, Clear Red, Clear Black
Leaning towards #2 at the moment, #1 is a bit too Pink and #3 too dark for what I want on this build.


Close up under an incandescent globe.


Outside under soft natural light.


Cheers, D
Joel_W
Staff MemberAssociate Editor
AUTOMODELER
_VISITCOMMUNITY
New York, United States
Joined: December 04, 2010
KitMaker: 11,666 posts
Auto Modeler: 2,974 posts
Posted: Friday, October 16, 2020 - 01:03 AM UTC
D,
To make the decision even harder on which color to vote for, everyone's monitor/Graphics card/Drivers are different. And unless the Monitor system is color corrected/calibrated, there's a really good chance that we're not seeing what you're seeing.

With that being said (my monitor is indeed color calibrated), I really like in pic#1 spoon 3, in pic#2 spoon 2, and in pic#3 spoon 2.

Joel
Joel_W
Staff MemberAssociate Editor
AUTOMODELER
_VISITCOMMUNITY
New York, United States
Joined: December 04, 2010
KitMaker: 11,666 posts
Auto Modeler: 2,974 posts
Posted: Friday, October 16, 2020 - 01:08 AM UTC
Mark,
Looking forward to seeing your Ferrari in Alcad primer.

Joel
md72
#439
_VISITCOMMUNITY
Washington, United States
Joined: November 05, 2005
KitMaker: 4,950 posts
Auto Modeler: 555 posts
Posted: Friday, October 16, 2020 - 12:52 PM UTC
Nothing terribly spectacular, just yellow plastic with a white coating.

Oh and I have to sand out a spot where the roof touched something before it was dray.
I didn't some of the grills as covered as I wanted but I was afraid of filling them in if painted them any more.

D What is the context for your Nomad? I thinking that the clear over red looks kinda like a 50's showroom finish. The clear red over red looks like a 60-80's restoration and the clear black over red is a modern restoration.
AussieReg
Staff MemberAssociate Editor
AUTOMODELER
#007
_VISITCOMMUNITY
Victoria, Australia
Joined: June 09, 2009
KitMaker: 8,156 posts
Auto Modeler: 2,953 posts
Posted: Friday, October 16, 2020 - 02:44 PM UTC
Nice solid cover there Mark, good work!


Quoted Text

D What is the context for your Nomad? I thinking that the clear over red looks kinda like a 50's showroom finish. The clear red over red looks like a 60-80's restoration and the clear black over red is a modern restoration.


Modern(ish) restoration, slight custom, I'm pretty set of #2 for this one, and maybe #3 for the next '57 I build!

Cheers, D
Removed by original poster on 10/19/20 - 12:36:12 (GMT).
Joel_W
Staff MemberAssociate Editor
AUTOMODELER
_VISITCOMMUNITY
New York, United States
Joined: December 04, 2010
KitMaker: 11,666 posts
Auto Modeler: 2,974 posts
Posted: Monday, October 19, 2020 - 04:30 AM UTC
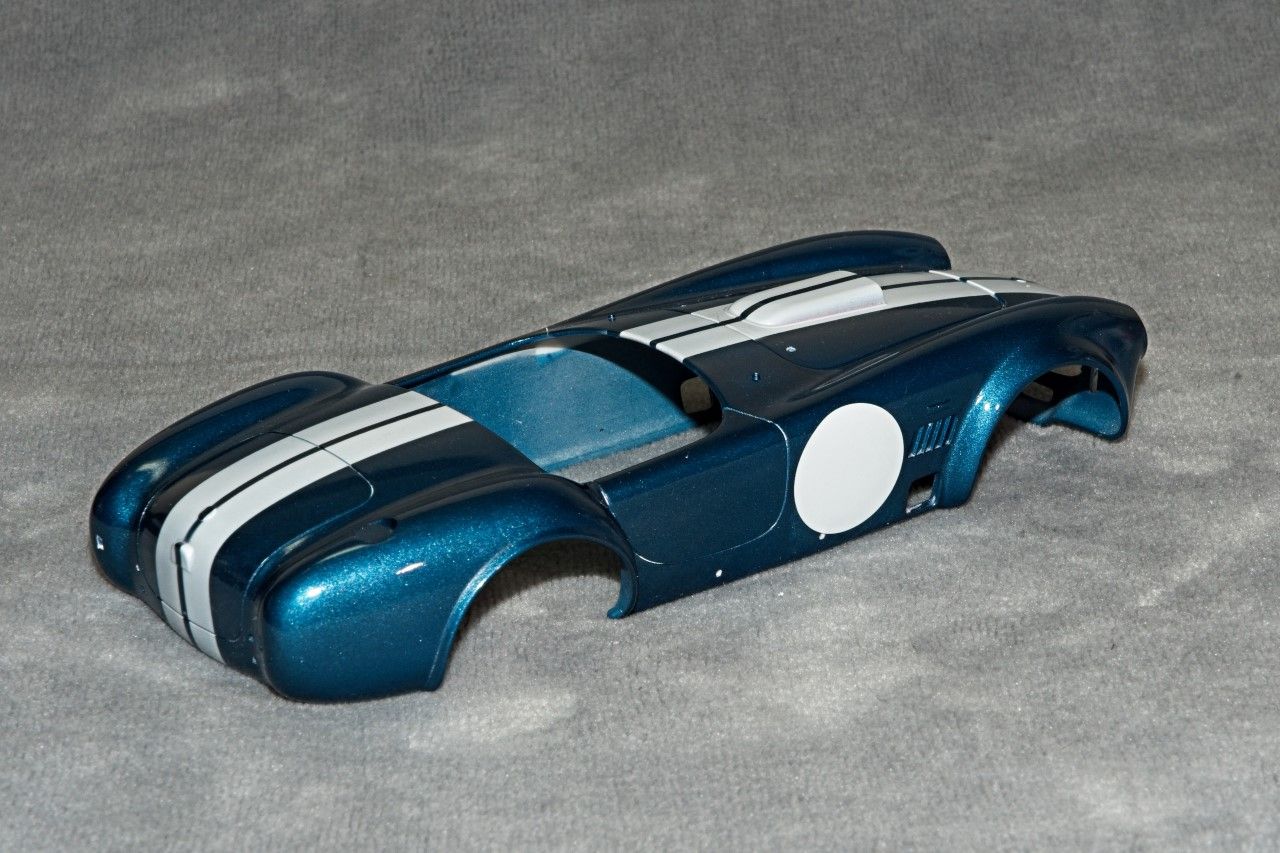
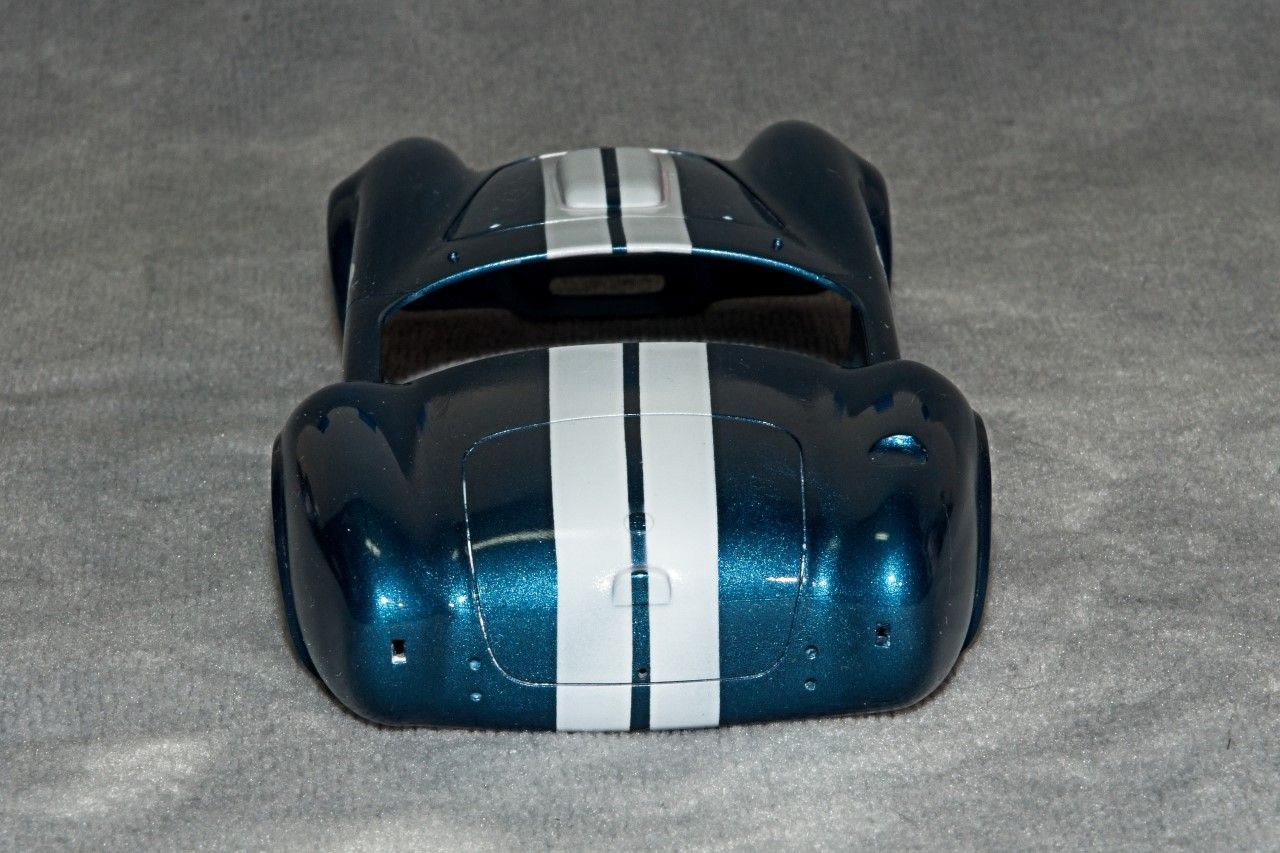
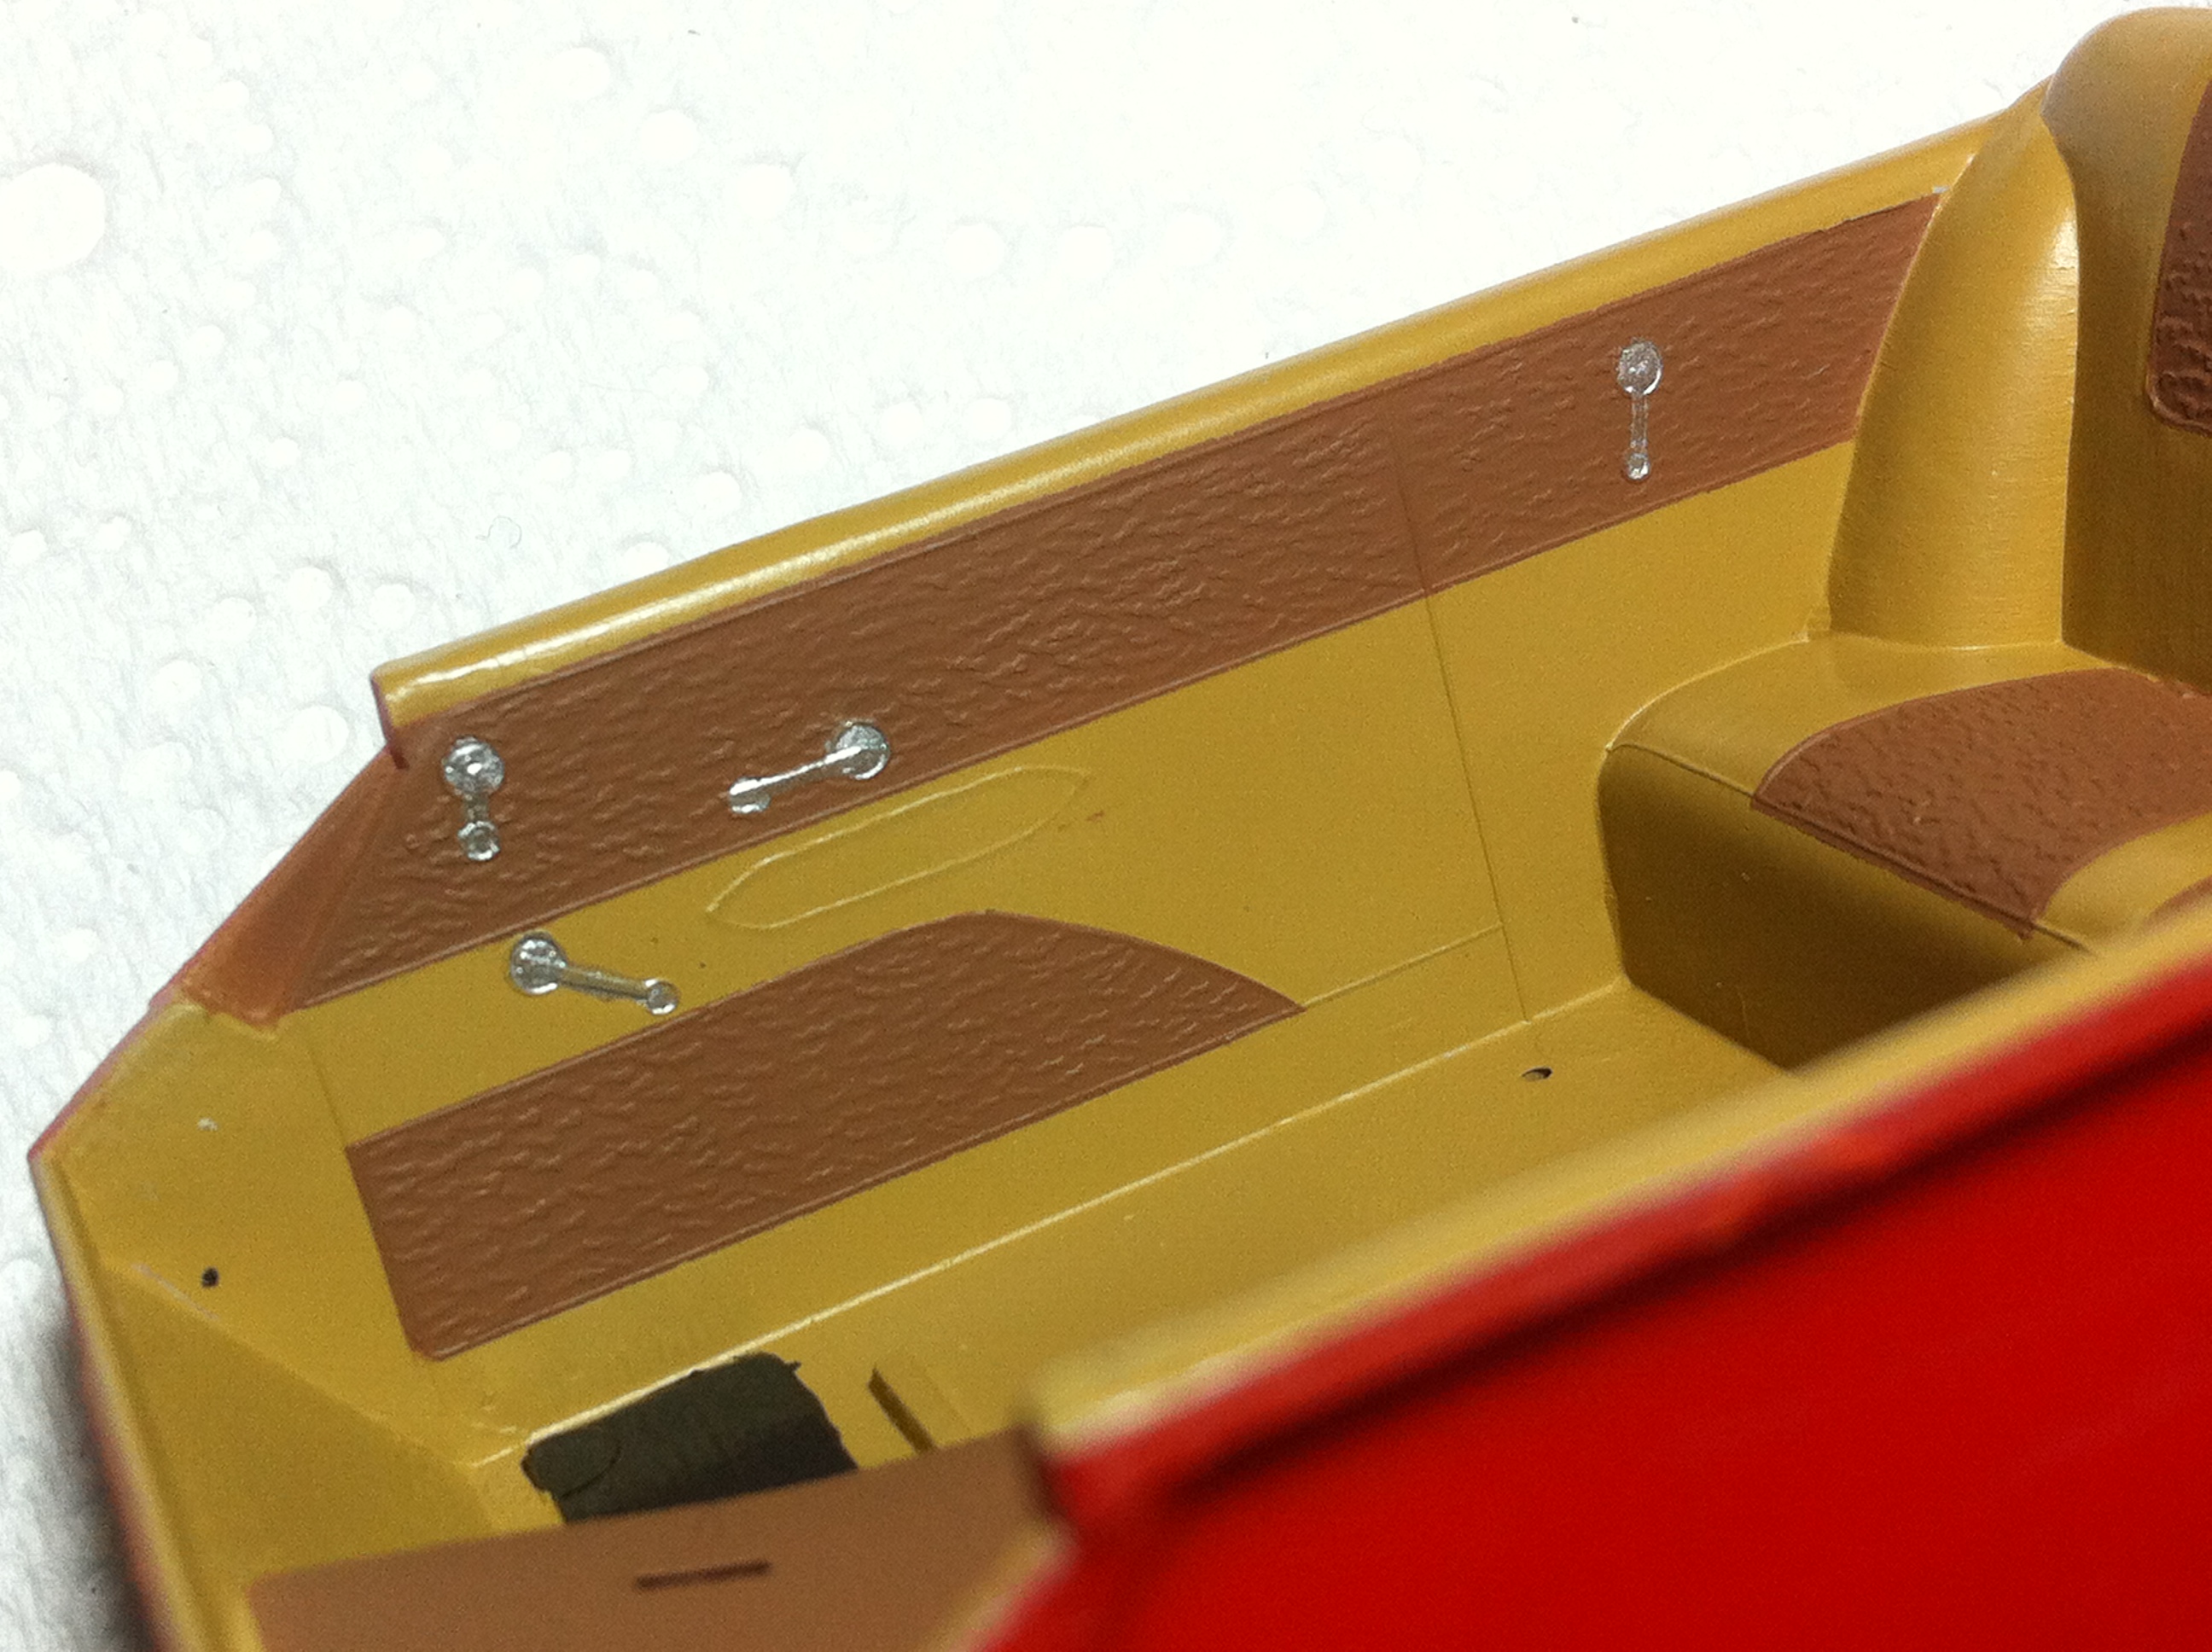
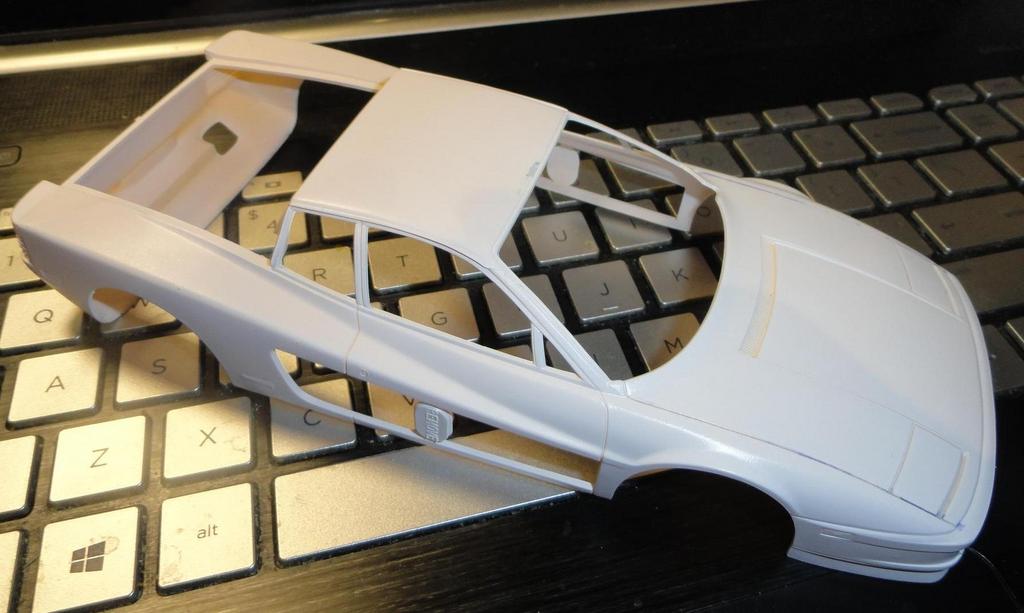
With the basic body shell completed, I next turned my attention to the chassis and the front & rear suspension sub assemblies. I must say that I was rather impressed with the detail of the complex suspensions, as both really looked more then quite good and equal to many of today's kit offerings, especially considering that the kit dates back from 1992.

I started off with the usual cleaning up of all the parts as there's an abundance of seam lines everywhere. Unfortunately, my effort still left a few here and there. Once that job was done, I've started the paint prep with a 15 min bath in Polident & room temp tap water. The parts not only come out spanking clean, but have a rather nice fresh scent to them.

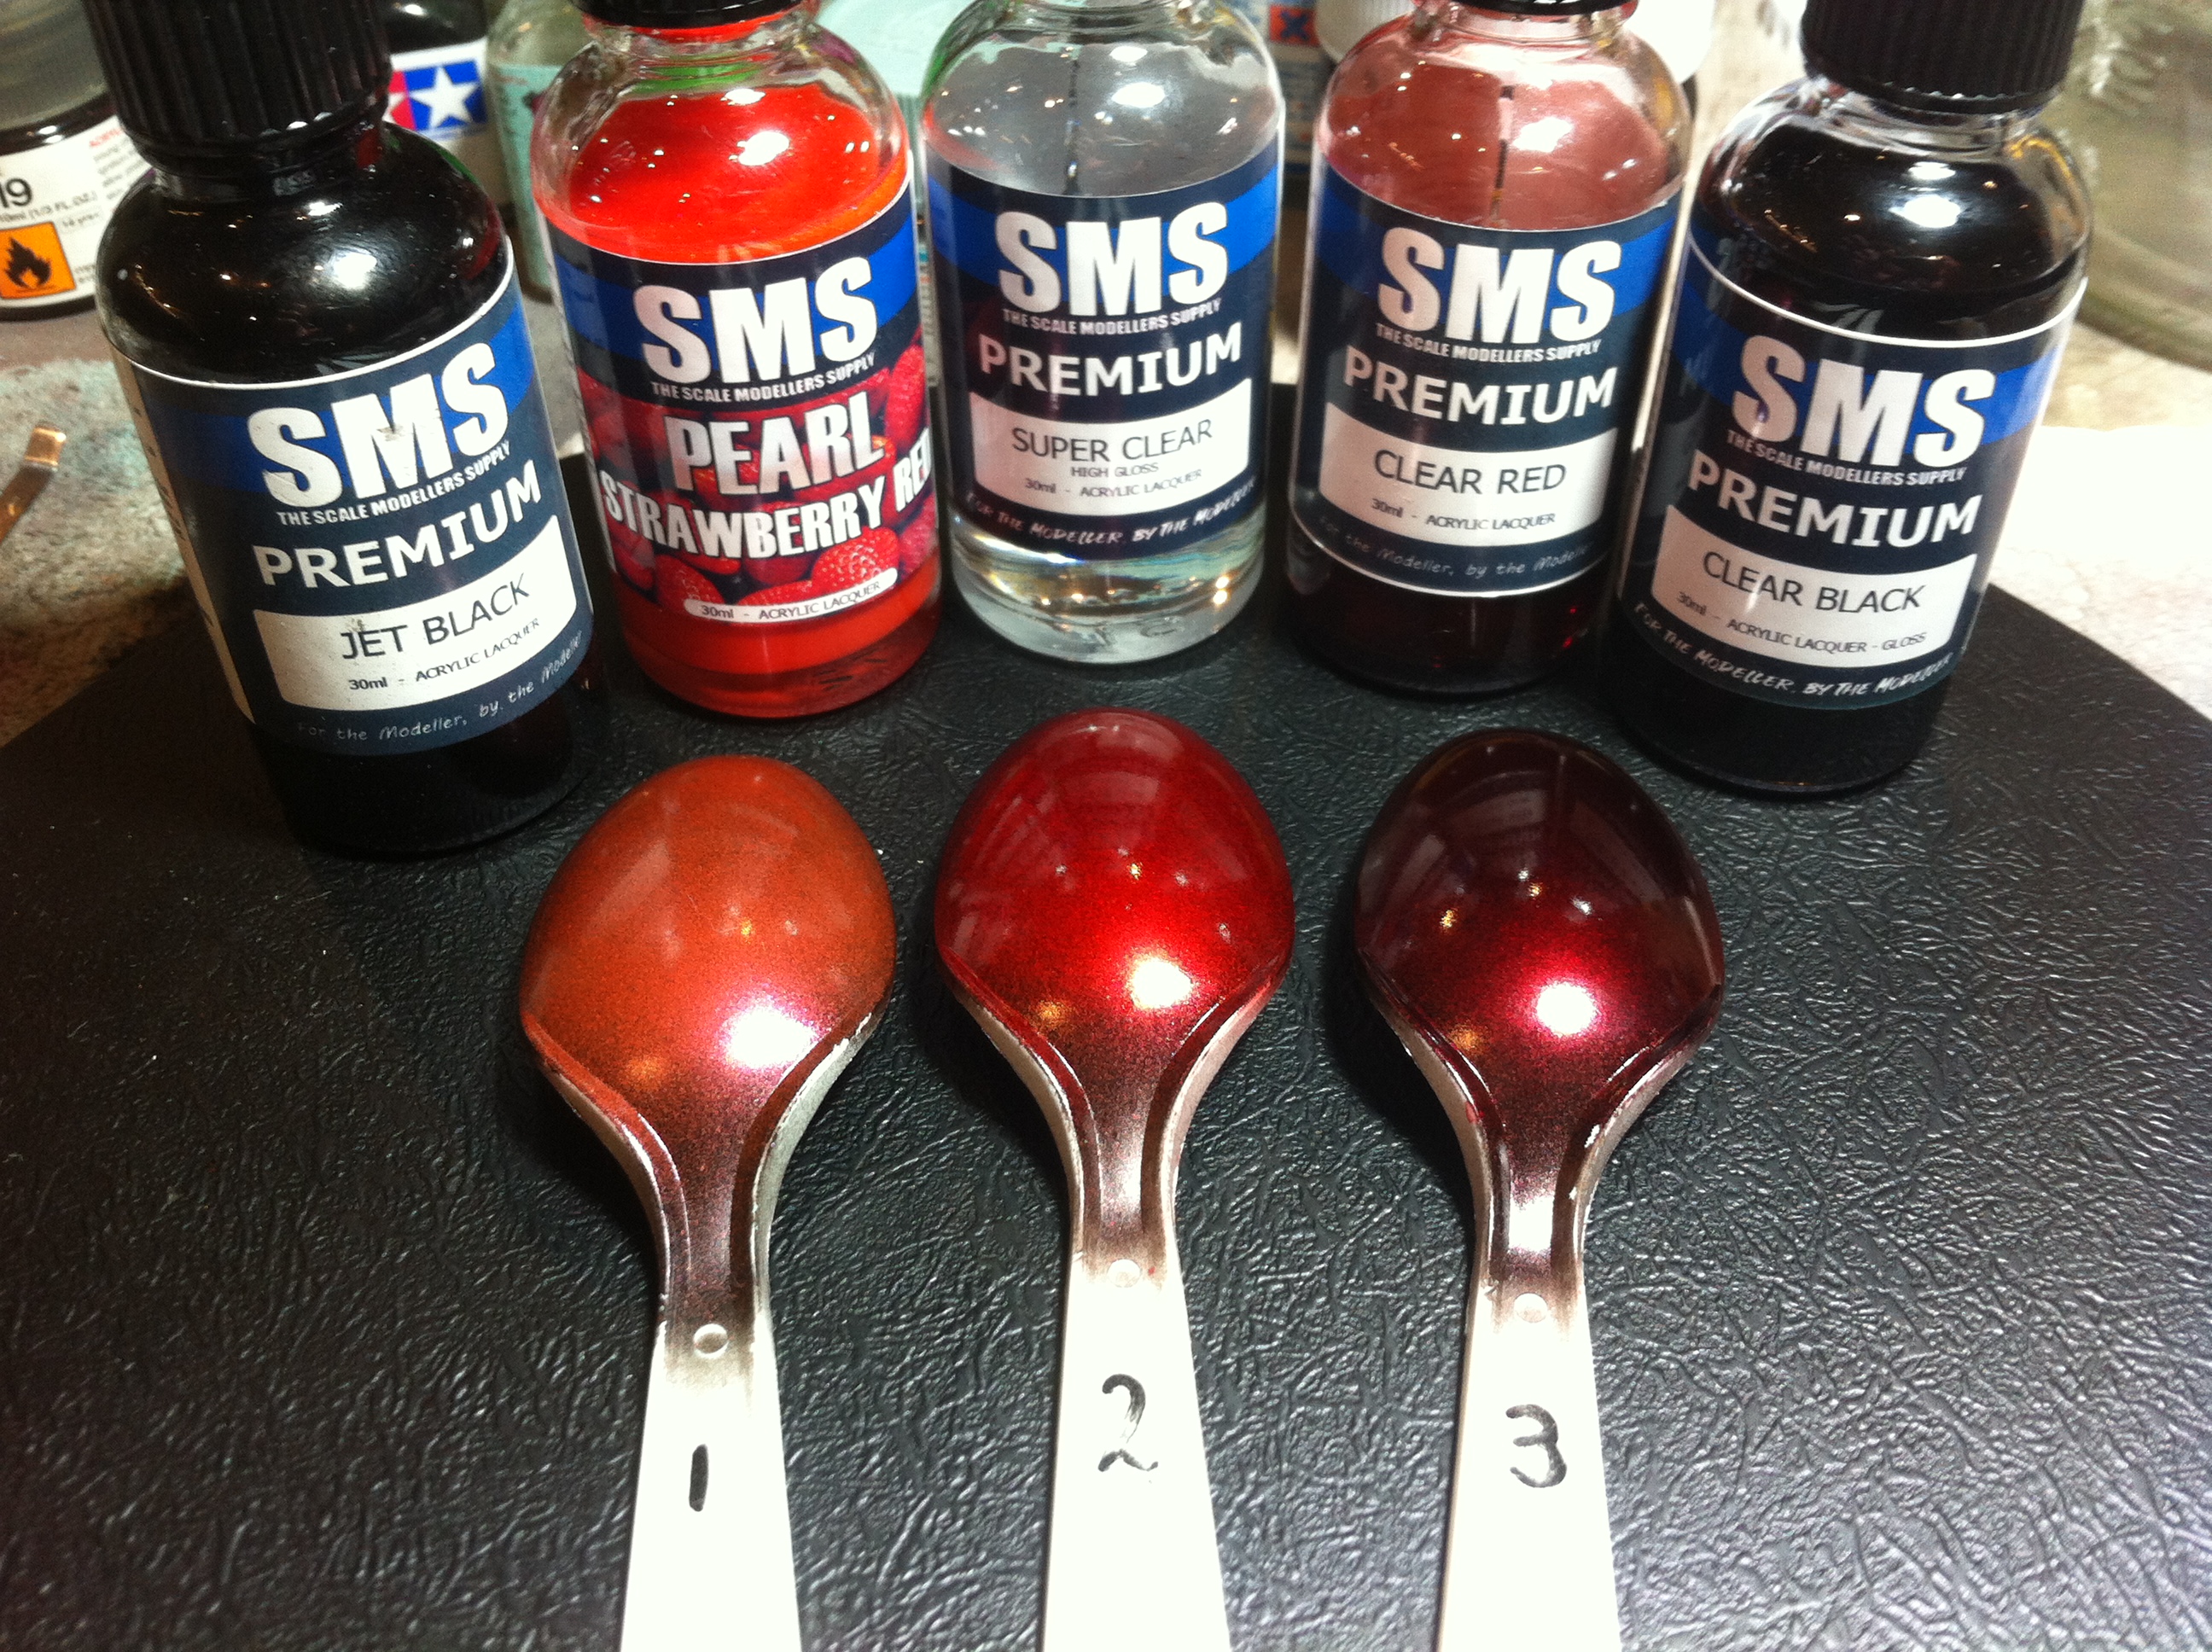
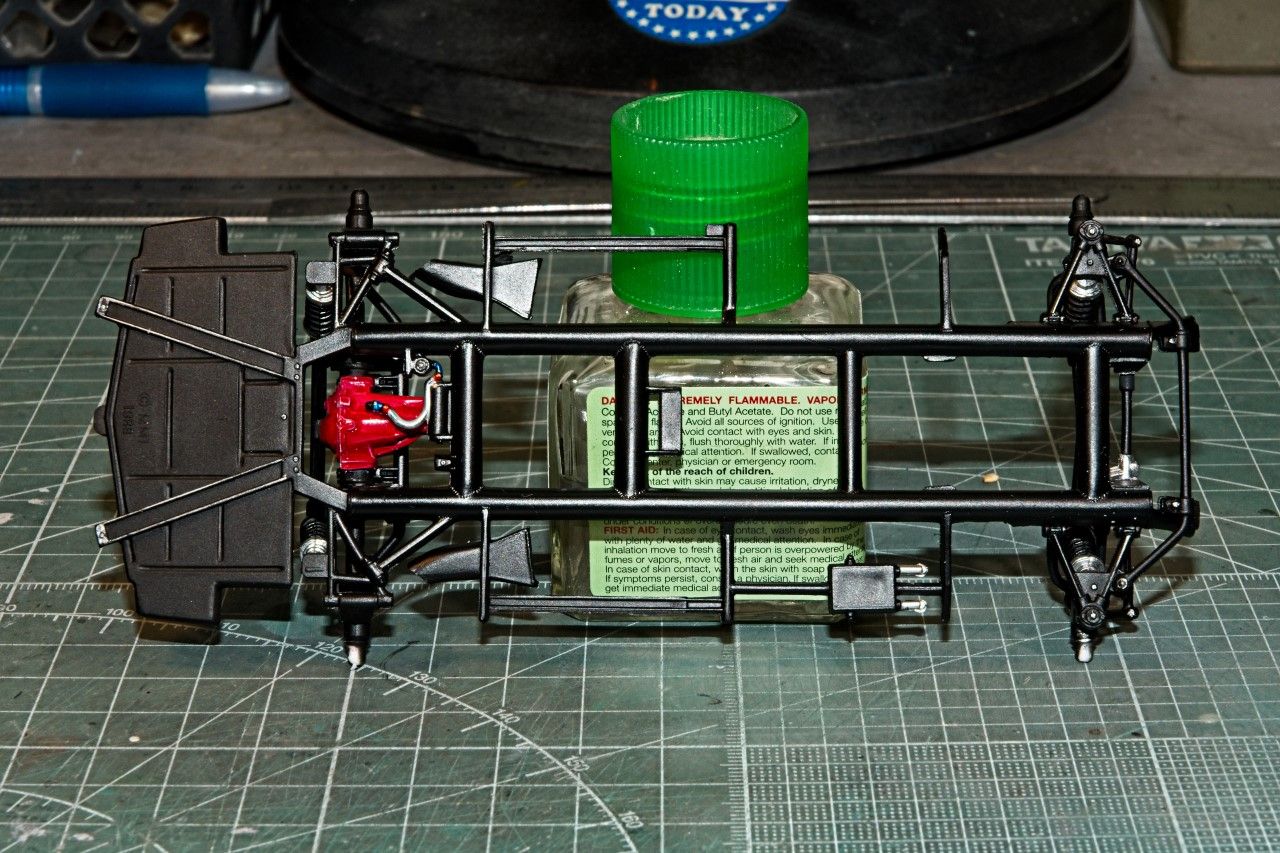
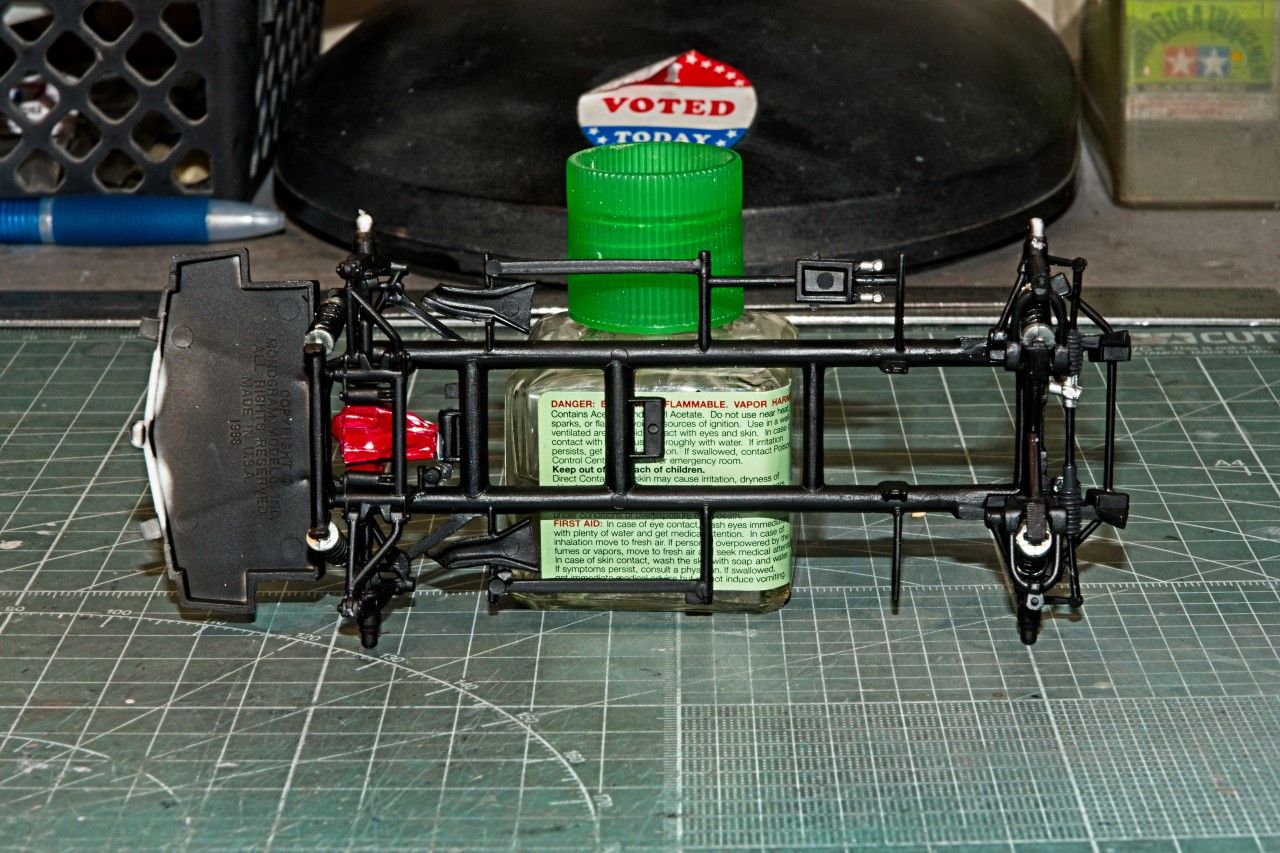
I'm still in the camp of priming every
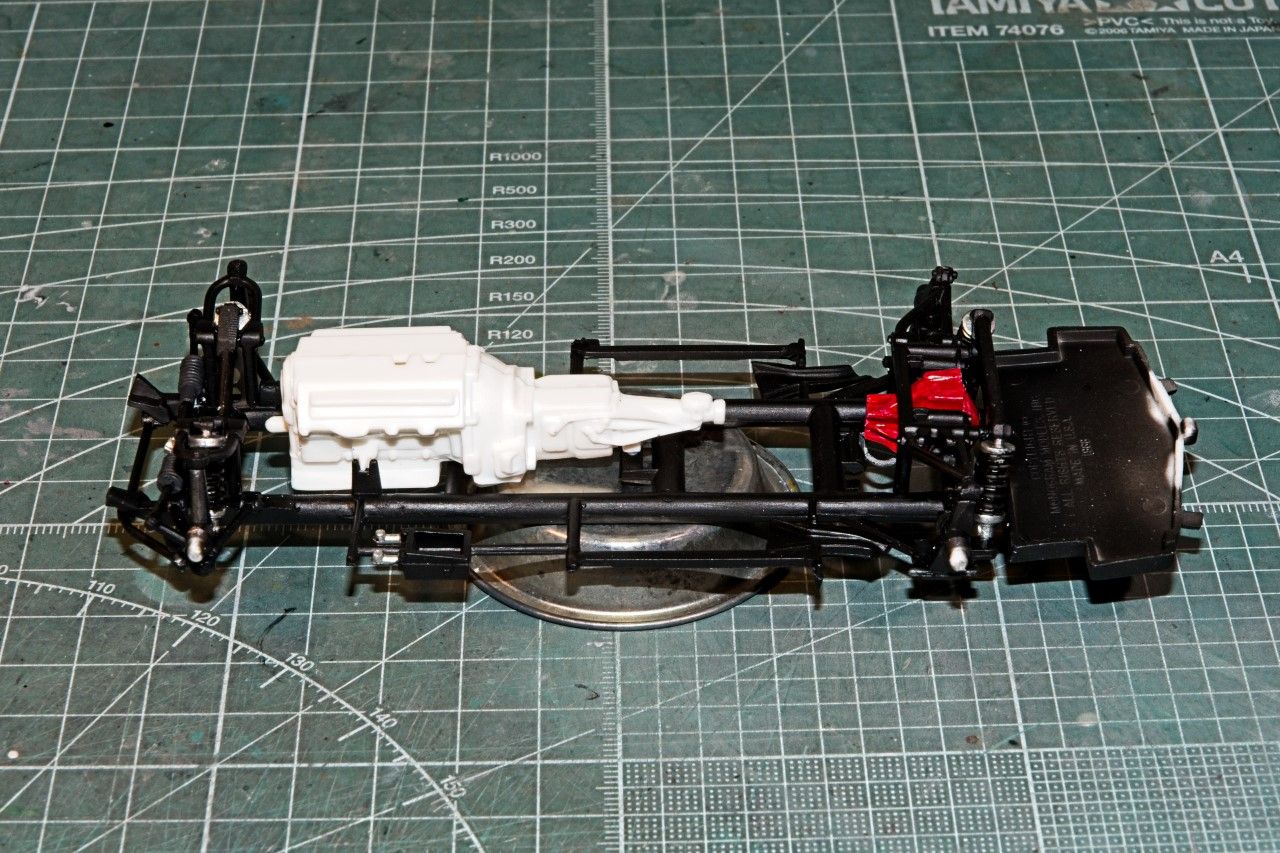
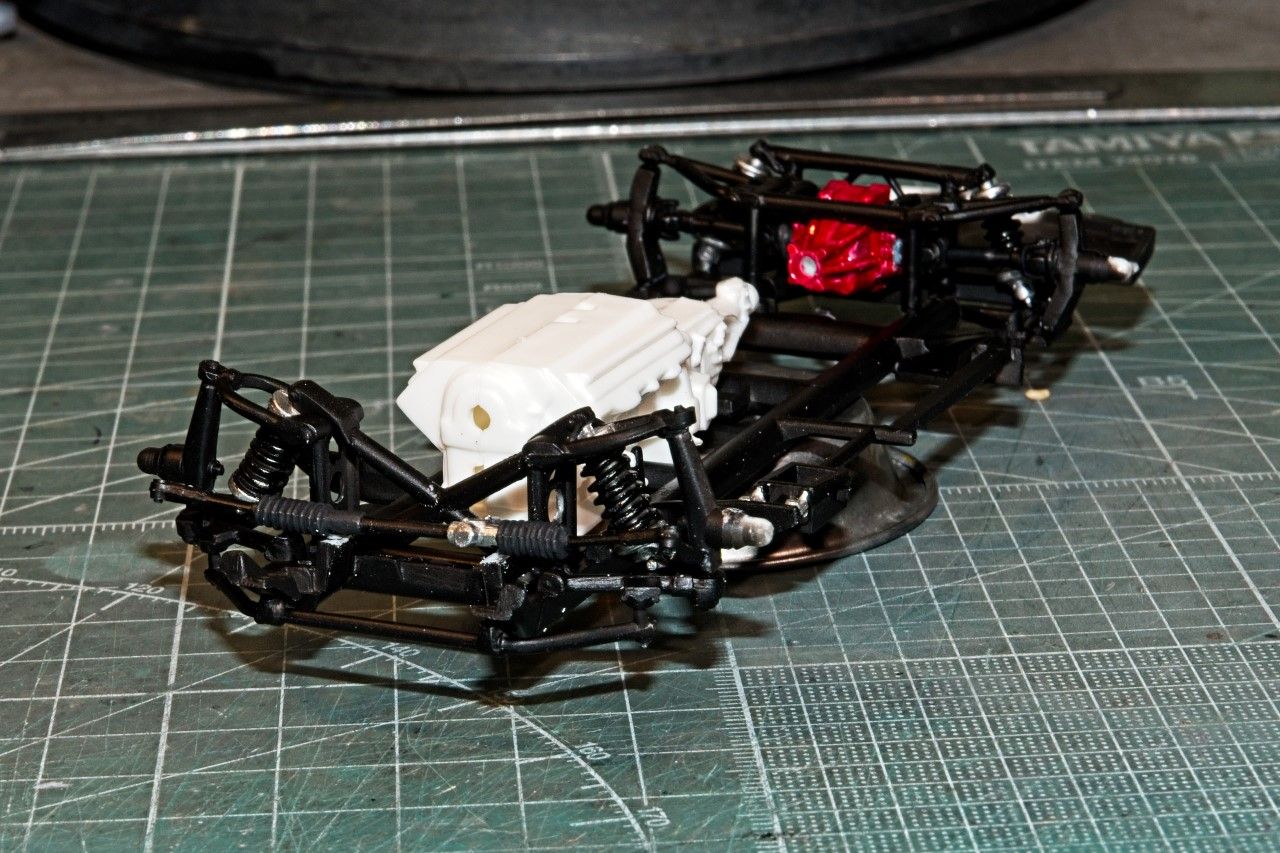
thing no matter what, so I used the last of my Gunze #1500 gray primer thinned 1:1 with Gunze #400 Mr. Leveler Thinner. I let the parts dry and cure for a few hours then I air brushed on Tamiya Semi Gloss Black, with the upper A arms in Gloss Black, and the rubber boots on the steering rod that connects both front wheel assemblies Tamiya Rubber, which really looks like their plain dark military Gray is you ask me. The following day I masked the cover of the rear end which is part of the rear axle, and then primed it once again as I forgot to mask it off when I painted the axle the day before. Several coats of Tamiya Gloss Red was air brushed on as well as the main body of the rear end gear housing.

The shocks/springs already were air brushed Semi Gloss Black, but the springs should be gloss Black, so I hand painted them as well as the tops and bottoms of the shocks Mig Ammo Polished Steel.


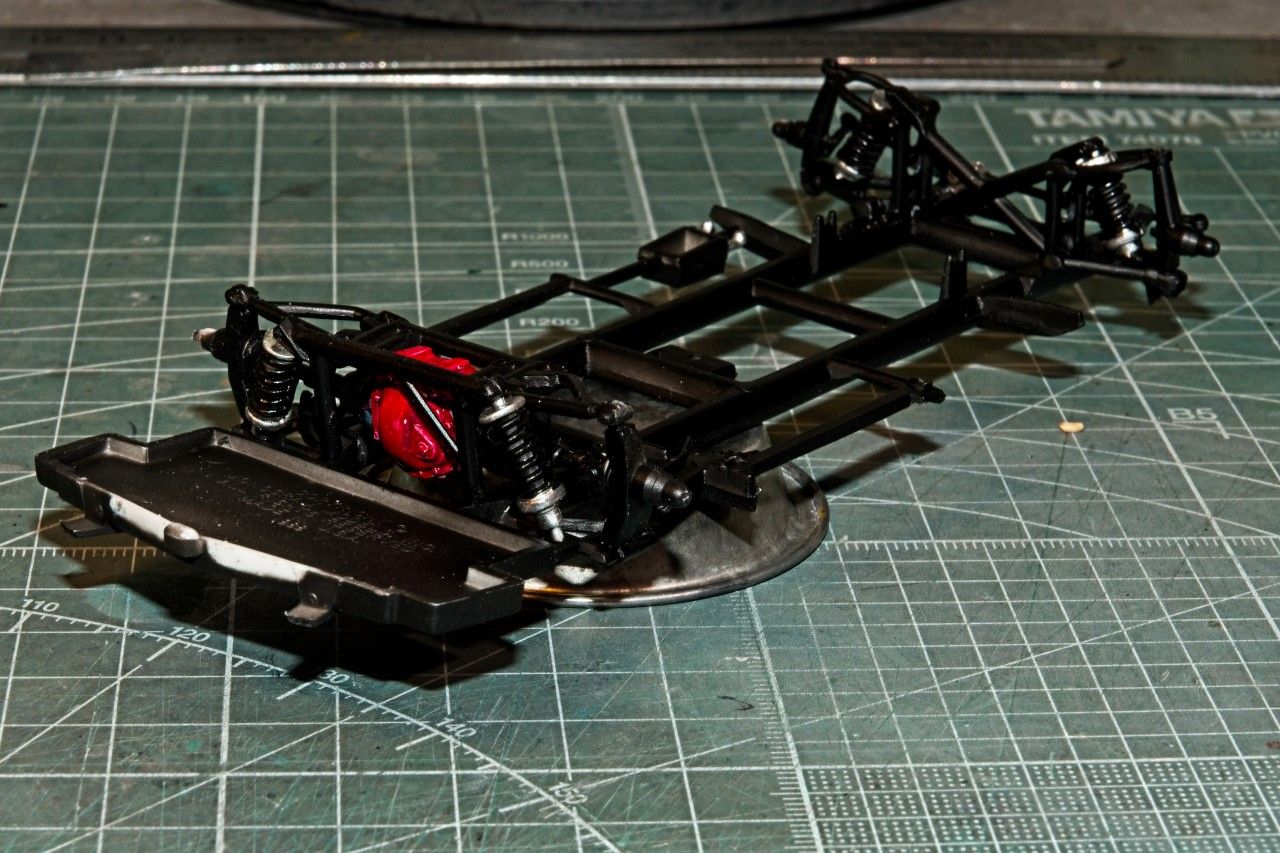
And a quick test fit of the engine/transmission.


Joel