Ohio, United States
Joined: December 13, 2005
KitMaker: 153 posts
Auto Modeler: 47 posts
Posted: Wednesday, January 21, 2009 - 08:01 AM UTC
Currently working on:
RPM Minenraumer
Revell 1940 Ford coupe
Revell 1929 Model A pickup
Amt Batwing
Tamiya T-55
Revell Rat Fink figure
New York, United States
Joined: December 07, 2004
KitMaker: 1,888 posts
Auto Modeler: 806 posts
Posted: Wednesday, January 21, 2009 - 08:33 AM UTC
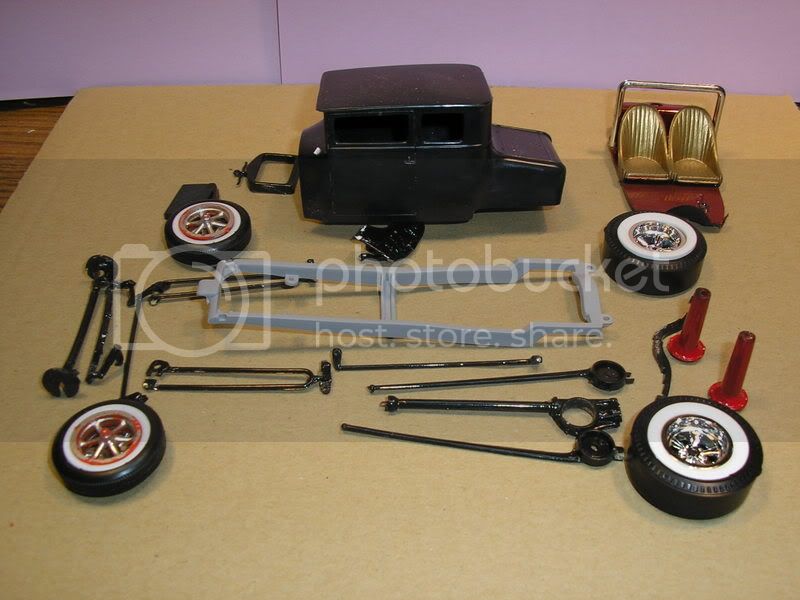
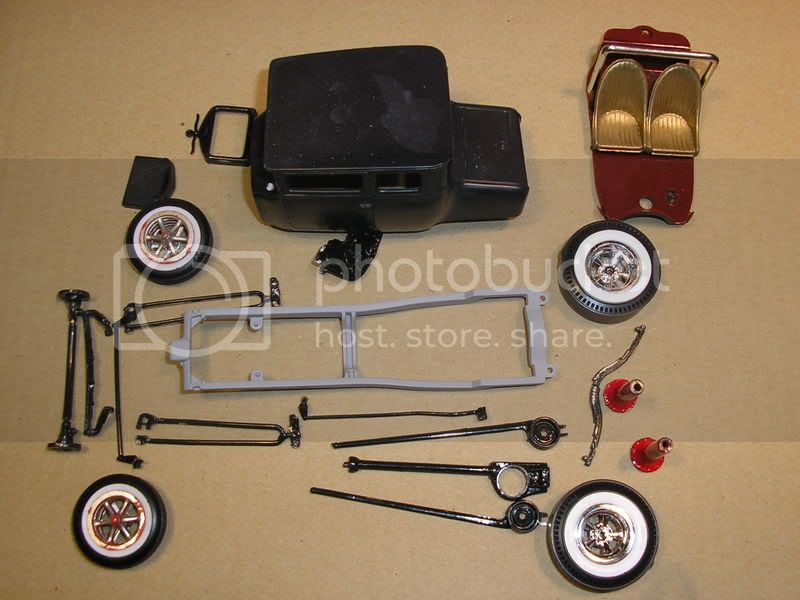
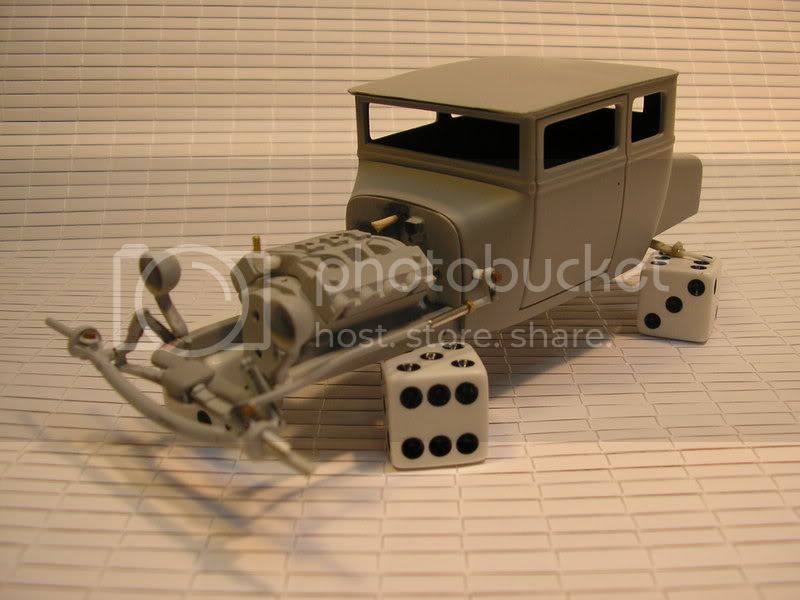
Great to have you with us Gary that old T should work well for this build, i like the wheels and tires.
Kobenhavn, Denmark
Joined: June 29, 2004
KitMaker: 6,760 posts
Auto Modeler: 2,182 posts
Posted: Wednesday, January 21, 2009 - 08:39 AM UTC
Excellent choice of material for a Rat Rod Gary.
On the workbench:
MPC: 1972 Pontiac GTO
Revell: 1965 Mustang
Verlinden 120mm guard of the marine.
Revell: 2010 Camaro
Monogram: 1931 Rolls Royce
Italeri: LVT2 Amtrac
North Carolina, United States
Joined: November 28, 2005
KitMaker: 2,216 posts
Auto Modeler: 522 posts
Posted: Wednesday, January 21, 2009 - 11:10 AM UTC
Quoted Text
I am not sure about the interior yet but I think I will use aluminum WWII aircraft seats.
What a cool idea. That Lincoln engine is makeing me drool also. This is gonna be a nice one when you get her finished Gary.
Hermon

"Those who would give up Essential Liberty
to purchase a little Temporary Safety,
deserve neither Liberty nor Safety."
Benjamin Franklin
Washington, United States
Joined: September 20, 2007
KitMaker: 861 posts
Auto Modeler: 339 posts
Posted: Wednesday, January 21, 2009 - 04:49 PM UTC
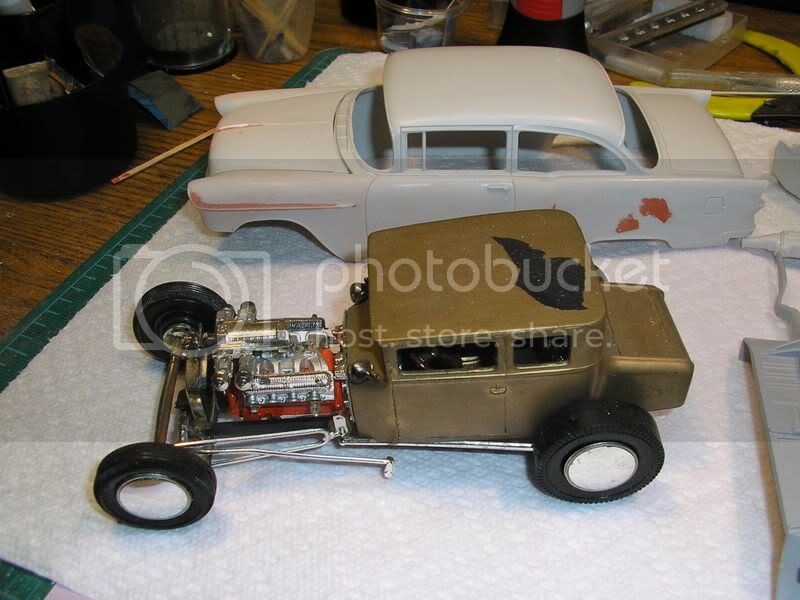
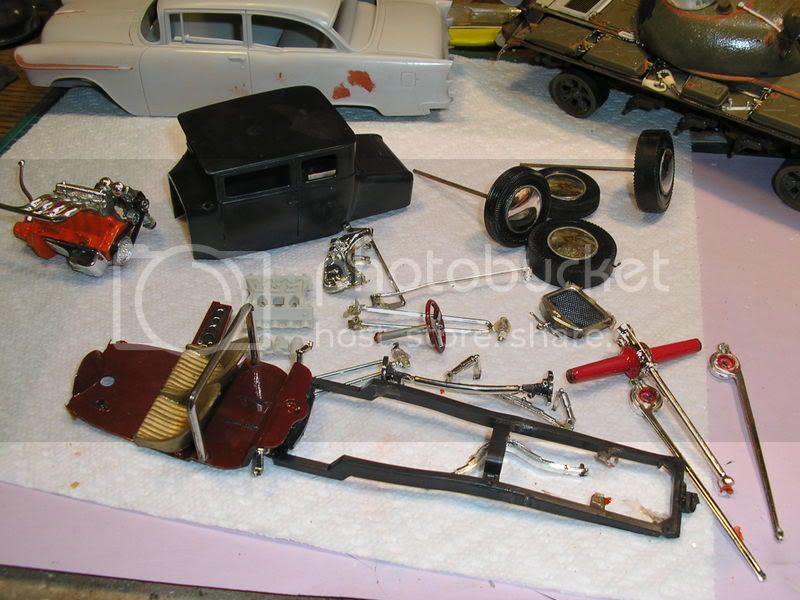
It's a shame about the '55, but the T is certainly a worthy substitute! It looks like you have all the pieces in place for a very cool rat rod build.
Seeing that '25 kit in pieces sure brings back memories.
-YL
Colorado, United States
Joined: December 25, 2004
KitMaker: 3,770 posts
Auto Modeler: 359 posts
Posted: Thursday, January 22, 2009 - 01:37 AM UTC
Gary,
Looking forward to watching this "pig's ear to silk purse" progress. The idea of the AC seats should be very interesting to see.
Mike

Ohio, United States
Joined: December 13, 2005
KitMaker: 153 posts
Auto Modeler: 47 posts
Posted: Thursday, January 22, 2009 - 07:48 AM UTC
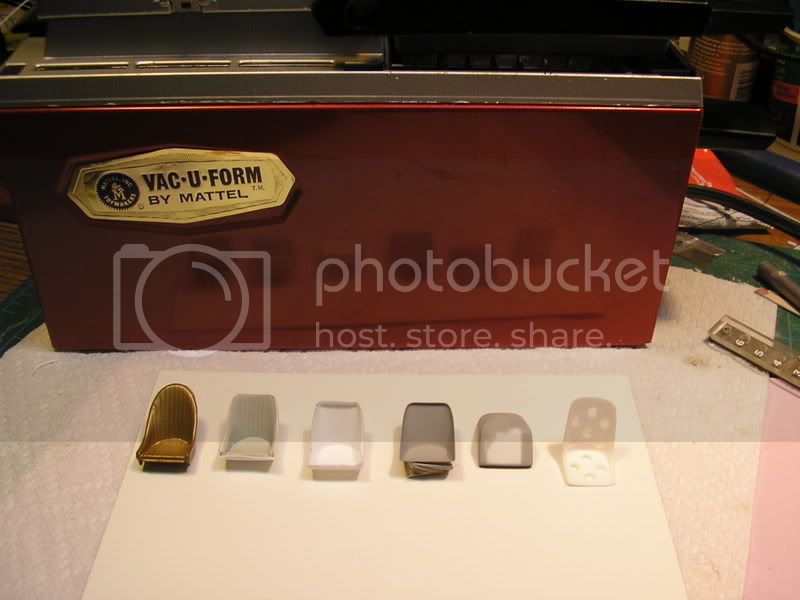
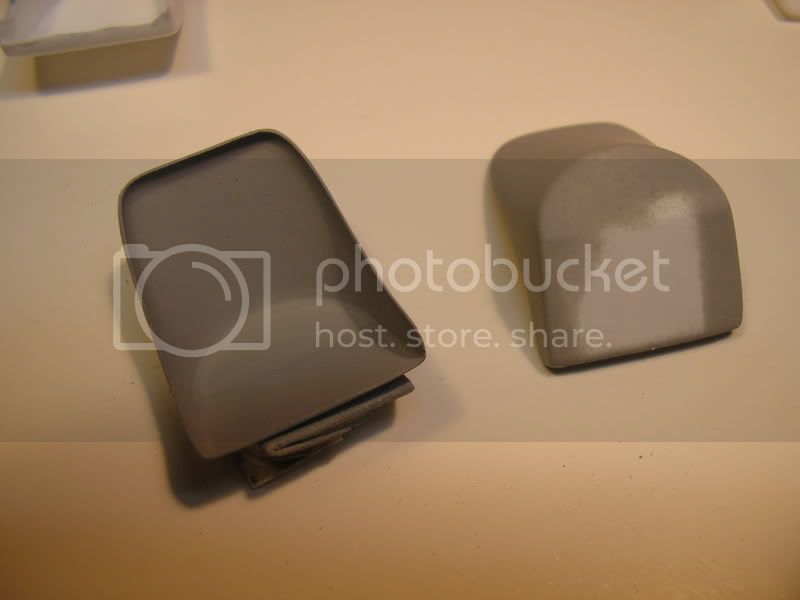
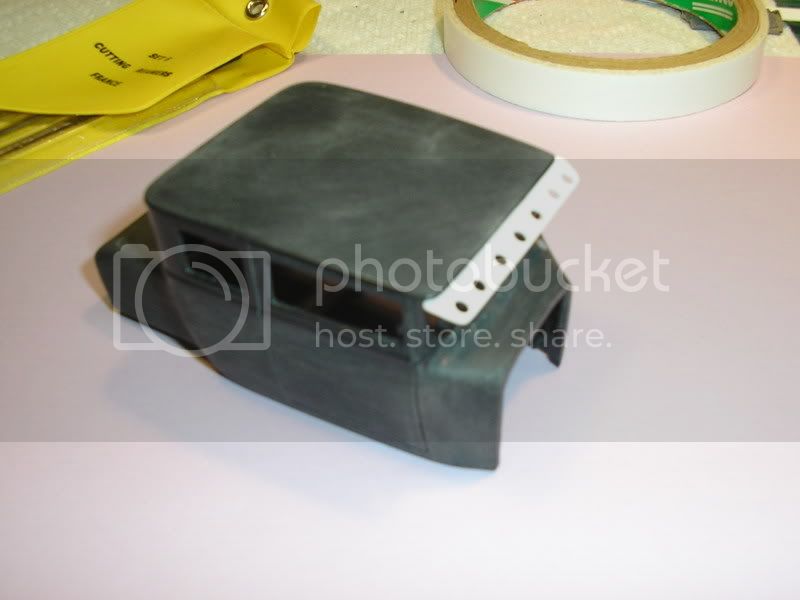
Just a couple of pics of the seats I plan to use, I dug out a 1/25 scale P-51 the other night and the seat was way too big for a Model T so I decided to make a couple of vacumn formed aircraft style seats. I made a buck from a cut down plastic seat and the made some copies on a Mattel Vac-u-Form. I also have a set of resin aircraft seats from Replicas and Miniatures Co. of Md. but I decided to make my own. The first pic shows the original seat from the T glue bomb, the buck I made, an untrimed vacumn formed seat, the next two are trimmed and have a coat of primer and last, the RMCOMD resin seat. The second pic is of the vacumn formed seats. I will either paint the seats aluminum or maybe olive drab (surplus seats) with chipping and wear. I also plan to use a set of aircraft style lap belts. I am trying to limit this build to most of the parts that came with the original built up kit with just a few added details. I do have a later issue 25 T kit from 2001 that has almost the same parts to replace any of the original parts that are not usable. So far I have only destroyed the rear spring from the original and I will need to replace some of the engine parts. The 2001 reissue did not include the chopped top T body. Back to work for now.
Currently working on:
RPM Minenraumer
Revell 1940 Ford coupe
Revell 1929 Model A pickup
Amt Batwing
Tamiya T-55
Revell Rat Fink figure
New York, United States
Joined: December 07, 2004
KitMaker: 1,888 posts
Auto Modeler: 806 posts
Posted: Thursday, January 22, 2009 - 08:43 AM UTC
Nice work on the seat Gary, you don't see to many of those machines any more.
Washington, United States
Joined: September 20, 2007
KitMaker: 861 posts
Auto Modeler: 339 posts
Posted: Thursday, January 22, 2009 - 12:41 PM UTC
The fact that you actually own a working Mattel Vac-U-Form automatically places you at the top of the "Who's Got The Coolest Things" list.
I haven't seen one of those in ages. If I had one, I'd be afraid to use it.
-YL
Myanmar
Joined: March 05, 2004
KitMaker: 4,011 posts
Auto Modeler: 851 posts
Posted: Thursday, January 22, 2009 - 12:59 PM UTC
WWII aircraft seats - Fantastic idea!
and BTW,
HARV recently scored one of those old vac-u-form machines

i watched a scale plastic figure crawl along the edge . . . of an exacto blade . . . that's my dream , it's my nightmare . . . . . . . crawling , slithering . . . . . along the edge . . . . . . of an exacto . . . . . blade . . . . and surviving
Ohio, United States
Joined: December 13, 2005
KitMaker: 153 posts
Auto Modeler: 47 posts
Posted: Thursday, January 22, 2009 - 01:09 PM UTC
Actually, I scored 2 working Vac-u-Form machines on Ebay last year for around $30 each. Also there are quite a few Ebay vendors that offer the plastic sheets and one offers a rebuild kit for them that turns it into an upgraded vacuum former. I bought one of the upgrade kits but havent installed it yet. The machines turn up on Ebay quite often -- hard to believe that many of them survived all these years.
Currently working on:
RPM Minenraumer
Revell 1940 Ford coupe
Revell 1929 Model A pickup
Amt Batwing
Tamiya T-55
Revell Rat Fink figure
North Carolina, United States
Joined: November 28, 2005
KitMaker: 2,216 posts
Auto Modeler: 522 posts
Posted: Thursday, January 22, 2009 - 01:26 PM UTC
Gary, I'm glad that you and I are such good pals. Now, I'm gonna send ya a list of all the parts I need you to make for me.


Seriously, as I said before, the aircraft seat is cool. I actually thought about installing a set of 1/24 scale Merlin exaust pipes from a P-51 kit on my 53 Bel Air hood at an offset angle. Looked pretty cool in the mock up, but I chickened out and went with the buble hood scoop.
Hermon
"Those who would give up Essential Liberty
to purchase a little Temporary Safety,
deserve neither Liberty nor Safety."
Benjamin Franklin
Ohio, United States
Joined: December 13, 2005
KitMaker: 153 posts
Auto Modeler: 47 posts
Posted: Friday, January 23, 2009 - 08:28 AM UTC
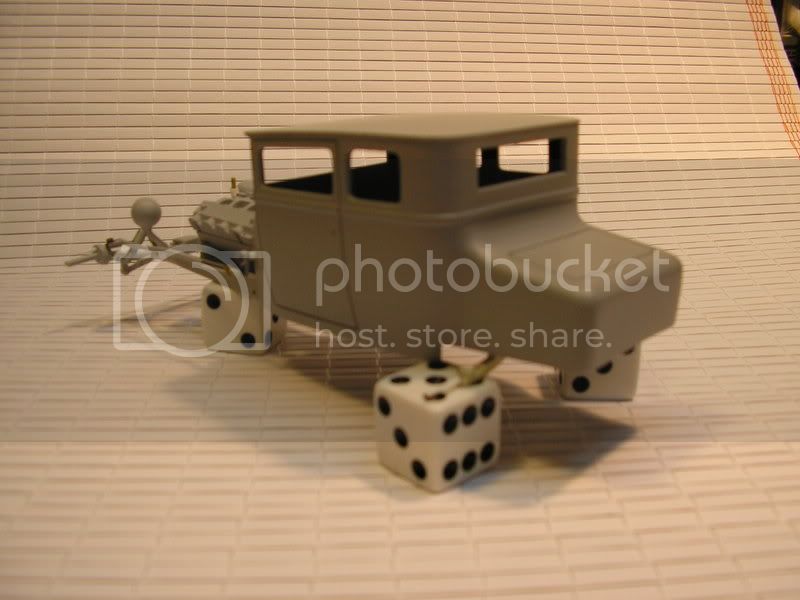
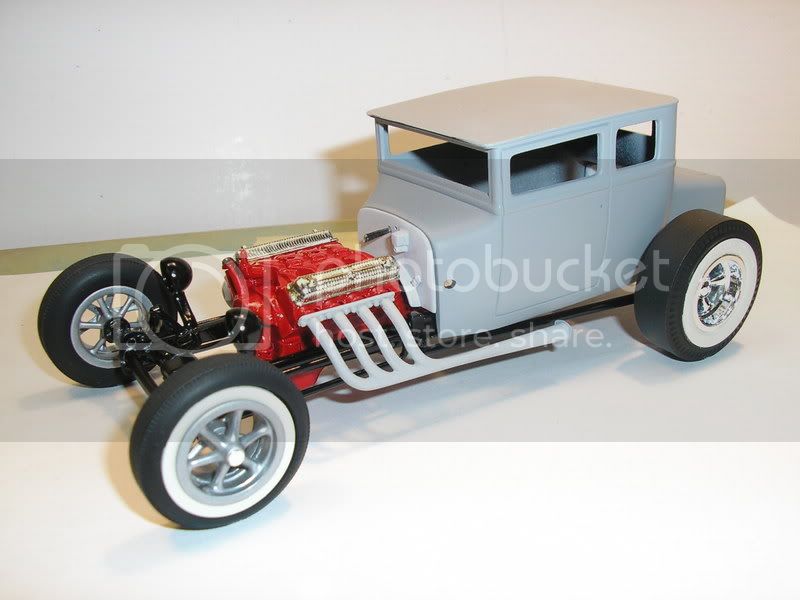
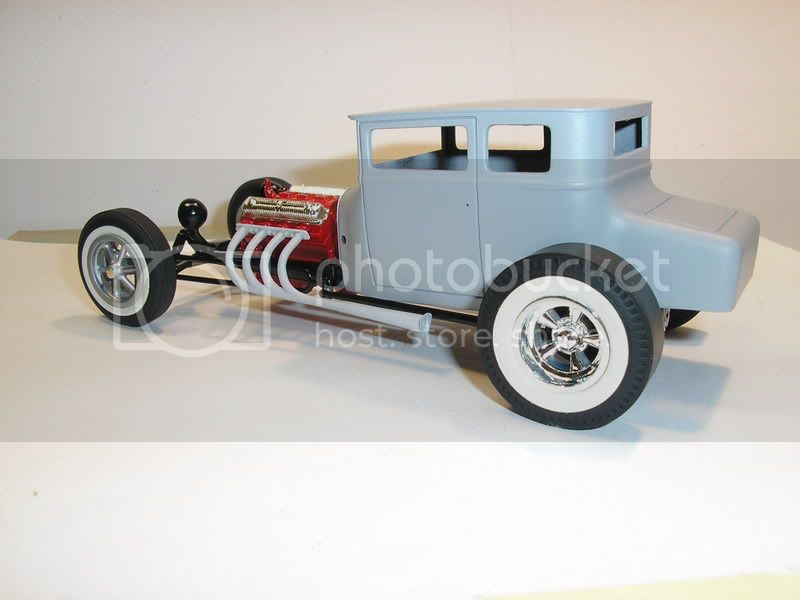
Got started on smoothing the body out today and I made a drilled visor from .020 Evergreen strip. I think this will be the last scratchbuilt part except for a gastank--takes too long to make parts--I never will get finished. I hope to get the body in primer this weekend and get the floorboard smoothed out--it really had a lot of glue damage. Anybody know where I can get a 1/25 scale shrunken head to hang from the inside mirror???
Currently working on:
RPM Minenraumer
Revell 1940 Ford coupe
Revell 1929 Model A pickup
Amt Batwing
Tamiya T-55
Revell Rat Fink figure
New York, United States
Joined: December 07, 2004
KitMaker: 1,888 posts
Auto Modeler: 806 posts
Posted: Friday, January 23, 2009 - 08:31 AM UTC
Gary why not sculpt it your self, if not you can make an 8 ball or a large dice, just a few ideas. the body and visor look very good.
Ohio, United States
Joined: December 13, 2005
KitMaker: 153 posts
Auto Modeler: 47 posts
Posted: Friday, January 23, 2009 - 08:46 AM UTC
I just thought after I posted my last post--I can use a 1/35 or 1/72 scale figure head for the shrunken head base. I will make one if I think I will have the time--it will go good with the skull shifter knob I plan to use.
Currently working on:
RPM Minenraumer
Revell 1940 Ford coupe
Revell 1929 Model A pickup
Amt Batwing
Tamiya T-55
Revell Rat Fink figure
Ohio, United States
Joined: December 13, 2005
KitMaker: 153 posts
Auto Modeler: 47 posts
Posted: Thursday, February 05, 2009 - 07:26 AM UTC
Currently working on:
RPM Minenraumer
Revell 1940 Ford coupe
Revell 1929 Model A pickup
Amt Batwing
Tamiya T-55
Revell Rat Fink figure
New York, United States
Joined: December 07, 2004
KitMaker: 1,888 posts
Auto Modeler: 806 posts
Posted: Thursday, February 05, 2009 - 07:47 AM UTC
Nice work Gary the body looks great in primer and i really like the shrunken head nice idea, i am putting an extension on the build so you and Jesper can both finish to the 10, i hope another 5 days will help.
North Carolina, United States
Joined: December 13, 2008
KitMaker: 63 posts
Auto Modeler: 50 posts
Posted: Thursday, February 05, 2009 - 11:38 AM UTC
Gary, the T is coming together nicely. I like the shrunken head idea.
Hunter

Air Force: If it absolutely has to be DESTROYED!!
Texas, United States
Joined: August 13, 2007
KitMaker: 109 posts
Auto Modeler: 39 posts
Posted: Thursday, February 05, 2009 - 01:41 PM UTC
It's looklng good Gary I always liked that kit.
Sheldon
Build them while you can still see..
Kobenhavn, Denmark
Joined: June 29, 2004
KitMaker: 6,760 posts
Auto Modeler: 2,182 posts
Posted: Thursday, February 05, 2009 - 10:57 PM UTC
Looking good Gary.
Love the shrunken head.
On the workbench:
MPC: 1972 Pontiac GTO
Revell: 1965 Mustang
Verlinden 120mm guard of the marine.
Revell: 2010 Camaro
Monogram: 1931 Rolls Royce
Italeri: LVT2 Amtrac
Ohio, United States
Joined: December 13, 2005
KitMaker: 153 posts
Auto Modeler: 47 posts
Posted: Friday, February 06, 2009 - 01:53 AM UTC
Thanks guys. Starting with a glue bomb, the model had a lot more repair work to do than I had planned for especially with the suspension and steering mounting pins. Also since I am old and slow, I will need all the extra time I can get too!
Currently working on:
RPM Minenraumer
Revell 1940 Ford coupe
Revell 1929 Model A pickup
Amt Batwing
Tamiya T-55
Revell Rat Fink figure
Ohio, United States
Joined: December 13, 2005
KitMaker: 153 posts
Auto Modeler: 47 posts
Posted: Wednesday, February 11, 2009 - 08:54 AM UTC
Currently working on:
RPM Minenraumer
Revell 1940 Ford coupe
Revell 1929 Model A pickup
Amt Batwing
Tamiya T-55
Revell Rat Fink figure
New York, United States
Joined: December 07, 2004
KitMaker: 1,888 posts
Auto Modeler: 806 posts
Posted: Wednesday, February 11, 2009 - 04:53 PM UTC
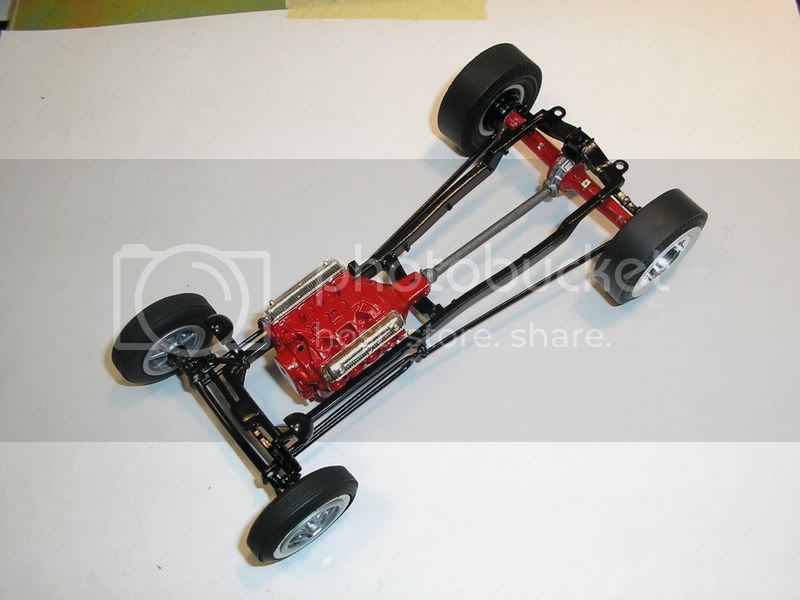
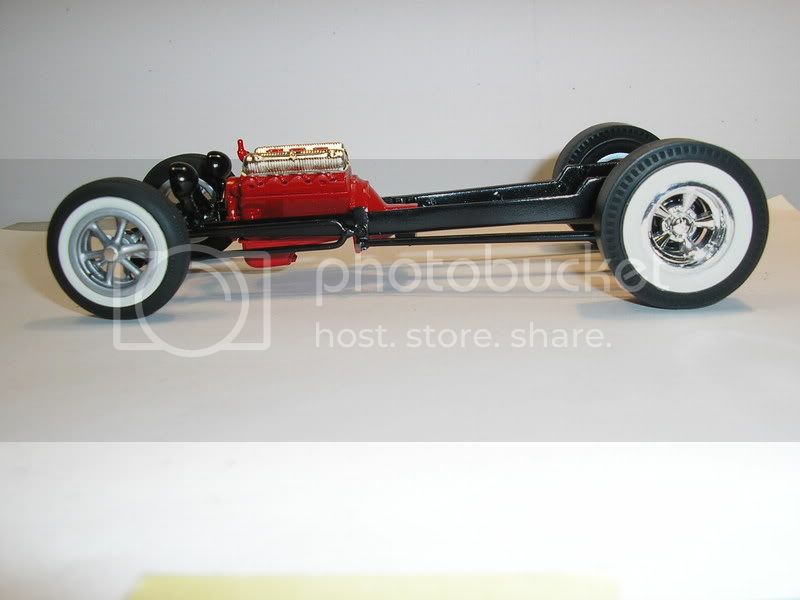
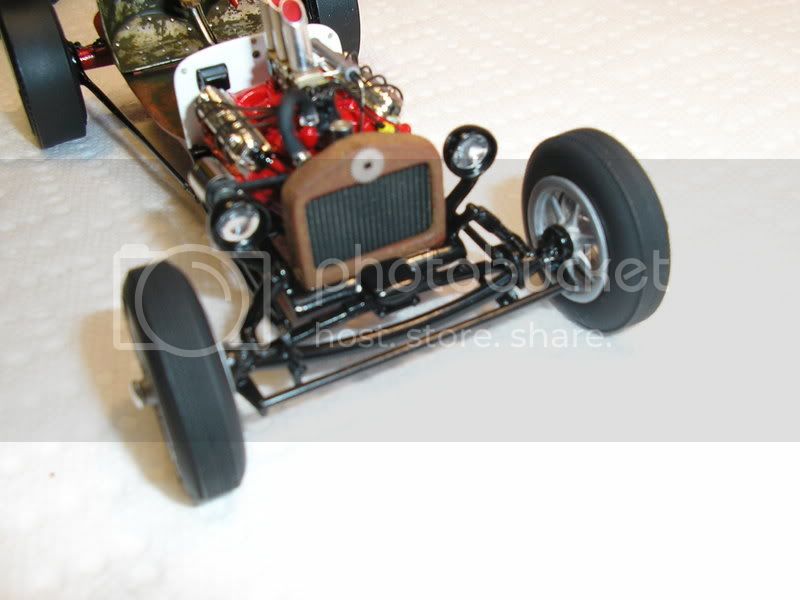
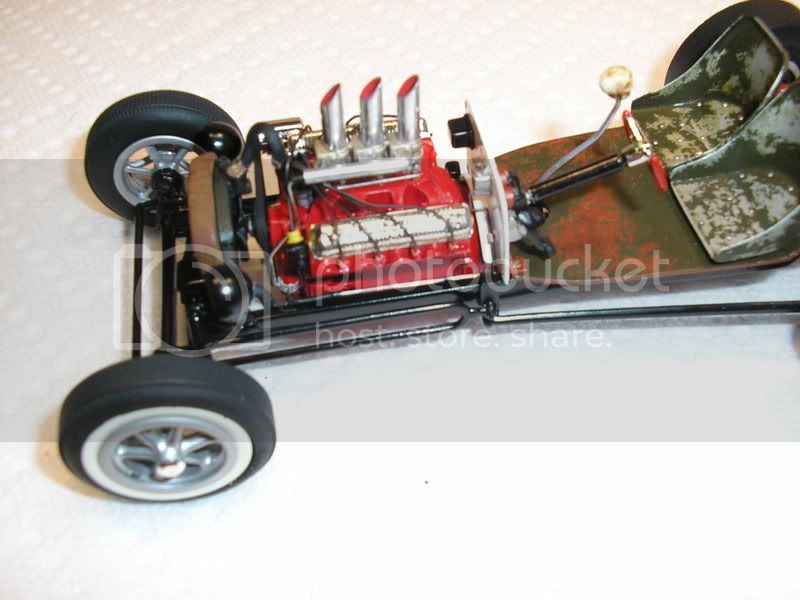
Outstanding work Gary, i know this was for a Rat Rod build and i can't believe i am saying this but i would keep it pretty and not weather or dirty it up, it looks to good clean i would detail this one to the max ignition wires, hoses, linkage the works and put a nice gloss paint job on it maybe red to match the engine, either way you go clean or dirty i think it looks great.
Ohio, United States
Joined: December 13, 2005
KitMaker: 153 posts
Auto Modeler: 47 posts
Posted: Thursday, February 12, 2009 - 02:35 AM UTC
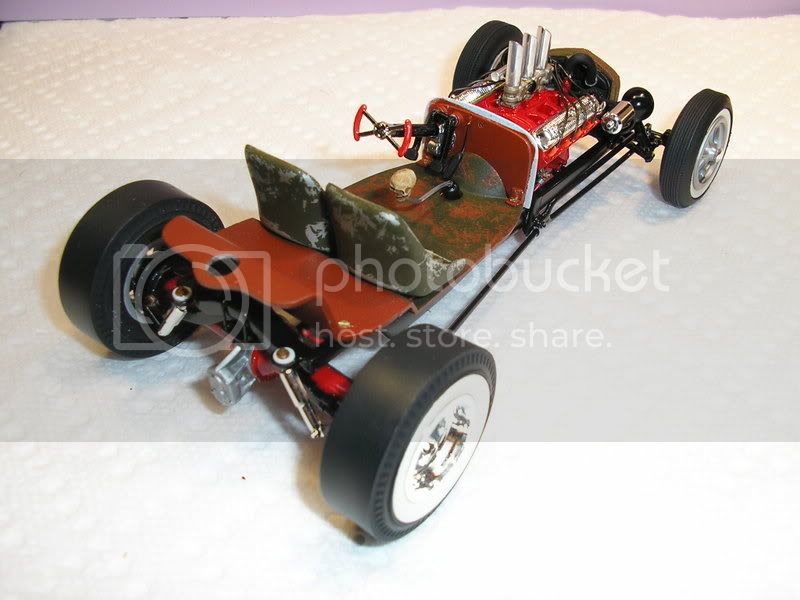
Thanks Robert. To me this is still a rat rod (junk car built with a bunch of leftover parts and paint) even though I dont plan to weather it heavily--just going to add some rust in a couple of places and some chipping wear to the interior floorboard and the airplane seats. I see plenty of real rat rods in the magazines and car shows that are in various stages of construction and condition. I am planning on a flat green or medium gray primer body color with some pinstripes with a white firewall--I still have to go through my left over paint to see what I have. I will mildly detail the engine with plug wires and boots, radiator hoses (the original kit had none), simple fuel lines and linkage, and some paint detailing. I will post an update in a couple of days.
Currently working on:
RPM Minenraumer
Revell 1940 Ford coupe
Revell 1929 Model A pickup
Amt Batwing
Tamiya T-55
Revell Rat Fink figure
Ohio, United States
Joined: December 13, 2005
KitMaker: 153 posts
Auto Modeler: 47 posts
Posted: Monday, February 23, 2009 - 08:00 AM UTC
Currently working on:
RPM Minenraumer
Revell 1940 Ford coupe
Revell 1929 Model A pickup
Amt Batwing
Tamiya T-55
Revell Rat Fink figure