Illinois, United States
Joined: August 30, 2005
KitMaker: 3,289 posts
Auto Modeler: 1,620 posts
Posted: Saturday, July 25, 2009 - 12:26 PM UTC
-I say I have two kids- one son & one daughter...my wife says she has three- one son ,one daughter and one husband.
...and don't tell yourself you can't do it....it'll just take longer then
Illinois, United States
Joined: August 30, 2005
KitMaker: 3,289 posts
Auto Modeler: 1,620 posts
Posted: Saturday, July 25, 2009 - 12:32 PM UTC
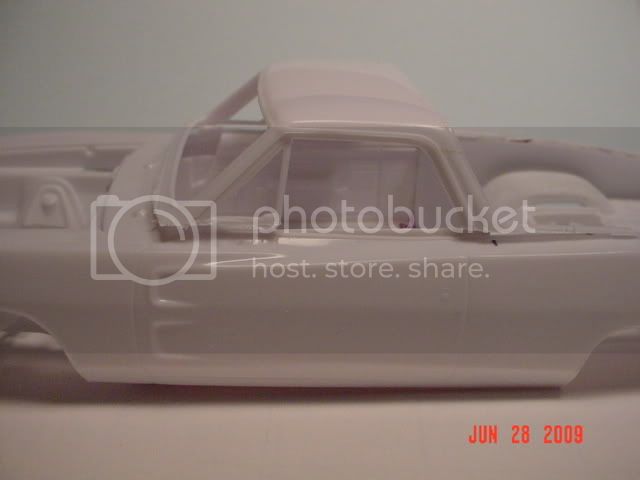
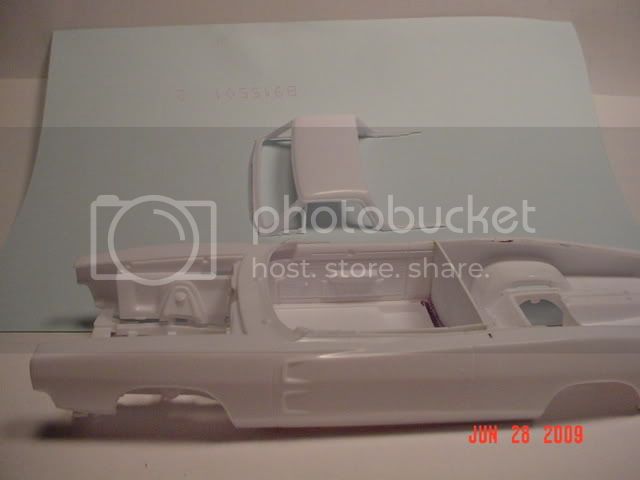
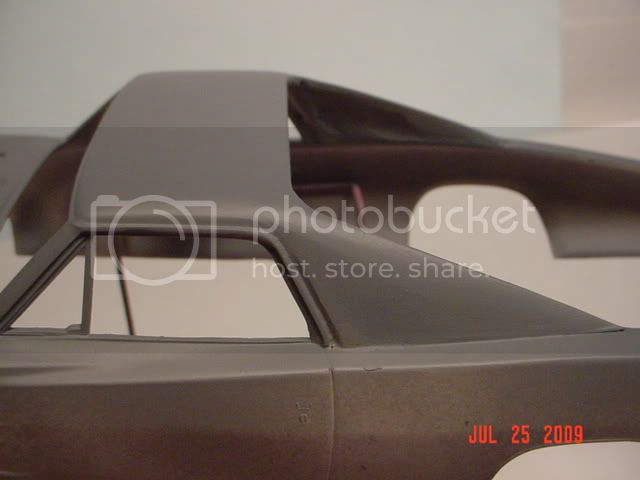
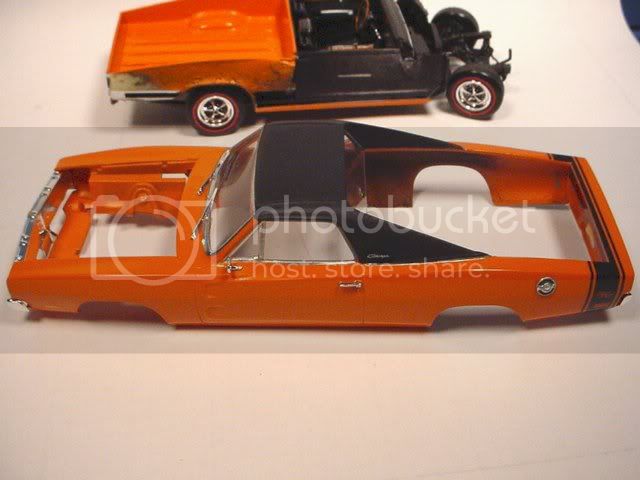
More progress, the wings are reinstalled and need to be smoothed and blended- I filled the origonal fuel filler area since I'm thinking a side mount would be better...time will tell...

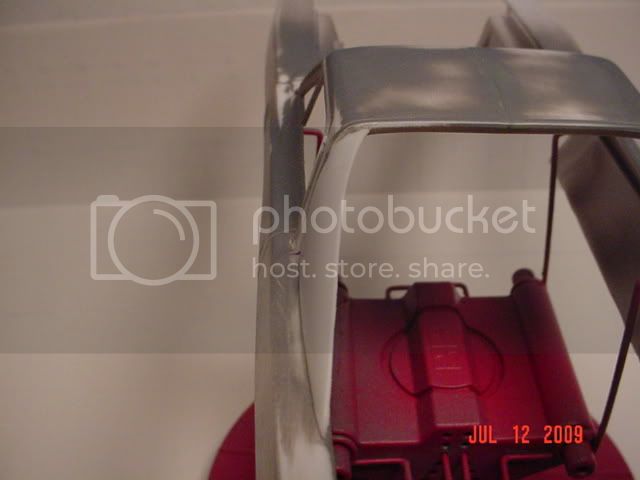
Sanded and blended more and gave it a radius in both rear corners...still needs more smoothing and inside wing filling...
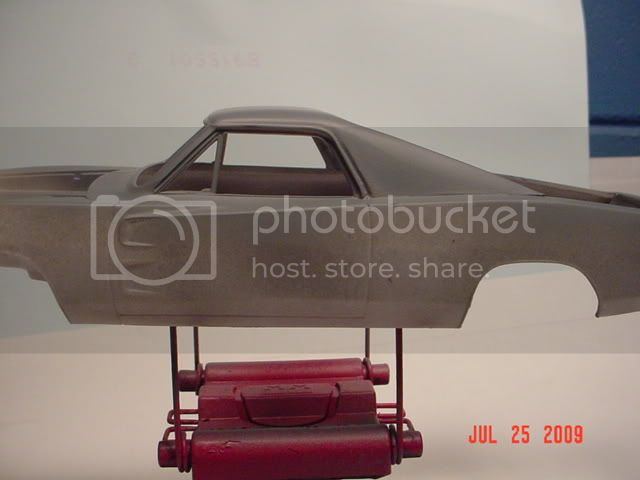
...she's gettin there...
-I say I have two kids- one son & one daughter...my wife says she has three- one son ,one daughter and one husband.
...and don't tell yourself you can't do it....it'll just take longer then
Illinois, United States
Joined: August 30, 2005
KitMaker: 3,289 posts
Auto Modeler: 1,620 posts
Posted: Saturday, July 25, 2009 - 12:39 PM UTC
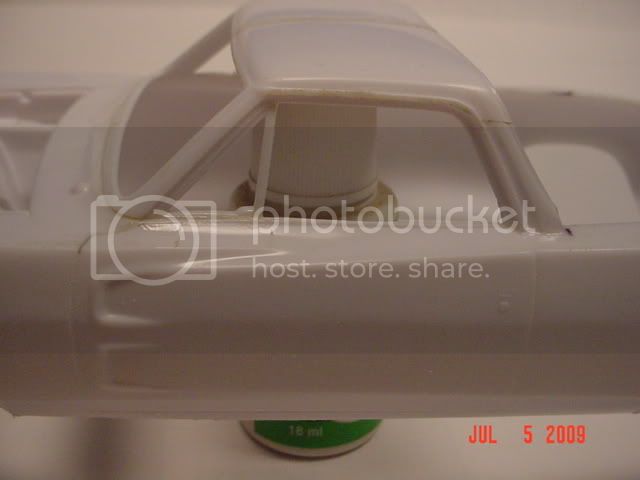
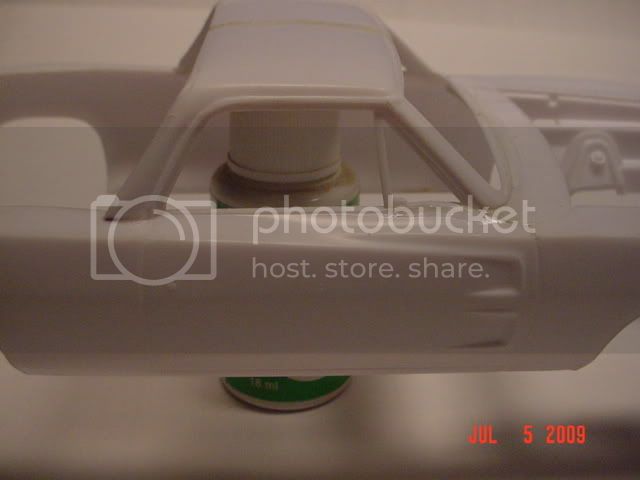
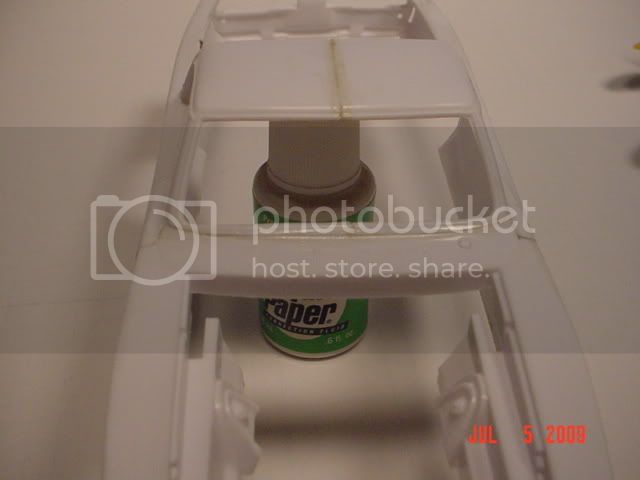
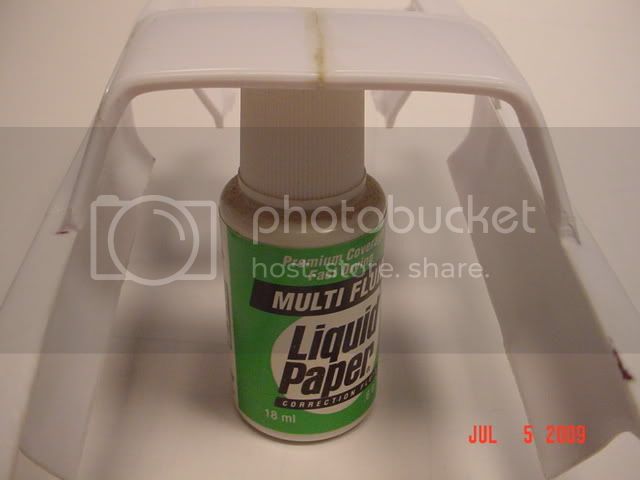
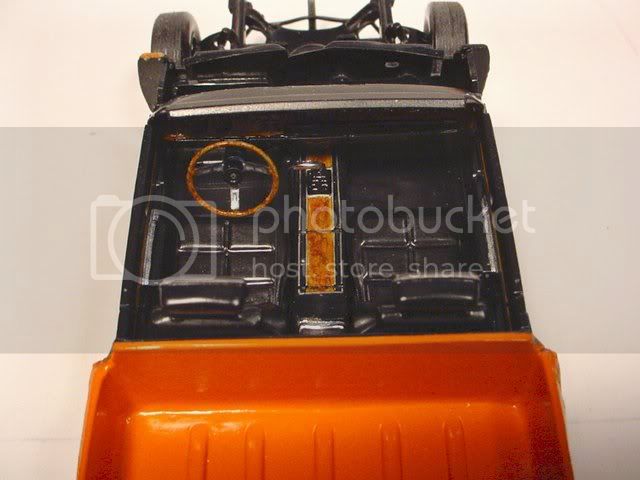
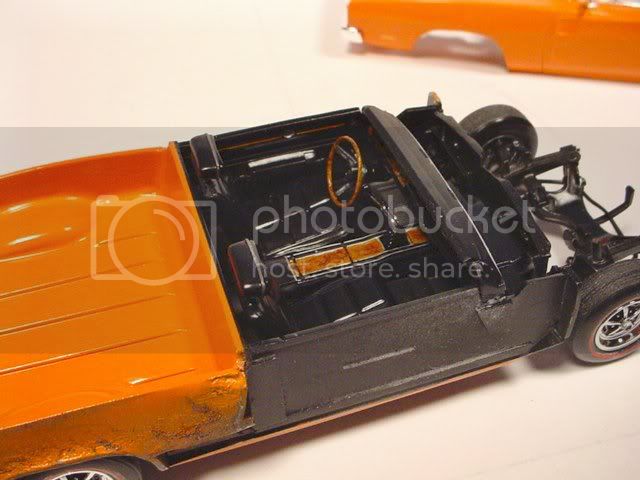
Sorry, I forgot the chassis/interior shot. The interior tub was cut behind the front seats and a flat wall was added.
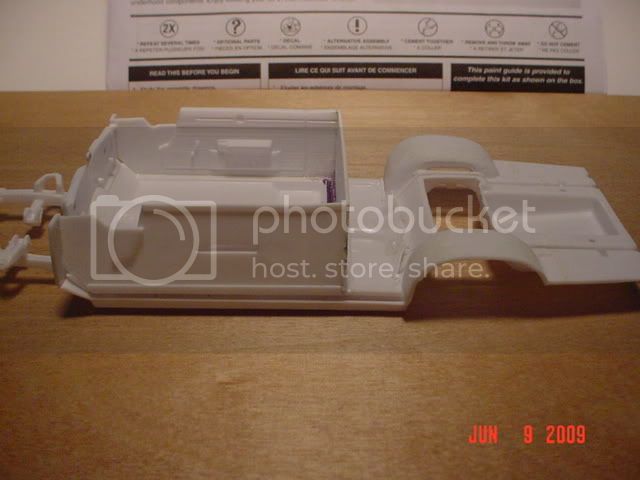
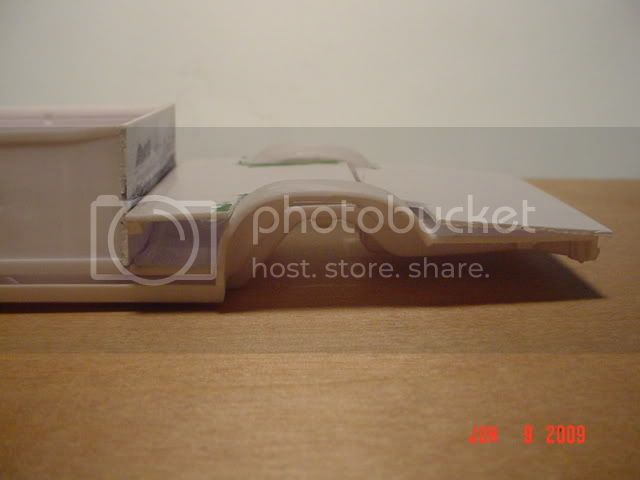
A temp bed floor was added, but I don't much like it....consider it a reference...
Stretch the top more and one could do a wagon...Hmmmmm...eh, that's another build!
-I say I have two kids- one son & one daughter...my wife says she has three- one son ,one daughter and one husband.
...and don't tell yourself you can't do it....it'll just take longer then
Kobenhavn, Denmark
Joined: June 29, 2004
KitMaker: 6,760 posts
Auto Modeler: 2,182 posts
Posted: Sunday, July 26, 2009 - 04:36 AM UTC
Wow, very very cool project Bob.
On the workbench:
MPC: 1972 Pontiac GTO
Revell: 1965 Mustang
Verlinden 120mm guard of the marine.
Revell: 2010 Camaro
Monogram: 1931 Rolls Royce
Italeri: LVT2 Amtrac
North Carolina, United States
Joined: November 28, 2005
KitMaker: 2,216 posts
Auto Modeler: 522 posts
Posted: Sunday, July 26, 2009 - 11:00 AM UTC
Bob, that Chargamino has Joe Dirt written all over it.
Very nice custom work so far.
Hermon

"Those who would give up Essential Liberty
to purchase a little Temporary Safety,
deserve neither Liberty nor Safety."
Benjamin Franklin
Illinois, United States
Joined: August 30, 2005
KitMaker: 3,289 posts
Auto Modeler: 1,620 posts
Posted: Monday, July 27, 2009 - 03:32 AM UTC
Thanks guys...when are you guys going to try one? It's more time consuming than anything else. I've seen your handy work...this isn't out of your reach, and it's fun making something totally different.

So far the "name" is the only thing I can't seem to figure out;
- El chargo
-Ramchero
-Loadrunner{that would be for a plymouth actually}
...any other thoughts?....
-I say I have two kids- one son & one daughter...my wife says she has three- one son ,one daughter and one husband.
...and don't tell yourself you can't do it....it'll just take longer then
Illinois, United States
Joined: August 30, 2005
KitMaker: 3,289 posts
Auto Modeler: 1,620 posts
Posted: Monday, July 27, 2009 - 03:43 AM UTC
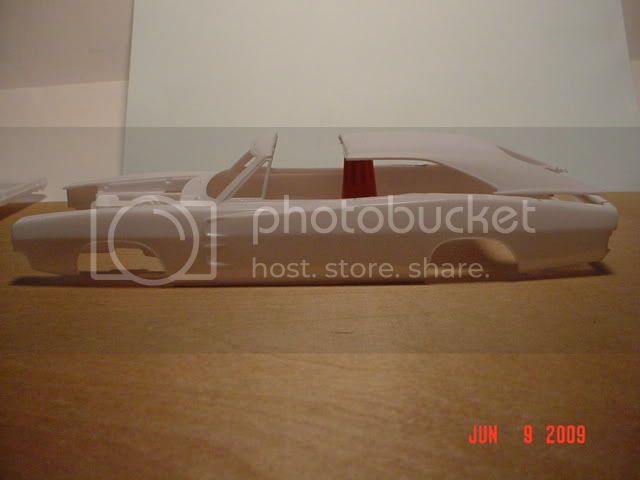
More progress...for those who have never tried this sorta thing, you'll note I frequently paint and semi sand off the primer...this is for two reasons;
1- the primer shows flaws that the eyes can't easily see without paint.
2- the primer acts as a filler for very minor low spots or cracks...very minor.
I like using paint as a small crack filler...brush it on the needed area, prime to see if it filled enough and redo as needed. This would only be for tight areas that you can't easily fill and sand or for paper thin cracks in tight areas...otherwise I use filler.
Just for references I'm using squadron green filler, use what you like or can easily get.
I just wet sanded the top this morning to knock down some of the marks on the top that weren't smooth or well rounded and filled in the inner wing panels behind the rear window area.
This is why a large can of auto primer is a good idea to have around, since priming and wet sanding the body often to get a smooth surface lends to a good paint job.
I used to simply prime and paint, then wet sand...why rework the already painted semi smooth surface when it's easier to get a great base before ya paint....makes things smoother this way and a better finish.
-I say I have two kids- one son & one daughter...my wife says she has three- one son ,one daughter and one husband.
...and don't tell yourself you can't do it....it'll just take longer then
Illinois, United States
Joined: August 30, 2005
KitMaker: 3,289 posts
Auto Modeler: 1,620 posts
Posted: Monday, July 27, 2009 - 04:00 AM UTC
Oh, have to add this...the very reason I like to use any kind of bottle paint to fill is for when you use filler. Ever notice that the area just sanded looks smooth, but after you wash it off - you are washing the model off, right? you may see pin holes or lines that weren't there before? That dust from sanding makes great "loose" filler, but it's the kind that doesn't stick! I always use a trickle of water over the model, and a soft tooth brush to clean things off. When dry, prime and look at what's there..or not there...and rework as needed. A small brush and some bottle paint is an easy way to fill those really tiny lines from sanding or pin holes in the filler. Prime afterwards and recheck. The primer will be your barrier for the final paint job whether it's enamel, lacquer, or acrylic...no worries about lifting, so long as you clean and prime every time!
-I say I have two kids- one son & one daughter...my wife says she has three- one son ,one daughter and one husband.
...and don't tell yourself you can't do it....it'll just take longer then
Myanmar
Joined: March 05, 2004
KitMaker: 4,011 posts
Auto Modeler: 851 posts
Posted: Tuesday, July 28, 2009 - 05:26 PM UTC
Very interesting project build. What is the bed going to look like?
what about, "Elco Change-o", ok, sorry 'bout that

i watched a scale plastic figure crawl along the edge . . . of an exacto blade . . . that's my dream , it's my nightmare . . . . . . . crawling , slithering . . . . . along the edge . . . . . . of an exacto . . . . . blade . . . . and surviving
Illinois, United States
Joined: August 30, 2005
KitMaker: 3,289 posts
Auto Modeler: 1,620 posts
Posted: Sunday, August 02, 2009 - 12:40 PM UTC
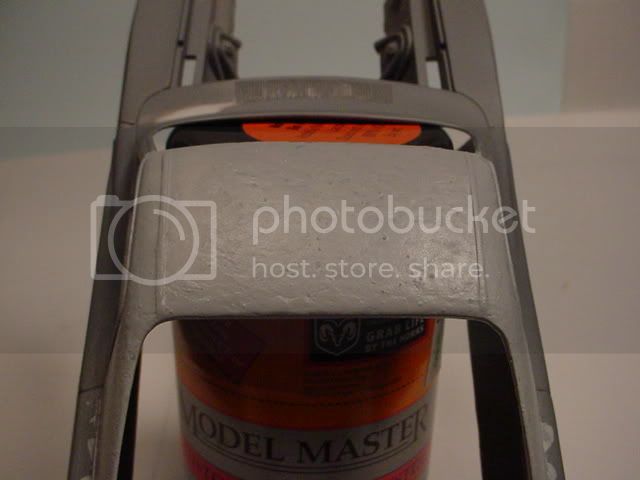
I bought some model master "vinyl top" paint the other day...this is the "2nd part with texture"...1st part is just paint. White is all that's offered @ the LHS.
Destructions say hold 2 feet away and shake up and down{I'll assume, the can} and do 1-2 light coats...here's what we get 1st try-
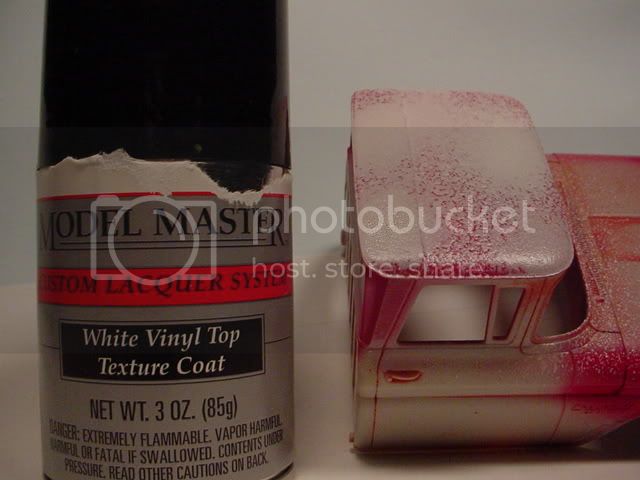
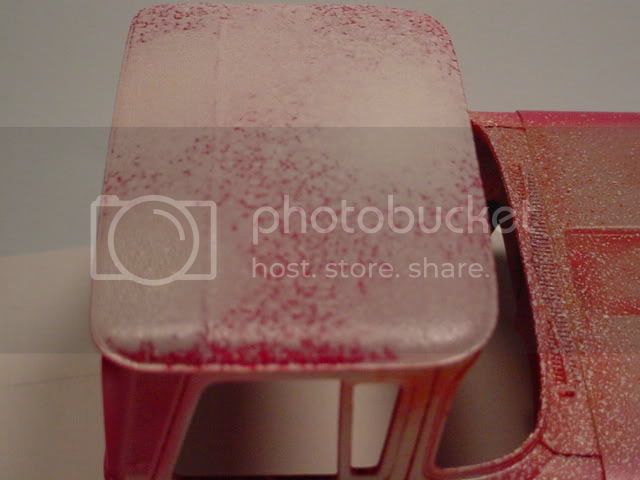
Light coats is a must since this stuff can clump up easily...I can see it working but it'll take a few more shots of practice to get it even. I plan on top coating in a flat black. The practice cab is just a slow work in progress of an early 2 ton semi tractor, so stripping it won't be a hassle.
-I say I have two kids- one son & one daughter...my wife says she has three- one son ,one daughter and one husband.
...and don't tell yourself you can't do it....it'll just take longer then
Myanmar
Joined: March 05, 2004
KitMaker: 4,011 posts
Auto Modeler: 851 posts
Posted: Sunday, August 02, 2009 - 02:43 PM UTC
I've never tried this product before. Keep us posted as to results.
I wonder if stippling on
Dr.Microtools Supreme Model Putty red (or another similar product), by hand with a brush will provide an adequate texture. I've never tried this before either
i watched a scale plastic figure crawl along the edge . . . of an exacto blade . . . that's my dream , it's my nightmare . . . . . . . crawling , slithering . . . . . along the edge . . . . . . of an exacto . . . . . blade . . . . and surviving
Illinois, United States
Joined: August 30, 2005
KitMaker: 3,289 posts
Auto Modeler: 1,620 posts
Posted: Sunday, August 02, 2009 - 11:35 PM UTC
I've got Mr surfacer 500 and was going to try that for the top...I'll try the spray again and my origonal idea and see which works better......
-I say I have two kids- one son & one daughter...my wife says she has three- one son ,one daughter and one husband.
...and don't tell yourself you can't do it....it'll just take longer then
Illinois, United States
Joined: August 30, 2005
KitMaker: 3,289 posts
Auto Modeler: 1,620 posts
Posted: Saturday, August 08, 2009 - 07:57 PM UTC
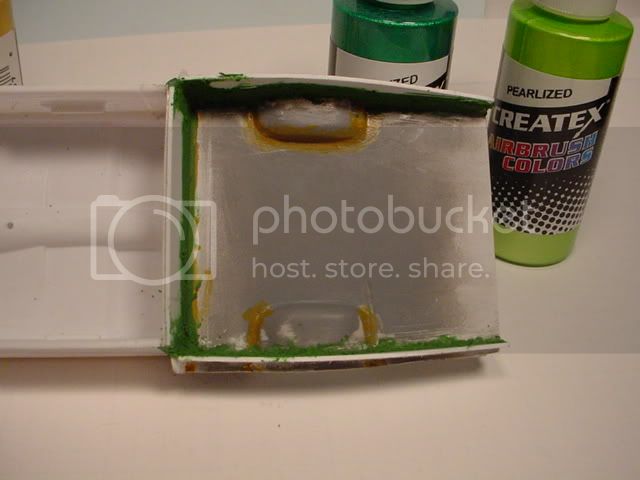
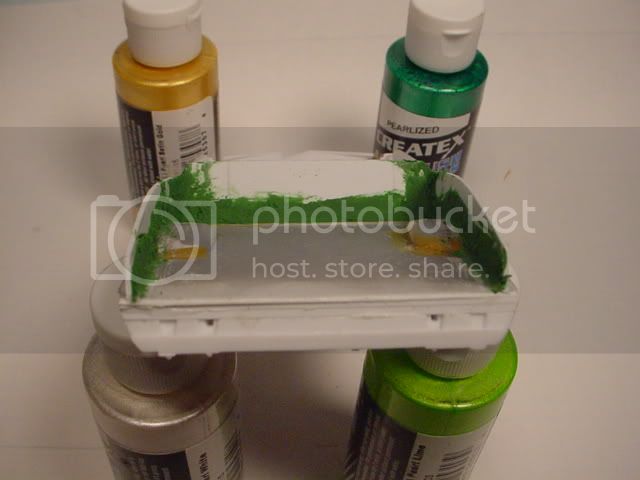
More progress lately so I'd thought I'd share. Here's the bed half done...the tan is paint for simple fine filling around the wheelwells and I had just dropped in the green filler for radiusing the corners inside...still needs that rounded and then I need to add the corrogated "bumps" in the walls and floor for stiffening like the real ones had.
-I say I have two kids- one son & one daughter...my wife says she has three- one son ,one daughter and one husband.
...and don't tell yourself you can't do it....it'll just take longer then
Illinois, United States
Joined: August 30, 2005
KitMaker: 3,289 posts
Auto Modeler: 1,620 posts
Posted: Saturday, August 22, 2009 - 03:36 PM UTC
Still working on her, but I've had troubles...seems the bed sides didn't heve enough support so every time I went and sanded the filler to round it, I'd create new cracks in the filler..after 4 times of redoing it I figured it out...I just put in 15min epoxy on both sides of the outer bed pieces to make it rigid...I wasn't pushing hard when I sanded but it obiously was enough to cause me trouble.
Note to all, if your going to puyt some filler and curve your bed sides youd be wise to shore up the outer walls so this doesn't happen to you!
-I say I have two kids- one son & one daughter...my wife says she has three- one son ,one daughter and one husband.
...and don't tell yourself you can't do it....it'll just take longer then
New York, United States
Joined: December 07, 2004
KitMaker: 1,888 posts
Auto Modeler: 806 posts
Posted: Sunday, August 23, 2009 - 02:27 AM UTC
Great work so far bob i have been following the build, keep up the good work.
Illinois, United States
Joined: August 30, 2005
KitMaker: 3,289 posts
Auto Modeler: 1,620 posts
Posted: Monday, August 31, 2009 - 03:39 PM UTC
Here's something new...Mr surfacer 500 applied with a stubby brush...thoughts?
-I say I have two kids- one son & one daughter...my wife says she has three- one son ,one daughter and one husband.
...and don't tell yourself you can't do it....it'll just take longer then
New York, United States
Joined: January 29, 2004
KitMaker: 3,836 posts
Auto Modeler: 256 posts
Posted: Monday, August 31, 2009 - 07:42 PM UTC
Hey Bob,
Ive been following the build and it looks great, enjoy each posting. Sorry about the bed, sounds like you figured it out. As to the Mr. Surfacer, are you going for a vinyl top
if so it looks ruff. My I suggest using masking tape. Lay it out just as you have it now. It also looks to scale and holds up for years. Ive done it twice without any problems. Hang in there
the bed will work out as will the body.
Happy Modeling,
Joe
It feels like bible camp
Only Im not crying pretending Im somewhere else.
Happy Modeling
Joe
Illinois, United States
Joined: August 30, 2005
KitMaker: 3,289 posts
Auto Modeler: 1,620 posts
Posted: Monday, August 31, 2009 - 11:20 PM UTC
Yup going for a vinyl top. The bed is far better now with the addition of the epoxy..no more flexing{was driving me nuts - and to quote the wife, that ain't a far trip}. I agree, the surface is alittle too textured so some sanding is in order.
-I say I have two kids- one son & one daughter...my wife says she has three- one son ,one daughter and one husband.
...and don't tell yourself you can't do it....it'll just take longer then
Washington, United States
Joined: September 20, 2007
KitMaker: 861 posts
Auto Modeler: 339 posts
Posted: Tuesday, September 01, 2009 - 05:20 AM UTC
I agree with Joe...give the masking tape a try for the vinyl top. I have, somewhere in my back issue stash, an article in either Scale Auto Enthusiast or Car Modeler magazine that outlines the technique. I will see if I can dig it up.
I have a modeling buddy who uses Tamiya Flat Black (XF-1) shot unthinned through his airbrush at pressure higher than normal to replicate vinyl top texture. He sprays several separate "mist coats" over the surface from about 12-14 inches away from the model, gradually building up to full coverage. The unthinned paint coupled with the higher pressure and distance create a very realistic vinyl texture. I've also heard of this being done with regular model enamels, but the Tamiya paint has the advantage of being easily removed while still wet, if you don't like the look.
HTH.
-YL
Illinois, United States
Joined: August 30, 2005
KitMaker: 3,289 posts
Auto Modeler: 1,620 posts
Posted: Wednesday, September 02, 2009 - 01:05 PM UTC
Yeah, in good light it looked as if it had a bunch of rust under the top...at least this gave me a perspective for another type of build....I sanded the stuff off and took it back down to bare top. The masking tape thing scares me alittle with the possibilty of it lifting off later...are folks gluing the tape on or what?
I still have my "vinyl top texture spray" that wasn't too bad...may try that next.
-I say I have two kids- one son & one daughter...my wife says she has three- one son ,one daughter and one husband.
...and don't tell yourself you can't do it....it'll just take longer then
Washington, United States
Joined: September 20, 2007
KitMaker: 861 posts
Auto Modeler: 339 posts
Posted: Wednesday, September 02, 2009 - 08:12 PM UTC
Quoted Text
The masking tape thing scares me alittle with the possibilty of it lifting off later...are folks gluing the tape on or what?
IIRC, the "proper technique" is to apply the masking tape over clean, bare plastic, then burnish it down and paint it. You're supposed to use a good, old-fashioned yellow or tan masking tape, not the blue or green removable "painter's tape". When I first learned of this trick back in the mid-1980s, I think the only kind of masking tape available was the old-fashioned kind!
The reason I mention the "proper technique" is because I applied my last masking tape vinyl top over paint, after the model was assembled...

and it hasn't lifted. Yet. But I'm fully expecting it to in a few months.
BTW, if I can find that article, I'll scan it for you and send it to you via email.
-YL
Illinois, United States
Joined: August 30, 2005
KitMaker: 3,289 posts
Auto Modeler: 1,620 posts
Posted: Friday, September 04, 2009 - 03:12 AM UTC
Quoted Text
But I'm fully expecting it to in a few months.
BTW, if I can find that article, I'll scan it for you and send it to you via email.
-YL
...that's what would worry me. Eons ago, when building the G scale train stuff, I once used MEK to bond the plastic laminates on the curved roof of a box switcher{different types of plastic used on the build - MEK was supposed to bond both types} and 2-3 months afterward it started to separate and curl....Uhg!!! Never again did I do that!
Hey, did you clear coat over the tape to seal it?
I'd love that article should you ever find it.
-I say I have two kids- one son & one daughter...my wife says she has three- one son ,one daughter and one husband.
...and don't tell yourself you can't do it....it'll just take longer then
Illinois, United States
Joined: August 30, 2005
KitMaker: 3,289 posts
Auto Modeler: 1,620 posts
Posted: Sunday, October 11, 2009 - 09:52 AM UTC
I bet you thought I forgot all about this one - huh? Nope.
She's getting closer!
...still a couple of lil things...like the motor and trans...exhaust...maybe a clear coat and polish...
-I say I have two kids- one son & one daughter...my wife says she has three- one son ,one daughter and one husband.
...and don't tell yourself you can't do it....it'll just take longer then
Kobenhavn, Denmark
Joined: June 29, 2004
KitMaker: 6,760 posts
Auto Modeler: 2,182 posts
Posted: Sunday, October 11, 2009 - 11:16 PM UTC
Awesome piece of work so far Bob.
On the workbench:
MPC: 1972 Pontiac GTO
Revell: 1965 Mustang
Verlinden 120mm guard of the marine.
Revell: 2010 Camaro
Monogram: 1931 Rolls Royce
Italeri: LVT2 Amtrac
Illinois, United States
Joined: August 30, 2005
KitMaker: 3,289 posts
Auto Modeler: 1,620 posts
Posted: Monday, October 12, 2009 - 04:04 AM UTC
Thank you sir-
To do it over again I'd make the bed as part of the body for a better fit. I also had to really trim off the front of the dash to fit the under part of the cowl since I changed that with the el camino top/winshield addition. I also had to grind off the back end of the tail lights to the point it went "thru" for clearance sake, but a thin layer of transparent red sheet fixed that.
-I say I have two kids- one son & one daughter...my wife says she has three- one son ,one daughter and one husband.
...and don't tell yourself you can't do it....it'll just take longer then