_GOTOBOTTOM
Cars
Discuss all types of automotive modeling here.
1911 Packard Tourer 1:32 scale
wombat58
_VISITCOMMUNITY
New South Wales, Australia
Joined: March 26, 2009
KitMaker: 366 posts
Auto Modeler: 19 posts
Posted: Friday, October 22, 2010 - 10:36 PM UTC
I finished adding all the rim/tyre locking plates and bolts to all four rims. I painted the rims with Humbrol No.133 Satin Brown, the locking plates and rim centres with black printer ink then coated them with humbrol Matt Cote. The second photos shows the rims sitting on the tyres just to give a general idea of what they will look like.

Des.

http://www.ww1aircraftmodels.com


AussieReg
Staff MemberAssociate Editor
AUTOMODELER
#007
_VISITCOMMUNITY
Victoria, Australia
Joined: June 09, 2009
KitMaker: 8,156 posts
Auto Modeler: 2,953 posts
Posted: Friday, October 22, 2010 - 11:53 PM UTC
Those wheels are a work of art Des, superb !

Cheers, D
wombat58
_VISITCOMMUNITY
New South Wales, Australia
Joined: March 26, 2009
KitMaker: 366 posts
Auto Modeler: 19 posts
Posted: Sunday, July 10, 2011 - 08:26 PM UTC
Sorry guys for taking so long to add more progress photos but I had a few aircraft models to build for some people.

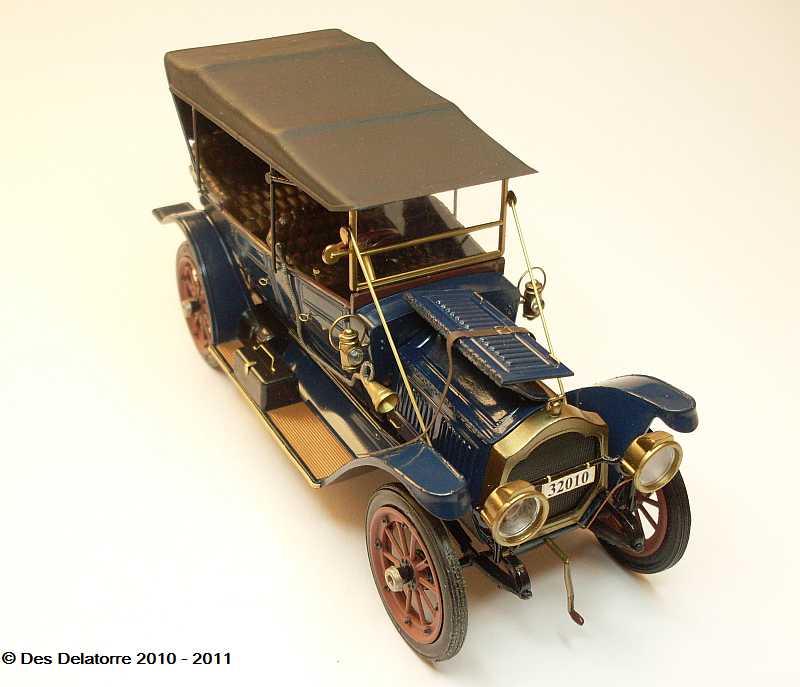
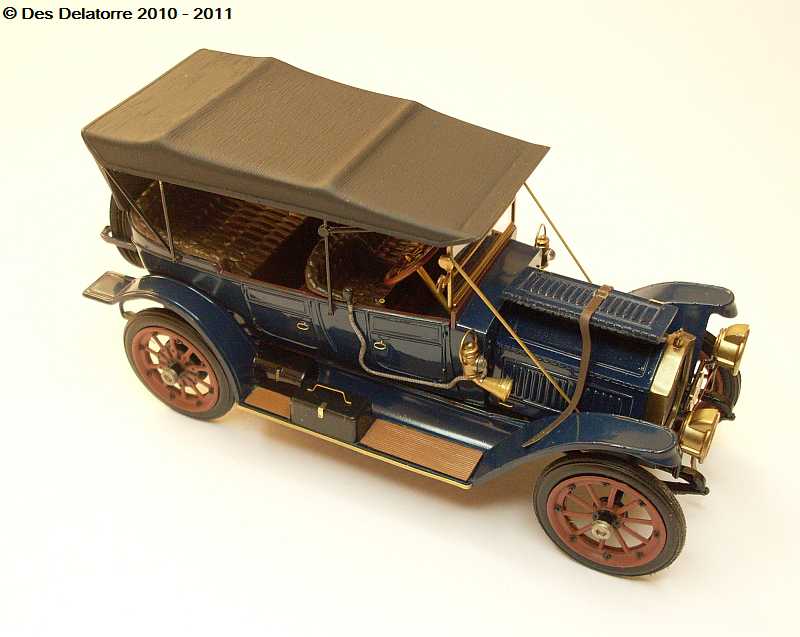
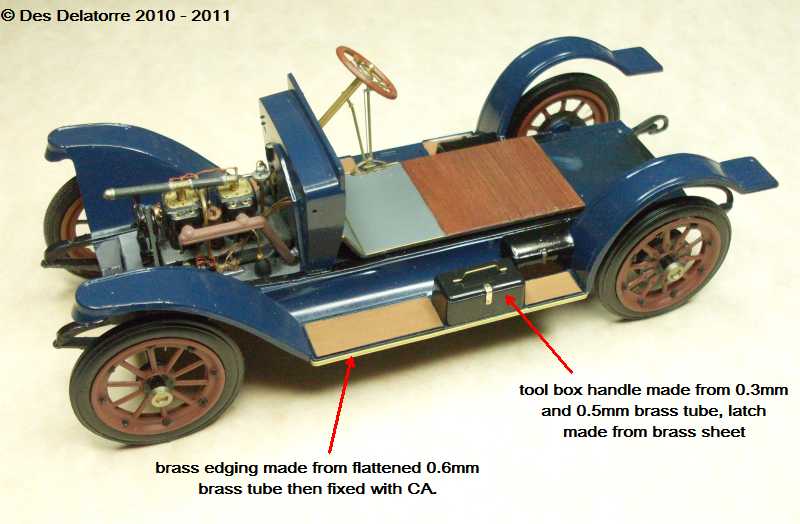
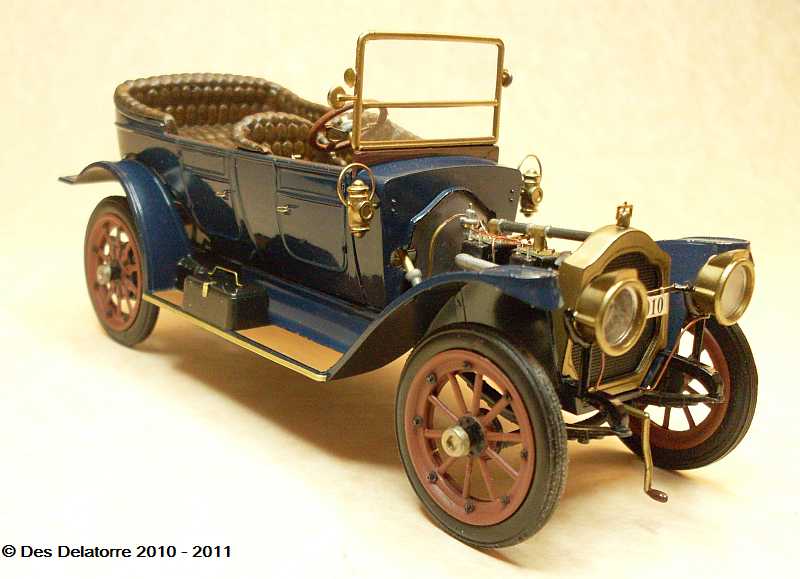
I've decided to paint the car a dark blue, I'm using Humbrol enamels which when thinned with enamel thinners by 50% sprays beautifully. The tool boxes were just a box so I added the swivel handles from brass tube, the latch is a piece of brass sheet. The running boards had a brass edging so I flattened some brass tube and glued it to the edge.


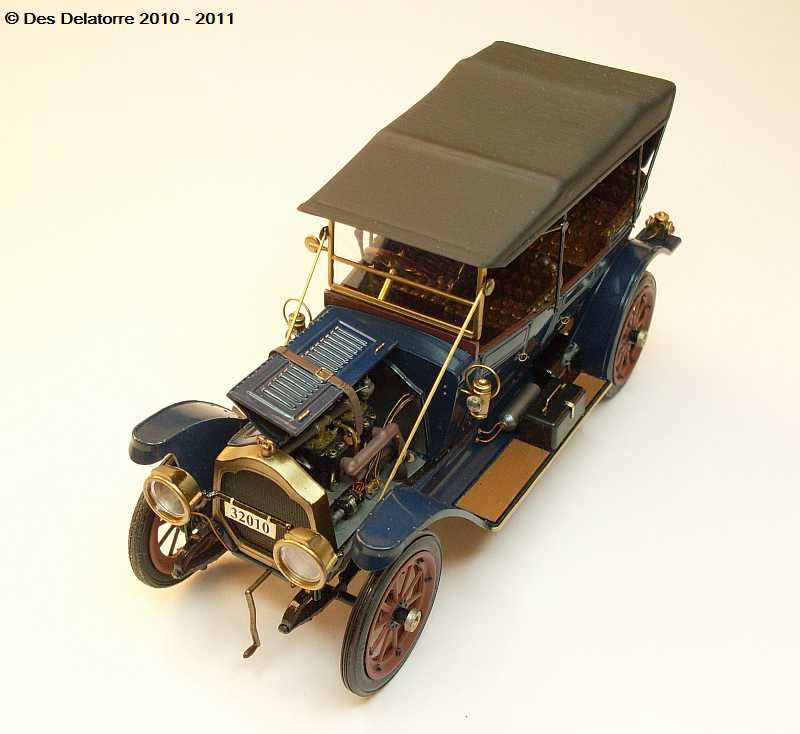
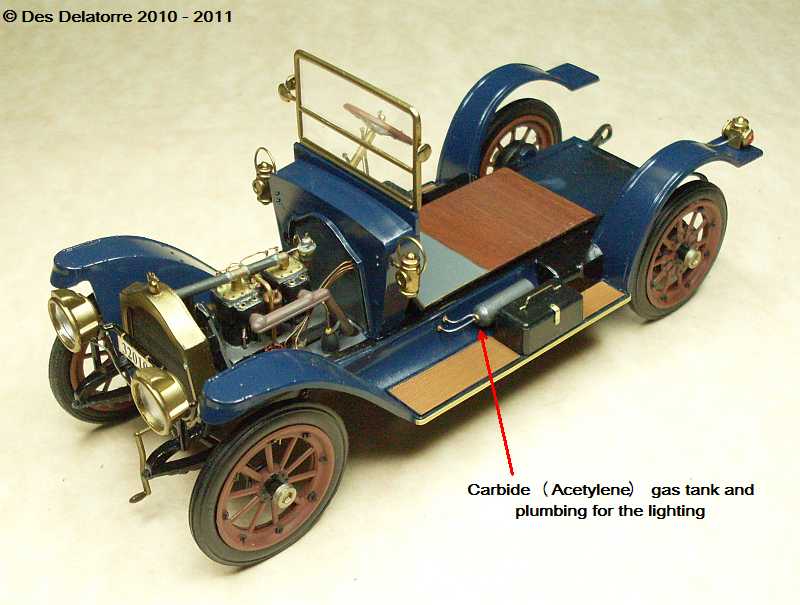
The kit was supposed to have brass plated parts but I only ended up with grey plastic, so I have painted all the brass bits with Alclad polished brass over a coat of Humbrol gloss black enamel, it turned out pretty good. The number plate is a piece of brass sheet with a white decal backing and some numbers from a left over decal sheet. As this car had carbide (acetylene) lighting I made an acetylene tank and mounted it on the running board, I connect some plumbing using copper wire. The kit supplied windscreen was very scratched and way too thick so I used acetate sheet.


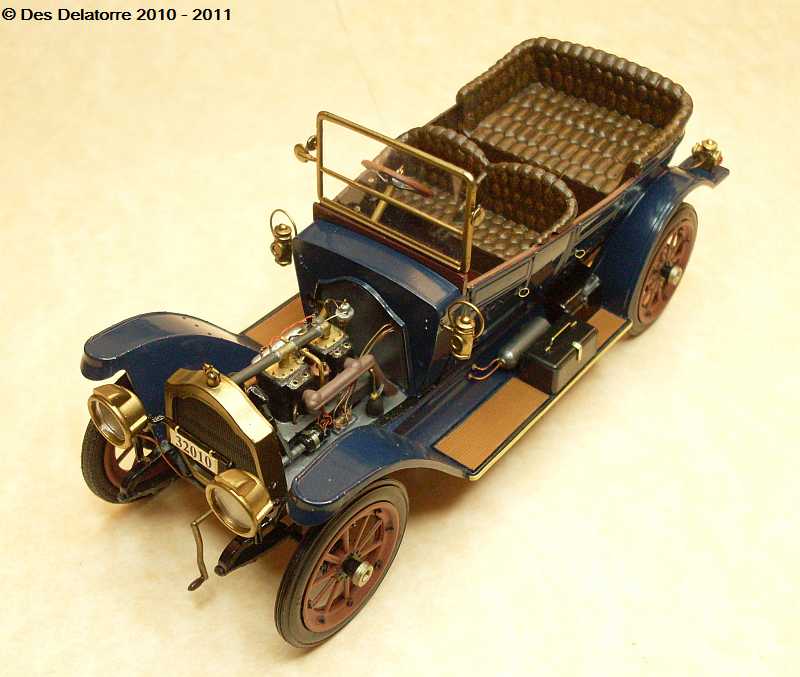
The next photos show the body painted and fitted, I made door handles from 0.18mm copper wire painted brass. The seats are also fitted, they were first sprayed with Gunze yellow then I used Raw Umber oil paint doing a stipple effect. When it was dry I sprayed it with Humbrol Matt Cote then went over it again with the Raw Umber but this time very diluted, just a wash. A final coat of Humbrol Satin Cote finished it off.


I am now working on the 'roof', it is proving a little time consuming, the frame that holds the roof up which was supplied in the kit are too short, one set of frames are 1/4 inch short, so I am making new ones from brass tube. A further up-date will be posted in a day or two, I promise.

Des.
Hwa-Rang
_VISITCOMMUNITY
Kobenhavn, Denmark
Joined: June 29, 2004
KitMaker: 6,760 posts
Auto Modeler: 2,182 posts
Posted: Monday, July 11, 2011 - 10:02 PM UTC
A long time since your latest update, but well worth the wait. This is seriously impressive work Des.
AussieReg
Staff MemberAssociate Editor
AUTOMODELER
#007
_VISITCOMMUNITY
Victoria, Australia
Joined: June 09, 2009
KitMaker: 8,156 posts
Auto Modeler: 2,953 posts
Posted: Monday, July 11, 2011 - 11:42 PM UTC
Awesome work Des, incredible detail !
wombat58
_VISITCOMMUNITY
New South Wales, Australia
Joined: March 26, 2009
KitMaker: 366 posts
Auto Modeler: 19 posts
Posted: Wednesday, July 13, 2011 - 03:33 PM UTC
Thanks guys for your kind words.

Here are the photos of my finished Packard, even though it is a very old kit it was a joy to build. Adding the extra detailing certainly helps the overall appearance.

Des.


Hwa-Rang
_VISITCOMMUNITY
Kobenhavn, Denmark
Joined: June 29, 2004
KitMaker: 6,760 posts
Auto Modeler: 2,182 posts
Posted: Sunday, July 17, 2011 - 06:48 AM UTC
Outstanding piece of work Des.
 _GOTOTOP