_GOTOBOTTOM
Cars
Discuss all types of automotive modeling here.
70 Hemi Cuda vs. 70 Camaro
VonCuda
_VISITCOMMUNITY
North Carolina, United States
Joined: November 28, 2005
KitMaker: 2,216 posts
Auto Modeler: 522 posts
Posted: Thursday, January 01, 2015 - 06:29 AM UTC
Well the time has come finally to teach all you chevy heathen a thing or two about history.....as well as the ultimate triumph of good over evil. This will be my first build blog in a few years so bare with me.
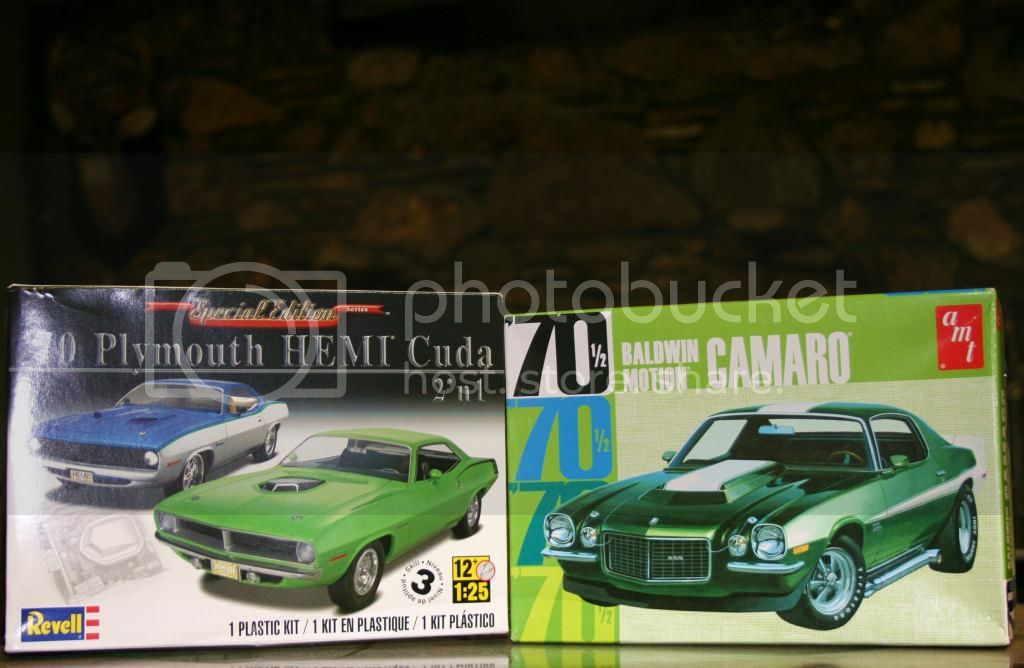
My kits are a Revell 1970 Hemi Cuda 2-n-1 and an AMT 1970-1/2 Chevy Camaro. I have already made some good progress on the Camaro kit today and wanted to get some pictures up to get things started. I have decided not to build the street rod version of the Camaro with the jacked up rear suspension and chrome side pipes. Instead I'll just build both cars as close to factory stock as possible.


The kits in their boxes:


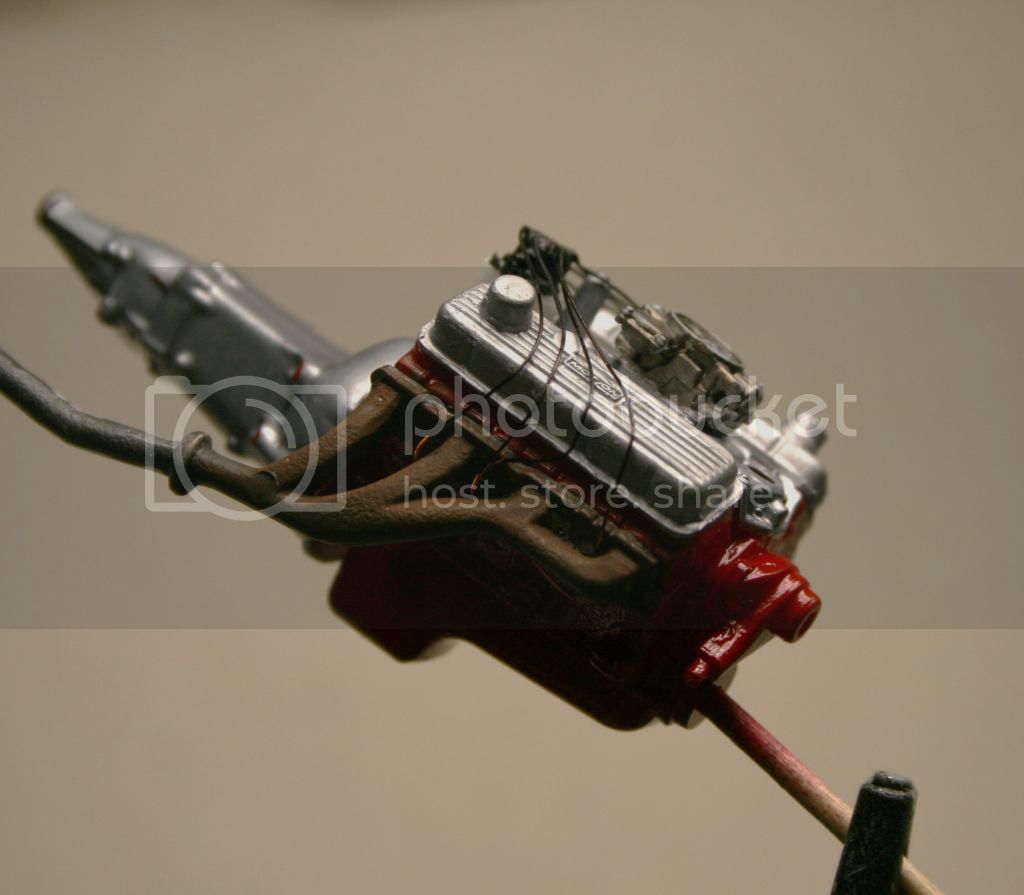
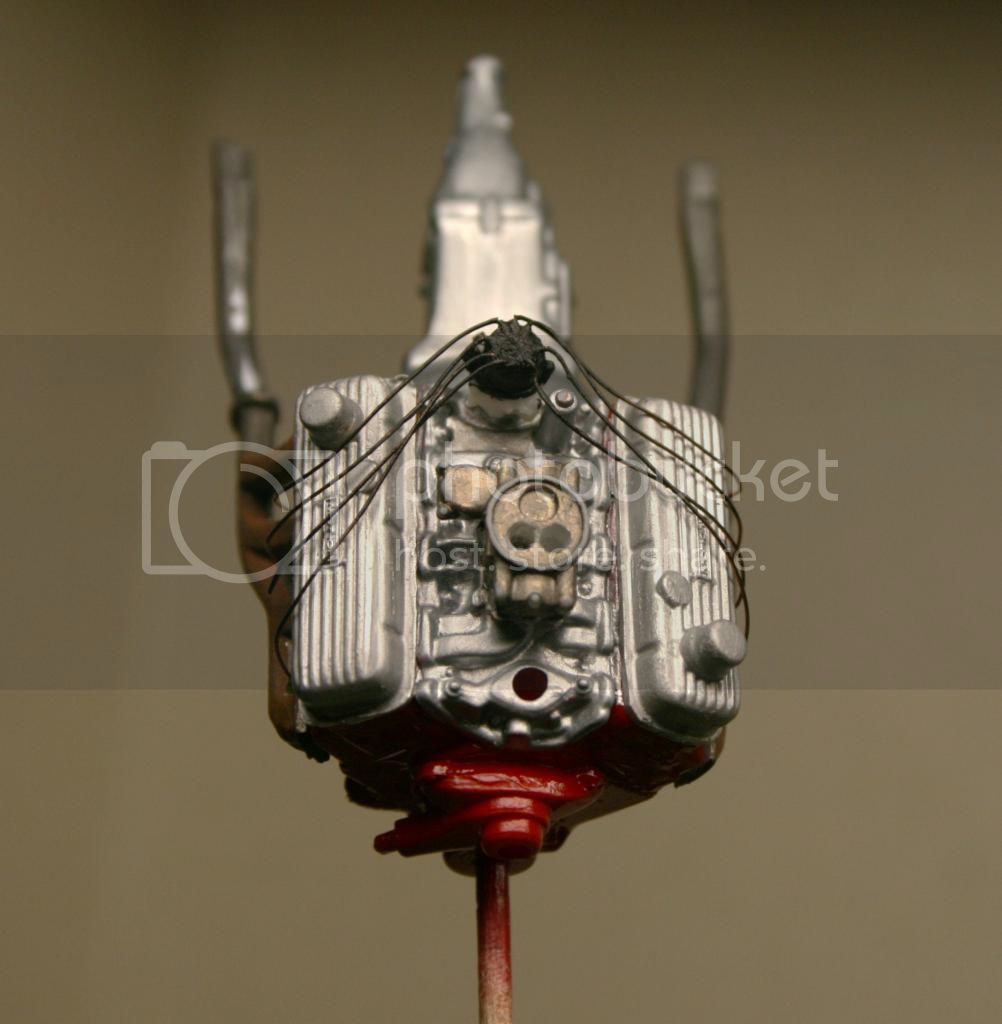
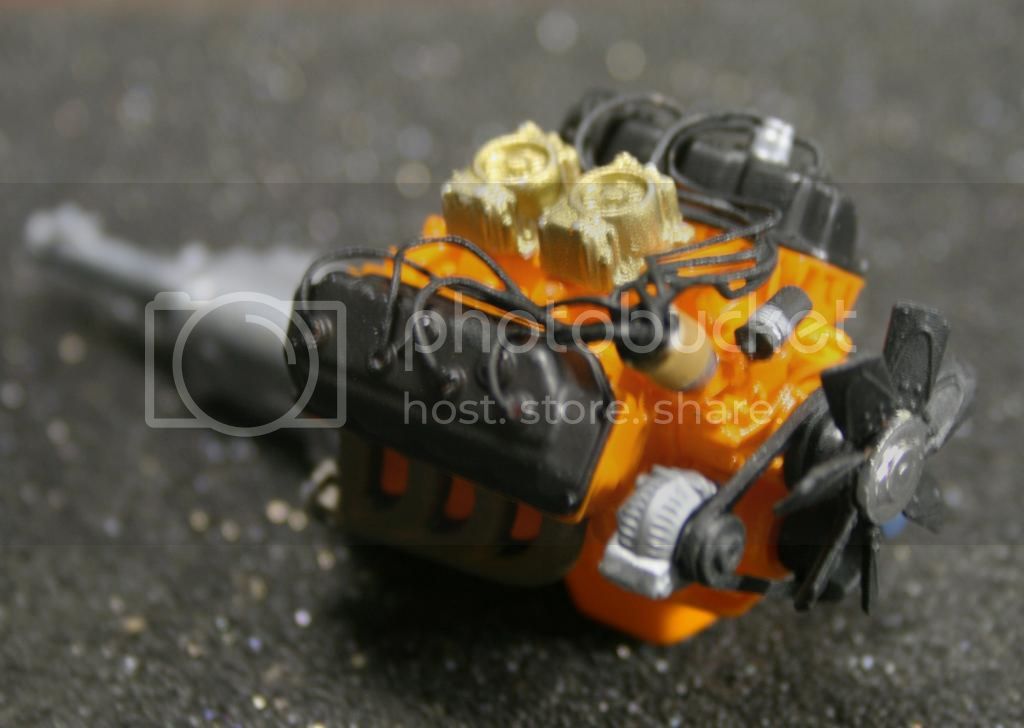
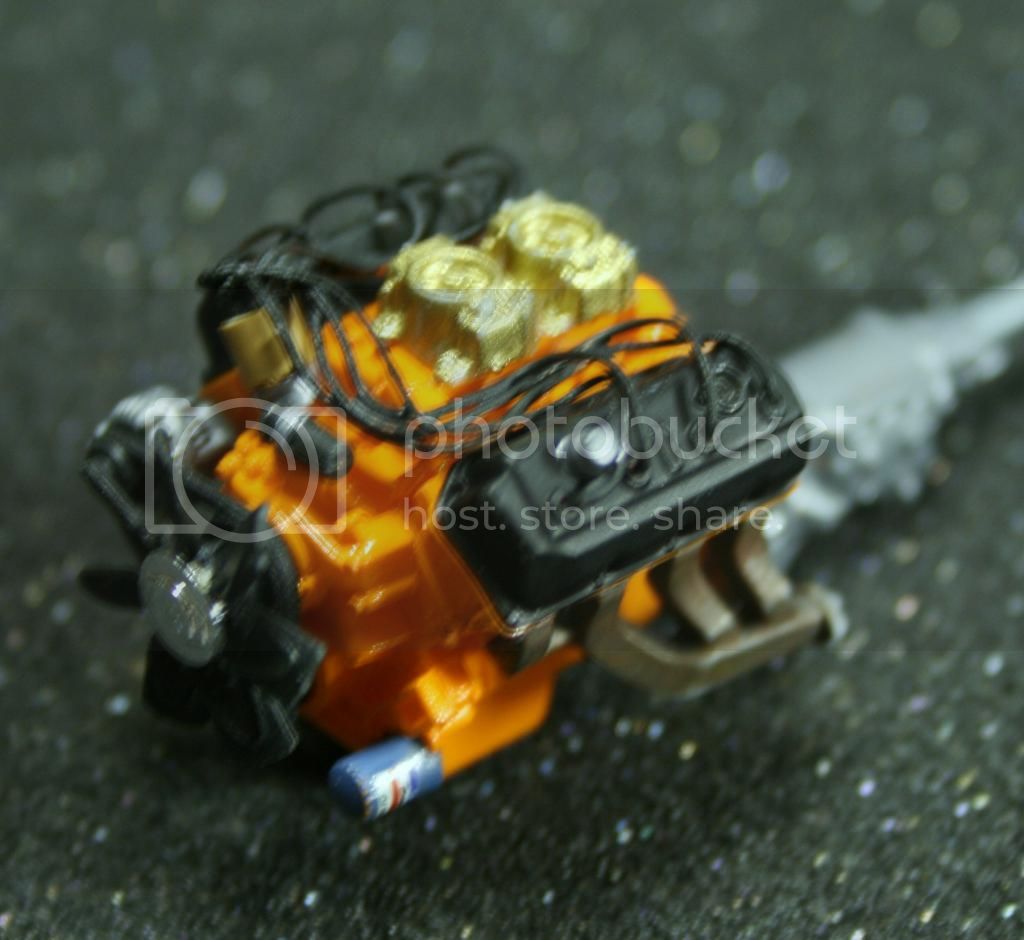
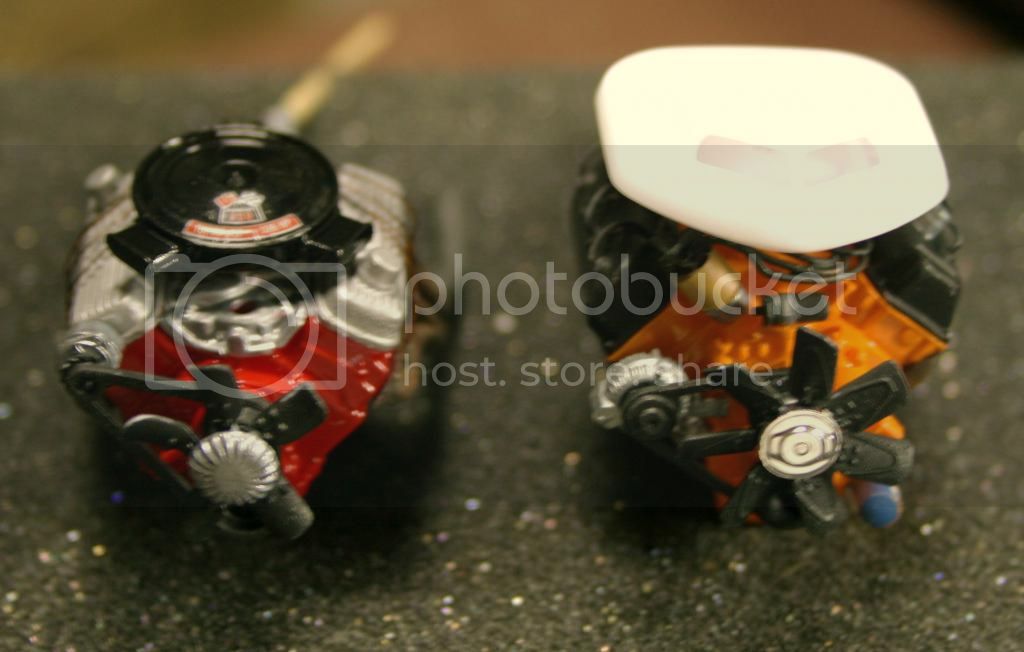
The poor little Chevy engine. I hate anything chrome, either in a model kit or in real life. So...I stripped the chrome off the kits valve covers and sprayed some MM Aluminium Plate on them. The intake & transmission were painted with Floquil stainless steel for some contrast and the carb was painted with MM Jet Exhaust.


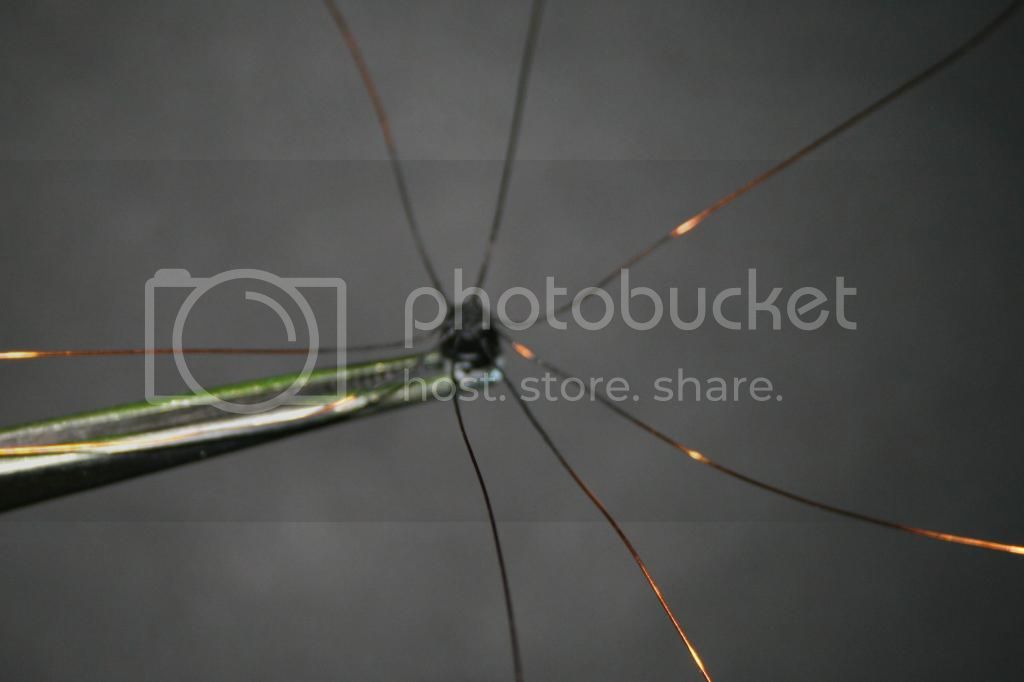
Next up is my first attempt and making spark plug wires. I drilled out the holes in the distributor with a micro bit and CA glued in some copper wires which I'll paint black later on. The wires are a bit small to scale but being it's a Chevy engine and will probably never start....oh well.


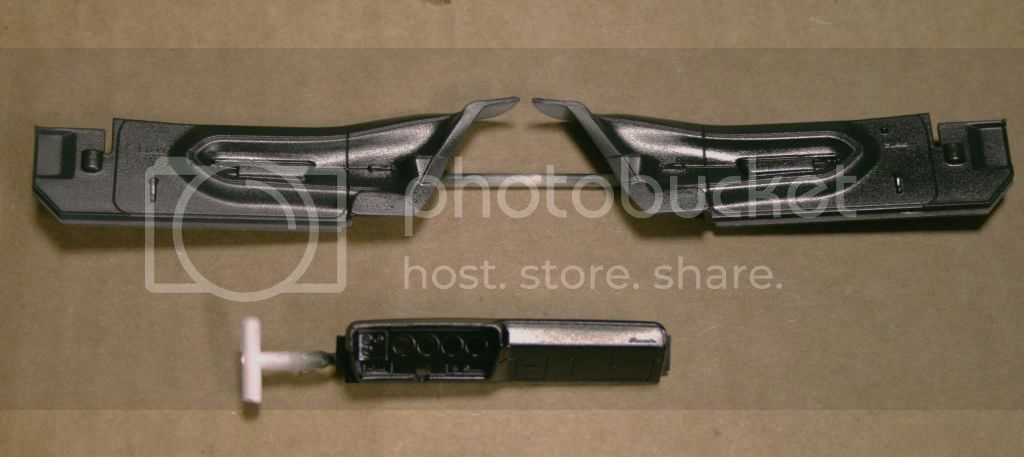
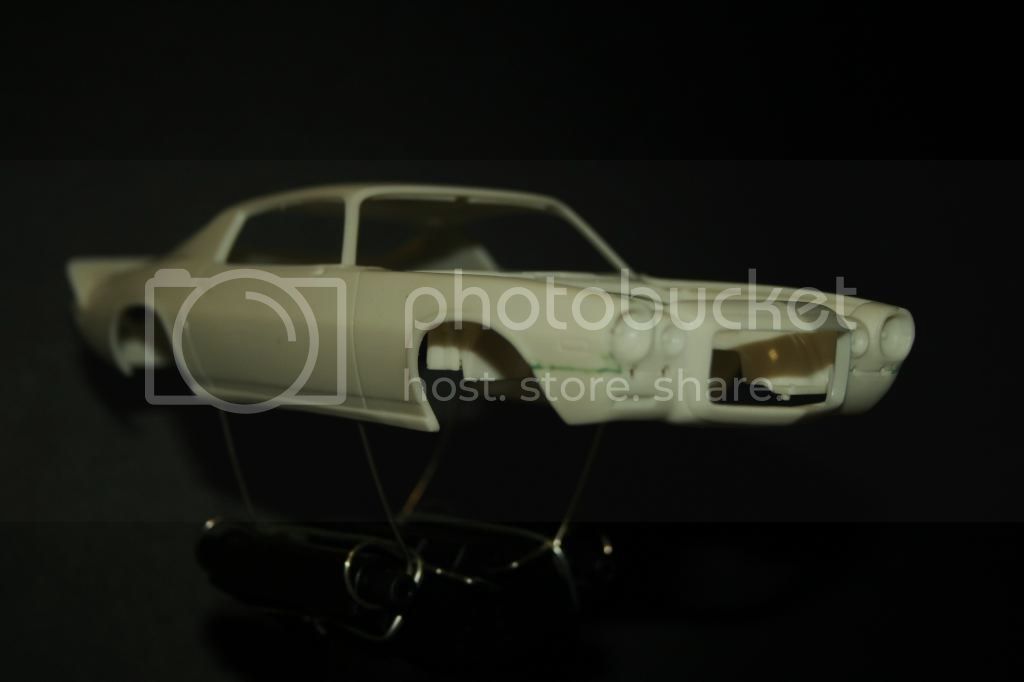
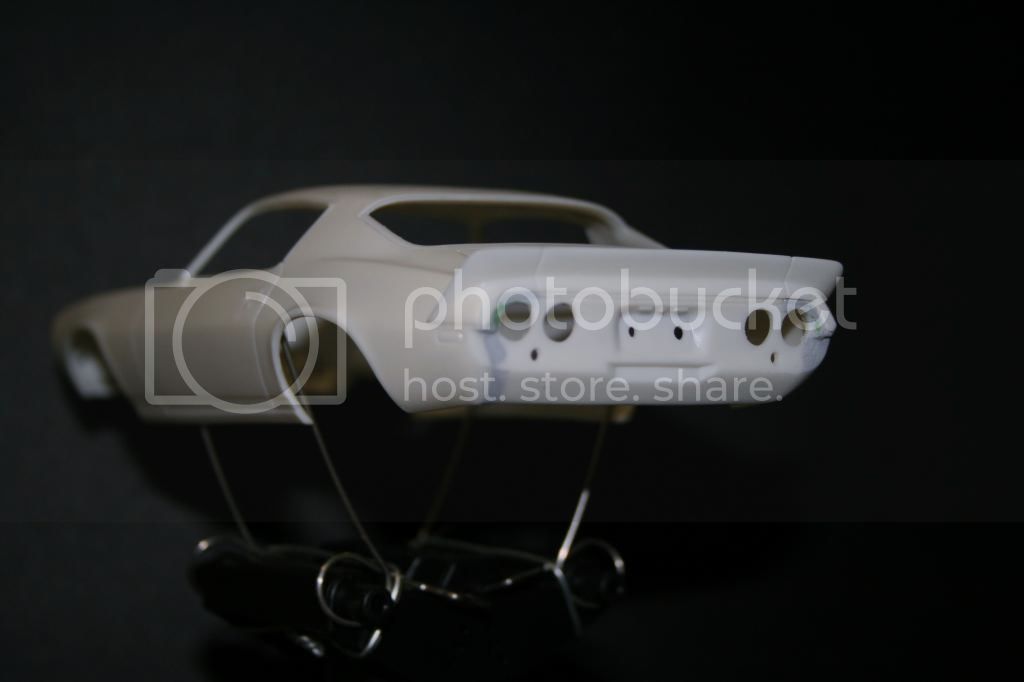
A couple of shots of the body so far. I have installed the rear valance, rear spoiler and front valance. Had to use very minimal green putty for gaps. The rear spoiler will take a lot more time as it's fit is atrocious.


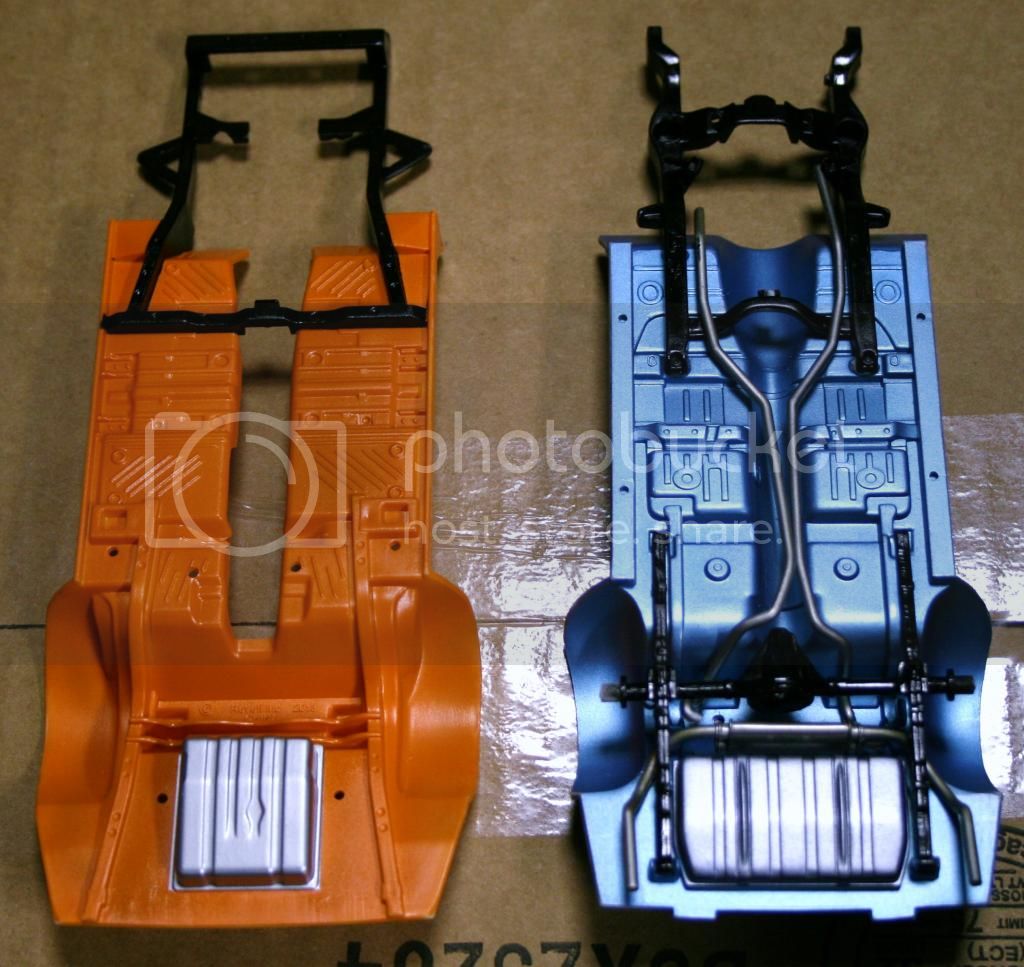
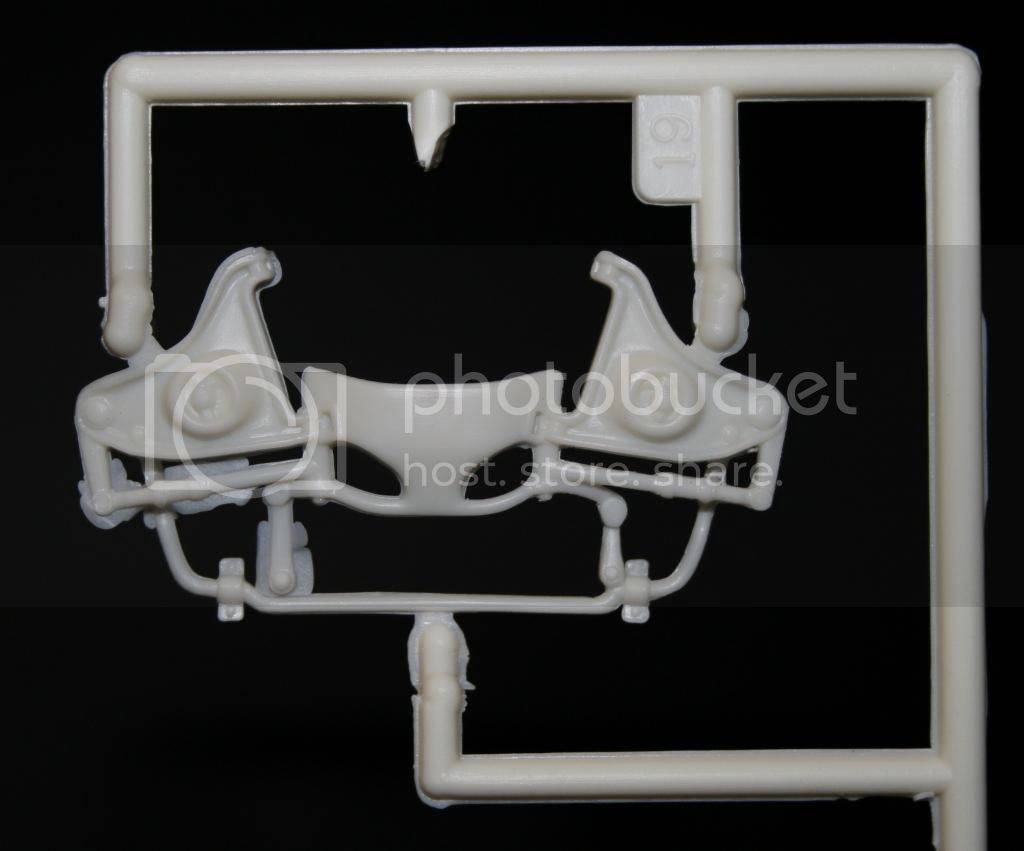
Next up is a shot of the lower control arms and sway bar. I left the flash on the left side and cleaned up the right side to show just how much flash is on these parts. So far this is the only drawback of this kit, which is not really a big deal.


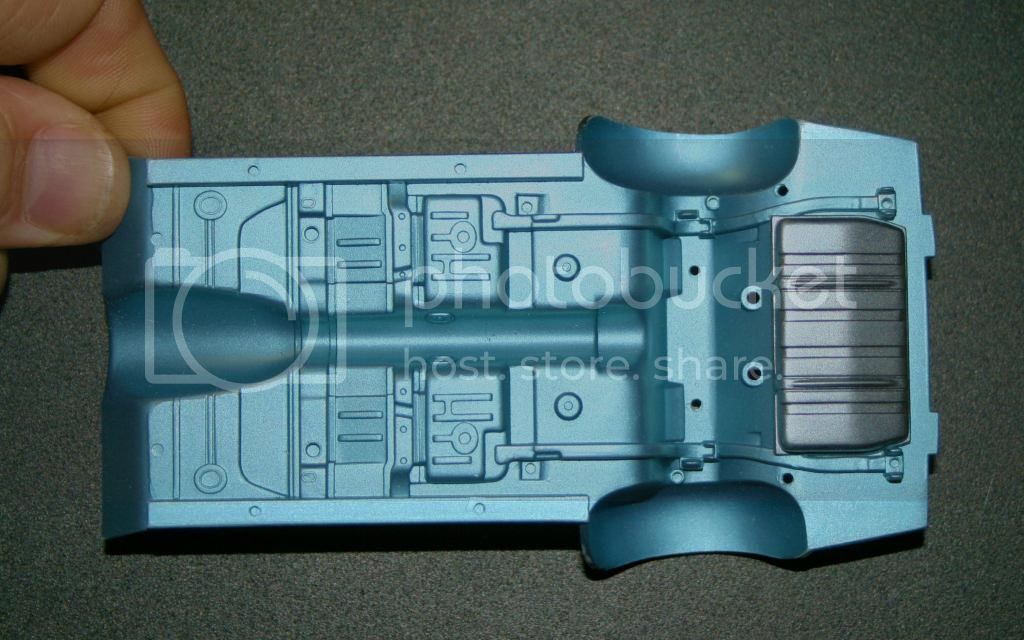
Last shot is of the chassis with the Nassau Blue Metallic paint I've chosen for the body color. I painted the Gas tank with Alclad II Dark Aluminum for some contrast.


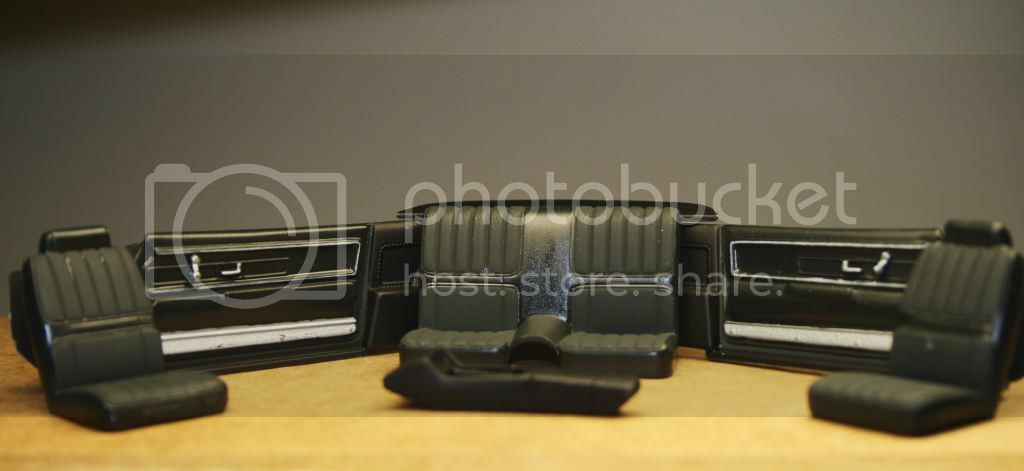
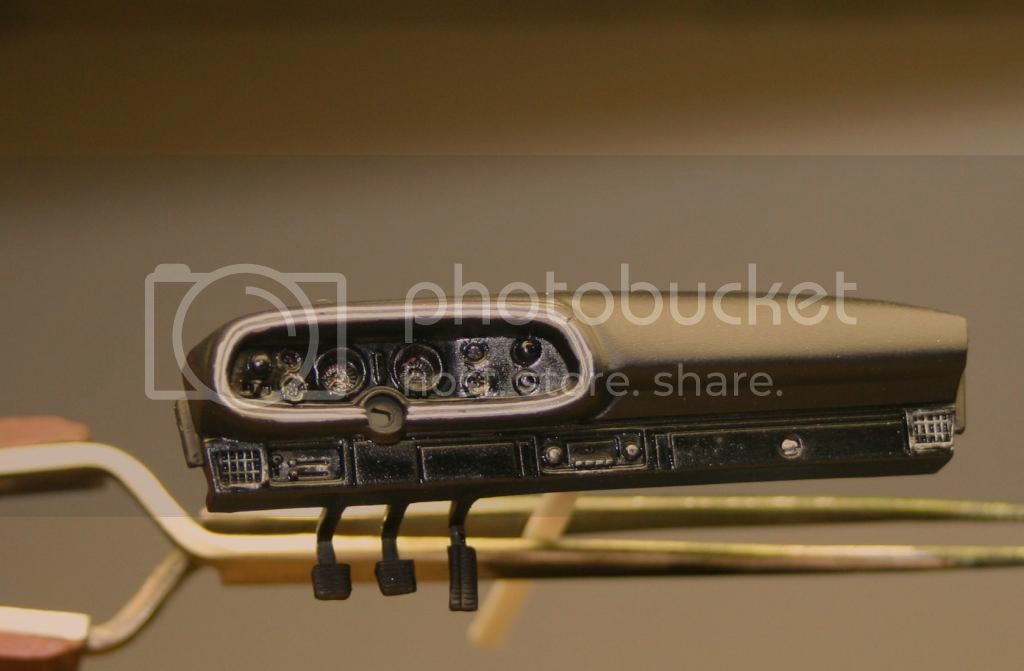
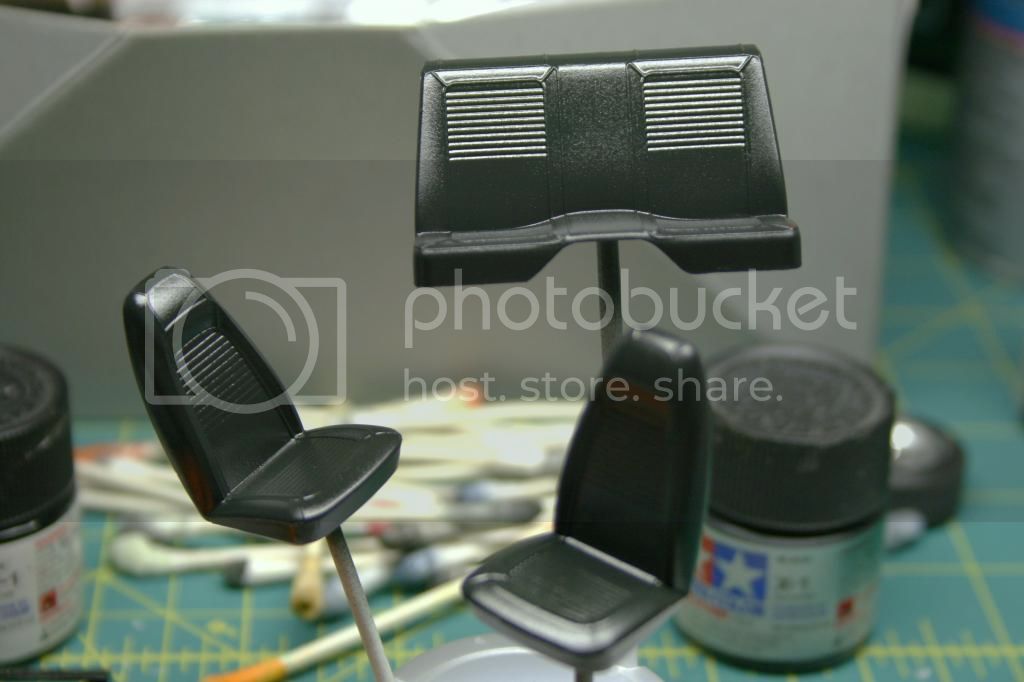
So far this kit has been pretty easy. Not much alignment problems or major gaps to fill and plenty of detail. I'm going to try and get started on the interior tonight. Hope you guys enjoy my re-entry into model building as much as I am. I have to say, today has been a good day working with plastic and leaving all of my real world problems behind for a while.
KoSprueOne
_VISITCOMMUNITY
Myanmar
Joined: March 05, 2004
KitMaker: 4,011 posts
Auto Modeler: 851 posts
Posted: Thursday, January 01, 2015 - 06:48 AM UTC
Good , no, Great to see you back in forums

I think the "… chrome side pipes…." are referred to as Lake Pipes. It's cool though, since you're a 'Mopard', you wouldn't know

I share the same sentiment regarding all things chrome


md72
#439
_VISITCOMMUNITY
Washington, United States
Joined: November 05, 2005
KitMaker: 4,950 posts
Auto Modeler: 555 posts
Posted: Thursday, January 01, 2015 - 07:27 AM UTC
Wait a minute, the Beach Boys put Lake pipes on a FORD, not a Chevy.
jimb
_VISITCOMMUNITY
New York, United States
Joined: August 25, 2006
KitMaker: 2,539 posts
Auto Modeler: 1,405 posts
Posted: Thursday, January 01, 2015 - 08:48 AM UTC
Nice start to the Chevy.

Jim
AussieReg
Staff MemberAssociate Editor
AUTOMODELER
#007
_VISITCOMMUNITY
Victoria, Australia
Joined: June 09, 2009
KitMaker: 8,156 posts
Auto Modeler: 2,953 posts
Posted: Thursday, January 01, 2015 - 09:40 AM UTC
'Cuda, it's been way too long my friend! Absolutely awesome to have you posting progress reports again, instead of just insults.

Great work so far on the Camaro, it's good to see that you started your thread on a high note to keep us all interested, if you had started with the HEMI then it is highly likely that admin would have just deleted this thread as SPAM 😝

I am seriously looking forward to following your builds, I will try to get a start on mine in the next few days.

Cheers, D 🚗
Szmann
_VISITCOMMUNITY
Netherlands Antilles
Joined: September 02, 2014
KitMaker: 1,977 posts
Auto Modeler: 1,371 posts
Posted: Thursday, January 01, 2015 - 08:52 PM UTC
Happy New Year, guys!

Hermon, you set for a good start. Good on you, mate! I am still waiting for my models, perhaps around 15th of this month. I still have to finish my Cooper first...
Just small thing: the underside of the car painted with body color? Never seen on stock cars.

Warm Regards.
VonCuda
_VISITCOMMUNITY
North Carolina, United States
Joined: November 28, 2005
KitMaker: 2,216 posts
Auto Modeler: 522 posts
Posted: Friday, January 02, 2015 - 04:51 AM UTC
Gabriel, I honestly don't know much about chevys so you are probably right about the chassis not being body color. Actually this is the first car I've ever built that I didn't paint the chassis black. I liked the blue color and thought it would make all the different suspension and engine colors stand out. Really, it being a chevy and all.....I'll just throw it in the wood stove after the group build is over anyway.


Here is a shot of my finished interior parts pre-assembly and a shot of the dash. I used three different shades of black including NATO black, and German black green as well as a mix of flats and semigloss to try and break things up.


The dash was done the same way and highlighted with a silver pencil. The kit instrument decals were really nice but you can barely see them.


I'm feeling a bit nauseous after spending so much time handling the chevy kit. After dinner I'm going to jump into that beautiful Cuda box and start building that mans man of engines...the HEMI.
KoSprueOne
_VISITCOMMUNITY
Myanmar
Joined: March 05, 2004
KitMaker: 4,011 posts
Auto Modeler: 851 posts
Posted: Friday, January 02, 2015 - 05:36 AM UTC
wow, that interior is looking sport classy. I like the different black setting' each other off

If the Chevy is looking this good already, I wonder how the other thing is going to evolve


AussieReg
Staff MemberAssociate Editor
AUTOMODELER
#007
_VISITCOMMUNITY
Victoria, Australia
Joined: June 09, 2009
KitMaker: 8,156 posts
Auto Modeler: 2,953 posts
Posted: Friday, January 02, 2015 - 06:33 AM UTC
'Cuda, you're flyin man, ease up!

Then again, best you get the Chev finished early because that Hemi is going to fall apart every time you turn your back on the bench and it will take you the rest of the year to get it sorted.

Awesome work on the interior mate, looking really nice.

Cheers, D
Hwa-Rang
_VISITCOMMUNITY
Kobenhavn, Denmark
Joined: June 29, 2004
KitMaker: 6,760 posts
Auto Modeler: 2,182 posts
Posted: Friday, January 02, 2015 - 09:31 PM UTC
No alignment problems and no major gaps to fill. Guess the Chevy wont be factory stock after all
VonCuda
_VISITCOMMUNITY
North Carolina, United States
Joined: November 28, 2005
KitMaker: 2,216 posts
Auto Modeler: 522 posts
Posted: Sunday, January 04, 2015 - 02:56 AM UTC
This will be the last of my updates for a while since I have to start back to work tomorrow.

Got the some paint on the underside of the Cuda as well as a start to the interior.


Had to do a lot of masking to paint the Cuda front frame assembly since it's molded as one piece to the underbody. Also painted the gas tank Alclad Aluminum.


The seats are painted Tamiya Nato Black with a coat of Future to keep it from being scratched. The decal set has some silvery looking inserts for the seats but I don't know if I'll use them or not. I'll spray a coat of semi-flat over them after the Future has set up for a while.


Door panels are done the same way. This kit also includes a piece of clear sprue which goes on the back of the dash at the instrument panel location to simulate glass over the gauges. I haven't installed it yet but will take some pics after it's in place and the gauge decals are in place.


I'll try and get the two interiors wrapped up tonight. From here on out what little free time I have will be devoted to getting both bodies sanded, filled, primed and ready for paint. I'm going to take my time on them so I can get a good shine going on.


ps: On the Cuda I have decided to do something I haven't attempted before and add a vinyl roof. I've seen a couple of videos on this technique and I'm excited to try it out.
AussieReg
Staff MemberAssociate Editor
AUTOMODELER
#007
_VISITCOMMUNITY
Victoria, Australia
Joined: June 09, 2009
KitMaker: 8,156 posts
Auto Modeler: 2,953 posts
Posted: Sunday, January 04, 2015 - 03:31 AM UTC
Beautiful work mate, looking good!
VonCuda
_VISITCOMMUNITY
North Carolina, United States
Joined: November 28, 2005
KitMaker: 2,216 posts
Auto Modeler: 522 posts
Posted: Sunday, January 04, 2015 - 04:06 AM UTC
Forgot to add this one, which happens to be the most important distinction between the pitiful, slow, economy car camaro and the mighty, mountain crumbling, awe inspiring, jaw dropping, head turning, monumental beast, sex on wheels we call the Hemi Cuda.

As can be seen here there really is no comparing the tiny 454, single carb chebby engine to the awesome, fire breathing monster 426, dual 4bbl carb Hemi.


I'll add all the bits and pieces later on, including the distributors and plug wires that I'm attempting to make.

That's all for now. Have a great week everyone.
Hwa-Rang
_VISITCOMMUNITY
Kobenhavn, Denmark
Joined: June 29, 2004
KitMaker: 6,760 posts
Auto Modeler: 2,182 posts
Posted: Sunday, January 04, 2015 - 04:13 PM UTC
Need I say, the Hemi looks awesome.

Must say you've made an amazing job making the Chevy "engine" actually look almost like an engine. No doubt it must have taken a lot of skill and effort.
Szmann
_VISITCOMMUNITY
Netherlands Antilles
Joined: September 02, 2014
KitMaker: 1,977 posts
Auto Modeler: 1,371 posts
Posted: Monday, January 05, 2015 - 01:51 AM UTC
Hi, Hermon. You're on fire, mate! There is no way I can match your speed!

Nicely done so far!
VonCuda
_VISITCOMMUNITY
North Carolina, United States
Joined: November 28, 2005
KitMaker: 2,216 posts
Auto Modeler: 522 posts
Posted: Tuesday, January 06, 2015 - 05:54 AM UTC
Only had an hour of bench time this week but I did manage to get the chebby engines wires installed. This was my first attempt at doing this and even though the wire is a little small to scale I can live with it. Also had to rob a Charger kit to get exhaust manifolds to put on the chebby engine since the kit only comes with one option which is full headers to be used with sidepipes.


Still have to do some touch up painting on the wires, paint the bottom of the distributor, etc. but it's starting to come together.
windysean
_VISITCOMMUNITY
Wisconsin, United States
Joined: September 11, 2009
KitMaker: 1,917 posts
Auto Modeler: 268 posts
Posted: Tuesday, January 06, 2015 - 07:47 AM UTC

Quoted Text

'Cuda, you're flyin man, ease up!
...
Awesome work on the interior mate, looking really nice.

Cheers, D


Ditto from me!
VonCuda
_VISITCOMMUNITY
North Carolina, United States
Joined: November 28, 2005
KitMaker: 2,216 posts
Auto Modeler: 522 posts
Posted: Friday, January 09, 2015 - 07:52 AM UTC
Sorry, these pictures kind of suck guys. But after attaching these plug wires my eyes are about shot. Here's the Hemi with the plug wires installed with fan and belt. I used a little bit larger wires on this one and I think it turned out a bit better scale wise.


I'll try and get both engines buttoned up tonight and take a side by side shot.
VonCuda
_VISITCOMMUNITY
North Carolina, United States
Joined: November 28, 2005
KitMaker: 2,216 posts
Auto Modeler: 522 posts
Posted: Friday, January 09, 2015 - 08:51 AM UTC
I'm too tired to paint the Cuda shaker hood scoop tonight, but here's a pic of the two engines side by side.....basically finished.


Kind of sucks that all the detail and plug wires on the Hemi are pretty much hidden by the shaker scoop. It is what it is. Time for bed.
rv1963
_VISITCOMMUNITY
New York, United States
Joined: December 07, 2004
KitMaker: 1,888 posts
Auto Modeler: 806 posts
Posted: Saturday, January 10, 2015 - 04:50 AM UTC
Nice detail work Hermon. I bet you haven't heard from me in a while.
AussieReg
Staff MemberAssociate Editor
AUTOMODELER
#007
_VISITCOMMUNITY
Victoria, Australia
Joined: June 09, 2009
KitMaker: 8,156 posts
Auto Modeler: 2,953 posts
Posted: Saturday, January 10, 2015 - 07:04 AM UTC
Nice work 'Cuda, making great progress.

The awesome powerplant on the left is just oozing class and power, the one on the right looks to be oozing oil and a little smoke!

VonCuda
_VISITCOMMUNITY
North Carolina, United States
Joined: November 28, 2005
KitMaker: 2,216 posts
Auto Modeler: 522 posts
Posted: Sunday, January 11, 2015 - 04:08 AM UTC
Robert! Good to see you back man. I hope you're planning on joining in with us on this one.

Damian, thanks.....I guess


I didn't get much done this weekend. My son headed back to college today so I spent as much time as possible with him.
SHarjacek
_VISITCOMMUNITY
Croatia Hrvatska
Joined: January 29, 2011
KitMaker: 977 posts
Auto Modeler: 53 posts
Posted: Sunday, January 11, 2015 - 05:39 AM UTC
loving this build so far, looking forward to new updates!


Kind regards
AussieReg
Staff MemberAssociate Editor
AUTOMODELER
#007
_VISITCOMMUNITY
Victoria, Australia
Joined: June 09, 2009
KitMaker: 8,156 posts
Auto Modeler: 2,953 posts
Posted: Sunday, January 11, 2015 - 05:58 AM UTC

Quoted Text

Damian, thanks.....I guess


You're welcome my friend, that's what I'm here for !
Hwa-Rang
_VISITCOMMUNITY
Kobenhavn, Denmark
Joined: June 29, 2004
KitMaker: 6,760 posts
Auto Modeler: 2,182 posts
Posted: Sunday, January 11, 2015 - 12:04 PM UTC
It's funny how small the puny little Chevy engine looks next to the mighty HEMI. Look how the Chevy "Big" block is blushing with shame.

Superb work there Hermon.
 _GOTOTOP