

Go to automodeler.com for the current dynamic site!


Cars
Discuss all types of automotive modeling here.
Discuss all types of automotive modeling here.
Hosted by Jim Starkweather
Heller 1/8. Traction Avant

kpnuts

Joined: December 20, 2013
KitMaker: 1,179 posts
Auto Modeler: 647 posts
Posted: Sunday, September 06, 2015 - 02:13 AM UTC
Hi all since I sold a couple of my ships and had 400 quid burning a hole in my pocket I bought this kit plus revells 1 / 12 mustang gt 500 and the foose camaro, these and the Citroen Traction Avant and my missus is buying me the Italari mefistofeles for my birthday, I am going to be a busy boy ( and that's not counting my on going builds )

Hwa-Rang

Joined: June 29, 2004
KitMaker: 6,760 posts
Auto Modeler: 2,182 posts

Posted: Sunday, September 06, 2015 - 12:33 PM UTC
Some really cool kits there Ken. Been comtemplating buying the Fiat, for a long time now. Very cool model, but will take up a lot of space.
Looking forward to seeing them build
Looking forward to seeing them build
kpnuts
Joined: December 20, 2013
KitMaker: 1,179 posts
Auto Modeler: 647 posts
Posted: Wednesday, September 09, 2015 - 10:14 PM UTC
Hi all well it arrived today and it is mahoosive

that is a 1/12 kit box on top of it
just to give you an idea of its size
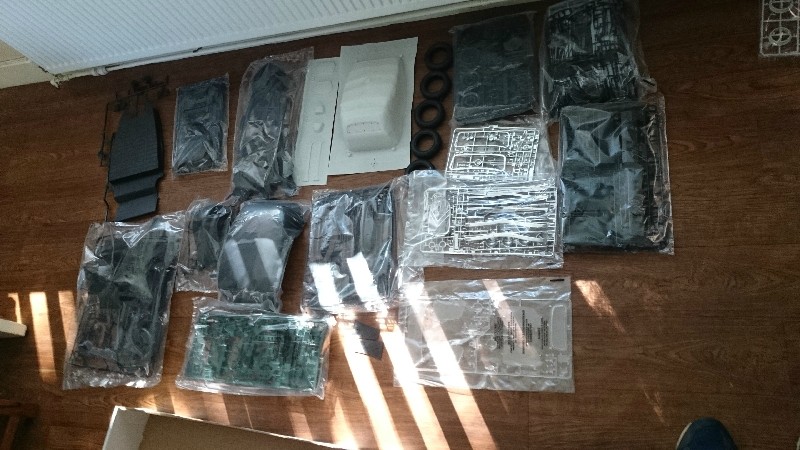
these are the sprues there are 3 or 4 sprues to each bag just for comparison (the rule devides the too model kits) the camaro has 1 sprue to each bag apart from the black sprues and that has 2 sprues
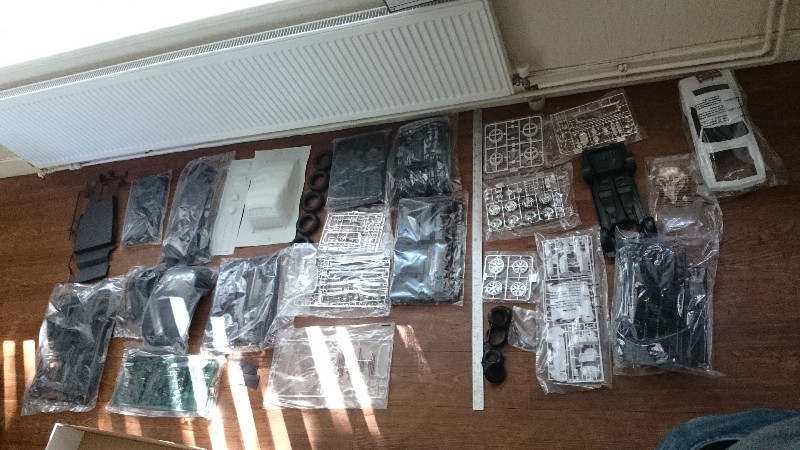
one tip I've already learned do not take the sprues out of the box as you wont get the all back in and shut the lid (unless you have a degree in astrophysics) that is, this is one case where the box is not big enough.
that is a 1/12 kit box on top of it
just to give you an idea of its size
these are the sprues there are 3 or 4 sprues to each bag just for comparison (the rule devides the too model kits) the camaro has 1 sprue to each bag apart from the black sprues and that has 2 sprues
one tip I've already learned do not take the sprues out of the box as you wont get the all back in and shut the lid (unless you have a degree in astrophysics) that is, this is one case where the box is not big enough.
kpnuts
Joined: December 20, 2013
KitMaker: 1,179 posts
Auto Modeler: 647 posts
Posted: Saturday, September 12, 2015 - 12:25 AM UTC
Hi I've been given a superb idea for this, I am going to have it in a barn being readied for a mission by the French resistance with the cross of lorraine and a tricolour on it, the possibilities are endless, need to find some 1/8 figures and things like bren guns or make them from scratch I've been doing some research and this was available in blue irise (which is apparently a course metallic where the flakes aluminum were bigger than modern colours) if I can find I will do it that colour or ac615 blue marine which it was also available in, since I'm on hols from Monday I won't be starting it for a while (lots of other stuff to finish first) but (assuming I can get internet) being on hols will give me lots of time for research.
kpnuts
Joined: December 20, 2013
KitMaker: 1,179 posts
Auto Modeler: 647 posts
Posted: Saturday, October 17, 2015 - 09:44 PM UTC
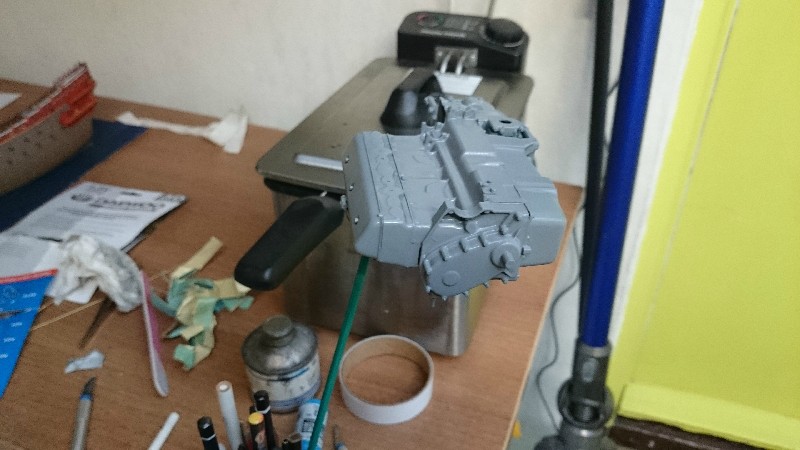
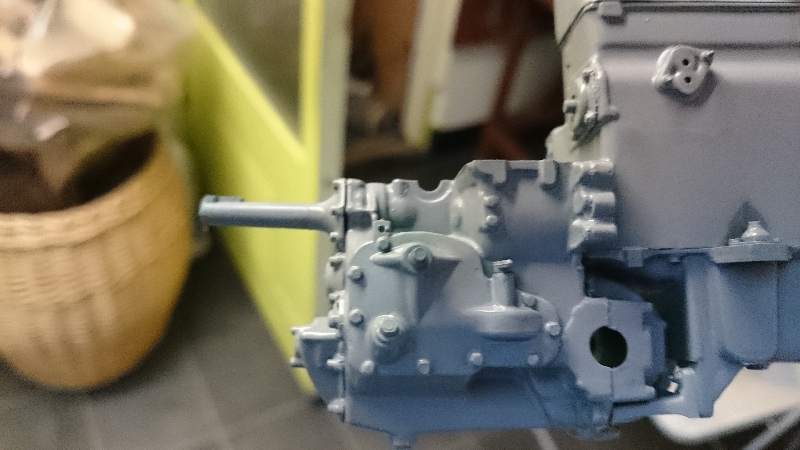
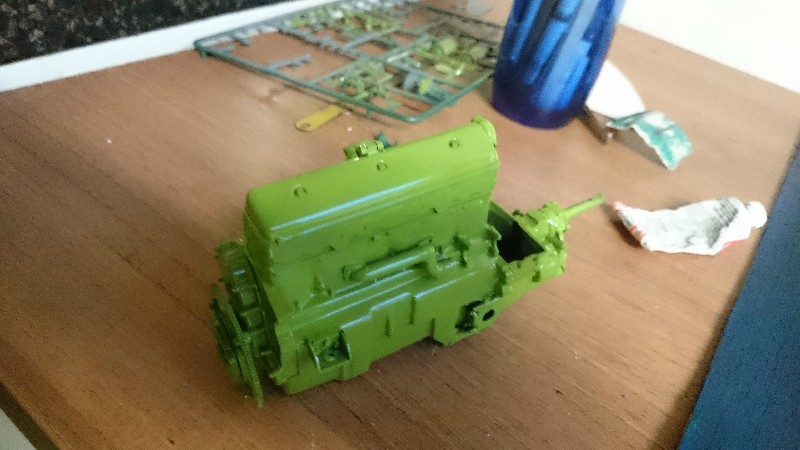
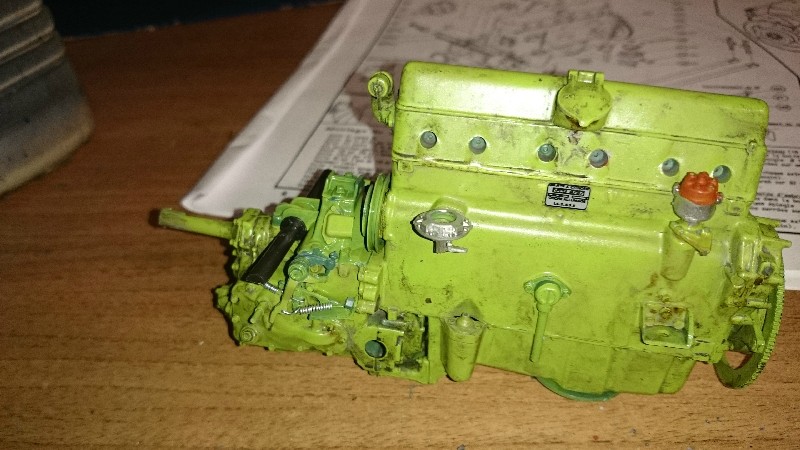
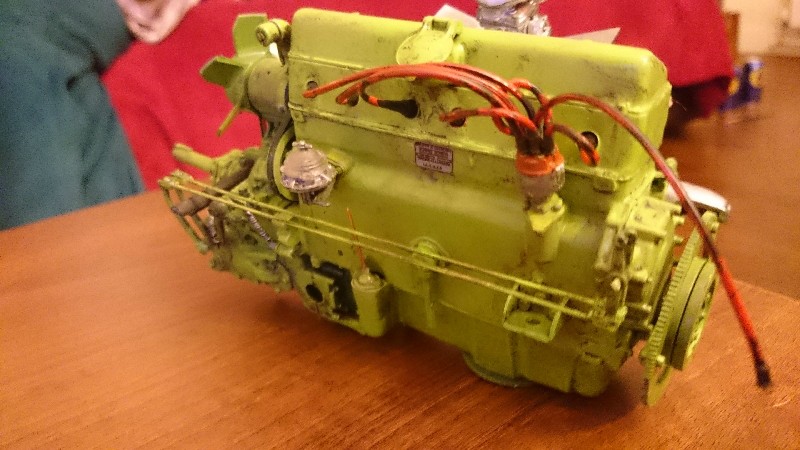
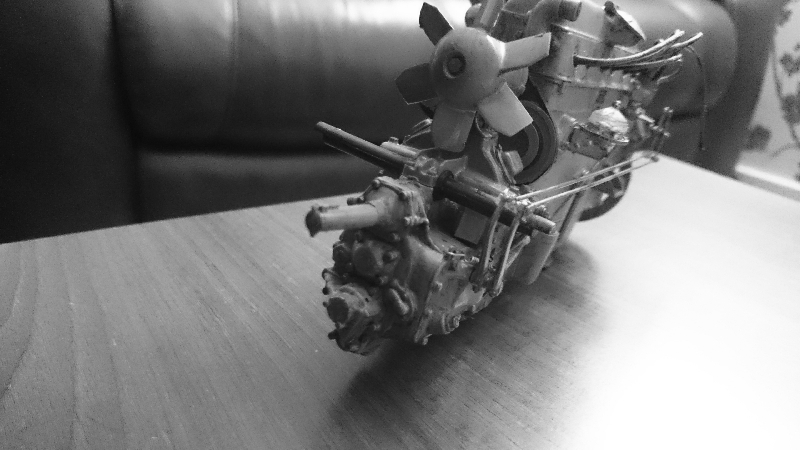
Hi all been working on the engine, this kit is awesome, the engine alone has more parts than the whole Shelby kit, just as an example that little nut is a separate part I've put the tin of humbrol paint there as a refrence I had to use my PE pencil to place it, thank god I got Roy's dvd the instruction are so vague (there's a little do hicky lever sticks out the side its only about 3mmx2x2 and from the instructions I had no idea which way up to put it)
I've primed it and now I can see a few bits if filling I've missed.
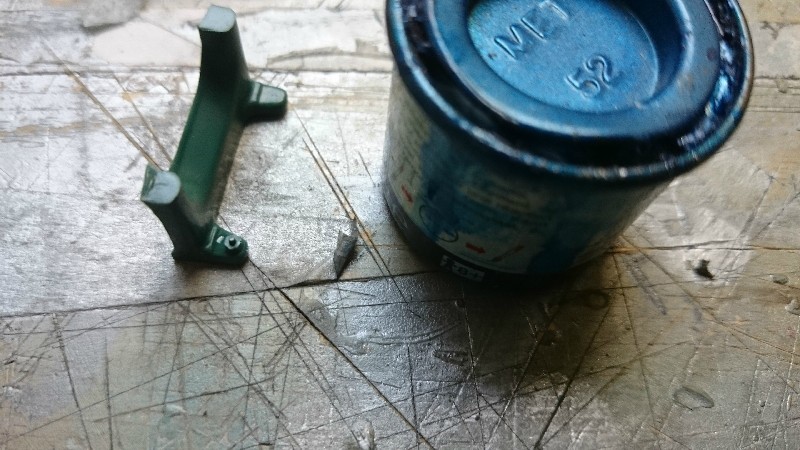

I've primed it and now I can see a few bits if filling I've missed.
kpnuts
Joined: December 20, 2013
KitMaker: 1,179 posts
Auto Modeler: 647 posts
Posted: Tuesday, October 20, 2015 - 12:20 AM UTC
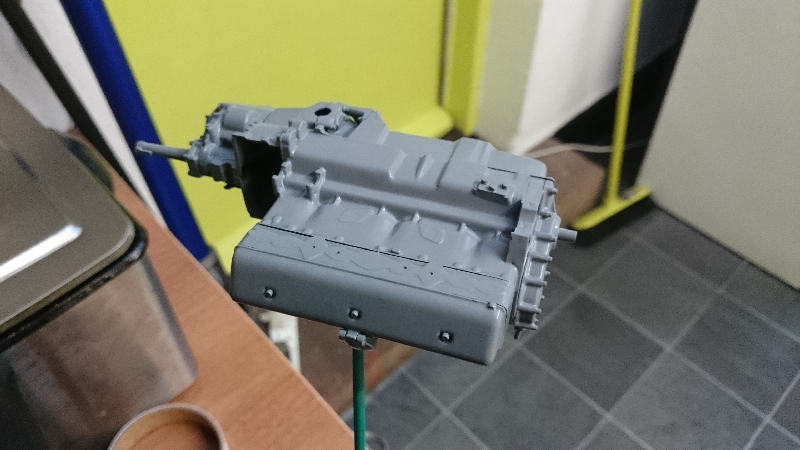
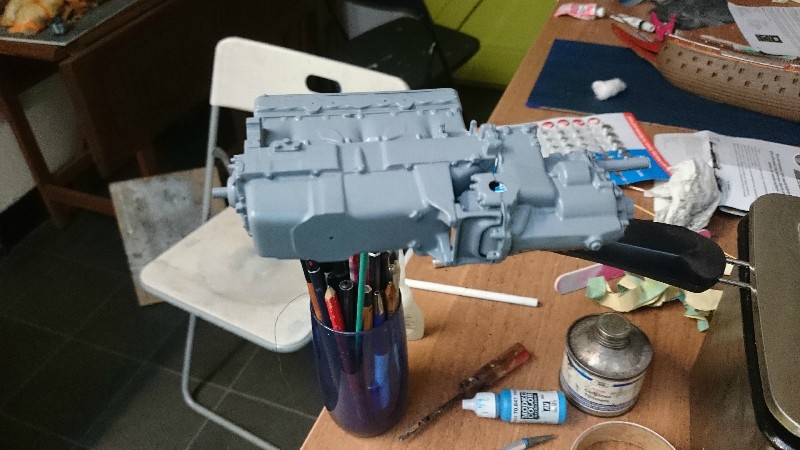
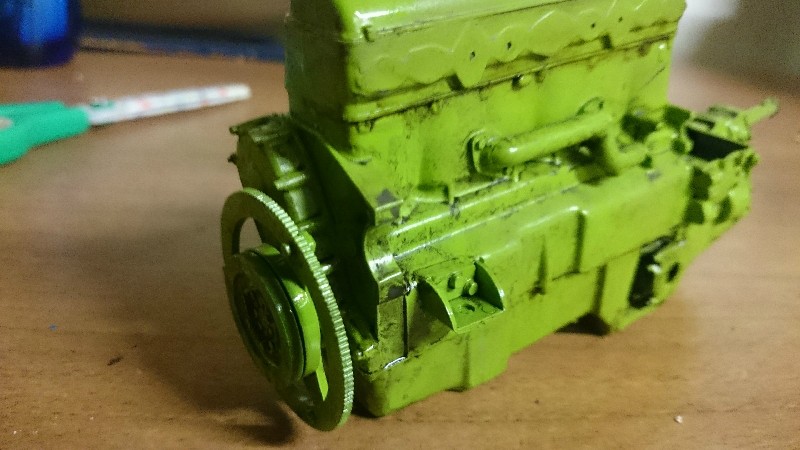
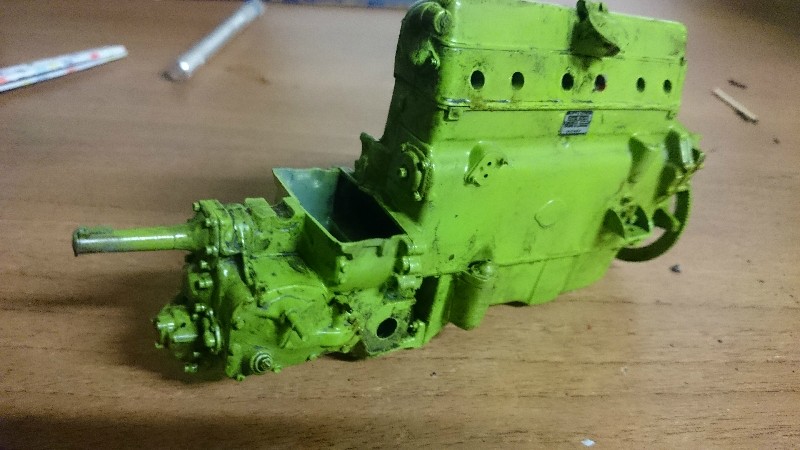
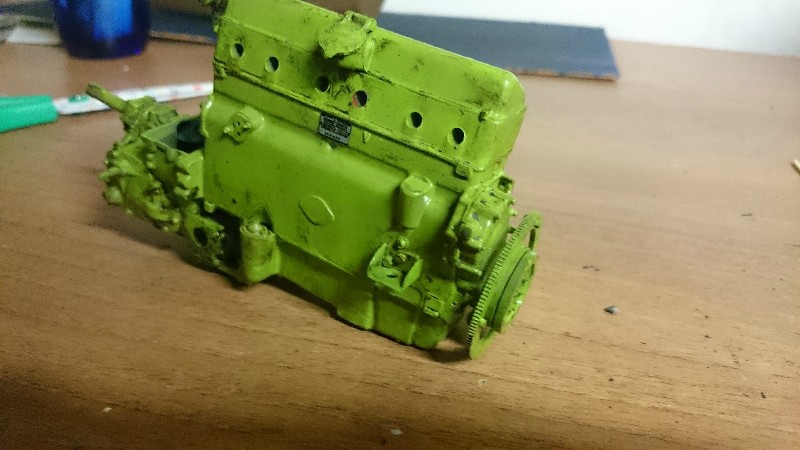
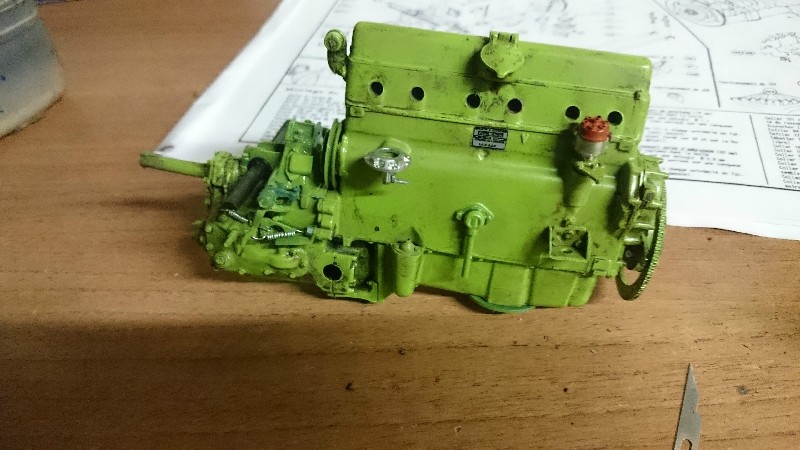
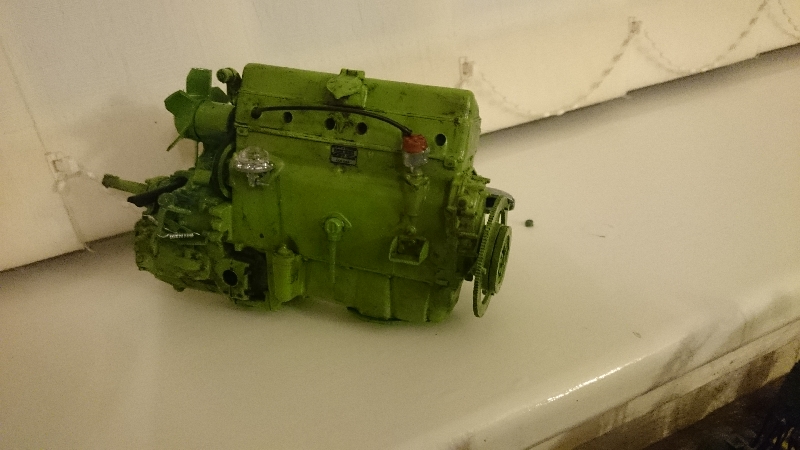
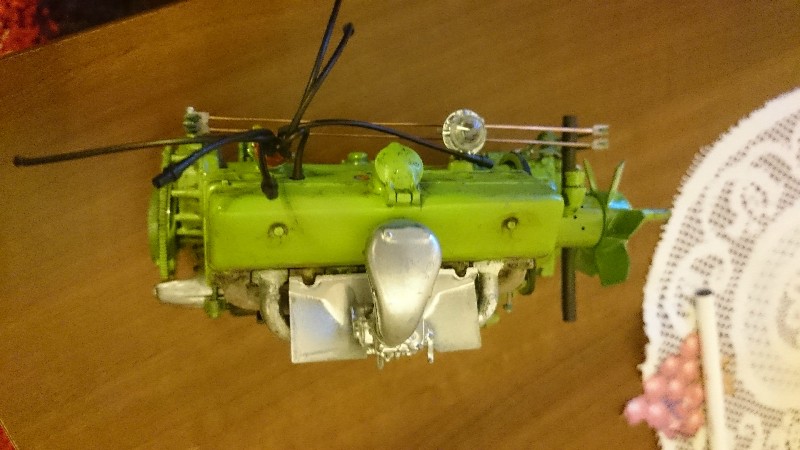
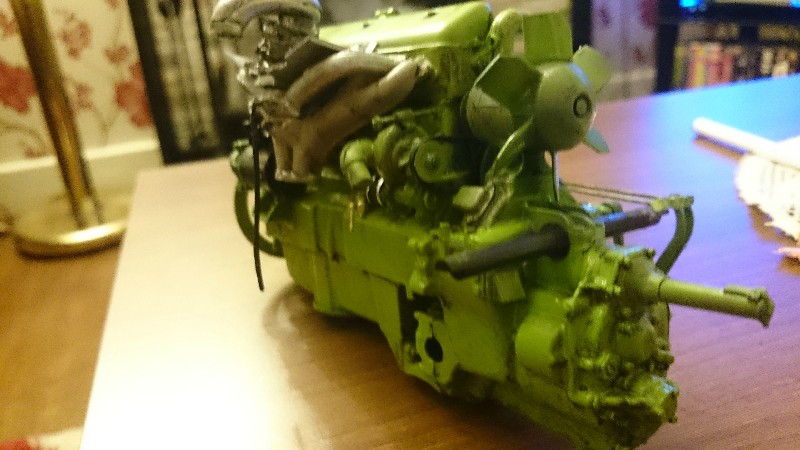
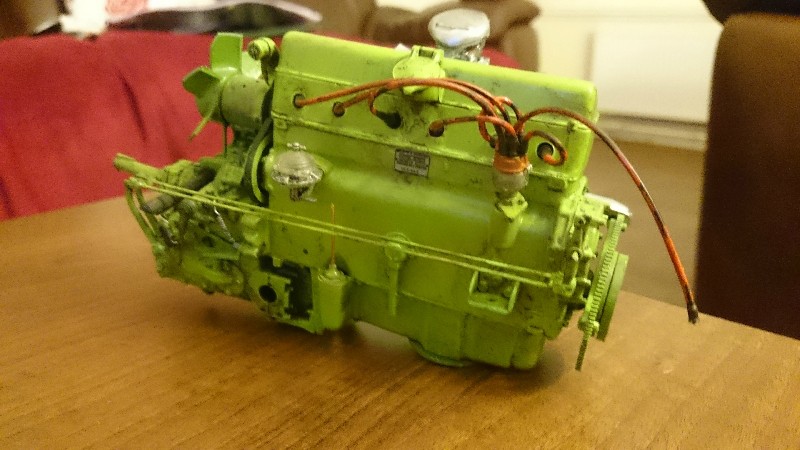
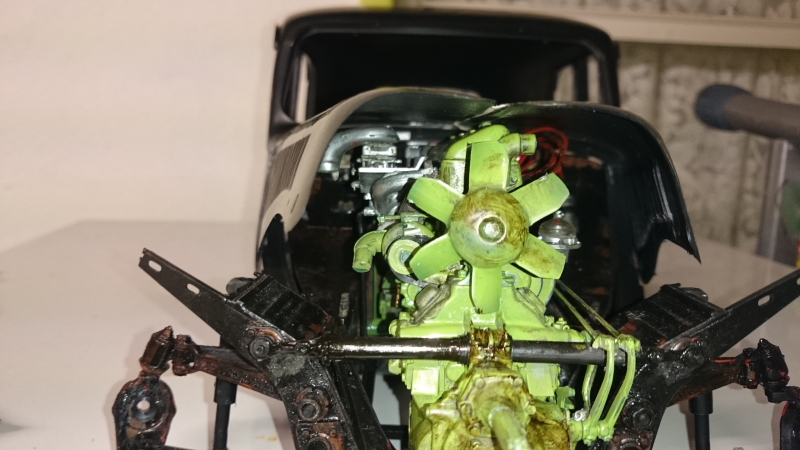
Hi all more work on this I've not been able to find a definitive colour for the engine (every pic I've seen has been a different shade of green but since I'm using CAT's info for the bodywork I will use that for the engine as well.
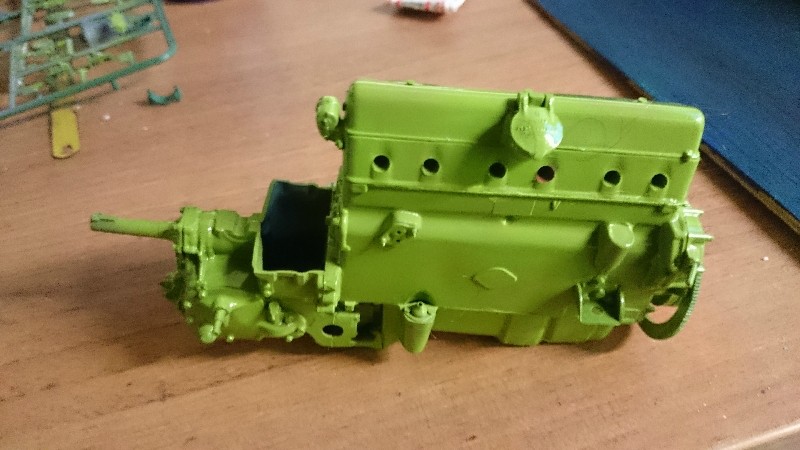
Thats a 1/24 scale car just to show how big this engine is
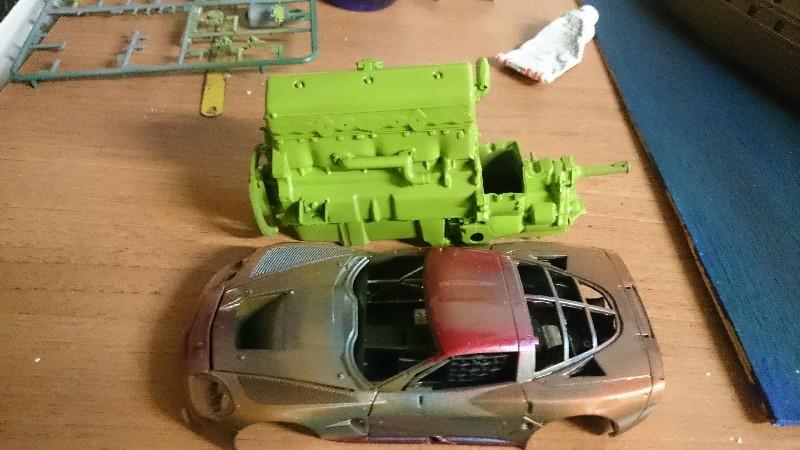
Thats a 1/24 scale car just to show how big this engine is
kpnuts
Joined: December 20, 2013
KitMaker: 1,179 posts
Auto Modeler: 647 posts
Posted: Tuesday, October 20, 2015 - 11:41 PM UTC
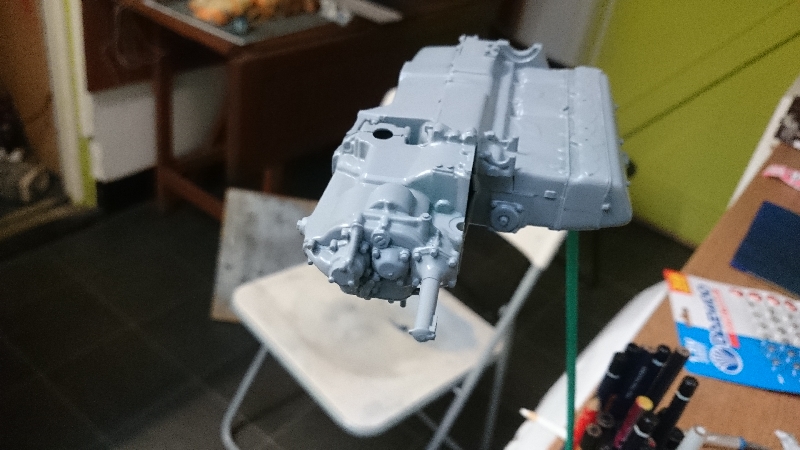
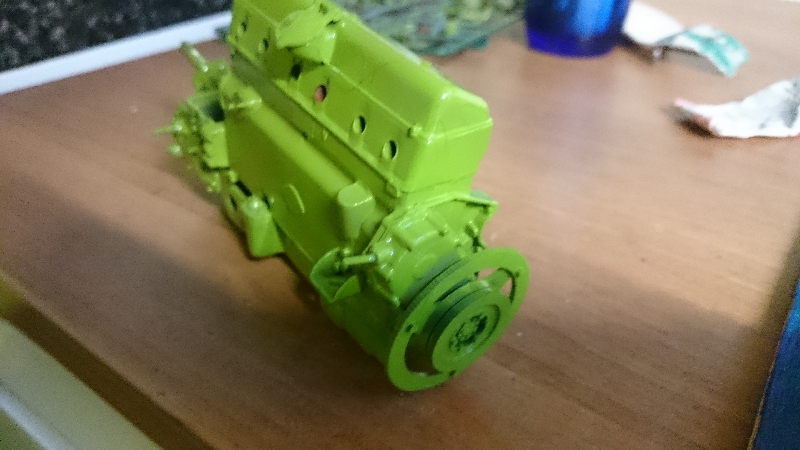
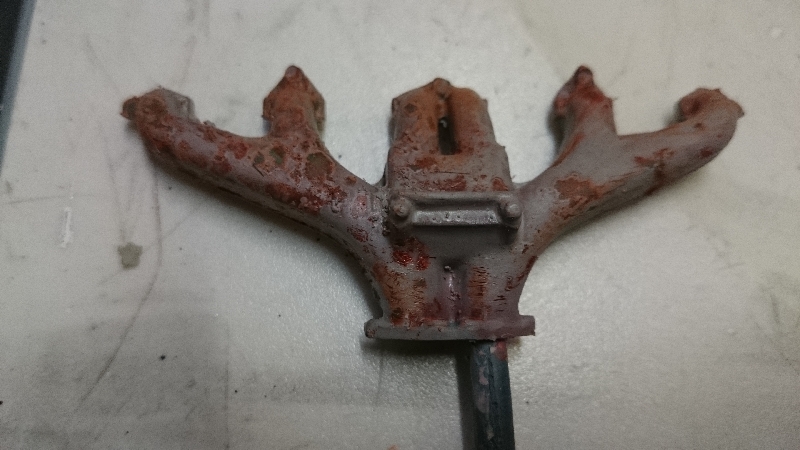
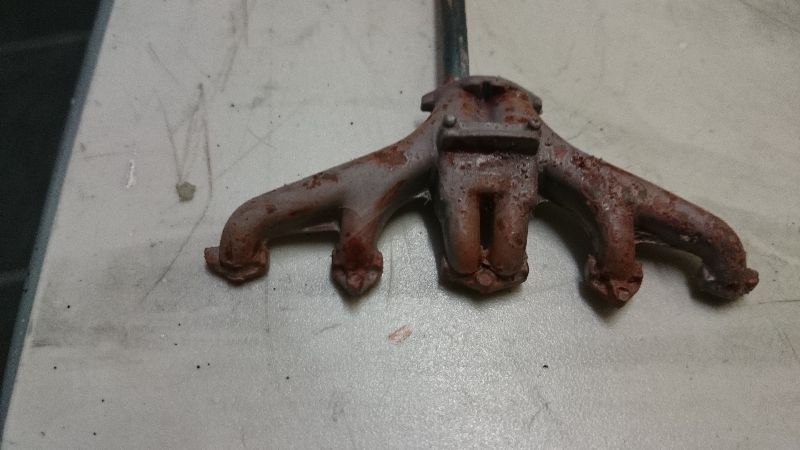
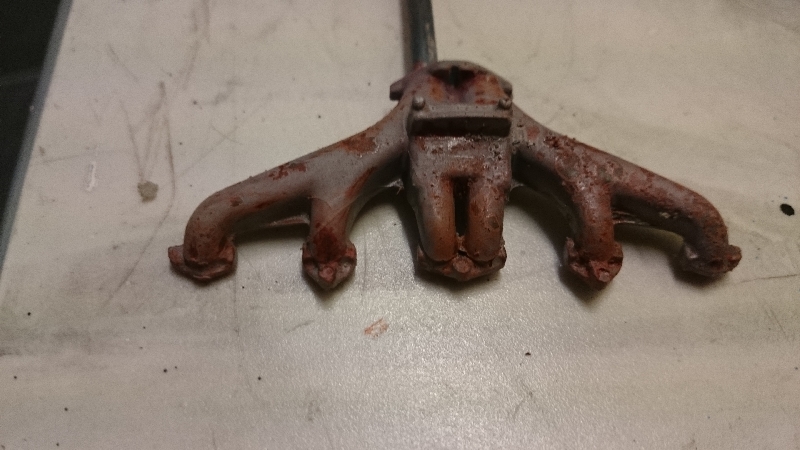
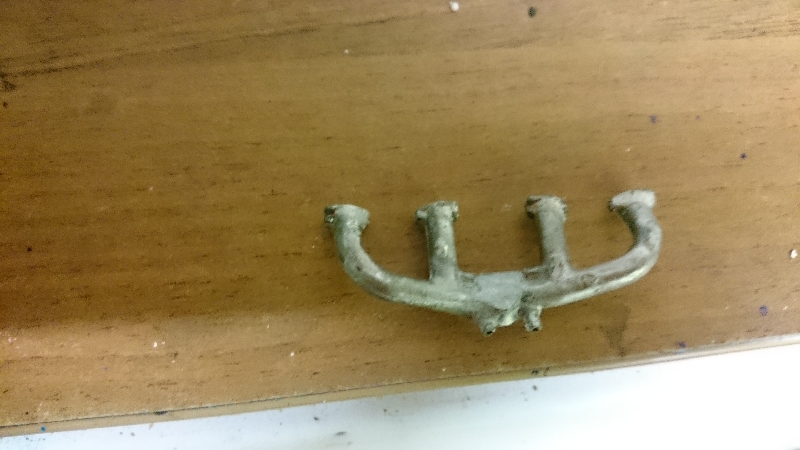
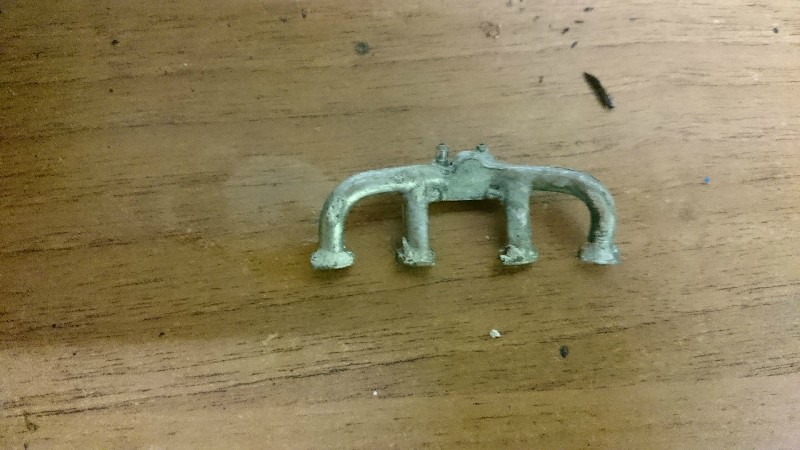
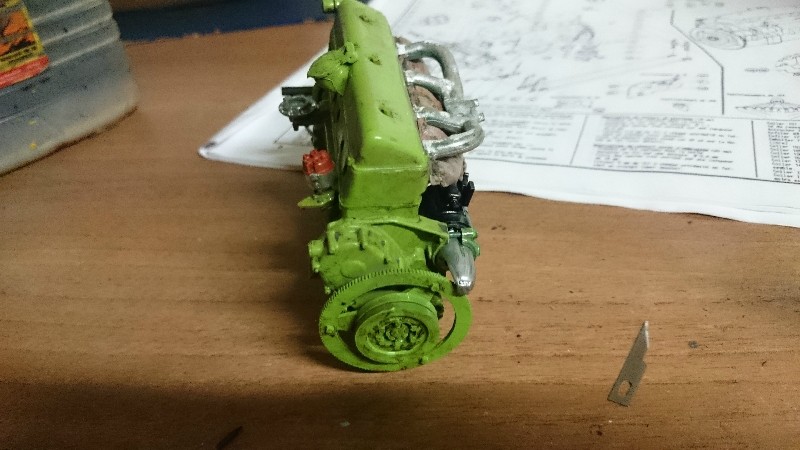
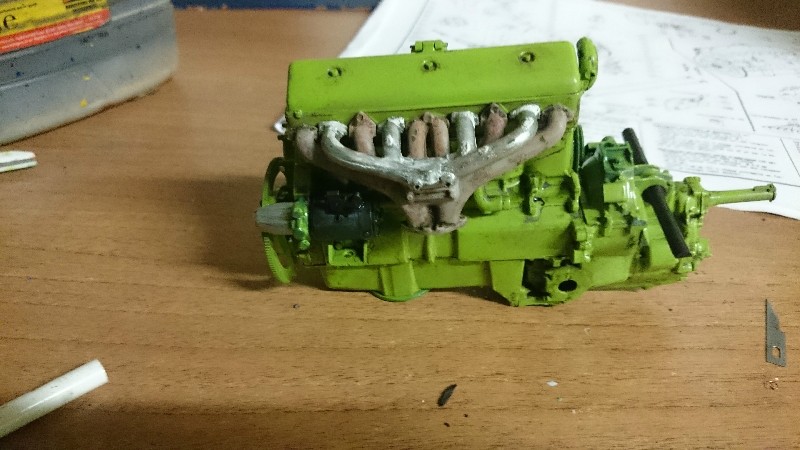
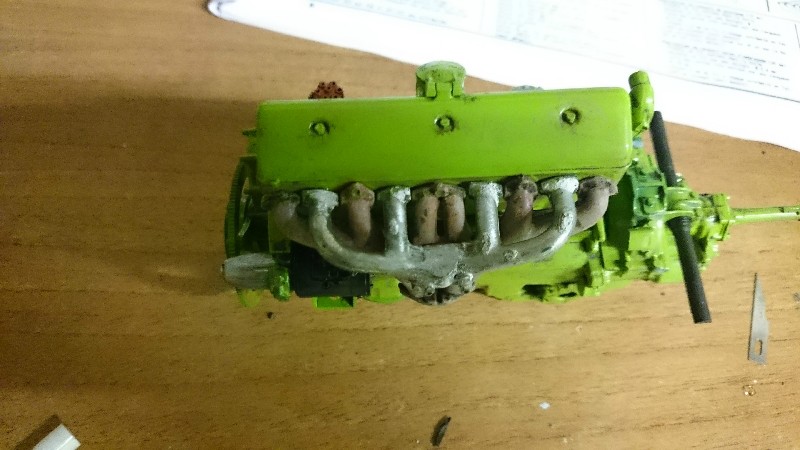
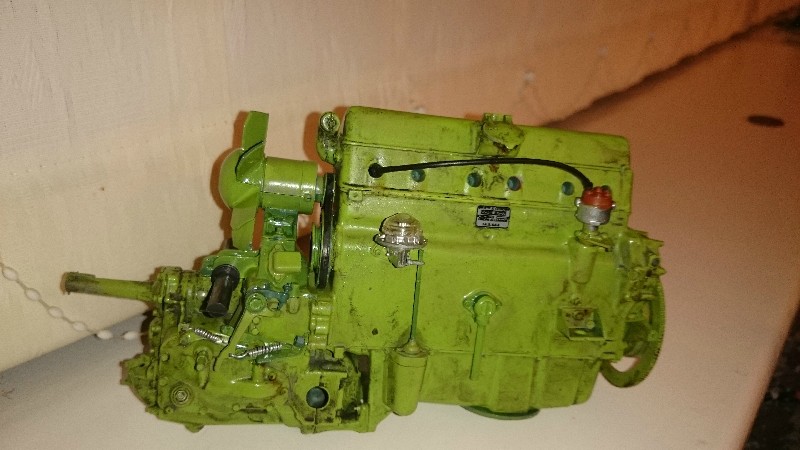
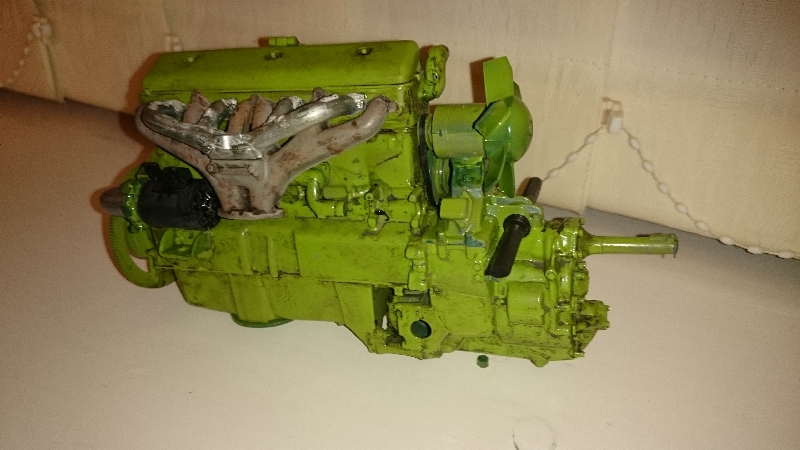
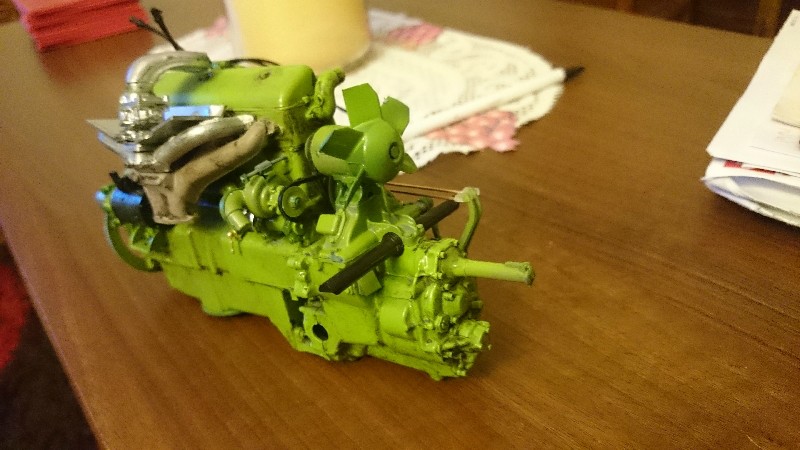
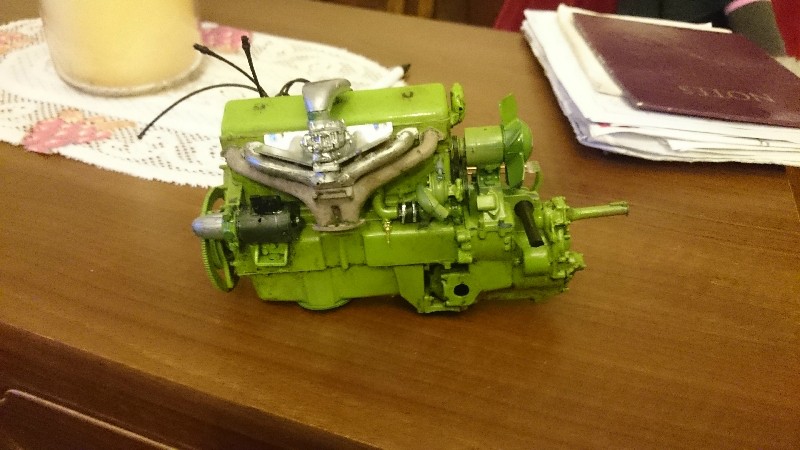
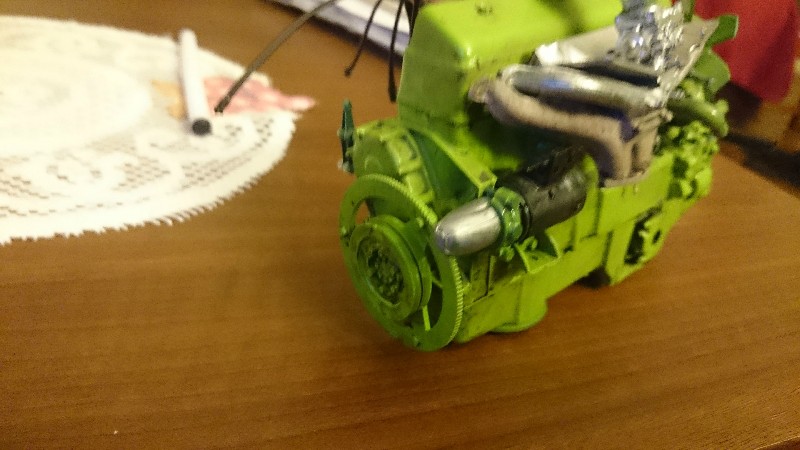
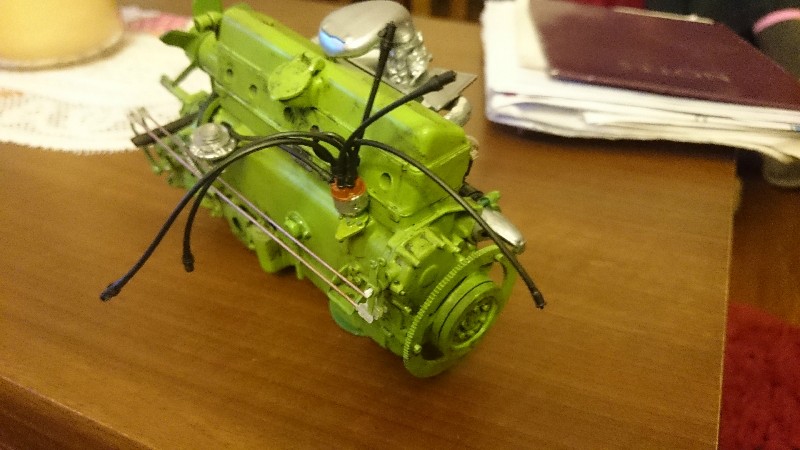
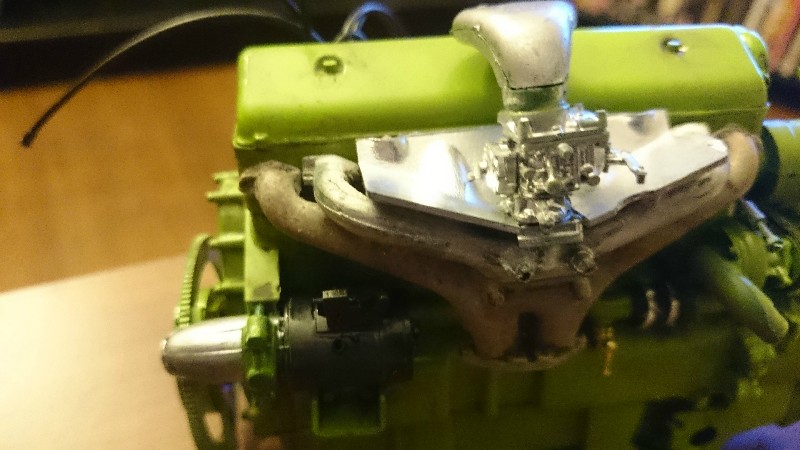
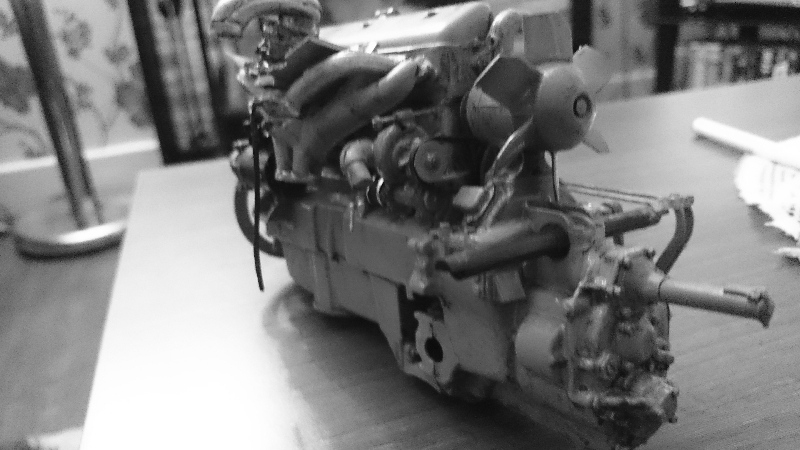
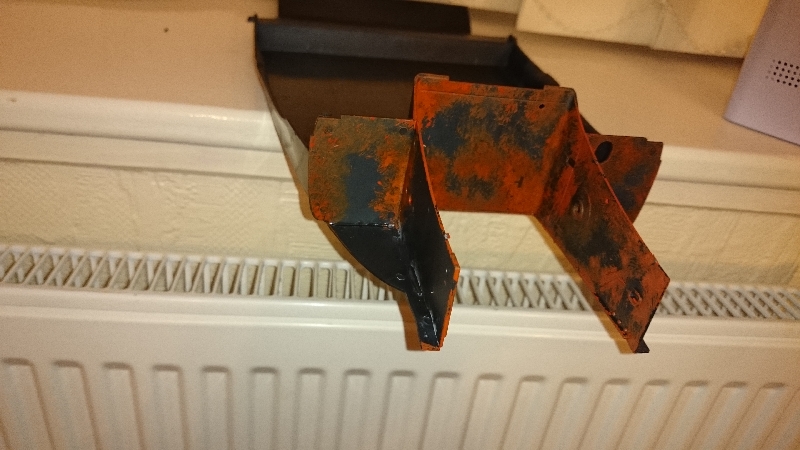
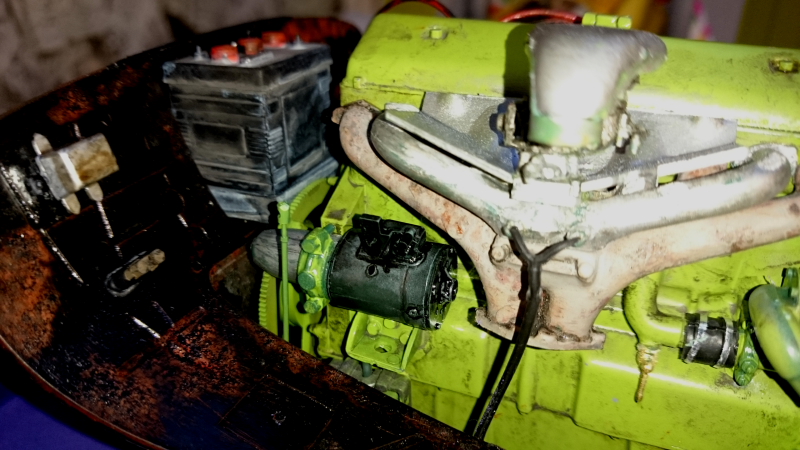
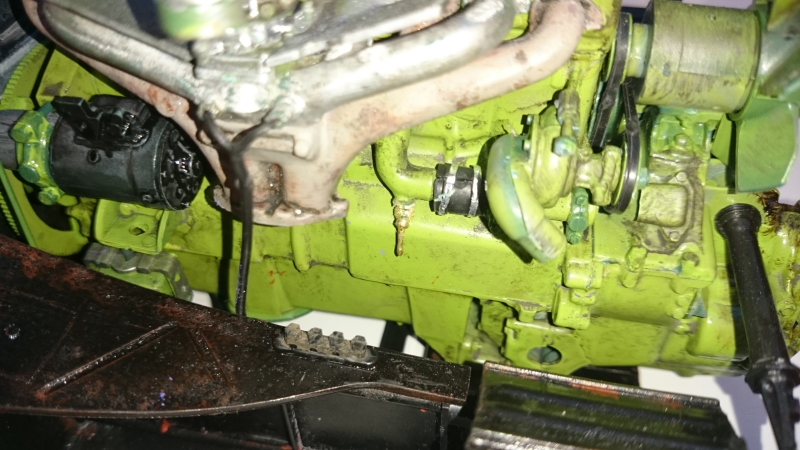
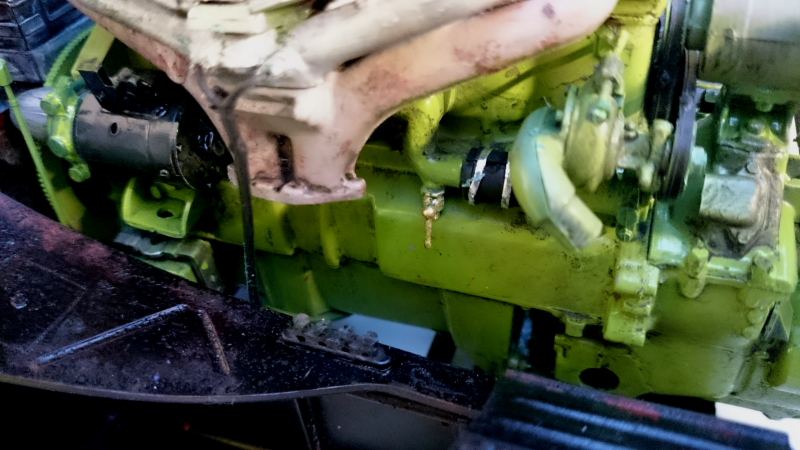
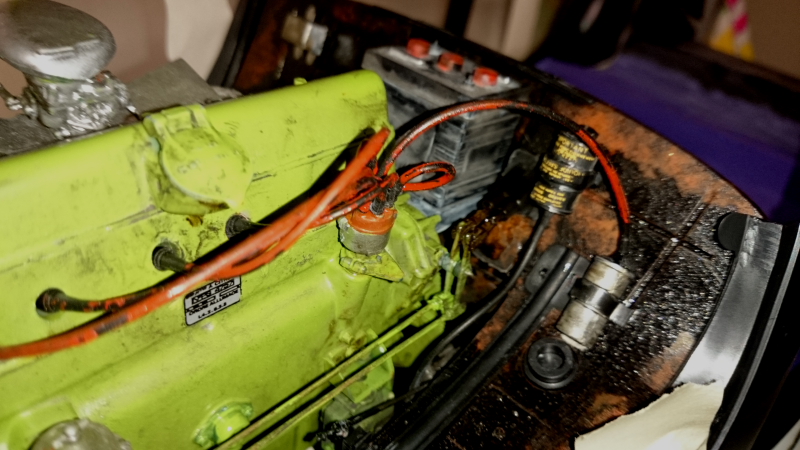
Hi all a bit of an update, weathered the engine and tried to emulate the oxidization on the ally manifold.
kpnuts
Joined: December 20, 2013
KitMaker: 1,179 posts
Auto Modeler: 647 posts
Posted: Friday, October 23, 2015 - 12:43 AM UTC
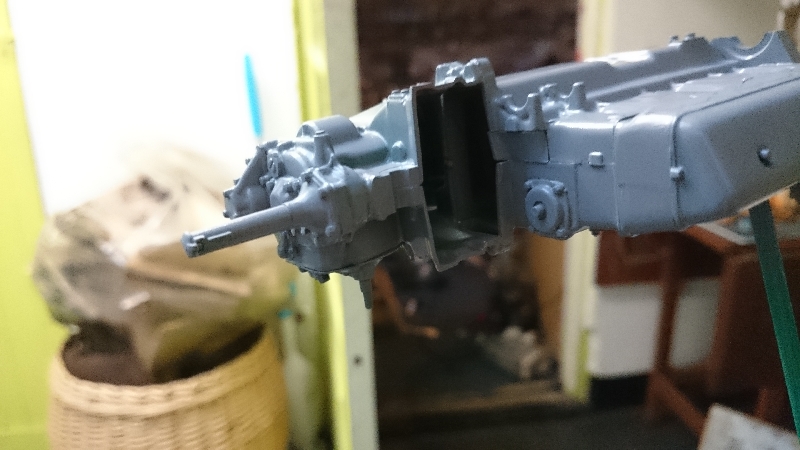
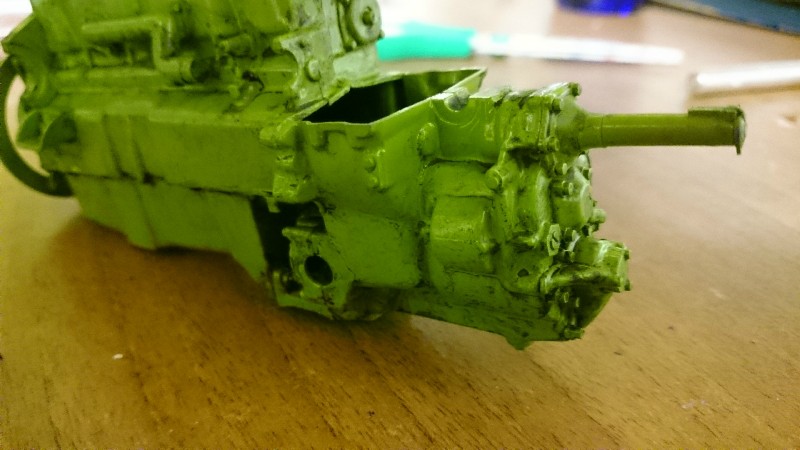
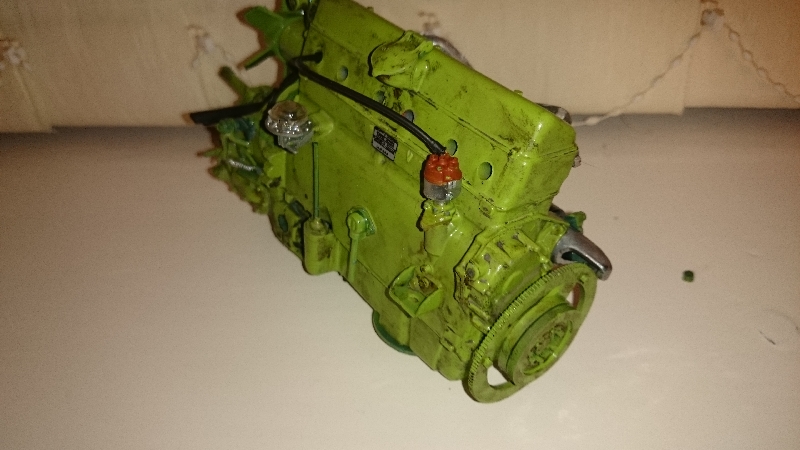
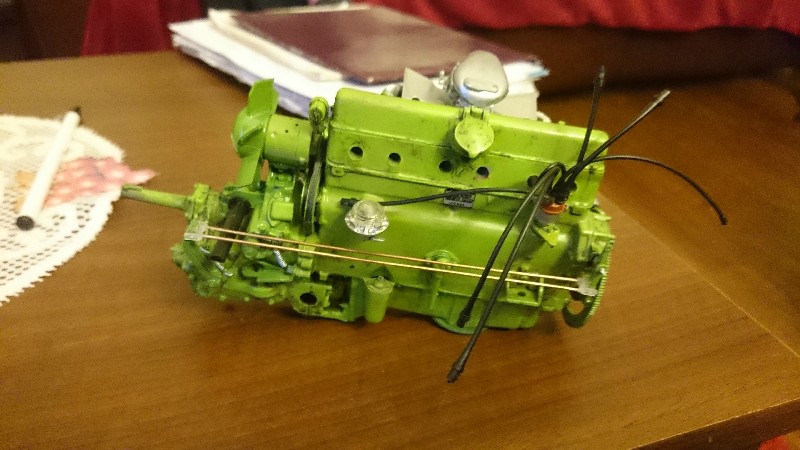
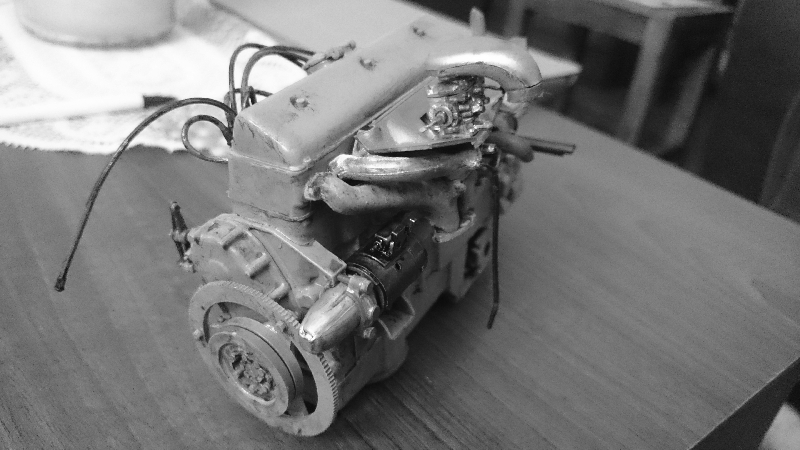
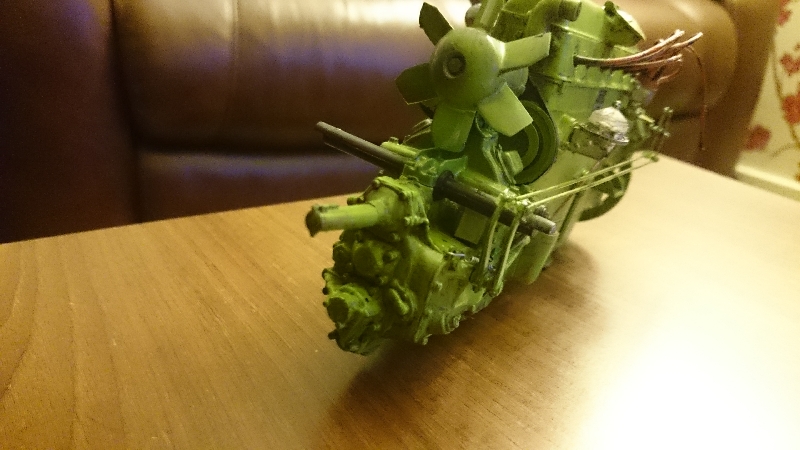
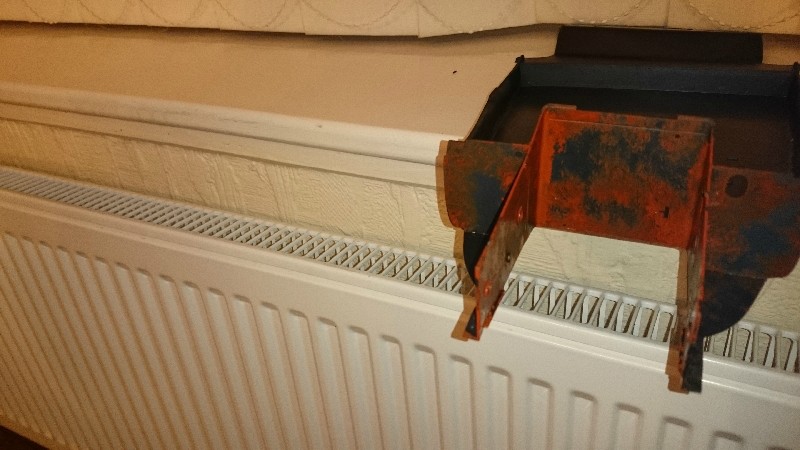
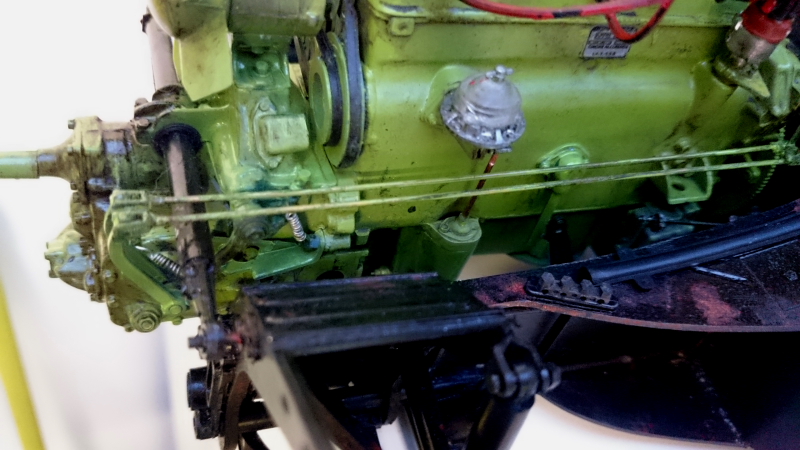
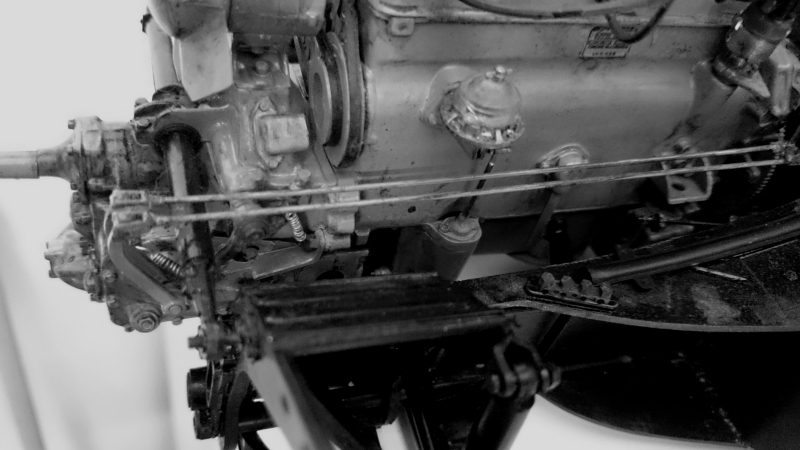
Hi all here is tonight's episode, there seem to be a lot of these on the go at the moment (no surprise really it is a superb kit)

kpnuts
Joined: December 20, 2013
KitMaker: 1,179 posts
Auto Modeler: 647 posts
Posted: Tuesday, October 27, 2015 - 12:50 AM UTC
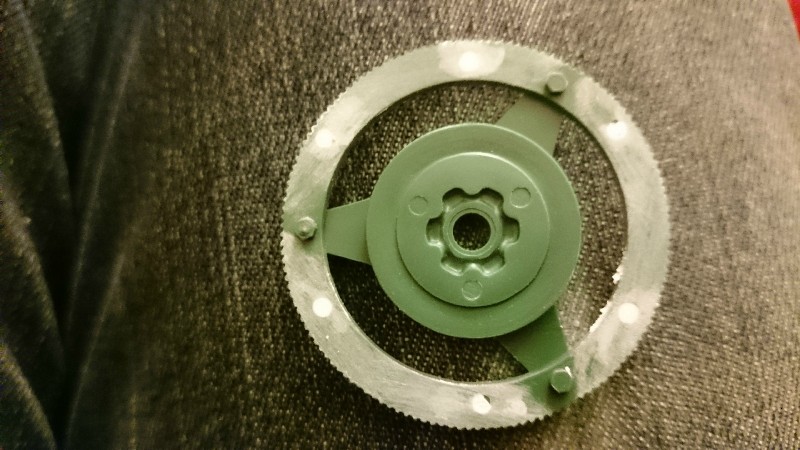
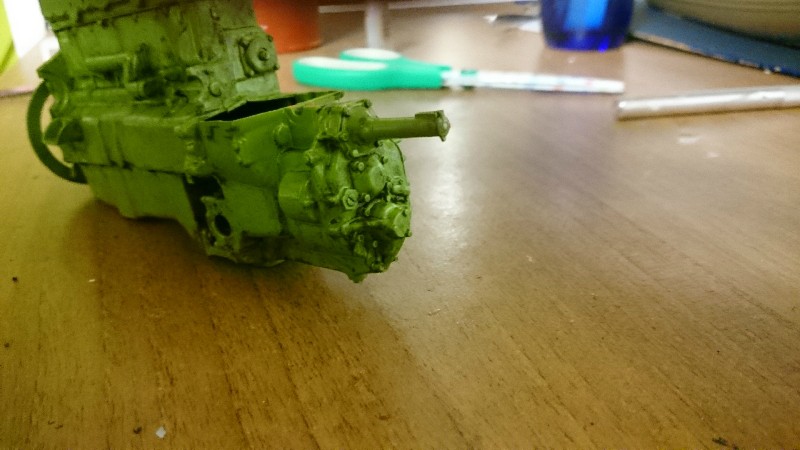
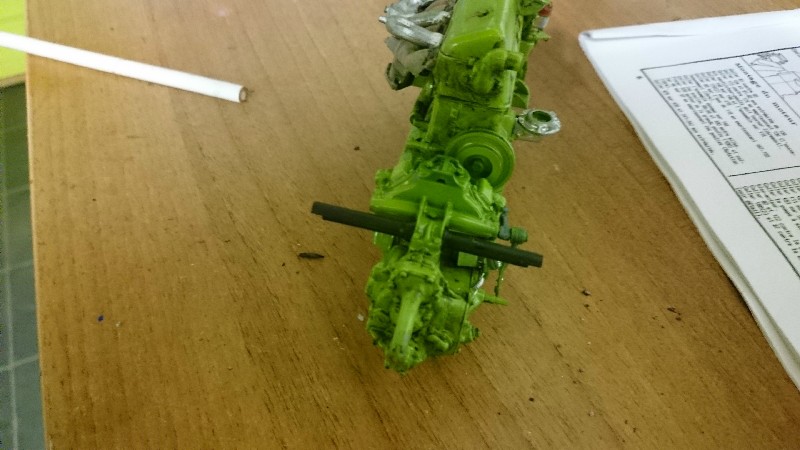
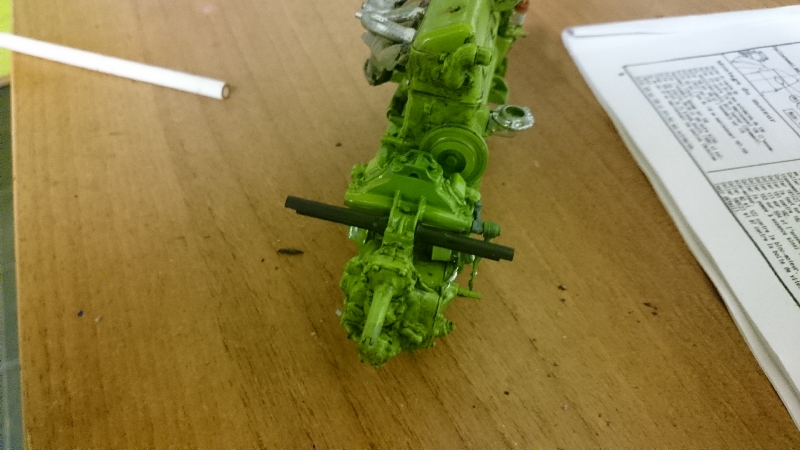
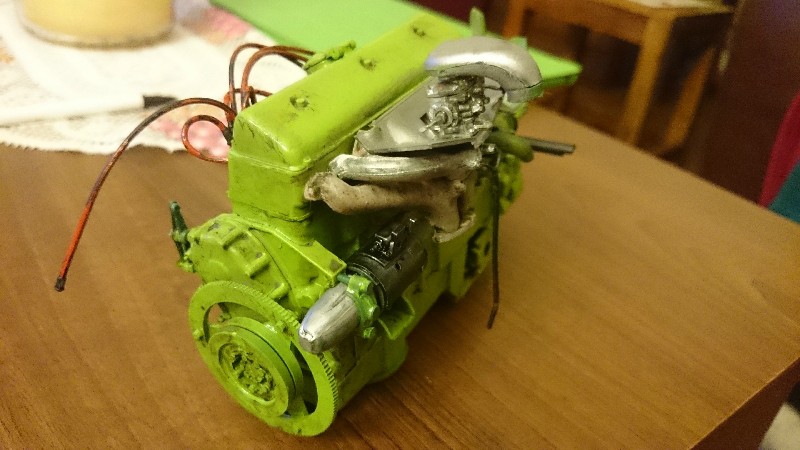
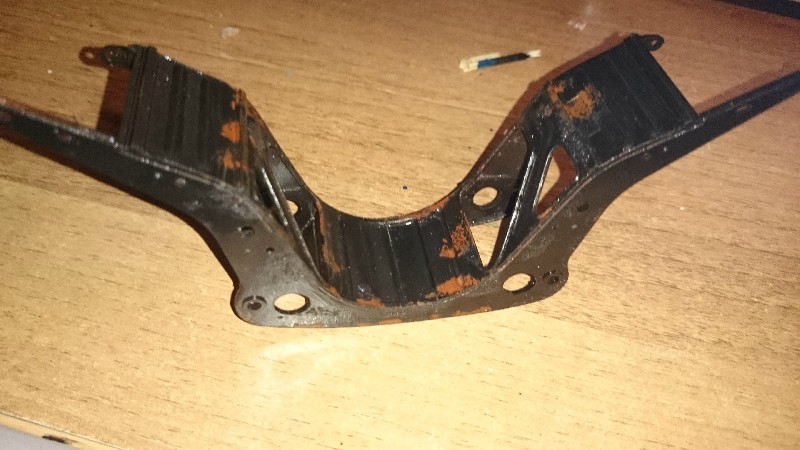
Here is todays update
these parts were bent so using Roy Fitzimmods dvd I corrected this problem with stretched copper wire
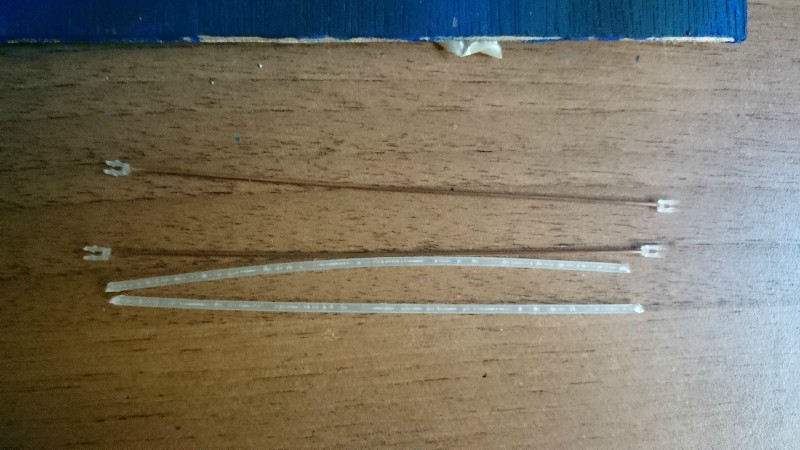
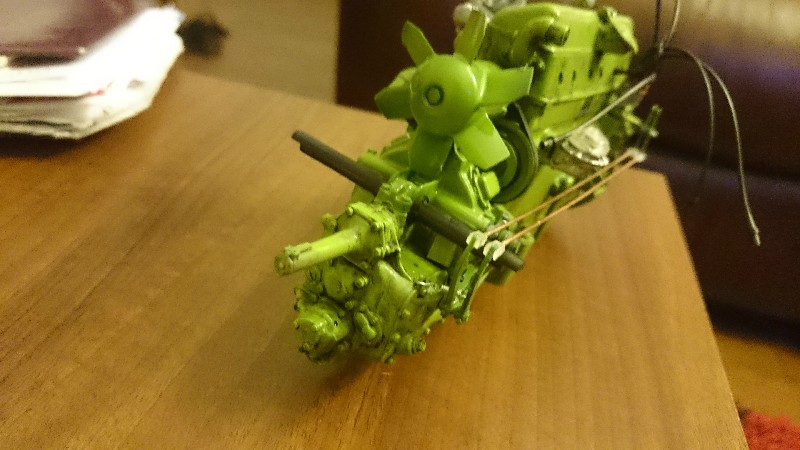
these parts were bent so using Roy Fitzimmods dvd I corrected this problem with stretched copper wire

AussieReg

#007

Joined: June 09, 2009
KitMaker: 8,156 posts
Auto Modeler: 2,953 posts

Posted: Tuesday, October 27, 2015 - 01:17 AM UTC
Looking good Ken, nice detail and weathering.
Cheers, D
Cheers, D

Hwa-Rang
Joined: June 29, 2004
KitMaker: 6,760 posts
Auto Modeler: 2,182 posts
Posted: Tuesday, October 27, 2015 - 06:01 PM UTC
Very nice work Ken.
kpnuts
Joined: December 20, 2013
KitMaker: 1,179 posts
Auto Modeler: 647 posts
Posted: Wednesday, October 28, 2015 - 12:45 AM UTC
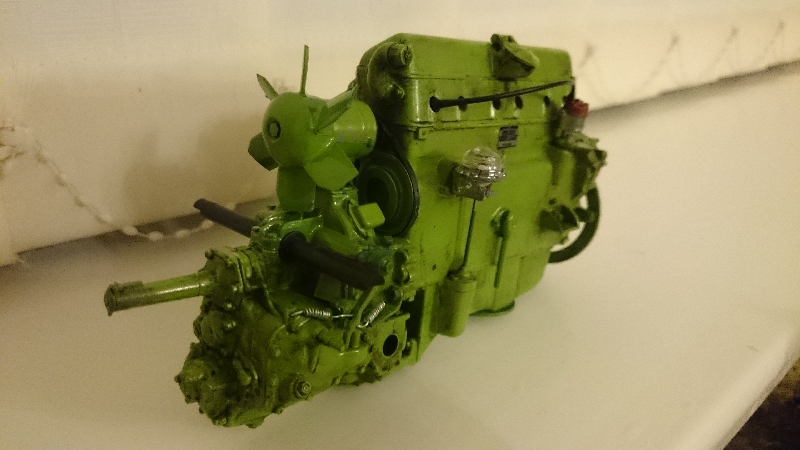
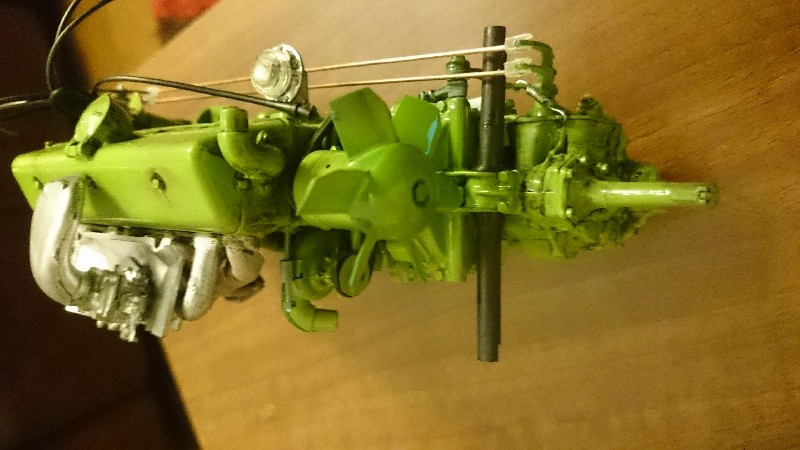
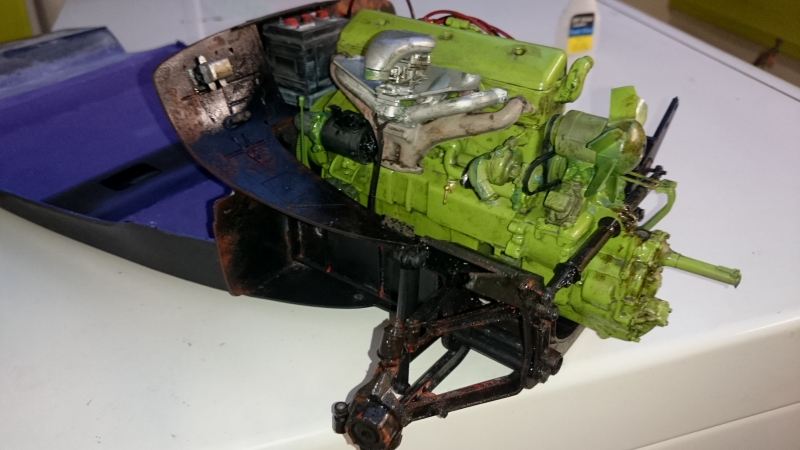
Hi all well the engine is done (well as much as I can do without putting it in the car)
The next bit is the front chassis and suspension (to be honest I keep looking at the instructions and I'm tempted to box it back up and put it away) looks to be way beyond my meagre abilities, I would start somewhere else on the model and come back to this part but that may cause problems later on I've no idea whether I can start the body without causing problems with the chassis, I will see how brave I'm feeling, this may be as far as this kit goes for me, really not feeling confident at all on the next bit.

The next bit is the front chassis and suspension (to be honest I keep looking at the instructions and I'm tempted to box it back up and put it away) looks to be way beyond my meagre abilities, I would start somewhere else on the model and come back to this part but that may cause problems later on I've no idea whether I can start the body without causing problems with the chassis, I will see how brave I'm feeling, this may be as far as this kit goes for me, really not feeling confident at all on the next bit.
kpnuts
Joined: December 20, 2013
KitMaker: 1,179 posts
Auto Modeler: 647 posts
Posted: Friday, October 30, 2015 - 11:38 PM UTC
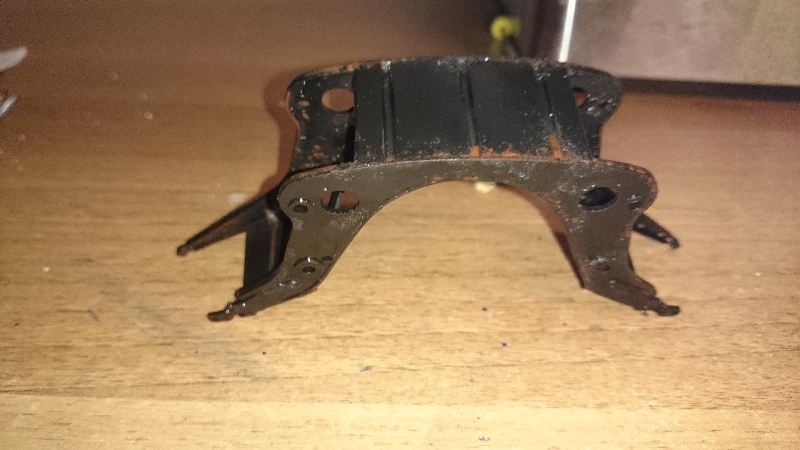
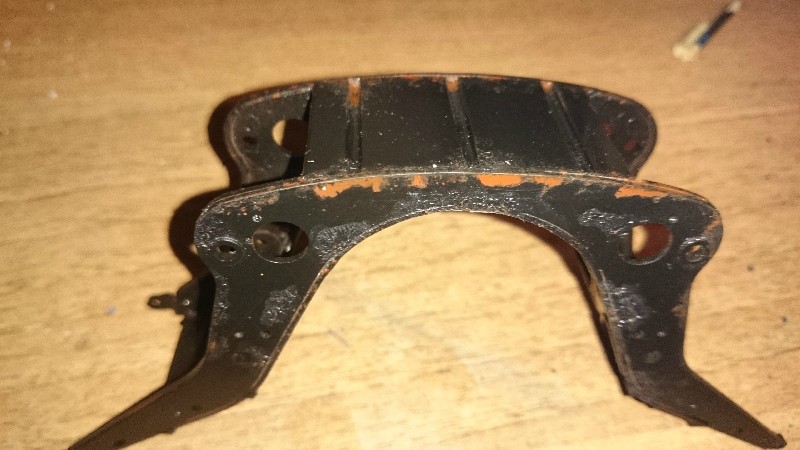
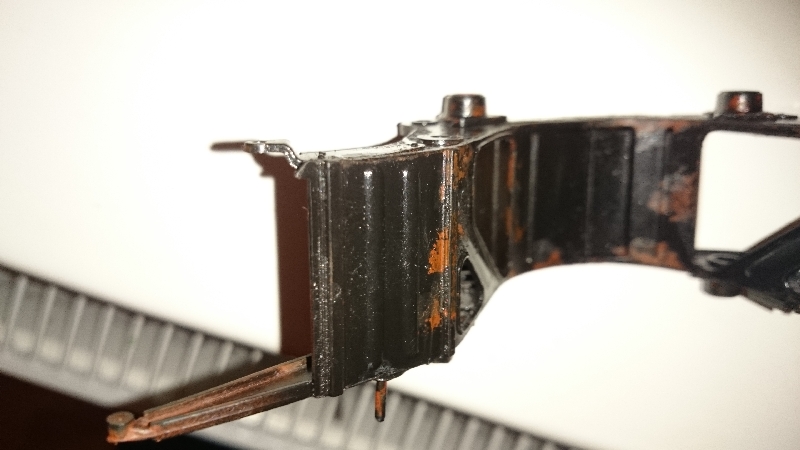
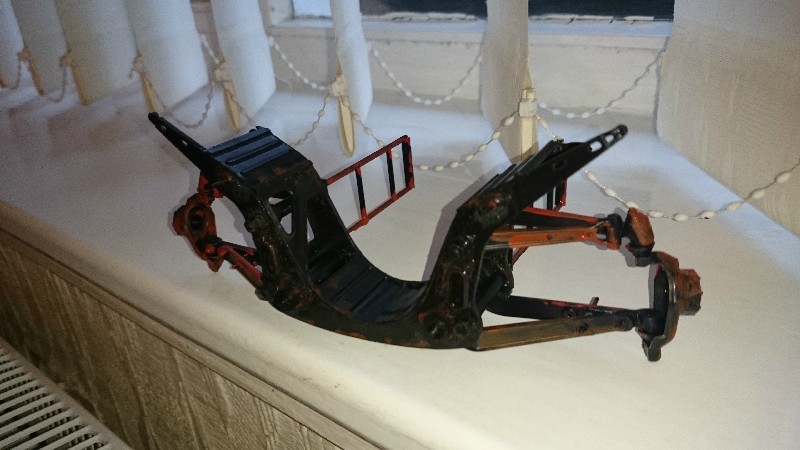
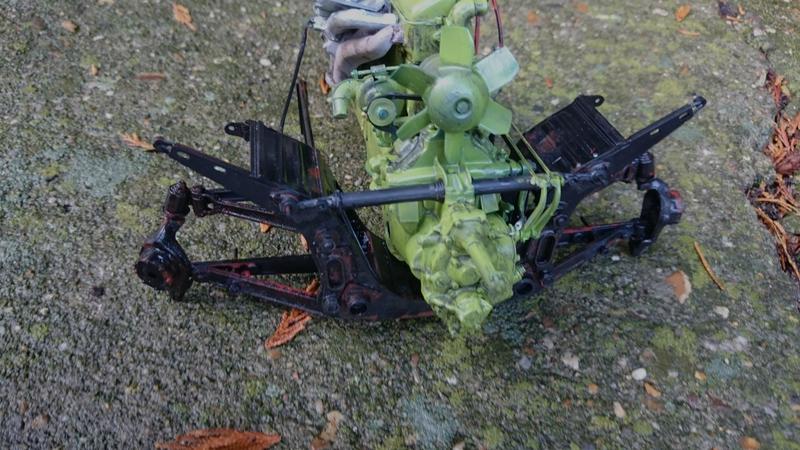
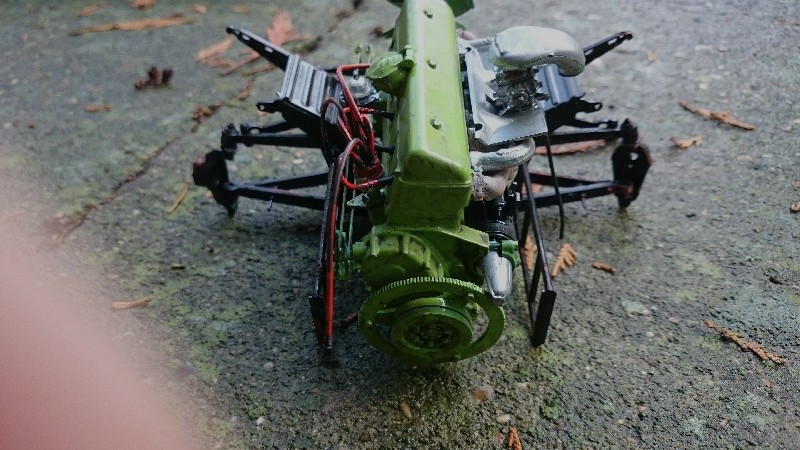
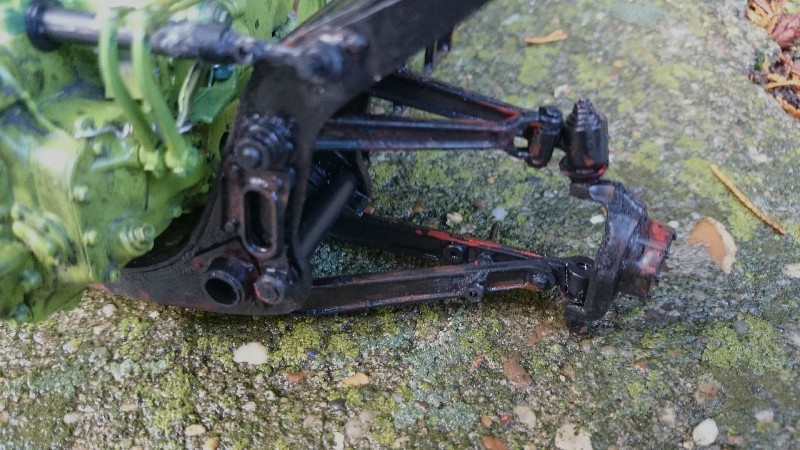
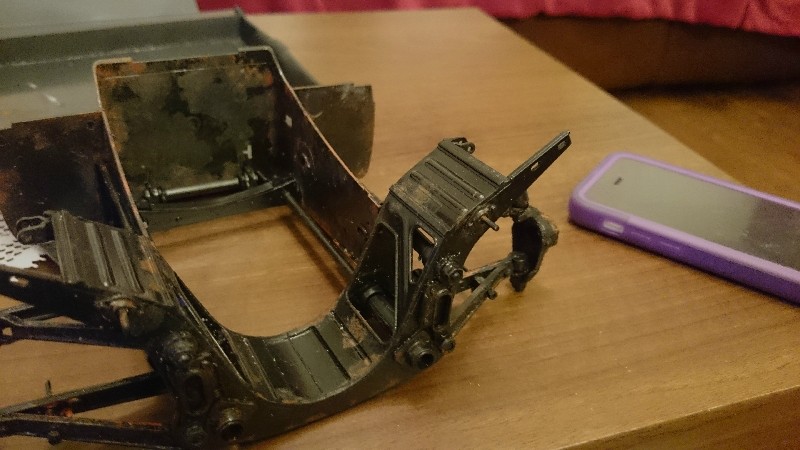
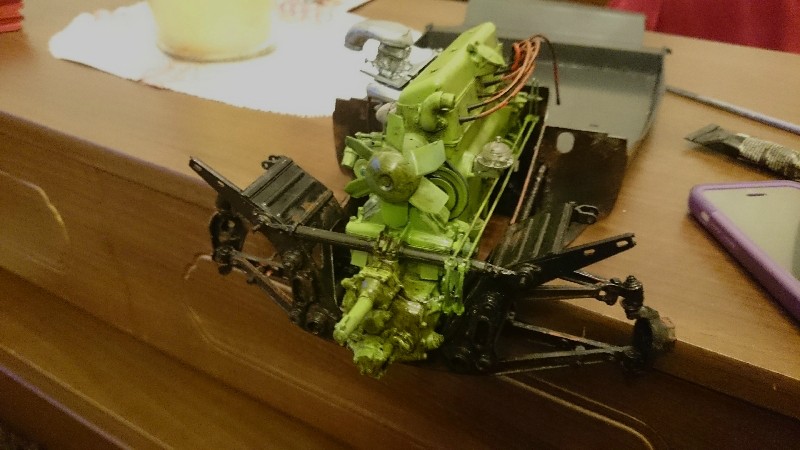
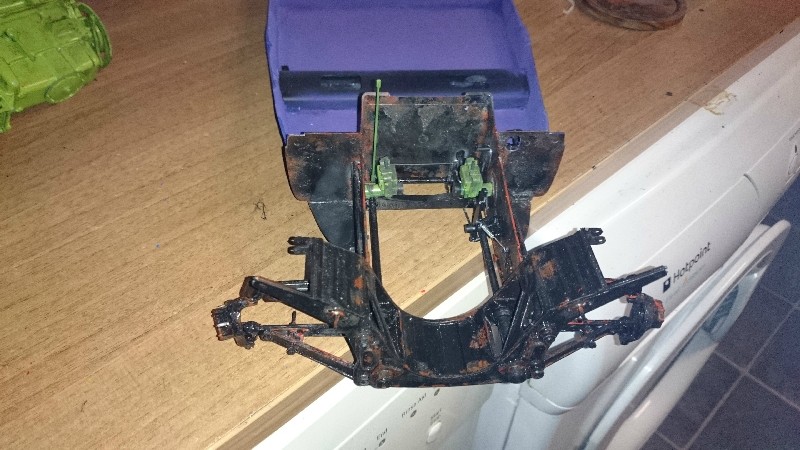
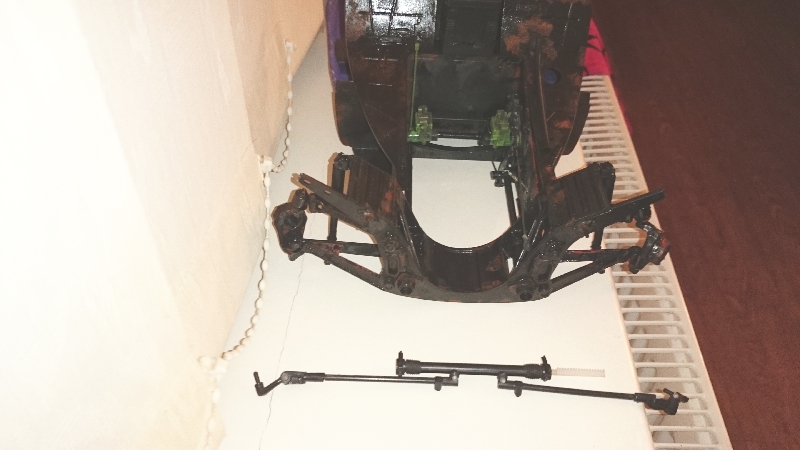
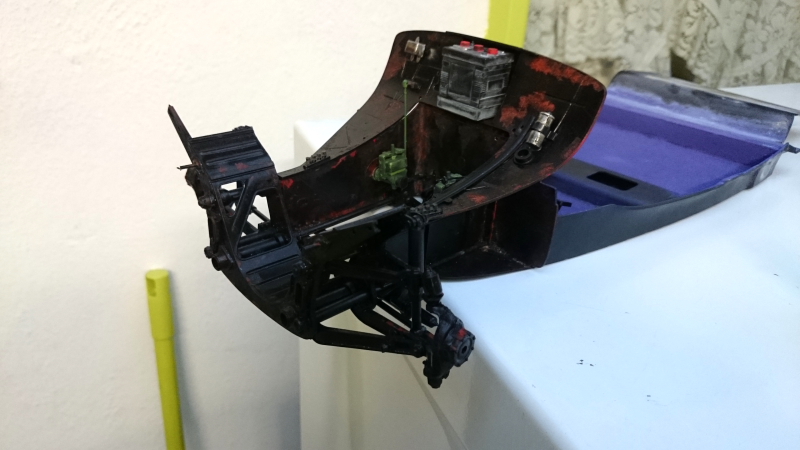
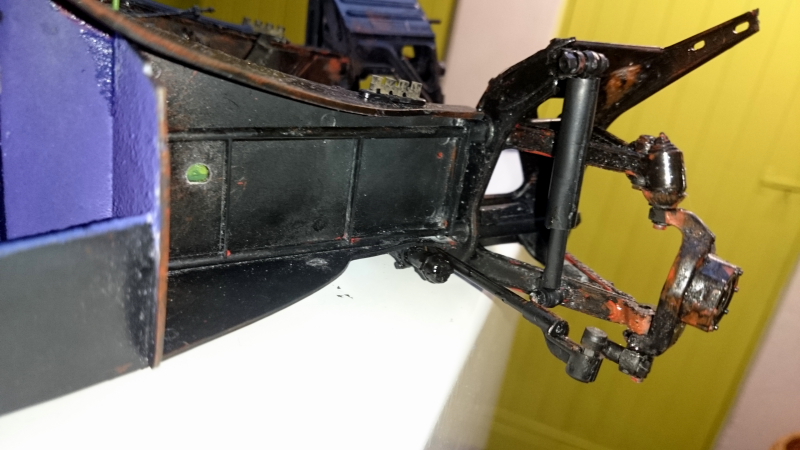
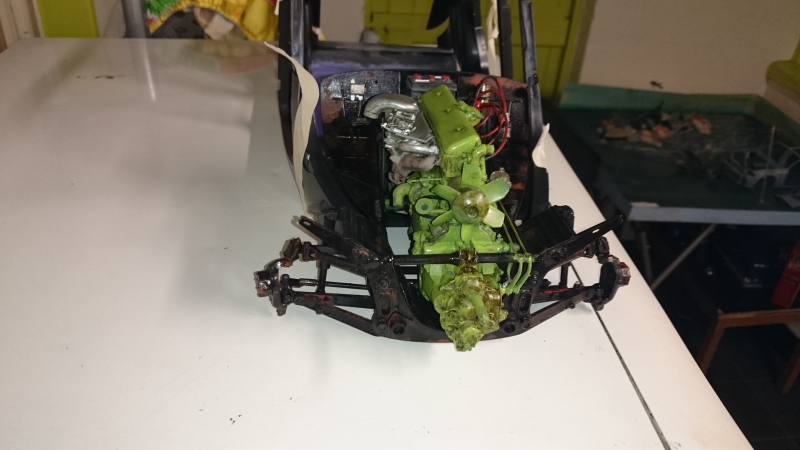
Hi all here is the next update
kpnuts
Joined: December 20, 2013
KitMaker: 1,179 posts
Auto Modeler: 647 posts
Posted: Saturday, October 31, 2015 - 09:29 PM UTC
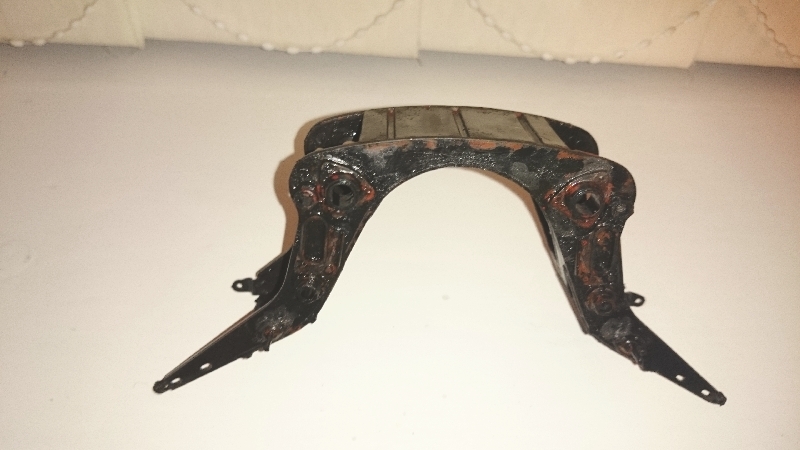
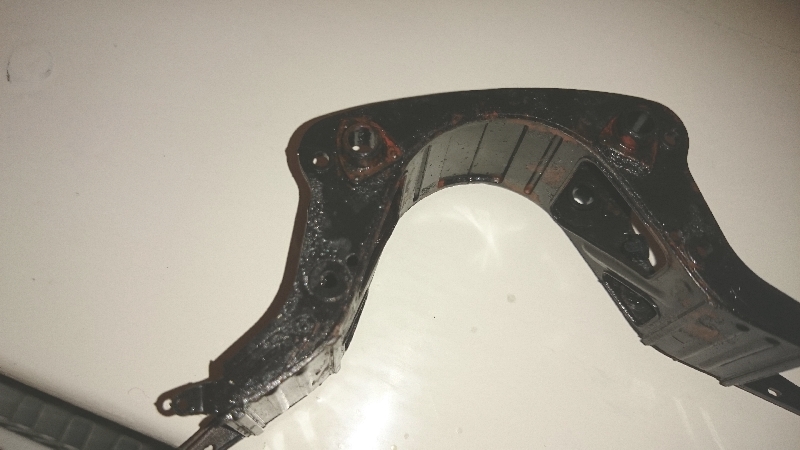
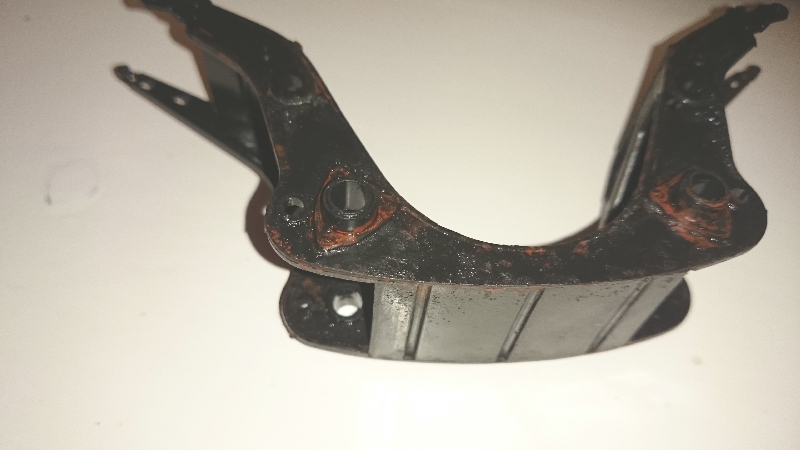
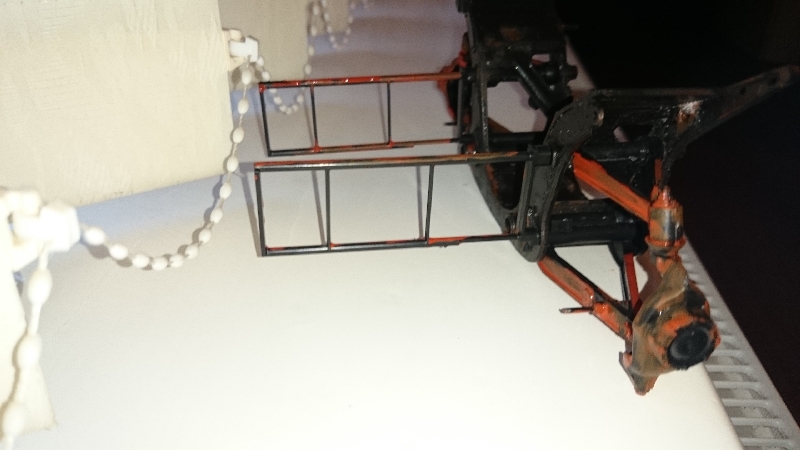
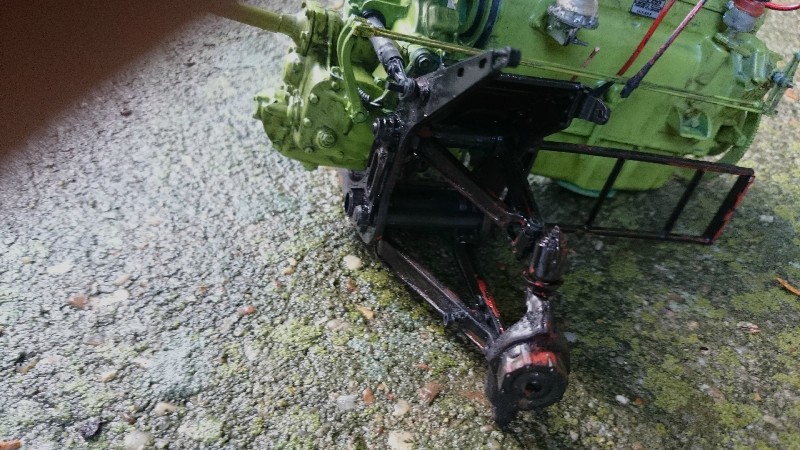
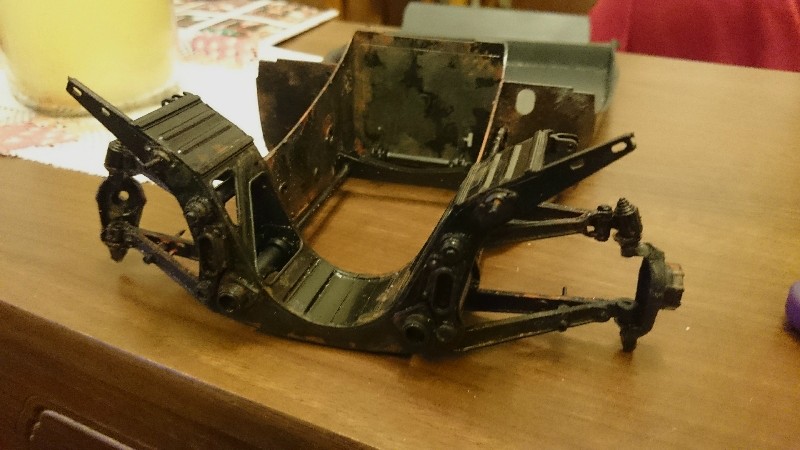
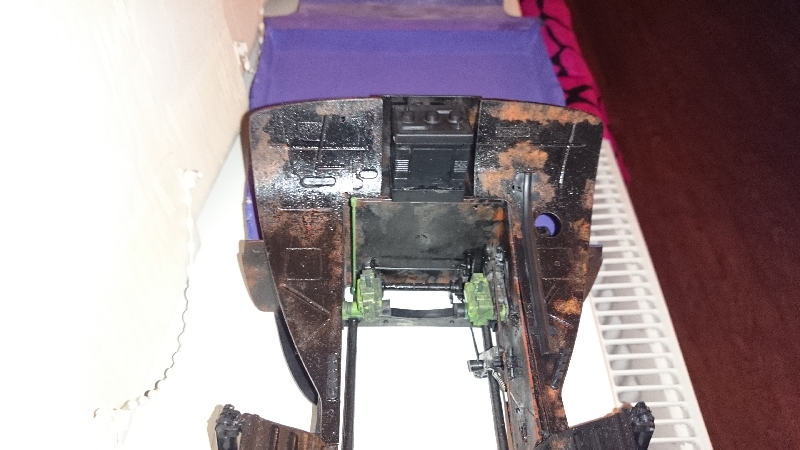
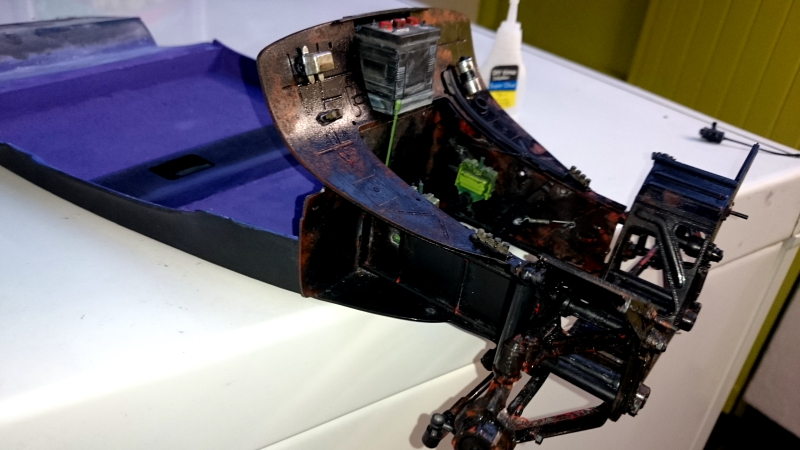
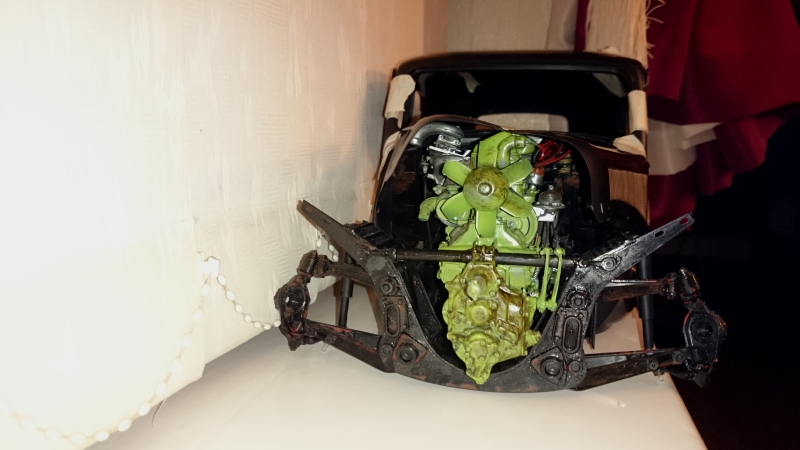
Hi all another update, quite pleased I've managed this part (very fiddly though could have done with another set of hands)
kpnuts
Joined: December 20, 2013
KitMaker: 1,179 posts
Auto Modeler: 647 posts
Posted: Sunday, November 01, 2015 - 01:02 AM UTC
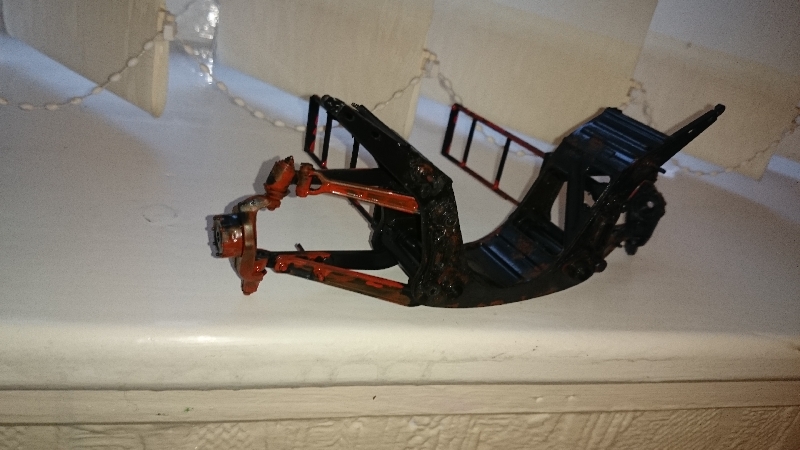
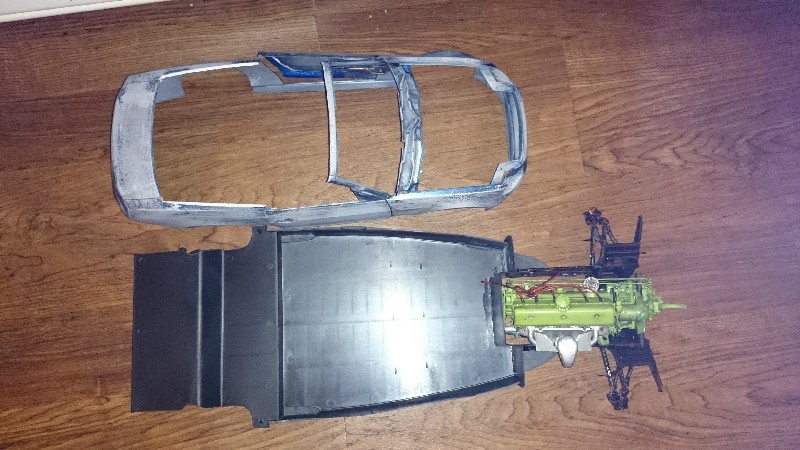
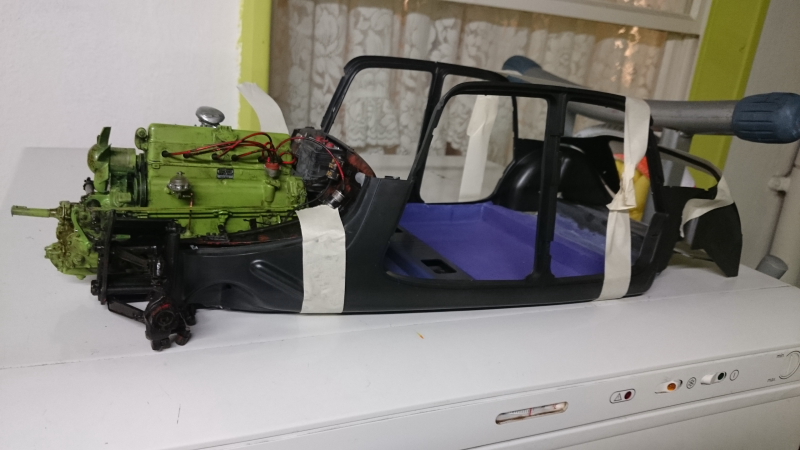
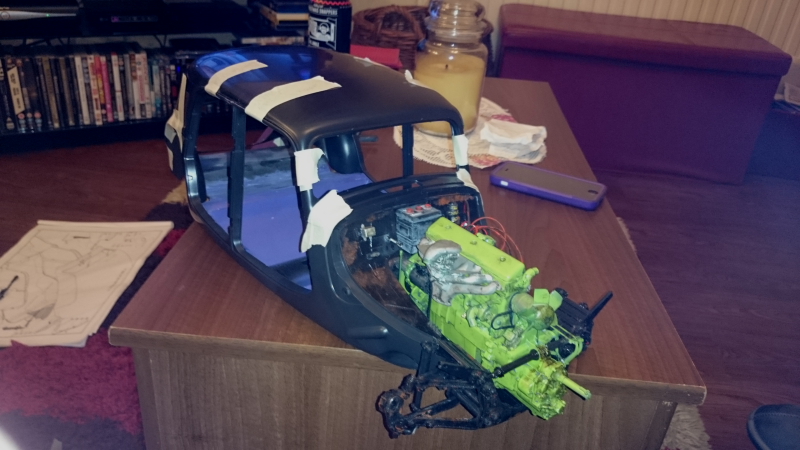
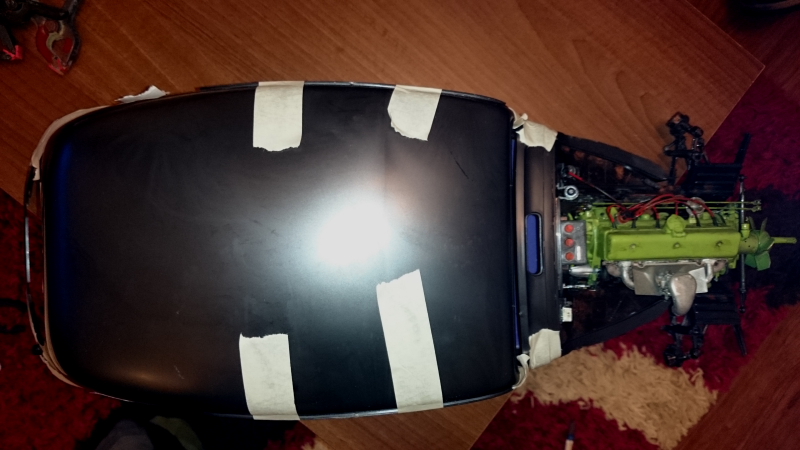
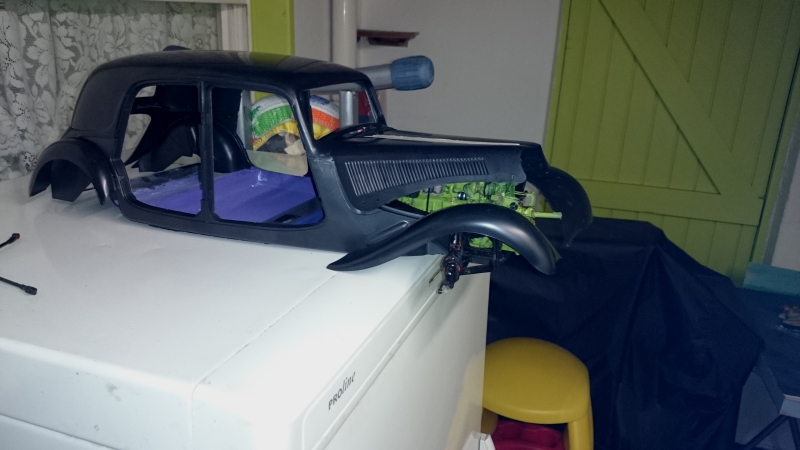
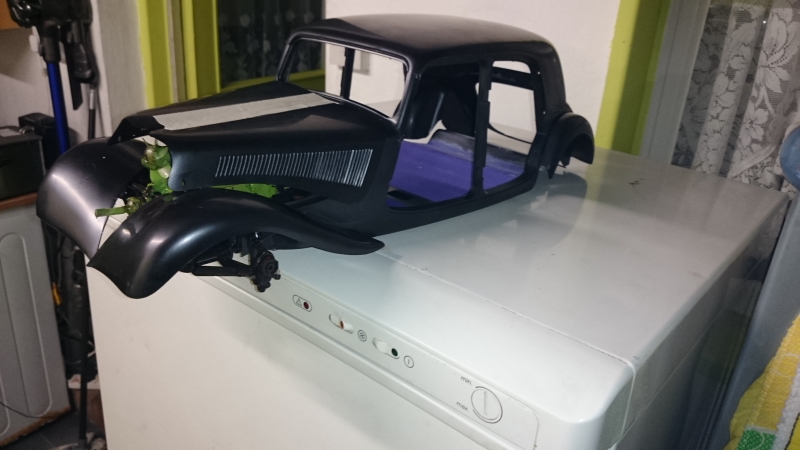
Hi all here is an Idea of just how huge this is, I thought the GT was big but, and dont forget it still has the rad and bumpers to go on, just look at this.
kpnuts
Joined: December 20, 2013
KitMaker: 1,179 posts
Auto Modeler: 647 posts
Posted: Sunday, November 01, 2015 - 11:35 PM UTC
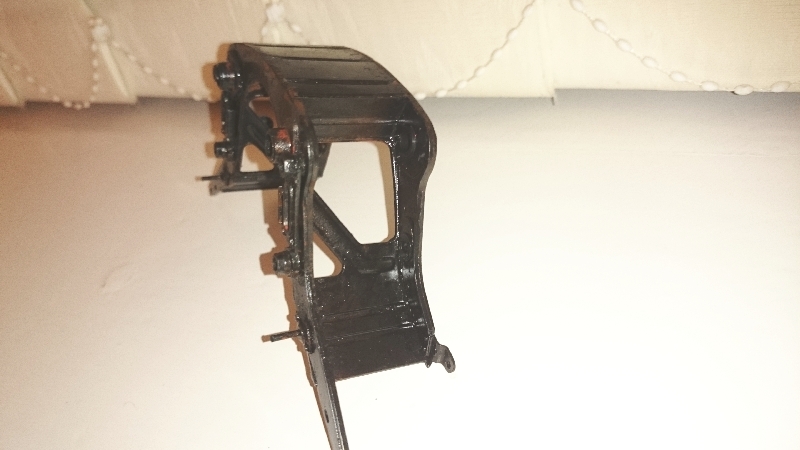
Here is tonights episode. I really, really, really, really love this kit cant wait to start the Mefistofeles if its anything like this.


kpnuts
Joined: December 20, 2013
KitMaker: 1,179 posts
Auto Modeler: 647 posts
Posted: Tuesday, November 03, 2015 - 01:44 AM UTC
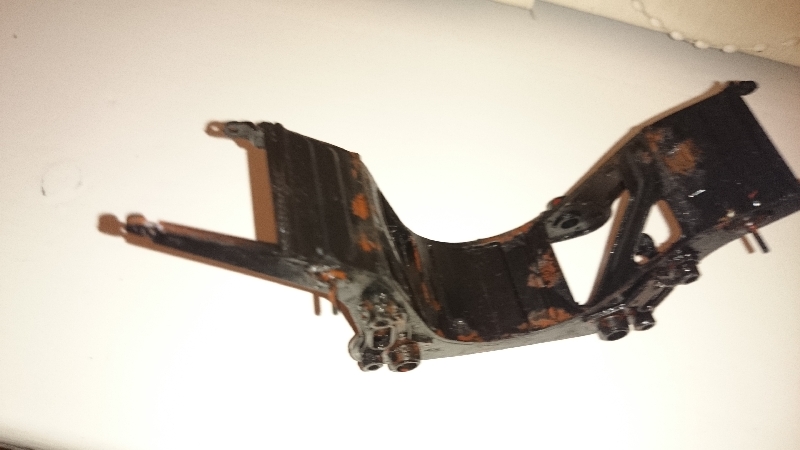
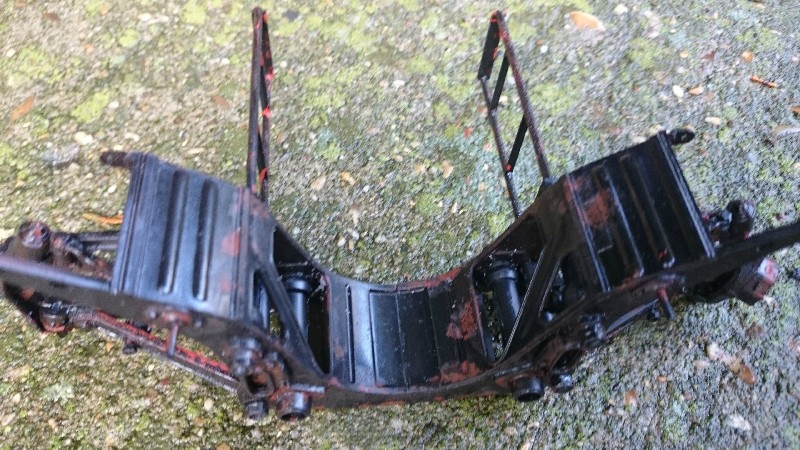
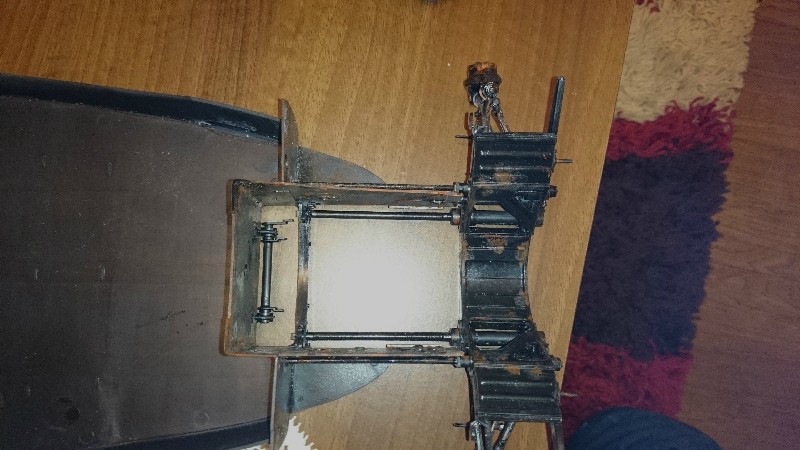
Hi all here's tonight's bit
kpnuts
Joined: December 20, 2013
KitMaker: 1,179 posts
Auto Modeler: 647 posts
Posted: Thursday, November 05, 2015 - 01:41 AM UTC
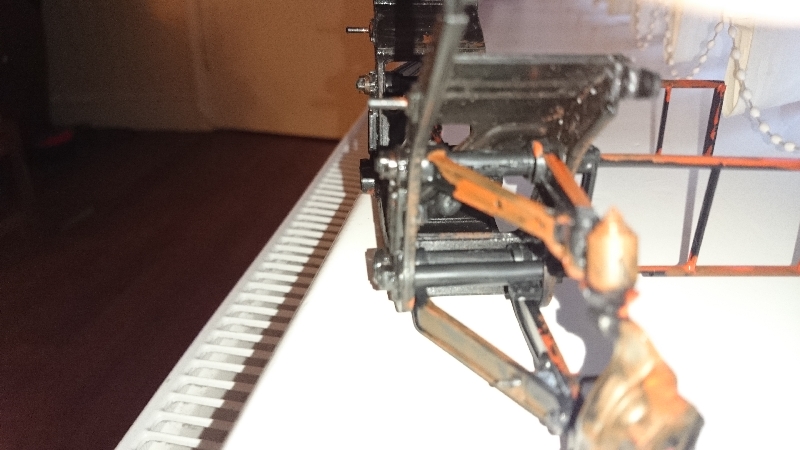
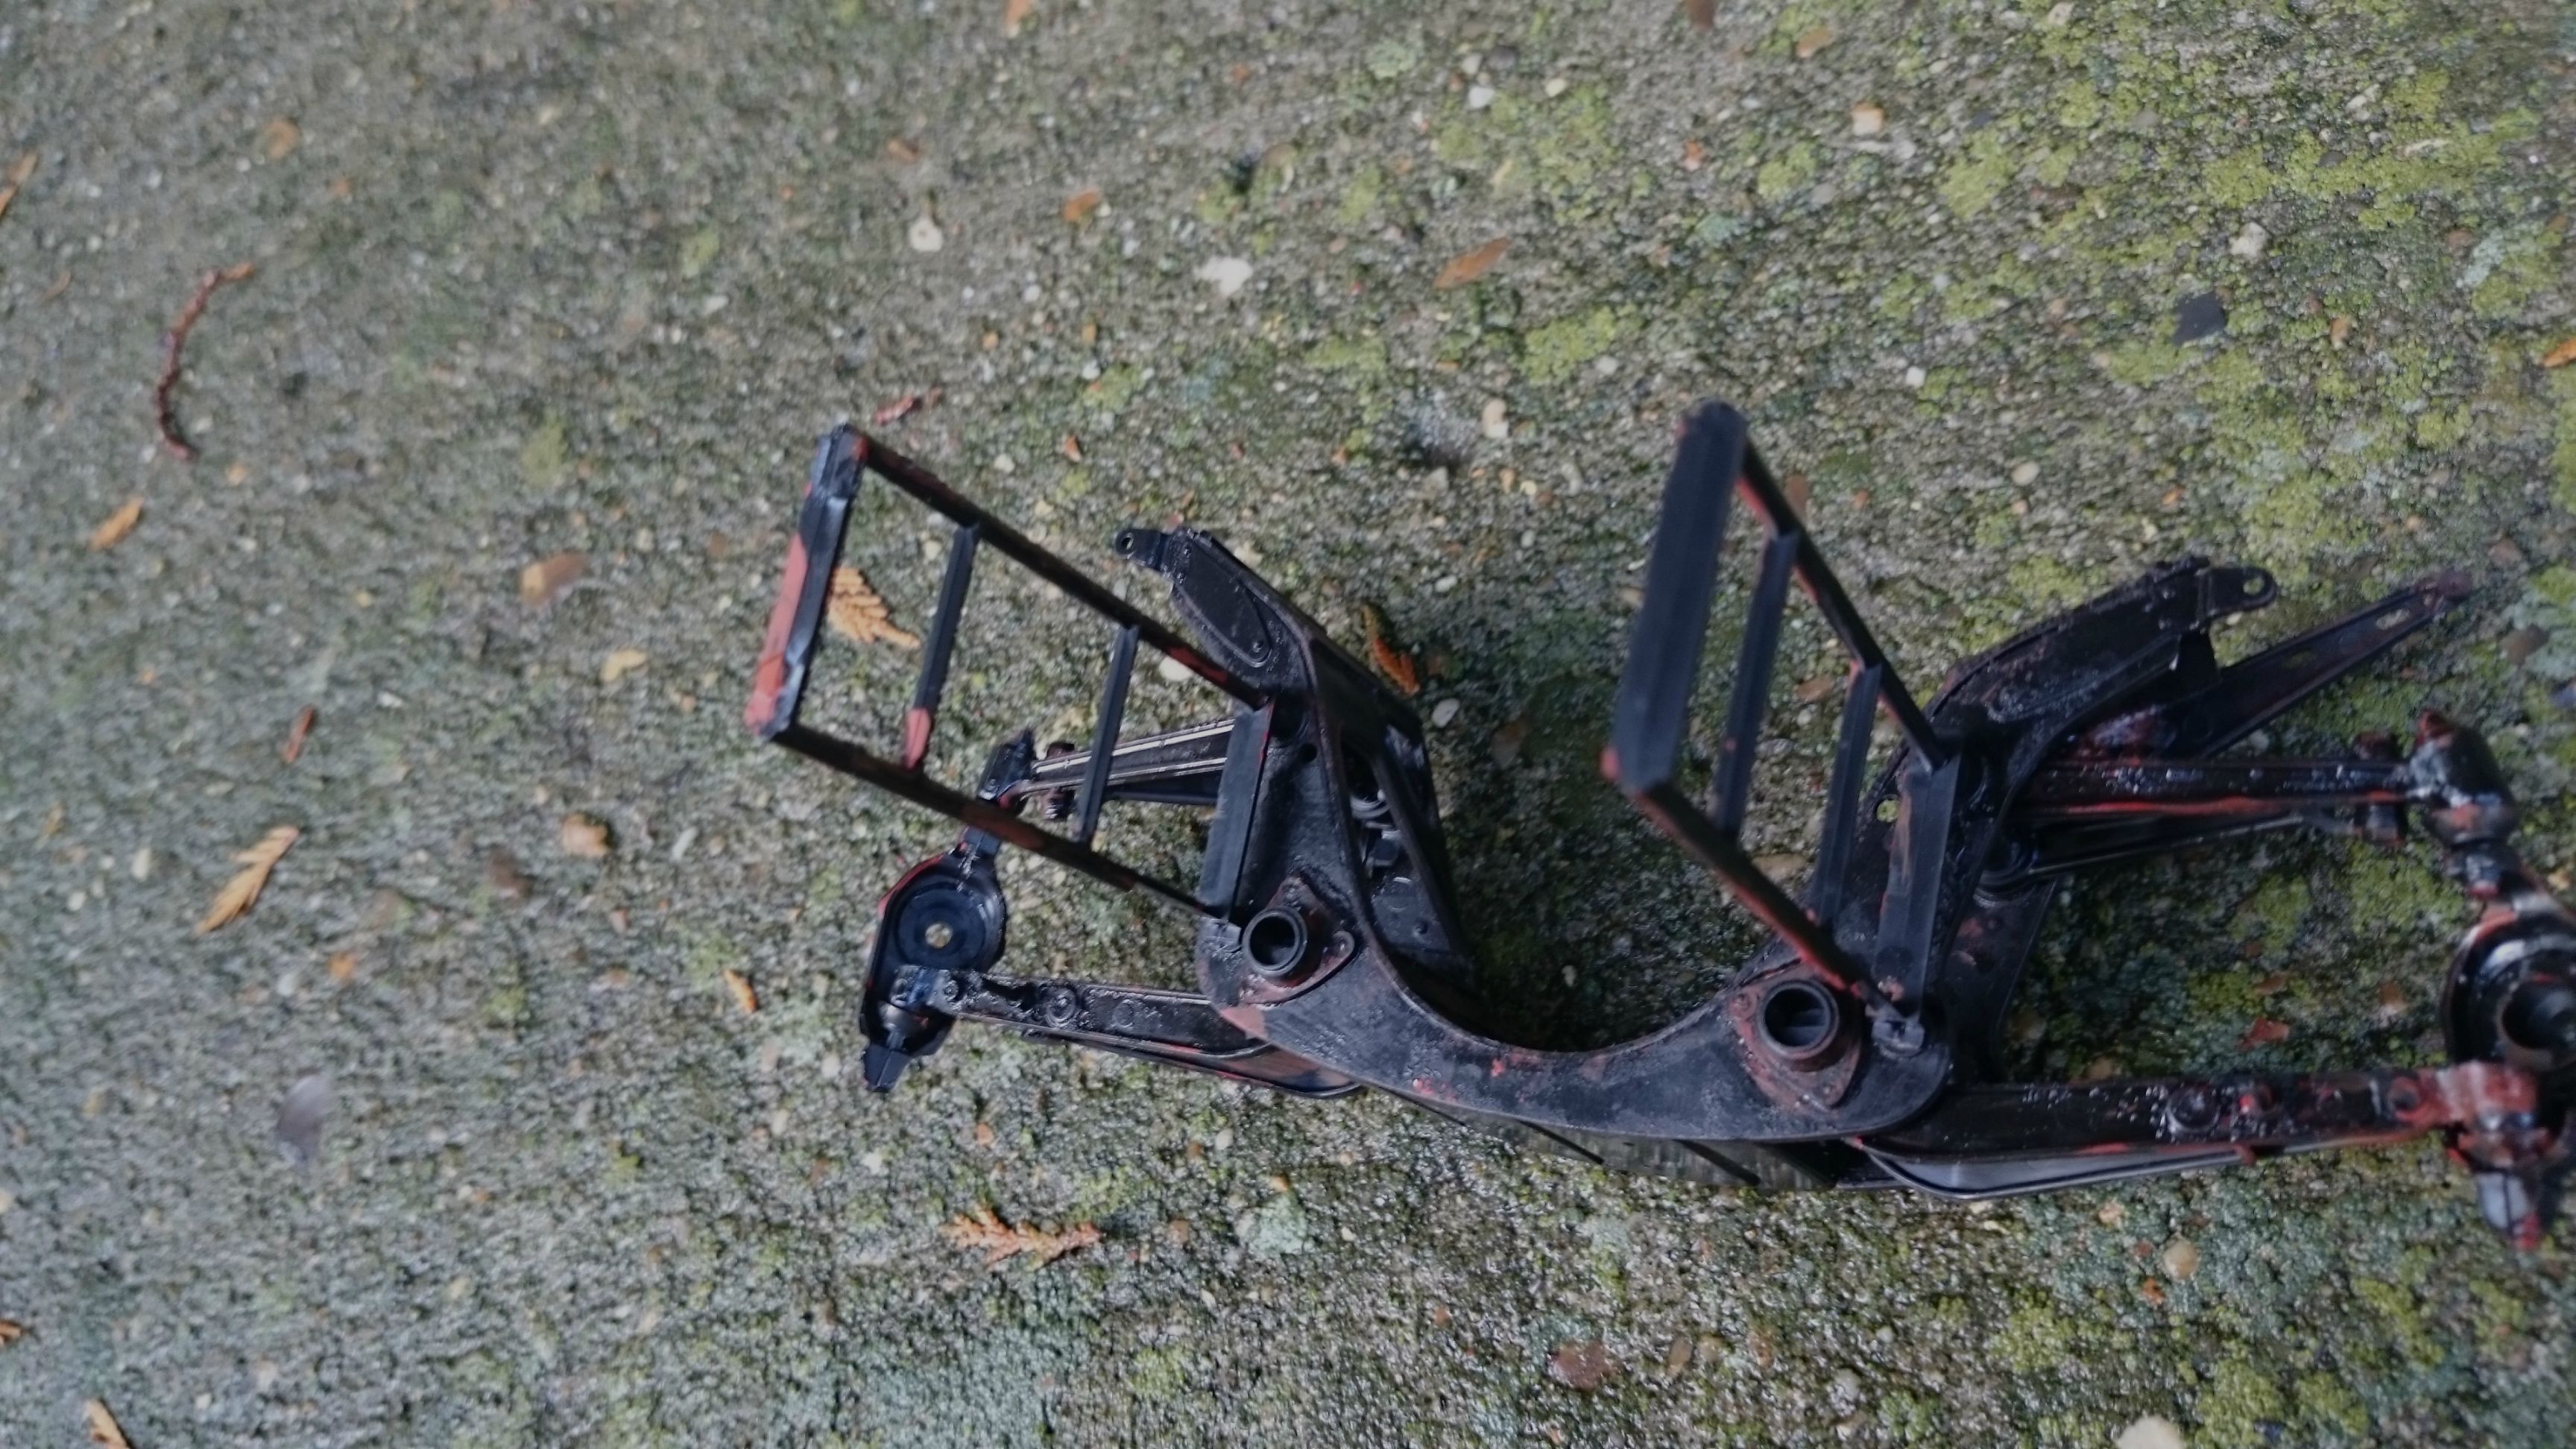
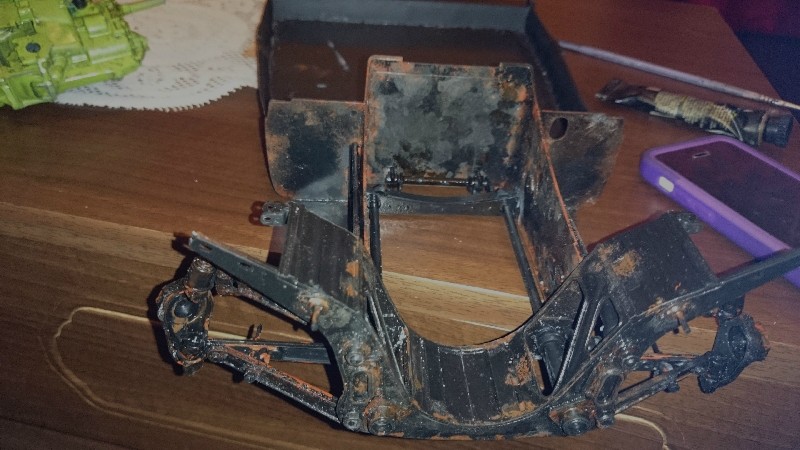
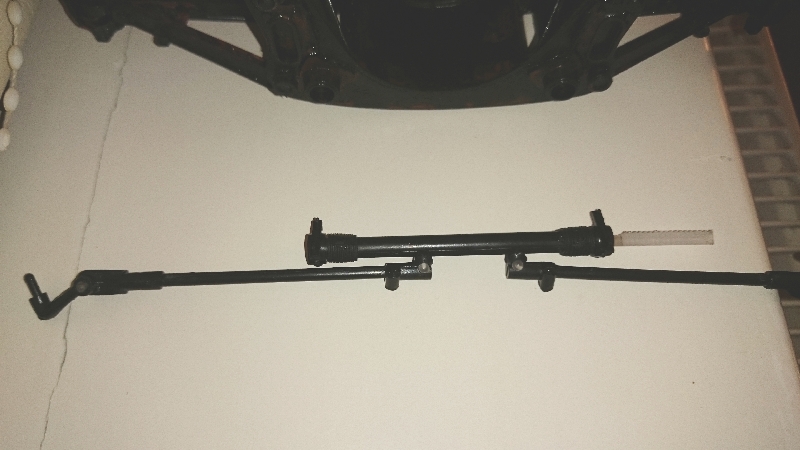
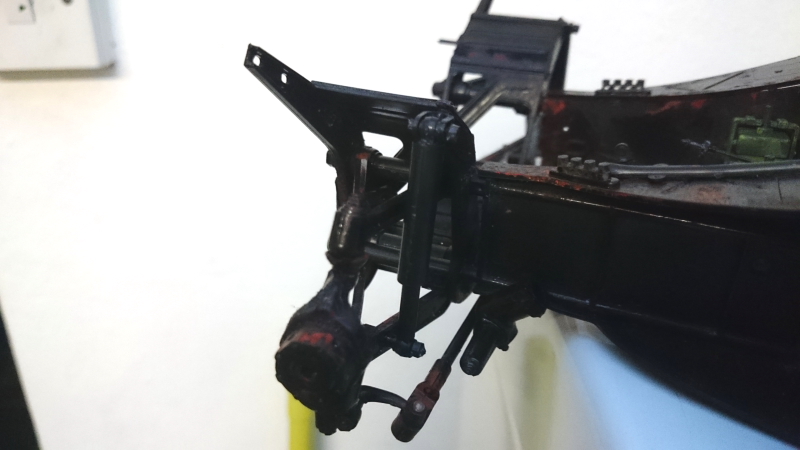
Hi all well here's tonight's bit, that steering rack was a real pain the ball joints are supposed to push through and be an interferance fit but I had us a dremell tool by hand to gradually open it up enough to get the ball joint through without it just falling back out again, very sloooow gentle work with lots of checking to make sure the ball joint didn't just fall through. got to paint it and weather it now, would have painted it first but it is a tight fit and wasn't sure it would slide through the shaft after it was painted will now use very thinned down paint and hopefully if I keep moving it as the paint dries it will remain working.
kpnuts
Joined: December 20, 2013
KitMaker: 1,179 posts
Auto Modeler: 647 posts
Posted: Saturday, November 07, 2015 - 10:40 PM UTC
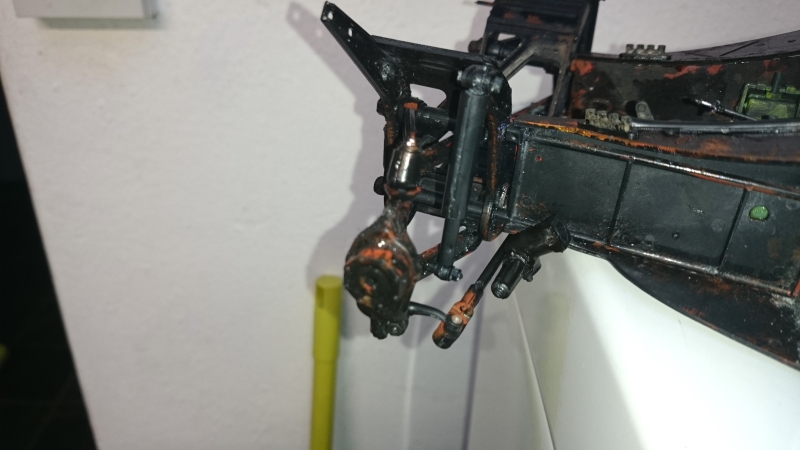
Hi all well this steering rack has driven me to hurling this against the wall, I've re-glued it on no less than a dozen times only for it to come off almost as soon as I turn it over, fingers crossed its on for good now, tried a test fit of the engine (I have to say it fitted before, but someone stood on one of the engine mounts (my fault I shouldnt have left it on the floor)when I took it off to do the breaks and clutch pedal linkages) now the engine dosnt lign up on that one so it will have to come off and see whats wrong with it.

kpnuts
Joined: December 20, 2013
KitMaker: 1,179 posts
Auto Modeler: 647 posts
Posted: Monday, November 09, 2015 - 12:50 AM UTC
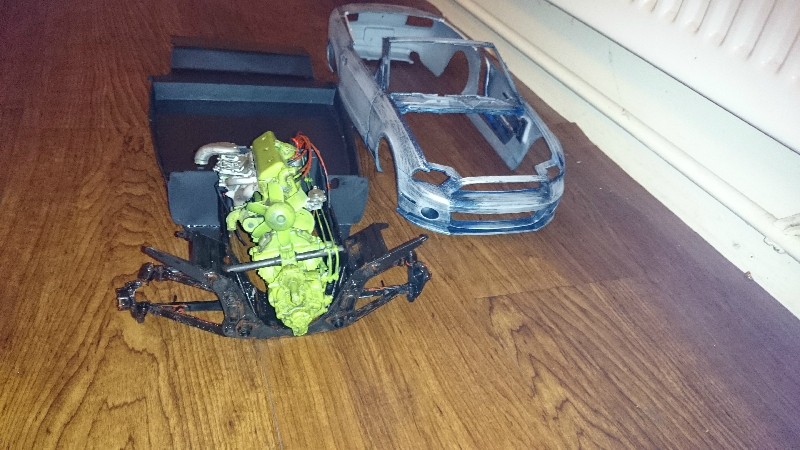
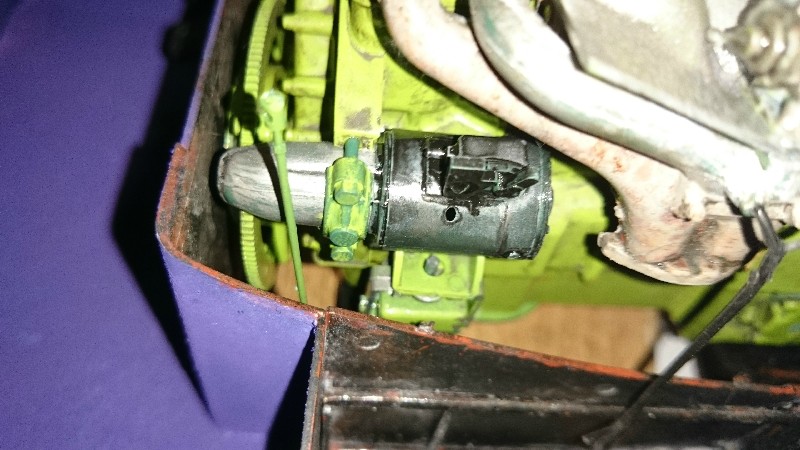
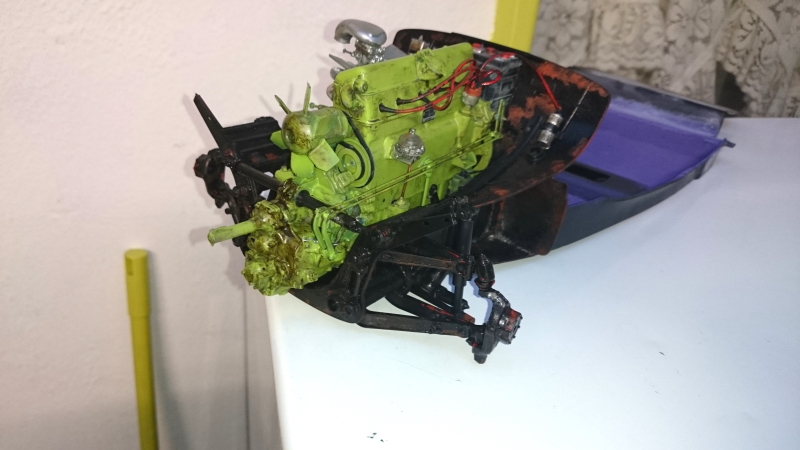
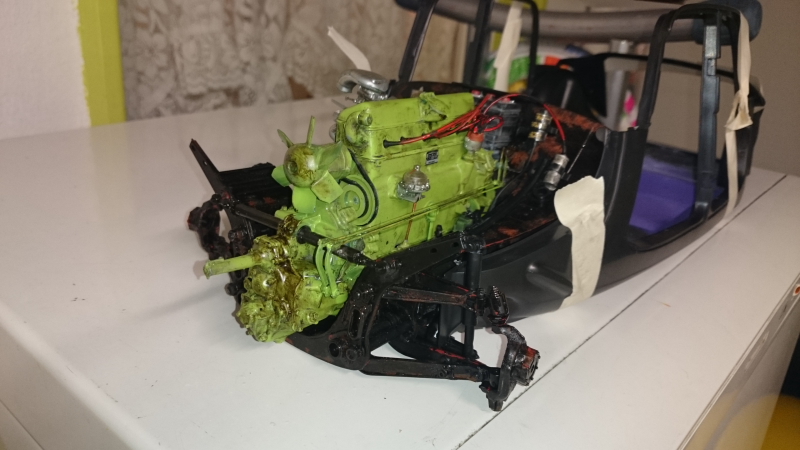
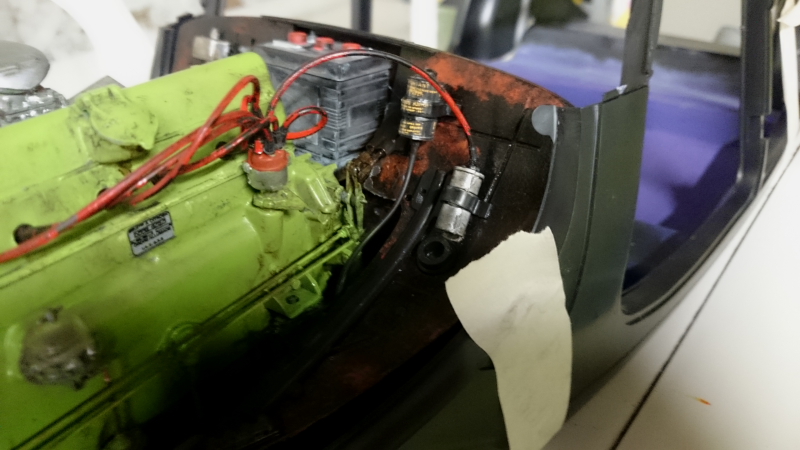
Hi all engine mount sorted some work on the engine bay and a quick try of the body
kpnuts
Joined: December 20, 2013
KitMaker: 1,179 posts
Auto Modeler: 647 posts
Posted: Monday, November 09, 2015 - 11:36 PM UTC
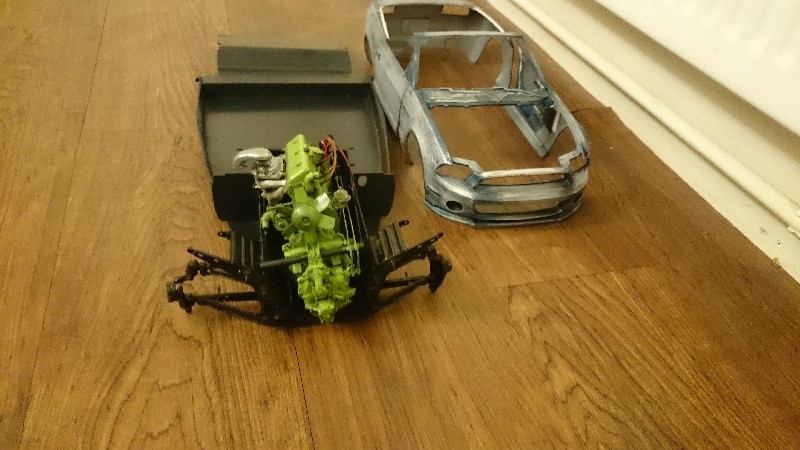
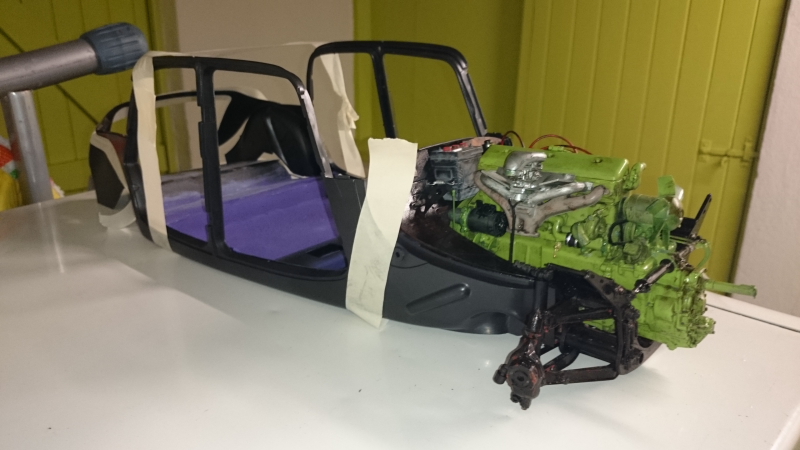
Hi all well the body (the majority of it anyway is glued together) I cant recommend Roy's cd enough, I've referenced it often but here it is invaluable he shows you how to assemble the body as a separate part which will save a lot of hard work later on also if following his instructions the finished body is very tough.
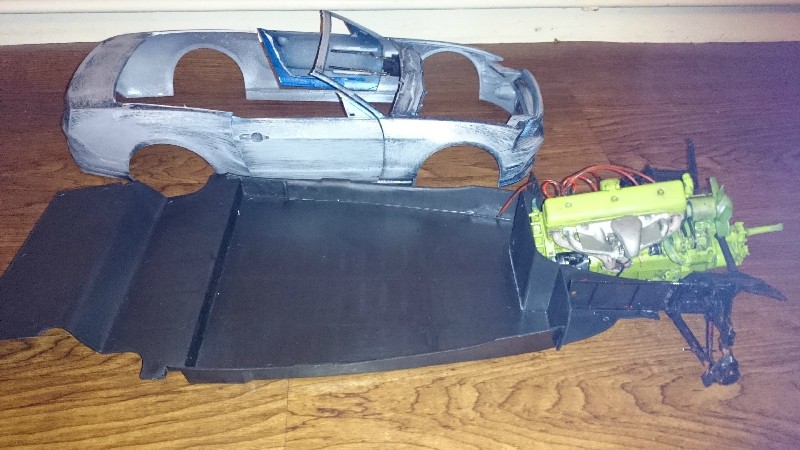
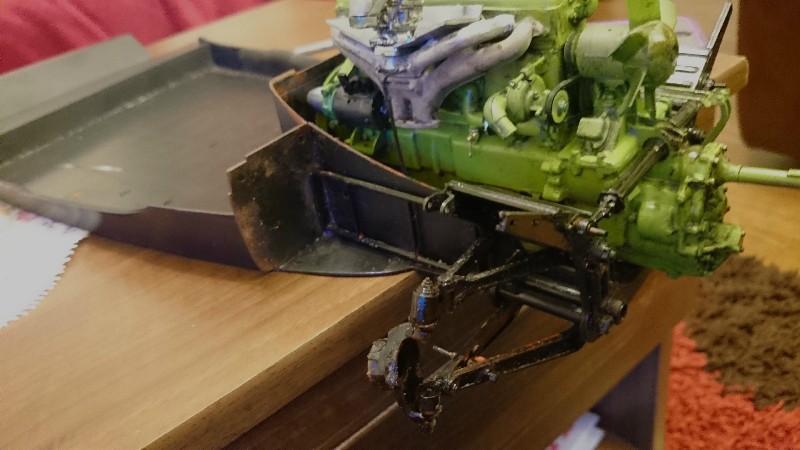
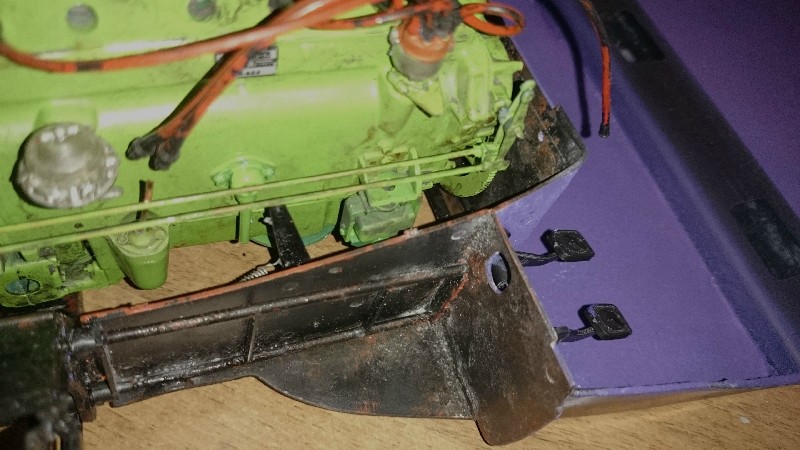
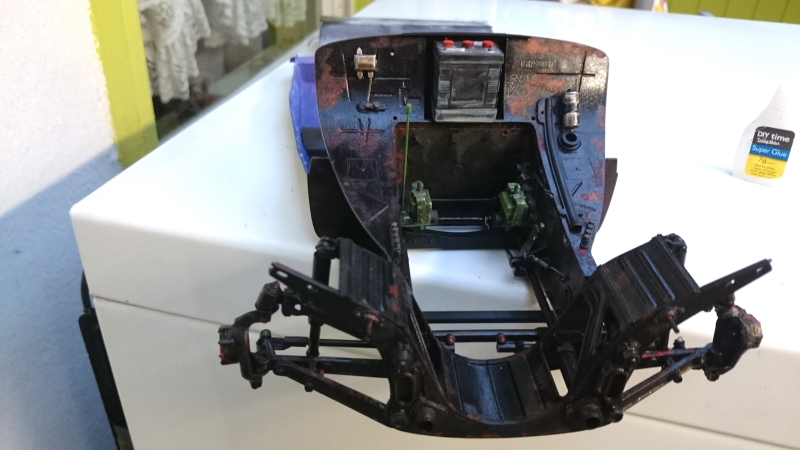
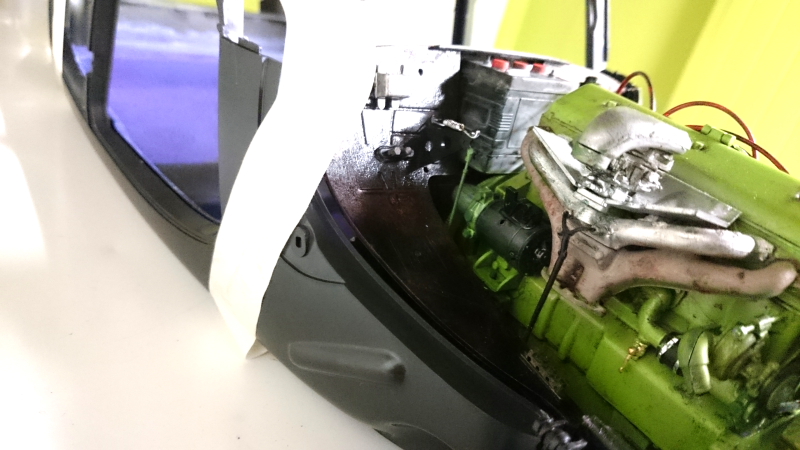
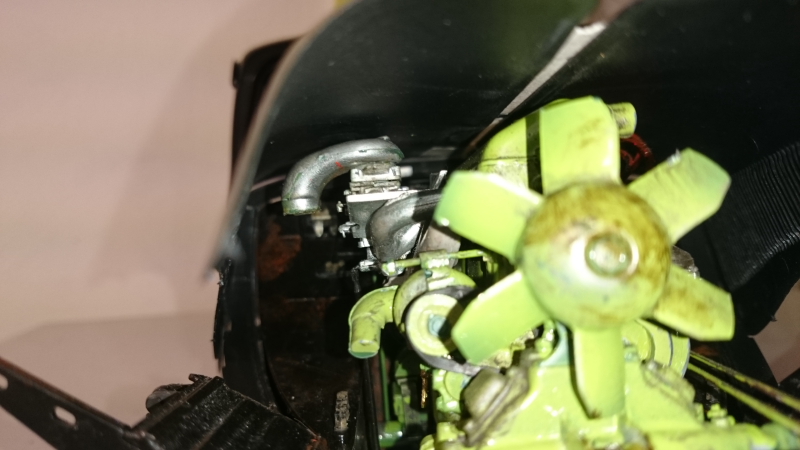
there is however one very big problem with my model, which I don't know how I will get round I couldn't resist trying the bonnet on and the air box is too high lifting the bonnet, that is going to be a real pain, not sure whats happening to be honest, I know I had it (the airbox ) in the wrong place originally but its where it should be now, the engine sits on the engine mount properly?
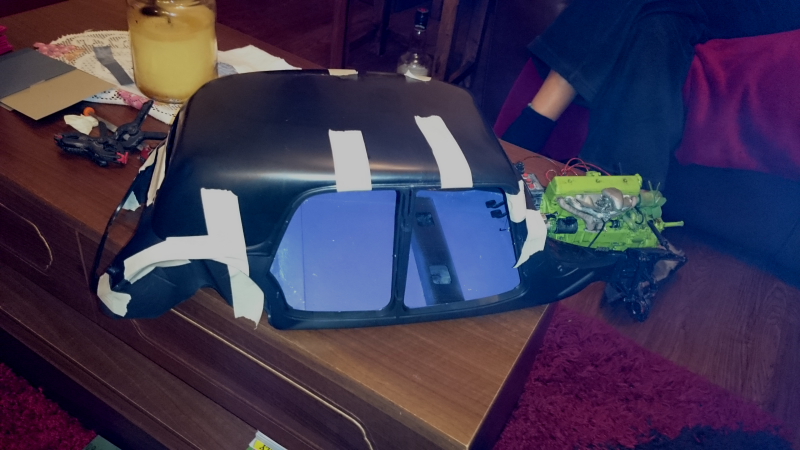
you can see from this pic the problem

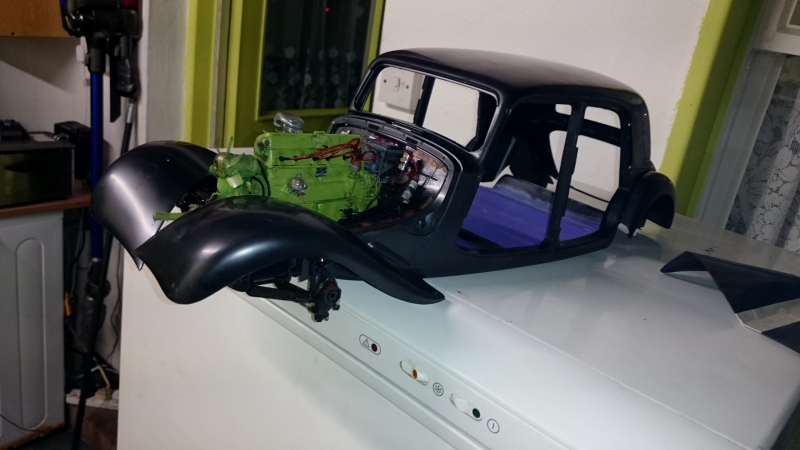
there is however one very big problem with my model, which I don't know how I will get round I couldn't resist trying the bonnet on and the air box is too high lifting the bonnet, that is going to be a real pain, not sure whats happening to be honest, I know I had it (the airbox ) in the wrong place originally but its where it should be now, the engine sits on the engine mount properly?
you can see from this pic the problem

Stickframe

#362

Joined: December 01, 2013
KitMaker: 1,661 posts
Auto Modeler: 431 posts

Posted: Wednesday, November 11, 2015 - 10:29 PM UTC
Hi Ken - wow! Great build - you're doing quite a job on that beast. From the last few photos, it looks huge! I'll keep an eye out for your next post.
Cheers
Nick
Cheers
Nick
kpnuts
Joined: December 20, 2013
KitMaker: 1,179 posts
Auto Modeler: 647 posts
Posted: Wednesday, November 11, 2015 - 11:48 PM UTC
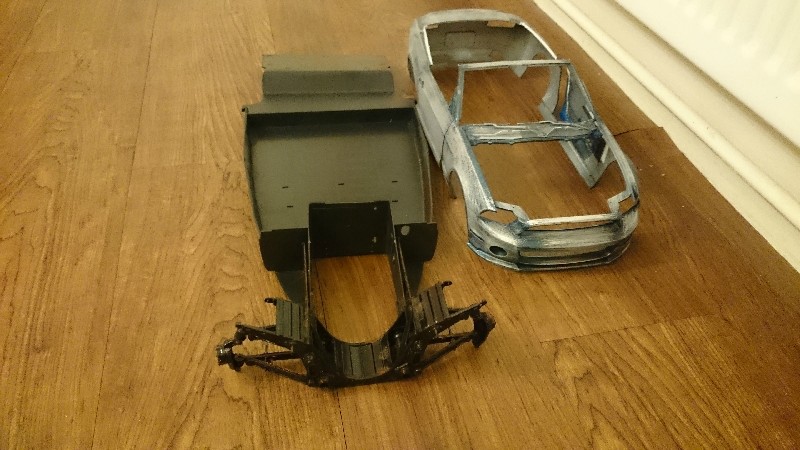
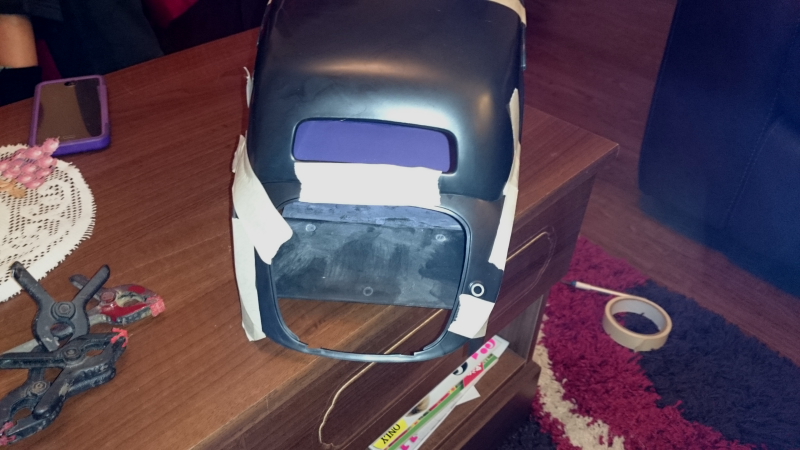
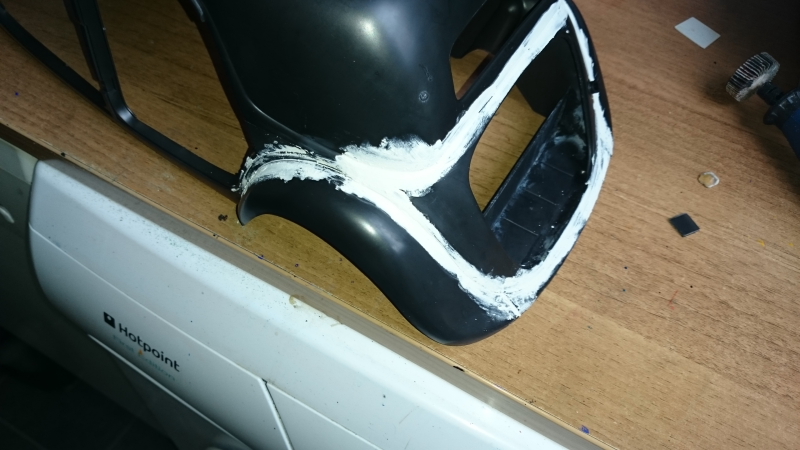
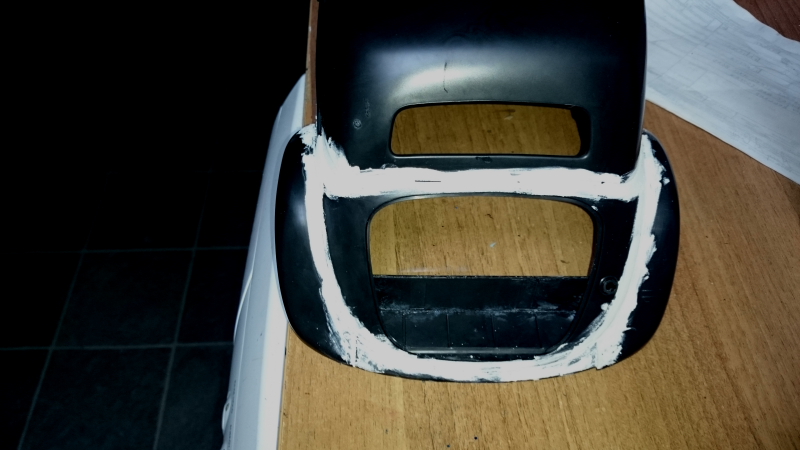
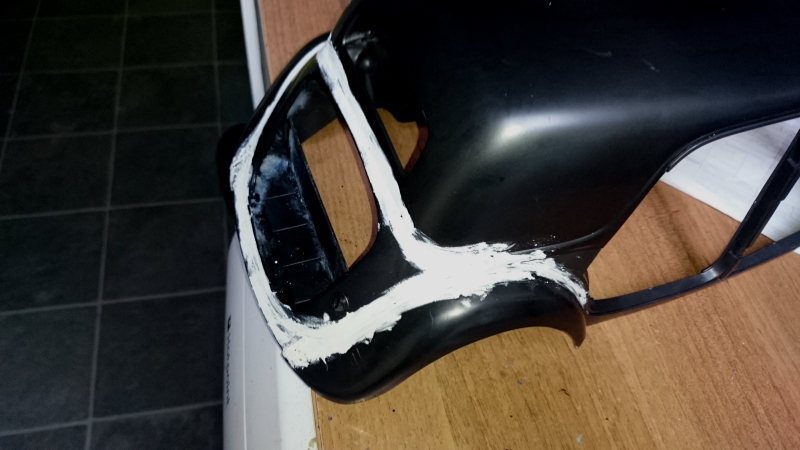
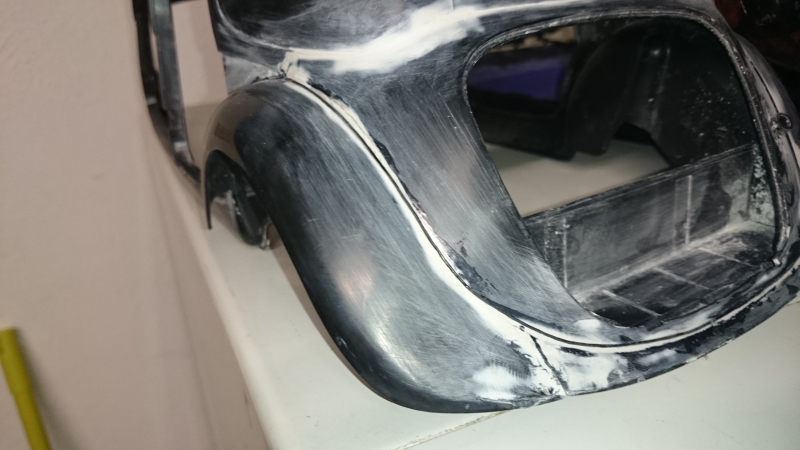
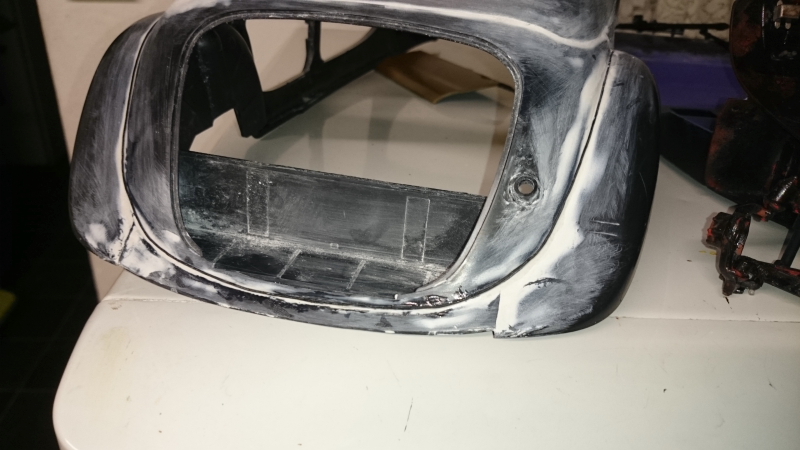
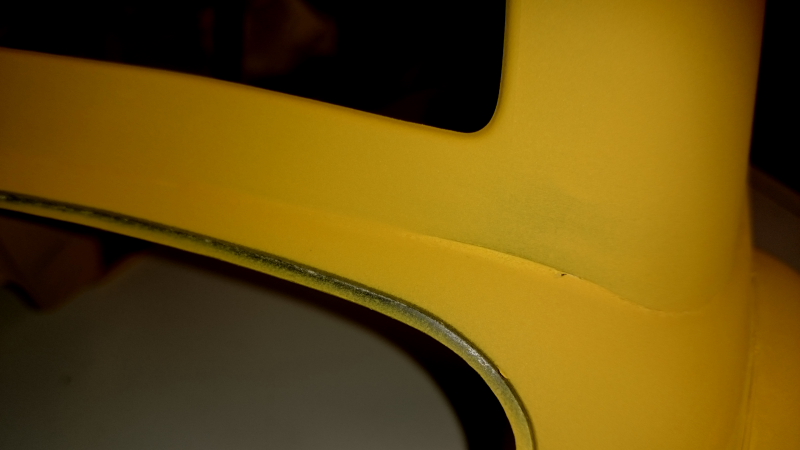
Hi all well I've sorted the air intake problem and started filling and sanding the rear of the car, I would like to prime it so I can see what further filling and sanding will be needed but till Citroen France get back to me with either the colour code or the paint itself, I've no idea what primer to use, I don't want to prime it then have it all react with the top coat.
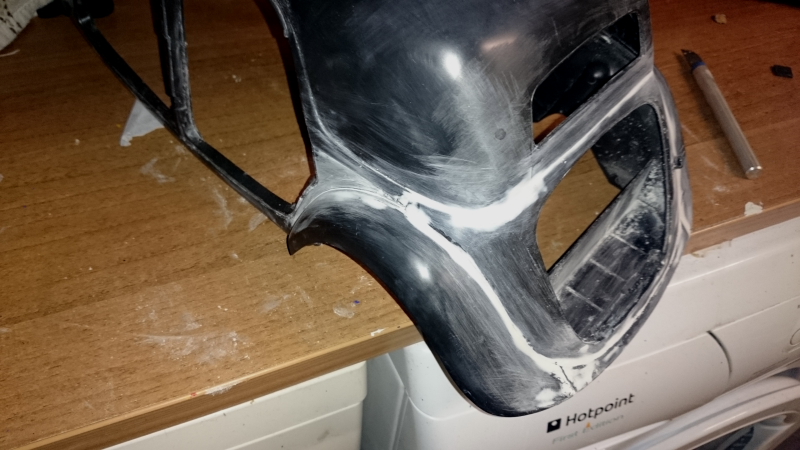
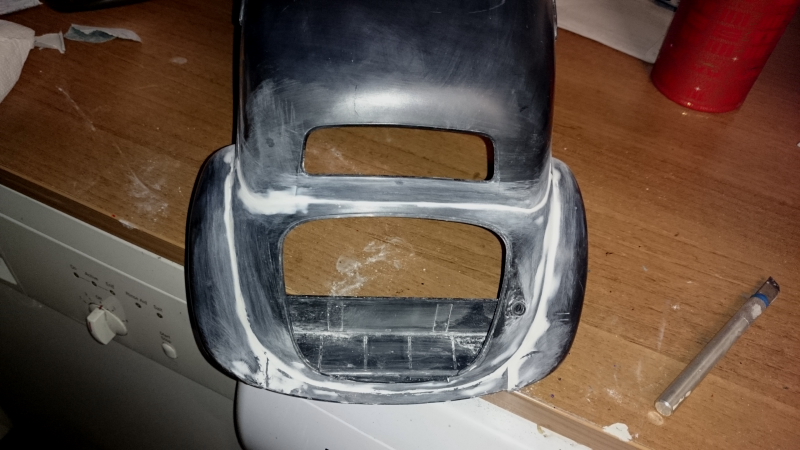
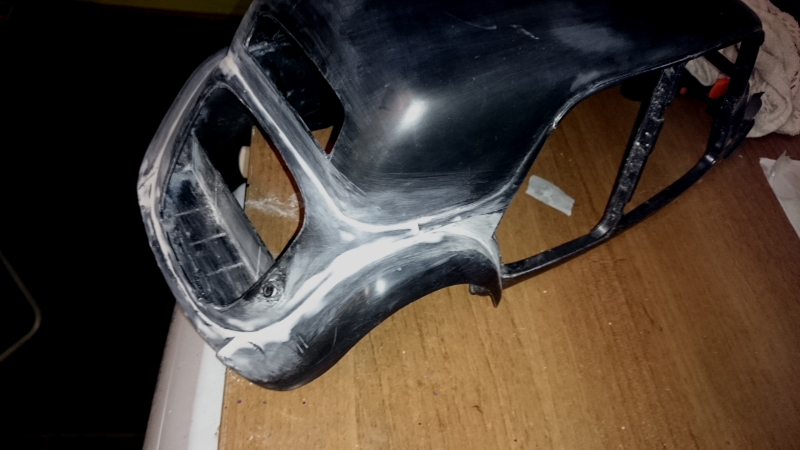
it is huge nick, its enormous I thought the 1/12 shelby Gt 500 was big but this makes it look like a mini.
it is huge nick, its enormous I thought the 1/12 shelby Gt 500 was big but this makes it look like a mini.
kpnuts
Joined: December 20, 2013
KitMaker: 1,179 posts
Auto Modeler: 647 posts
Posted: Thursday, November 12, 2015 - 11:23 PM UTC
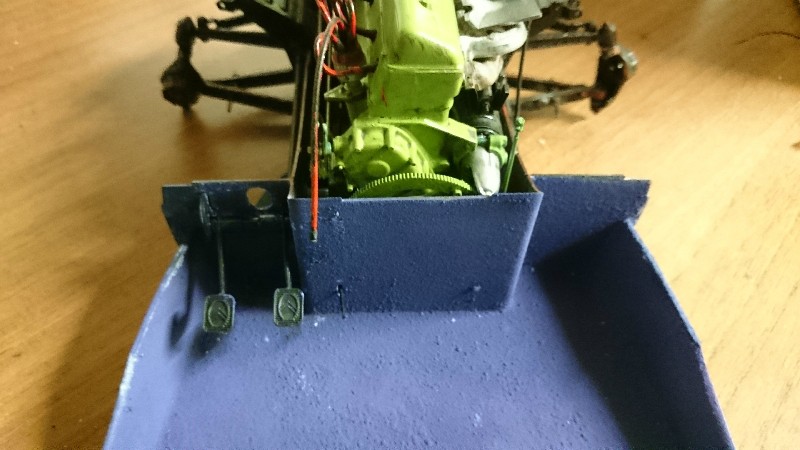
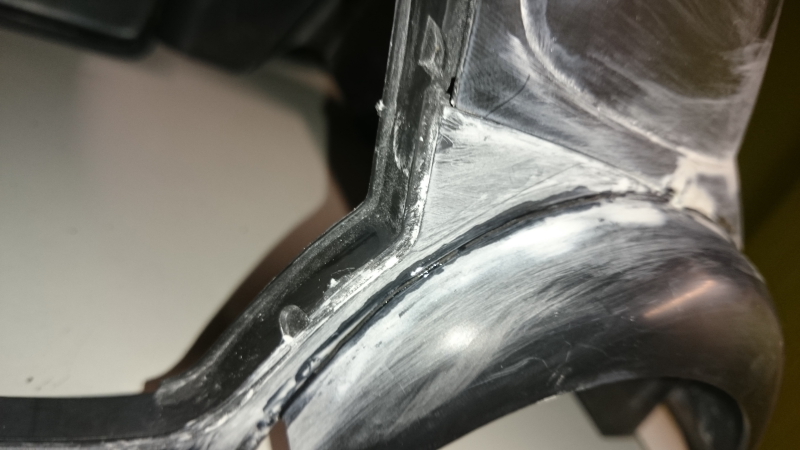
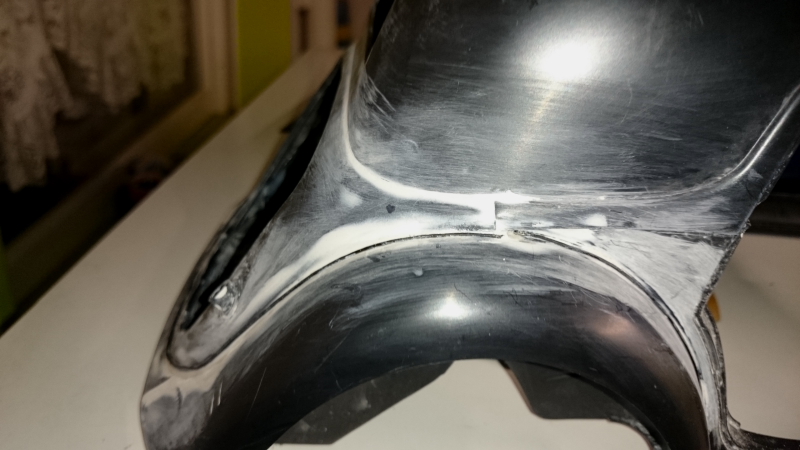
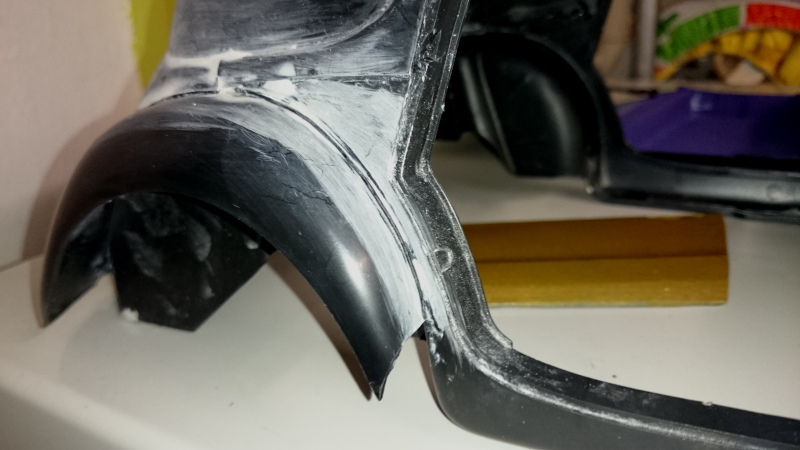
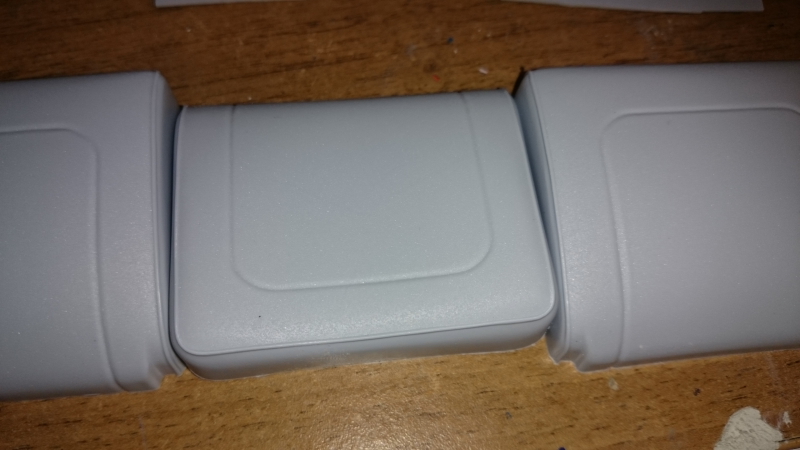
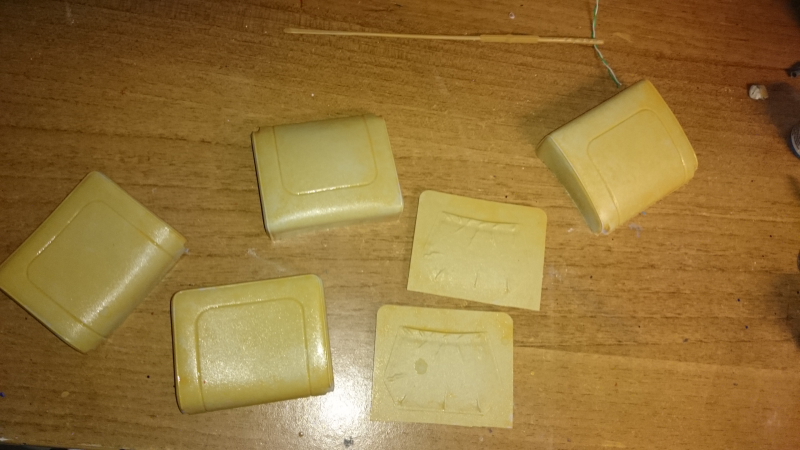
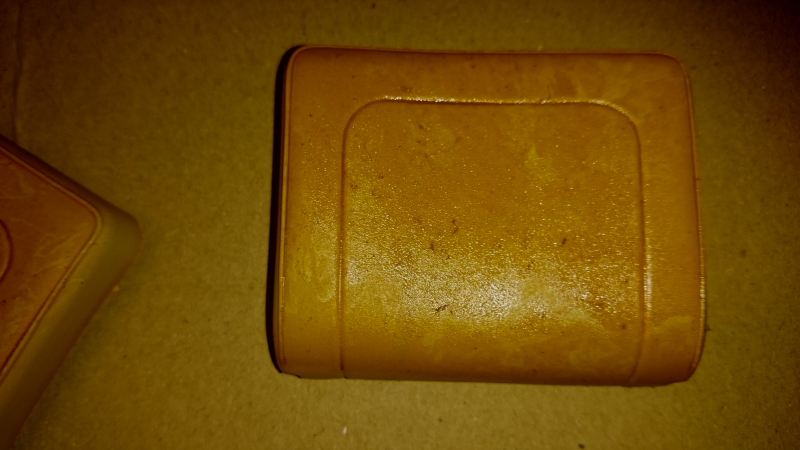
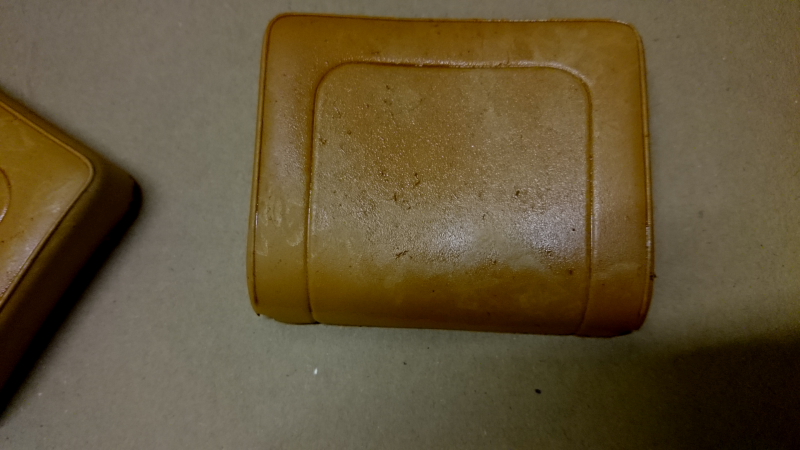
Hi all well I've added the rubber piping that goes between the wings and the body and I've started the front seats (see if this works before I do the rear ones) I'm going to try the marbelling effect I used on the Kwak Z1 a while ago only not going to have so much of it, so this is just the base colour which would show through from the cracked vynle (how do you spell vynel vynal ????)

kpnuts
Joined: December 20, 2013
KitMaker: 1,179 posts
Auto Modeler: 647 posts
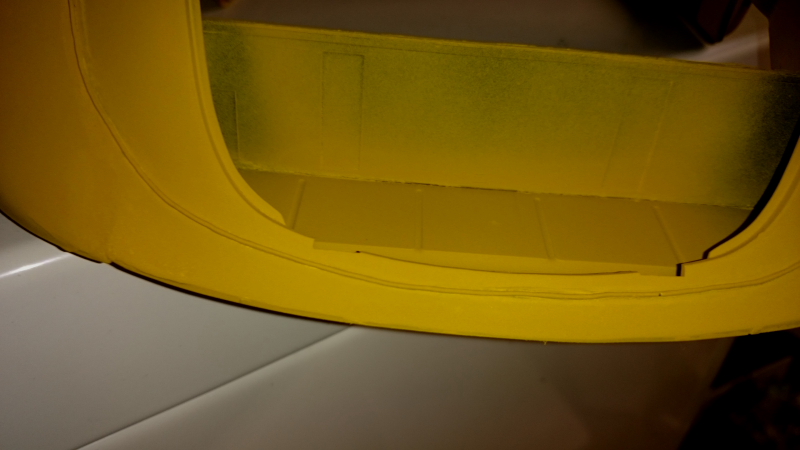
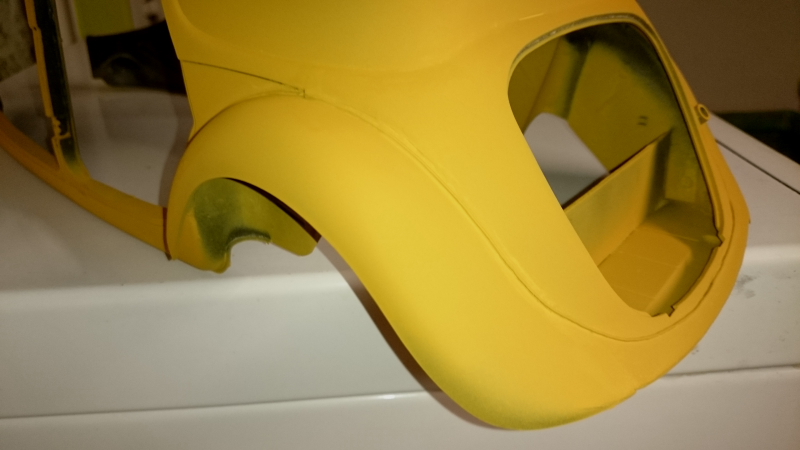
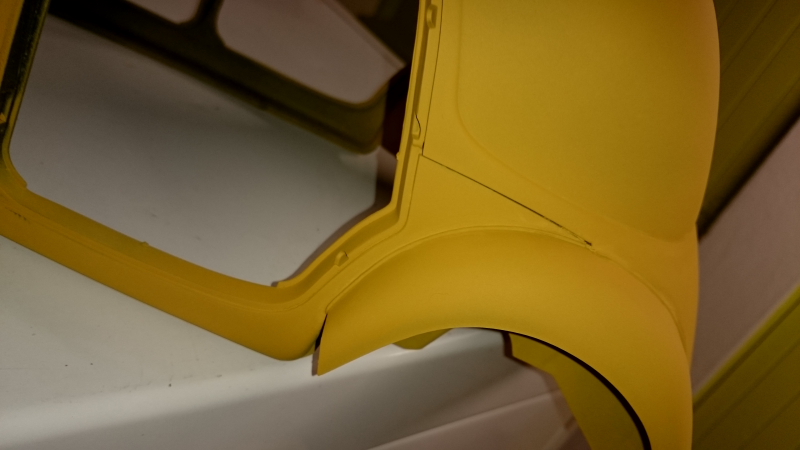
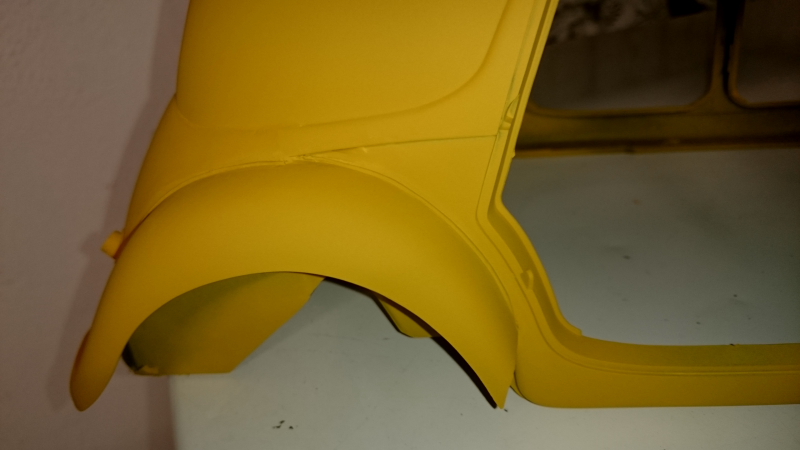
Posted: Friday, November 13, 2015 - 09:57 PM UTC
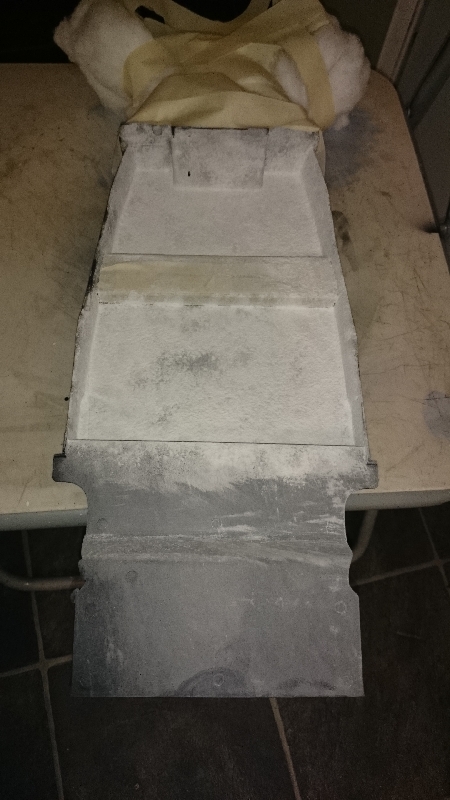
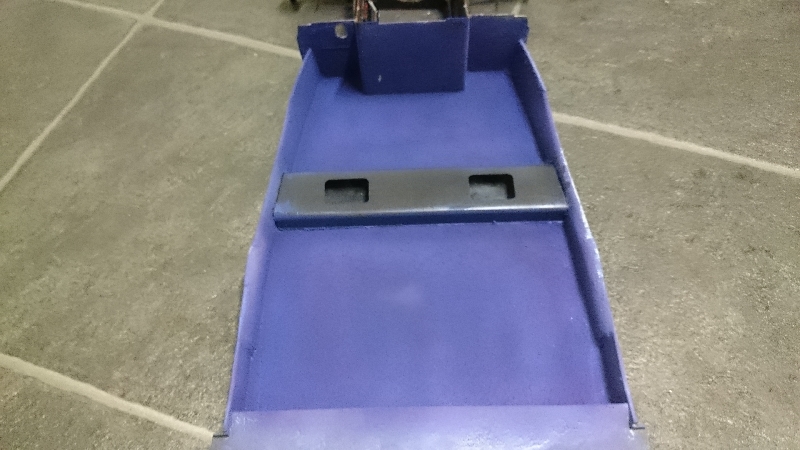
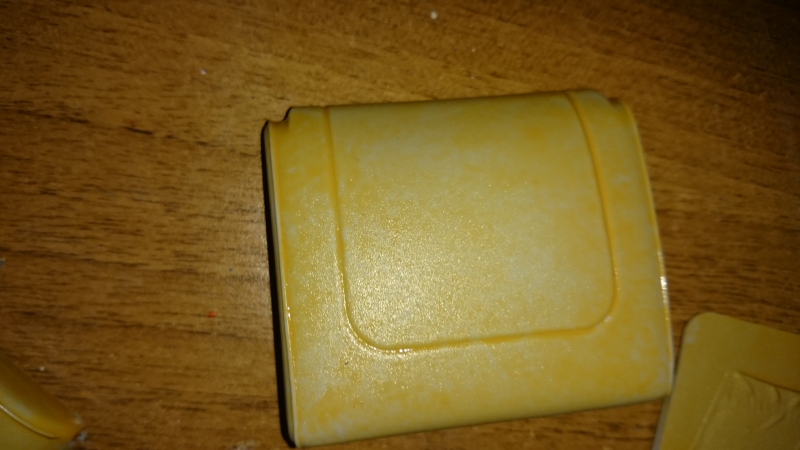
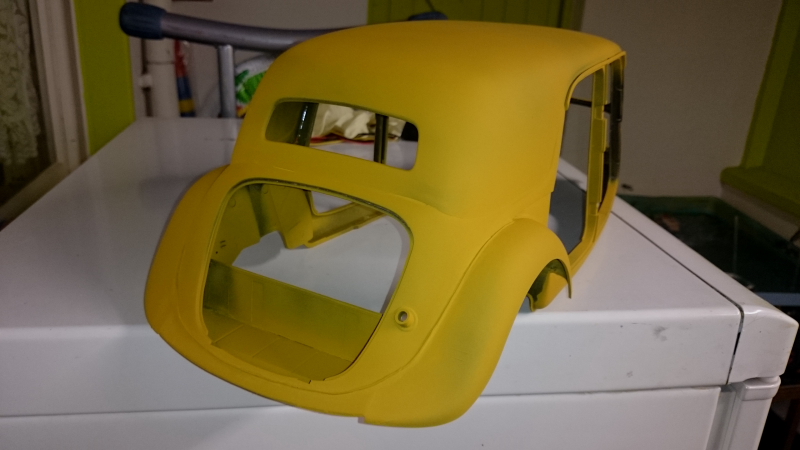
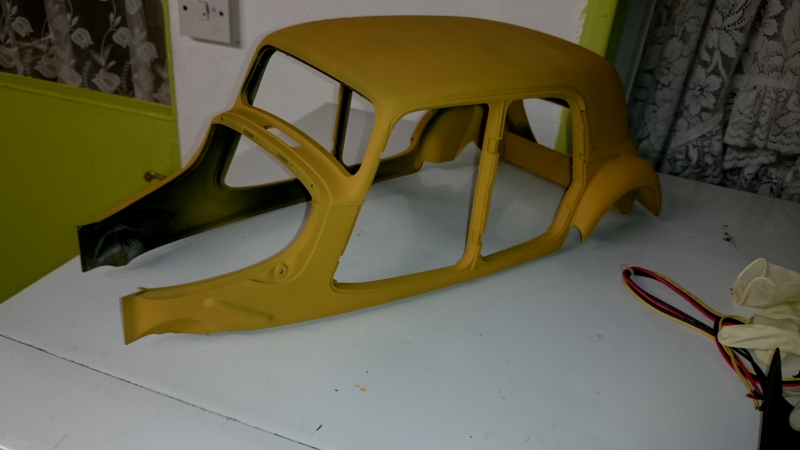
Hi all well I bought some halfords plastic filler/primer and some halfords plastic primer and here is the result of the first coat of filler primer, I must say I am well chuffed with the first coat (I thought it would reveal a horrendous filling job which required loads of work) I will admit it has shown some areas which need attention, but the piping (I think anyway) looks just about right. I also did the first coat on the seats, which I'm also quite pleased with, yes it needs another coat but (I think anyway) its looking promising.


 |

WEB HOSTING BY


Copyright ©2021 Auto Modeler and Kitmaker Network, a subsidiary of Silver Star Enterprises
All Rights Reserved. Please read our Conditions of Use and Privacy Policy.
All Rights Reserved. Please read our Conditions of Use and Privacy Policy.