_GOTOBOTTOM
Cars
Discuss all types of automotive modeling here.
Nunu 1/24 scale Audi R8 LMS GT3
Joel_W
Staff MemberAssociate Editor
AUTOMODELER
_VISITCOMMUNITY
New York, United States
Joined: December 04, 2010
KitMaker: 11,666 posts
Auto Modeler: 2,974 posts
Posted: Sunday, June 07, 2020 - 07:03 AM UTC
The FIA Racing Body had two classes in their Touring car series which I've always refered to as closed wheel Tin Tops, GT1 and GT2. these two classes completed with the prototype classes from sprint races to 24 hour hours, with LeMans as the big prize. The cars, which looked like what you saw in the various manufacture showrooms where anything but that. Fully developed from the ground up for racing, were out of the reach of most private teams even if they could afford them. So in 2005 the FIA created the GT3 class.

The GT3 cars were literally showroom cars in every sense of the word. Anyone with enough money could buy one, and then modify it to the very strict/limited rules and go racing. Well, to make a long story short, the GT3 class has become the most popular of the 3 classes by a wide margin, where almost all the factories with cars in the series have official factory or professional teams representing them. As a matter of fact, GT1 is gone, and GT2 is a mere shell of what it once was. Even IMSA has series for the GT3 cars here in States.

Needless to say, I'm a huge fan of GT3 racing. I'm also one of the oldest Auto Sim racers that I know online, and my favorite series to race both on and off line are GT3 cars. And one of my favorite GT3 cars to race is the Audi R8 LMS, which actually won it's class at the 2015 24 hrs of LeMans.

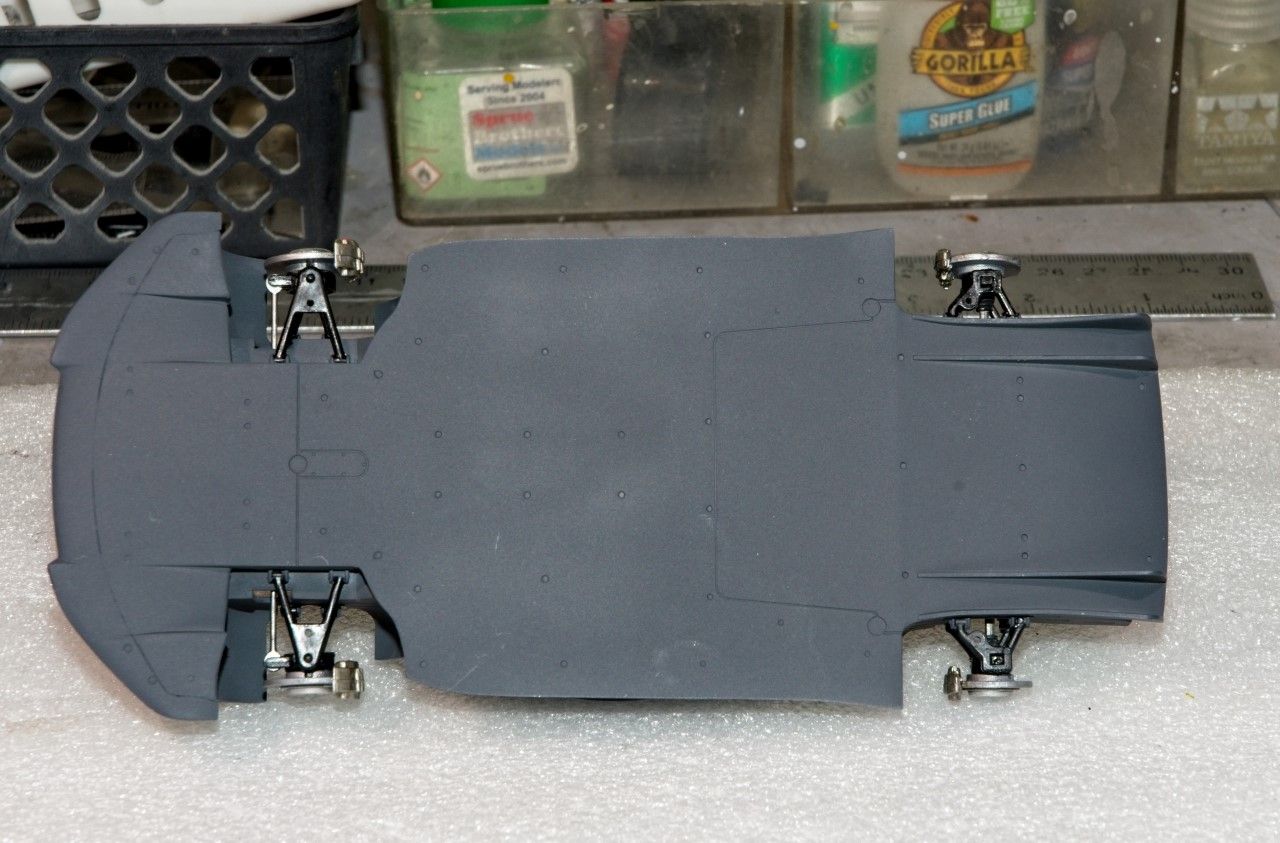
So when Nunu announced that they were making a model of this car, I just couldn't wait. Took what seemed like forever, but I finally got the kit. As with all the Nunu/Platz/Beemax kits, it's a semi curbside model with just the lower suspension, engine & transaxle included. Hence, the bonnet doesn't open up as there's no upper engine.


the instructions start with the chassis sub assemblies, but I much prefer to build, prepare, paint, and decal the body shell 1st. So I started on step 11.

After removing what just could be a World's record for sprue attachment points, as well as plently of alignment supports so that the shell didn't twist or warp out of shape during the molding and cooling process. I'd gladly spend the clean up time then have to figure out how to straighten a problematic shell. As usual, vents and intakes are on the thick side.

Here's a picture I borrowed from the Net as I forgot to take one while thinning the individual vent blades for the front wheel air vents.


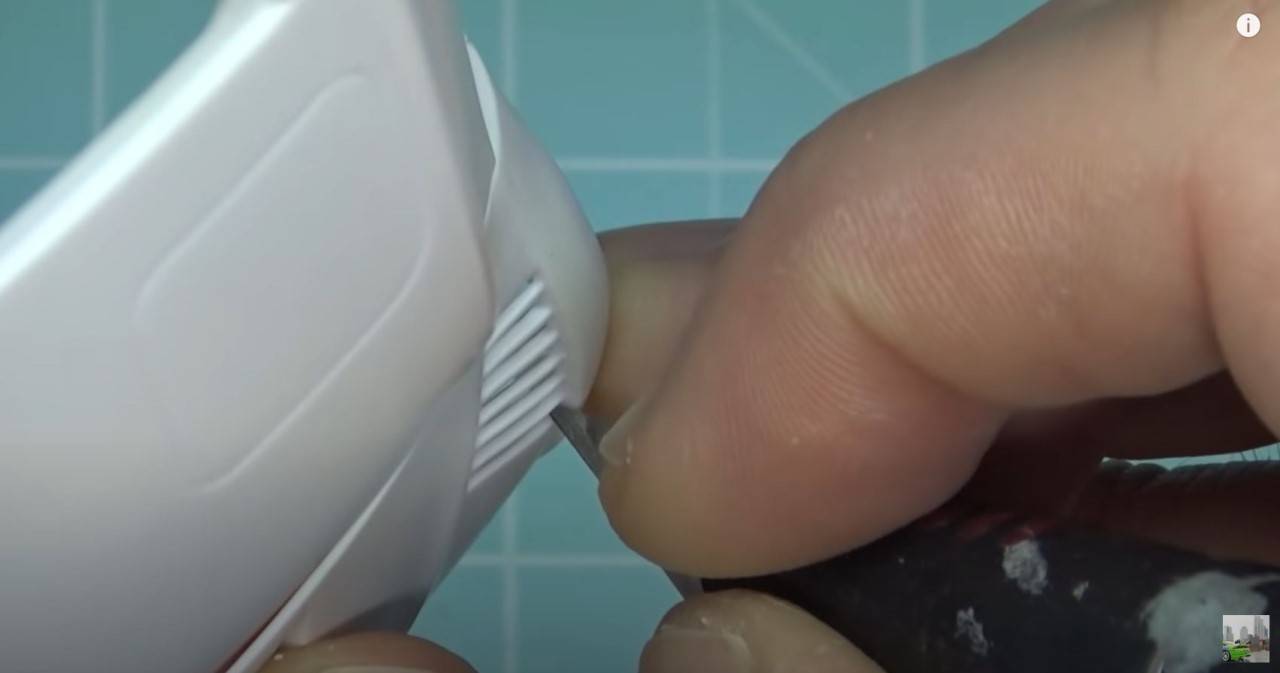
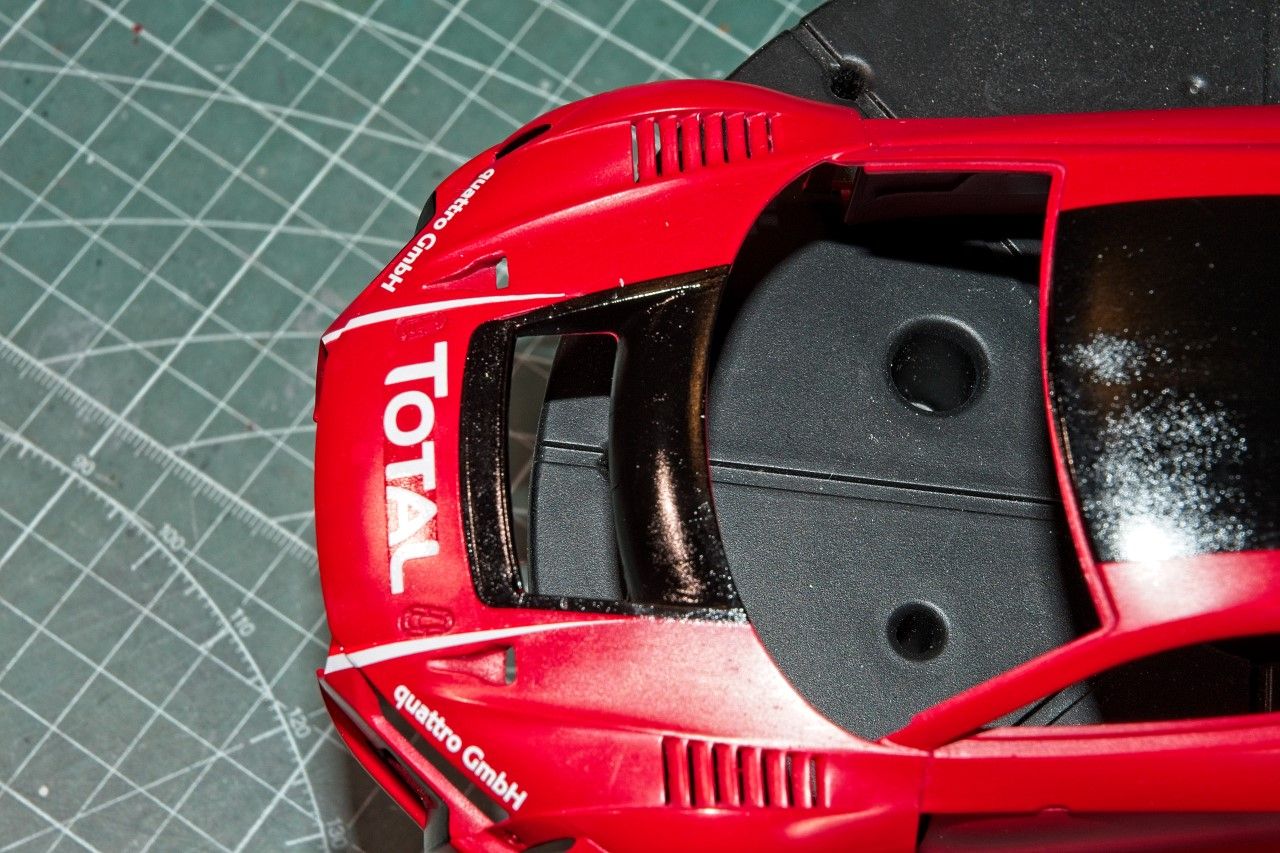
and after I thinned it to a more scale appearence


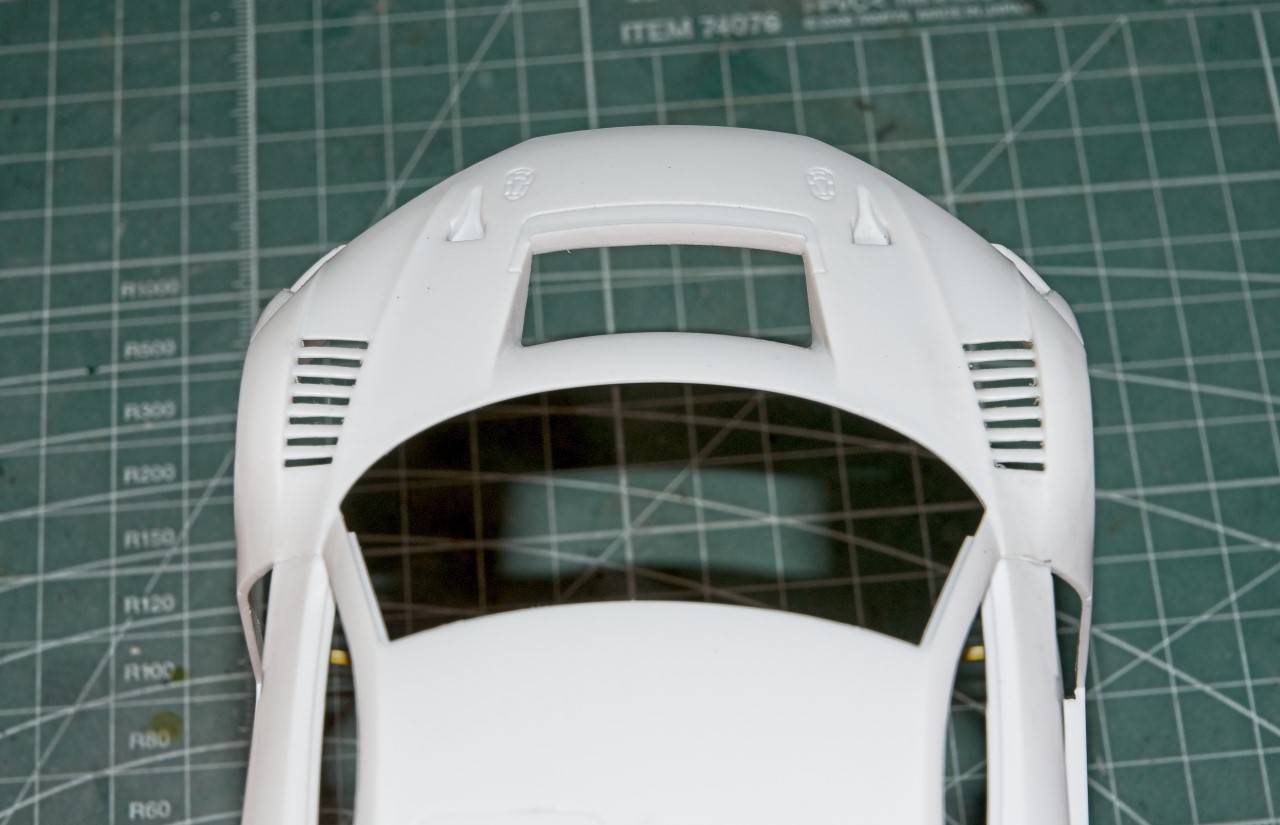
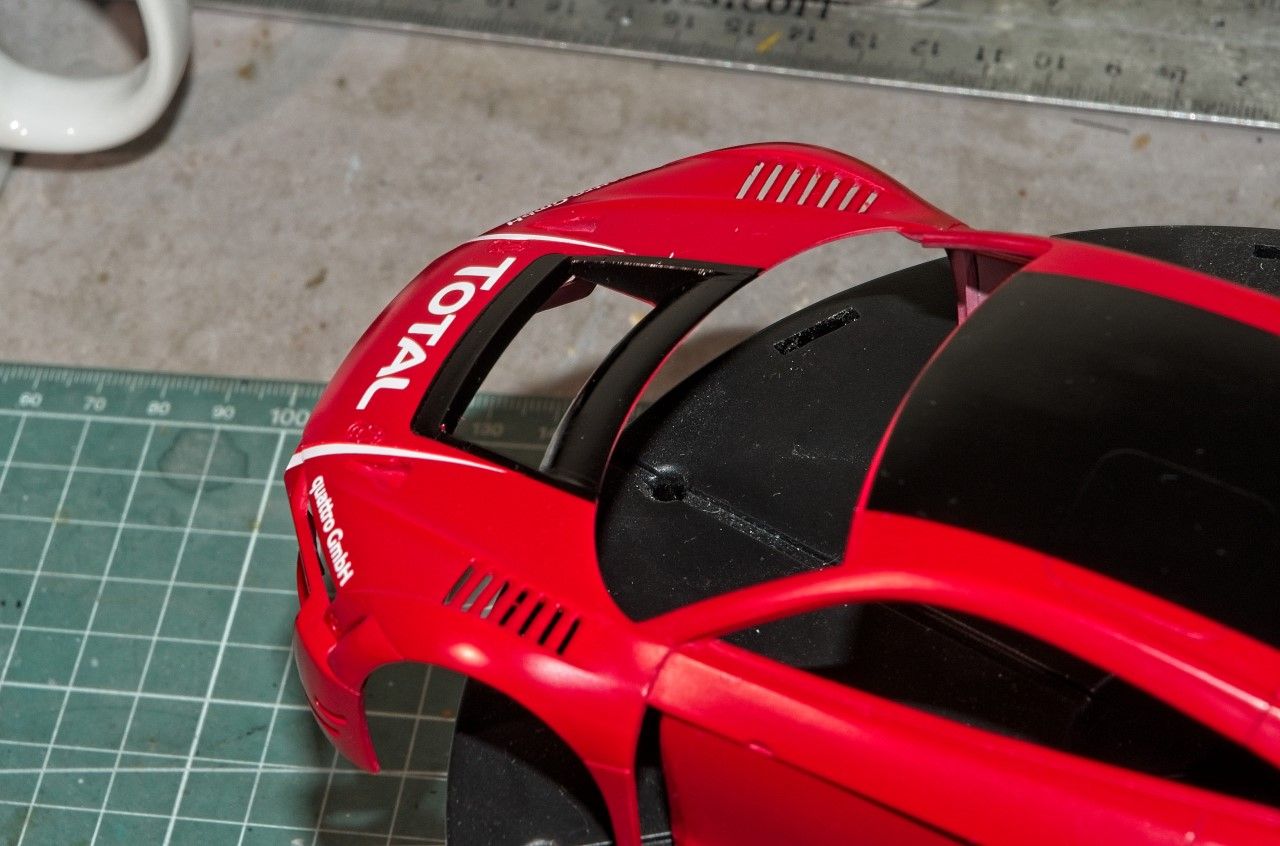
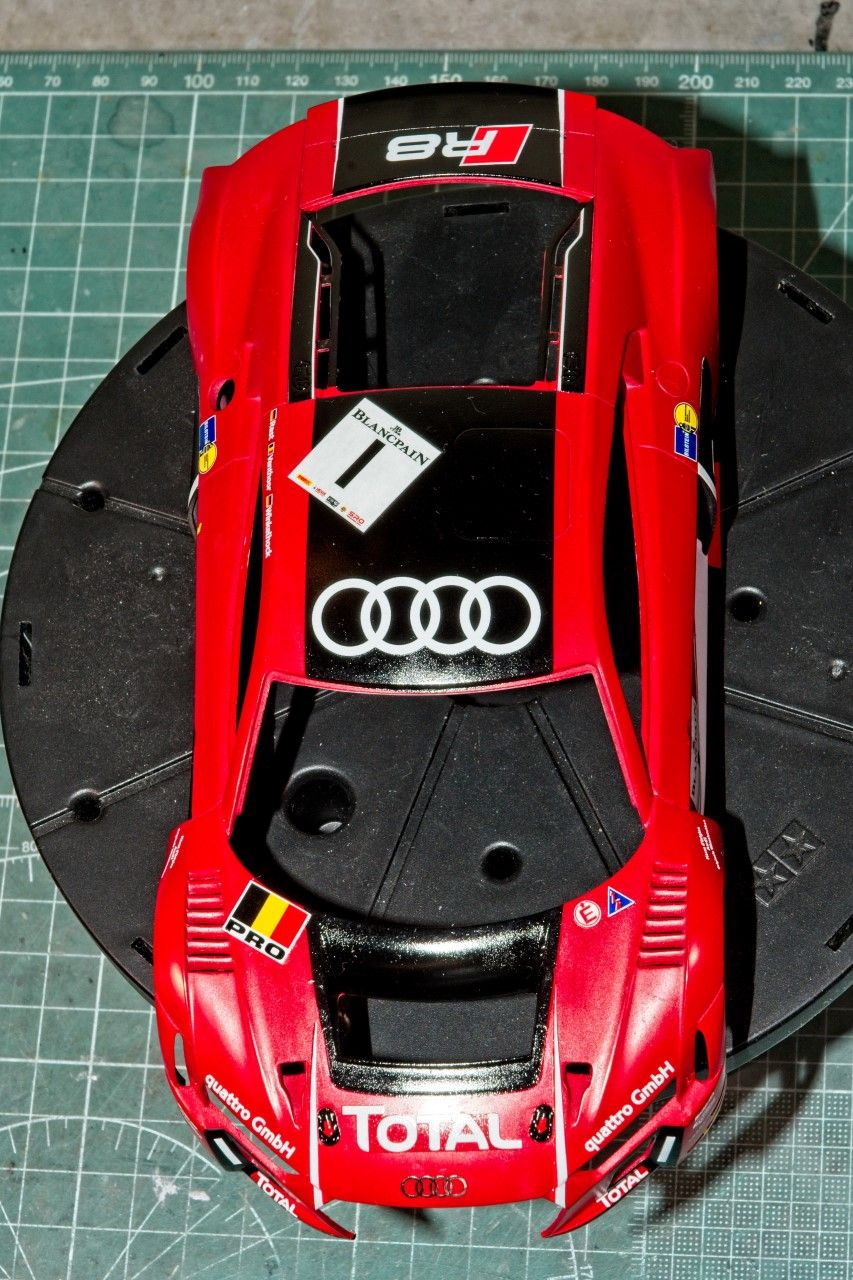
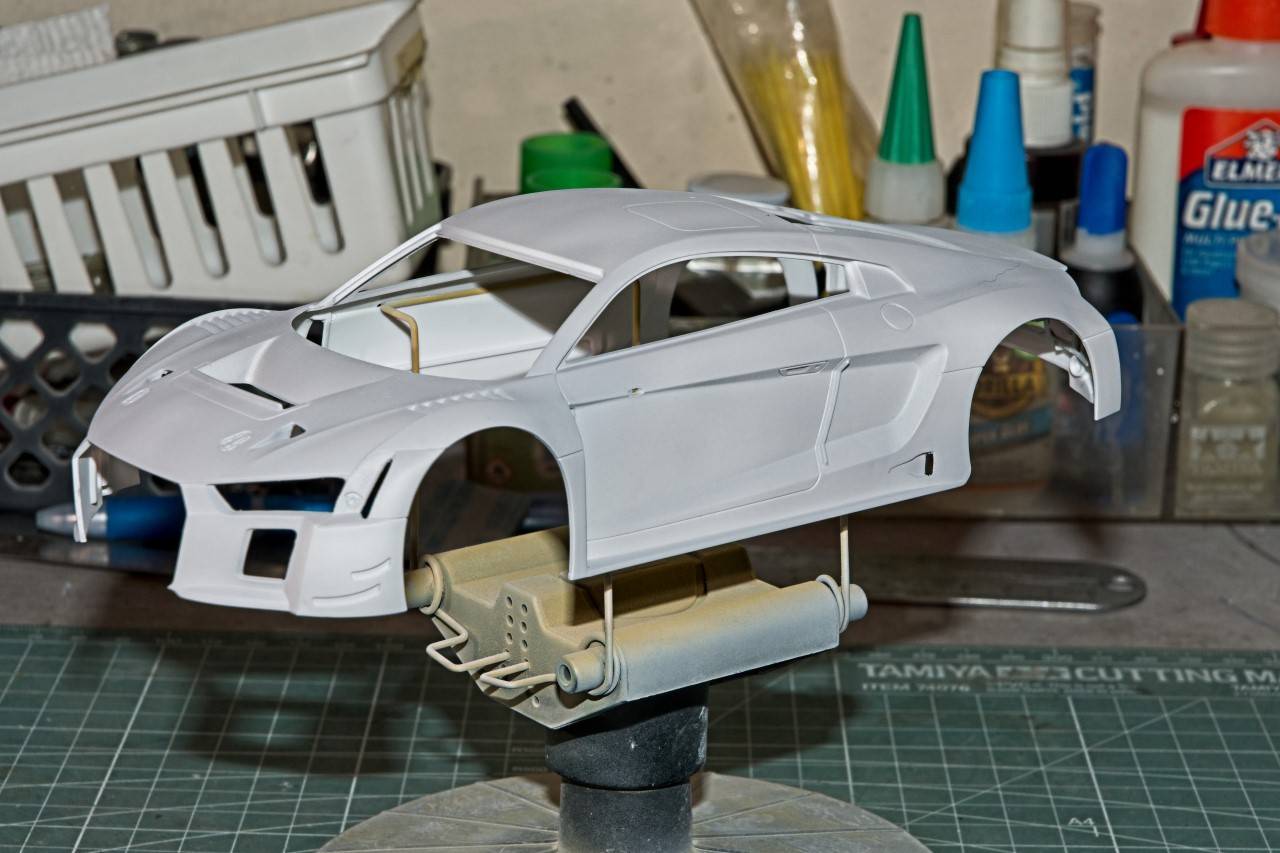
I also opened up the Naca Ducts on the hood, as well as the intake ducts on the side of the front fenders.


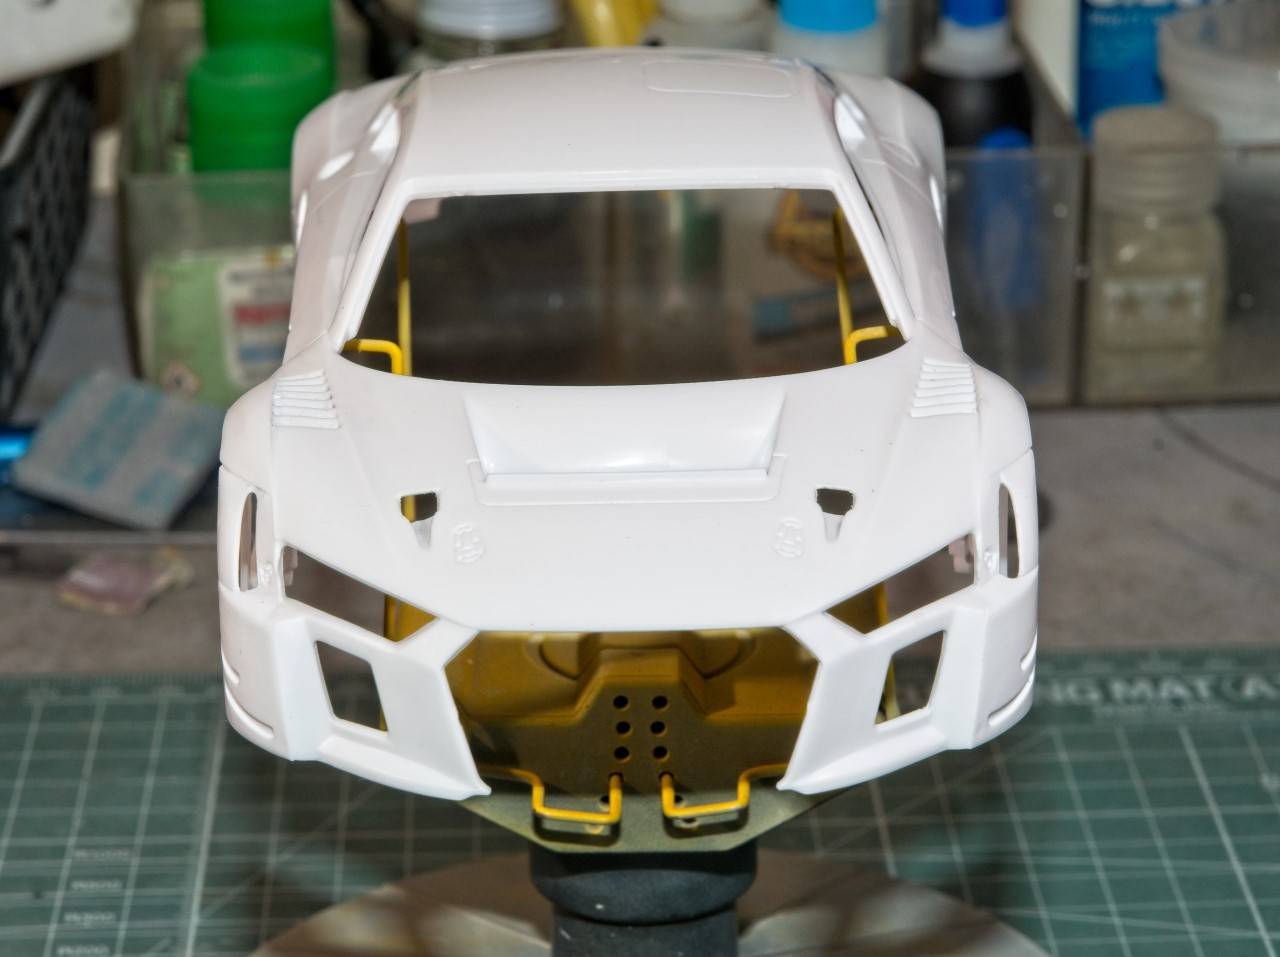
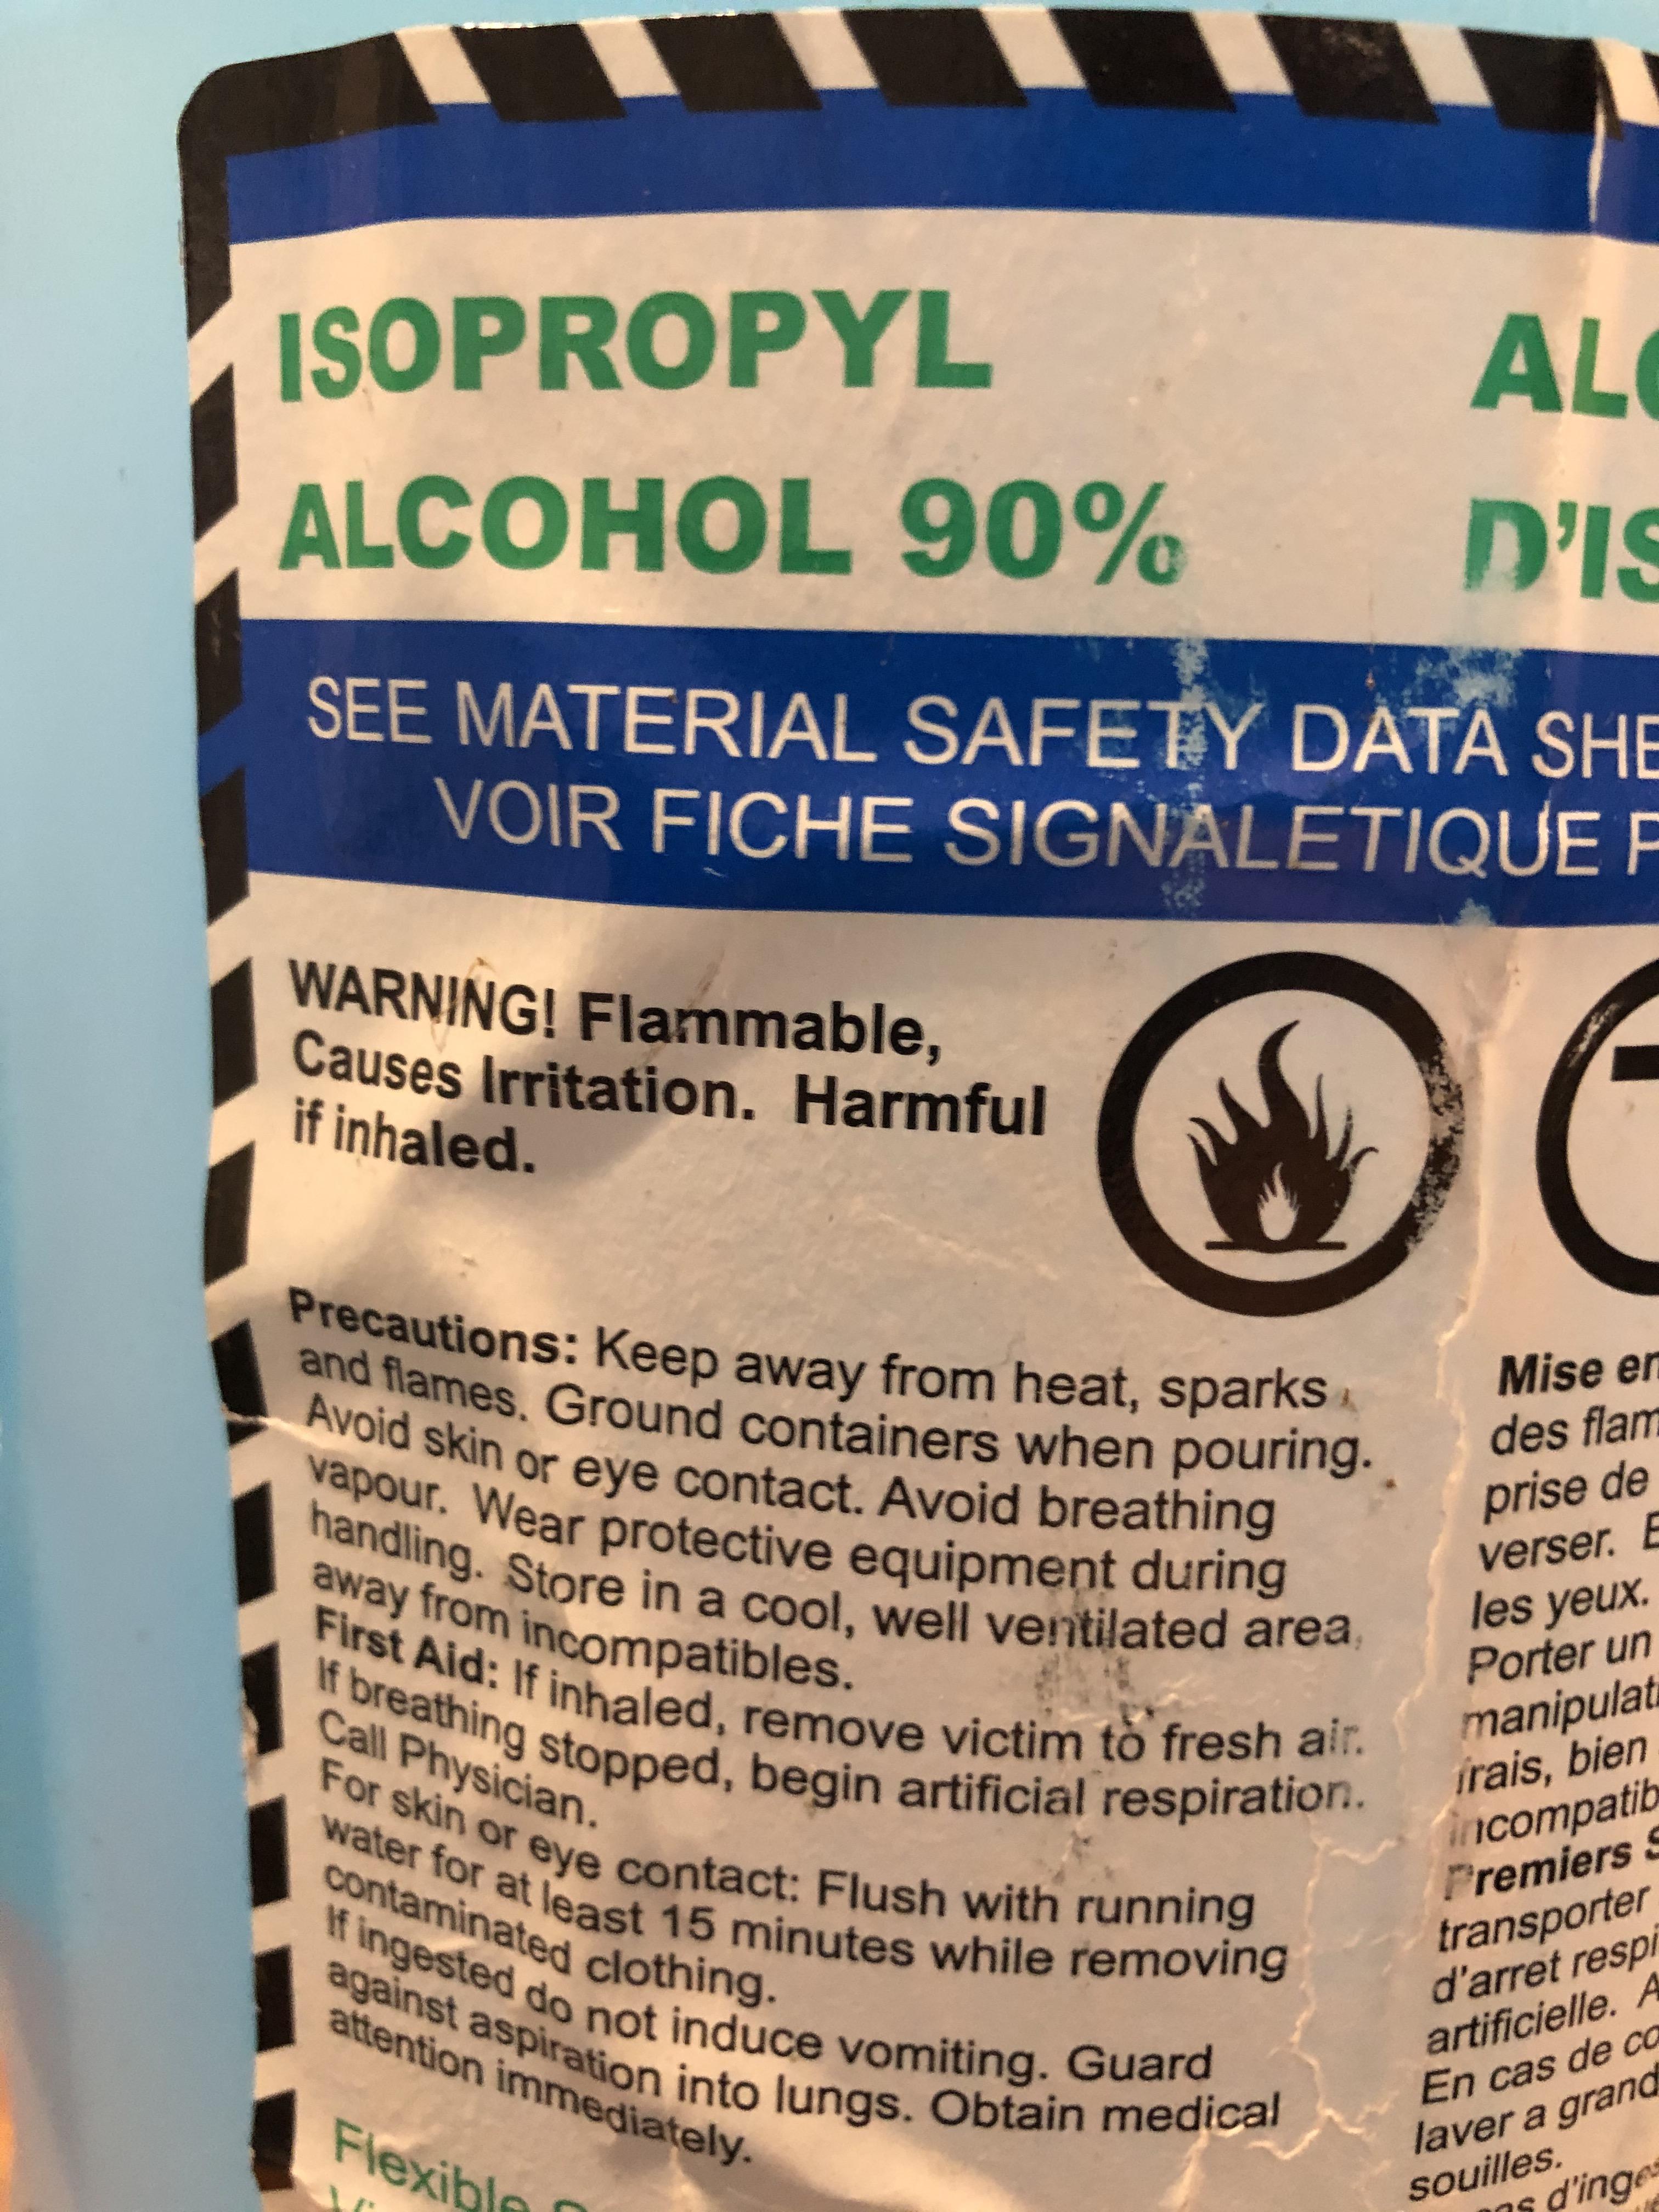
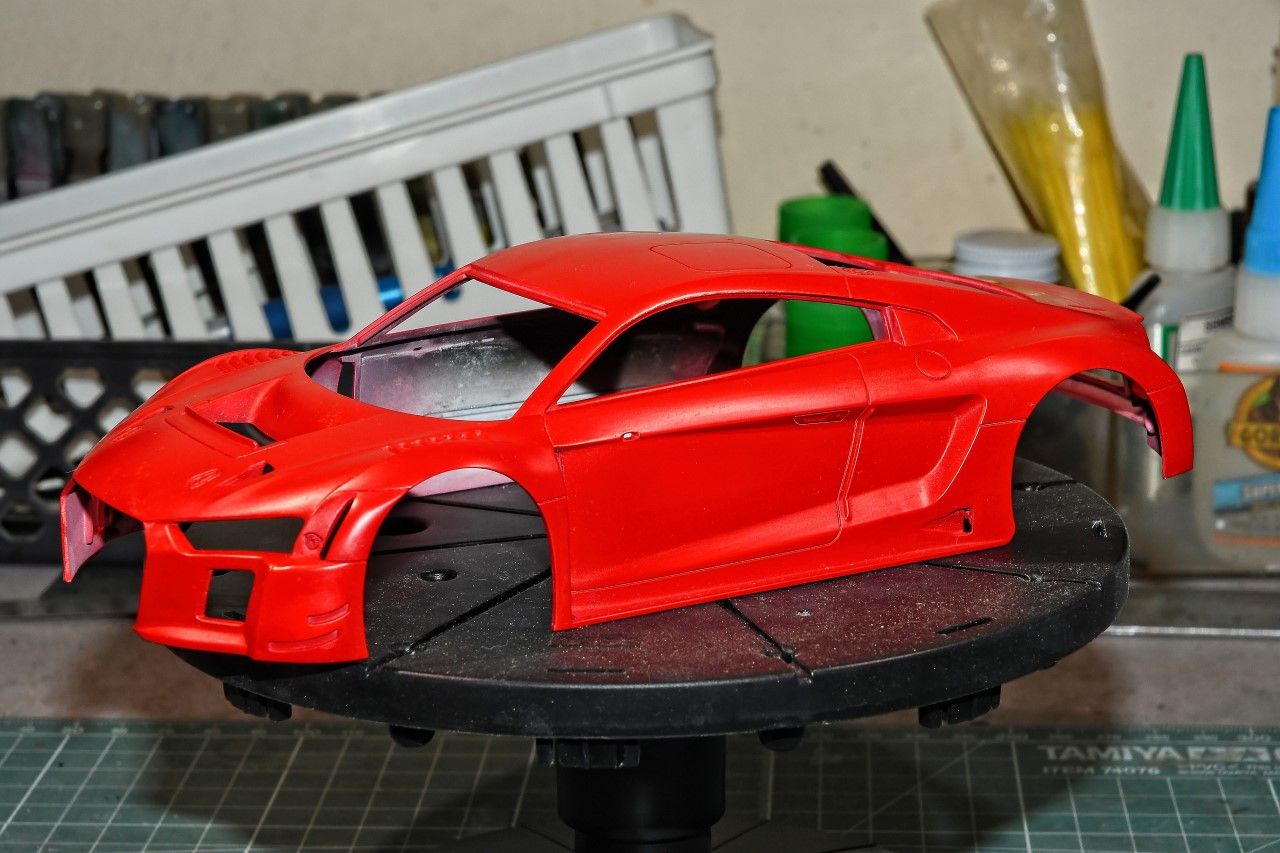
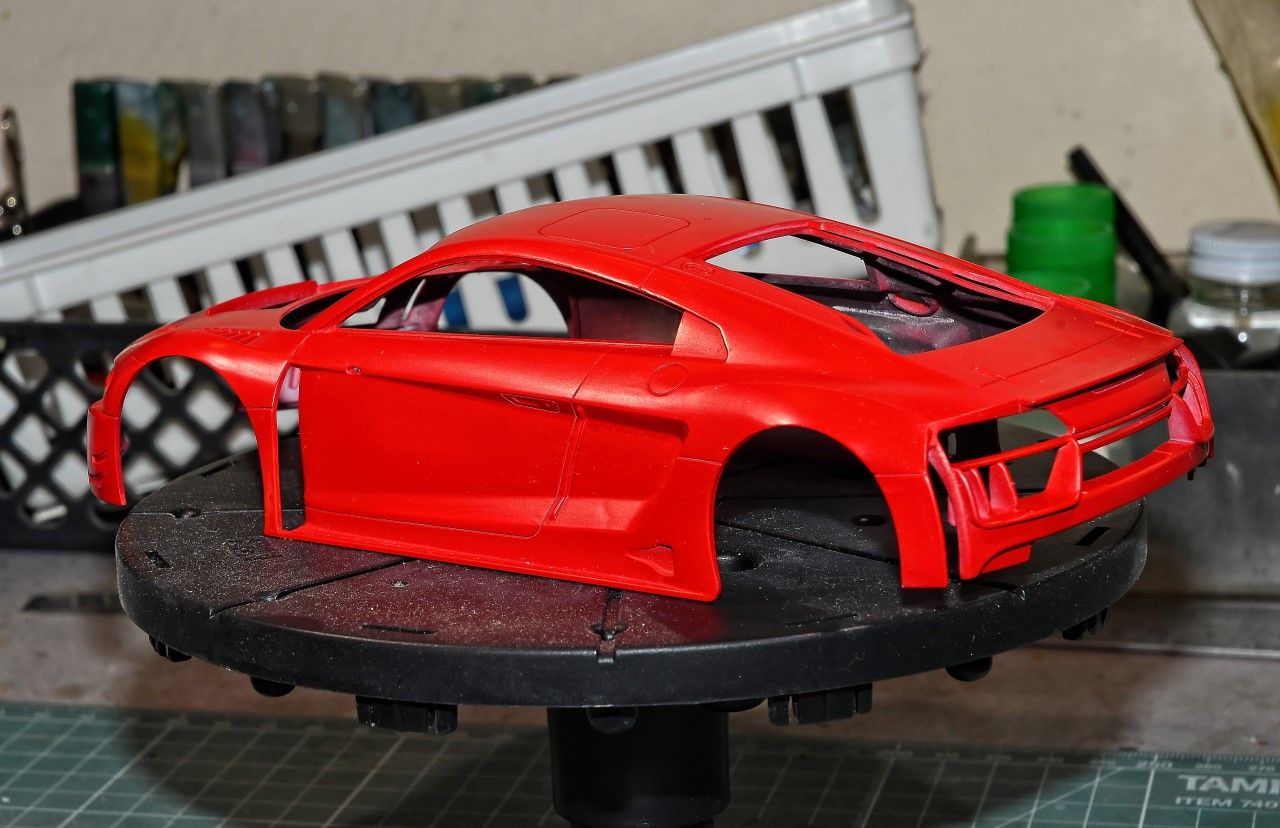
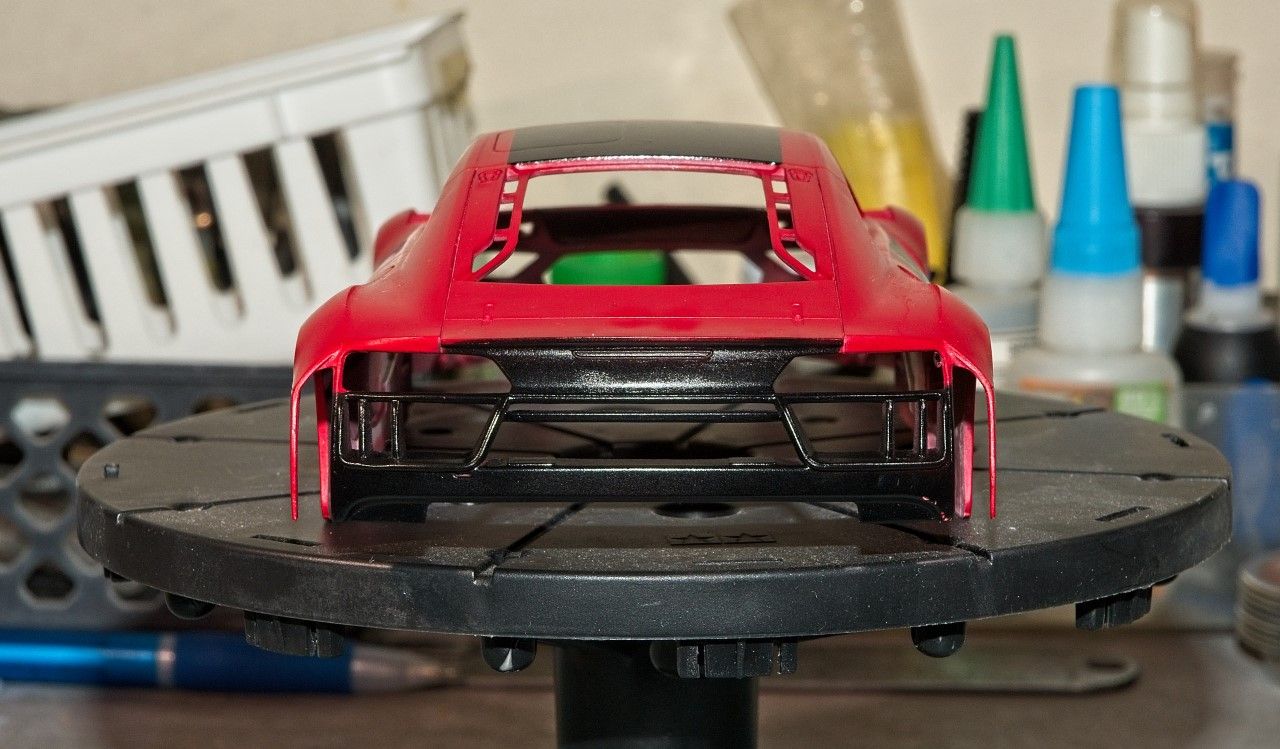
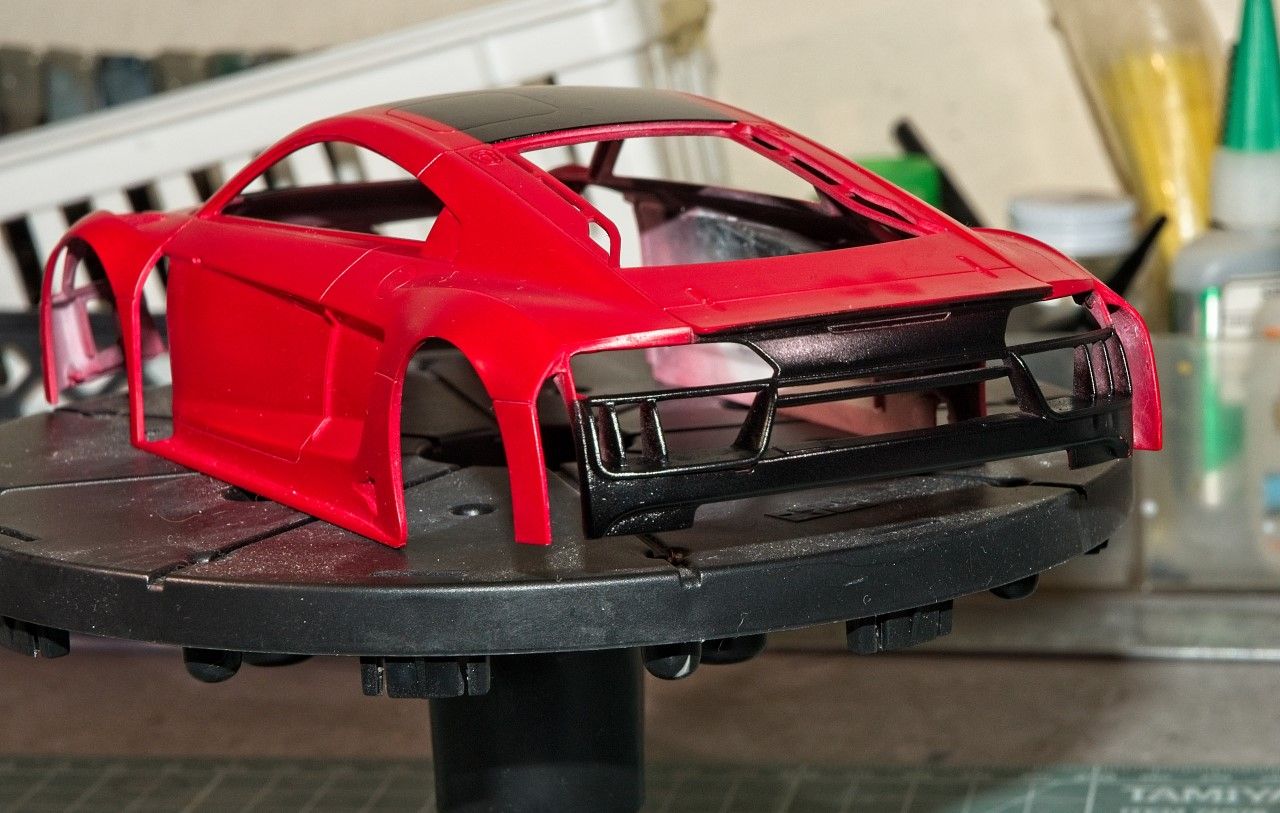
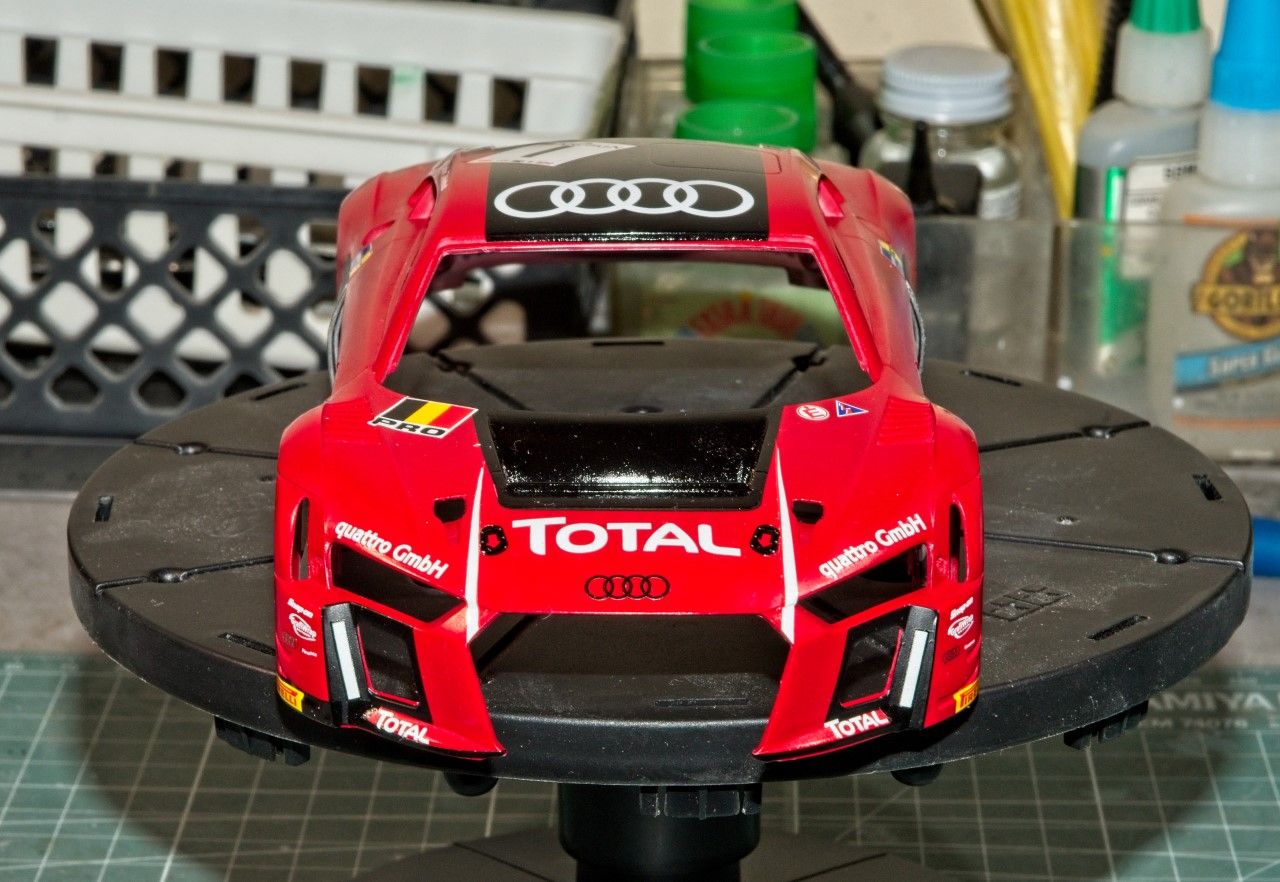
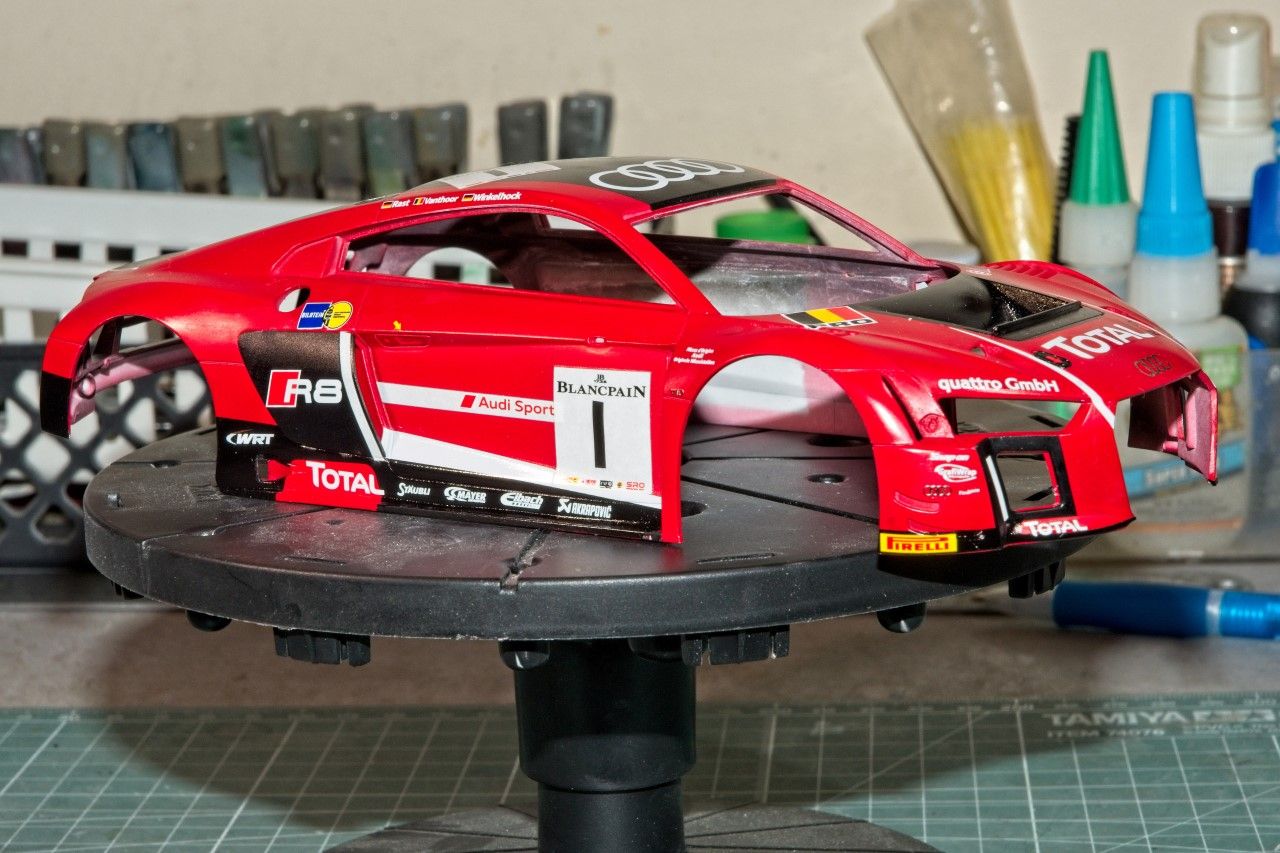
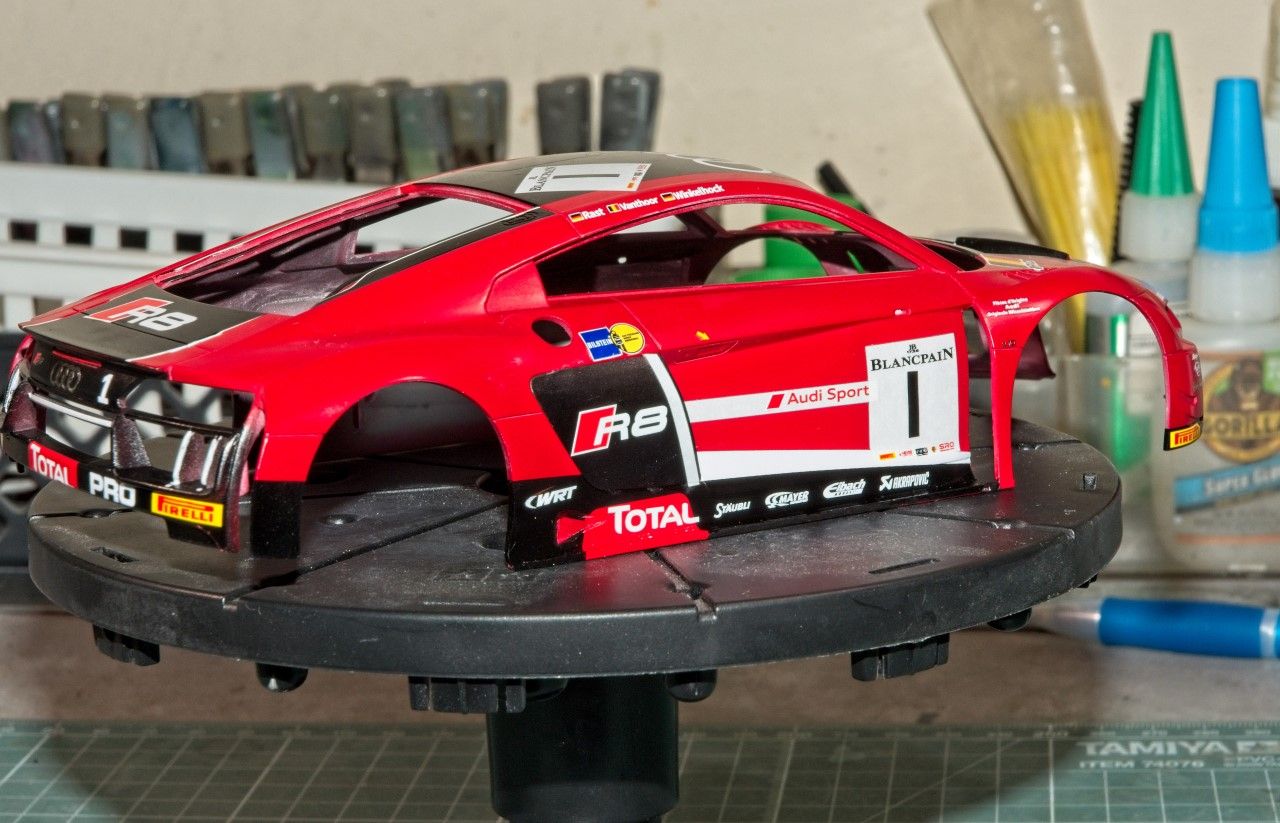
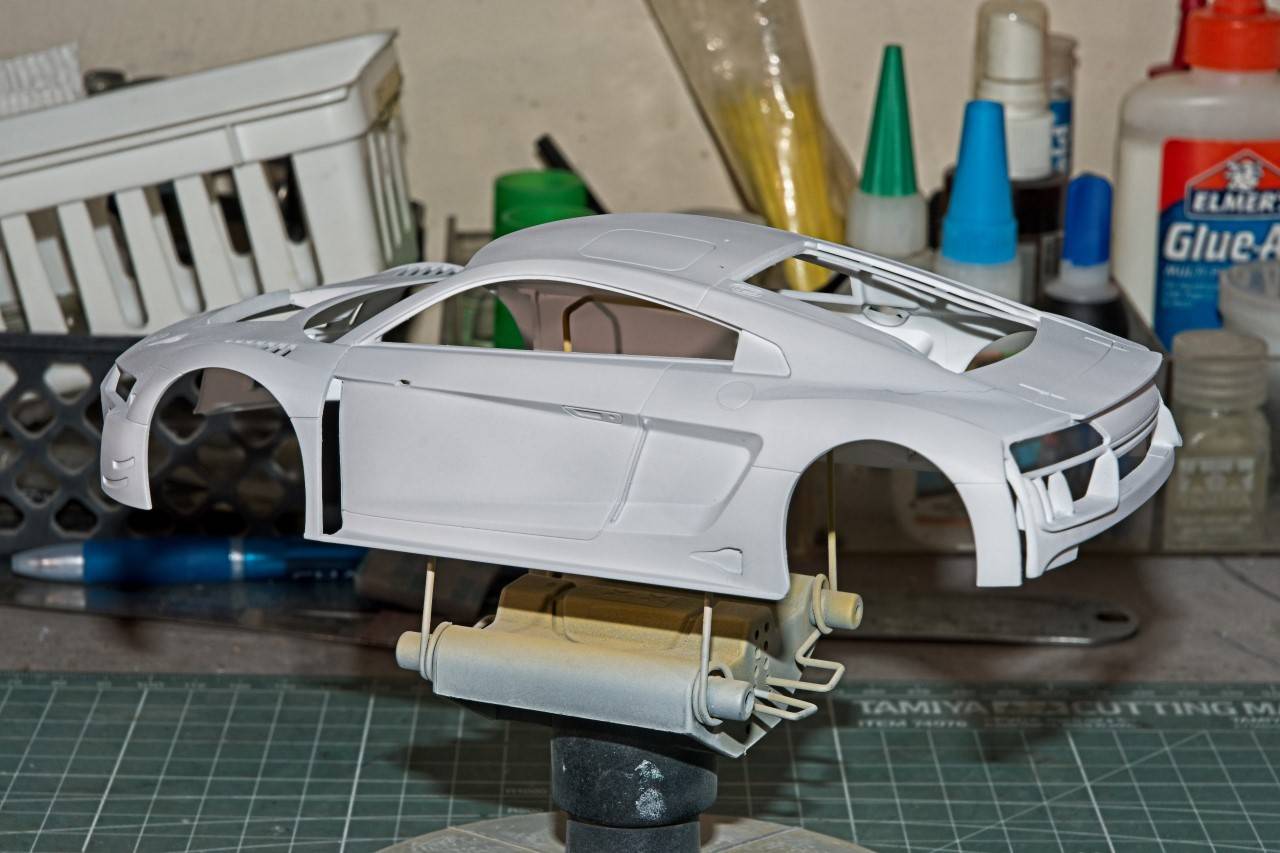
I gave the shell a light wet sanding with 600 paper, and put it on my Tamiya paint stand.


Next came priming with my go to primer: Mr.Finisher Surfacer 1500 light gray thinned with Mr. Leveler #400


As always, thanks so much for stopping by and checking out my build. It's much appreciated.

Joel
Dixon66
_VISITCOMMUNITY
New Hampshire, United States
Joined: December 12, 2002
KitMaker: 1,500 posts
Auto Modeler: 645 posts
Posted: Sunday, June 07, 2020 - 08:49 AM UTC
Looks like it is going to be another great one Joel.
Cosimodo
#335
_VISITCOMMUNITY
Auckland, New Zealand
Joined: September 03, 2013
KitMaker: 1,808 posts
Auto Modeler: 701 posts
Posted: Sunday, June 07, 2020 - 12:30 PM UTC
Nice start Joel. Did you buy any extras for it or is this going to straight from the box.

cheers
Michael
AussieReg
Staff MemberAssociate Editor
AUTOMODELER
#007
_VISITCOMMUNITY
Victoria, Australia
Joined: June 09, 2009
KitMaker: 8,156 posts
Auto Modeler: 2,953 posts
Posted: Monday, June 08, 2020 - 12:27 AM UTC
Off and running in fine style as usual Joel, great to see another new release getting the full treatment!

Cheers, D
Joel_W
Staff MemberAssociate Editor
AUTOMODELER
_VISITCOMMUNITY
New York, United States
Joined: December 04, 2010
KitMaker: 11,666 posts
Auto Modeler: 2,974 posts
Posted: Monday, June 08, 2020 - 03:08 AM UTC
David,
My only concern is to do the kit justice. I'm going with the Silver box top scheme as I really don't much care for the Red one with the red decals. The scheme is really complex as I'm not planning on using any of the multi piece black decals including the roof, and going with paint instead. Well, that's the plan for now.

joel
Joel_W
Staff MemberAssociate Editor
AUTOMODELER
_VISITCOMMUNITY
New York, United States
Joined: December 04, 2010
KitMaker: 11,666 posts
Auto Modeler: 2,974 posts
Posted: Monday, June 08, 2020 - 03:13 AM UTC

Quoted Text

Nice start Joel. Did you buy any extras for it or is this going to straight from the box.

cheers
Michael


Michael,
I opted not to buy the Nunu Detail up set as it costs $25, add in the kit, and postage from Spain, and I was looking at another $100 build. Since it's basically a bottom detailed only curbside kit, I just couldn't see it.

I do have two builds planned for down the road, both Tamiya kits; The Saber Mercedes C9 and the Mazda 787B that I acquired the Studio 27 PE detail sets, and the C9 will be getting Indy Cal decals. Until the pandemic lets up and shipping from Asia is realistic, I'm going to have to go with the Tamiya decals for the Mazda. Fortunately, I bought the paint from Gravity for both kits quite a while ago.

Joel
Joel_W
Staff MemberAssociate Editor
AUTOMODELER
_VISITCOMMUNITY
New York, United States
Joined: December 04, 2010
KitMaker: 11,666 posts
Auto Modeler: 2,974 posts
Posted: Monday, June 08, 2020 - 03:17 AM UTC

Quoted Text

Off and running in fine style as usual Joel, great to see another new release getting the full treatment!

Cheers, D


D,
I actually took off a few days between finish one and start the next build. I also am duplicating the build blog here and posting it on the GB thread as well, as it seems that most of the members who visit these forums, don't check the GBs or at least very often. Honestly, it's pretty hard to follow a build there, especially with the number of builds presently in the mix.

Joel
RussellE
#306
_VISITCOMMUNITY
Victoria, Australia
Joined: June 27, 2010
KitMaker: 3,959 posts
Auto Modeler: 495 posts
Posted: Monday, June 08, 2020 - 11:14 PM UTC
Buckled in and along for the ride, Joel
Joel_W
Staff MemberAssociate Editor
AUTOMODELER
_VISITCOMMUNITY
New York, United States
Joined: December 04, 2010
KitMaker: 11,666 posts
Auto Modeler: 2,974 posts
Posted: Wednesday, June 10, 2020 - 01:26 AM UTC
Just a quick update on the Audi R8 paint progress. I air brushed on the Gravity Audi Silver which is a Metallic not anything like the Silvers and chromes I use from Mr. Color. And it looked horrid , actually worse then Horrid. The Metallic flakes are just way to large IMHO! I tried to live with it for a day, but the more I looked at it, the more I truly hated it.

It got to the point last night that I 1st tried to rub out the paint with 8,000 then 12,000 but that didn't really help. So out came the bottle of 70% Iso Alcohol and I've been slowly removing the paint and primer with Qtips and paper towel. So I'm back to square #1. I can't find 91% anywhere as it's sold out like everything else is due to the Pandemic.

I'll be priming again, the switching to the Red scheme for the other team car. I'm saving my bottle of Mr. Color Super Metallic Silver or their Silver for the Saber Mercedes C9 if I can't find another paint scheme and decals available here in the States.

Joel
Joel_W
Staff MemberAssociate Editor
AUTOMODELER
_VISITCOMMUNITY
New York, United States
Joined: December 04, 2010
KitMaker: 11,666 posts
Auto Modeler: 2,974 posts
Posted: Wednesday, June 10, 2020 - 01:31 AM UTC
Russell,
Glad to have you along once again for the ride. So far it's not been the smoothest of starts I've had in a very long time.

Joel
AussieReg
Staff MemberAssociate Editor
AUTOMODELER
#007
_VISITCOMMUNITY
Victoria, Australia
Joined: June 09, 2009
KitMaker: 8,156 posts
Auto Modeler: 2,953 posts
Posted: Wednesday, June 10, 2020 - 01:43 AM UTC
Joel, I'm sorry to hear that you've hit a hurdle with the paint on this one. I know exactly what you mean though, overscale metallic flakes really bug me on this type of build.


Quoted Text

I can't find 91% anywhere as it's sold out like everything else is due to the Pandemic.


Here's a tip, go to your local swimming pool supply store and look for something called "Liquid Pool Blanket". It is used to create a super thin surface film to minimise evaporation from the pool and guess what, it's 90% IPA

Here's the one I use, from a company that I worked at for 8 years.


I've used it for airbrushing thinner for acrylics, general cleaning and paint stripping.

Cheers, D
slobuilder
_VISITCOMMUNITY
California, United States
Joined: September 06, 2013
KitMaker: 70 posts
Auto Modeler: 35 posts
Posted: Wednesday, June 10, 2020 - 03:42 AM UTC

Quoted Text

Just a quick update on the Audi R8 paint progress. I air brushed on the Gravity Audi Silver which is a Metallic not anything like the Silvers and chromes I use from Mr. Color. And it looked horrid , actually worse then Horrid. The Metallic flakes are just way to large IMHO! I tried to live with it for a day, but the more I looked at it, the more I truly hated it.

It got to the point last night that I 1st tried to rub out the paint with 8,000 then 12,000 but that didn't really help. So out came the bottle of 70% Iso Alcohol and I've been slowly removing the paint and primer with Qtips and paper towel. So I'm back to square #1. I can't find 91% anywhere as it's sold out like everything else is due to the Pandemic.

I'll be priming again, the switching to the Red scheme for the other team car. I'm saving my bottle of Mr. Color Super Metallic Silver or their Silver for the Saber Mercedes C9 if I can't find another paint scheme and decals available here in the States.

Joel


Joel,

I had the same problem with Gravity paints AMG Gray for Tamiya's AMG GT3. I thought it was my problem because parts to the car came out prefect, but there were spots that looked awful. I rubbed those spots and and resprayed several times before it was something I could live with. In the end it is OK. I believe the problem is that the particles do not stay evenly suspended. So as I'm spraying I'm getting a heavier concentration of particles. Only using a very small amount of paint at a time and then doing another small batch seemed to give better results. Do you believe all Gravity metallics will have this problem?

Russ
Dixon66
_VISITCOMMUNITY
New Hampshire, United States
Joined: December 12, 2002
KitMaker: 1,500 posts
Auto Modeler: 645 posts
Posted: Wednesday, June 10, 2020 - 06:51 AM UTC
On the repaint of the Mustang I used the pipette that I was transferring the paint with to suck up and squirt back into the cup as I was adding more paint. It seem to keep them in suspension better.

Also, start spraying off the model (which you should be doing anyway) in case any pools when adjusting or stopping for a few seconds.
Cosimodo
#335
_VISITCOMMUNITY
Auckland, New Zealand
Joined: September 03, 2013
KitMaker: 1,808 posts
Auto Modeler: 701 posts
Posted: Wednesday, June 10, 2020 - 05:13 PM UTC
That's bad luck Joel. I would have Gravity would have had more refinement in their metallic paints though I'm not sure that big flakes is limited to them. I am using Mr Hobby for the Pig and their metallic are quite sparkly. I have mixed them 50:50 with lacks to tone them down.

cheers
Michael
Joel_W
Staff MemberAssociate Editor
AUTOMODELER
_VISITCOMMUNITY
New York, United States
Joined: December 04, 2010
KitMaker: 11,666 posts
Auto Modeler: 2,974 posts
Posted: Saturday, June 13, 2020 - 05:28 AM UTC
Well, after that very rocky start with the Gravity Metallic Audi Silver, with the full stripping down back to the raw plastic, I reprimed it with Mr. Finisher's light Gray #1500 primer. Gave it a few hours to cure, then a wet rub with Tamiya #3,000 sponge and warm water, and into the drying bin.

Next up was applying the Red Color coat using Gravity's GC1222 Audi R8 Red lacquer paint. Boy am I glad I ordered both colors. Guess I knew that there just might be a issue with the Silver. My usual 2 tack coats, and 4 light color coats, & then into the drying bin again. Next day I gave it a wet rub with Micro Mesh # 8,000 & 12,000 emery cloth and warm water. Then back into the drying bin once again.


Now on to decaling. The kit comes with 3+ sheets of decals, with the sheets split between the two team cars due to color. The Silver got mostly Black stenciling, while the Red mostly white. So that equates to about 1 full sheet of decals dedicated to the Silver car. Still, 2+ sheets to deal with. Good thing I love decaling.

I was shocked when I saw the decaling instructions supplied with the kit. They were basically black and white copies of color pictures, and they were Horrid. The end result was that you really can't see nor read any of the details needed to apply the correct decals in the correct places. So I resorted to pictures of the real car and of the Nunu display model.

I started on the nose clip and slowly working my way back. With those Horrid instructions and the fact that these are in house decals, I was expecting the worst, but what I quickly found out was that the decals themselves are one of the best sets I've ever used. I rate them dead even with Cartograf's best. They're that good. Perfectly printed, dead on registration, sharp as a tack, and the white over Red has zero bleed through so far. The decals are a perfect thickness so they preformed as decals should. Usually, I have issues with laying down a decal over MicroSol as the decal just grabs the surface so I need to add water around the decal to move it into place. But not this time. They not only slid to where ever I needed to move them to, but once pated down, they stuck perfectly. As always, I use my "borrowed" decal procedures from Paul Budzik of Set, sol, and then Solvaset. And as I said, the decals just laid down perfectly, and were a true joy to work the wrinkles and air bubbles out, yet didn't seem to stretch or distort as some decals have a tendency to do.

I started with the radiator air exhaust on the front deck. It's quite a complex shape, and it's painted black down to the radiator housing. Nunu uses 5 Black decals that perfectly covered all the sides without an issue. And yes I need to touch up the bottom edges a tad. the White side strips are parts of the Red nose clip decal for the Silver version, so I cut them out and applied them separately, as the Red was very close to the Gravity Red but a tad brighter.


For some strange reason the white strip is longer on one side then other, but that's the way it seemed to be on the full decal.

Then I applied the big Black decal on the roof rather then painting it so that there was no chance of bleed through, then the Black around the headlight housings, and a few sponsor decals. Time to let it dry, so back in the bin once again.

the rear deck is flat Black so I masked it out and air brushed it with Zero Lotus Black.


thanks to all for stopping by and checking out my progress to date. As usual, it's always greatly appreciated.

Joel


RussellE
#306
_VISITCOMMUNITY
Victoria, Australia
Joined: June 27, 2010
KitMaker: 3,959 posts
Auto Modeler: 495 posts
Posted: Saturday, June 13, 2020 - 09:41 AM UTC
I'm really glad you did change the colour, Joel!

Red is so much more evocative than silver!

Can't begin to tell you how boring it is driving around here in Melbourne, as almost all the cars are black, grey/silver or white... zzz
AussieReg
Staff MemberAssociate Editor
AUTOMODELER
#007
_VISITCOMMUNITY
Victoria, Australia
Joined: June 09, 2009
KitMaker: 8,156 posts
Auto Modeler: 2,953 posts
Posted: Saturday, June 13, 2020 - 02:21 PM UTC
That red is a real eye-catcher Joel, maybe the paint issues with the silver were a blessing in disguise?

Great work on the decals as well, this build is progressing beautifully now.

Cheers, D
rdt1953
_VISITCOMMUNITY
New Jersey, United States
Joined: February 06, 2015
KitMaker: 1,098 posts
Auto Modeler: 52 posts
Posted: Sunday, June 14, 2020 - 11:04 AM UTC
Nice Joel !
Joel_W
Staff MemberAssociate Editor
AUTOMODELER
_VISITCOMMUNITY
New York, United States
Joined: December 04, 2010
KitMaker: 11,666 posts
Auto Modeler: 2,974 posts
Posted: Friday, June 19, 2020 - 03:27 AM UTC
Been spending hours everyday this week just decaling the main body shell, as this kit has broken the record for the most decals applied to a shell by a huge margin. At this point I've applied 75 decals or so including the several layered decals.

As for the decals themselves, I'm just super impressed with their overall quality. I've used Beemax, Nunu, and Platz which are all basically the same company, but it's my understanding that Beemax has left the group and gone out on it's own. The decals are thin, but not so thin as they stretch or tear at the slightest touch. The registration and colors are just dead on perfect, with literally no bleed through of the deep Red body color through any of the white decals. And all were the perfect size. Like I said before, they're the equal to any AM decals I've ever used.

As usual, I applied every decal using the Paul Budzik process of Microset, Microsol, & Solvaset without a single issue.

Here's the body shell after decaling. I haven't cleaned it as yet to get it ready for the glosscoat process so there is a little post decaling stains that needs to be removed.

Joel


BlackWidow
_VISITCOMMUNITY
European Union
Joined: August 09, 2009
KitMaker: 1,732 posts
Auto Modeler: 23 posts
Posted: Friday, June 19, 2020 - 08:57 AM UTC
75 decals is quite a lot for a car model, I guess. And the result is worth the effort, Joel. Looks great so far!

Russell, you're right. All cars in more or less the same colour looks boring. Same over here. I also drive a silver car (Ford Focus) but I bought it 2nd hand. I would never buy a silver car 1st hand. I only had once a 1st hand car and that was ..... green
AussieReg
Staff MemberAssociate Editor
AUTOMODELER
#007
_VISITCOMMUNITY
Victoria, Australia
Joined: June 09, 2009
KitMaker: 8,156 posts
Auto Modeler: 2,953 posts
Posted: Friday, June 19, 2020 - 10:27 PM UTC
Nice work Joel, the decals look to have laid down beautifully! And 75 on one car is a crazy number!

Cheers, D
RussellE
#306
_VISITCOMMUNITY
Victoria, Australia
Joined: June 27, 2010
KitMaker: 3,959 posts
Auto Modeler: 495 posts
Posted: Monday, June 22, 2020 - 03:27 PM UTC
75 Decals! Holy Moley! Awesome work Joel!

And the red looks fantastic too!
Joel_W
Staff MemberAssociate Editor
AUTOMODELER
_VISITCOMMUNITY
New York, United States
Joined: December 04, 2010
KitMaker: 11,666 posts
Auto Modeler: 2,974 posts
Posted: Friday, June 26, 2020 - 05:30 AM UTC
This week I've concentrated on the chassis, and what is modeled of the front & rear suspensions. Basically, both ends of the suspension are basic at best as the only way to see them is by looking at the bottom of the pan.


I air brushed the pan a darkish Gray to simulate Carbon Fiber. And since it's never going to be seen once it's in its display bin, it's more then good enough for the intended purpose. For me the focus is on the 4 disc brakes as you will clearly see them through the wheels. The discs are steel, the hubs Aluminum, and the Calibers Titanium Aluminum followed by the makers logo. I gave each disc a wash with Tamiya Black panel line wash just to help pop out the view details. I also painted the transaxle aluminum but once the interior is added, you'll never see it.

the Front brakes:


The Rear brakes:


the radiator and fan housing will be visible when looking down through the radiator exhaust opening in the hood, so it was air brushed with Dark Gray to simulate CF, then dry brushed with a light Sky Gray.
The radiator assembly was air brushed polished Aluminum, and once dry the radiator core was given a few washes of Tamiya Black panel line wash.


As always, thanks for stopping by, and checking out my progress to date.

Joel
RussellE
#306
_VISITCOMMUNITY
Victoria, Australia
Joined: June 27, 2010
KitMaker: 3,959 posts
Auto Modeler: 495 posts
Posted: Friday, June 26, 2020 - 11:25 AM UTC
Looking good Joel

I really like how you've distinguished each individual component so that each one looks like its assigned material...
AussieReg
Staff MemberAssociate Editor
AUTOMODELER
#007
_VISITCOMMUNITY
Victoria, Australia
Joined: June 09, 2009
KitMaker: 8,156 posts
Auto Modeler: 2,953 posts
Posted: Friday, June 26, 2020 - 11:44 AM UTC
Very nice detail work Joel, it'd definitely worth the extra effort on those small items. Having manufacturer decals for the brake calipers is a great touch!

Cheers, D
 _GOTOTOP