

12 Days? I've been cleaning parts for longer than that on a kit this size.
Looking great Gabriel!


Go to automodeler.com for the current dynamic site!
Cars
Discuss all types of automotive modeling here.
Discuss all types of automotive modeling here.
Hosted by Jim Starkweather
VW Beetle Cabrio 1303S by Aoshima

Dixon66

Joined: December 12, 2002
KitMaker: 1,500 posts
Auto Modeler: 645 posts

Posted: Friday, September 11, 2020 - 11:17 PM UTC

Szmann

Joined: September 02, 2014
KitMaker: 1,977 posts
Auto Modeler: 1,371 posts

Posted: Sunday, September 13, 2020 - 01:17 AM UTC
Michael & David - with a kit simple like this, 14 days now it is rather a counter-performance  I've been working in short bursts, as time allowed, nd the quality suffered. (see the update).
UPDATE - no luck after all
On the underside I did as much as I could with the little detail kit has to offer: some accents added:

Body masked and the luggage deck primed:
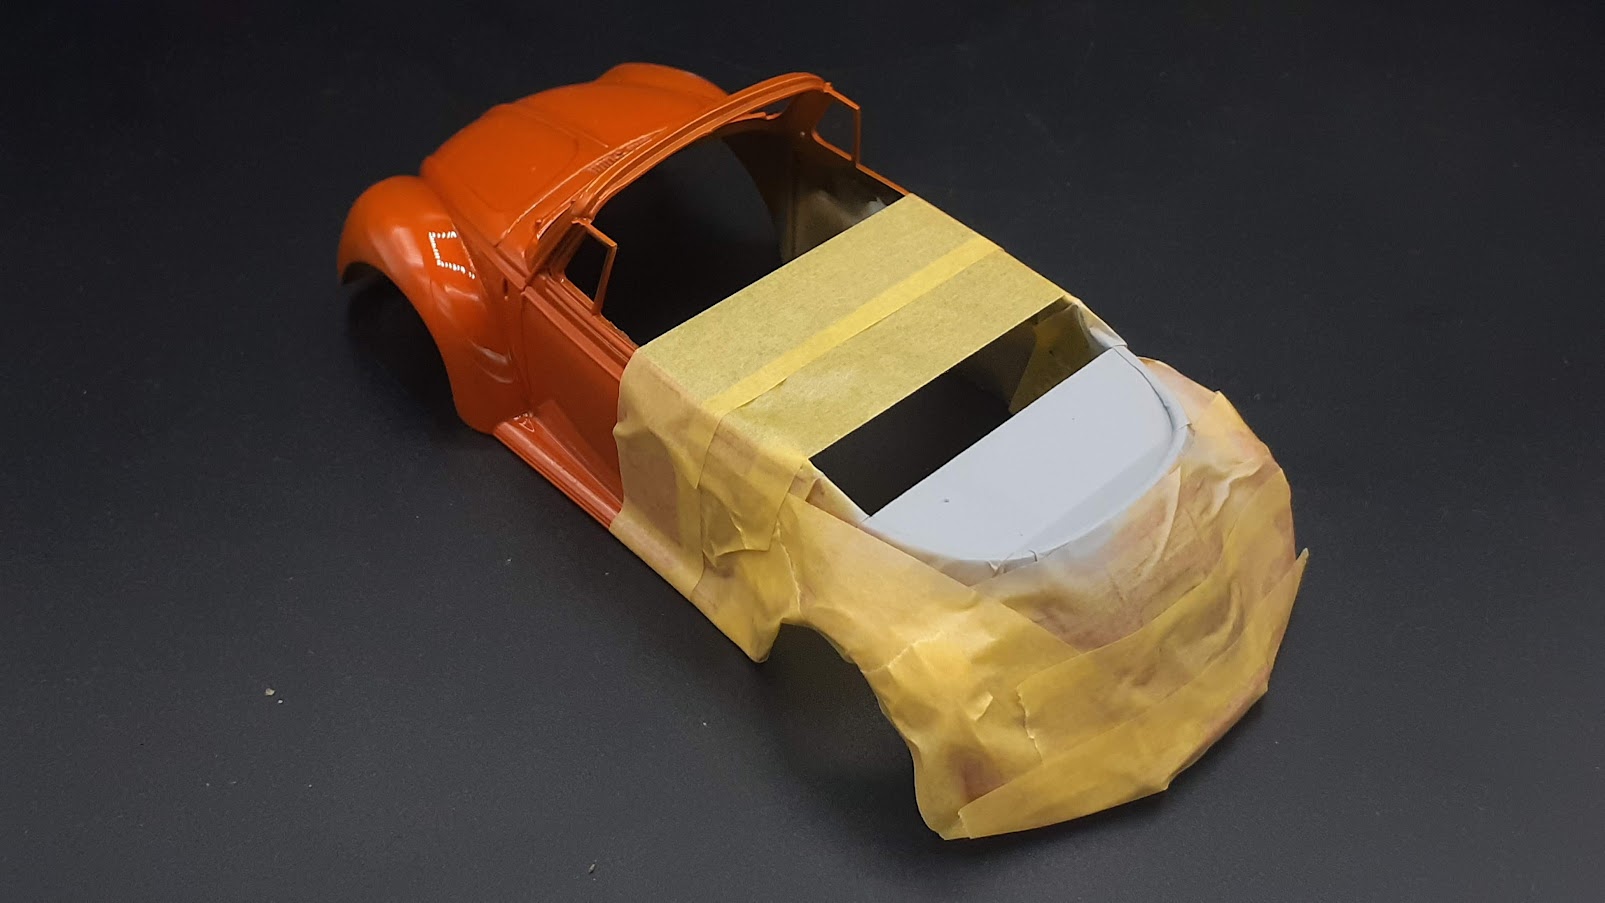
Same went for the two versions of the tops - my friend will choose which one she likes best:

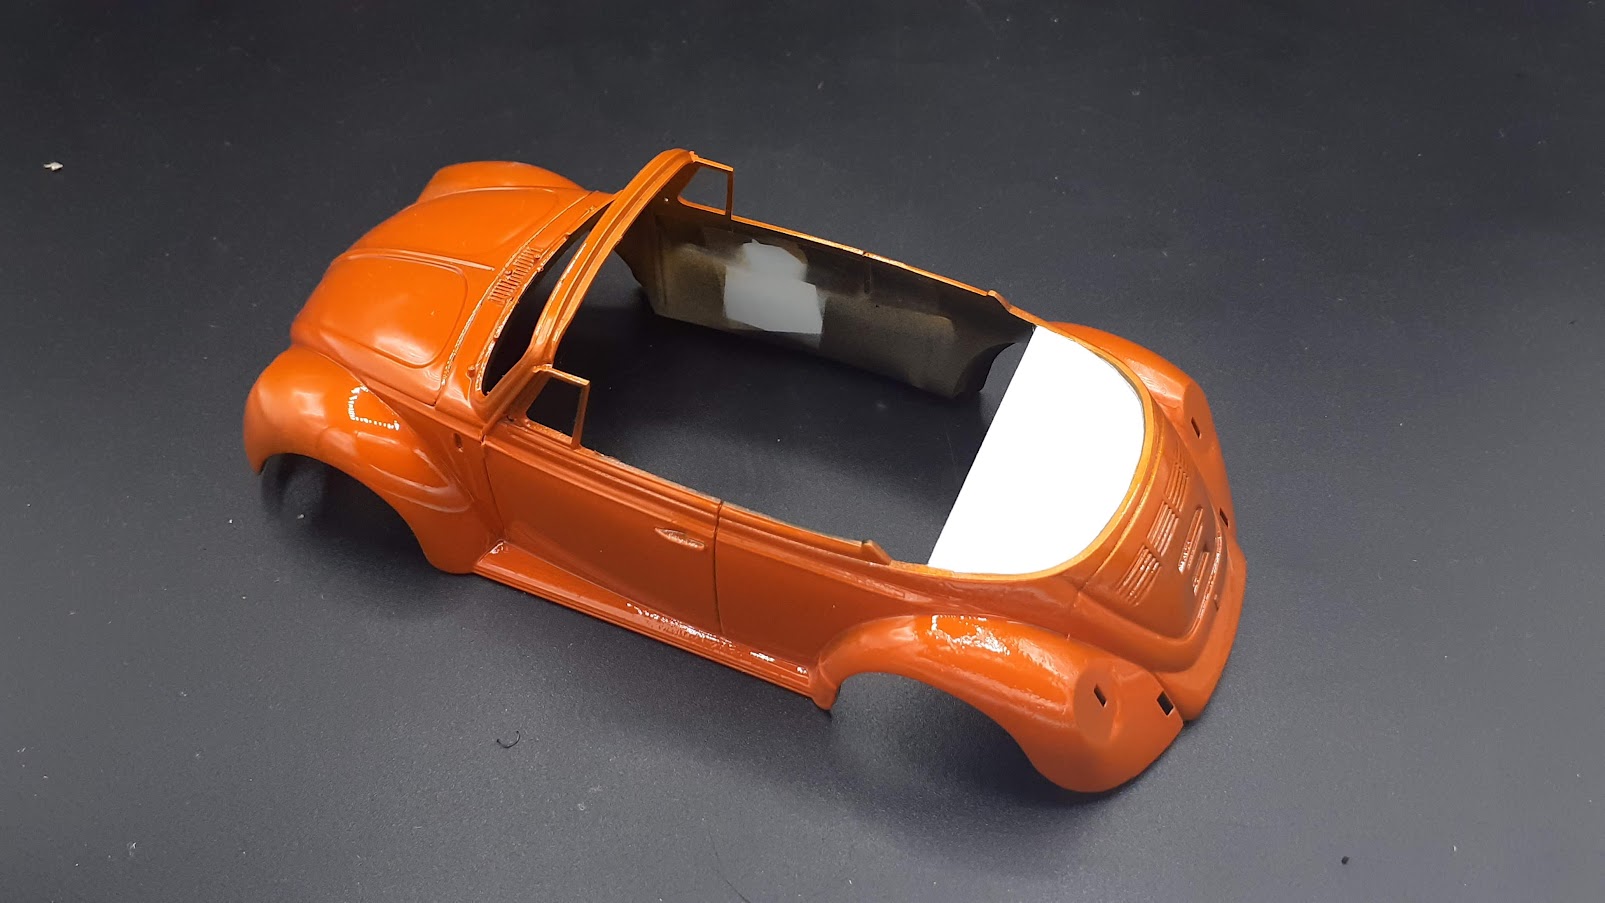
The area sprayed with an off white acrylic mix (white + burnt sienna):
Same for the tops - these received a coat of clear acrylic matte as well:

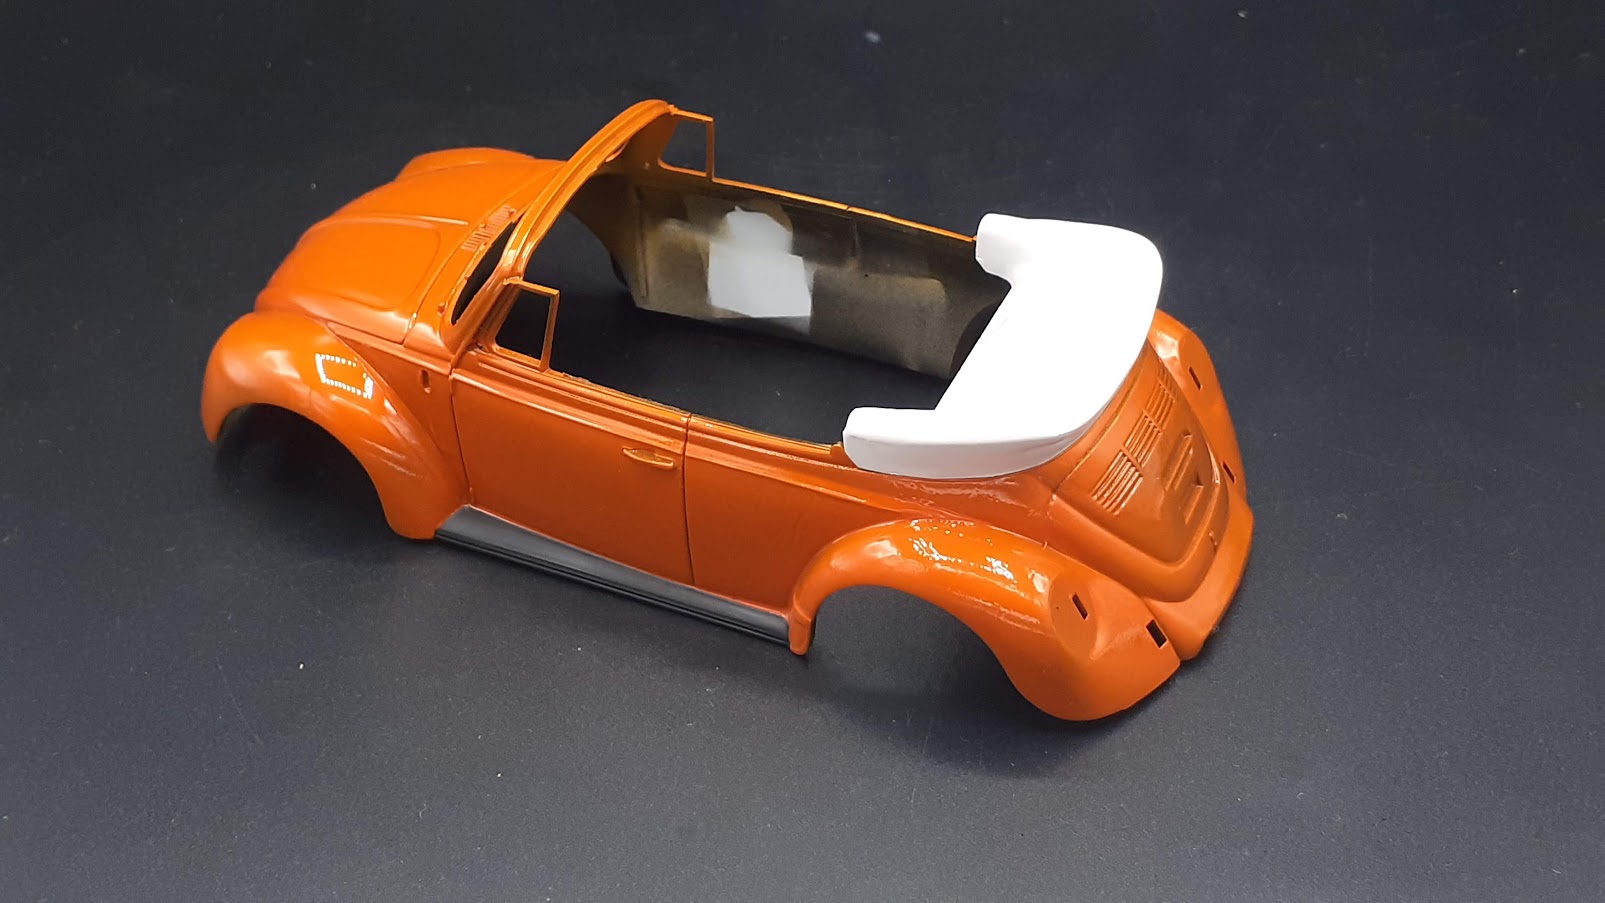
Test fit with the top up:

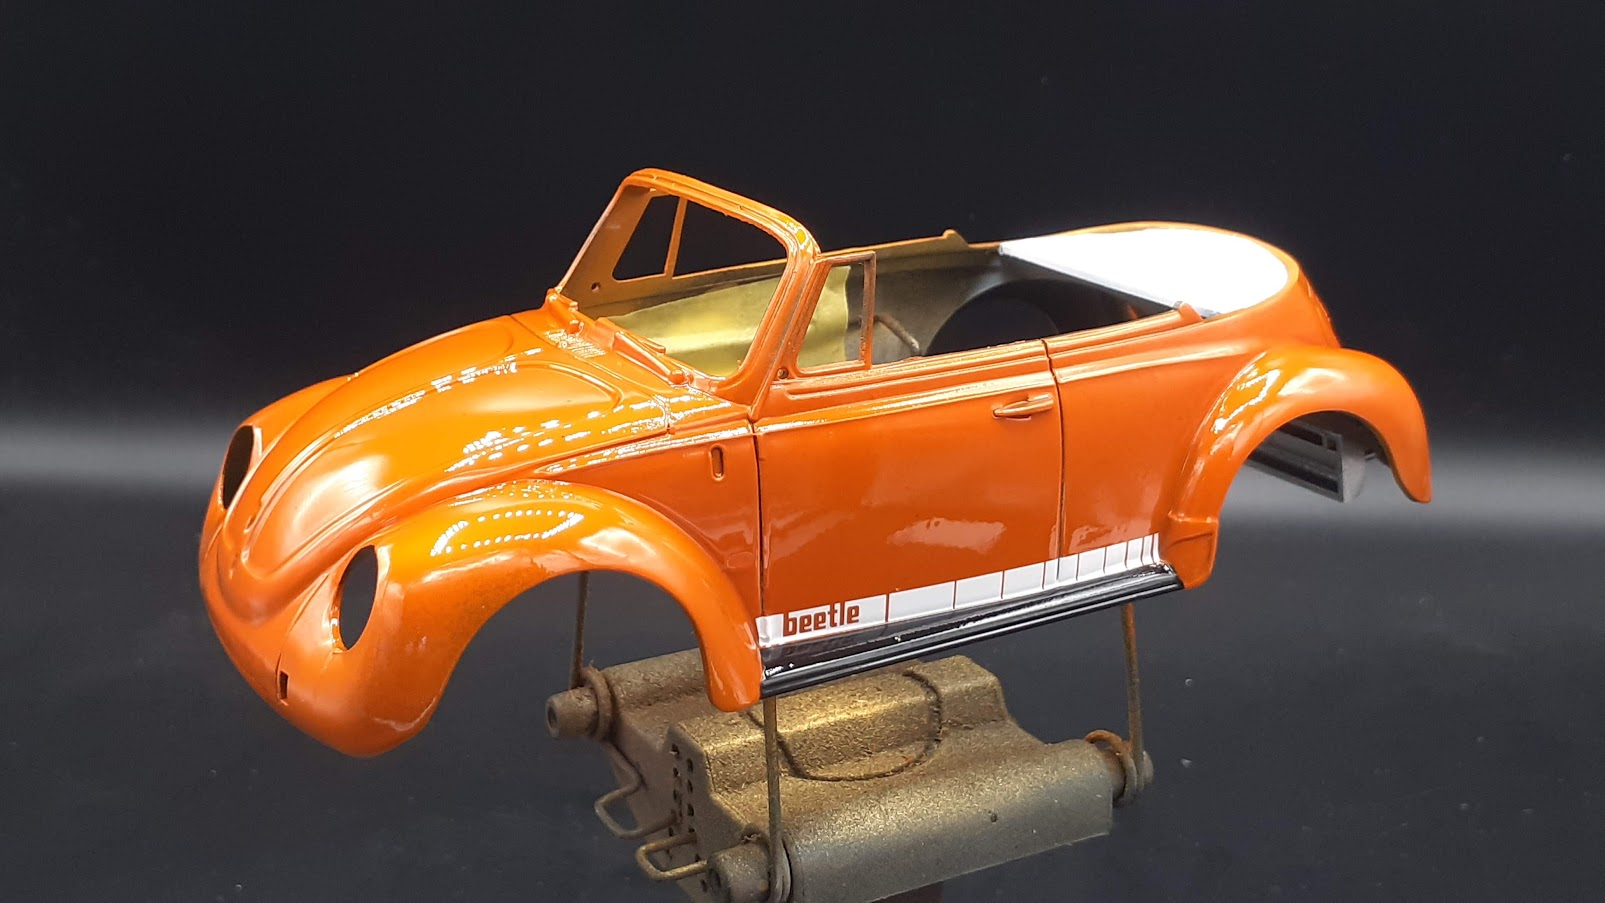
The runner boards masked off and sprayed with MS Surfacer 1500 black for semi-gloss black:

I didn't make a mess this time and there is very little to touch with paint:

Dry-fit with the dropped top:
... and there is the bomb:
WHile masking / unmasking the body I noticed these 2K runs which I missed before

Back to sanding!
Gabriel
I've been working in short bursts, as time allowed, nd the quality suffered. (see the update).UPDATE - no luck after all
On the underside I did as much as I could with the little detail kit has to offer: some accents added:
Body masked and the luggage deck primed:
Same went for the two versions of the tops - my friend will choose which one she likes best:
The area sprayed with an off white acrylic mix (white + burnt sienna):
Same for the tops - these received a coat of clear acrylic matte as well:
Test fit with the top up:
The runner boards masked off and sprayed with MS Surfacer 1500 black for semi-gloss black:
I didn't make a mess this time and there is very little to touch with paint:
Dry-fit with the dropped top:
... and there is the bomb:
WHile masking / unmasking the body I noticed these 2K runs which I missed before
Back to sanding!
Gabriel

Szmann
Joined: September 02, 2014
KitMaker: 1,977 posts
Auto Modeler: 1,371 posts
Posted: Tuesday, September 15, 2020 - 11:21 AM UTC
UPDATE
The exhaust ports and the rear bumper added to the body - also a set of decals from the kit.

The body sprayed again with 2K - maybe not as smooth as first time but as glossy. I don't think I have more to do to it than to add external details:
Gabriel
The exhaust ports and the rear bumper added to the body - also a set of decals from the kit.
The body sprayed again with 2K - maybe not as smooth as first time but as glossy. I don't think I have more to do to it than to add external details:
Gabriel

Hwa-Rang

Joined: June 29, 2004
KitMaker: 6,760 posts
Auto Modeler: 2,182 posts

Posted: Tuesday, September 15, 2020 - 05:14 PM UTC
Looks spectacular Gabriel.
Szmann
Joined: September 02, 2014
KitMaker: 1,977 posts
Auto Modeler: 1,371 posts
Posted: Tuesday, September 15, 2020 - 11:50 PM UTC
Quoted Text
Looks spectacular Gabriel.
Thanks, Jesper
Gabriel

Joel_W
Joined: December 04, 2010
KitMaker: 11,666 posts
Auto Modeler: 2,974 posts

Posted: Wednesday, September 16, 2020 - 02:57 AM UTC
Gabriel,
You're certainly becoming a 2K master. Nice save. The resprayed body looks super shiny.
I do like the closed top version better, but that's just me, and what does an old cook like me know anyway.
The bottom pan looks just fine with the detail paintings and light weathering.
You should be wrapping up this build in no time flat.
Joel
Szmann
Joined: September 02, 2014
KitMaker: 1,977 posts
Auto Modeler: 1,371 posts
Posted: Wednesday, September 16, 2020 - 10:51 AM UTC
Quoted Text
Gabriel,
You're certainly becoming a 2K master. Nice save. The resprayed body looks super shiny.
I do like the closed top version better, but that's just me, and what does an old cook like me know anyway.
The bottom pan looks just fine with the detail paintings and light weathering.
You should be wrapping up this build in no time flat.
Joel
Thanks, Joel - I still think the first coat was better, if not for the unfortunate runs.
In this colour scheme - indeed - the top-up version I find it better myself.
Not much left to do - other than chroming and exterior details - but I am running 3 projects in parallel right now in real life and time is scarce.
Gabriel

Cosimodo

#335

Joined: September 03, 2013
KitMaker: 1,808 posts
Auto Modeler: 701 posts

Posted: Wednesday, September 16, 2020 - 12:19 PM UTC
I'm with the others - it looks fabulous!
Joel_W
Joined: December 04, 2010
KitMaker: 11,666 posts
Auto Modeler: 2,974 posts
Posted: Thursday, September 17, 2020 - 12:38 AM UTC
Gabriel,
Seems that you're a man of many talents. As for time being scarce from so many real life projects, being retired is a true gift from the Gods. Other then a "Honey to do List" that never shrinks, I've got all the time in the world. Too bad that every other factor of old age conspires against truly enjoying all this new found time.
Joel

AussieReg

#007

Joined: June 09, 2009
KitMaker: 8,156 posts
Auto Modeler: 2,953 posts

Posted: Thursday, September 17, 2020 - 01:05 PM UTC
Looks amazing Gabriel, great work! I'm undecided on the top-up or top-down question, both work really well!
A quick question, are you going to cut the decal around the bottom of the door and the door hinge and settle it in further?
Cheers, D
A quick question, are you going to cut the decal around the bottom of the door and the door hinge and settle it in further?
Cheers, D

Szmann
Joined: September 02, 2014
KitMaker: 1,977 posts
Auto Modeler: 1,371 posts
Posted: Sunday, September 20, 2020 - 05:21 AM UTC
Quoted Text
I'm with the others - it looks fabulous!
Thank you, Michael
Quoted Text
Gabriel,
Seems that you're a man of many talents. As for time being scarce from so many real life projects, being retired is a true gift from the Gods. Other then a "Honey to do List" that never shrinks, I've got all the time in the world. Too bad that every other factor of old age conspires against truly enjoying all this new found time.
Joel
Yes, I am in the middle of a lot of things. That's not very helpful for modelling.
Quoted Text
A quick question, are you going to cut the decal around the bottom of the door and the door hinge and settle it in further?
Cheers, D
Damian, That was a kit's flaw that I didn't noticed until it was too late: there is no panel line between the bottom of the door and runner board. I could have it scribed in the moment I cleaned the shell, but never crossed my mind because I just didn't see it. I will simulate it by wash.
The decal laid very good around hinge; again, a wash will do - I hope.
UPDATE
Chrome foil added to simulate the chrome inserts. It has a couple of errors that can be still corrected and I'm going to go one more time over them

The lights bezels and the bumpers added. Here I've tried for the first time to deal with the chrome on the bezels

The rearview mirror and the rear light plates also added:

There are some ugly gaps remaining between the light bezels and the body (left side). I covered them with tinted white glue (right side); the excess was latter removed.

The effect of the "gaskets" isn't all that bad, but my problem here was the bezels. My patch with Molotow chrome pen made the looks even worse:

Right now I took the bezels off and I'm going to Alclad them after cleaning.
Interior panels and the dashboard added. The dash goes in straightforward, but the door cards are molded flat while the body is curved. I know: the panels should be rather flat, but in this case gaps will show at the middle, top and bottom.

Gabriel
Dixon66
Joined: December 12, 2002
KitMaker: 1,500 posts
Auto Modeler: 645 posts
Posted: Sunday, September 20, 2020 - 07:46 AM UTC
Still one happy looking bug. Looking great, keep it up.
Joel_W
Joined: December 04, 2010
KitMaker: 11,666 posts
Auto Modeler: 2,974 posts
Posted: Sunday, September 20, 2020 - 08:35 AM UTC
Gabriel,
You're slowly but surely bringing that Bug up to your standards. So far you've beat every issue back, and I'm positive that you'll continue to do so till the Bug is done and in the books.
Joel
You're slowly but surely bringing that Bug up to your standards. So far you've beat every issue back, and I'm positive that you'll continue to do so till the Bug is done and in the books.
Joel
Szmann
Joined: September 02, 2014
KitMaker: 1,977 posts
Auto Modeler: 1,371 posts
Posted: Sunday, September 20, 2020 - 10:49 AM UTC
Quoted Text
Still one happy looking bug. Looking great, keep it up.
Thanks, David! I will!
Quoted Text
Gabriel,
You're slowly but surely bringing that Bug up to your standards. So far you've beat every issue back, and I'm positive that you'll continue to do so till the Bug is done and in the books.
Joel
Thank you for the vote of confidence, Joel! I don't think the bezels issue cannot be beaten ideed.
Gabriel
AussieReg
#007
Joined: June 09, 2009
KitMaker: 8,156 posts
Auto Modeler: 2,953 posts
Posted: Sunday, September 20, 2020 - 11:52 AM UTC
Gabriel, you are working though a catalogue of small problems on this build, and doing a great job!
With regard to the headlights, would it be worth stripping them off to bare plastic, then gluing on a fine rod to create a "flange" to cover the gaps at the fender? Then refinish with Alclad. This might be neater and easier than trying to fill gaps around the installed bezels on that beautiful paint job.
Cheers, D
Szmann
Joined: September 02, 2014
KitMaker: 1,977 posts
Auto Modeler: 1,371 posts
Posted: Sunday, September 20, 2020 - 12:46 PM UTC
Quoted Text
Gabriel, you are working though a catalogue of small problems on this build, and doing a great job!
With regard to the headlights, would it be worth stripping them off to bare plastic, then gluing on a fine rod to create a "flange" to cover the gaps at the fender? Then refinish with Alclad. This might be neater and easier than trying to fill gaps around the installed bezels on that beautiful paint job.
Cheers, D
Thanks, D.! Your idea would have been an excellent idea if the bezels were parallel with the body, but in this case the body shape is slanted in rapport with the axis of the cylinder forming the bezel, which is also slightly conical. Yes, the protrusion limit can be traced and material added accordingly, but it would be already more complicated than just filling up the gap with glue.
Gabriel
AussieReg
#007
Joined: June 09, 2009
KitMaker: 8,156 posts
Auto Modeler: 2,953 posts
Posted: Sunday, September 20, 2020 - 12:56 PM UTC
Quoted Text
Thanks, D.! Your idea would have been an excellent idea if the bezels were parallel with the body, but in this case the body shape is slanted in rapport with the axis of the cylinder forming the bezel, which is also slightly conical. Yes, the protrusion limit can be traced and material added accordingly, but it would be already more complicated than just filling up the gap with glue.
Gabriel
That sounds like me, an excellent idea that makes things more difficult than they already are

I'm sure you've got it under control.
Cheers, D
 |

WEB HOSTING BY


Copyright ©2021 Auto Modeler and Kitmaker Network, a subsidiary of Silver Star Enterprises
All Rights Reserved. Please read our Conditions of Use and Privacy Policy.
All Rights Reserved. Please read our Conditions of Use and Privacy Policy.