_GOTOBOTTOM
Cars
Discuss all types of automotive modeling here.
VW Beetle Cabrio 1303S by Aoshima
Szmann
_VISITCOMMUNITY
Netherlands Antilles
Joined: September 02, 2014
KitMaker: 1,977 posts
Auto Modeler: 1,371 posts
Posted: Tuesday, September 01, 2020 - 12:55 PM UTC
Hi, guys!

My recent experiences showed that if I let my bench go to cool, it freezes. So there I am again, with another build!


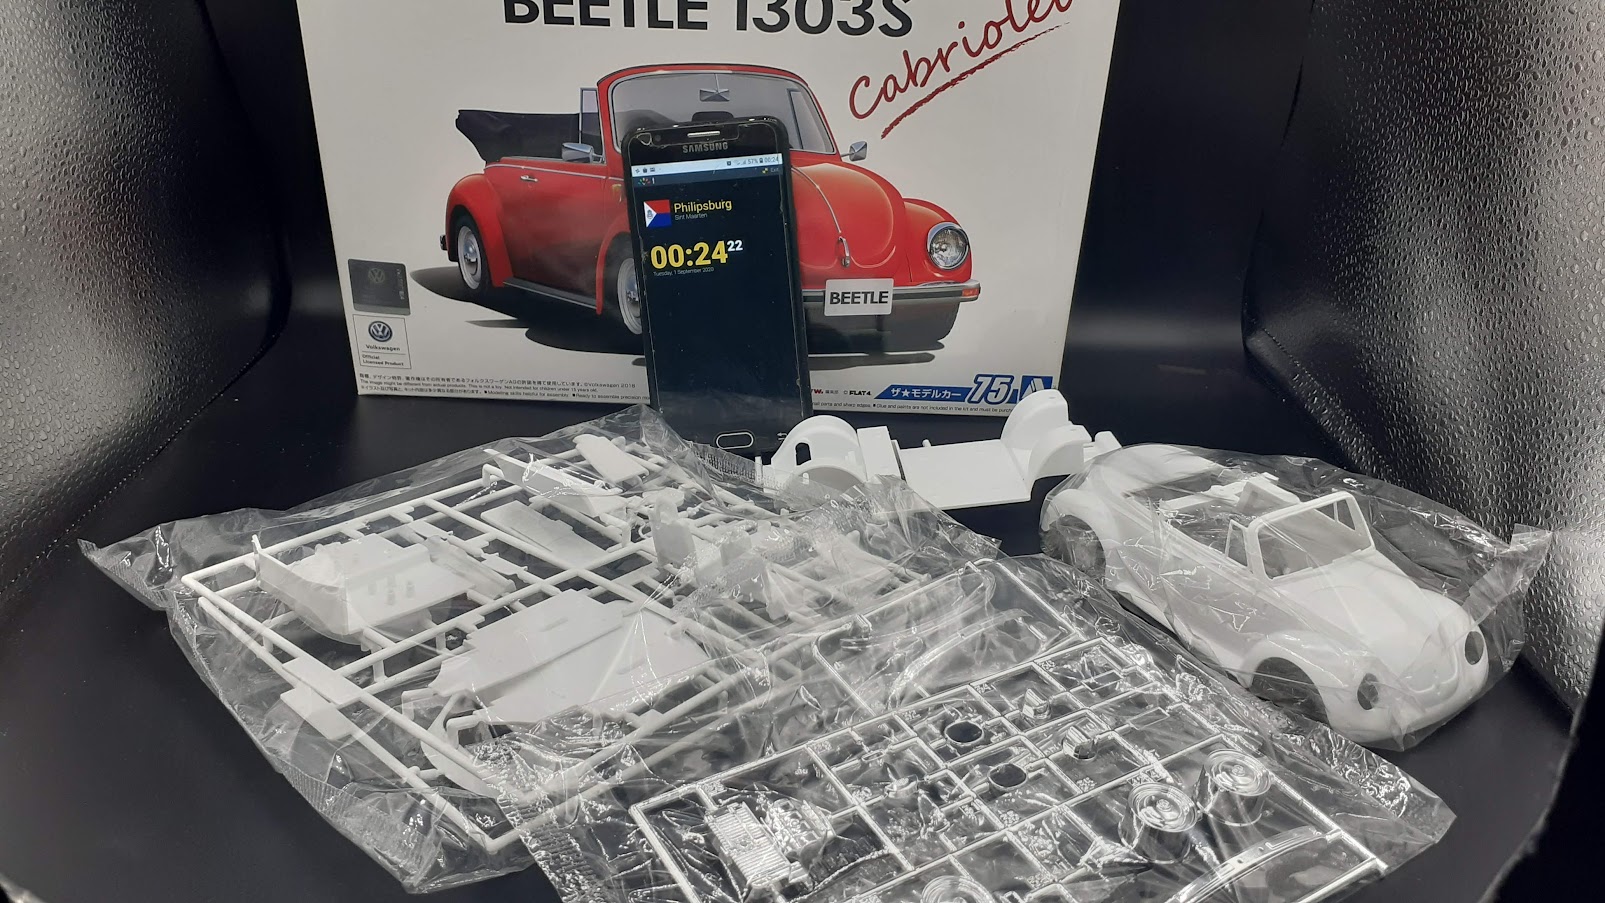
But before any word about the Aoshima kit, do you remember this one? It was my first build I have shared with you, guys, a few years ago...


Well, what goes 'round, turns 'round. I am back to it from a different angle. The original model has suffered a cruel fate. Somebody torn it to pieces, but my lady friend still keeps it. I think 2 years have passed since this happened, and she keeps begging of me on every encounter to fix it back for her - offering to pay for repairs. I can't take the offer, since it was my gift for her in the first place. I kept postponing the job until last time I've seen her. I explained her that is easier to build one anew than to fix the old one. She agreed, even when she was told that the colours will be different (see the original story in the features section). By the time the kit reached my bench, I had a change of heart and I asked myself what sense will make to gift a orange Beetle owner with a 2-tone blue Beetle. Although I just completed a candy orange truck, I decided to take the risk and rather be accused of lack of inspiration than to give the lady the wrong gift.

As it happens, yesterday I have run into this picture:

Not related to the Beetle by any means, but the visual effect of the colour scheme totally tipped the balance. My Cabrio is going to be orange, imagination working or not!

A new curse stuck apparently on me: this will make the fourth model in a row designed initially to be motorized. Again gaps on the bottom plate and all that - but - hey! Look an orange Cabrio! (she doesn't know yet I changed my plans and I will keep is as a surprise).

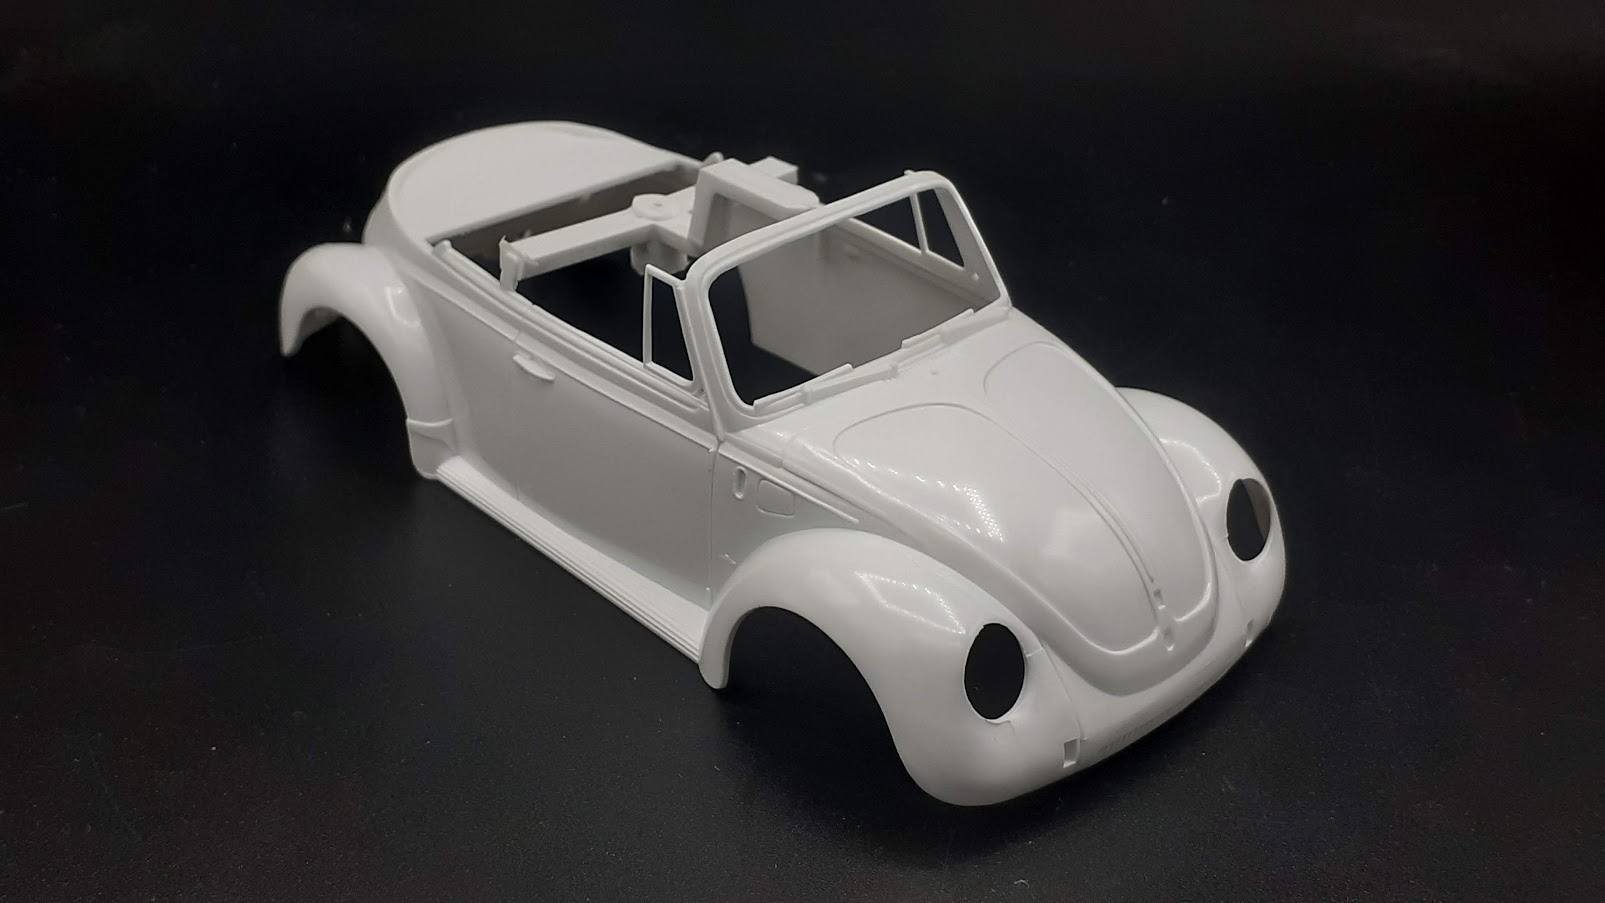
Body is one piece, very fine and close to scale plastic, filigran detail. Just look how delicate (and dangerous) are these lateral window frames!


You really have to strain your eyes to find any flash on the parts. Minor bonus, the battery lid has some detail on it (see that Yodel and Tamiya?)


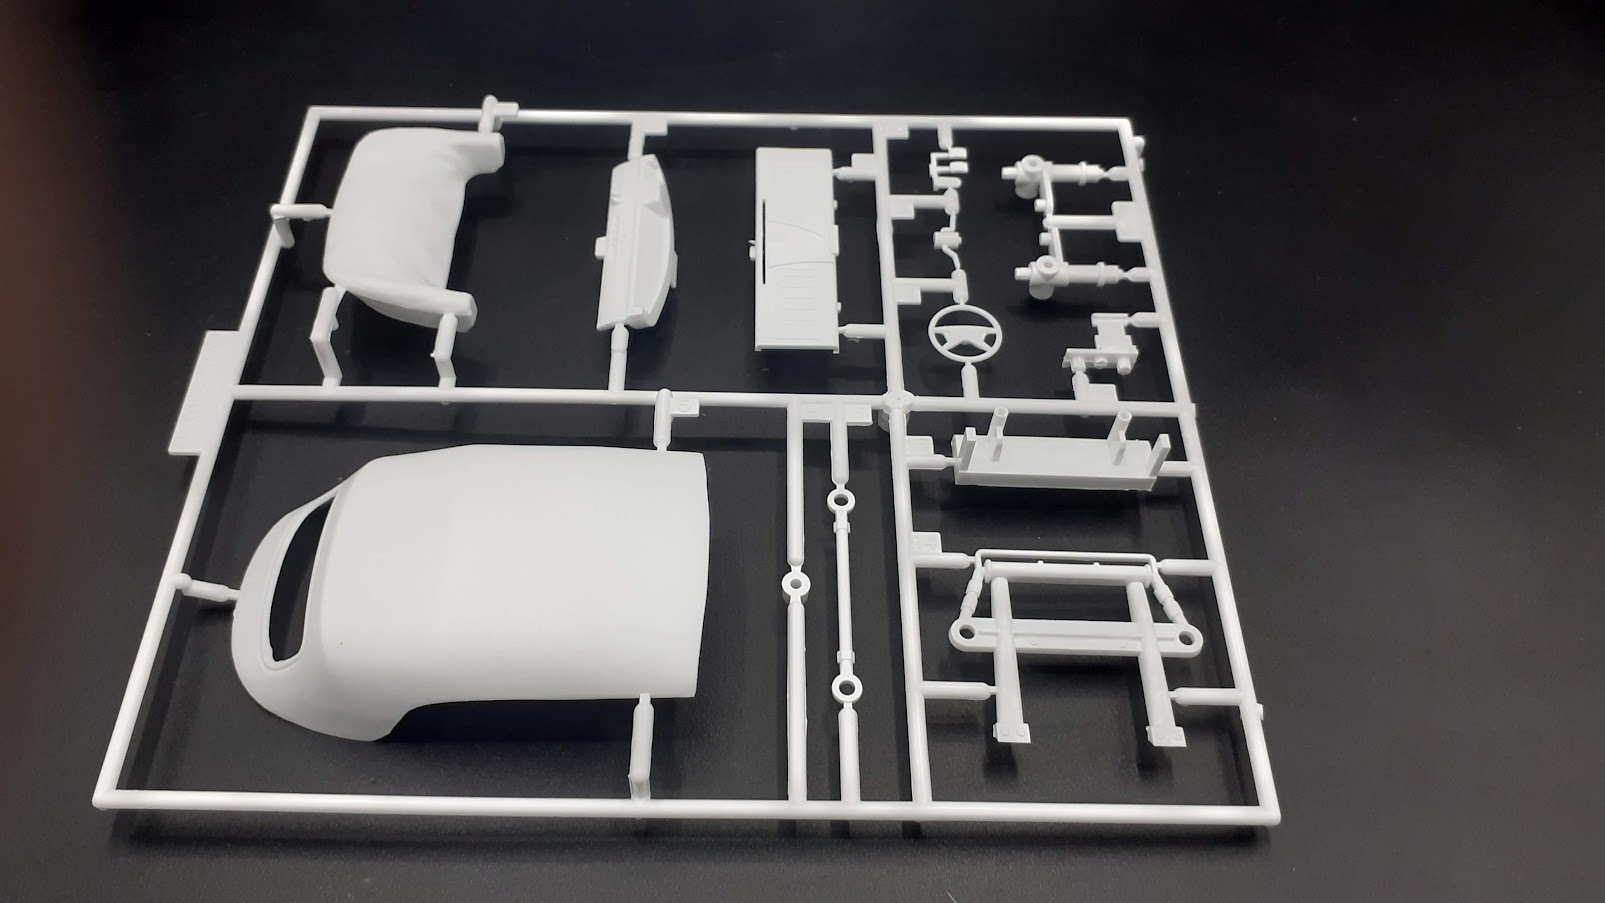
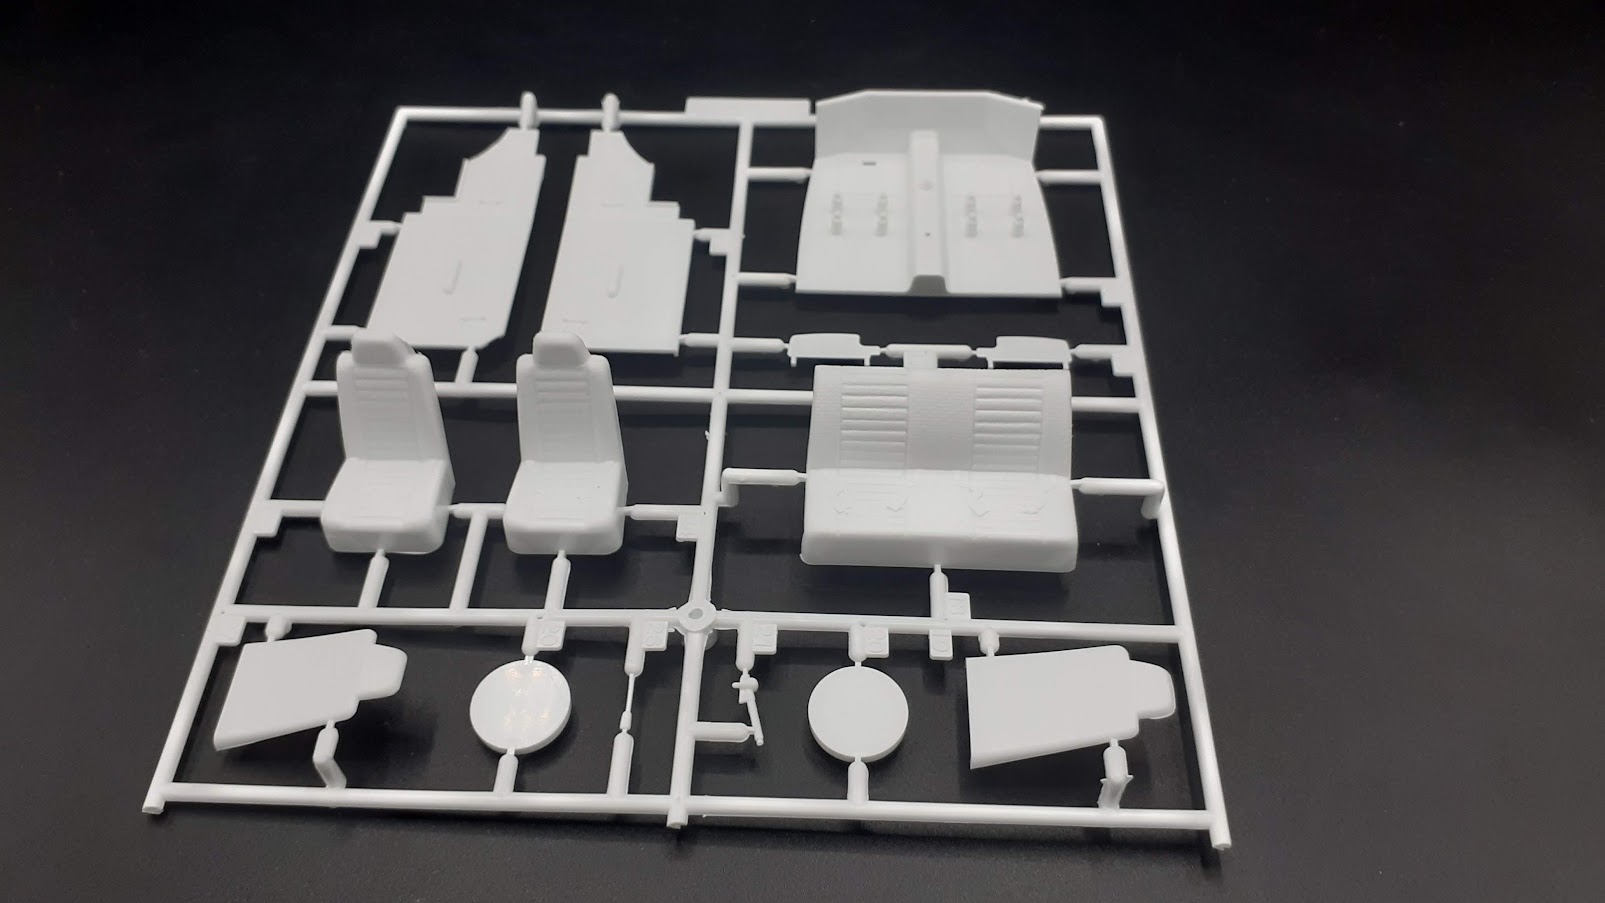
If the Japanese are cheap with the interior details, they aren't bad at all at molding quality. This kit originates back in 1972! See that MPC, right? Maybe AMT and other flash manufacturers.


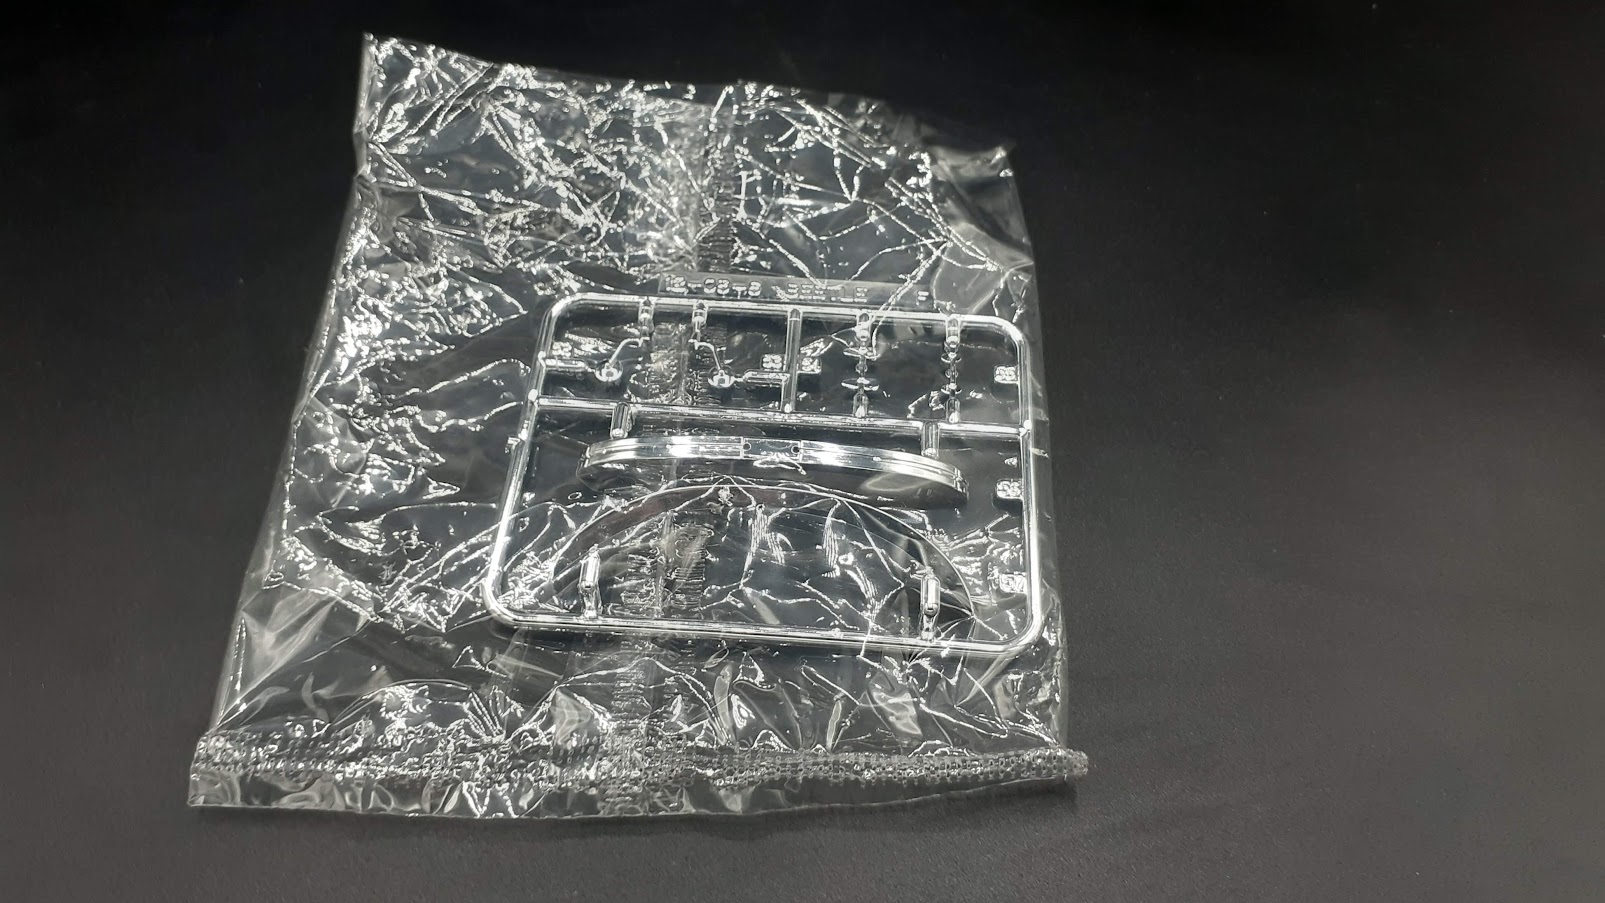
Chromed oil pan is not an European manufacturer business, so off it goes. The chrome on the other parts looks not so gleamy - I might keep it:


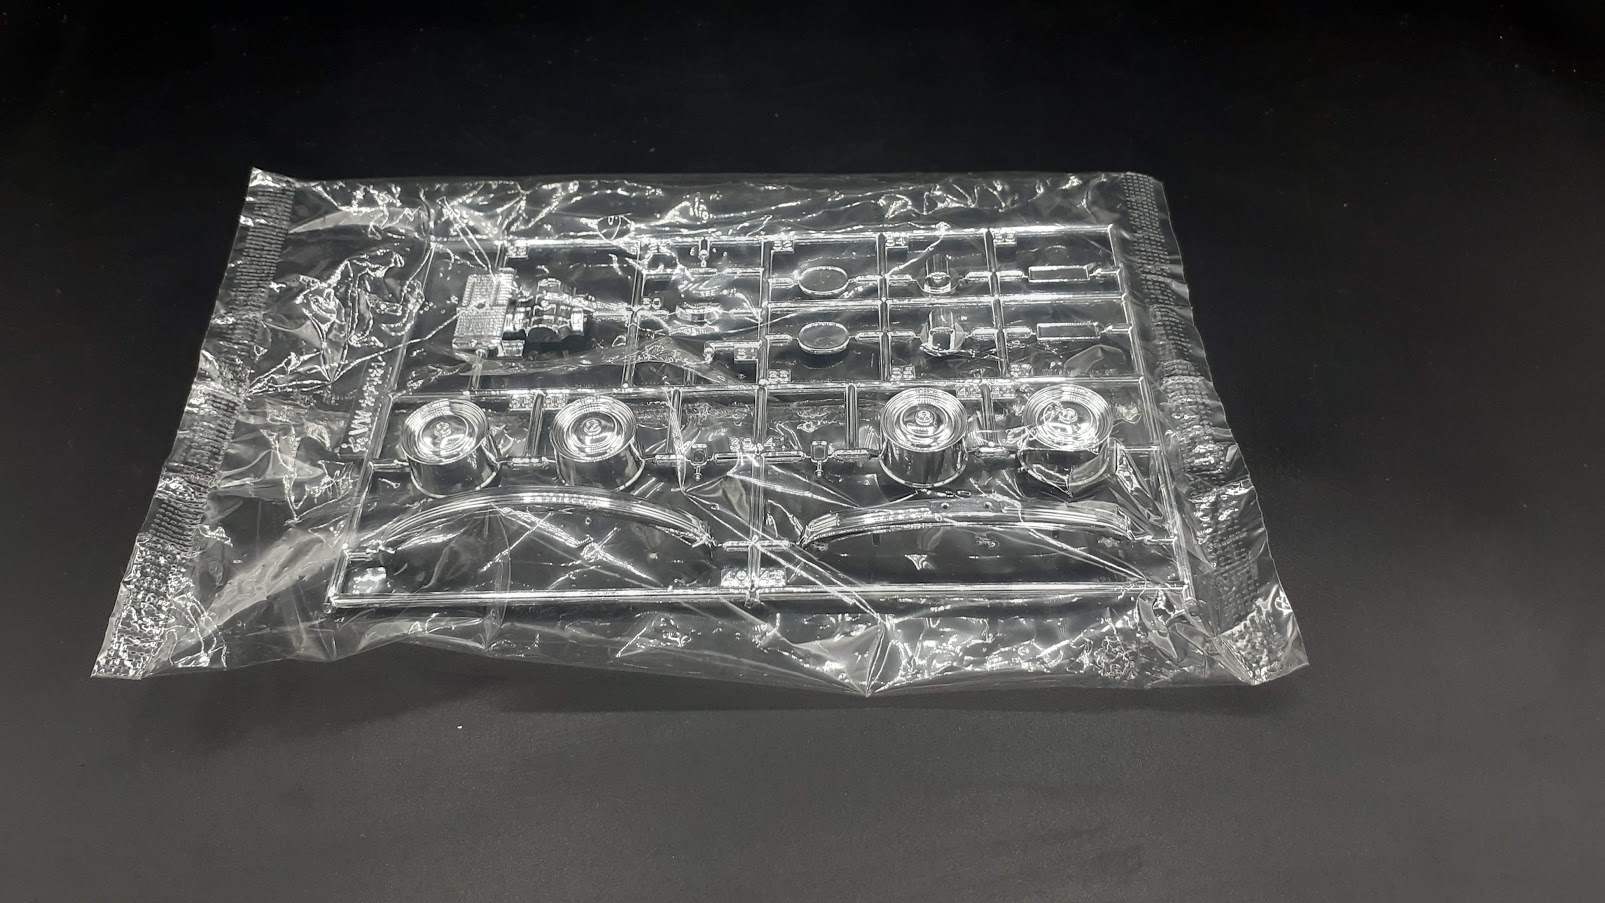
Even on the chromed parts the detail is superb and there are no seam lines:


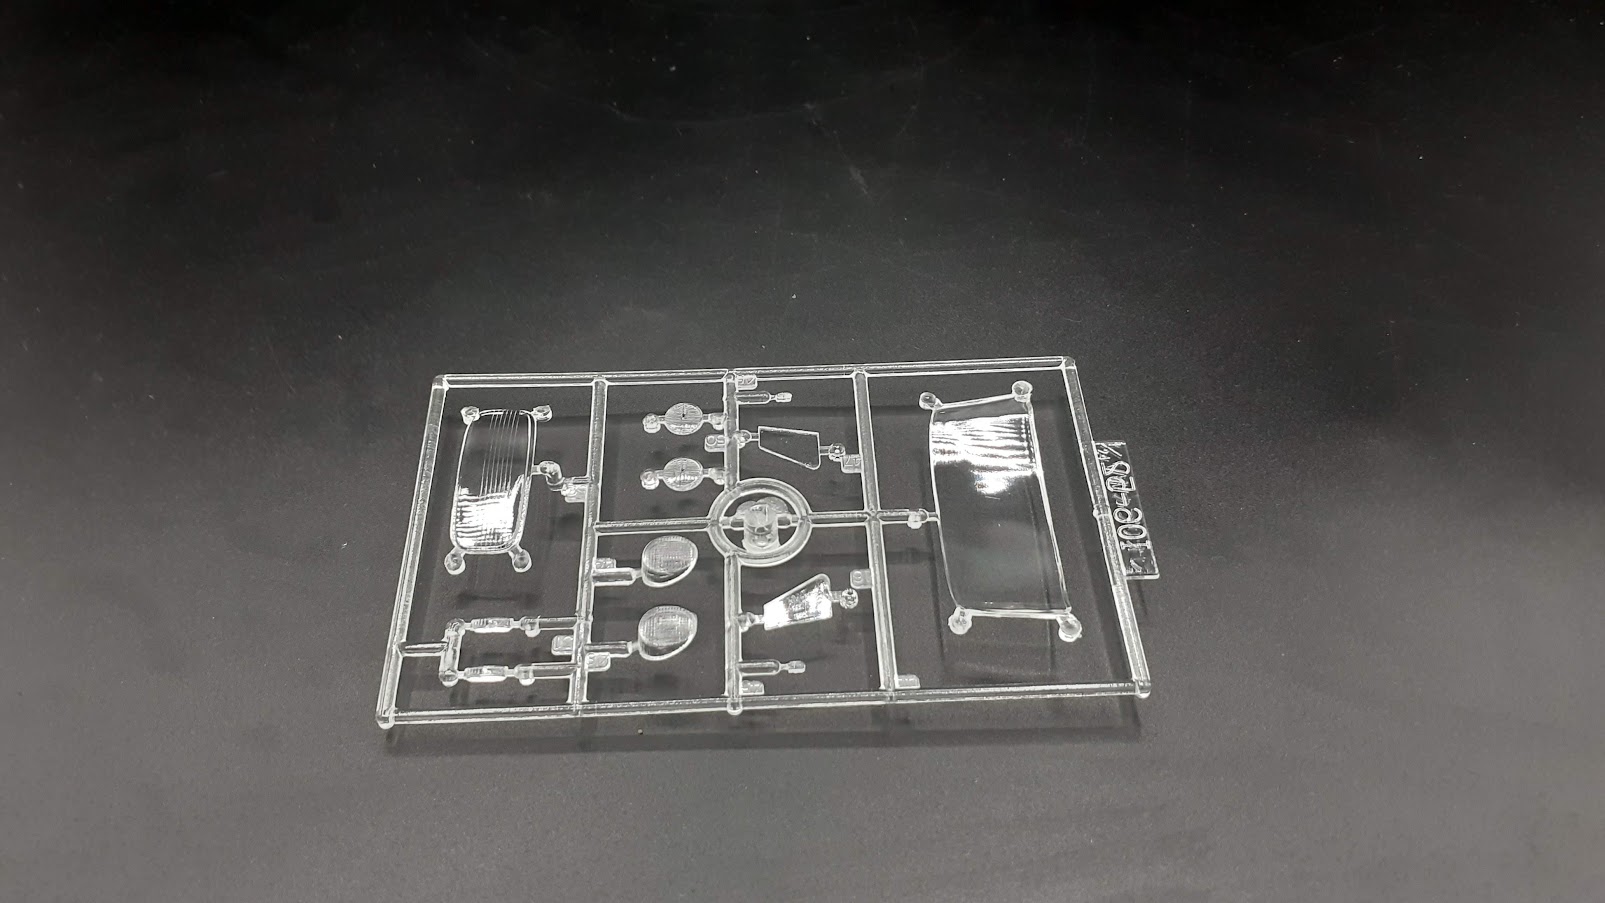
Clear pats, again, totally reasonable as thickness and clarity, and there are no scratches:


That was for tonight - knowing the Japanese precision manufacturing, I am expecting another "blitz" (if another Gabriel stupid painting experiment doesn't ruin it all that is).

Gabriel
Cosimodo
#335
_VISITCOMMUNITY
Auckland, New Zealand
Joined: September 03, 2013
KitMaker: 1,808 posts
Auto Modeler: 701 posts
Posted: Tuesday, September 01, 2020 - 04:46 PM UTC
Gabriel, you are relentless! A candy orange VW cabrio. I am sure it will be a winner!

cheers
Michael
AussieReg
Staff MemberAssociate Editor
AUTOMODELER
#007
_VISITCOMMUNITY
Victoria, Australia
Joined: June 09, 2009
KitMaker: 8,156 posts
Auto Modeler: 2,953 posts
Posted: Tuesday, September 01, 2020 - 05:17 PM UTC
Gabriel, this looks like a whole bunch of fun, and a super bright candy colour choice as well!

Cheers, D
Joel_W
Staff MemberAssociate Editor
AUTOMODELER
_VISITCOMMUNITY
New York, United States
Joined: December 04, 2010
KitMaker: 11,666 posts
Auto Modeler: 2,974 posts
Posted: Wednesday, September 02, 2020 - 02:49 AM UTC
Gabriel,
I'll be following your Beatle build for sure. I've always had a soft spot for them as I actually owned one for all of 6 months.

Are you going to go for that Candy Orange or a more traditional solid orange color?

BTW, I'd still try to repair the original Beatle for her, as it will surely get you a few more goodie points.

Joel
Szmann
_VISITCOMMUNITY
Netherlands Antilles
Joined: September 02, 2014
KitMaker: 1,977 posts
Auto Modeler: 1,371 posts
Posted: Thursday, September 03, 2020 - 12:21 AM UTC

Quoted Text

Gabriel, you are relentless! A candy orange VW cabrio. I am sure it will be a winner!

cheers
Michael


Thank you, Michael
Apparently and hopefully I have regained my "natural pace".
I'm still trying to "eyemind see" the outcome...


Quoted Text

Gabriel, this looks like a whole bunch of fun, and a super bright candy colour choice as well!

Cheers, D


Thanks, D.. Yes, it looks like a simple just-for-fun build. Super-Bug Super-Bright Super-Orange We still have to see how it turns out


Quoted Text

Gabriel,
I'll be following your Beatle build for sure. I've always had a soft spot for them as I actually owned one for all of 6 months.

Are you going to go for that Candy Orange or a more traditional solid orange color?

BTW, I'd still try to repair the original Beatle for her, as it will surely get you a few more goodie points.

Joel


Thanks, Joel. The biggest unhappiness of my life is that I cannot actually own one of these, restored to stock. I don't have the financial means and my Island is going to devour it all too fast!

I'm going to paint it resto-mode: clear orange over metallic - see the update.

As for the first version, I believe it is too much of a hassle to redo-it. It's all painted in enamels, and it was glued with superglue. When was torn apart, the pieces broke with chunks of plastic and swates of dry paint. The windows are also matted and yellowed. That one needs a DOT3 bath just to bring it below 0. I'd better buy the Tamiya kit and do it again

UPDATE - Seeking the orange

The body has very fine molding lines - nearly invisible - I had to "see" them with the tip of my pen:


The panel line are very delicate and - for good measure - I slightly re-scribed them:


Body primed with MS 1500 Black - as primer and base for the following metallic undercoat. Smooth and nice - I don't think any sanding is required - but I still need to check it closer:


I also primed a few spoons to test the colours and the behaviour over different undercoats. I have used already the Tamiya Clear Orange on another build, but I wanted to see the difference. The Model MAster Turn Signal Amber was still new to me, and I wasn't sure about it, because in the bottle looks rather solid than clear:


I didn't bother to polish the primer or the undercoat - I just wanted to see the coverage and the final look. Each spoon was painted with both orange clears (MM is a clear after all - or I shall say translucent), over chrome, gold and copper (all Alclads). Here's the results:


I like best the MM paint over copper (I was searching since long for that auburn colour) but for this build I have settled for MM over gold (middle spoon lower section).

Thanks for following!
Gabriel
Joel_W
Staff MemberAssociate Editor
AUTOMODELER
_VISITCOMMUNITY
New York, United States
Joined: December 04, 2010
KitMaker: 11,666 posts
Auto Modeler: 2,974 posts
Posted: Thursday, September 03, 2020 - 12:41 AM UTC
Gabriel,
Your idea of a new Tamiya kit just might be worth it's weight in Gold over the long run

As for the best looking Orange color, with my crap eyes, I'm the wrong one to ask, but the middle spoon looks about right to me.

Joel
AussieReg
Staff MemberAssociate Editor
AUTOMODELER
#007
_VISITCOMMUNITY
Victoria, Australia
Joined: June 09, 2009
KitMaker: 8,156 posts
Auto Modeler: 2,953 posts
Posted: Thursday, September 03, 2020 - 03:22 AM UTC
You are moving very fast with this build Gabriel, the body looks great in its primer coat!

On the computer screen it is difficult to see the subtle differences between the sample shots on your spoons, it would be much more visible in natural light, but the middle spoon does look closer to the target colour to me.

As to the destroyed old build, leave it destroyed. Buy a small shadow-box frame and glue the pieces in randomly and mount it on a wall. You will never be happy with a patched up rebuild. I agree, buy a Tamiya kit and start fresh (any excuse to buy a new Tamiya kit is fine by me).

Cheers, D
Szmann
_VISITCOMMUNITY
Netherlands Antilles
Joined: September 02, 2014
KitMaker: 1,977 posts
Auto Modeler: 1,371 posts
Posted: Thursday, September 03, 2020 - 02:00 PM UTC

Quoted Text

Gabriel,
Your idea of a new Tamiya kit just might be worth it's weight in Gold over the long run

As for the best looking Orange color, with my crap eyes, I'm the wrong one to ask, but the middle spoon looks about right to me.

Joel


I think so too - and Damian's idea is brilliant!
Yes, I have chosen the second spoon. The Tamiya and MM paints look very close even under naked eye but MM has the edge in shine and self-levelling properties.


Quoted Text

You are moving very fast with this build Gabriel, the body looks great in its primer coat!


Well, let's hope so. This evening I've done some sanding and I went a little too energetic. I sprayed a second coat, almost wet, with the same MS1500 Black that looks good - but wasn't "ripe" for metallizer. But this week-end will be busy for me - I'm having check-in at the villa - the first one after the madness begun.

Quoted Text


On the computer screen it is difficult to see the subtle differences between the sample shots on your spoons, it would be much more visible in natural light, but the middle spoon does look closer to the target colour to me.


Indeed - the chrome performs poorly as undercoat and it is all shot thorough; the gold gives the brightest orange and the copper gives a heavier, richer orange with brown waters. The last one is the prettiest one to my eye, but not suited for my target. The middle one will be!

Quoted Text


As to the destroyed old build, leave it destroyed. Buy a small shadow-box frame and glue the pieces in randomly and mount it on a wall. You will never be happy with a patched up rebuild. I agree, buy a Tamiya kit and start fresh (any excuse to buy a new Tamiya kit is fine by me).

Cheers, D


D., brilliant advice! Actually since long I wanted to do an "exploded view" display like that but I couldn't choose what kit to "sacrifice", then I totally forgot about it. Now that's the perfect opportunity You, Sir, are a gem of a friend!

Gabriel
Szmann
_VISITCOMMUNITY
Netherlands Antilles
Joined: September 02, 2014
KitMaker: 1,977 posts
Auto Modeler: 1,371 posts
Posted: Saturday, September 05, 2020 - 05:03 PM UTC
UPDATE
My last two days were a constant running up and down to home - villa - airport and back - the American airlines are performing very poorly lately; however - in between errands I found time for short sessions with the following results:

The primer was sanded a little rough and I had to apply a second coat - all good - it looked even better than before after a wet polishing with a spent 2000 grit sponge. Next morning I have applied the "gold" - I couldn't find any gold paint actually in my can collection, but Rust-oleum brass makes a pretty good replacement to pale gold I have used in the previous test.
For best results, metallics have to be applied frugally - but here I went straightforward cheap - so cheap that I need to cover again a small patch (A pillar root, right side of the vehicle)
The result is very good I have to say and my most detailed inspection could find only 2 "grains" on the surface. For that less, I'm not going to through the trouble of sanding the undercoat:


Here comes the funny part: I bought some White Pearl from Mr. Color for my nest build (Suzuki Jimny) and I was dying to test it before. I was suspecting it has to be sprayed over white and I was right. In fact, I would call the "white pearl" rather a clear pearl, as it didn't changed the colour when sprayed over gray primer; it added only the pearlescent looks.
It is a very kinky kind of paint: very thick, almost like a gel and I needed to scoop it out of the jar rather than pour it; it was sedimented in three layers, from top to bottom: gel, pigment, pearl. It took forever to mix homogeneously and I literally hat to scrape the bottom of the jar with mi paddle mixer to get the pearl to move from there. Well aware from before of these rich in medium paint, they have to be diluted to a very viscous mix (thicker even than Vallejo Air straight from the bottle). I know, it looks like the paint will never make it thru the nozzle, but it will, and it will do it beautifully.
I'm not sure what you're going to see on your screen - probably some sort of aluminum metallic tone, but under naked eye the effect is beautiful - like some sort of mineral glass that shines to a purple tone under artificial light, from a very sharp angle. Hard to describe:

You might get a better reference next to the pure white seats:


💀Caution! Viewer's discretion required. The following image my hurt your retina! 💀
My bug turns into a radioactive one, or at least a poisonous one. The result of painting by hand the seat and door inserts: Cadmium Orange from Liquitex over TCP 005 white


Now I have to correct the edges and to do something about that contrast before I lose all my teeth, nails and whatever left of my hair and - God forbid! - the goatee

Gabriel
Cosimodo
#335
_VISITCOMMUNITY
Auckland, New Zealand
Joined: September 03, 2013
KitMaker: 1,808 posts
Auto Modeler: 701 posts
Posted: Saturday, September 05, 2020 - 05:49 PM UTC

They could call you the Tangerine Man! Looking forward even more to the outside now.

cheers
Michael
Dixon66
_VISITCOMMUNITY
New Hampshire, United States
Joined: December 12, 2002
KitMaker: 1,500 posts
Auto Modeler: 645 posts
Posted: Saturday, September 05, 2020 - 11:38 PM UTC
Gabriel, the contrast between the three colors is great. Too bad the white pearl really doesn't show on my screen.
Joel_W
Staff MemberAssociate Editor
AUTOMODELER
_VISITCOMMUNITY
New York, United States
Joined: December 04, 2010
KitMaker: 11,666 posts
Auto Modeler: 2,974 posts
Posted: Sunday, September 06, 2020 - 07:28 AM UTC
Gabriel,
Like David, I can't see any White Pearl. looks more like a very lite Gray to me. But with my crap eyes, you can't go by what I in this case can't see.

The seats and door cards really do look quite good with the orange inserts. It that's painted by hand, you've certainly got the touch.

I've known you for years, and never new that you had a goatee.

Joel
Dixon66
_VISITCOMMUNITY
New Hampshire, United States
Joined: December 12, 2002
KitMaker: 1,500 posts
Auto Modeler: 645 posts
Posted: Sunday, September 06, 2020 - 08:12 AM UTC

Quoted Text

I've known you for years, and never new that you had a goatee.


I'd been thinking of this since he posted it. We should do a "What do you look like" thread, says the guy with the full beard for more than 30 years. LOL
Joel_W
Staff MemberAssociate Editor
AUTOMODELER
_VISITCOMMUNITY
New York, United States
Joined: December 04, 2010
KitMaker: 11,666 posts
Auto Modeler: 2,974 posts
Posted: Sunday, September 06, 2020 - 09:05 AM UTC
I just might start a thread for us to post our pictures. Then again, I'll have to take a few pics as Z I don't have anything very recent.

Joel
AussieReg
Staff MemberAssociate Editor
AUTOMODELER
#007
_VISITCOMMUNITY
Victoria, Australia
Joined: June 09, 2009
KitMaker: 8,156 posts
Auto Modeler: 2,953 posts
Posted: Sunday, September 06, 2020 - 12:34 PM UTC
I'm the same as the others, the pearl just appears as a light metallic grey, but that Cadmium Orange is just super-bright over the white! I can't wait to see what it looks like once you have tidied it up and detailed a bit more.

Cheers, D
Hwa-Rang
_VISITCOMMUNITY
Kobenhavn, Denmark
Joined: June 29, 2004
KitMaker: 6,760 posts
Auto Modeler: 2,182 posts
Posted: Sunday, September 06, 2020 - 05:32 PM UTC
Moving along fast, with those vibrant colors. Love it

How about a trailer, for the VW?
https://www.toms.nl/article/c1fk002

Szmann
_VISITCOMMUNITY
Netherlands Antilles
Joined: September 02, 2014
KitMaker: 1,977 posts
Auto Modeler: 1,371 posts
Posted: Tuesday, September 08, 2020 - 04:36 AM UTC

Quoted Text


Quoted Text

I've known you for years, and never new that you had a goatee.


I'd been thinking of this since he posted it. We should do a "What do you look like" thread, says the guy with the full beard for more than 30 years. LOL


It comes and go, actually, and I wear it more like an accent than like a feature. My work requires a neat appearance

I'm not surprised at all the pearl doesn't show. I just hope it will show better (through the camera that is, when airbrushed over white, as intended).

Jesper that will be awesome! I would prefer a slightly shorter bed - but still nice. However, the subject of this build doesn't require any extras. I have another planned build though which will fit it perfectly... processing information 35% ... 38%...

UPDATE
I was - again - working in short "bursts" as time allows. I sprayed MM Amber over gold. This weird phenomena happened again: the AB was spitting "cotton candy" strands. It is the second time is happening in my whole modelling experience - each time with MM lacquers - but I cannot pinpoint the causes (maybe ambient temperature, maybe air humidity). The solution is to modify the dilution of the paint:


Second coat wasn't bad, but it had already a not-so-good undercoat and ended up with lots of orange peel. That will make probably my worst paint job in ages


Bottom pan sprayed with Tamiya Schwartzgrun. Again, it is a logistic choice, not one dictated by taste - I am spending now useless aircraft shades.


SLight sanding on the dry lacquer. There is still a lot of orange peel, but my main concern it was not to rub through the feeble clear and to give me extra work. My bet rests now in 2 coats of 2K, which I can abuse harder:


I did some other bits and bobs and some intermediary clears - but nothing to show on camera.

Gabriel
Dixon66
_VISITCOMMUNITY
New Hampshire, United States
Joined: December 12, 2002
KitMaker: 1,500 posts
Auto Modeler: 645 posts
Posted: Tuesday, September 08, 2020 - 07:33 AM UTC
Well Gabriel, that is a happy looking bug, orange peel or not.
Joel_W
Staff MemberAssociate Editor
AUTOMODELER
_VISITCOMMUNITY
New York, United States
Joined: December 04, 2010
KitMaker: 11,666 posts
Auto Modeler: 2,974 posts
Posted: Tuesday, September 08, 2020 - 10:38 AM UTC
Gabriel
the Beetle in the Orange Pearl really looks good. I really dont' see any Orange Peel to speak of.

What's the plan for the other Bug which is the 1st we've heard about it.

Joel
Cosimodo
#335
_VISITCOMMUNITY
Auckland, New Zealand
Joined: September 03, 2013
KitMaker: 1,808 posts
Auto Modeler: 701 posts
Posted: Tuesday, September 08, 2020 - 12:15 PM UTC
Gabriel, that's unfortunate with the colour coat, I have found it difficult in the past to fix a less than satisfactory paint job by trying to paint over it with more of the same. I think as you note, once the base is wrong there is not much chance of coming back from that. So I will be interested to see of if your 2K coat cures that because it would save a lot of time in the future of stripping back and starting again.

cheers
Michael
Hwa-Rang
_VISITCOMMUNITY
Kobenhavn, Denmark
Joined: June 29, 2004
KitMaker: 6,760 posts
Auto Modeler: 2,182 posts
Posted: Tuesday, September 08, 2020 - 05:23 PM UTC
Love the orange color, a shame about the other orange(peel) though.
Szmann
_VISITCOMMUNITY
Netherlands Antilles
Joined: September 02, 2014
KitMaker: 1,977 posts
Auto Modeler: 1,371 posts
Posted: Friday, September 11, 2020 - 03:57 AM UTC

Quoted Text

Well Gabriel, that is a happy looking bug, orange peel or not.


Thanks, David. Yes, the idea revolves around Caribbean colors. Orange peel dealt with - see the Update.


Quoted Text

Gabriel
the Beetle in the Orange Pearl really looks good. I really dont' see any Orange Peel to speak of.

What's the plan for the other Bug which is the 1st we've heard about it.

Joel


There was some orange peel indeed, gone by now.
The other beetle fate is still uncertain - my friend nor even knows I started already working on the new one. Surprise!


Quoted Text

Gabriel, that's unfortunate with the colour coat, I have found it difficult in the past to fix a less than satisfactory paint job by trying to paint over it with more of the same. I think as you note, once the base is wrong there is not much chance of coming back from that. So I will be interested to see of if your 2K coat cures that because it would save a lot of time in the future of stripping back and starting again.

cheers
Michael


2k might cure the problem - I'm sure of it - because self-leveling abilities - but if I need more than 2 coats I'll worry already as it will clog all detail. I took a different approach - see the update.


Quoted Text

Love the orange color, a shame about the other orange(peel) though.


Thanks! I was worried indeed, Jesper but for once I've got lucky.

UPDATE - lucky shot
I had to ponder a lot about what is to do with the orange peel. Whatever the next step, the first one was to sand back as much as possible from it, without hurting the clear. here's the result of sanding:


I was very hesitant of abusing the 2K but I still needed a fix. Then I remembered the ultra-thin finishing method Damian employed recently. I diluted the clear with MLT approx 1:5 and, using my .2mm setup, I "flooded" every panel in turn, and then I sprayed another "unifying" coat, wet. It worked, and the orange peel disappeared as by magic. I won't recommend the method though, unless absolutely required. If anything can go wrong, it will, and there are plenty things that can go wrong here:


Parallel with the work on the body, I kept at detailing the dash and finishing other components:
here's the dash fully assembled and painted:


Rolling chassis complete - needs more detailing and some wash:


interior dry-fit:


2 K applied almost perfectly - I think I have 2 "sugar grains" on the left door, but other than that everything went smooth:


Interior detailing one step further by wash application:


Same wash applied on the door panels and dashboard - these parts still need some refinement and detailing.


Thanks for following!
Gabriel.
Joel_W
Staff MemberAssociate Editor
AUTOMODELER
_VISITCOMMUNITY
New York, United States
Joined: December 04, 2010
KitMaker: 11,666 posts
Auto Modeler: 2,974 posts
Posted: Friday, September 11, 2020 - 09:40 AM UTC
Gabriel,
Congrats on pulling out a really super paint job. No orange peel, and the 2k really adds that last little bit. The Interior side panels, seats, and dash really does the interior justice.

Joel
Szmann
_VISITCOMMUNITY
Netherlands Antilles
Joined: September 02, 2014
KitMaker: 1,977 posts
Auto Modeler: 1,371 posts
Posted: Friday, September 11, 2020 - 11:44 AM UTC

Quoted Text

Gabriel,
Congrats on pulling out a really super paint job. No orange peel, and the 2k really adds that last little bit. The Interior side panels, seats, and dash really does the interior justice.

Joel


Thanks, Joel!

To be honest, it was more of a lucky shot than skill, but yes, the result is very pleasing indeed!

Gabriel
Cosimodo
#335
_VISITCOMMUNITY
Auckland, New Zealand
Joined: September 03, 2013
KitMaker: 1,808 posts
Auto Modeler: 701 posts
Posted: Friday, September 11, 2020 - 04:13 PM UTC
Luck or not, it's a fantastic outcome Gabriel! The wash also does a great job on the interior. And lastly I note this build has only taken 12 days so far. I would still be reading the instructions!

cheers
Michael
 _GOTOTOP