New York, United States
Joined: January 29, 2004
KitMaker: 3,836 posts
Auto Modeler: 256 posts
Posted: Tuesday, October 28, 2008 - 06:09 PM UTC
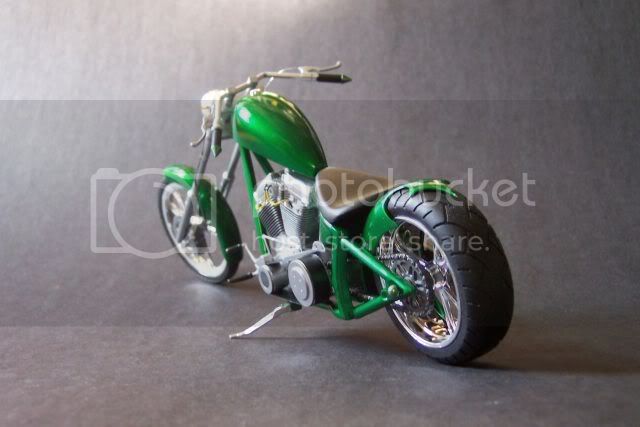
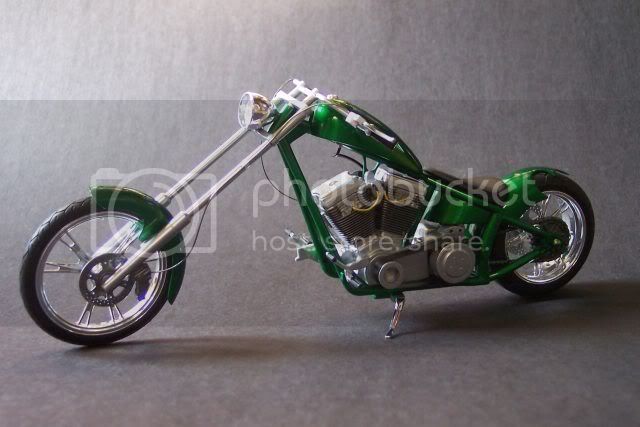
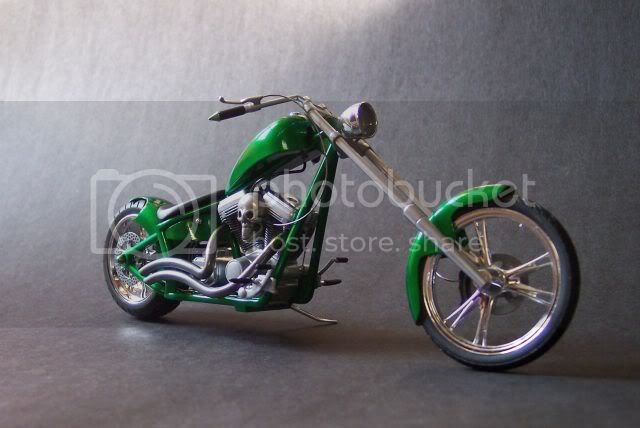
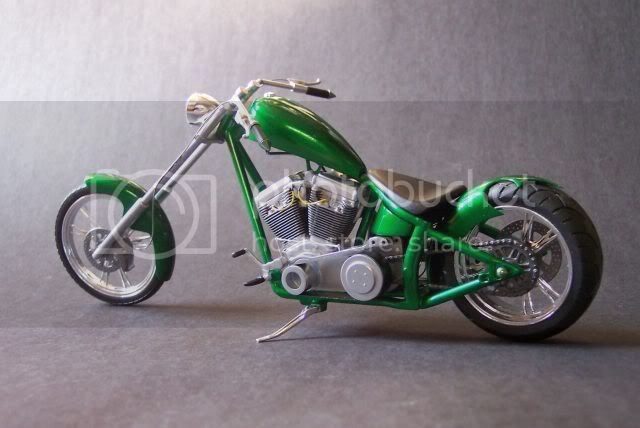
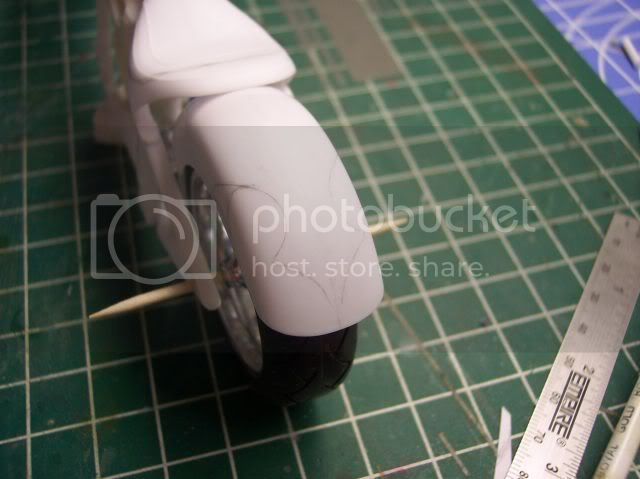
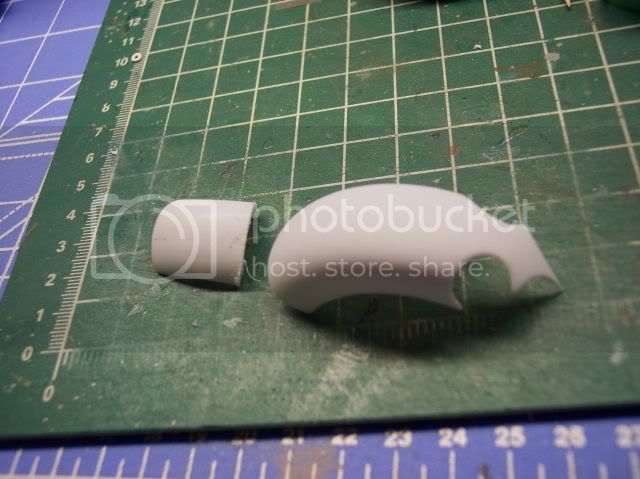
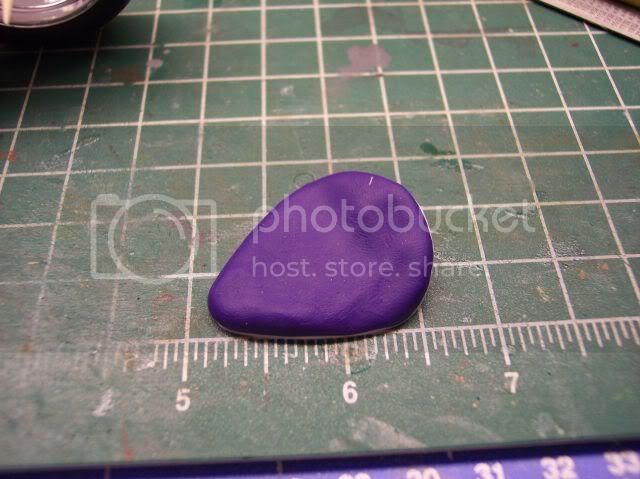
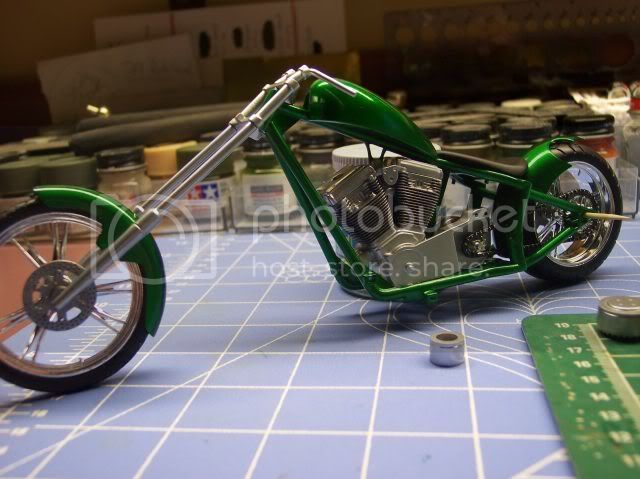
Heres a small project I started over the weekend. Its Revells 1/12th scale Motorcycle Chopper. I decided it needed to be raked so I had to cut the forks and extend them. I wanted a new rear fender and I penciled in a design and proceeded to cut away. The kits seat was to large and thick so I made a new seat pan and cover it in Poly-Clay. It (seat) was baked for 12mins., cooled and sanded. New Drag Bar handle bars were made and the belt was cut from the pulleys. They were sanded round and new face plates were added on.
Paint
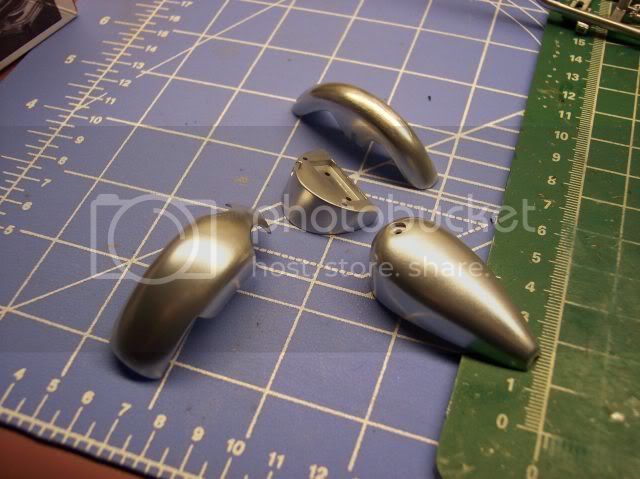
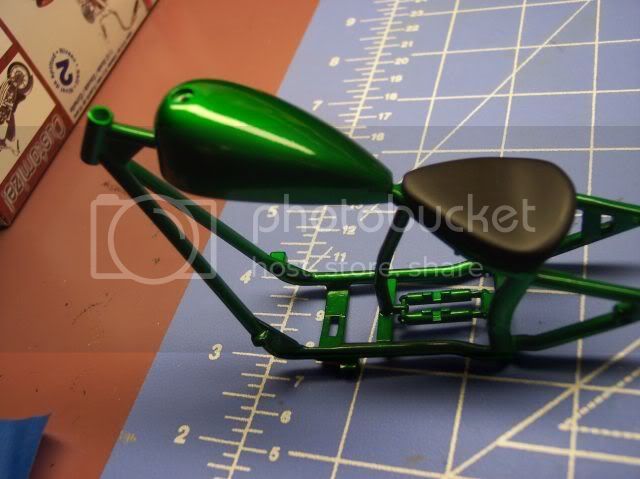
first it was painted in Model Masters Metalizer aluminum plate, once dry it was buffed out followed by 3 coats of Tamiya X-25 Clear Green.
The engine, forks and such were all de-chromed. They will be finished in Alclad chrome and other shades.
Enjoy,
Joe
More progress pics seen
here It feels like bible camp
Only Im not crying pretending Im somewhere else.
Happy Modeling
Joe
Washington, United States
Joined: September 20, 2007
KitMaker: 861 posts
Auto Modeler: 339 posts
Posted: Tuesday, October 28, 2008 - 06:17 PM UTC
That is just so flippin' cool, and I love the color. Looks great, Joe!
How did you make the intricate cuts on the rear fender?
-YL
Kobenhavn, Denmark
Joined: June 29, 2004
KitMaker: 6,760 posts
Auto Modeler: 2,182 posts
Posted: Tuesday, October 28, 2008 - 10:56 PM UTC
Very cool work so far Joe. Love the color.
On the workbench:
MPC: 1972 Pontiac GTO
Revell: 1965 Mustang
Verlinden 120mm guard of the marine.
Revell: 2010 Camaro
Monogram: 1931 Rolls Royce
Italeri: LVT2 Amtrac
North Carolina, United States
Joined: February 22, 2002
KitMaker: 11,718 posts
Auto Modeler: 408 posts
Posted: Tuesday, October 28, 2008 - 11:43 PM UTC
Nice build so far. Funny - i just watched two shows of OCC last night and woke up to this The green is cool. I bet it's 10times better in person.
Keep postin' this one's got 'legs'
New York, United States
Joined: December 07, 2004
KitMaker: 1,888 posts
Auto Modeler: 806 posts
Posted: Wednesday, October 29, 2008 - 12:42 AM UTC
Nice work so far Joe i like the pulley idea, I want to see what you use for the new belt and i like that green i wll be watching for the update on this one.
Illinois, United States
Joined: February 10, 2004
KitMaker: 2,058 posts
Auto Modeler: 310 posts
Posted: Wednesday, October 29, 2008 - 01:40 AM UTC
Sweet ride, Joe! I like the colors. The forks are a mile long! AWESOME!
Long live the anti-OOB builders!
Cuhail

Campaigns:
Stop, Look and Listen -ENDS 1-31-10
ACUTR Again-STARTS 08-18-09
What if? -STARTS 06-01-09
On the bench:
1/35 Scratchbuilt Rail Tank
New York, United States
Joined: January 29, 2004
KitMaker: 3,836 posts
Auto Modeler: 256 posts
Posted: Wednesday, October 29, 2008 - 06:29 AM UTC
Thanks guys

Yeah I was impressed with the color myself, no dust, link or hair found. No need to buff out either. I will clear coat it with future. My first choice was to use Tamiyas clear orange.... the next one.
How did you make the intricate cuts on the rear fender?
@ Yoni
first I had to find center, then drawn on paper. I then cut out one side of the design drew it on, turned it over and drew it one. Now the hard part, I scored the pattern with the hobby knife over and over. Once I got close to half way I then just chunked out small pieces at a time. Ill tell I was worried at first, if I had messed it up it was over. I would have had to scratch up a fender.
I want to see what you use for the new belt
@ Robert
the belt will be made from simple black electrical tape.
Happy Modeling,
Joe
It feels like bible camp
Only Im not crying pretending Im somewhere else.
Happy Modeling
Joe
Colorado, United States
Joined: December 25, 2004
KitMaker: 3,770 posts
Auto Modeler: 359 posts
Posted: Wednesday, October 29, 2008 - 11:09 AM UTC
Good gosh a'mighty Joe....Oooo....she's looking GOOD! The color is suhweet and the rear fendy is sharp. Really, very nice....VeRy NiCe! The more bikes I see, the more I'd like to build one!
Mike
New York, United States
Joined: January 29, 2004
KitMaker: 3,836 posts
Auto Modeler: 256 posts
Posted: Wednesday, October 29, 2008 - 05:26 PM UTC
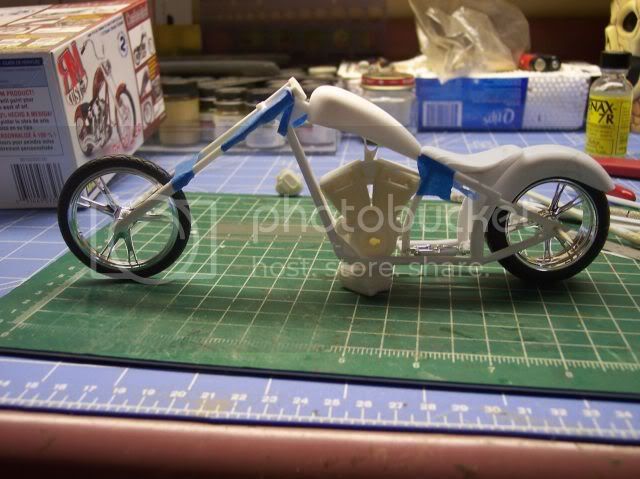
Components dry fitted, nothing glued. Unfortunately I broke the handle bar

oh well build a new one. I hope to have it finished this weekend.

Happy Modeling,
Joe
It feels like bible camp
Only Im not crying pretending Im somewhere else.
Happy Modeling
Joe
Kobenhavn, Denmark
Joined: June 29, 2004
KitMaker: 6,760 posts
Auto Modeler: 2,182 posts
Posted: Wednesday, October 29, 2008 - 10:57 PM UTC
On the workbench:
MPC: 1972 Pontiac GTO
Revell: 1965 Mustang
Verlinden 120mm guard of the marine.
Revell: 2010 Camaro
Monogram: 1931 Rolls Royce
Italeri: LVT2 Amtrac
Al Qahirah, Egypt / لعربية
Joined: July 23, 2004
KitMaker: 6,856 posts
Auto Modeler: 50 posts
Posted: Friday, October 31, 2008 - 02:14 AM UTC
It looks beautiful!
I love that green color. Is it from a spray can or a special mix that you sprayed with an air brush?
Hisham
OOPS!!! my bad.. just noticed what you wrote in the first post. It certainly turned out great.
Al Qahirah, Egypt / لعربية
Joined: July 23, 2004
KitMaker: 6,856 posts
Auto Modeler: 50 posts
Posted: Friday, October 31, 2008 - 02:21 AM UTC
Another question, if I may... how do you de-chrome parts? And what do you use to "re-chrome" them? Is there a special product for chrome plating?
Hisham
Illinois, United States
Joined: August 30, 2005
KitMaker: 3,289 posts
Auto Modeler: 1,620 posts
Posted: Saturday, November 01, 2008 - 12:20 PM UTC
Joe, I'm working with that very same chassis and front fork assy...how much longer did you extend the fork tubes{was just shy of an inch between the bottom of the triple tree and the top of the fork tube....I now have 2" worth of straight there}.
Love the back fender!!! Next cycle I do gets a "full cover with alittle sweep"...old Indian style.
I took that same tank and "V" cut it, widened 1/4" and am making a speedo with chrome tank cover insert. I still have to plumb the clutch cable...when I figure out where it goes on the tranny{never owned a harley - oops}. I'm trying to scratch a tombstone tail light too.
Also, nice touch on opening up the top of the motor mount...I shouda done that!{next one I guess}.
-I say I have two kids- one son & one daughter...my wife says she has three- one son ,one daughter and one husband.
...and don't tell yourself you can't do it....it'll just take longer then
Illinois, United States
Joined: August 30, 2005
KitMaker: 3,289 posts
Auto Modeler: 1,620 posts
Posted: Saturday, November 01, 2008 - 12:23 PM UTC
Oh, forgot to ask...did you jack the tank up on the frame - mount wise?... Or is it just not all the way down in the tabs?{don't look bad sittin that far up...}
-I say I have two kids- one son & one daughter...my wife says she has three- one son ,one daughter and one husband.
...and don't tell yourself you can't do it....it'll just take longer then
Illinois, United States
Joined: August 30, 2005
KitMaker: 3,289 posts
Auto Modeler: 1,620 posts
Posted: Saturday, November 01, 2008 - 07:09 PM UTC
Quoted Text
Another question, if I may... how do you de-chrome parts? And what do you use to "re-chrome" them? Is there a special product for chrome plating?
Hisham
Hisham, I use "castrol super clean"...soak the parts or trees{old/bad plating} for about ten minutes{maybe longer if needed} and it comes out clean. I've only had to lengthly soak only a few pieces ever...seems older plated kits take alittle longer and new rereleases the chrome falls off quickly. As far as rechroming, I like AlcladII laquer, but certain parts can be easily bare metal foiled with regular or bright chrome foil. "Regular chrome BMF" looks kinda like somewhat polished steel to me...my opinion.
...sorry joe, didn't mean to step on your toes, but I was up still...
-I say I have two kids- one son & one daughter...my wife says she has three- one son ,one daughter and one husband.
...and don't tell yourself you can't do it....it'll just take longer then
Al Qahirah, Egypt / لعربية
Joined: July 23, 2004
KitMaker: 6,856 posts
Auto Modeler: 50 posts
Posted: Saturday, November 01, 2008 - 08:59 PM UTC
Thanks for the reply, Bob.
But what is "Castrol Super Clean"? I mean, what is it usually used for and where do you buy it, so I can look for an equivalent for it here in Egypt.
Thanks again
Hisham
New York, United States
Joined: January 29, 2004
KitMaker: 3,836 posts
Auto Modeler: 256 posts
Posted: Sunday, November 02, 2008 - 06:02 AM UTC
Hello Hisham and Bob
How do you de-chrome parts? And what do you use to "re-chrome" them?
Super Clean is a great product, but I used Simply Green. Both work the same. They can be found at any auto supply store. The both are a Automotive Cleaner & Degreaser. Not only will it strip chrome its also work to remove all paints. Just soak the parts for a day and wash and rinse.
And what do you use to "re-chrome" them?
Well I was going to use Alclad paints but I was unable to get my hands on some. So I went with Model Masters Metalizer Stainless Steel. You have to make sure the parts are sanded smooth before using metalizer paints or the scratches will show. I used a 1000 grit paper for my final sanding then a coat of future floor wax. I sprayed on the metalizer using a airbrush, let dry and buffed out with a soft t-shirt.
Bob I think I extended the fork about ¾ of an inch. It wasnt all that much. As for the tank
I didnt install all the way down onto the frame.
Your chopper is looking good itself, nice work on widening the tank and scratching the sidecar.
I just finished my chopper last night, I plan on posting pics later today.
Happy Modeling,
Joe
It feels like bible camp
Only Im not crying pretending Im somewhere else.
Happy Modeling
Joe
New York, United States
Joined: January 29, 2004
KitMaker: 3,836 posts
Auto Modeler: 256 posts
Posted: Sunday, November 02, 2008 - 09:00 AM UTC
It feels like bible camp
Only Im not crying pretending Im somewhere else.
Happy Modeling
Joe
Illinois, United States
Joined: August 30, 2005
KitMaker: 3,289 posts
Auto Modeler: 1,620 posts
Posted: Sunday, November 02, 2008 - 09:31 AM UTC
I like the electrical tape belt...I thought about making teeth on the pulleys...then laughed and made a center guard!
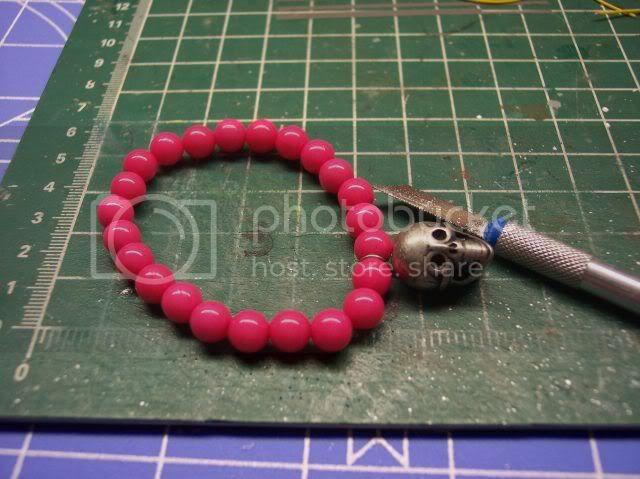
Nice bar end weights...occasionally harleys can vibrate...or so I've heard.

Where's you get the braided stainless line?!....I need some that size{had to do the rubber black rubber line look for lack of anything else to use}.
Oh, Joe - that rattle can paint I have has only one can with the price still on it...$5.50 for that one. Figure ballpark $16ish dollars for all the needed three. And, that triple change color spray is the only color combo they have...all the rest are single or two tone flips. Still nice paint for the money-
Speaking of money -- For all who read this thread...I've come to find out that the "RM Custom" cycle kits{revell germany} are the same kits as the regular US revell...except they cost more{shipping from germany}...try and find yourselves the regular revell kits and save alittle cash. Too late for some of us....
-I say I have two kids- one son & one daughter...my wife says she has three- one son ,one daughter and one husband.
...and don't tell yourself you can't do it....it'll just take longer then
European Union
Joined: November 23, 2006
KitMaker: 35 posts
Auto Modeler: 1 posts
Posted: Monday, November 03, 2008 - 01:43 AM UTC
SUPER
Dirk
Ohio, United States
Joined: December 13, 2005
KitMaker: 153 posts
Auto Modeler: 47 posts
Posted: Monday, November 03, 2008 - 08:08 AM UTC
Fantastic paint--really sets the bike off.
Currently working on:
RPM Minenraumer
Revell 1940 Ford coupe
Revell 1929 Model A pickup
Amt Batwing
Tamiya T-55
Revell Rat Fink figure
North Carolina, United States
Joined: February 22, 2002
KitMaker: 11,718 posts
Auto Modeler: 408 posts
Posted: Monday, November 03, 2008 - 12:31 PM UTC
Great build. If you want MG could put an OD up for a general On Display feature.
Alberta, Canada
Joined: January 19, 2008
KitMaker: 6,743 posts
Auto Modeler: 64 posts
Posted: Wednesday, March 25, 2009 - 05:04 AM UTC
Looks good Joe , paint job turn out really well .
England - South East, United Kingdom
Joined: January 11, 2003
KitMaker: 4,307 posts
Auto Modeler: 231 posts
Posted: Wednesday, March 25, 2009 - 09:13 AM UTC
Looks good Joe. I have the "Aces Wild" kit that I bought for my daughter to try, and now she's leaving home without building it you and Terri have inspired me to build it myself.
I fancy a dirty, tatty 'rat' to put alongside the showroom Manx Norton that I have on my shelf.
Bulldog#3
Grumpy Old Modeller No1
Growing old disgracefully!
Illinois, United States
Joined: August 30, 2005
KitMaker: 3,289 posts
Auto Modeler: 1,620 posts
Posted: Wednesday, March 25, 2009 - 01:50 PM UTC
Quoted Text
I fancy a dirty, tatty 'rat' to put alongside the showroom Manx Norton that I have on my shelf.
...oh, so your going to build an old honda then?...........
-I say I have two kids- one son & one daughter...my wife says she has three- one son ,one daughter and one husband.
...and don't tell yourself you can't do it....it'll just take longer then