British Columbia, Canada
Joined: March 16, 2010
KitMaker: 473 posts
Auto Modeler: 257 posts
Posted: Saturday, September 17, 2016 - 01:21 AM UTC
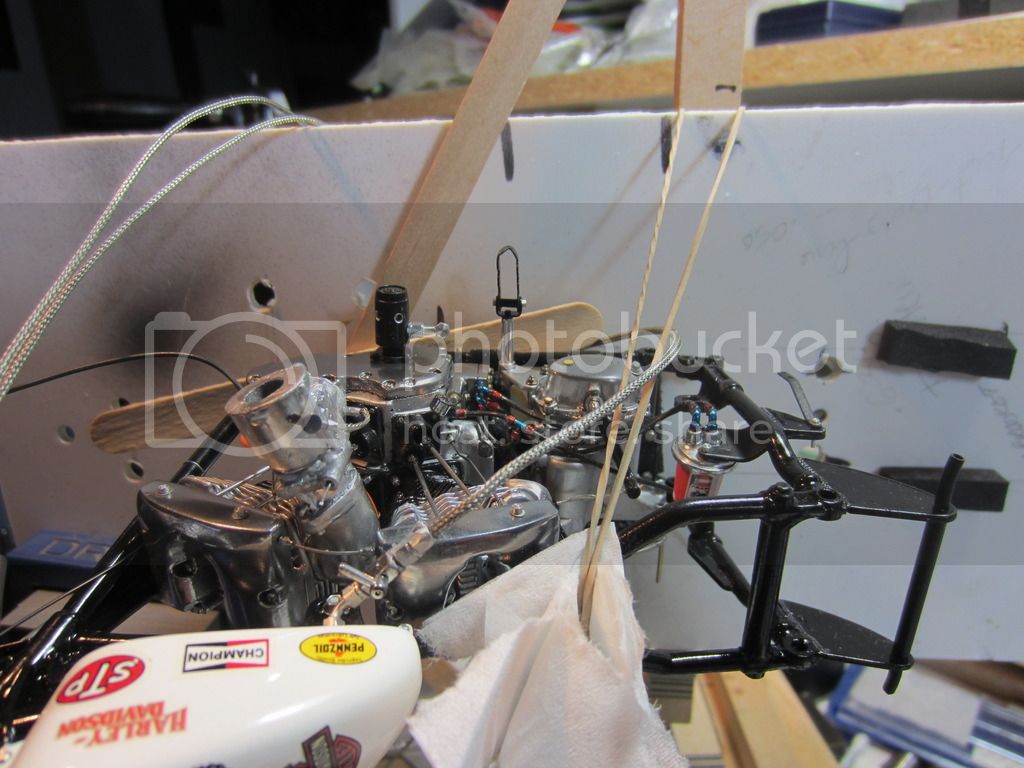
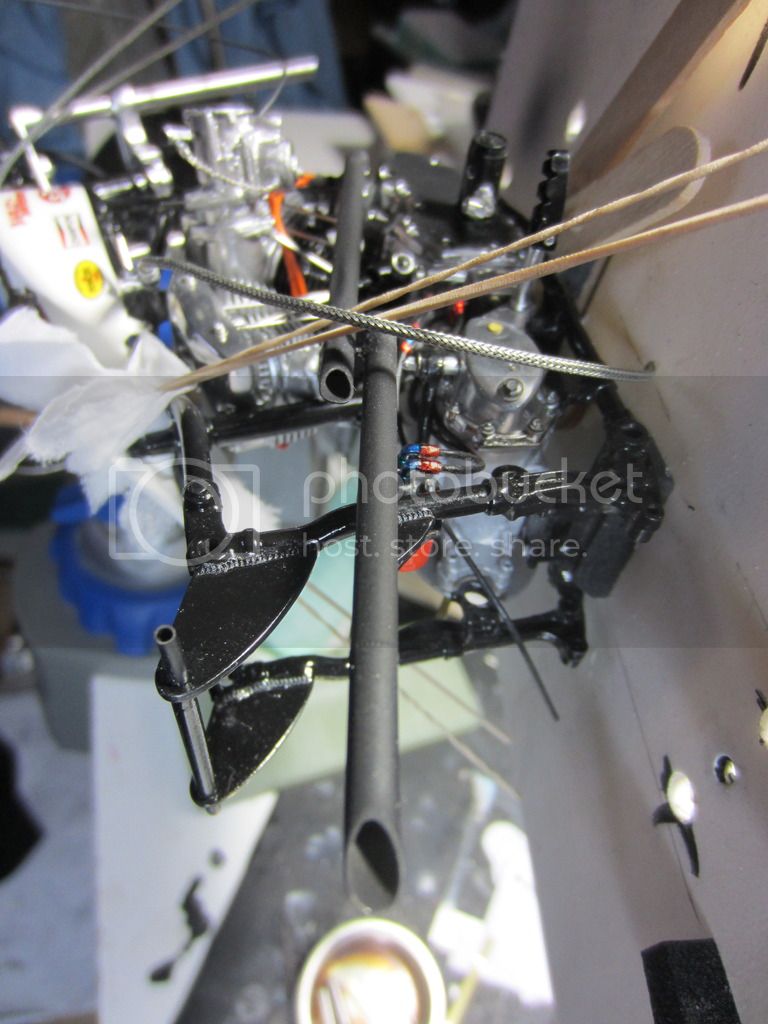
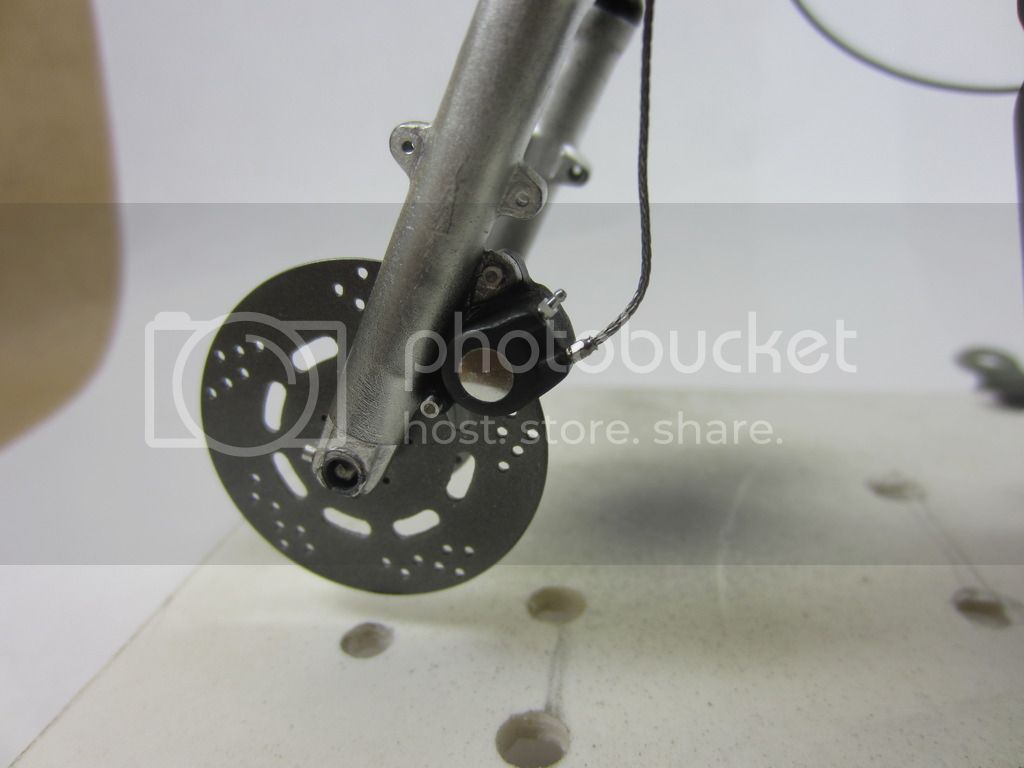
...and the front brake line:
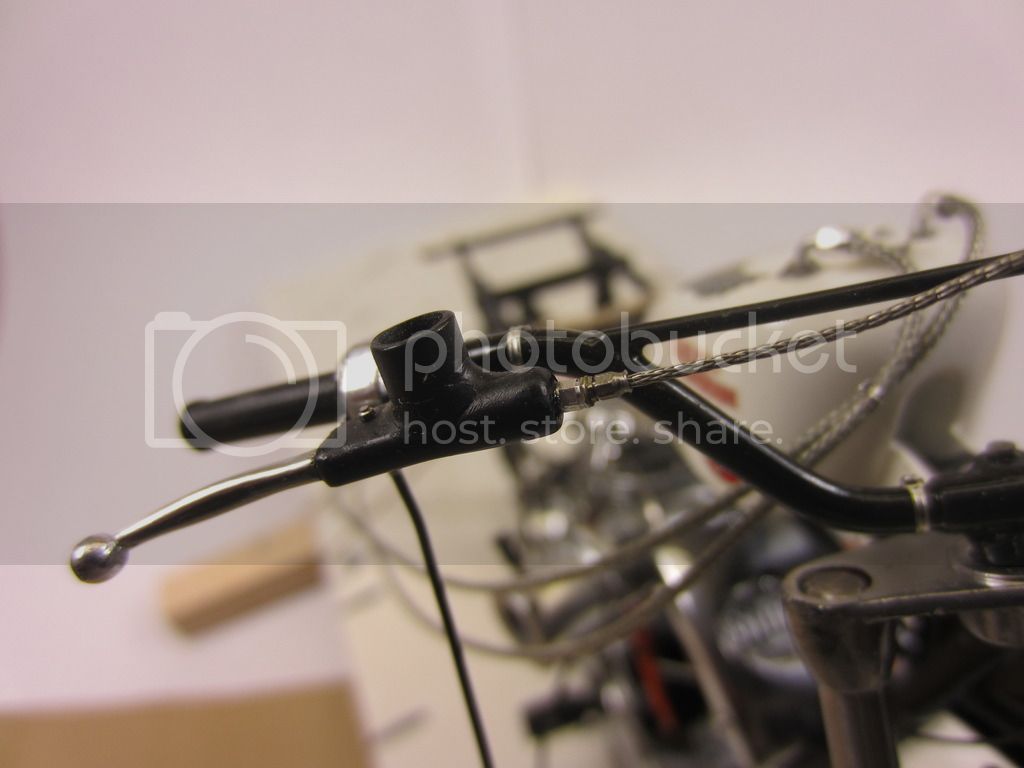
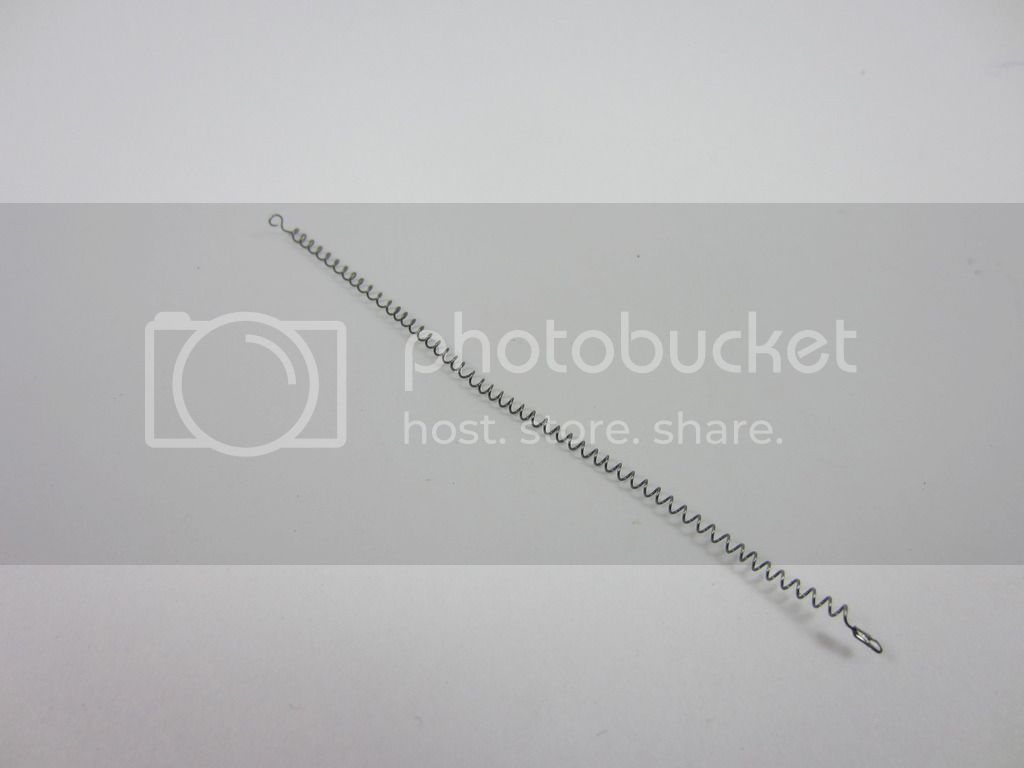
As well as the lanyard that connects the rider to the machine , and kills the machine in the case of rider ejection:
fbook : Custom Motorcycle Modeler Page
Thank you , Steve
British Columbia, Canada
Joined: March 16, 2010
KitMaker: 473 posts
Auto Modeler: 257 posts
Posted: Saturday, September 17, 2016 - 10:41 PM UTC
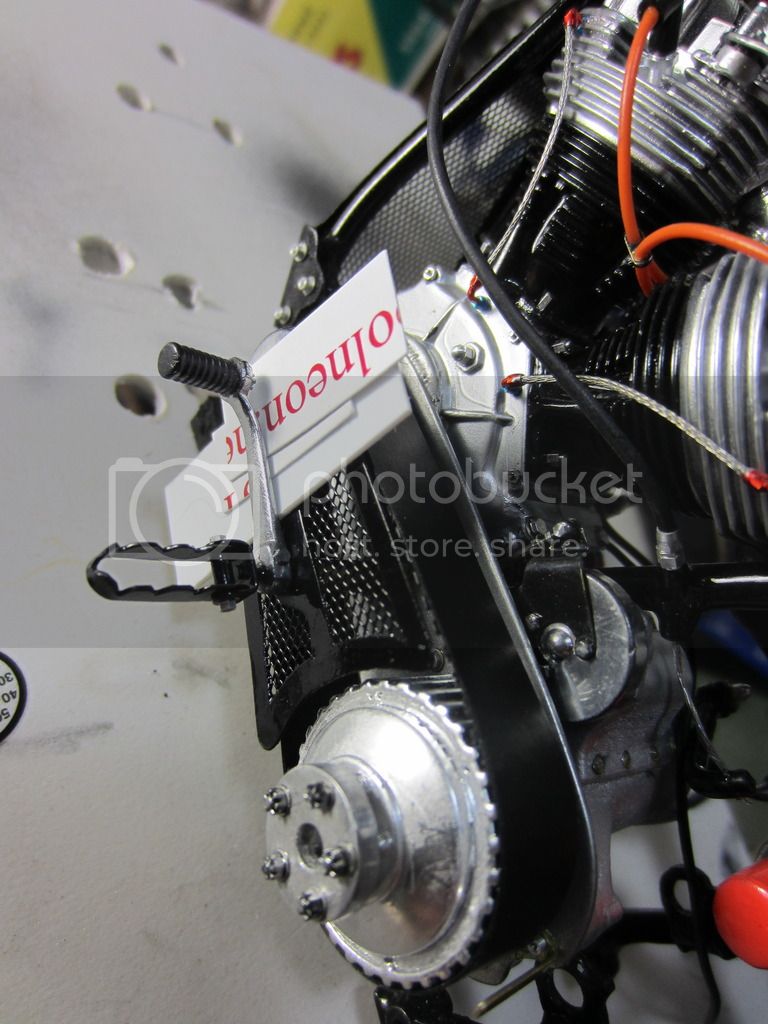
Vertical integration allows footpeg alignment:
fbook : Custom Motorcycle Modeler Page
Thank you , Steve
British Columbia, Canada
Joined: March 16, 2010
KitMaker: 473 posts
Auto Modeler: 257 posts
Posted: Sunday, September 18, 2016 - 12:03 AM UTC
And exhaust pipe fitment begins:
fbook : Custom Motorcycle Modeler Page
Thank you , Steve
British Columbia, Canada
Joined: March 16, 2010
KitMaker: 473 posts
Auto Modeler: 257 posts
Posted: Sunday, September 18, 2016 - 08:17 AM UTC
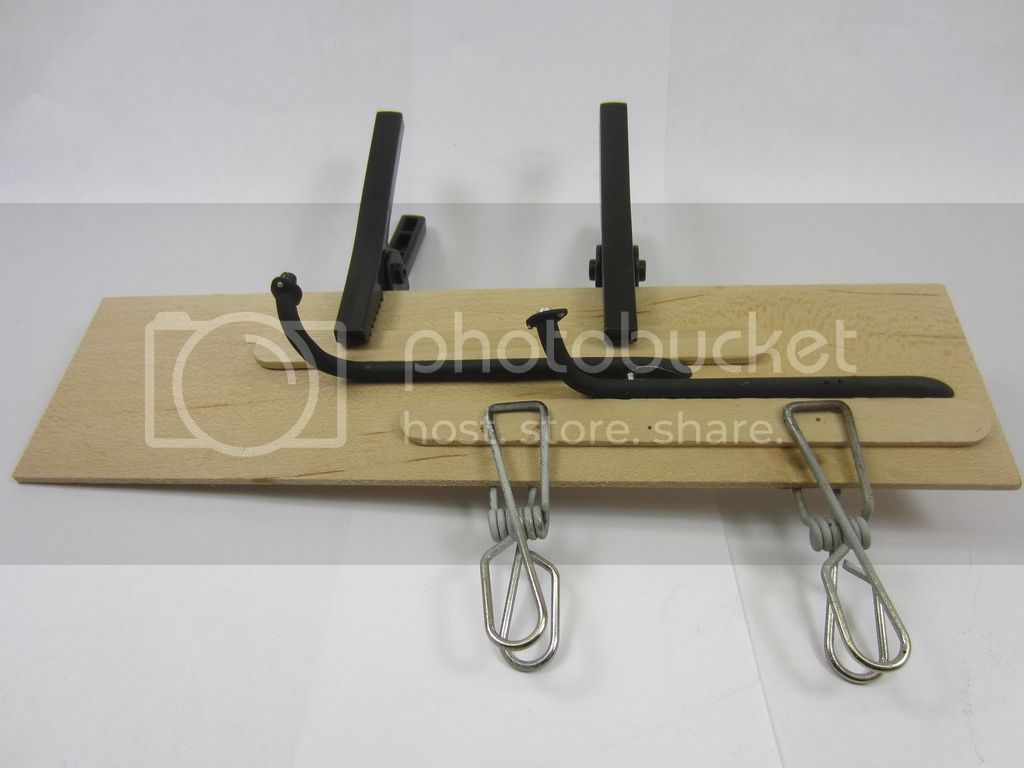
Pipe lineup tricky , so a little simple jig set up to keep the pipes semi-straight while the epoxy dries:
fbook : Custom Motorcycle Modeler Page
Thank you , Steve
British Columbia, Canada
Joined: March 16, 2010
KitMaker: 473 posts
Auto Modeler: 257 posts
Posted: Sunday, September 18, 2016 - 12:17 PM UTC
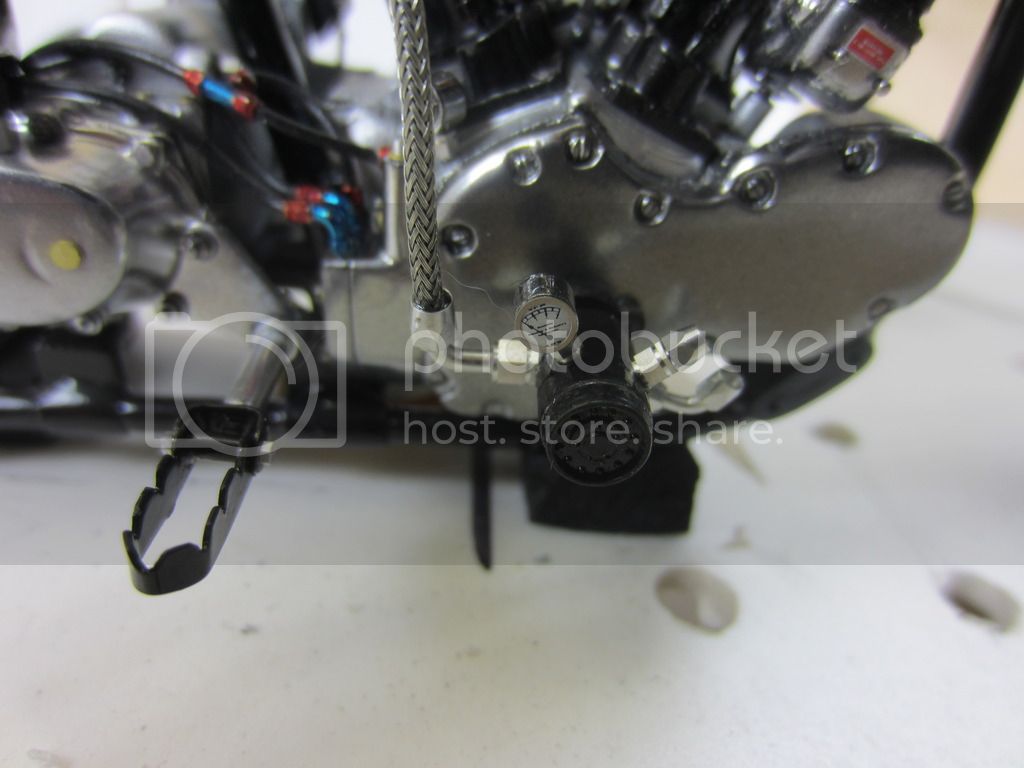
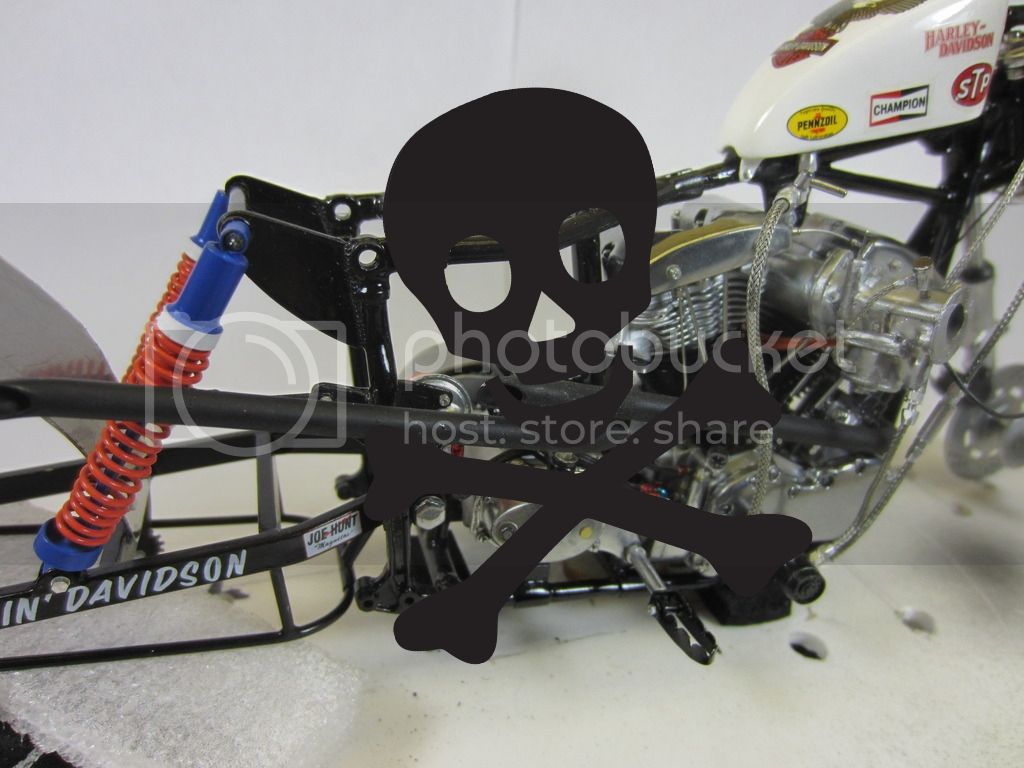
Best procedure appears to be to mount all of the fittings for the fuel lines etc, first then fit the lines. So the pump gets a gauge , a feed a tank return and a carb feed , the carb gets a return fitting and a feed:
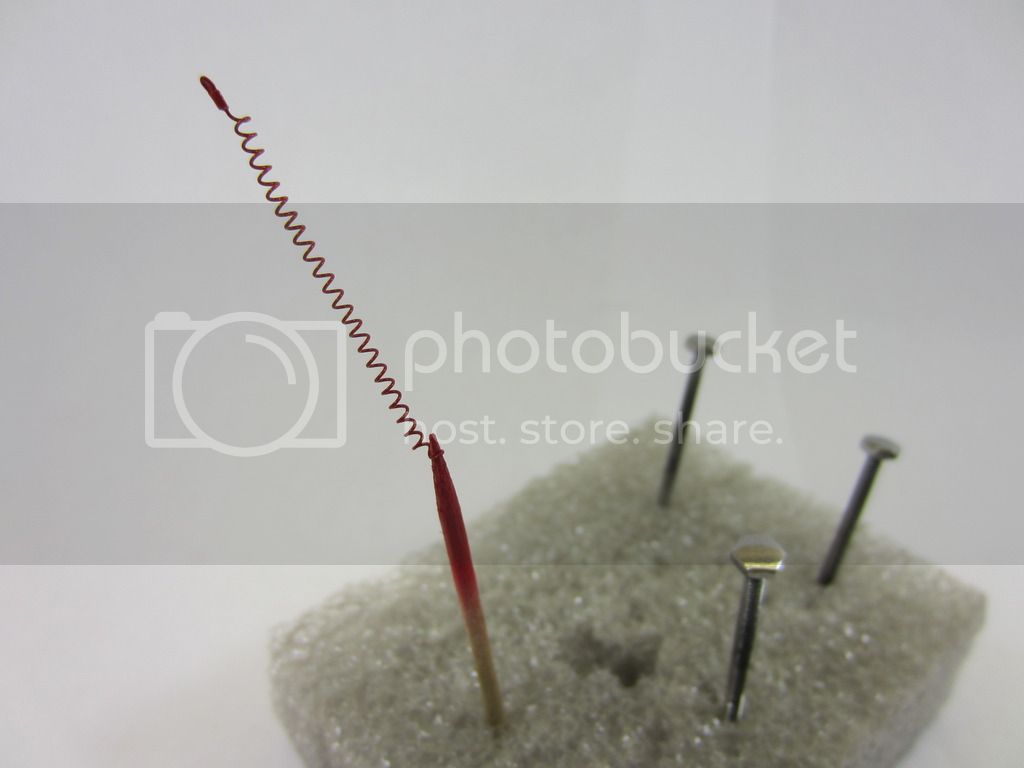
And the axles and swingarm bolt get chromed, the kill lanyard gets red:
fbook : Custom Motorcycle Modeler Page
Thank you , Steve
British Columbia, Canada
Joined: March 16, 2010
KitMaker: 473 posts
Auto Modeler: 257 posts
Posted: Monday, September 19, 2016 - 12:53 AM UTC
Pipes get mounted:
fbook : Custom Motorcycle Modeler Page
Thank you , Steve
British Columbia, Canada
Joined: March 16, 2010
KitMaker: 473 posts
Auto Modeler: 257 posts
Posted: Wednesday, September 21, 2016 - 11:34 AM UTC
Rear fender and strut mated to the swingarm:
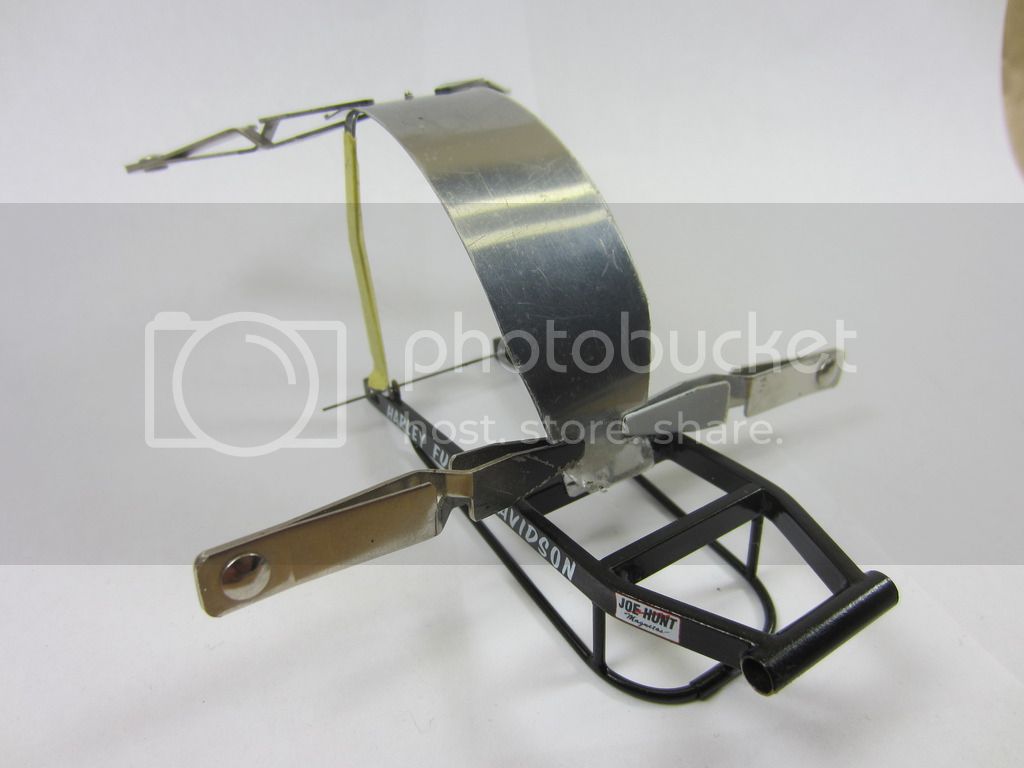
Exhaust mounting completed , and the fuel system ahs one more connection to complete:

Going well at 9500.
fbook : Custom Motorcycle Modeler Page
Thank you , Steve
British Columbia, Canada
Joined: March 16, 2010
KitMaker: 473 posts
Auto Modeler: 257 posts
Posted: Thursday, September 22, 2016 - 02:44 AM UTC
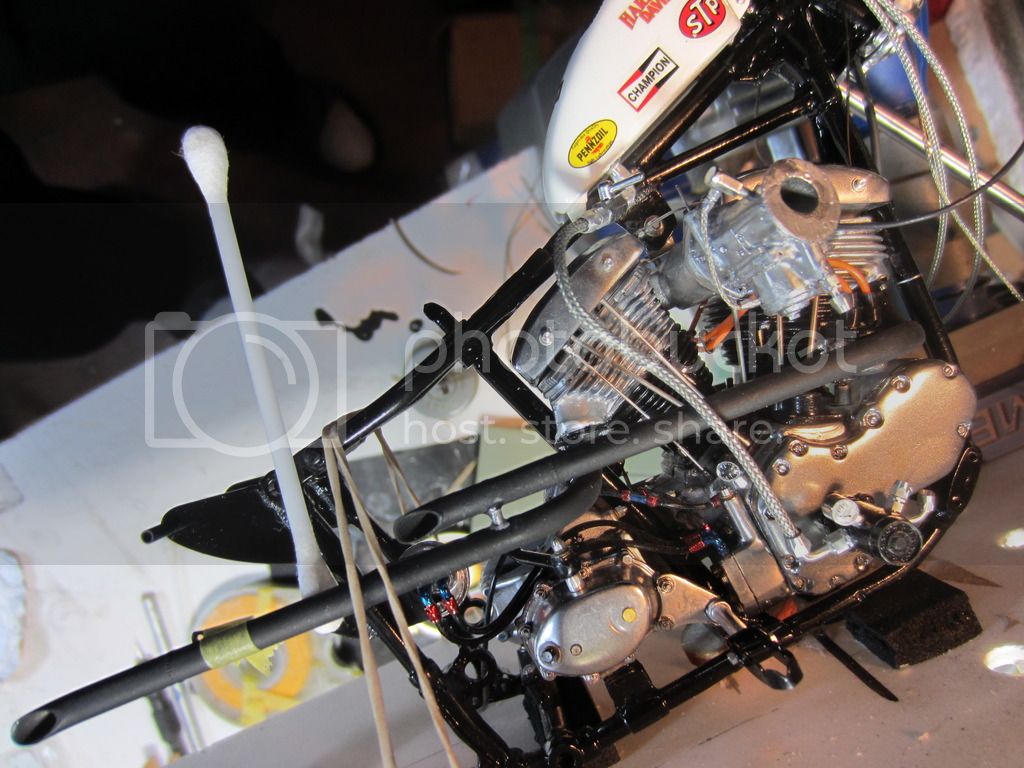
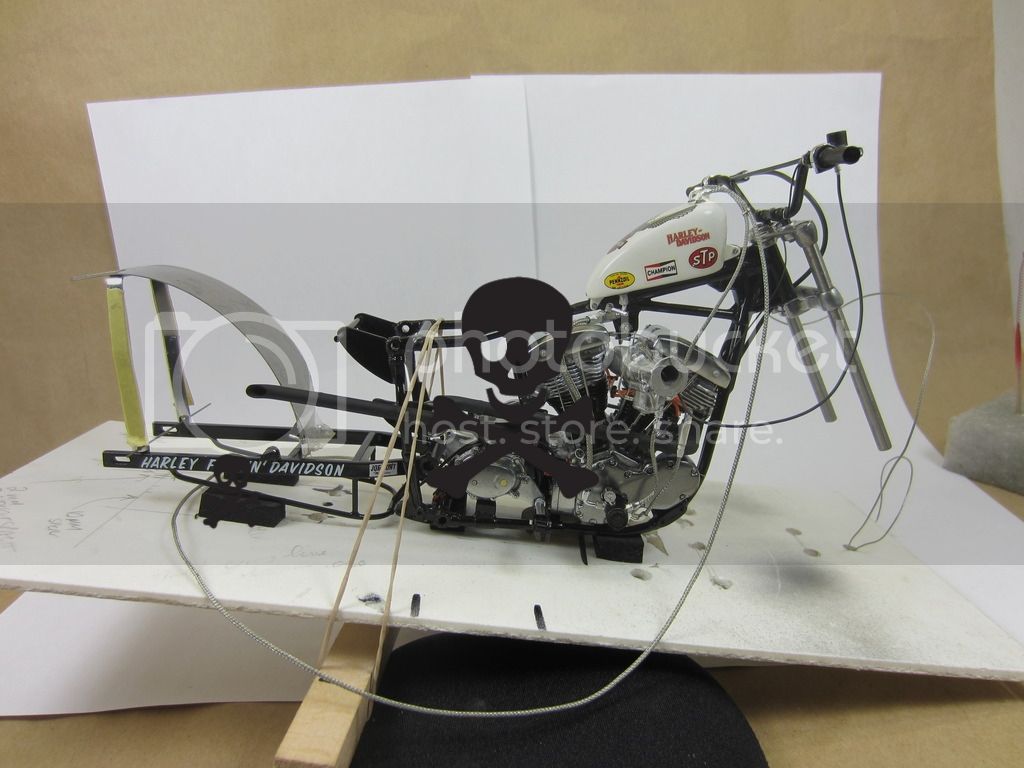
Test fitting tomfoolery:
fbook : Custom Motorcycle Modeler Page
Thank you , Steve
British Columbia, Canada
Joined: March 16, 2010
KitMaker: 473 posts
Auto Modeler: 257 posts
Posted: Thursday, September 22, 2016 - 06:14 AM UTC
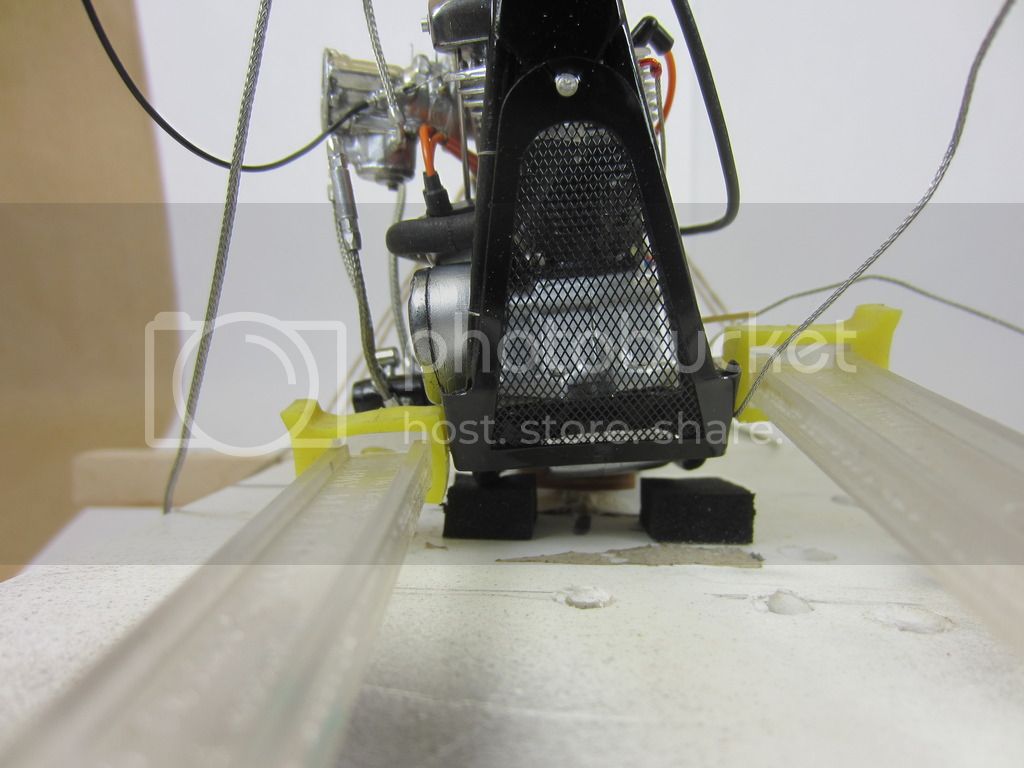
Grilled:
fbook : Custom Motorcycle Modeler Page
Thank you , Steve
British Columbia, Canada
Joined: March 16, 2010
KitMaker: 473 posts
Auto Modeler: 257 posts
Posted: Thursday, September 22, 2016 - 10:11 AM UTC
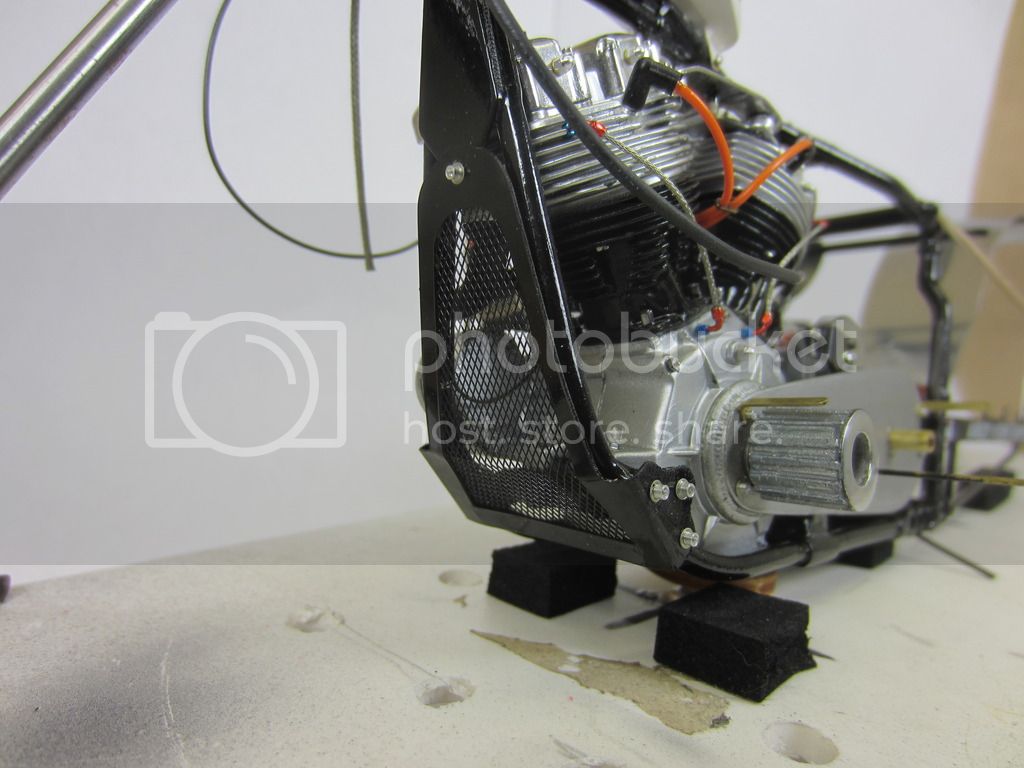
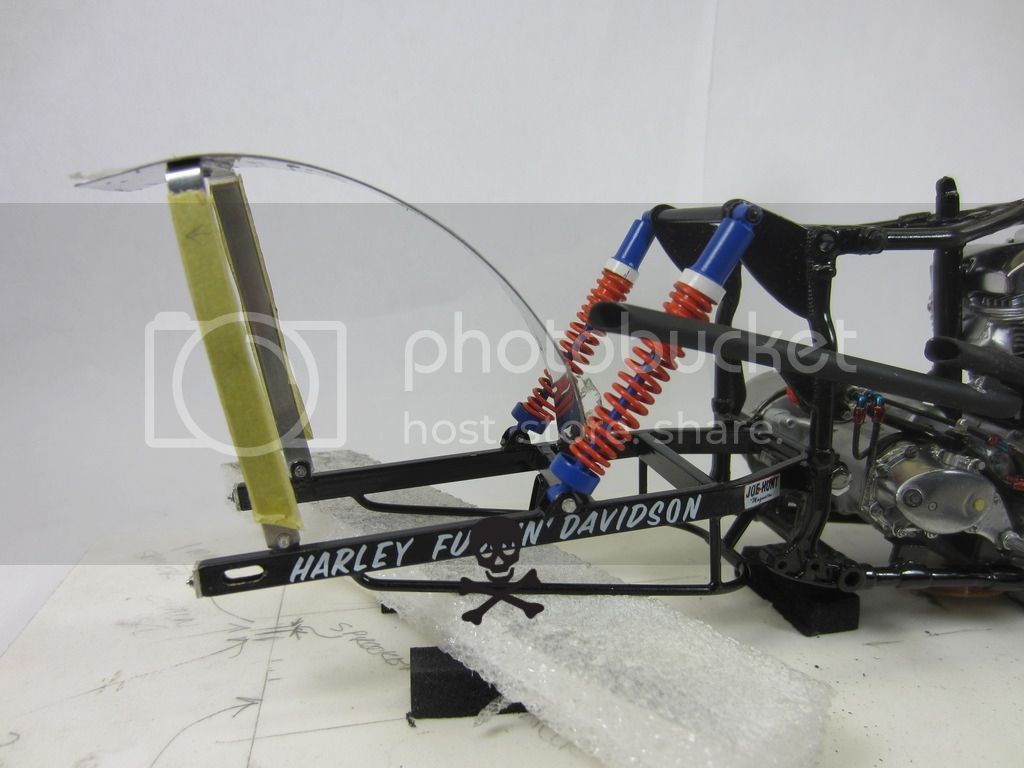
Front grill in place with hardware:
fbook : Custom Motorcycle Modeler Page
Thank you , Steve
British Columbia, Canada
Joined: March 16, 2010
KitMaker: 473 posts
Auto Modeler: 257 posts
Posted: Friday, September 23, 2016 - 11:54 PM UTC
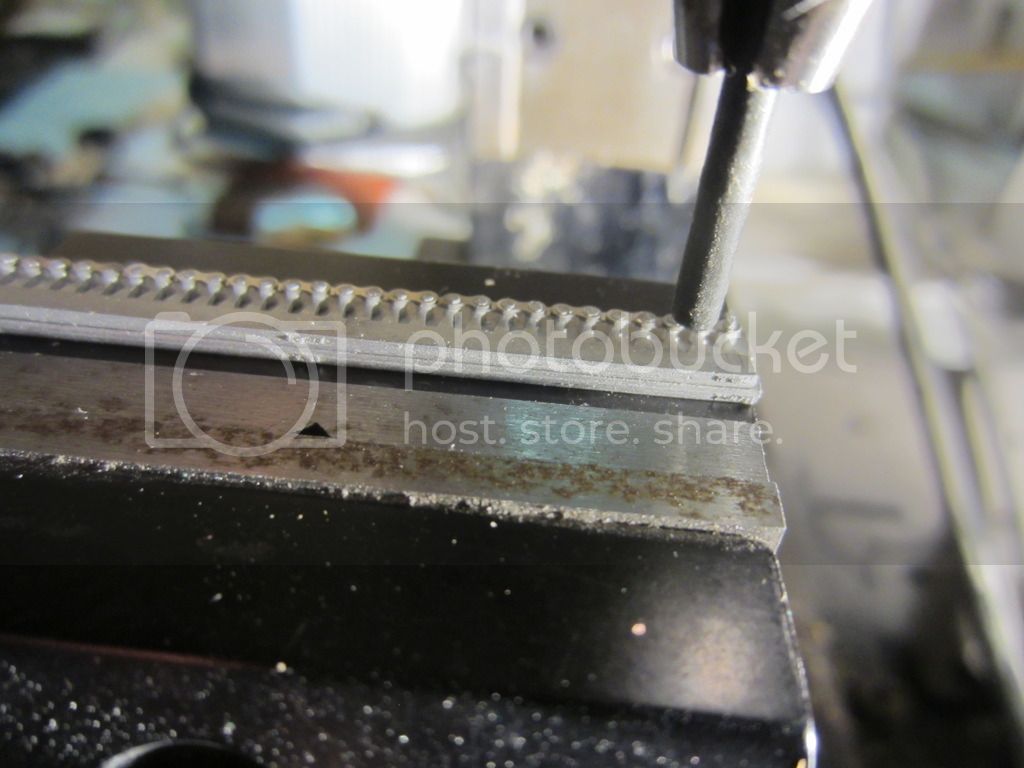
Bad news first my chain assy tools and parts have turned out to be unworkable. I wont go into the details as I' already pi$$ed enough!
Good news is my 1/9 Brough kit , with a white metal and p/e chain set works on my sprockets and has been substituted for the useless parts. MFH offers these separate now so 2 more ordered to make up the extended Hillclimber chain.
Chain assy in progress:
fbook : Custom Motorcycle Modeler Page
Thank you , Steve
British Columbia, Canada
Joined: March 16, 2010
KitMaker: 473 posts
Auto Modeler: 257 posts
Posted: Saturday, September 24, 2016 - 05:42 AM UTC
20 - 30 minutes per section , 4 sections make an 8 inch Hillclimber chain:
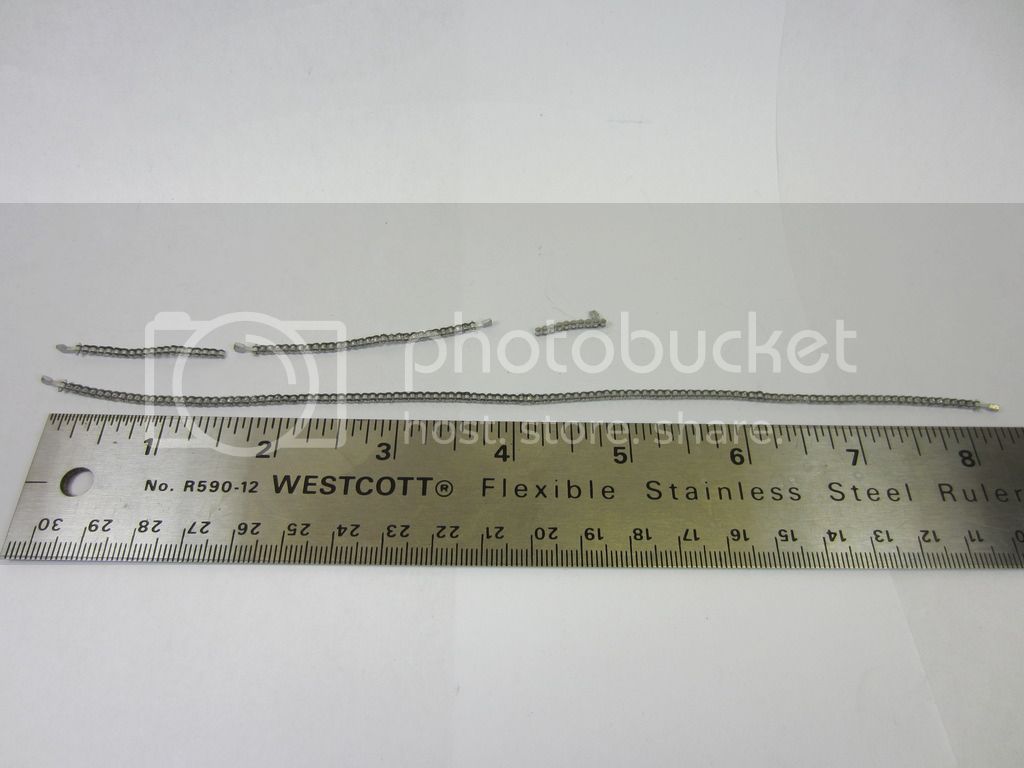
Solves a big headache- thanks MFH!
fbook : Custom Motorcycle Modeler Page
Thank you , Steve
British Columbia, Canada
Joined: March 16, 2010
KitMaker: 473 posts
Auto Modeler: 257 posts
Posted: Saturday, September 24, 2016 - 11:10 AM UTC
Naturally chain run and wheel spacing follows:
Everything looks good work can progress in the rear wheel dept.
fbook : Custom Motorcycle Modeler Page
Thank you , Steve
British Columbia, Canada
Joined: March 16, 2010
KitMaker: 473 posts
Auto Modeler: 257 posts
Posted: Sunday, September 25, 2016 - 01:03 AM UTC
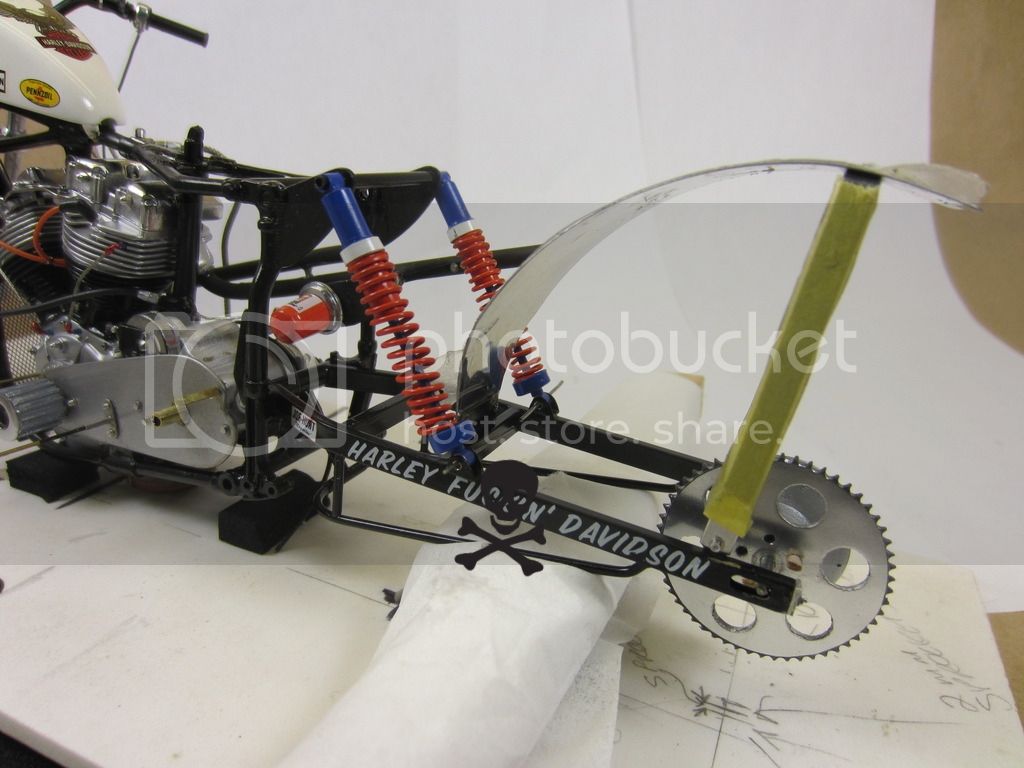
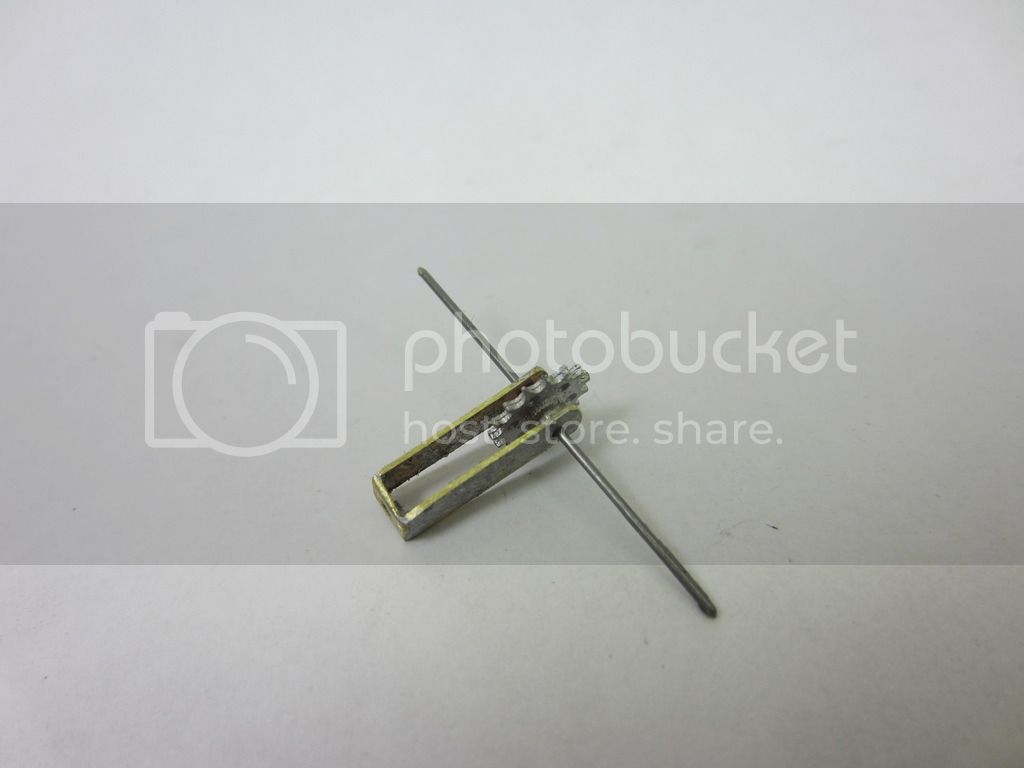
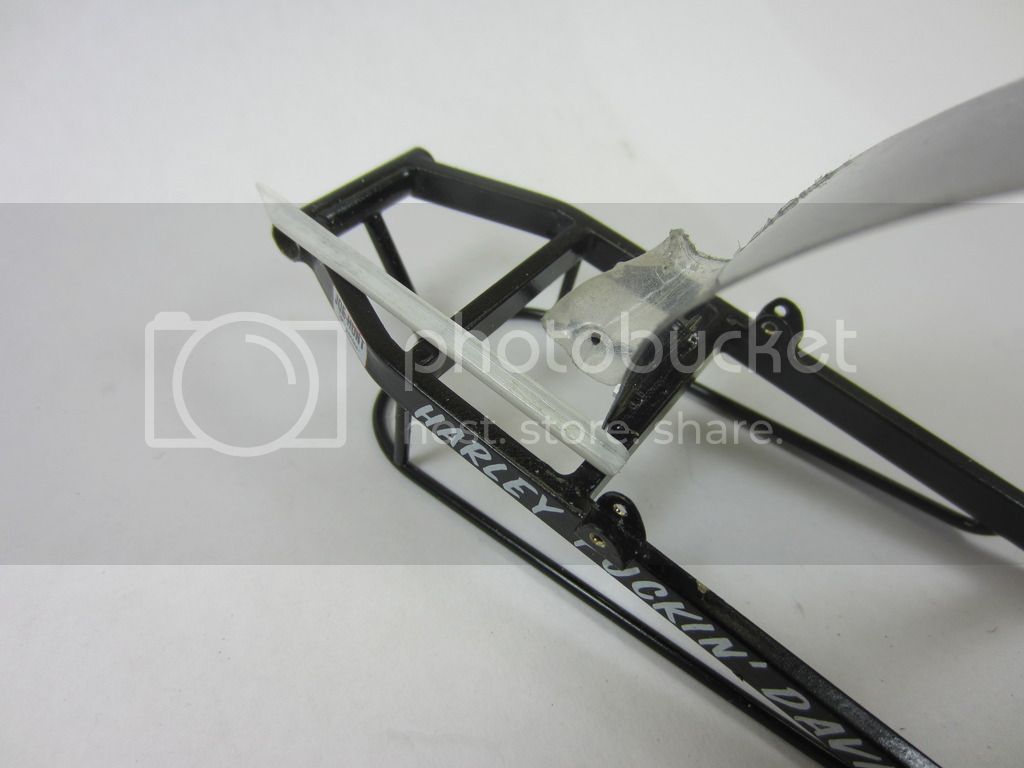
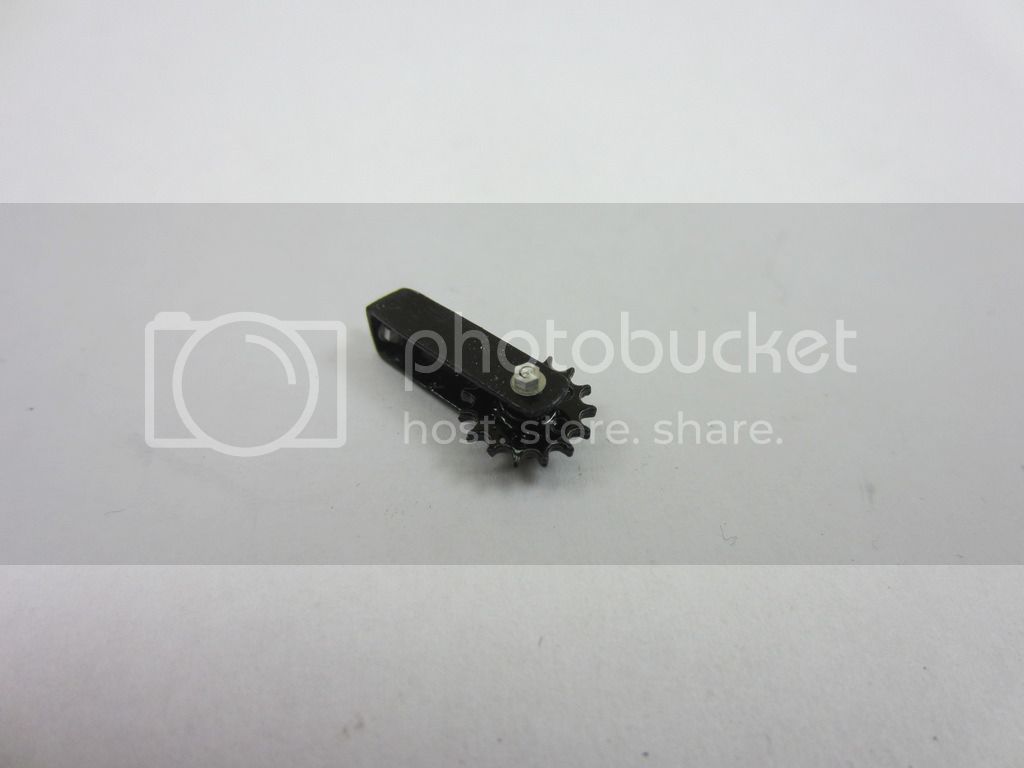
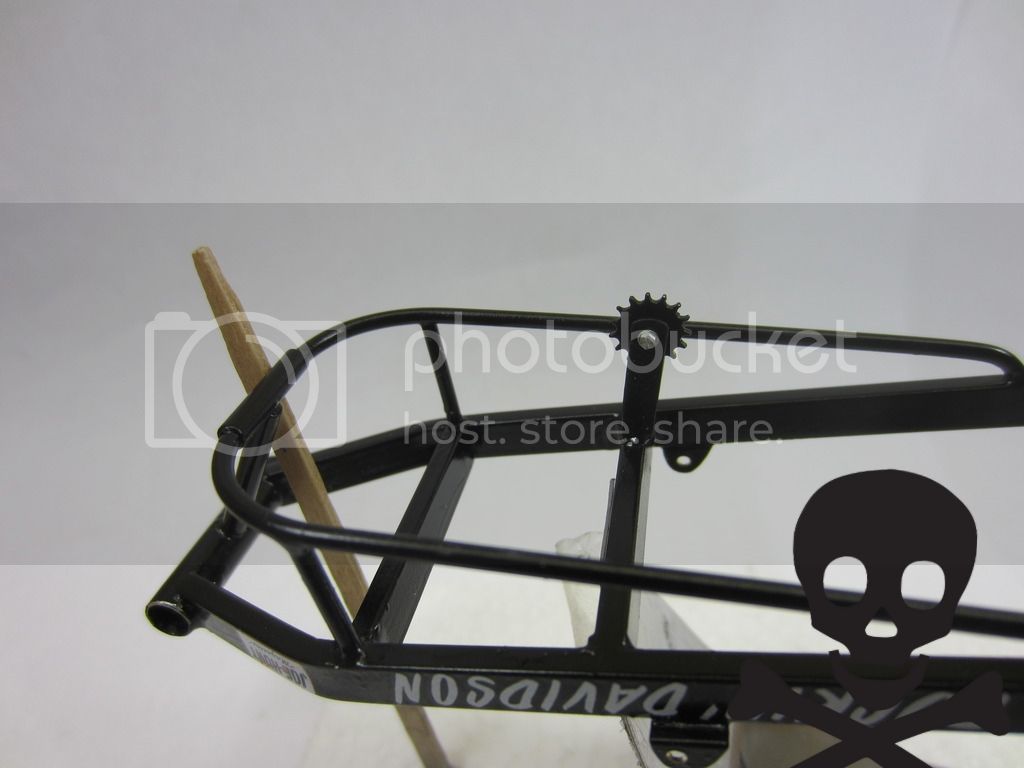
An extended swingarm/chain run would need a guide, usually underneath close to the rear sprocket. Here is one with a leftover sprocket, this will keep the chain in line on its way to the wheel sprocket:
On top it the chain run would need a Teflon pad or guide, as the chain is loose until the rider is on board and power is applied. Here is one out of plastic box section:
fbook : Custom Motorcycle Modeler Page
Thank you , Steve
British Columbia, Canada
Joined: March 16, 2010
KitMaker: 473 posts
Auto Modeler: 257 posts
Posted: Sunday, September 25, 2016 - 12:03 PM UTC
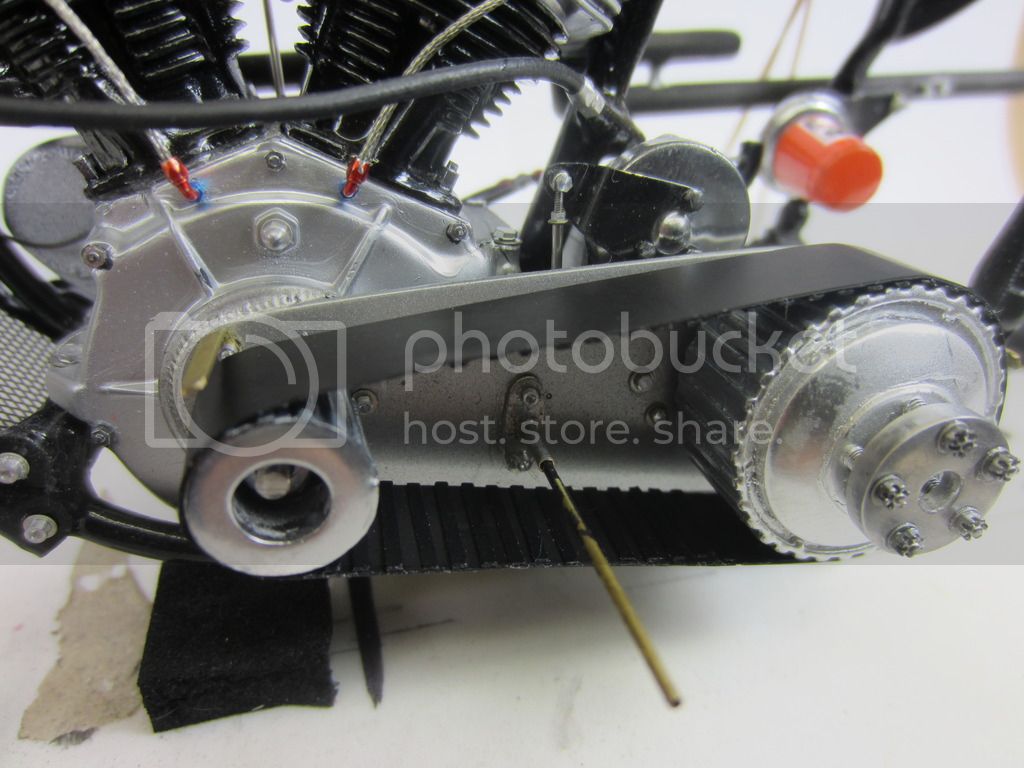
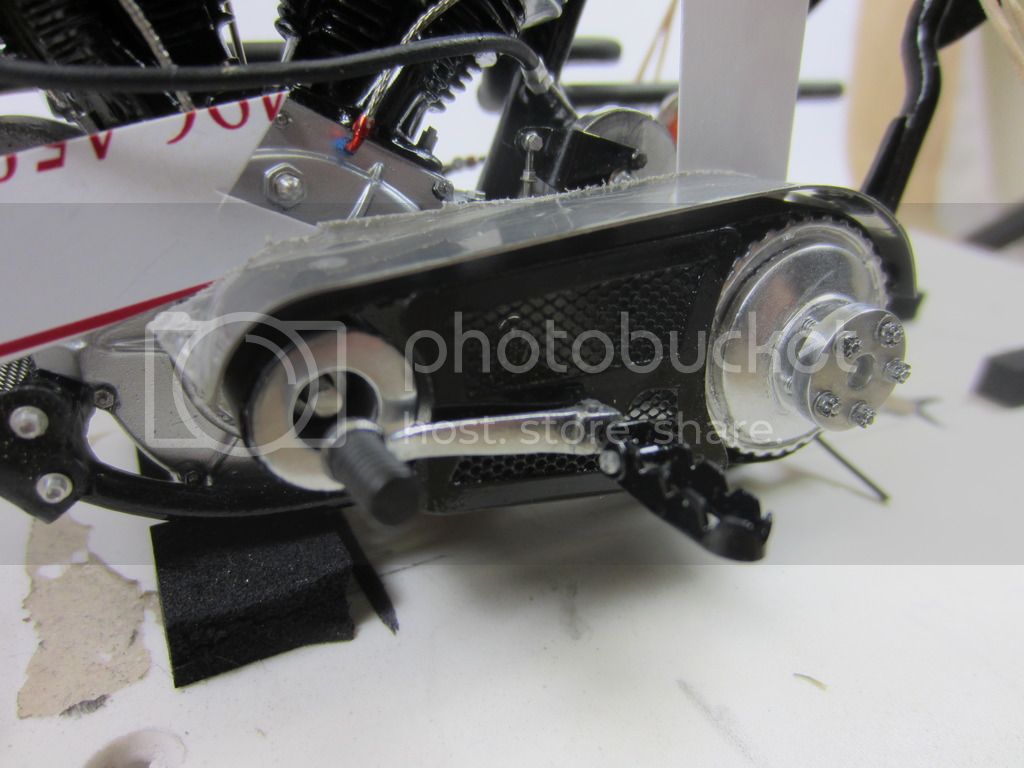
Primary drive pully's and belt on , inner tooth detail added:
fbook : Custom Motorcycle Modeler Page
Thank you , Steve
Namabiiru
 Associate Editor
#399
Rhode Island, United States
Joined: March 05, 2014
KitMaker: 2,888 posts
Auto Modeler: 32 posts
Posted: Sunday, September 25, 2016 - 04:54 PM UTC
Really starting to shape up, Steve. Looks fantastic!
Out of curiosity, roughly what percentage of the mass of this thing is actually metal, rather than plastic/resin/etc.?

British Columbia, Canada
Joined: March 16, 2010
KitMaker: 473 posts
Auto Modeler: 257 posts
Posted: Sunday, September 25, 2016 - 09:44 PM UTC
The piece has all metal wheels, top motor mount , primary drive top cover , primary plate , entire swingarm , exhaust pipes , fork tubes , handlebars , rear fender , axles , swingarm bolt , shocks , footpegs , clutch collar and fuel pump are all metal of some type.
Thanks for your interest and having the jam tarts to comment.
fbook : Custom Motorcycle Modeler Page
Thank you , Steve
British Columbia, Canada
Joined: March 16, 2010
KitMaker: 473 posts
Auto Modeler: 257 posts
Posted: Monday, September 26, 2016 - 02:42 AM UTC
Assy progess':
Playin' the duck on wheel work...
fbook : Custom Motorcycle Modeler Page
Thank you , Steve
British Columbia, Canada
Joined: March 16, 2010
KitMaker: 473 posts
Auto Modeler: 257 posts
Posted: Monday, September 26, 2016 - 11:29 PM UTC
Velocity stack and chain run guide get some work:

fbook : Custom Motorcycle Modeler Page
Thank you , Steve
British Columbia, Canada
Joined: March 16, 2010
KitMaker: 473 posts
Auto Modeler: 257 posts
Posted: Tuesday, September 27, 2016 - 02:48 AM UTC
Primary drive complete to the detail wash stage:
And the chain guide gets mounted:
fbook : Custom Motorcycle Modeler Page
Thank you , Steve
British Columbia, Canada
Joined: March 16, 2010
KitMaker: 473 posts
Auto Modeler: 257 posts
Posted: Tuesday, September 27, 2016 - 07:48 AM UTC
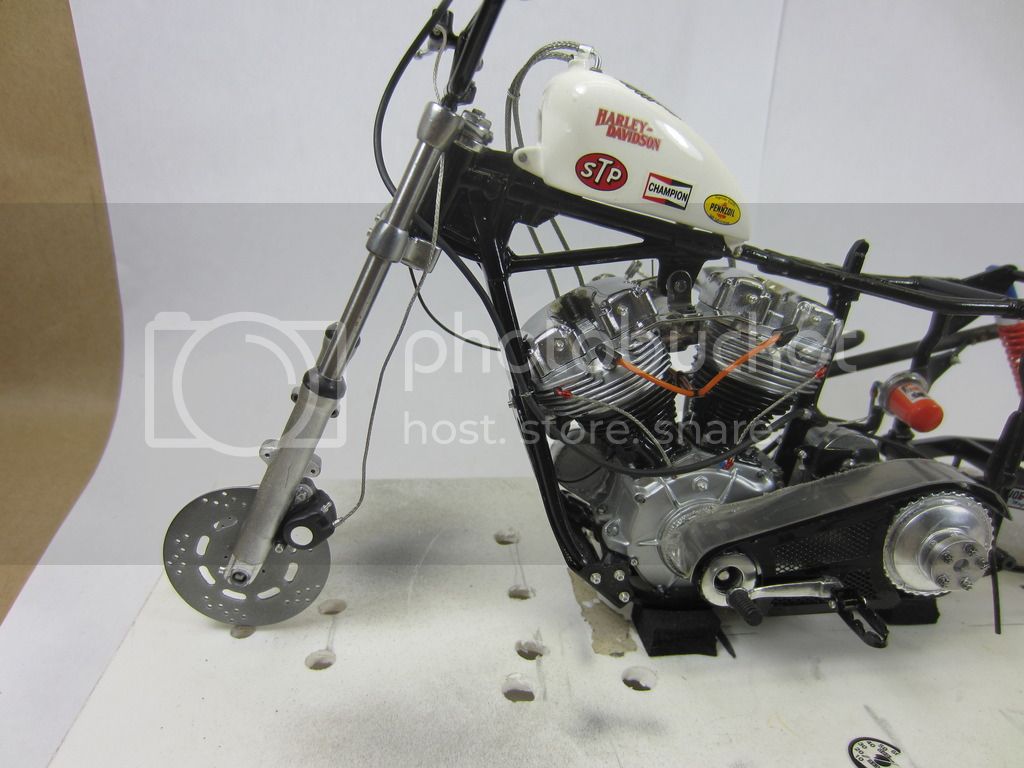
Forking progress:

fbook : Custom Motorcycle Modeler Page
Thank you , Steve
British Columbia, Canada
Joined: March 16, 2010
KitMaker: 473 posts
Auto Modeler: 257 posts
Posted: Tuesday, September 27, 2016 - 09:35 AM UTC
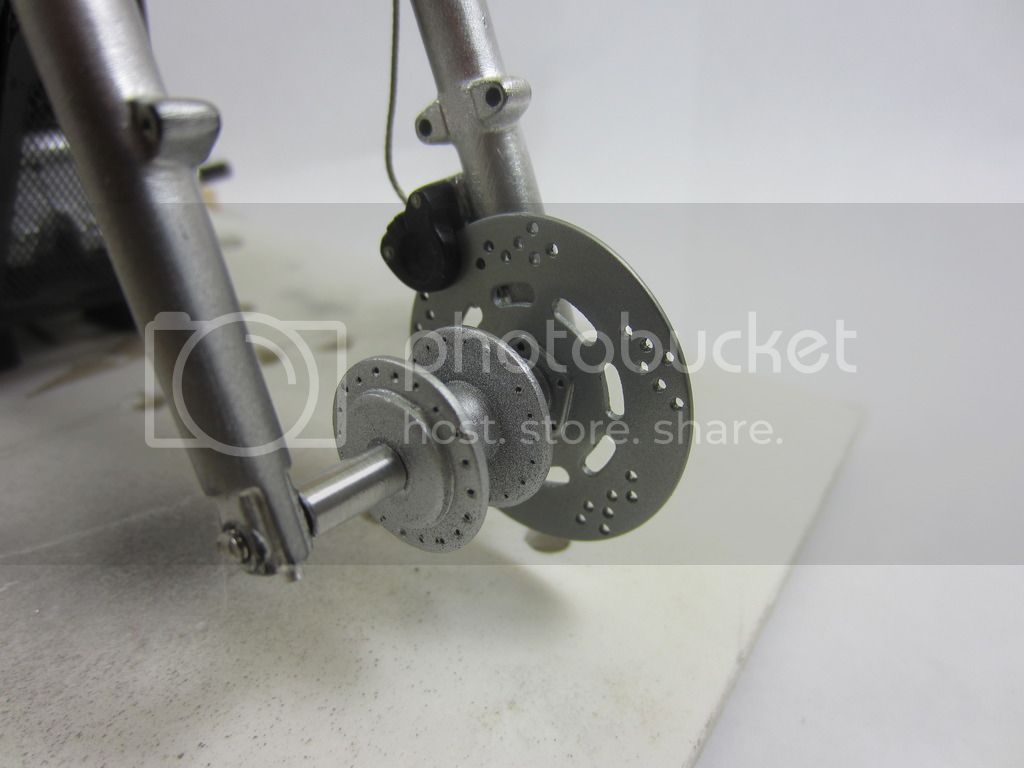
Rotor and caliper matrix aligned, as well as wheel spacing:
fbook : Custom Motorcycle Modeler Page
Thank you , Steve
British Columbia, Canada
Joined: March 16, 2010
KitMaker: 473 posts
Auto Modeler: 257 posts
Posted: Wednesday, September 28, 2016 - 03:07 AM UTC
Final assy in progress for the next few days. Rims are painted and drying , wheel spacing done. I will shortly have a chassis sans wheels. This is good.
This thread will be sealed off within 2 weeks so get some now!!
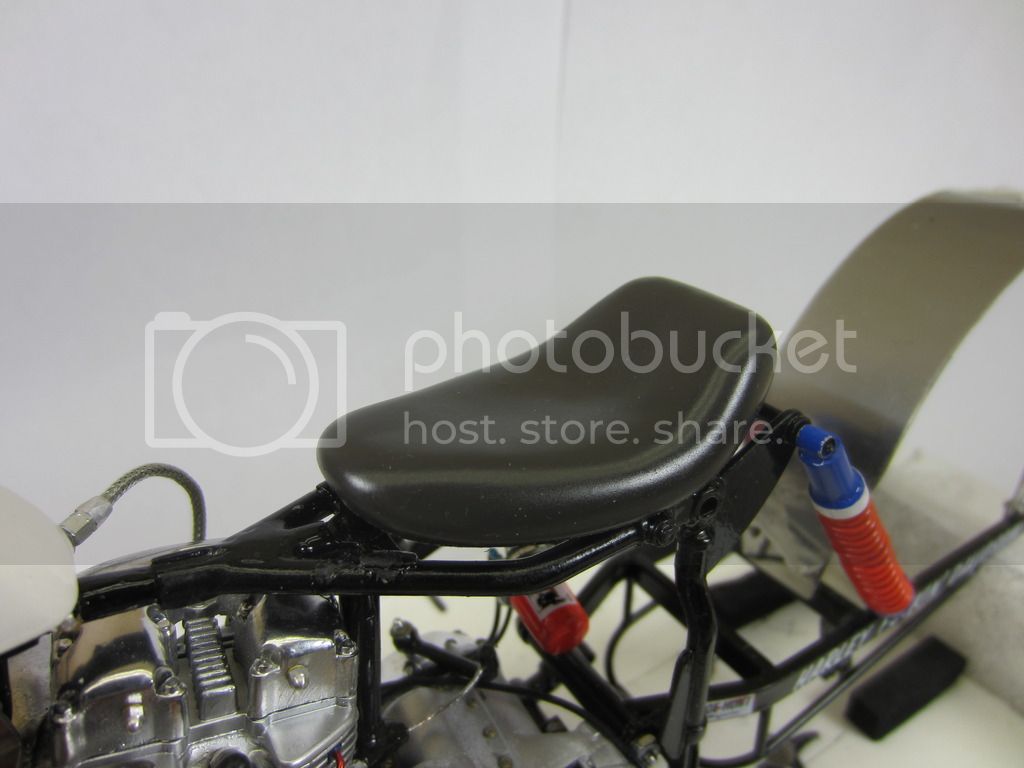
Test fitting repeatedly on a Frankenstien piece of this nature is by far the best advice. I feel huge strain & stress
as I move through installing the final parts on the as it is, having to modify at the last minute is hair-raising to say the least.
So the seat plopped on without much fanfare or panty-knotting:
fbook : Custom Motorcycle Modeler Page
Thank you , Steve
British Columbia, Canada
Joined: March 16, 2010
KitMaker: 473 posts
Auto Modeler: 257 posts
Posted: Thursday, September 29, 2016 - 12:23 AM UTC
10,000
Pretty good for a 'sickle blog.
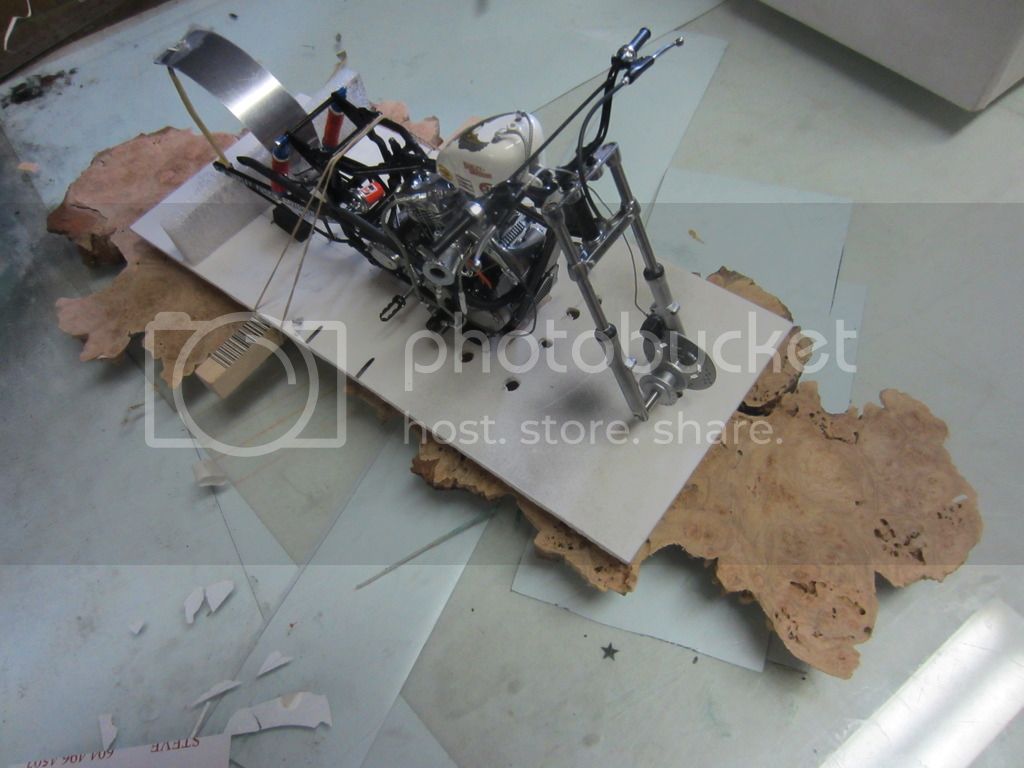
Wasn't gonna go too fancy on the base, but a quick check of my burl stock and I found this:
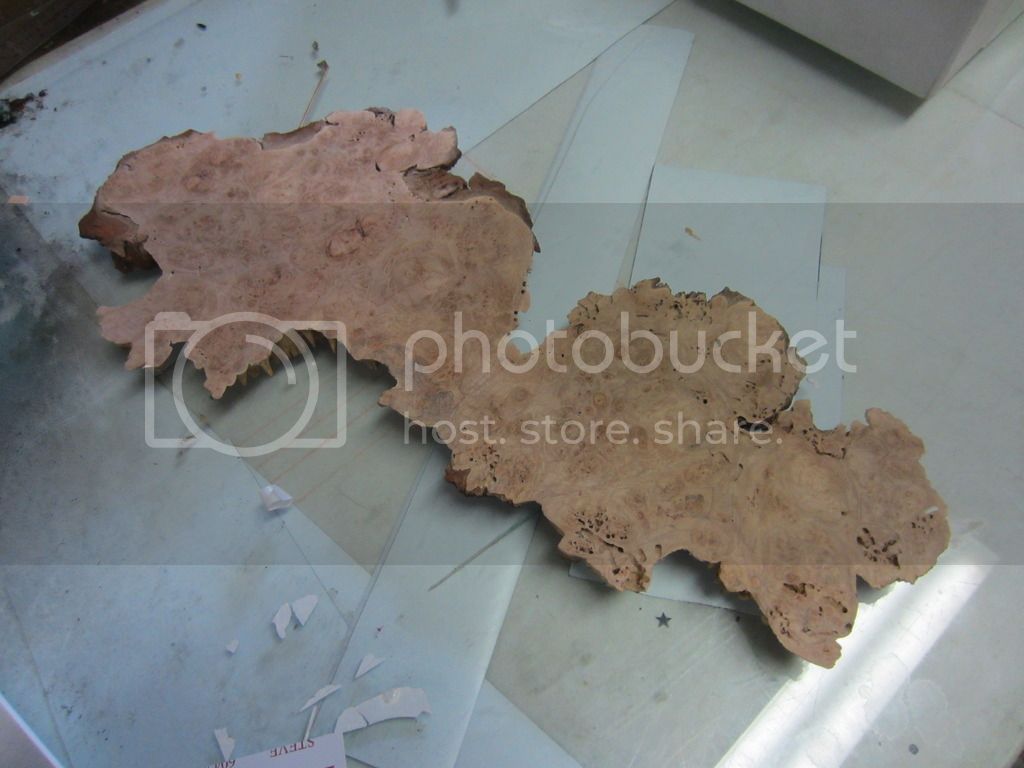
Locally sourced birds eye maple burl , planed and sanded , I'll be soaking it in polyurethane clear to bring out the detail.
Checking:
fbook : Custom Motorcycle Modeler Page
Thank you , Steve
Florida, United States
Joined: May 14, 2012
KitMaker: 730 posts
Auto Modeler: 14 posts
Posted: Thursday, September 29, 2016 - 02:02 AM UTC
Just chkd in again and went back thru the pgs for a refresh.
Wadda fr'kn Masterpiece Steve, thanks for posting.
I, for one, would be interested in any marketing you may be heading for.
Cheers
Dave

"No beast so fierce but knows some touch of pity.
But I know none, and therefore am no beast."


