Group Build - People Movers
England - South East, United Kingdom
Joined: January 11, 2003
KitMaker: 4,307 posts
Auto Modeler: 231 posts
Posted: Saturday, April 13, 2013 - 10:45 PM UTC
Bulldog#3
Grumpy Old Modeller No1
Growing old disgracefully!

#226
British Columbia, Canada
Joined: February 20, 2012
KitMaker: 1,909 posts
Auto Modeler: 118 posts
Posted: Sunday, April 14, 2013 - 10:35 AM UTC
Dave,
That looks like it will be a showstopper when done.

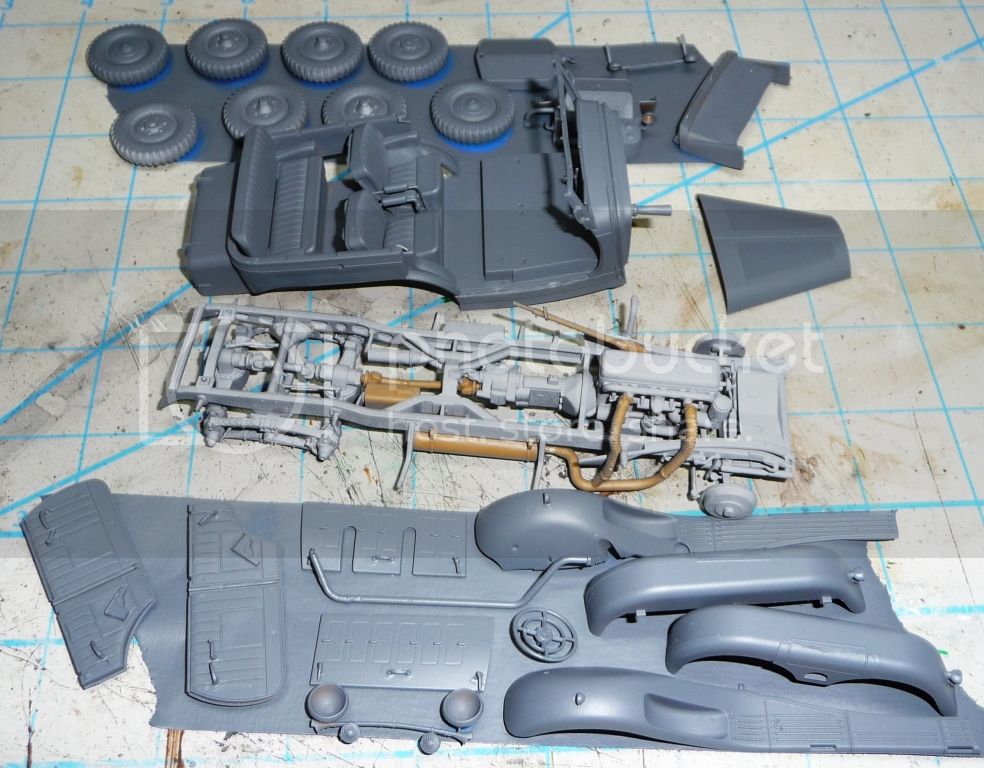
Got started on mine, mostly just cleaning up the body and some assembly of the engine. The kit comes with two types of panels for the lower rear I want to use the scoop on the drivers side as that is where the air intake is, but that part does not fit right so I will have to cut out the scoop and add it to the other panel. More work but will look much better in the end.
Cheers Rob.

Anything without guns is a target!
27 completed campaigns and counting :)
England - South East, United Kingdom
Joined: January 11, 2003
KitMaker: 4,307 posts
Auto Modeler: 231 posts
Posted: Friday, April 19, 2013 - 09:51 PM UTC
Bulldog#3
Grumpy Old Modeller No1
Growing old disgracefully!
Istanbul, Turkey / Türkçe
Joined: December 05, 2007
KitMaker: 953 posts
Auto Modeler: 157 posts
Posted: Saturday, April 20, 2013 - 09:35 AM UTC
Good work Dave...

Maryland, United States
Joined: February 25, 2013
KitMaker: 209 posts
Auto Modeler: 11 posts
Posted: Monday, April 22, 2013 - 01:39 AM UTC
Dave that looks great!
No pictures yet but I finally finished a couple other projects and while I await my tamiya spray bombs to be delivered I have started sub-assembly construction for my Ford Focus
I settled on a Midnight Blue Metallic and I am going to paint the aftermarket ground effects in gun-metal to go with the composite roof decal that came with the kit. I am going for the effect of a stock Focus that has been modified piece-meal by a teenager, so I will probably leave off the uber-ridiculous wing that is shown on the boxtop model.
Scotland, United Kingdom
Joined: February 15, 2013
KitMaker: 1,273 posts
Auto Modeler: 207 posts
Posted: Monday, April 22, 2013 - 09:11 AM UTC
Istanbul, Turkey / Türkçe
Joined: December 05, 2007
KitMaker: 953 posts
Auto Modeler: 157 posts
Posted: Monday, April 22, 2013 - 11:24 AM UTC
'57...

Good luck Peter...
Scotland, United Kingdom
Joined: February 15, 2013
KitMaker: 1,273 posts
Auto Modeler: 207 posts
Posted: Tuesday, April 23, 2013 - 02:37 AM UTC
Cheers Hakan, I am looking at a scrapyard 57 tho, 1st time I've destroyed a model before I start it lol

New York, United States
Joined: March 08, 2010
KitMaker: 3,662 posts
Auto Modeler: 29 posts
Posted: Tuesday, April 23, 2013 - 07:31 AM UTC
Dave great job looks awesome
Peter 57 Chevy I think I built that kit as a kid looking forward to seeing what you do with it

Some progress, ready for some paint before assembly can continue
Active Campaigns on the bench:
Operation Fall Gelb - Pz.Kpfw. IV Ausf. C
Engineering the Future - M-26 Recovery Vehicle
115 Campaigns completed
#226
British Columbia, Canada
Joined: February 20, 2012
KitMaker: 1,909 posts
Auto Modeler: 118 posts
Posted: Saturday, April 27, 2013 - 11:58 PM UTC
Some body work,

found a small mis formed corner.
Cheers Rob.

Anything without guns is a target!
27 completed campaigns and counting :)
New York, United States
Joined: March 08, 2010
KitMaker: 3,662 posts
Auto Modeler: 29 posts
Posted: Thursday, May 02, 2013 - 03:21 PM UTC
Slow progress
Had some trouble getting the wheels to stay on

Active Campaigns on the bench:
Operation Fall Gelb - Pz.Kpfw. IV Ausf. C
Engineering the Future - M-26 Recovery Vehicle
115 Campaigns completed
Scotland, United Kingdom
Joined: February 15, 2013
KitMaker: 1,273 posts
Auto Modeler: 207 posts
Posted: Monday, May 06, 2013 - 04:53 AM UTC
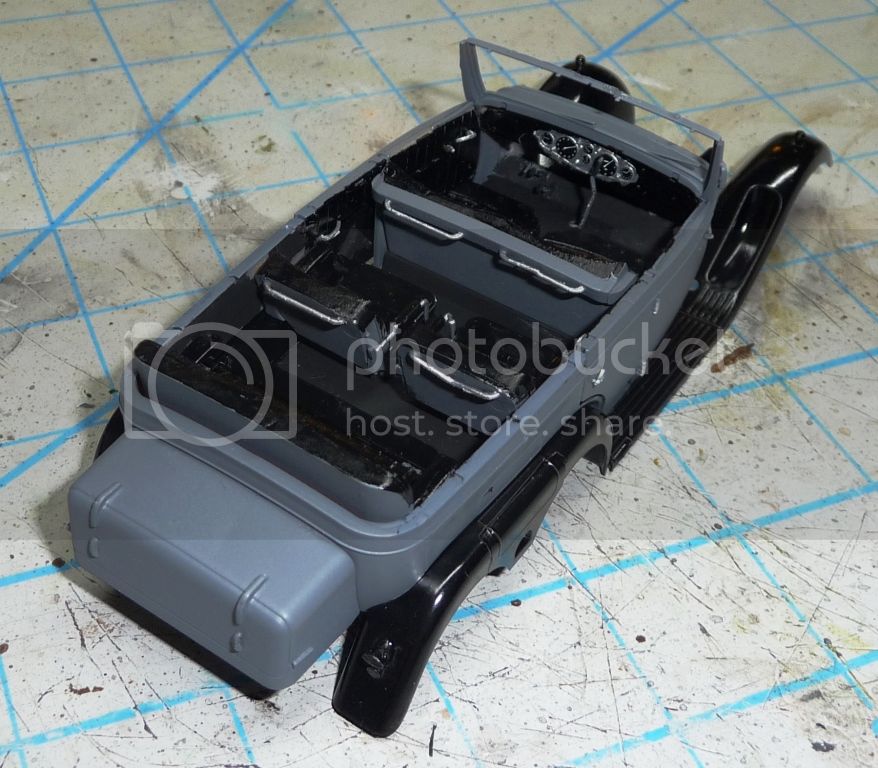
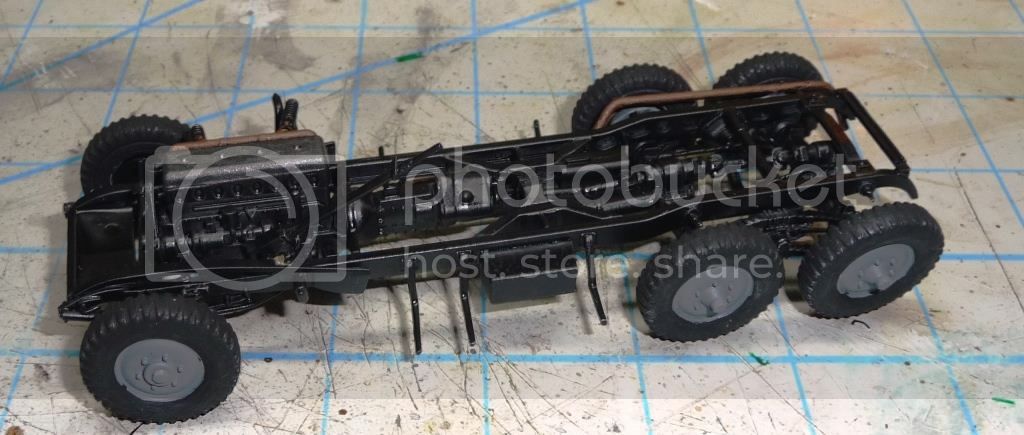
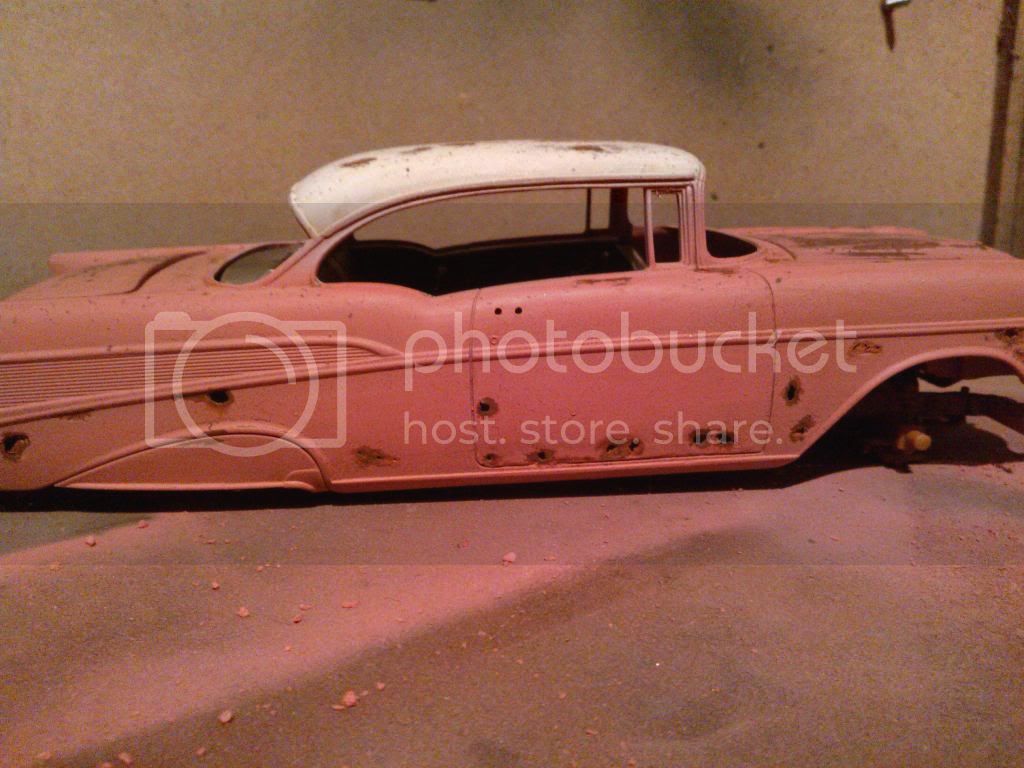
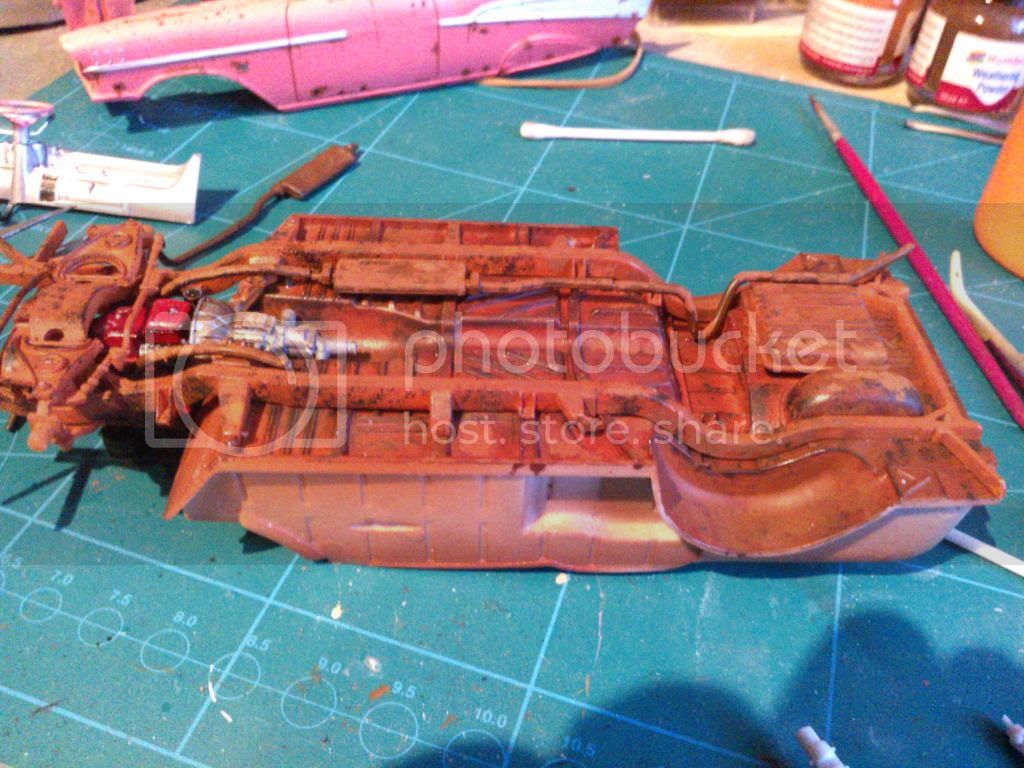
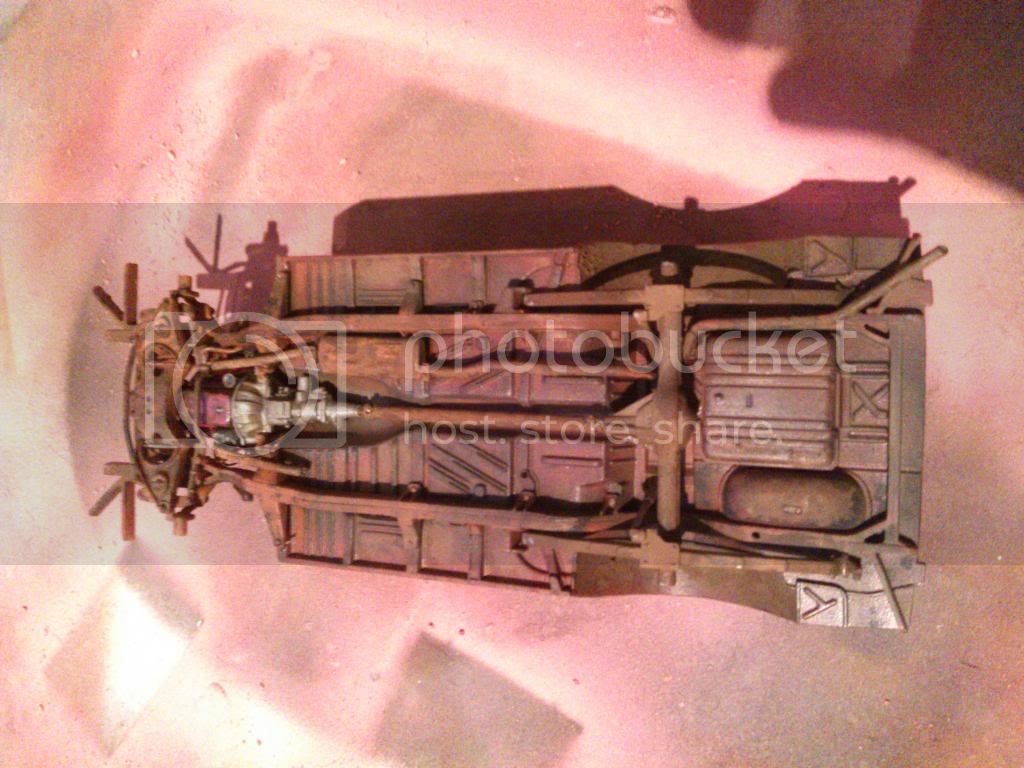
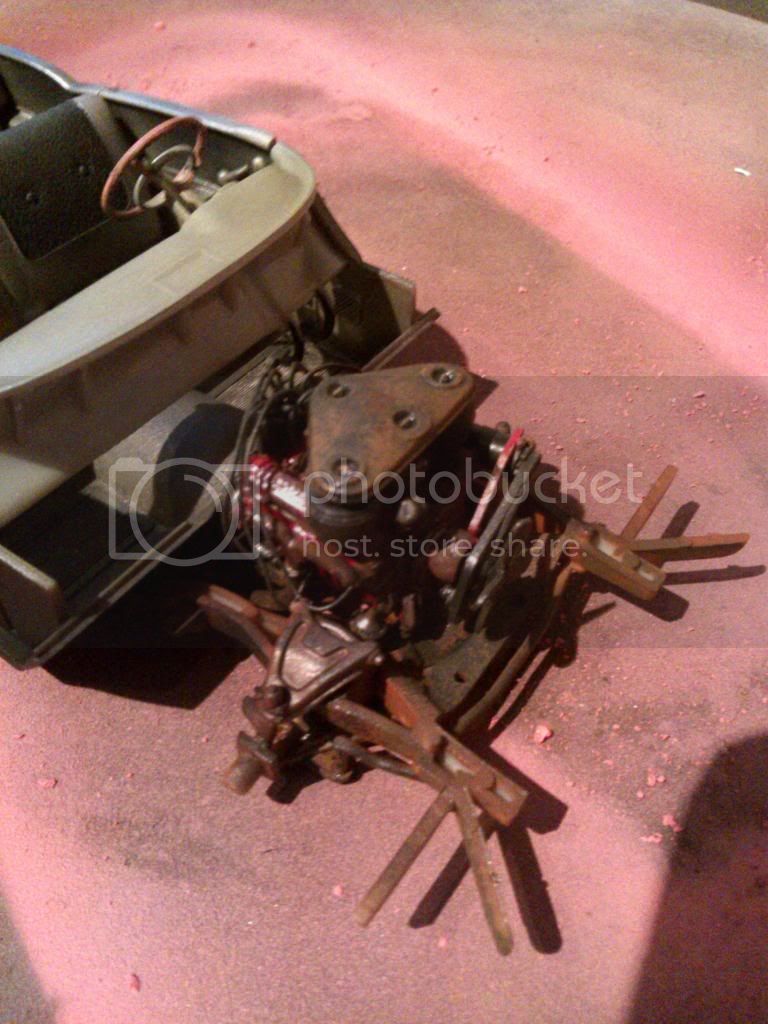
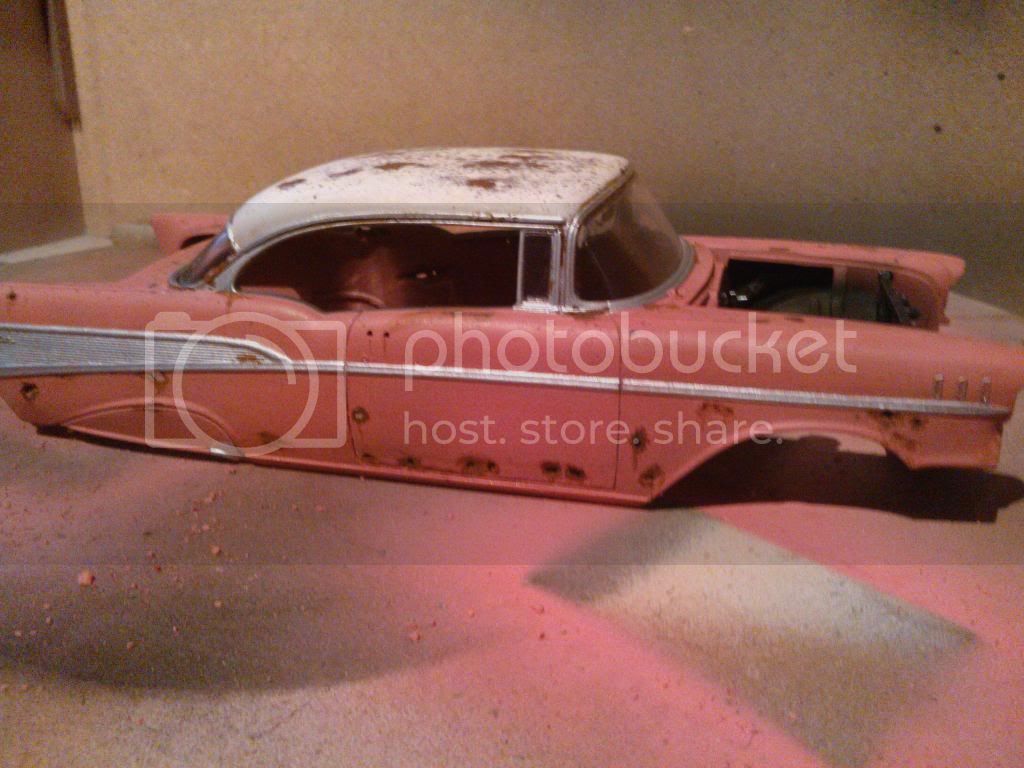
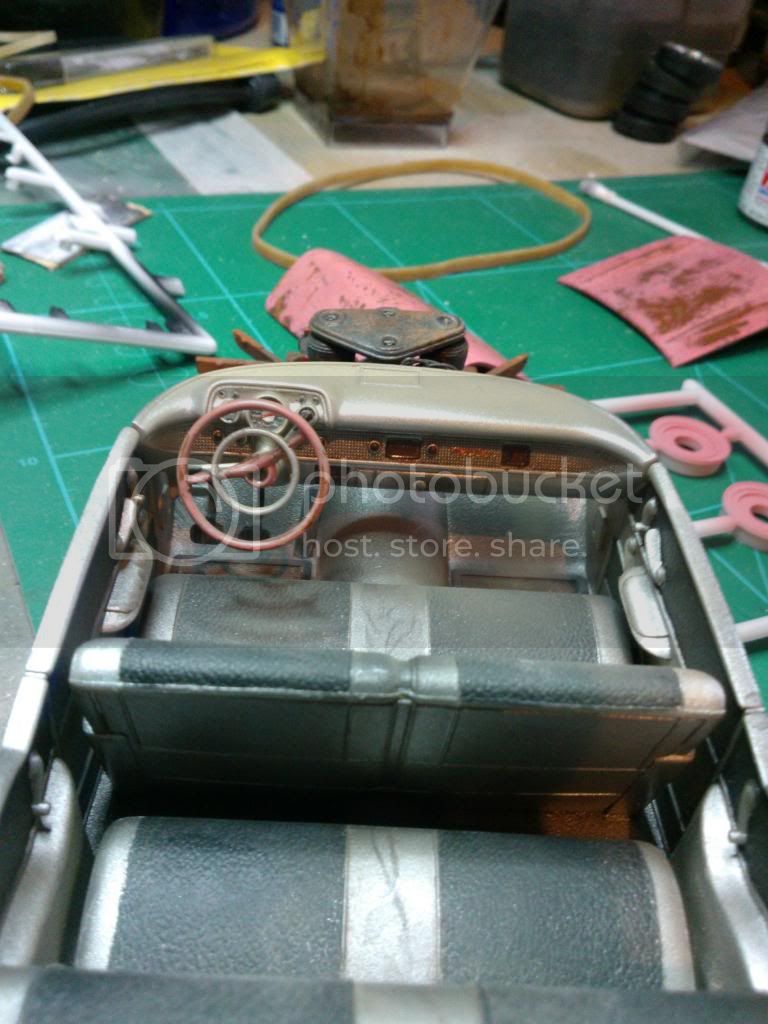
Here is the progress so far

Engine and chasis
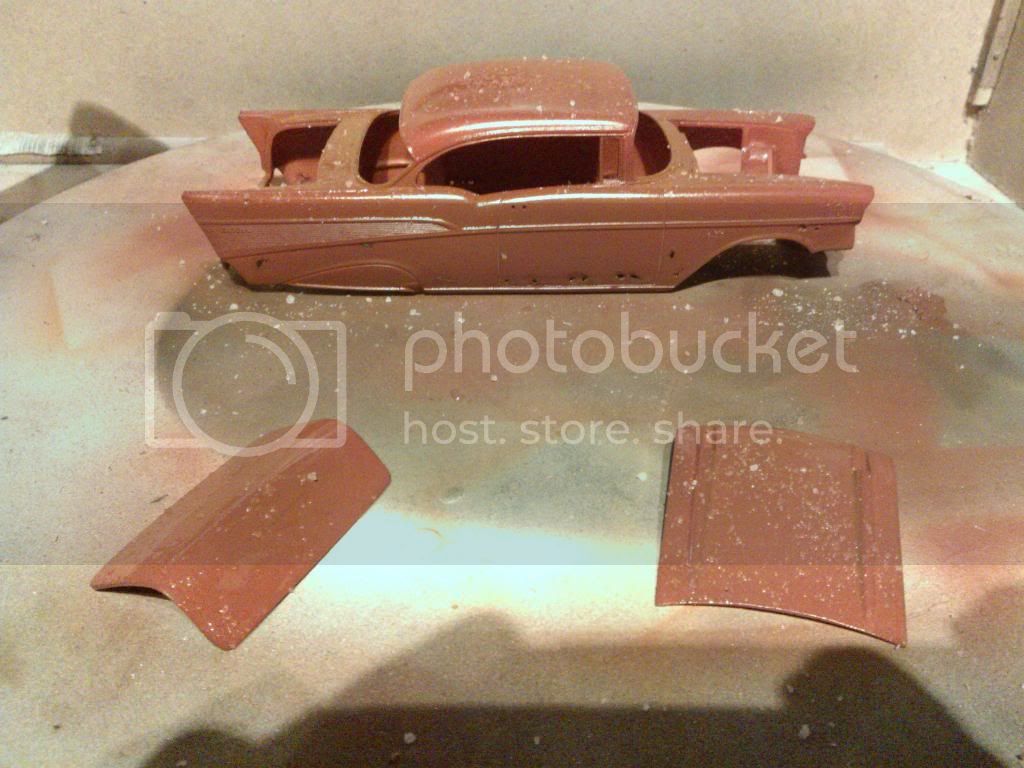
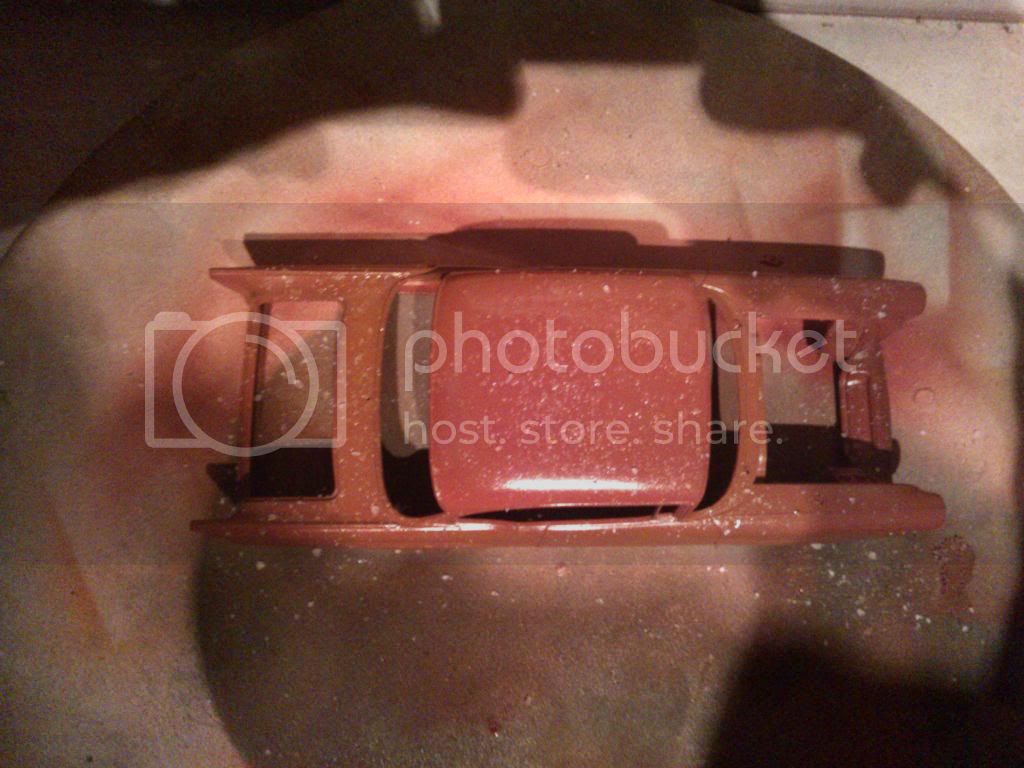
body with rust base coat and hairspray
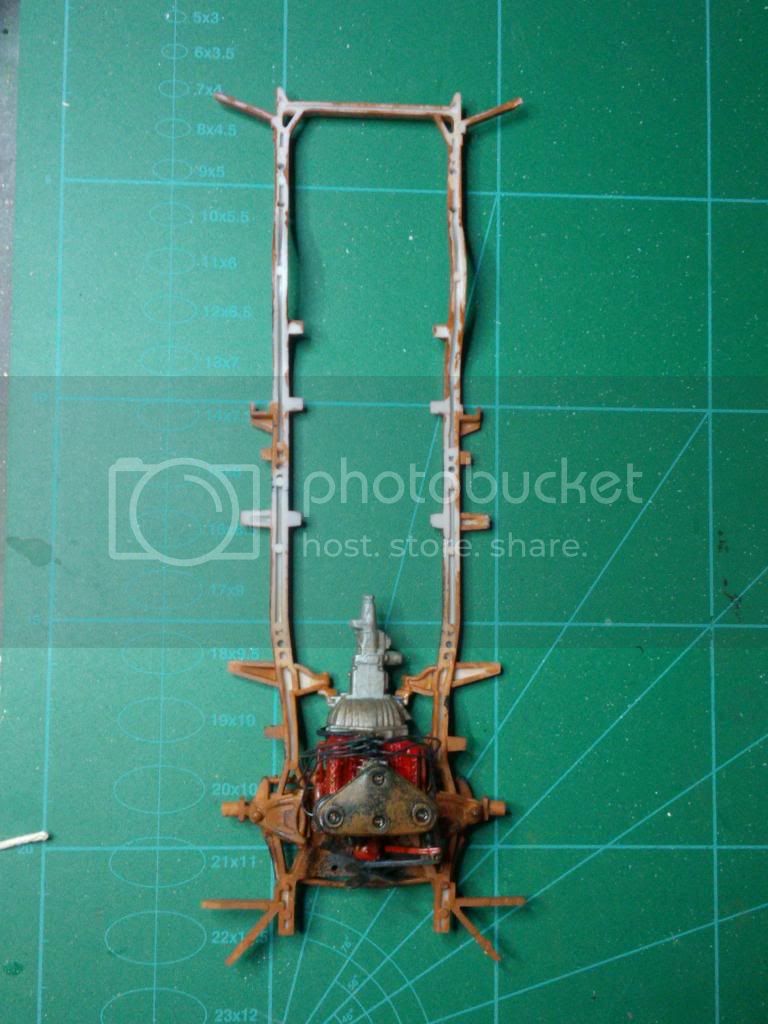
more chasis
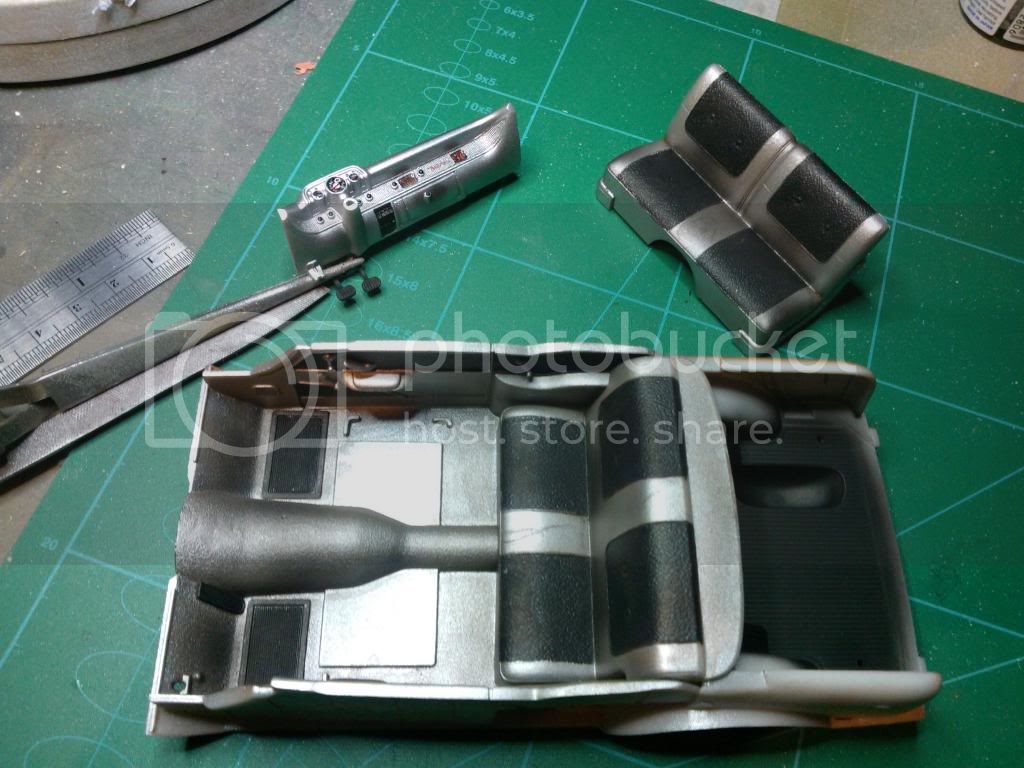
interior
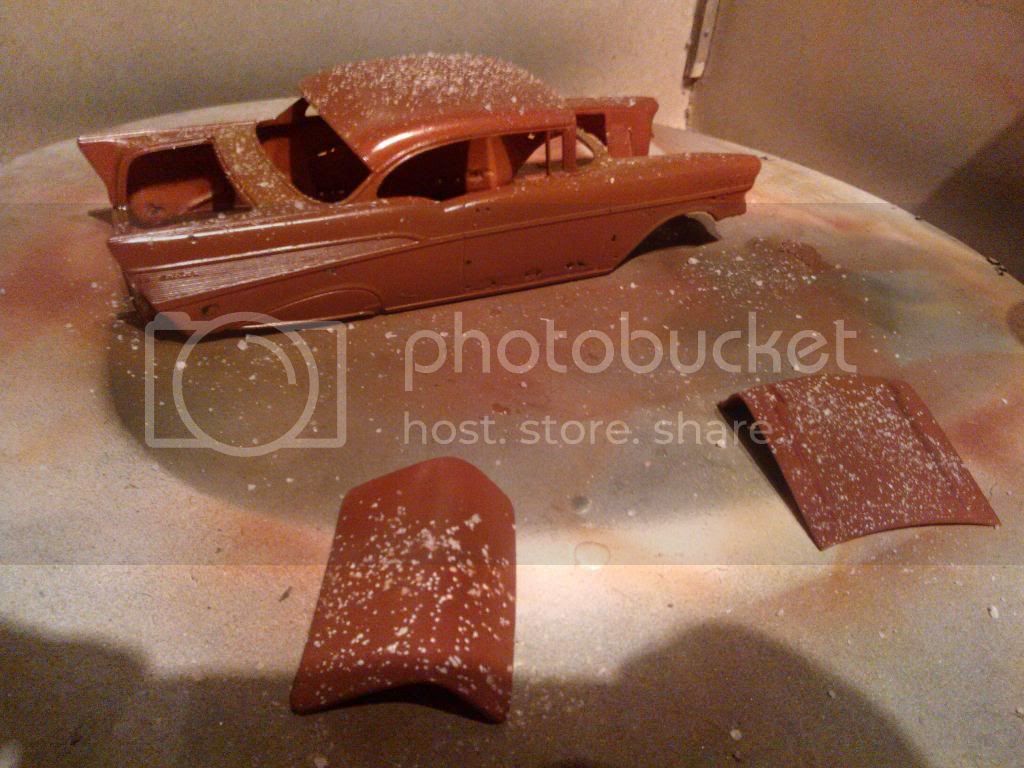
body with salt and another coat of hairspray.
Main body colour next.
England - South East, United Kingdom
Joined: January 11, 2003
KitMaker: 4,307 posts
Auto Modeler: 231 posts
Posted: Monday, May 06, 2013 - 09:13 AM UTC
Interesting! Look forward to seeing that one finished Peter!
Bulldog#3
Grumpy Old Modeller No1
Growing old disgracefully!
Scotland, United Kingdom
Joined: February 15, 2013
KitMaker: 1,273 posts
Auto Modeler: 207 posts
Posted: Tuesday, May 07, 2013 - 12:10 AM UTC
Okay 1st time I've tried the hairspray technic, so this is the main colours on, time to work that brush on the paint and see how it goes.
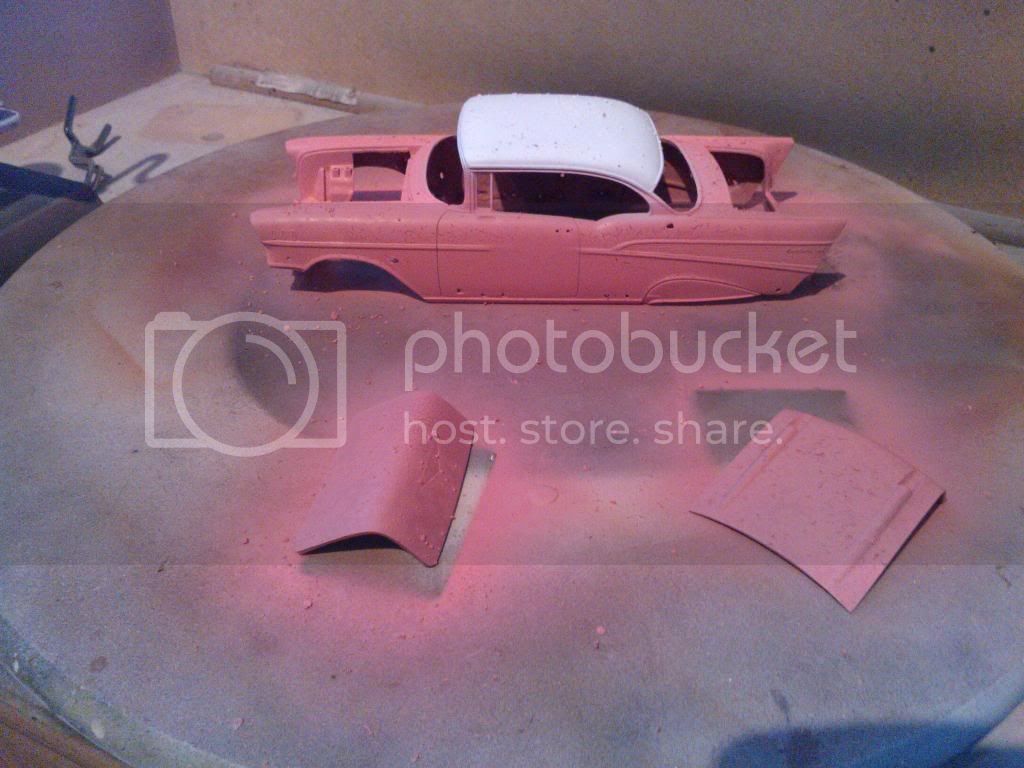
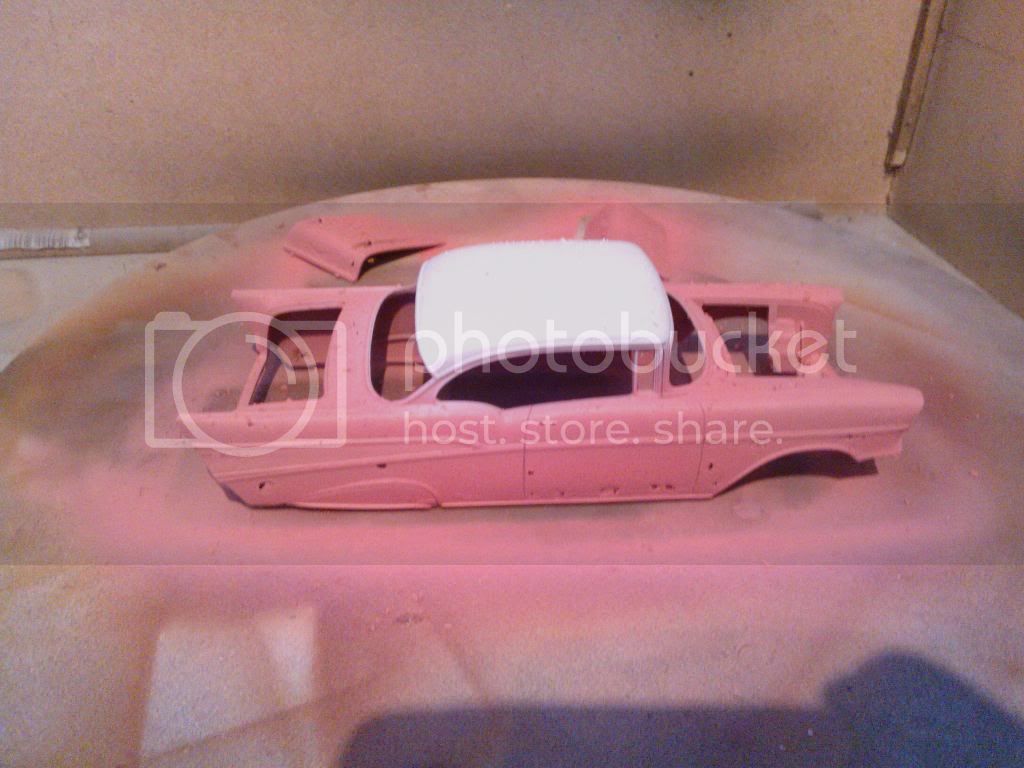
fingers Xd

California, United States
Joined: October 21, 2007
KitMaker: 3,684 posts
Auto Modeler: 294 posts
Posted: Tuesday, May 07, 2013 - 01:42 AM UTC
This should look great Peter
Colorado, United States
Joined: December 25, 2004
KitMaker: 3,770 posts
Auto Modeler: 359 posts
Posted: Wednesday, May 08, 2013 - 04:10 PM UTC
Hey all. I'm still here. A lot going on again. Interior pre-painting is being done and a lot of basic dry fitting. Interior will be a combo of black with yellow highlights. Exterior will be yellow with some black highlights. I may, just may, put three black strips on the butt end of the Ranchero.

Mike
Scotland, United Kingdom
Joined: February 15, 2013
KitMaker: 1,273 posts
Auto Modeler: 207 posts
Posted: Tuesday, May 14, 2013 - 06:25 AM UTC
wow seems ages since I did a post, been busy tho........
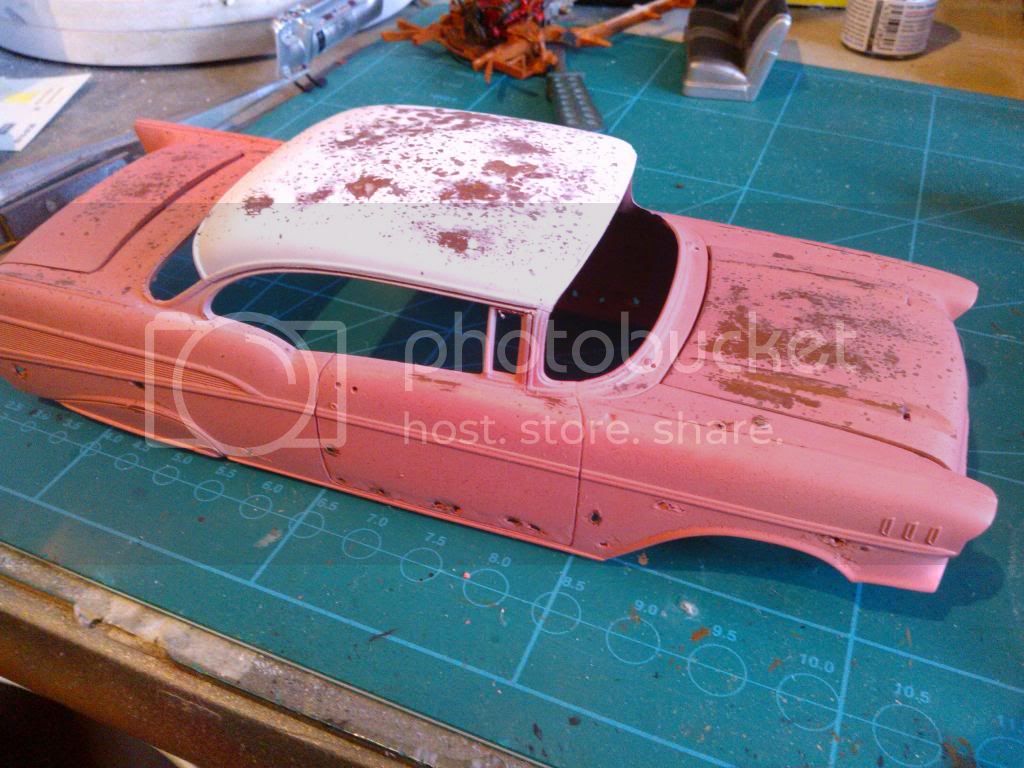
after some stiff brush work.

chasis
dash board
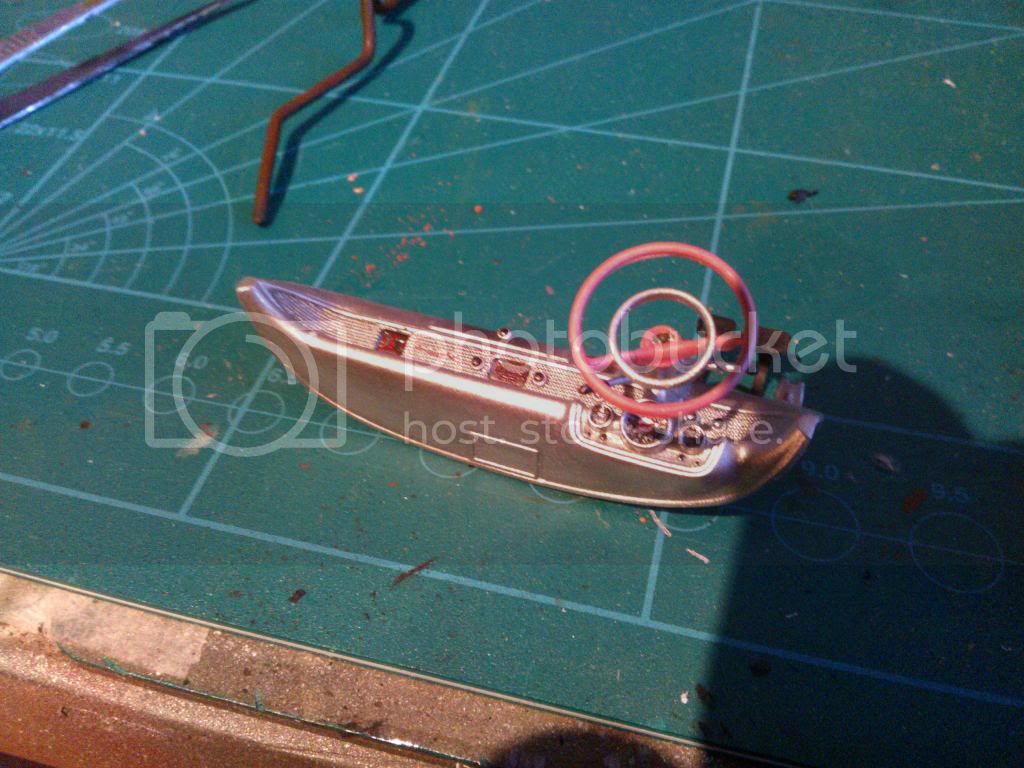

chrome work
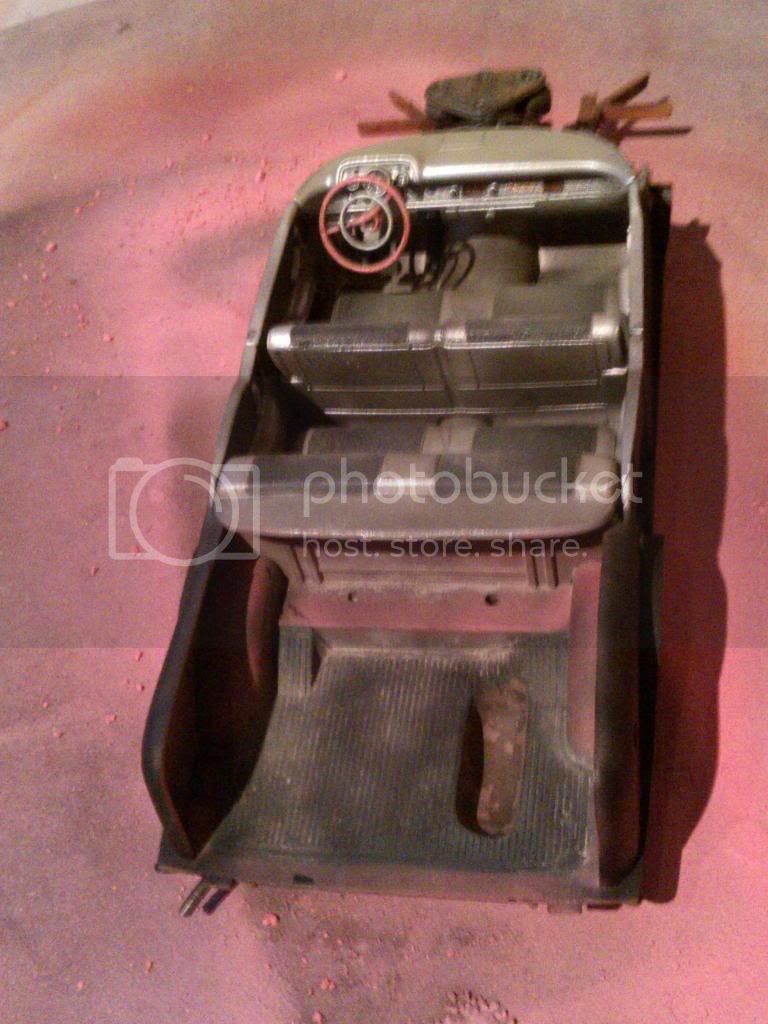
interior
more chasis
glass in
dash in
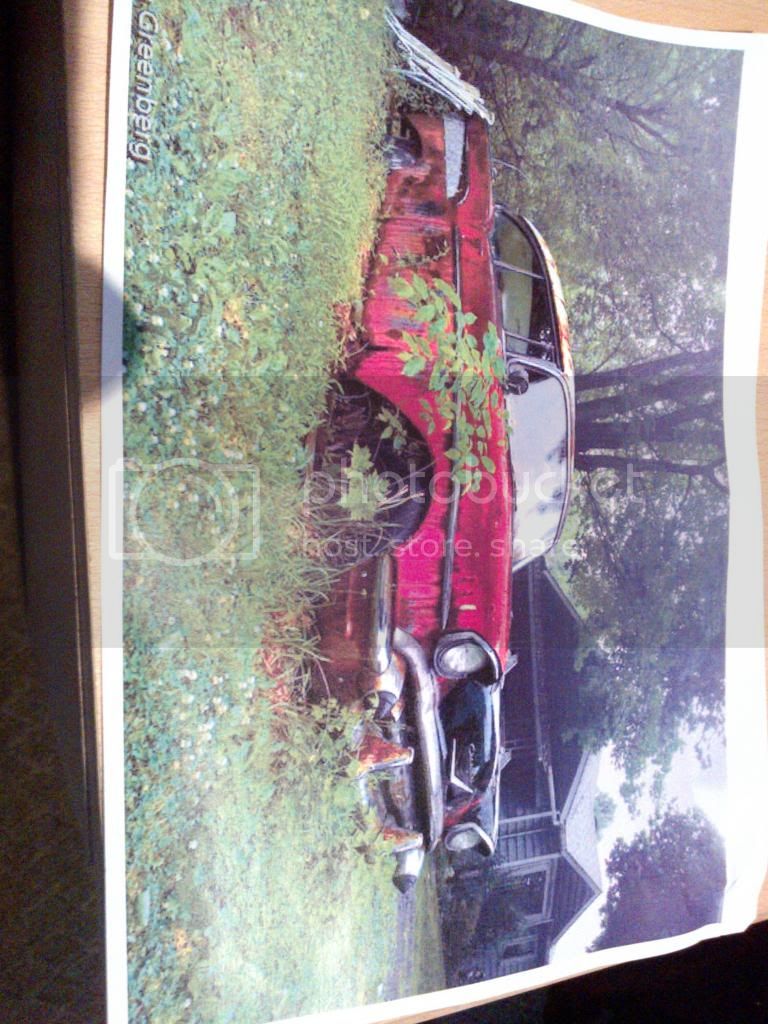
the insperation
still some work to do, but I think it's getting there.
California, United States
Joined: October 21, 2007
KitMaker: 3,684 posts
Auto Modeler: 294 posts
Posted: Tuesday, May 14, 2013 - 12:20 PM UTC
Oh, I'd say its getting there Peter...looks excellent
Scotland, United Kingdom
Joined: February 15, 2013
KitMaker: 1,273 posts
Auto Modeler: 207 posts
Posted: Tuesday, May 14, 2013 - 11:32 PM UTC
Thanks James.1st time i've attempted something like this, but have had a picture in mind. Trawled the net for Chevy 57s and got the picture I've shown. It's been a great build so far, really enjoyed it. I would recommend attempting a scrappy, it's a little nerve wrenching getting the grinder to the plastic, but once the build starts you don't feel so bad. My only concern is I didn't use enough hairspray, it could have looked a little more chipped, but not unhappy with it so far.
#226
British Columbia, Canada
Joined: February 20, 2012
KitMaker: 1,909 posts
Auto Modeler: 118 posts
Posted: Wednesday, May 15, 2013 - 10:27 AM UTC
Peter,
Looks Awesome!
Cheers Rob.
Anything without guns is a target!
27 completed campaigns and counting :)
Istanbul, Turkey / Türkçe
Joined: December 05, 2007
KitMaker: 953 posts
Auto Modeler: 157 posts
Posted: Wednesday, May 15, 2013 - 10:41 AM UTC
Looks good Peter..Keep goin' mate...
AussieReg
 Associate Editor
#007
Victoria, Australia
Joined: June 09, 2009
KitMaker: 8,156 posts
Auto Modeler: 2,953 posts
Posted: Wednesday, May 15, 2013 - 10:48 AM UTC
Great job on the 57 Peter. My favourite car and you're build is spot on. I have similar plans for a 1/12 Monogram 57 but I'm thinking about cutting it down to a convertible as well. I will be looking back at your work here for inspiration.
Cheers, D
ON the bench
Revell 1/24 '53 Corvette (building as '54)
Revell 1/24 BMW 507 Coupe and Cabrio
Italeri 1/48 Me262 B-1a/U1 Nightfighter
Monogram 1/24 '57 Chevy Nomad
Dragon 1/350 USS Frank Knox DD-742
Scotland, United Kingdom
Joined: February 15, 2013
KitMaker: 1,273 posts
Auto Modeler: 207 posts
Posted: Thursday, May 16, 2013 - 02:58 AM UTC
Thanks for the comments guys, as I said it's something new. Damien I have a great picture of a 57 cropped top that is a scrappy if you're interested buddy.
California, United States
Joined: October 21, 2007
KitMaker: 3,684 posts
Auto Modeler: 294 posts
Posted: Saturday, May 18, 2013 - 11:30 AM UTC
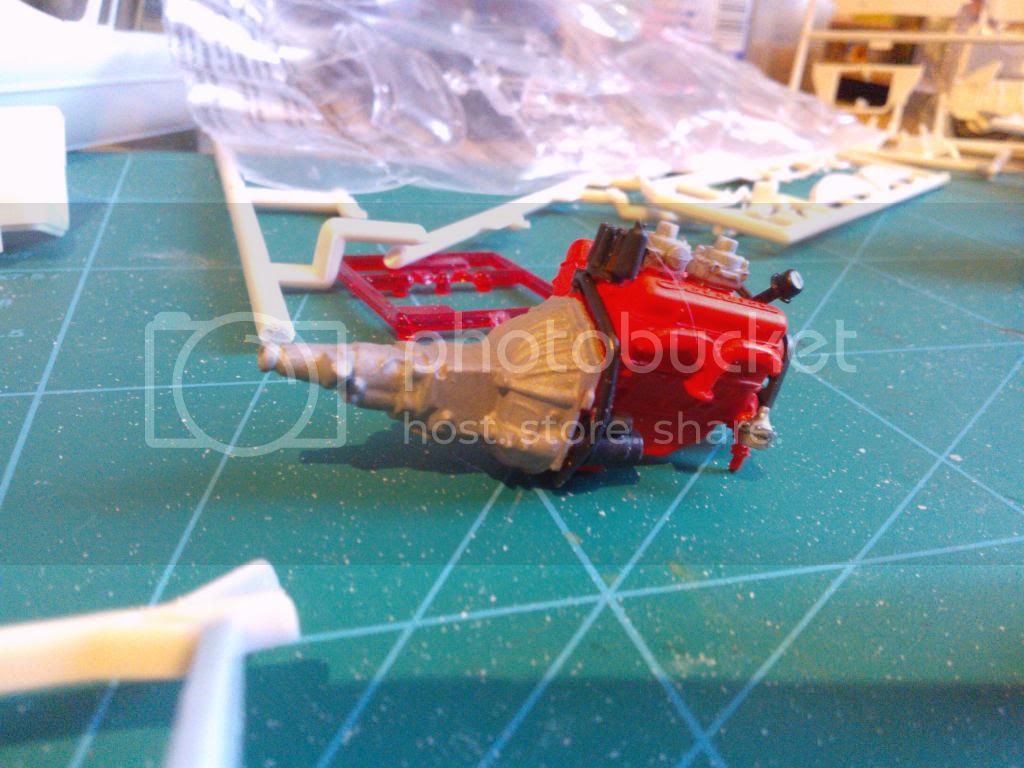
Got a start on my people mover, the Aoshima RAV4 that I reviewed not too long ago. So far so good kit wise, nice, easy build. Started off doing it in metallic blue but something was funky with the paint so went with red
Instructions showed the calipers towards the front...I'll have to check if that's correct 'cause that's just weird.
EDIT...yup, towards the front is correct!


Istanbul, Turkey / Türkçe
Joined: December 05, 2007
KitMaker: 953 posts
Auto Modeler: 157 posts
Posted: Saturday, May 18, 2013 - 11:38 AM UTC
Good luck James....


