Tri-Five Project Part 1 - 55 Series

#439
Washington, United States
Joined: November 05, 2005
KitMaker: 4,950 posts
Auto Modeler: 555 posts
Posted: Tuesday, July 02, 2019 - 11:55 AM UTC
Well, it's clear that I've lost my mind. I thought for sure I saw that this Bel Air logo was already chromed.

Hanger Queens in Waiting:
Monogram 1/72 F8F-1
Corsair the Sky Pirate - 1/72 Ace A-7D
Century Series - Airfix 1/72 F-105G
Anti Shipping - Academy 1/72 PBJ-1D
Academy 1/72 F-84E
Joel_W
 Associate Editor
New York, United States
Joined: December 04, 2010
KitMaker: 11,666 posts
Auto Modeler: 2,974 posts
Posted: Wednesday, July 03, 2019 - 02:24 AM UTC
D,
A word of caution with the pens, the ink really flows out of them. Even when I use a 2mm tip I have a hard time controlling the flow. For really small, delicate jobs I still prefer a the finest brush I have working slowly and holding my breath.
Joel
On my Workbench:
Monogram 1/24 scale 427 Shelby Cobra
Just Completed:
Beemax 1/24 scale BMW M3 E30 1992 Evolution II
AussieReg
Associate Editor #007
Victoria, Australia
Joined: June 09, 2009
KitMaker: 8,156 posts
Auto Modeler: 2,953 posts
Posted: Tuesday, July 23, 2019 - 02:07 AM UTC
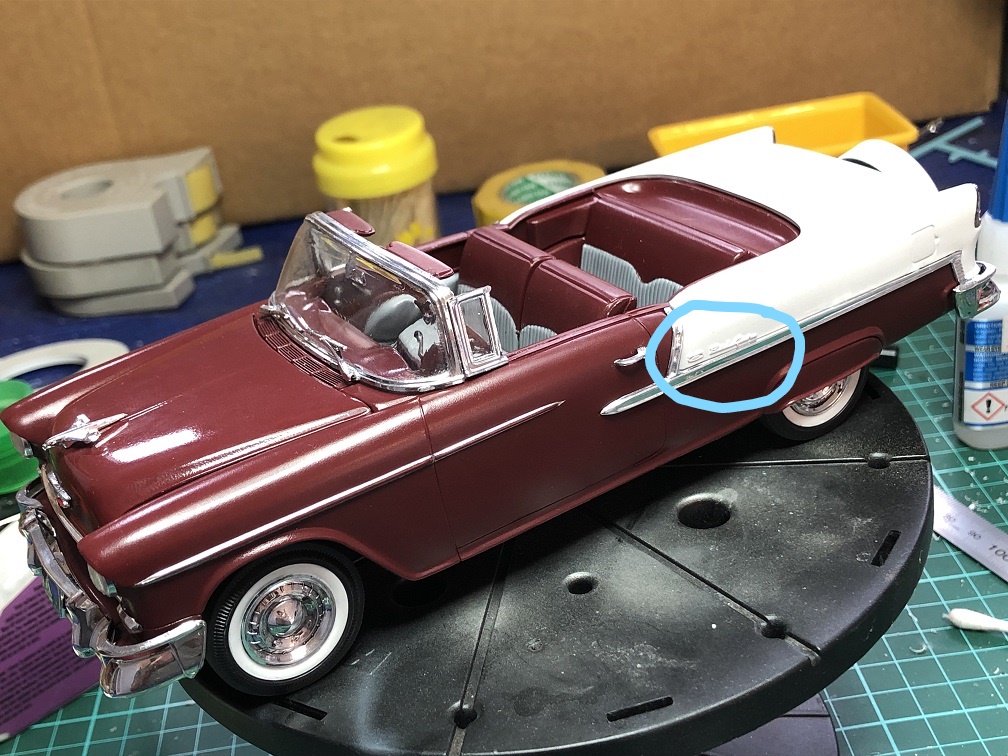
I was in a contemplative mood tonight, enjoying a JD on ice and looking over my multiple builds to assure myself that I am on track, and I decided to put some finishing touches on the '55 Convertible.
The moulded trim on the door and front quarter has had a couple of "mask&paint" attempts that were worn off quite quickly with handling, so it was time to drag out the "Ultra Bright Chrome" BMF and give it a proper job.

Once that was done I used some medium CA to fix the windscreen, aerial and side mirror in place (as well as the door handle that I knocked off
).


All that's left now is a drop of chrome for the keyholes on the doors and a drybrush of chrome on the Bel Air side emblems, then I will get some decent photos in natural light.
Cheers, D
ON the bench
Revell 1/24 '53 Corvette (building as '54)
Revell 1/24 BMW 507 Coupe and Cabrio
Italeri 1/48 Me262 B-1a/U1 Nightfighter
Monogram 1/24 '57 Chevy Nomad
Dragon 1/350 USS Frank Knox DD-742
Joel_W
Associate Editor New York, United States
Joined: December 04, 2010
KitMaker: 11,666 posts
Auto Modeler: 2,974 posts
Posted: Tuesday, July 23, 2019 - 06:56 AM UTC
D,
she's looking better & better as you're nearly completion.
Joel
On my Workbench:
Monogram 1/24 scale 427 Shelby Cobra
Just Completed:
Beemax 1/24 scale BMW M3 E30 1992 Evolution II
AussieReg
Associate Editor #007
Victoria, Australia
Joined: June 09, 2009
KitMaker: 8,156 posts
Auto Modeler: 2,953 posts
Posted: Wednesday, July 24, 2019 - 05:42 PM UTC
Time to drag out the tiny brush and steady hand for the last little loose ends.
Chrome paint on the Bel Air side emblems and panel line wash (super thin black enamel) in the door lines.

Panel line wash in the fuel filler door and boot (trunk

) recesses.


Time to cure then glamour shots.
Cheers, D
ON the bench
Revell 1/24 '53 Corvette (building as '54)
Revell 1/24 BMW 507 Coupe and Cabrio
Italeri 1/48 Me262 B-1a/U1 Nightfighter
Monogram 1/24 '57 Chevy Nomad
Dragon 1/350 USS Frank Knox DD-742
AussieReg
Associate Editor #007
Victoria, Australia
Joined: June 09, 2009
KitMaker: 8,156 posts
Auto Modeler: 2,953 posts
Posted: Wednesday, July 24, 2019 - 10:29 PM UTC
ON the bench
Revell 1/24 '53 Corvette (building as '54)
Revell 1/24 BMW 507 Coupe and Cabrio
Italeri 1/48 Me262 B-1a/U1 Nightfighter
Monogram 1/24 '57 Chevy Nomad
Dragon 1/350 USS Frank Knox DD-742
Joel_W
Associate Editor New York, United States
Joined: December 04, 2010
KitMaker: 11,666 posts
Auto Modeler: 2,974 posts
Posted: Thursday, July 25, 2019 - 12:50 AM UTC
D,
I'd say you did one heck of a fine job. The finished build looks simply outstanding. Love the color combination, and I like it better with the top down, but that's just me.
Joel
On my Workbench:
Monogram 1/24 scale 427 Shelby Cobra
Just Completed:
Beemax 1/24 scale BMW M3 E30 1992 Evolution II
Netherlands Antilles
Joined: September 02, 2014
KitMaker: 1,977 posts
Auto Modeler: 1,371 posts
Posted: Thursday, July 25, 2019 - 03:57 AM UTC
As Joel said, you nail the color combo every single time! Fine job!
I would never have noticed the side emblem if you didn't say it

Off topic: did you took the pictures with a mobile phone?
Gwbriel

Gabriel
Many of my builds can be seen on YT in video format. Please check 'Panzergrau Models' Channel.
#306
Victoria, Australia
Joined: June 27, 2010
KitMaker: 3,959 posts
Auto Modeler: 495 posts
Posted: Thursday, July 25, 2019 - 09:38 AM UTC
Beautiful work Damian!

another fine addition to the garage (collection)

thanks for sharing
Stay home and build models!
In 1/72
Gloster Gladiator MkII for the Bi-planes Campaign
In 1/350
Airfix 1:350 Type 45 Destroyer
AussieReg
Associate Editor #007
Victoria, Australia
Joined: June 09, 2009
KitMaker: 8,156 posts
Auto Modeler: 2,953 posts
Posted: Thursday, July 25, 2019 - 10:09 AM UTC
Many thanks for the feedback guys as always. Much appreciated.
Quoted Text
Off topic: did you took the pictures with a mobile phone?
Yes, I have an iPhone 8. I don't play around with the settings at all, just point and shoot. I download them to my computer, use "Paint" to resize them to 1008x756, then into the Kitmaker Gallery. I don't have any online image store following the Photobucket fiasco.
Cheers, D
ON the bench
Revell 1/24 '53 Corvette (building as '54)
Revell 1/24 BMW 507 Coupe and Cabrio
Italeri 1/48 Me262 B-1a/U1 Nightfighter
Monogram 1/24 '57 Chevy Nomad
Dragon 1/350 USS Frank Knox DD-742
Removed by original poster on 07/26/19 - 00:50:59 (GMT).
Netherlands Antilles
Joined: September 02, 2014
KitMaker: 1,977 posts
Auto Modeler: 1,371 posts
Posted: Thursday, July 25, 2019 - 12:57 PM UTC
Quoted Text
Many thanks for the feedback guys as always. Much appreciated.
Quoted Text
Off topic: did you took the pictures with a mobile phone?
Yes, I have an iPhone 8. I don't play around with the settings at all, just point and shoot. I download them to my computer, use "Paint" to resize them to 1008x756, then into the Kitmaker Gallery. I don't have any online image store following the Photobucket fiasco.
Cheers, D
Yes, the quality is as good as it gets and the colors the same, but the depth of field is very shallow. You can see that best in the first three pictures.
You can bypass that by taking the pictures from further away of the subject, aim at the middle, then crop the picture. Only if you are interested, of course
I8 should have a good enough resolution to allow for larger crops. You might even achieve a better white balance, depending where the weight of focus is.
Gabriel
Gabriel
Many of my builds can be seen on YT in video format. Please check 'Panzergrau Models' Channel.
Joel_W
Associate Editor New York, United States
Joined: December 04, 2010
KitMaker: 11,666 posts
Auto Modeler: 2,974 posts
Posted: Friday, July 26, 2019 - 01:27 AM UTC
D,
If you didn't tell me that your pictures were by a I8 Cell, I'd have sworn that they were via a DSL/Mirrorless camera. Most of the time I can tell Just by the White Balance. Your cell does an excellent job with the basics.
DOF is always an issue the closer you get to your subject. I have a Nikkor 105mm Macro lens, and the smallest aperture is f32, which really helps. As Gabriel suggested, try to focus about 1/3 of the way into the picture, as most camera software has the field of focus at 1/3 in front and 2/3 behind the point of focus.
Your use of the Gallery is quite amazing. usually the pictures are smaller, but yours fill the frame just fine. Again, if you didn't mention it, I'd have thought that you were using a hosting service.
I walked away from Photobucket when they 1st started having issues on the free accounts. I moved to Image Shack which has been fantastic since day 1. I have the basic package for $3.99/month. Like you and so many others, I'd never go back to Photobucket. But there are free online hosting sites. Take a look at Fotki @:https://www.fotki.com/us/en/ Everyone I know that uses it, loves it. I keep on saying that I should switch, but old habits are so hard to break.
Joel
On my Workbench:
Monogram 1/24 scale 427 Shelby Cobra
Just Completed:
Beemax 1/24 scale BMW M3 E30 1992 Evolution II
AussieReg
Associate Editor #007
Victoria, Australia
Joined: June 09, 2009
KitMaker: 8,156 posts
Auto Modeler: 2,953 posts
Posted: Sunday, December 15, 2019 - 01:20 PM UTC
With my current plan for WIP reduction, once I move a build into the "Completed" status, I go to my Scalemates profile and look through the "Started" lists to see what I can follow on with.
Next up on the '55 play list is the old Monogram 1/24 Street Machine.
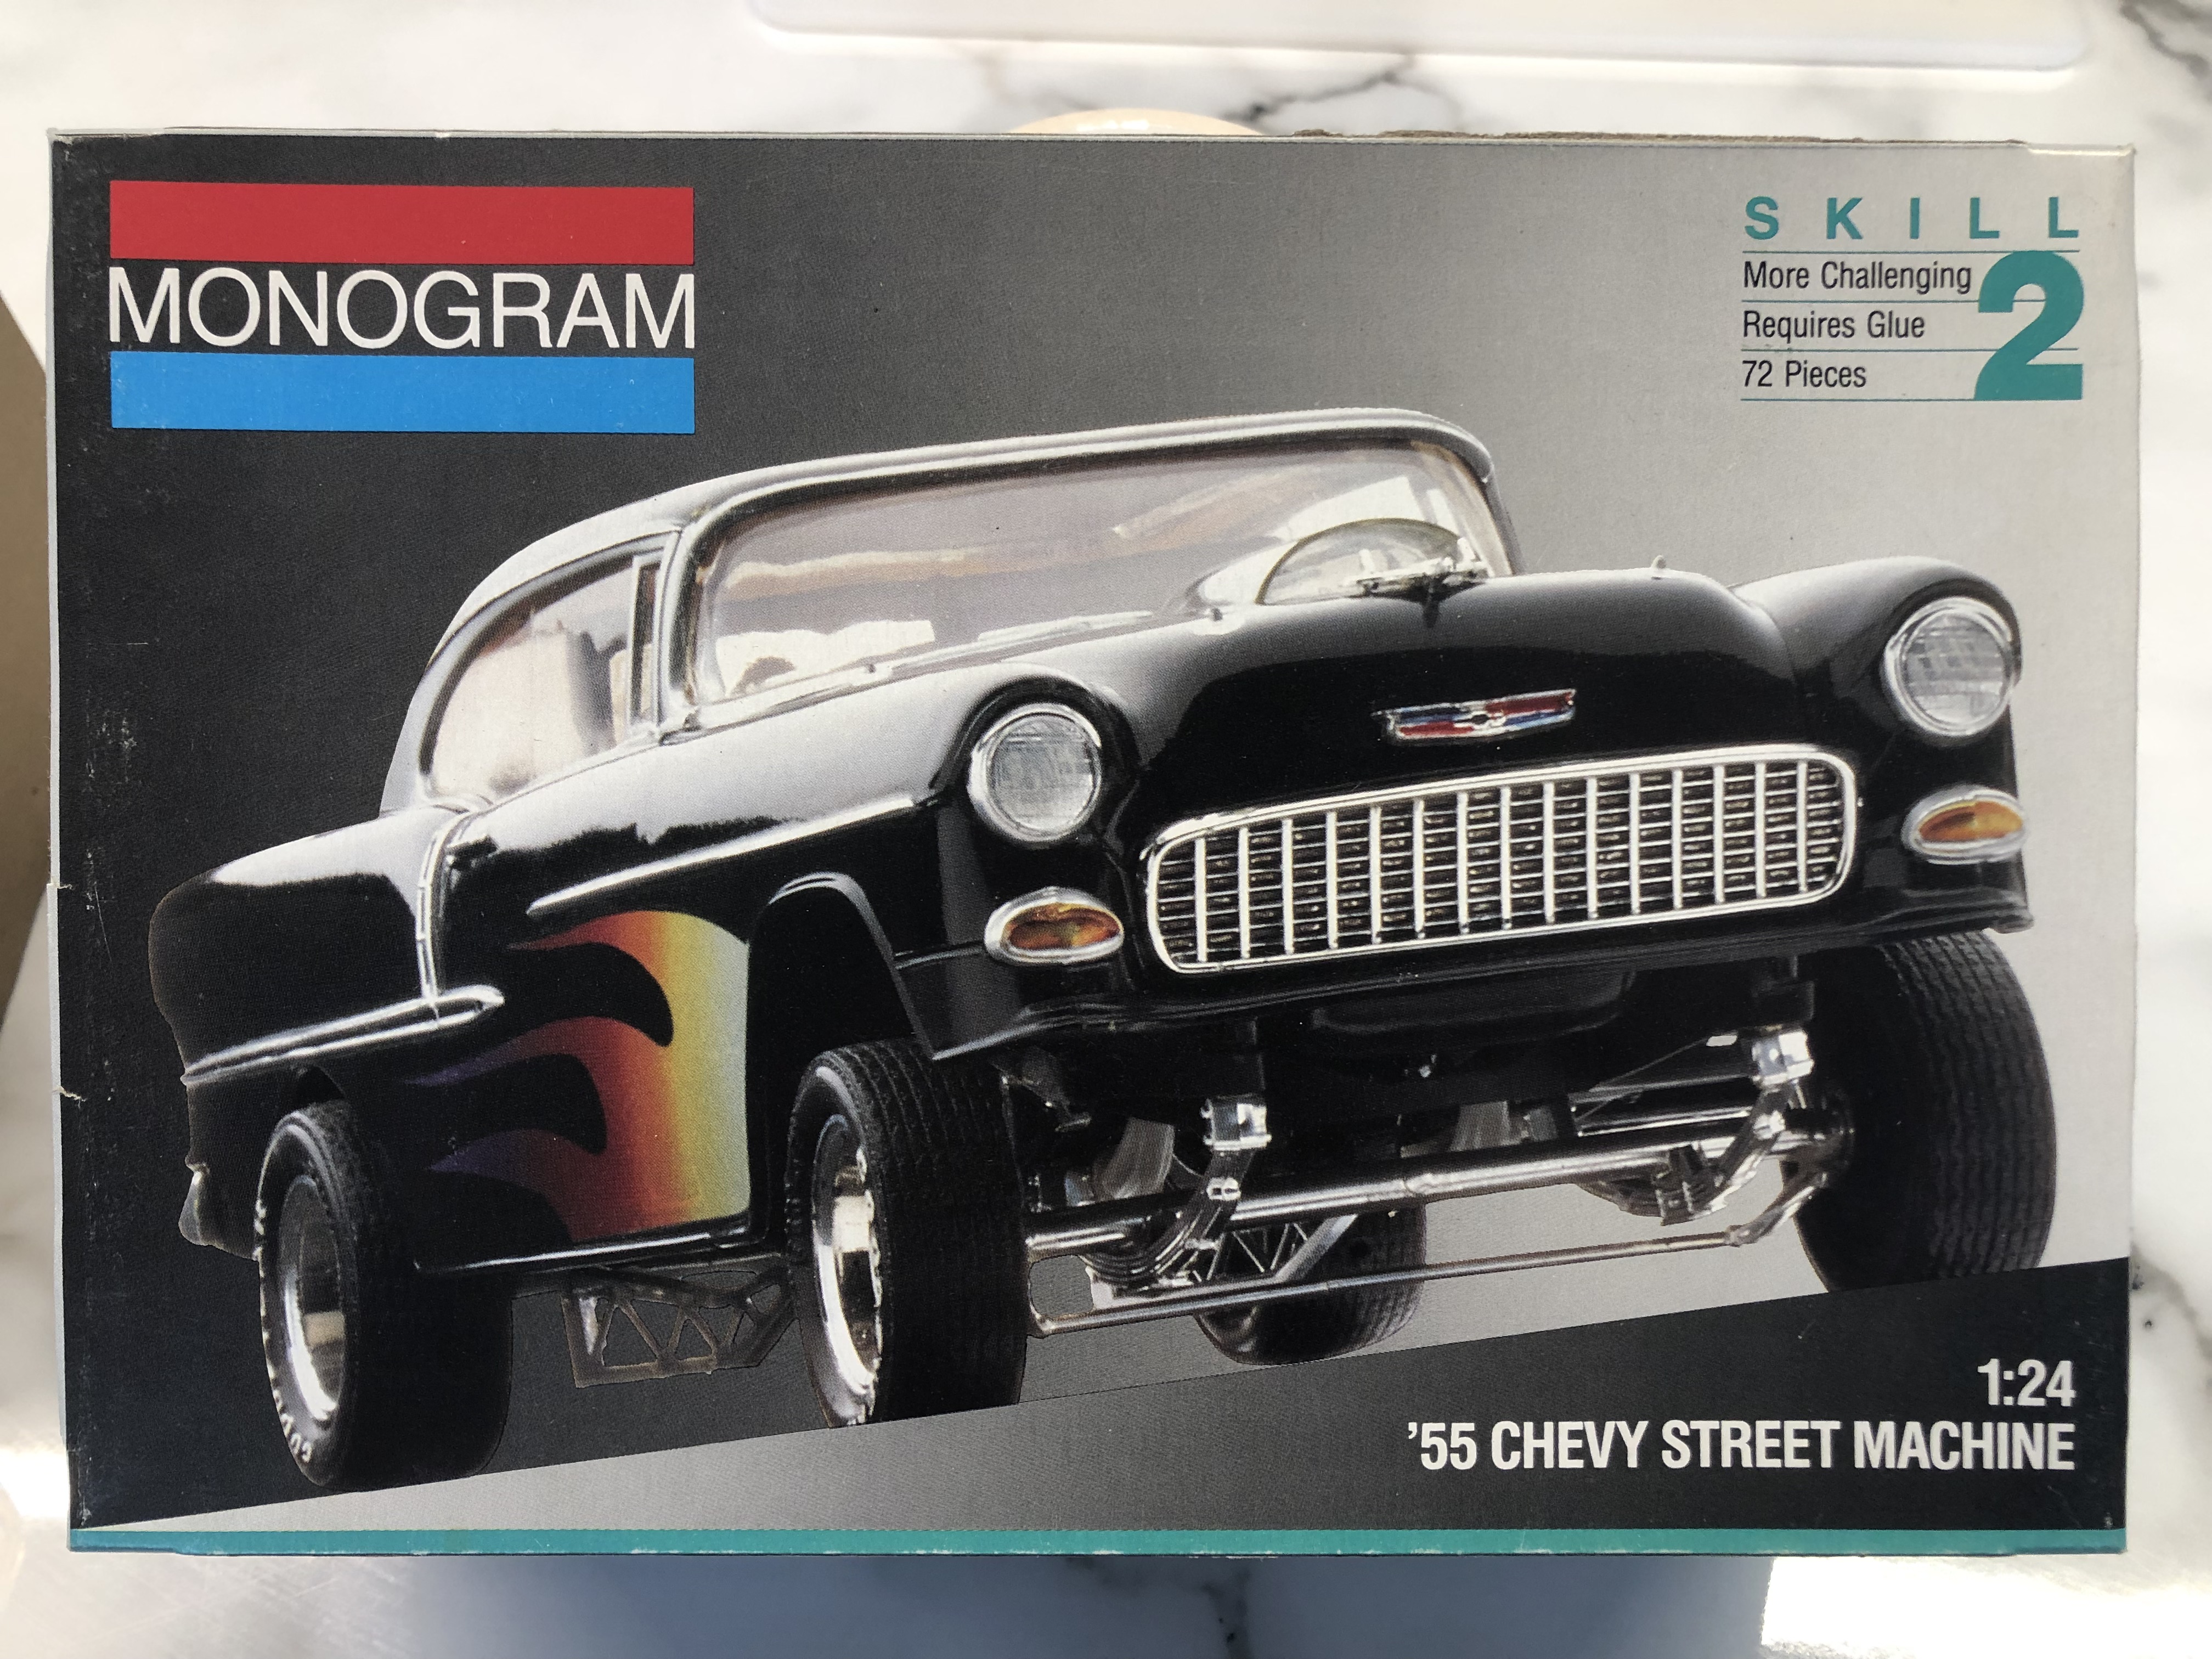
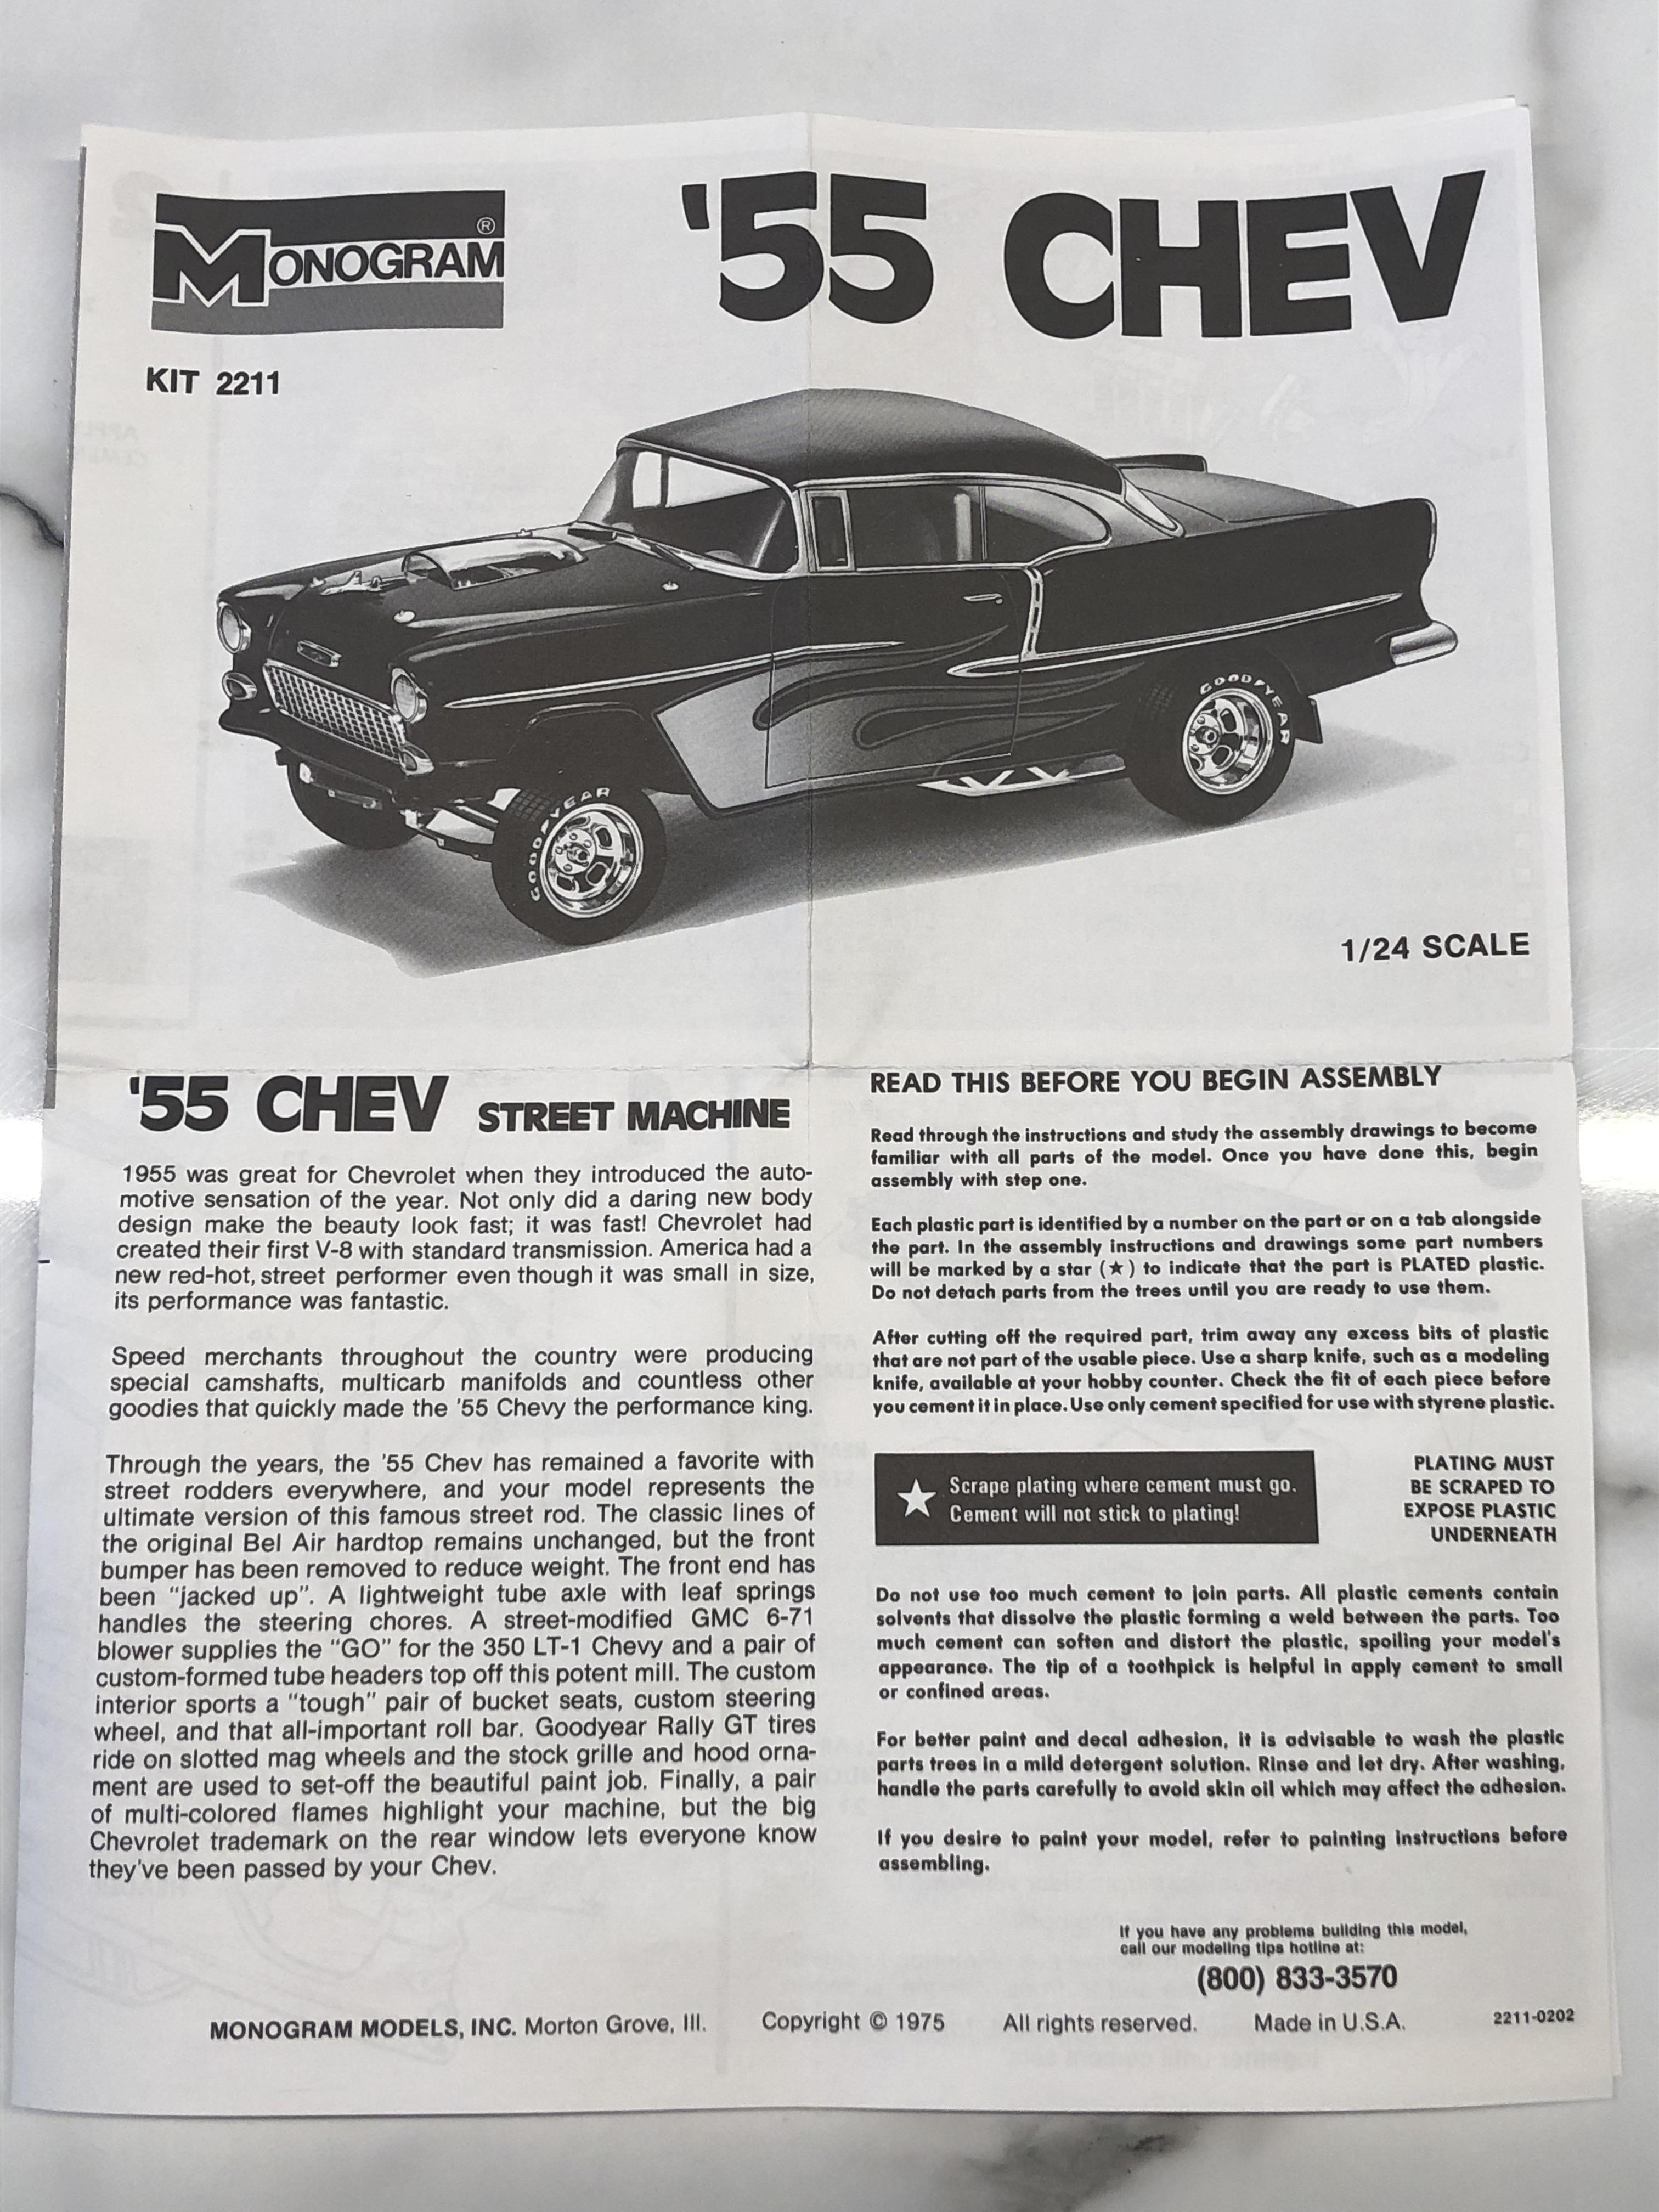
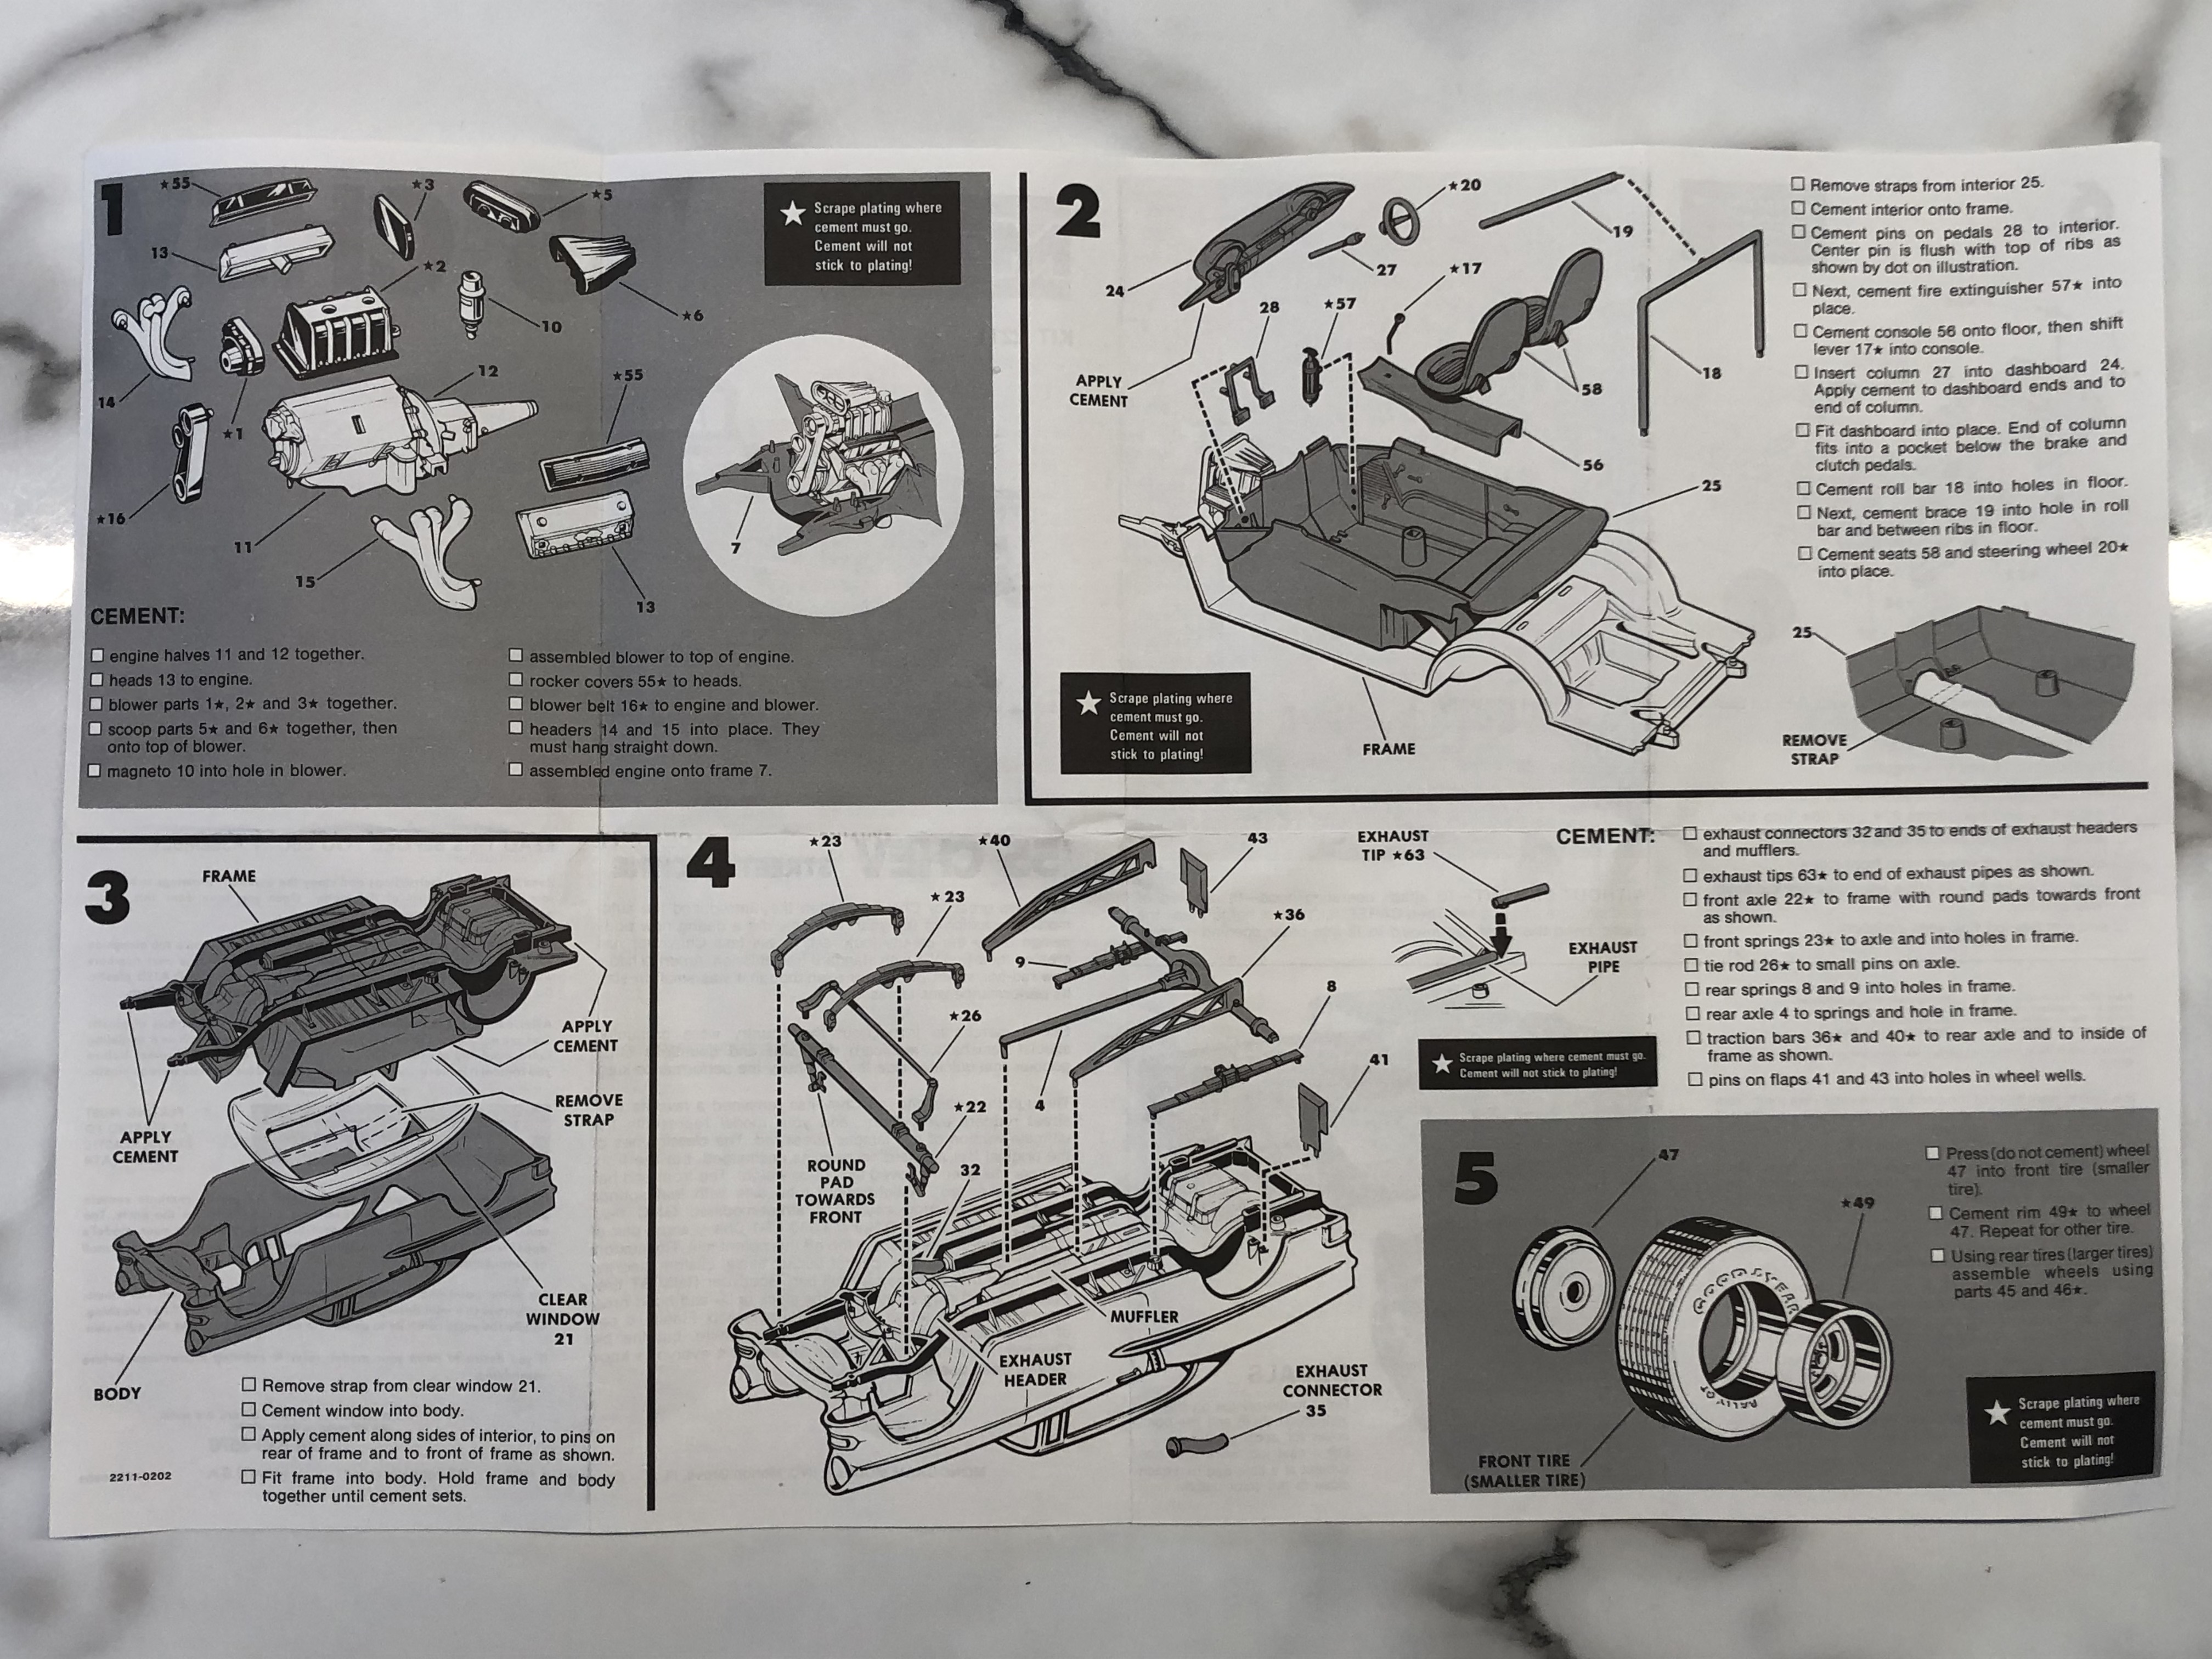
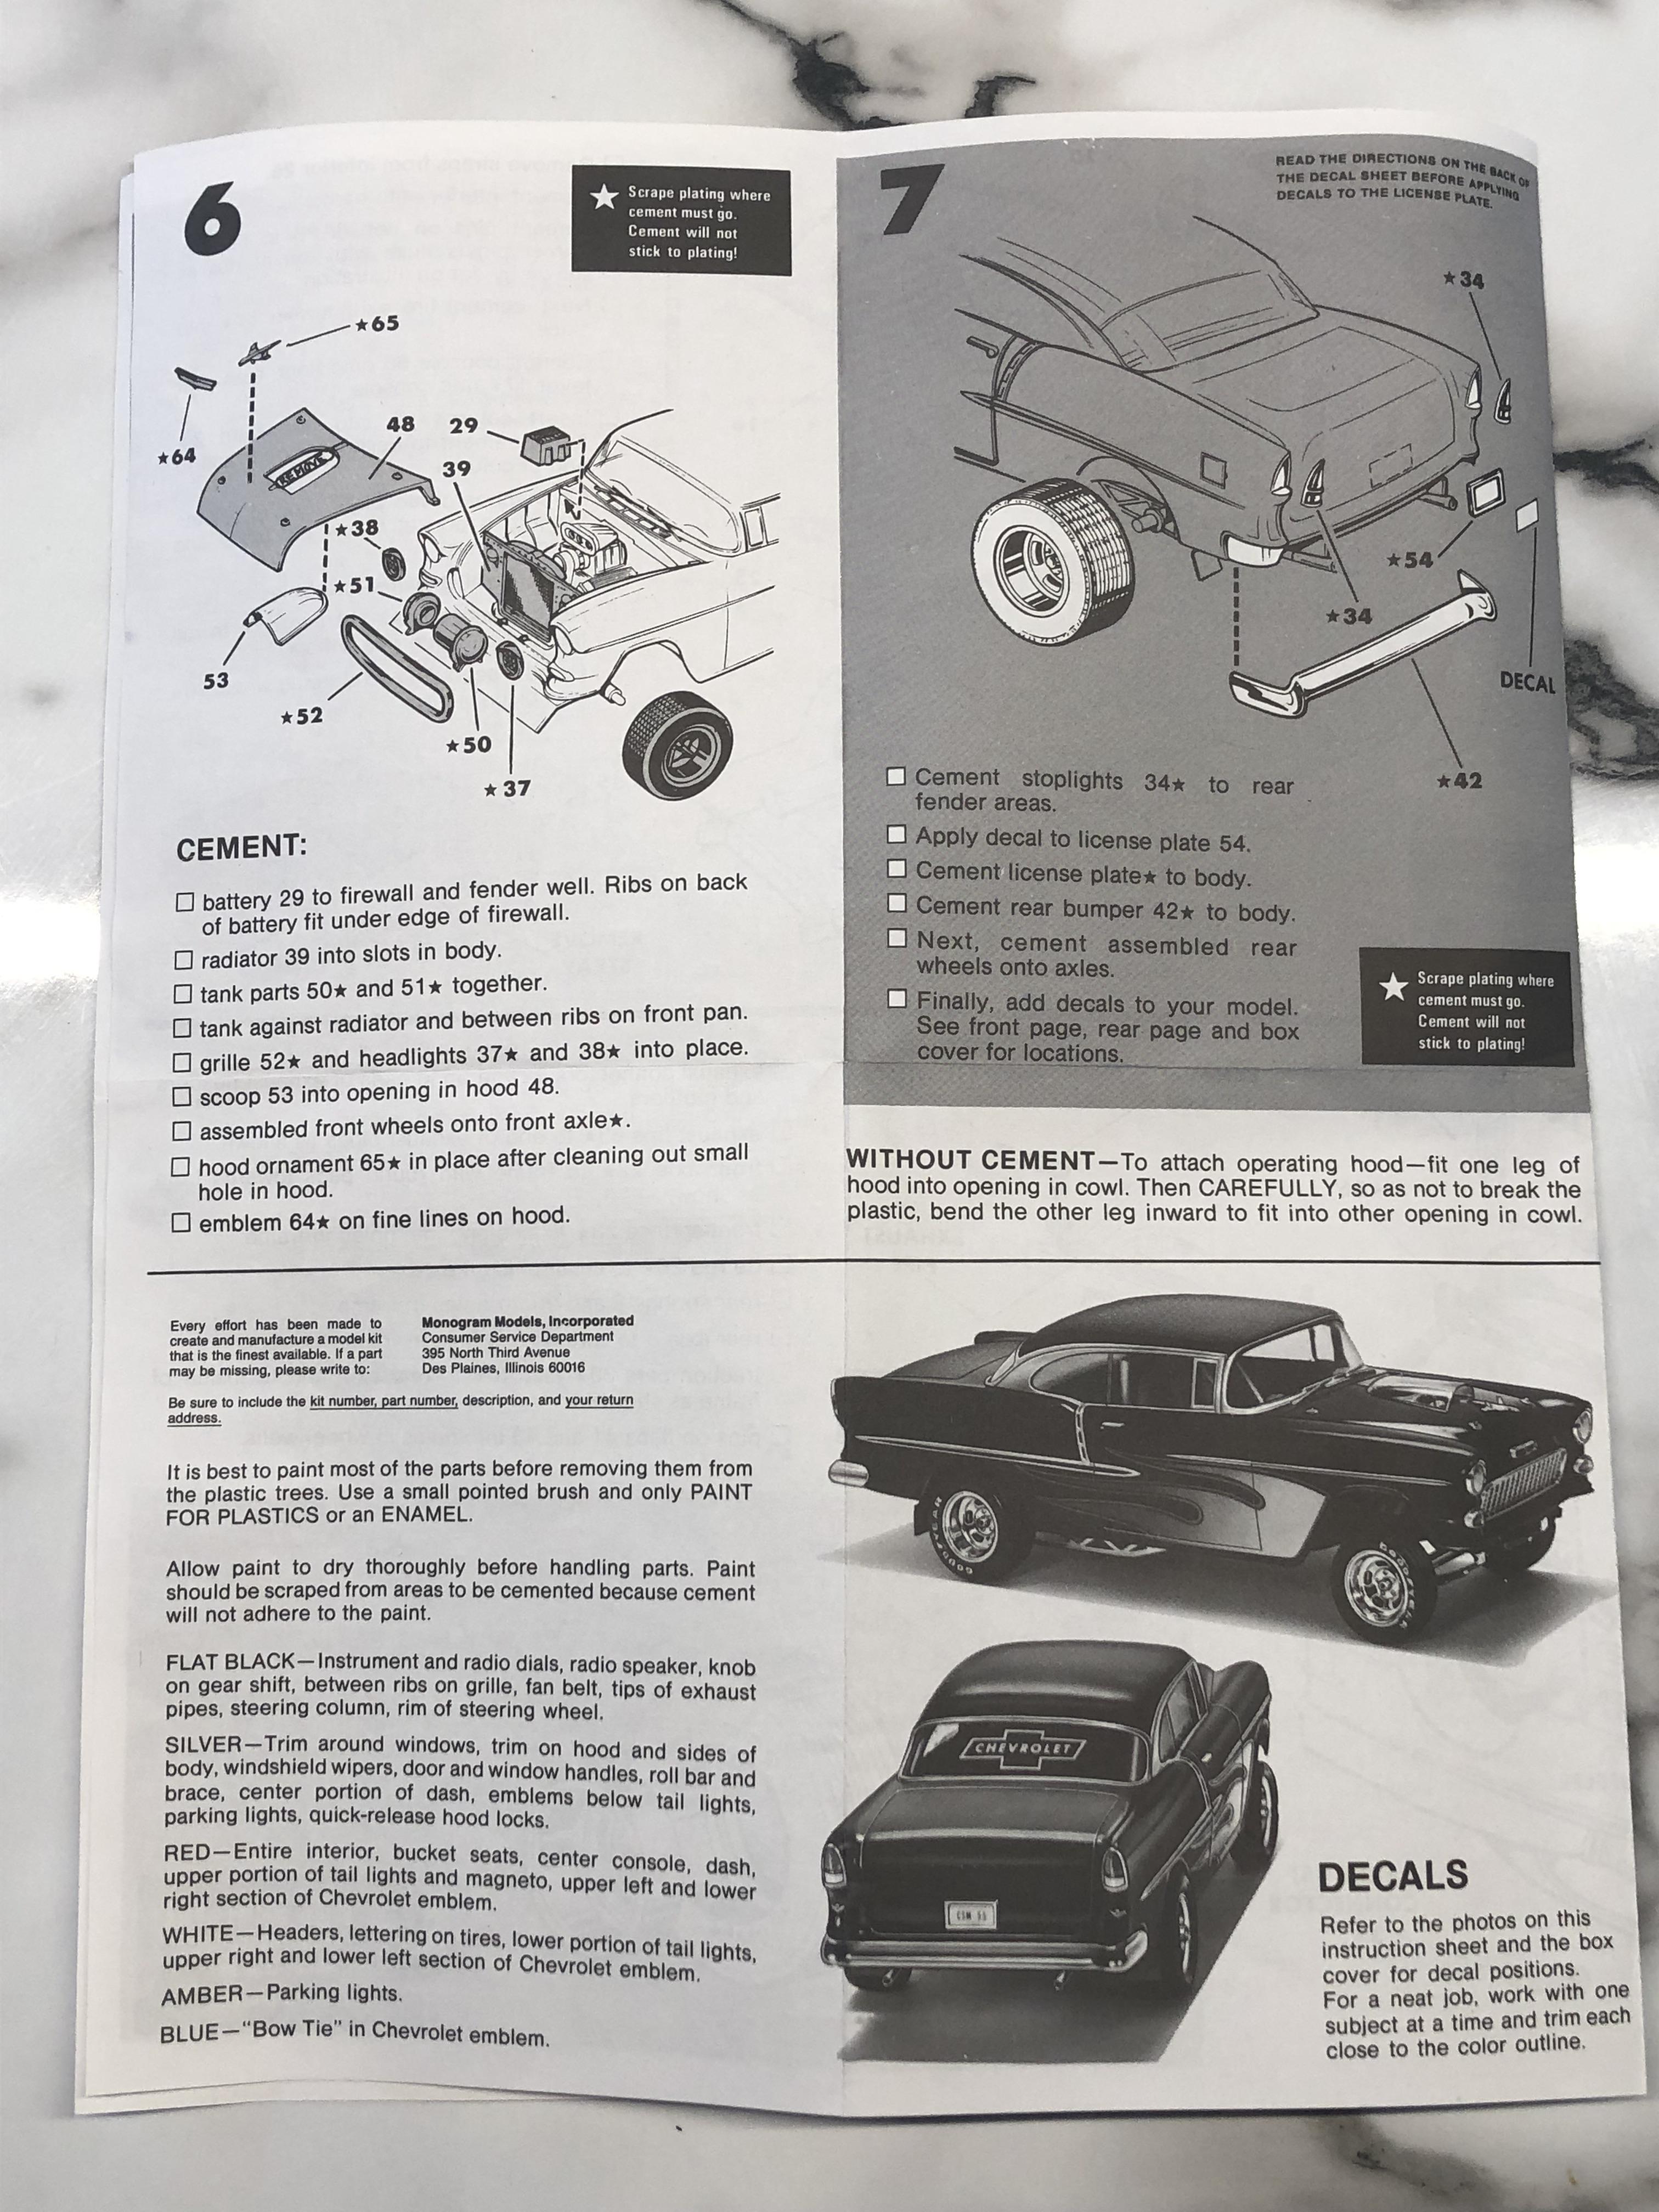
I started tinkering with this kit a couple of years back, glued the engine block and heads and started cleaning up the parts. Here's where it's at right now.

While the airbrush is active on my other builds I will start priming this one and test fitting parts.
I'm thinking, rather than the traditional black, of an overall white finish on this one, maybe with a tinted pearl for some bling.
Cheers, D
ON the bench
Revell 1/24 '53 Corvette (building as '54)
Revell 1/24 BMW 507 Coupe and Cabrio
Italeri 1/48 Me262 B-1a/U1 Nightfighter
Monogram 1/24 '57 Chevy Nomad
Dragon 1/350 USS Frank Knox DD-742
#439
Washington, United States
Joined: November 05, 2005
KitMaker: 4,950 posts
Auto Modeler: 555 posts
Posted: Sunday, December 15, 2019 - 01:42 PM UTC
Looks pretty mean. Good luck with it!
Hanger Queens in Waiting:
Monogram 1/72 F8F-1
Corsair the Sky Pirate - 1/72 Ace A-7D
Century Series - Airfix 1/72 F-105G
Anti Shipping - Academy 1/72 PBJ-1D
Academy 1/72 F-84E
Joel_W
Associate Editor New York, United States
Joined: December 04, 2010
KitMaker: 11,666 posts
Auto Modeler: 2,974 posts
Posted: Monday, December 16, 2019 - 04:24 AM UTC
D,
Now there's a 55 Chevy Dragster from the past that I do actually remember from my trips to National Speedway back in the late 60s early 70s, as almost all my gearhead friends were into straight line speed. Just a handful of us even knew about road racing, and Bridgehampton was only a little more then a hour's drive east.
So once again I'll be pulling up my old man's rocking chair, and following your build.
Joel
On my Workbench:
Monogram 1/24 scale 427 Shelby Cobra
Just Completed:
Beemax 1/24 scale BMW M3 E30 1992 Evolution II
AussieReg
Associate Editor #007
Victoria, Australia
Joined: June 09, 2009
KitMaker: 8,156 posts
Auto Modeler: 2,953 posts
Posted: Wednesday, January 08, 2020 - 12:35 AM UTC
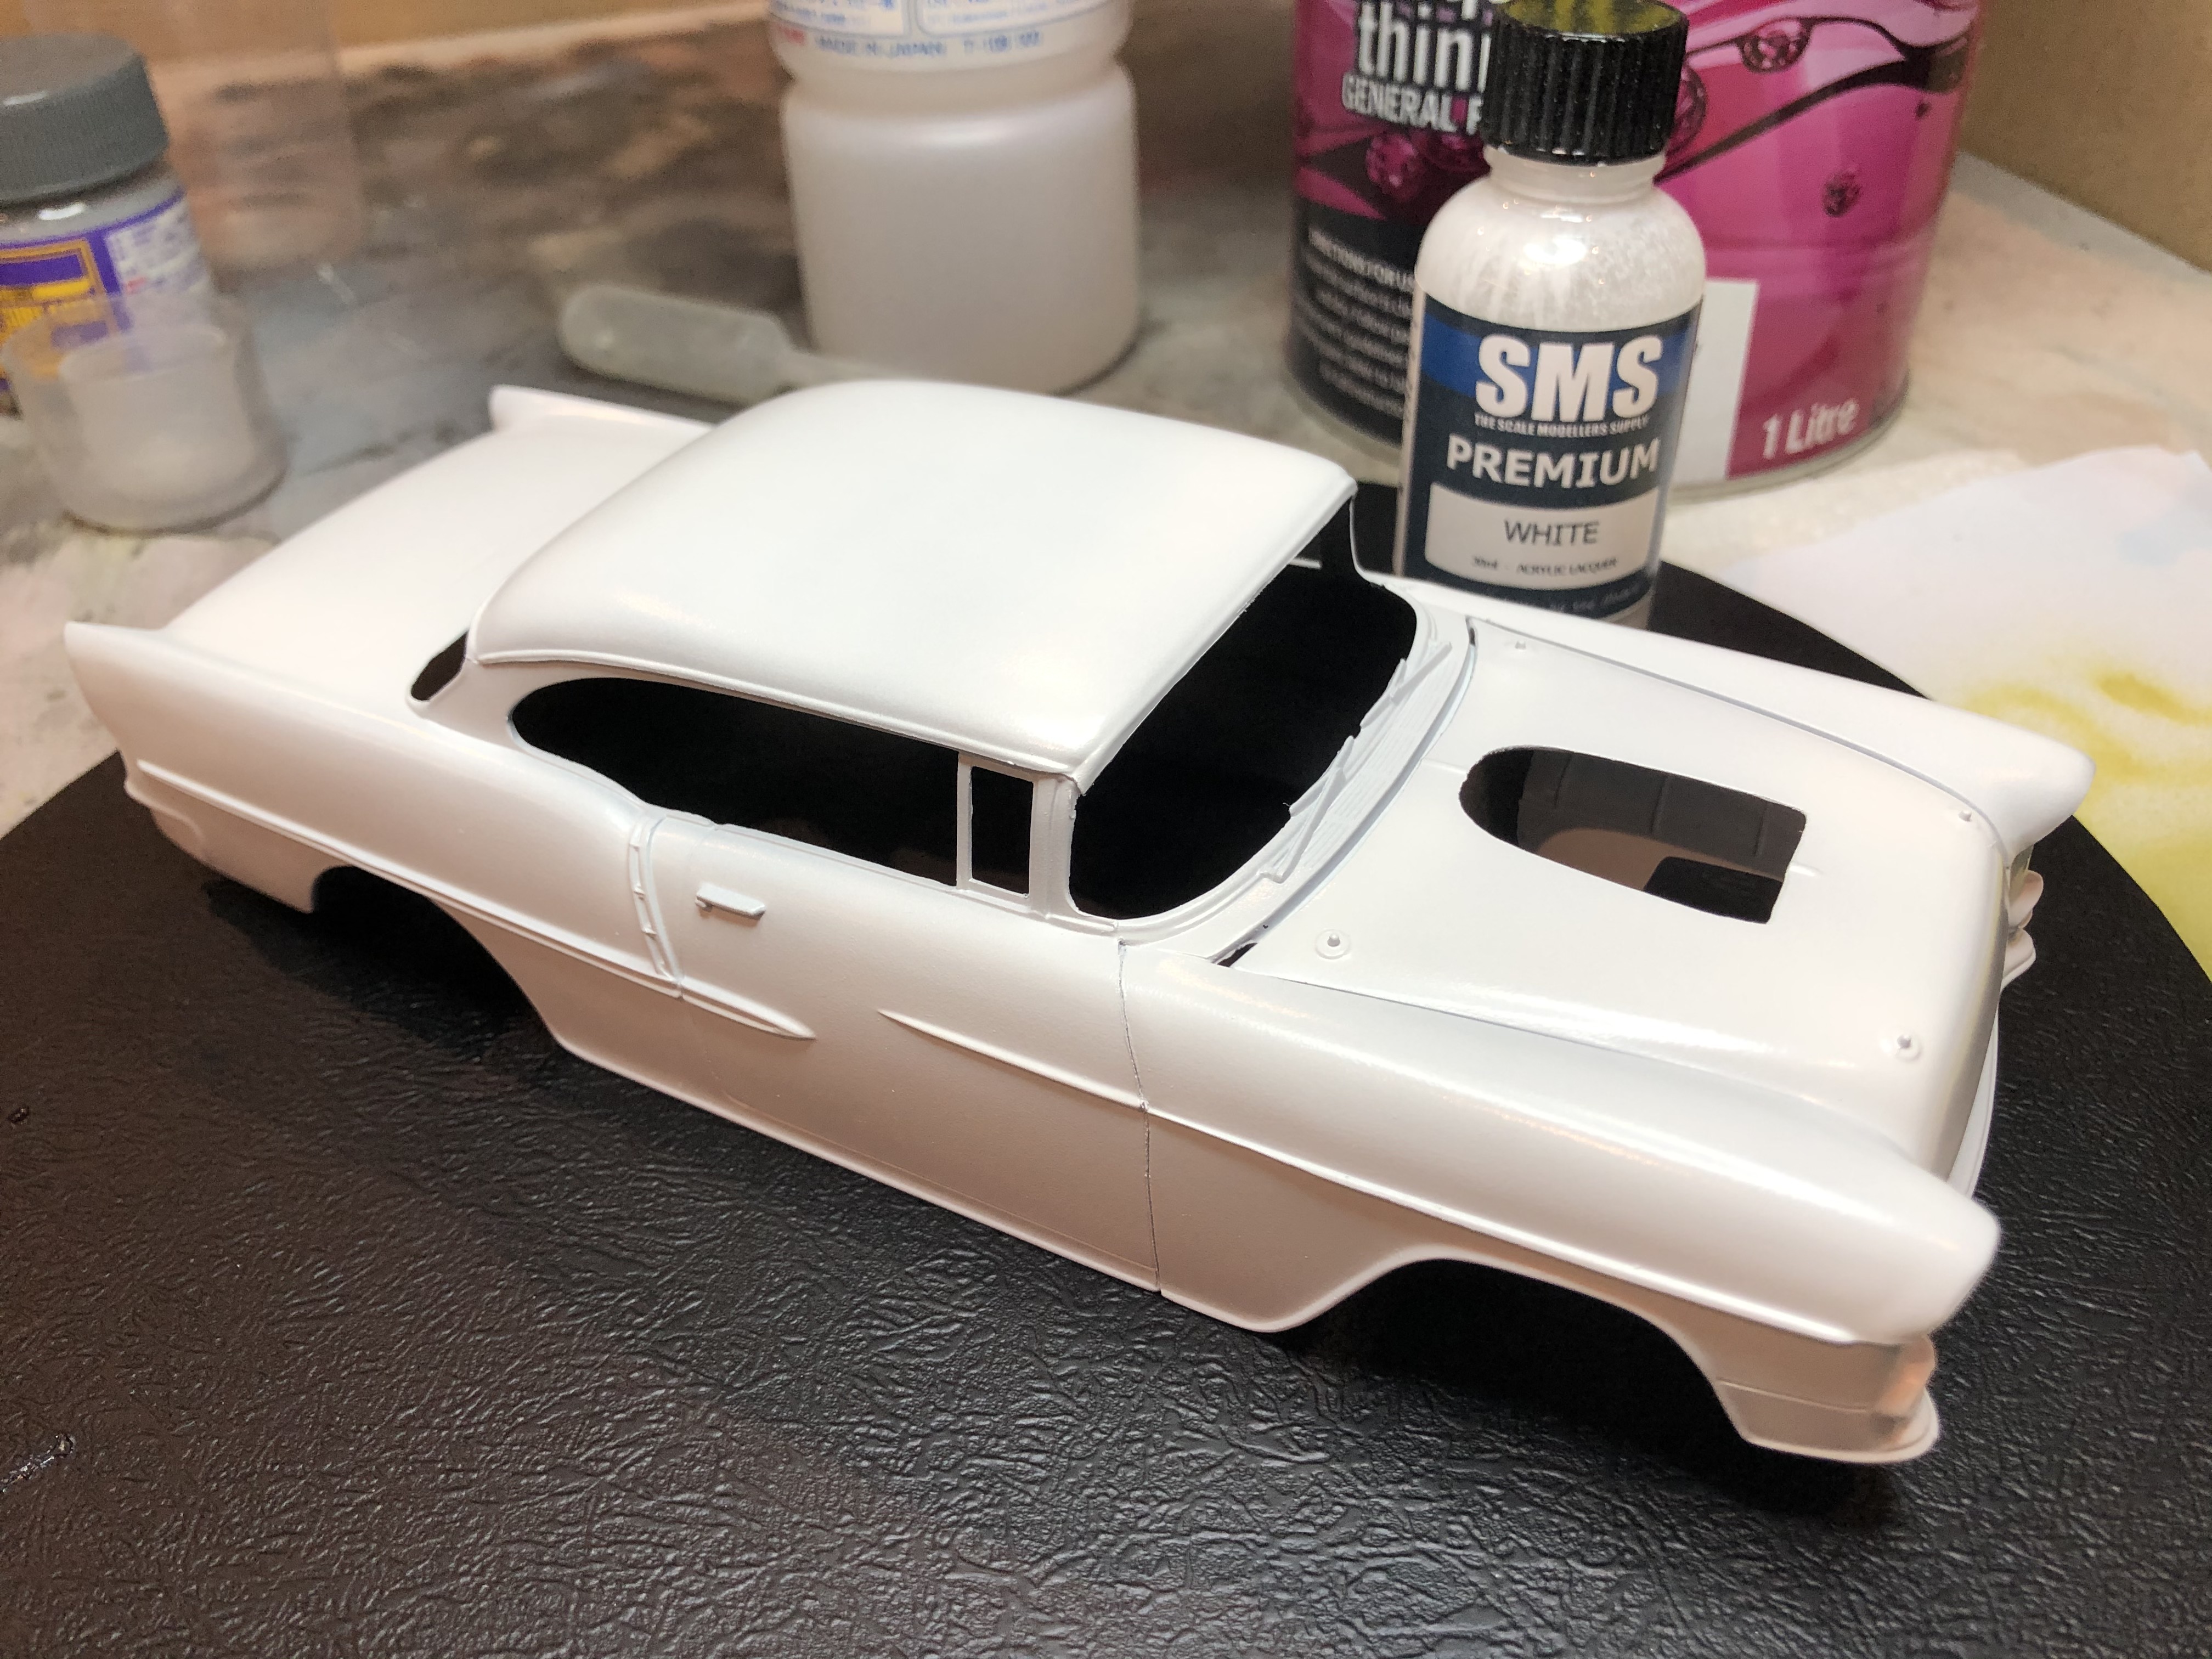
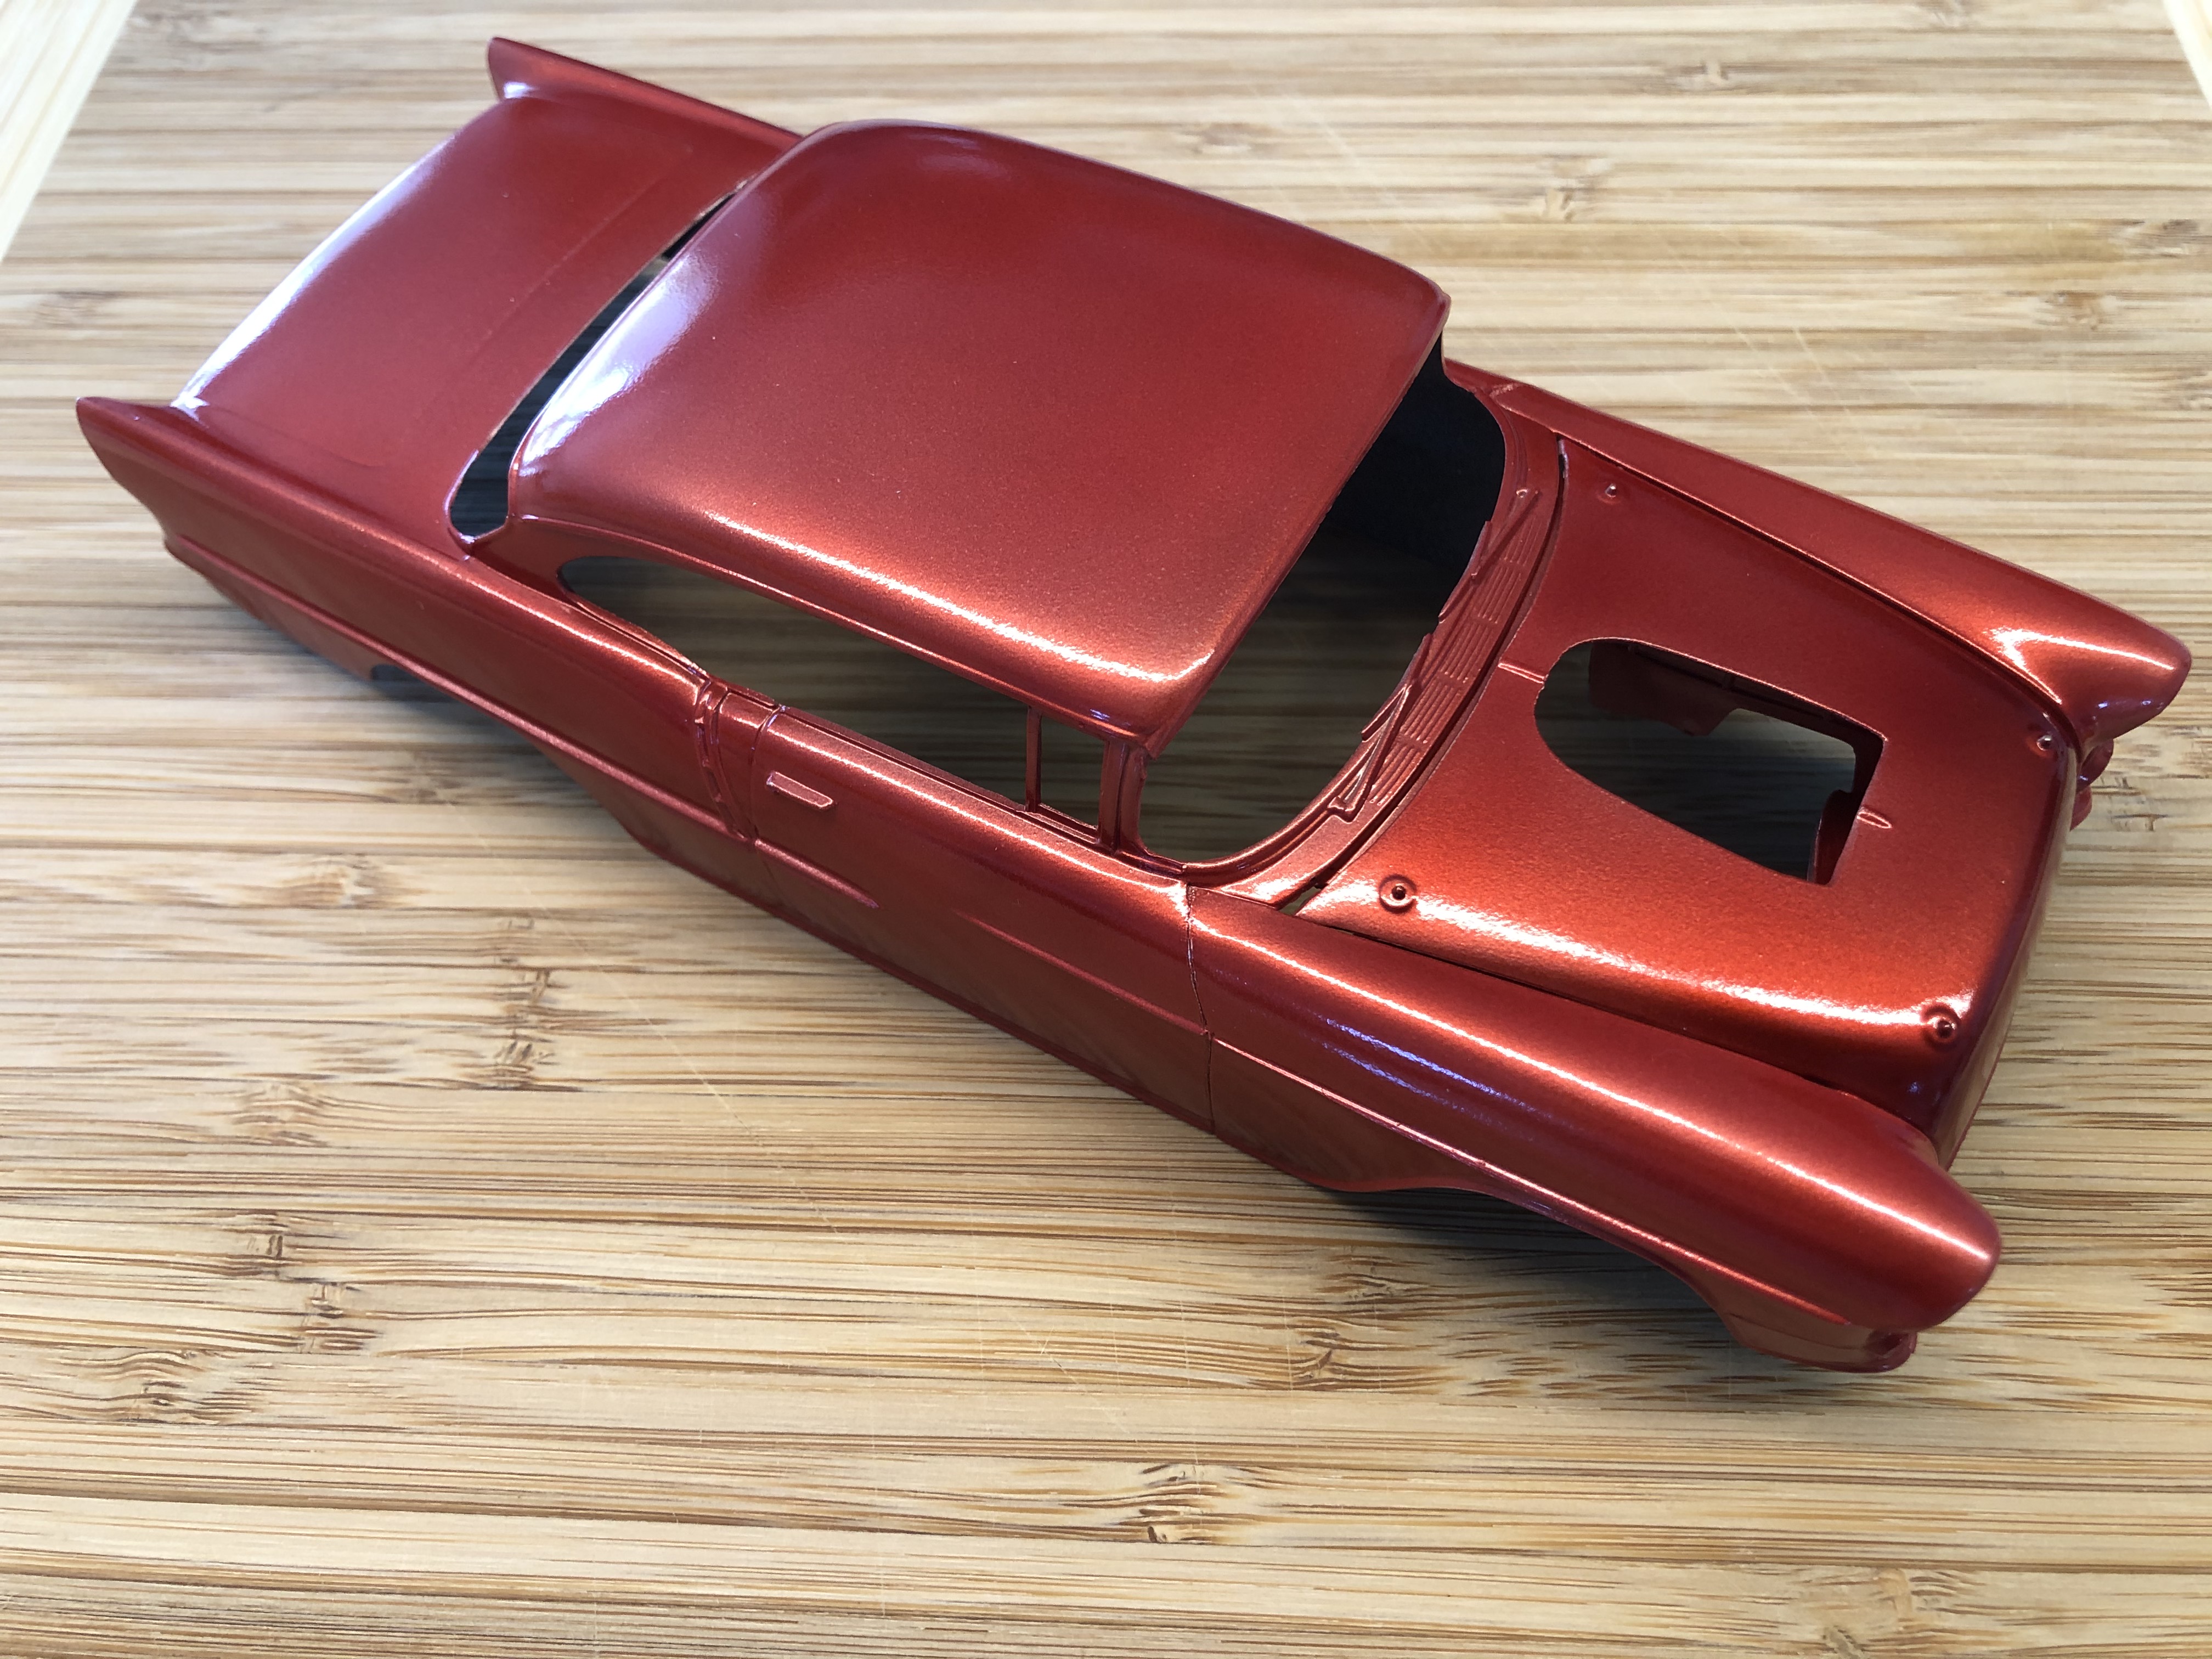
I had some fun experimenting with paints tonight on the '55. The standard MS1500/MLT mix was applied a week or so back then tidied up and touched up, so tonight was all about the colour.

First up SMS Premium White as an undercoat.
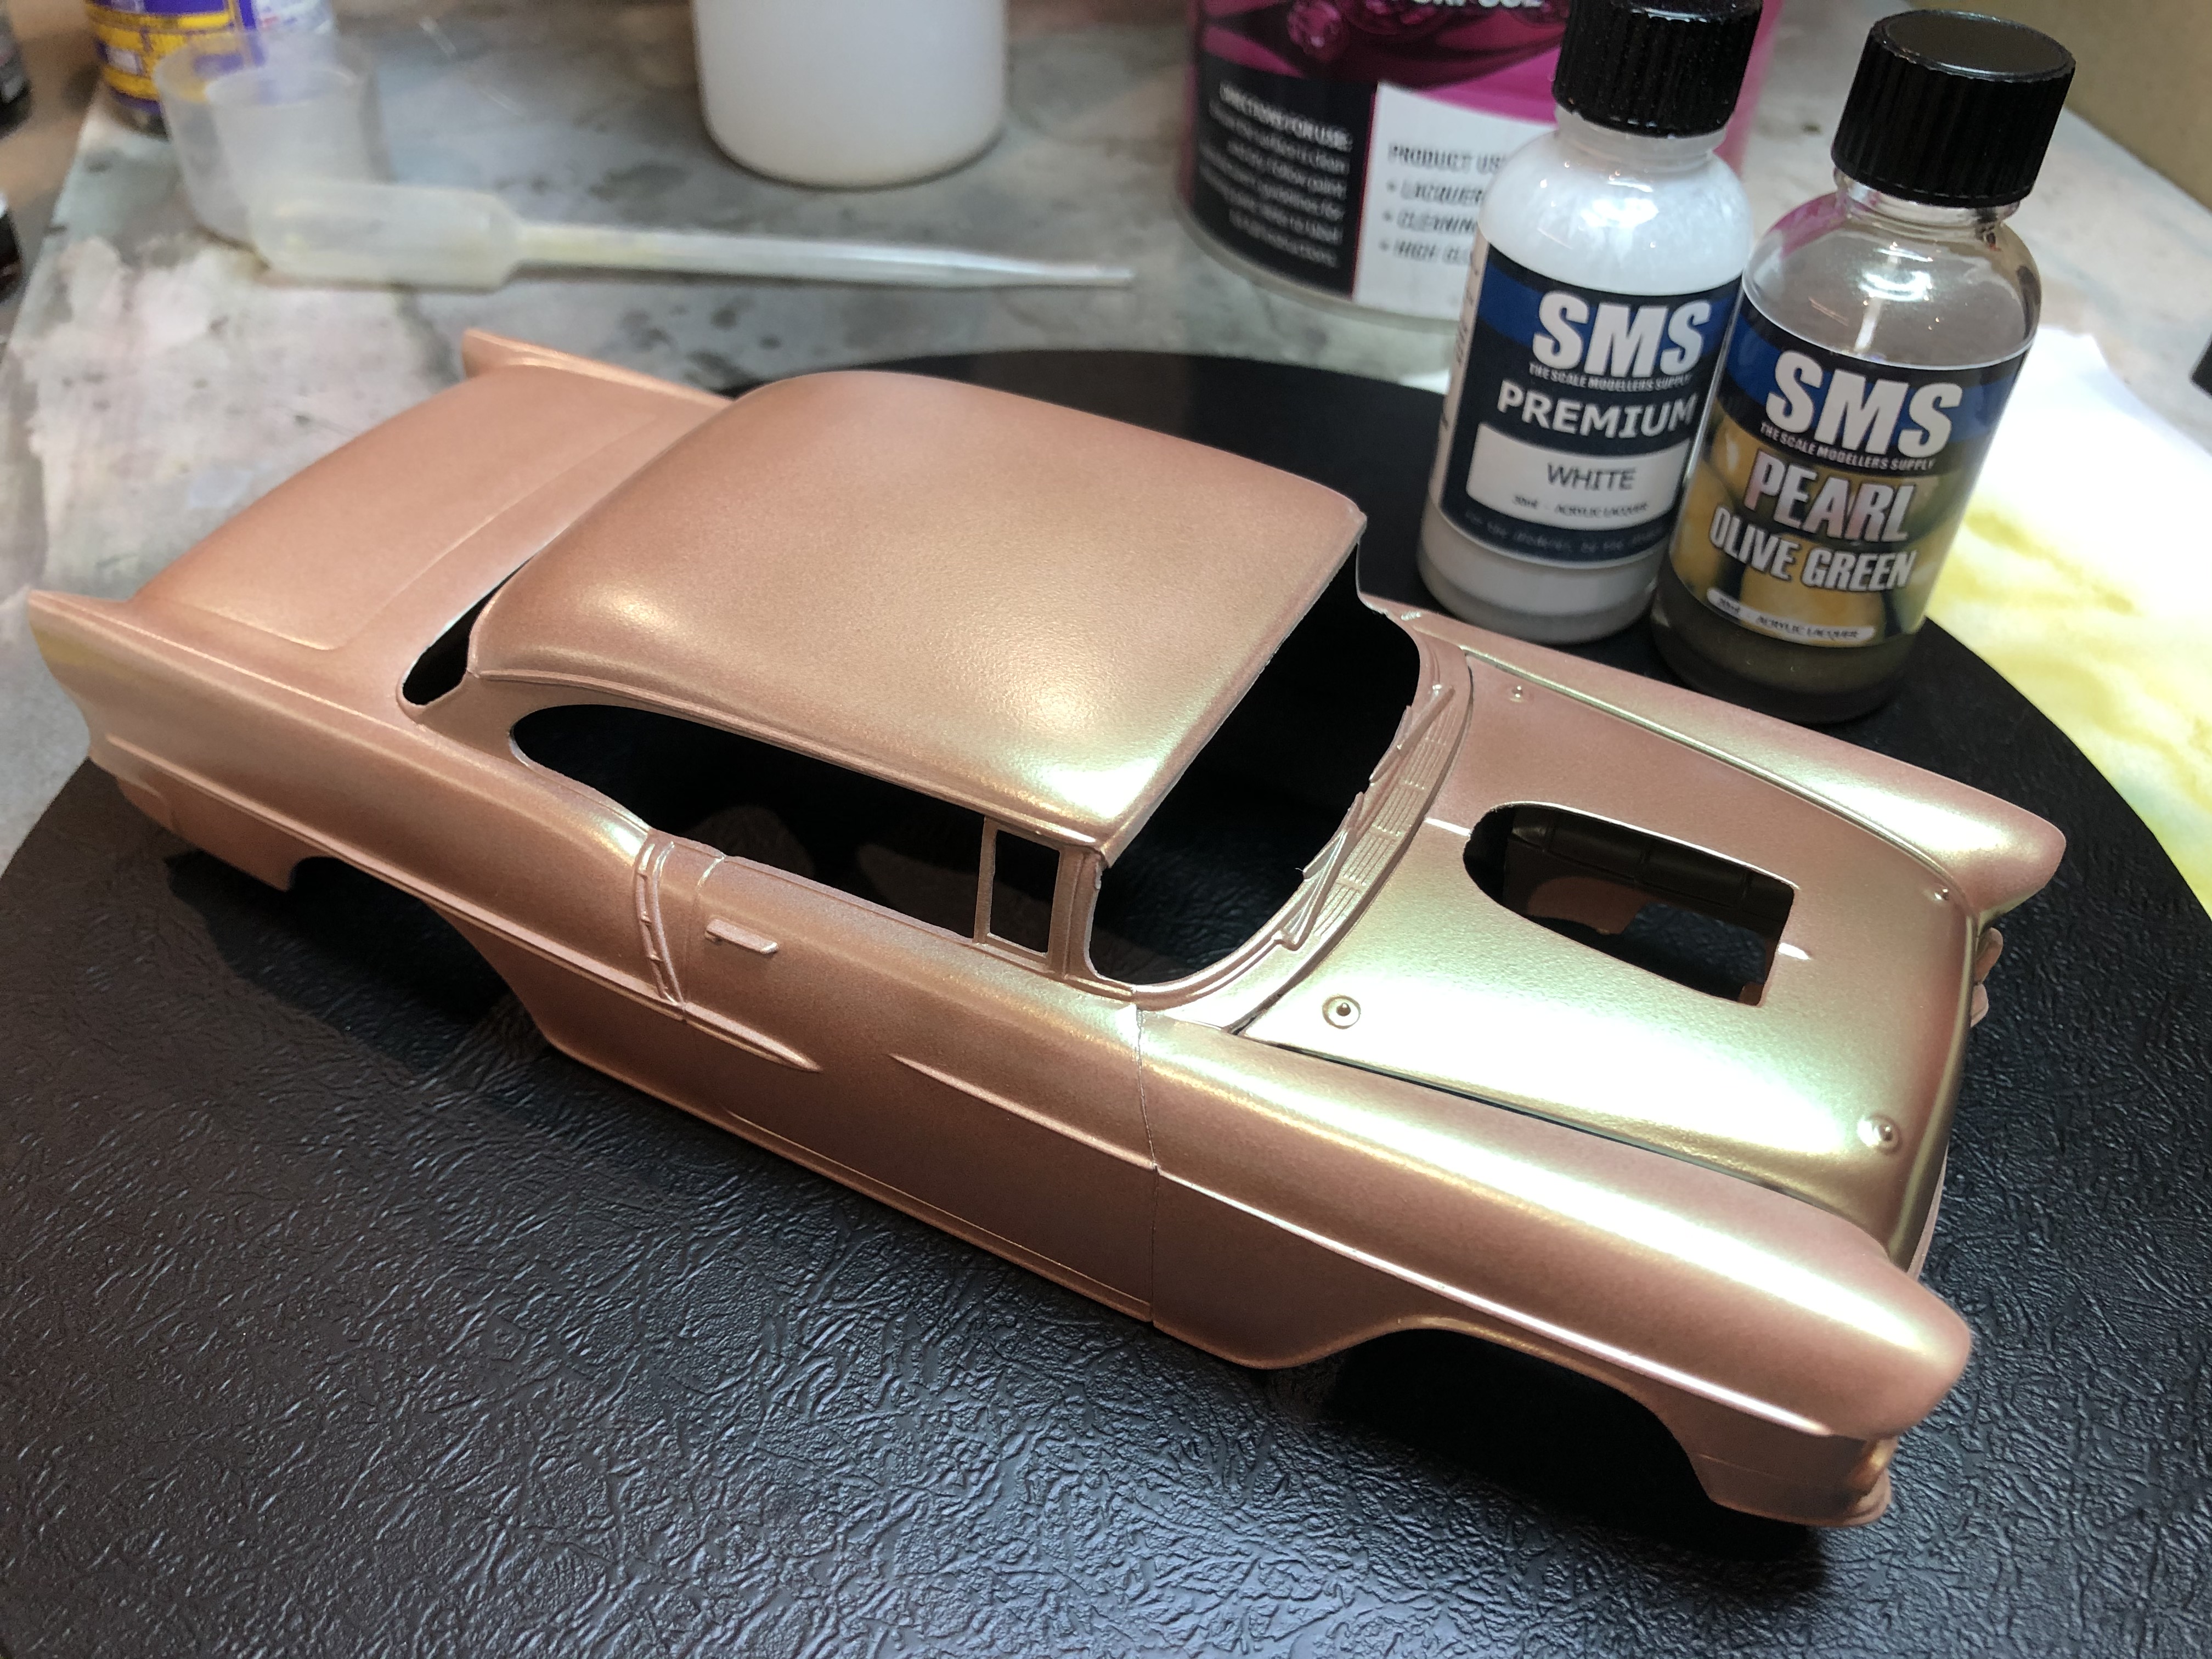
Then an Olive Green Pearl as a different base.
Then Clear Red for a Candy finish colour coat.
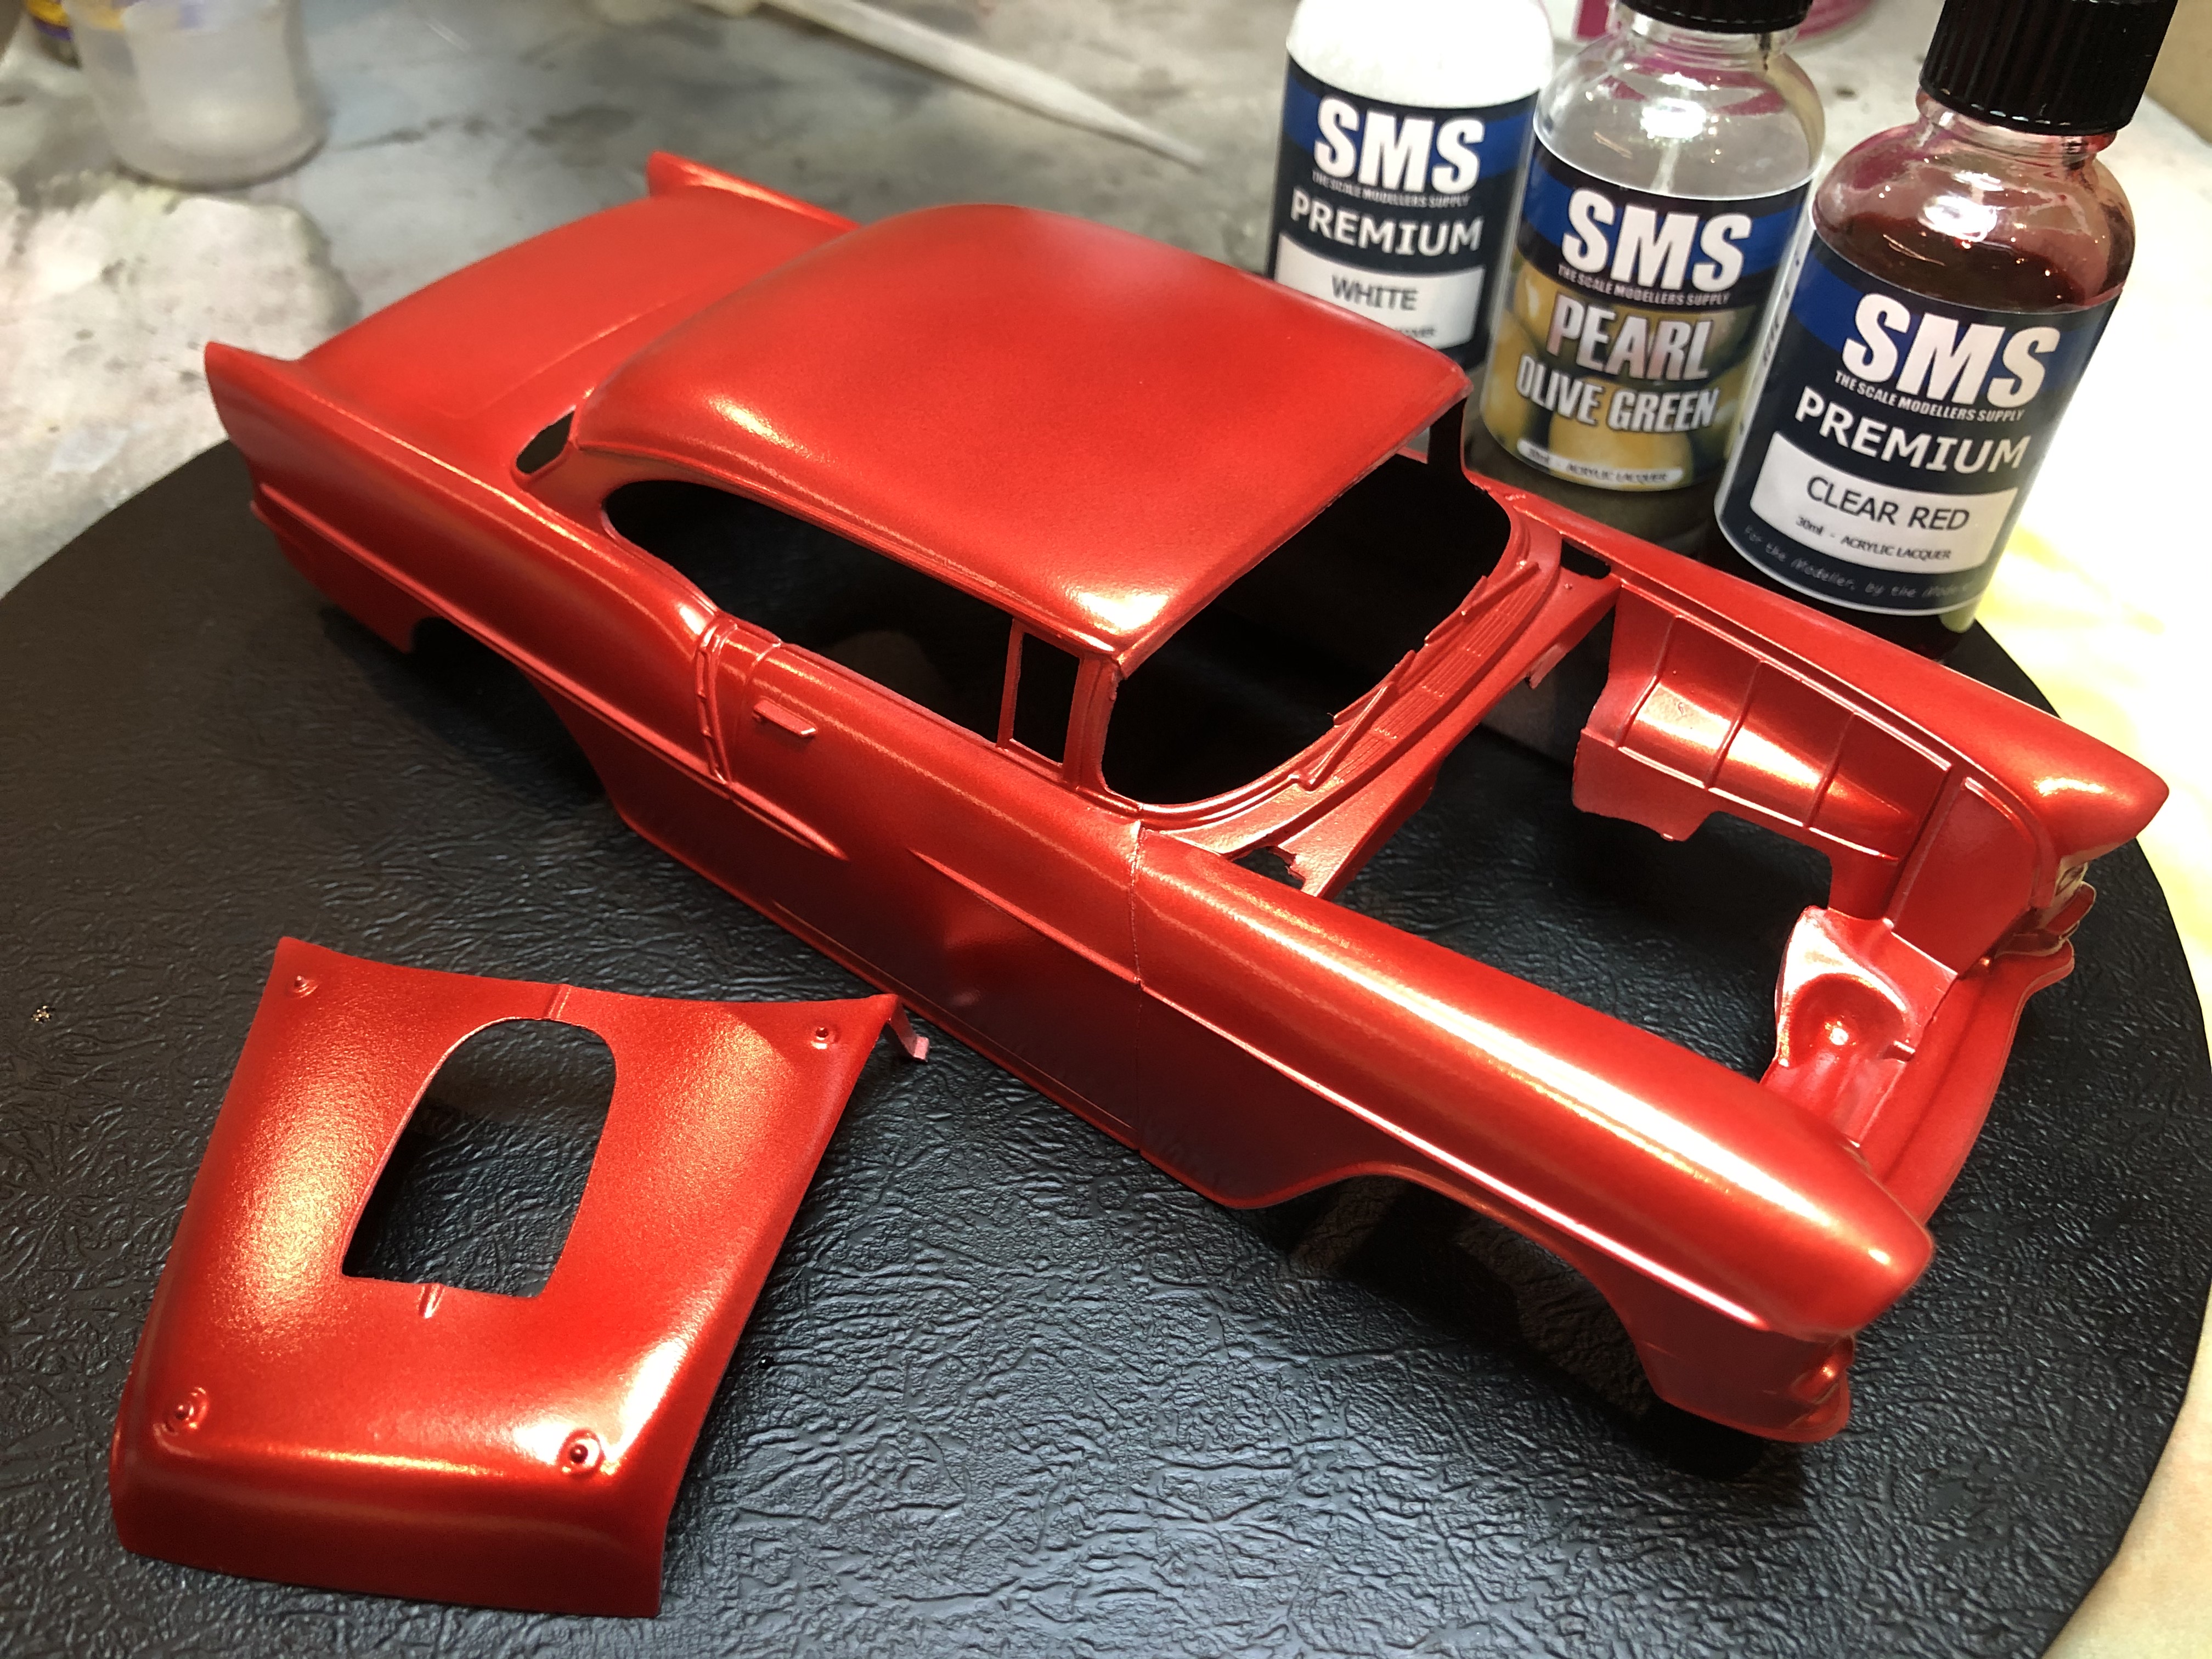
I will let this cure for a few days then give it a fine wet sand ready for the clear gloss.
Cheers, D
ON the bench
Revell 1/24 '53 Corvette (building as '54)
Revell 1/24 BMW 507 Coupe and Cabrio
Italeri 1/48 Me262 B-1a/U1 Nightfighter
Monogram 1/24 '57 Chevy Nomad
Dragon 1/350 USS Frank Knox DD-742
Joel_W
Associate Editor New York, United States
Joined: December 04, 2010
KitMaker: 11,666 posts
Auto Modeler: 2,974 posts
Posted: Wednesday, January 08, 2020 - 01:57 AM UTC
Now that's going to be one super bright Candy Apple Red finish. Just one question. Why a White base coat, then the Olive Green Pearl base? Is it just that you wanted to go with a different color or as a 2 part base?
Joel
On my Workbench:
Monogram 1/24 scale 427 Shelby Cobra
Just Completed:
Beemax 1/24 scale BMW M3 E30 1992 Evolution II
AussieReg
Associate Editor #007
Victoria, Australia
Joined: June 09, 2009
KitMaker: 8,156 posts
Auto Modeler: 2,953 posts
Posted: Wednesday, January 08, 2020 - 09:28 AM UTC
Quoted Text
Now that's going to be one super bright Candy Apple Red finish. Just one question. Why a White base coat, then the Olive Green Pearl base? Is it just that you wanted to go with a different color or as a 2 part base?
Joel
Thanks Joel. I used the white as a base to really kick the pearl colours to see how they look under the clear red. The pearl doesn't show up anywhere near as much over a grey primer base. I also wanted something a bit different from the traditional clear-over-silver candy finish, and in different lighting the olive green does vary the colour a bit.
Cheers, D
ON the bench
Revell 1/24 '53 Corvette (building as '54)
Revell 1/24 BMW 507 Coupe and Cabrio
Italeri 1/48 Me262 B-1a/U1 Nightfighter
Monogram 1/24 '57 Chevy Nomad
Dragon 1/350 USS Frank Knox DD-742
Kobenhavn, Denmark
Joined: June 29, 2004
KitMaker: 6,760 posts
Auto Modeler: 2,182 posts
Posted: Wednesday, January 08, 2020 - 08:32 PM UTC
Great choice, of color, for a classic Chevy
It might not show, in the images, but I'm sure your choice of base coat, will have quite an impact, on the candy red. I have made a few experiments, with base coats, for candy red, such as gold, various shades of gunmetal, silver, aluminium and steel. The 3 later colors don't make that much of a difference, for a single color paint scheme, but if you use them for graphics, you can see the difference.
On the workbench:
MPC: 1972 Pontiac GTO
Revell: 1965 Mustang
Verlinden 120mm guard of the marine.
Revell: 2010 Camaro
Monogram: 1931 Rolls Royce
Italeri: LVT2 Amtrac
AussieReg
Associate Editor #007
Victoria, Australia
Joined: June 09, 2009
KitMaker: 8,156 posts
Auto Modeler: 2,953 posts
Posted: Friday, January 10, 2020 - 07:59 PM UTC
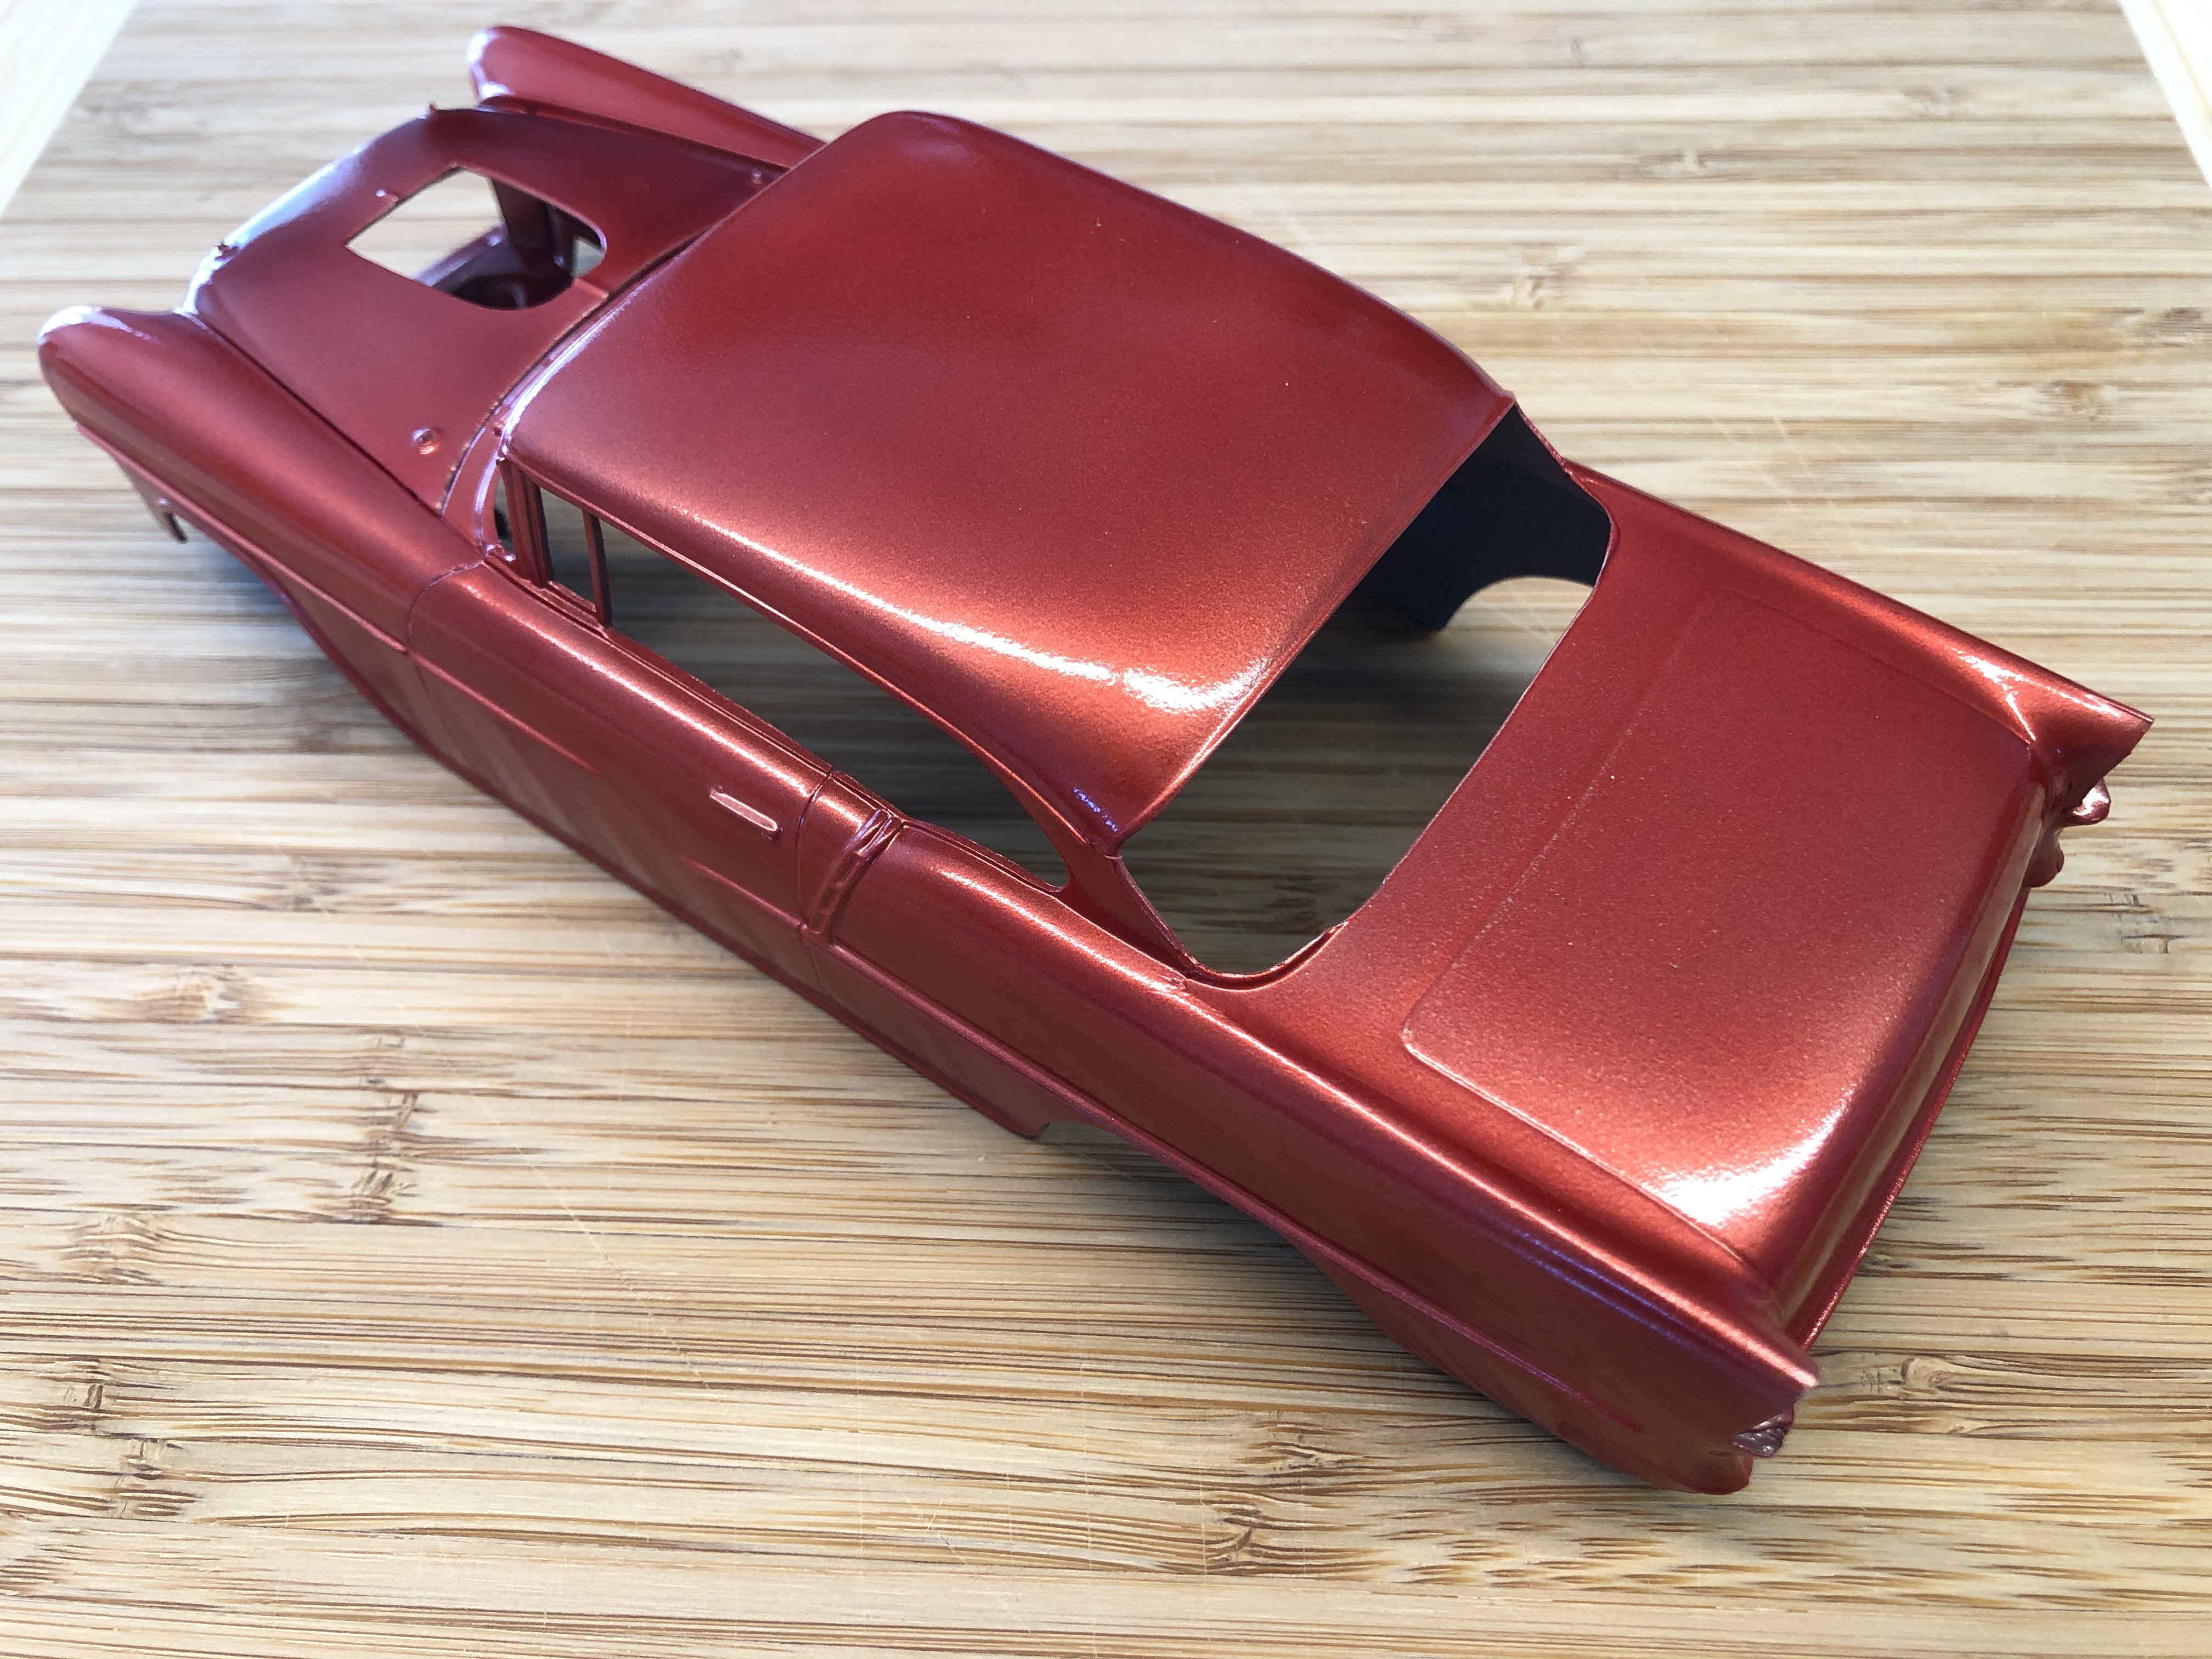
Clear Gloss Saturday today
Cheers, D
ON the bench
Revell 1/24 '53 Corvette (building as '54)
Revell 1/24 BMW 507 Coupe and Cabrio
Italeri 1/48 Me262 B-1a/U1 Nightfighter
Monogram 1/24 '57 Chevy Nomad
Dragon 1/350 USS Frank Knox DD-742
Joel_W
Associate Editor New York, United States
Joined: December 04, 2010
KitMaker: 11,666 posts
Auto Modeler: 2,974 posts
Posted: Saturday, January 11, 2020 - 07:17 AM UTC
D,
The color Candy Red coat with the clear gloss looks outstanding.
Joel
On my Workbench:
Monogram 1/24 scale 427 Shelby Cobra
Just Completed:
Beemax 1/24 scale BMW M3 E30 1992 Evolution II
Kobenhavn, Denmark
Joined: June 29, 2004
KitMaker: 6,760 posts
Auto Modeler: 2,182 posts
Posted: Tuesday, January 14, 2020 - 07:42 PM UTC
That's a good looking gloss candy red Damian.
On the workbench:
MPC: 1972 Pontiac GTO
Revell: 1965 Mustang
Verlinden 120mm guard of the marine.
Revell: 2010 Camaro
Monogram: 1931 Rolls Royce
Italeri: LVT2 Amtrac
#306
Victoria, Australia
Joined: June 27, 2010
KitMaker: 3,959 posts
Auto Modeler: 495 posts
Posted: Saturday, January 18, 2020 - 09:59 PM UTC
Beautiful work D... reminds me of a certain song "Candy, Candy, Candy! "
Stay home and build models!
In 1/72
Gloster Gladiator MkII for the Bi-planes Campaign
In 1/350
Airfix 1:350 Type 45 Destroyer
AussieReg
Associate Editor #007
Victoria, Australia
Joined: June 09, 2009
KitMaker: 8,156 posts
Auto Modeler: 2,953 posts
Posted: Sunday, January 19, 2020 - 12:46 AM UTC
Thanks guys! I'm happy with the way this one is shaping up, and I'm enjoying keeping the "Tri-5" series rolling along.
The underside was primed with MS1500 Grey, then shot with MRP-172 Super Gloss Black, because I had the bottle there and it needs to be used up. After a day curing I hand painted the tank and pipes with the Vallejo Metal Color Chrome.
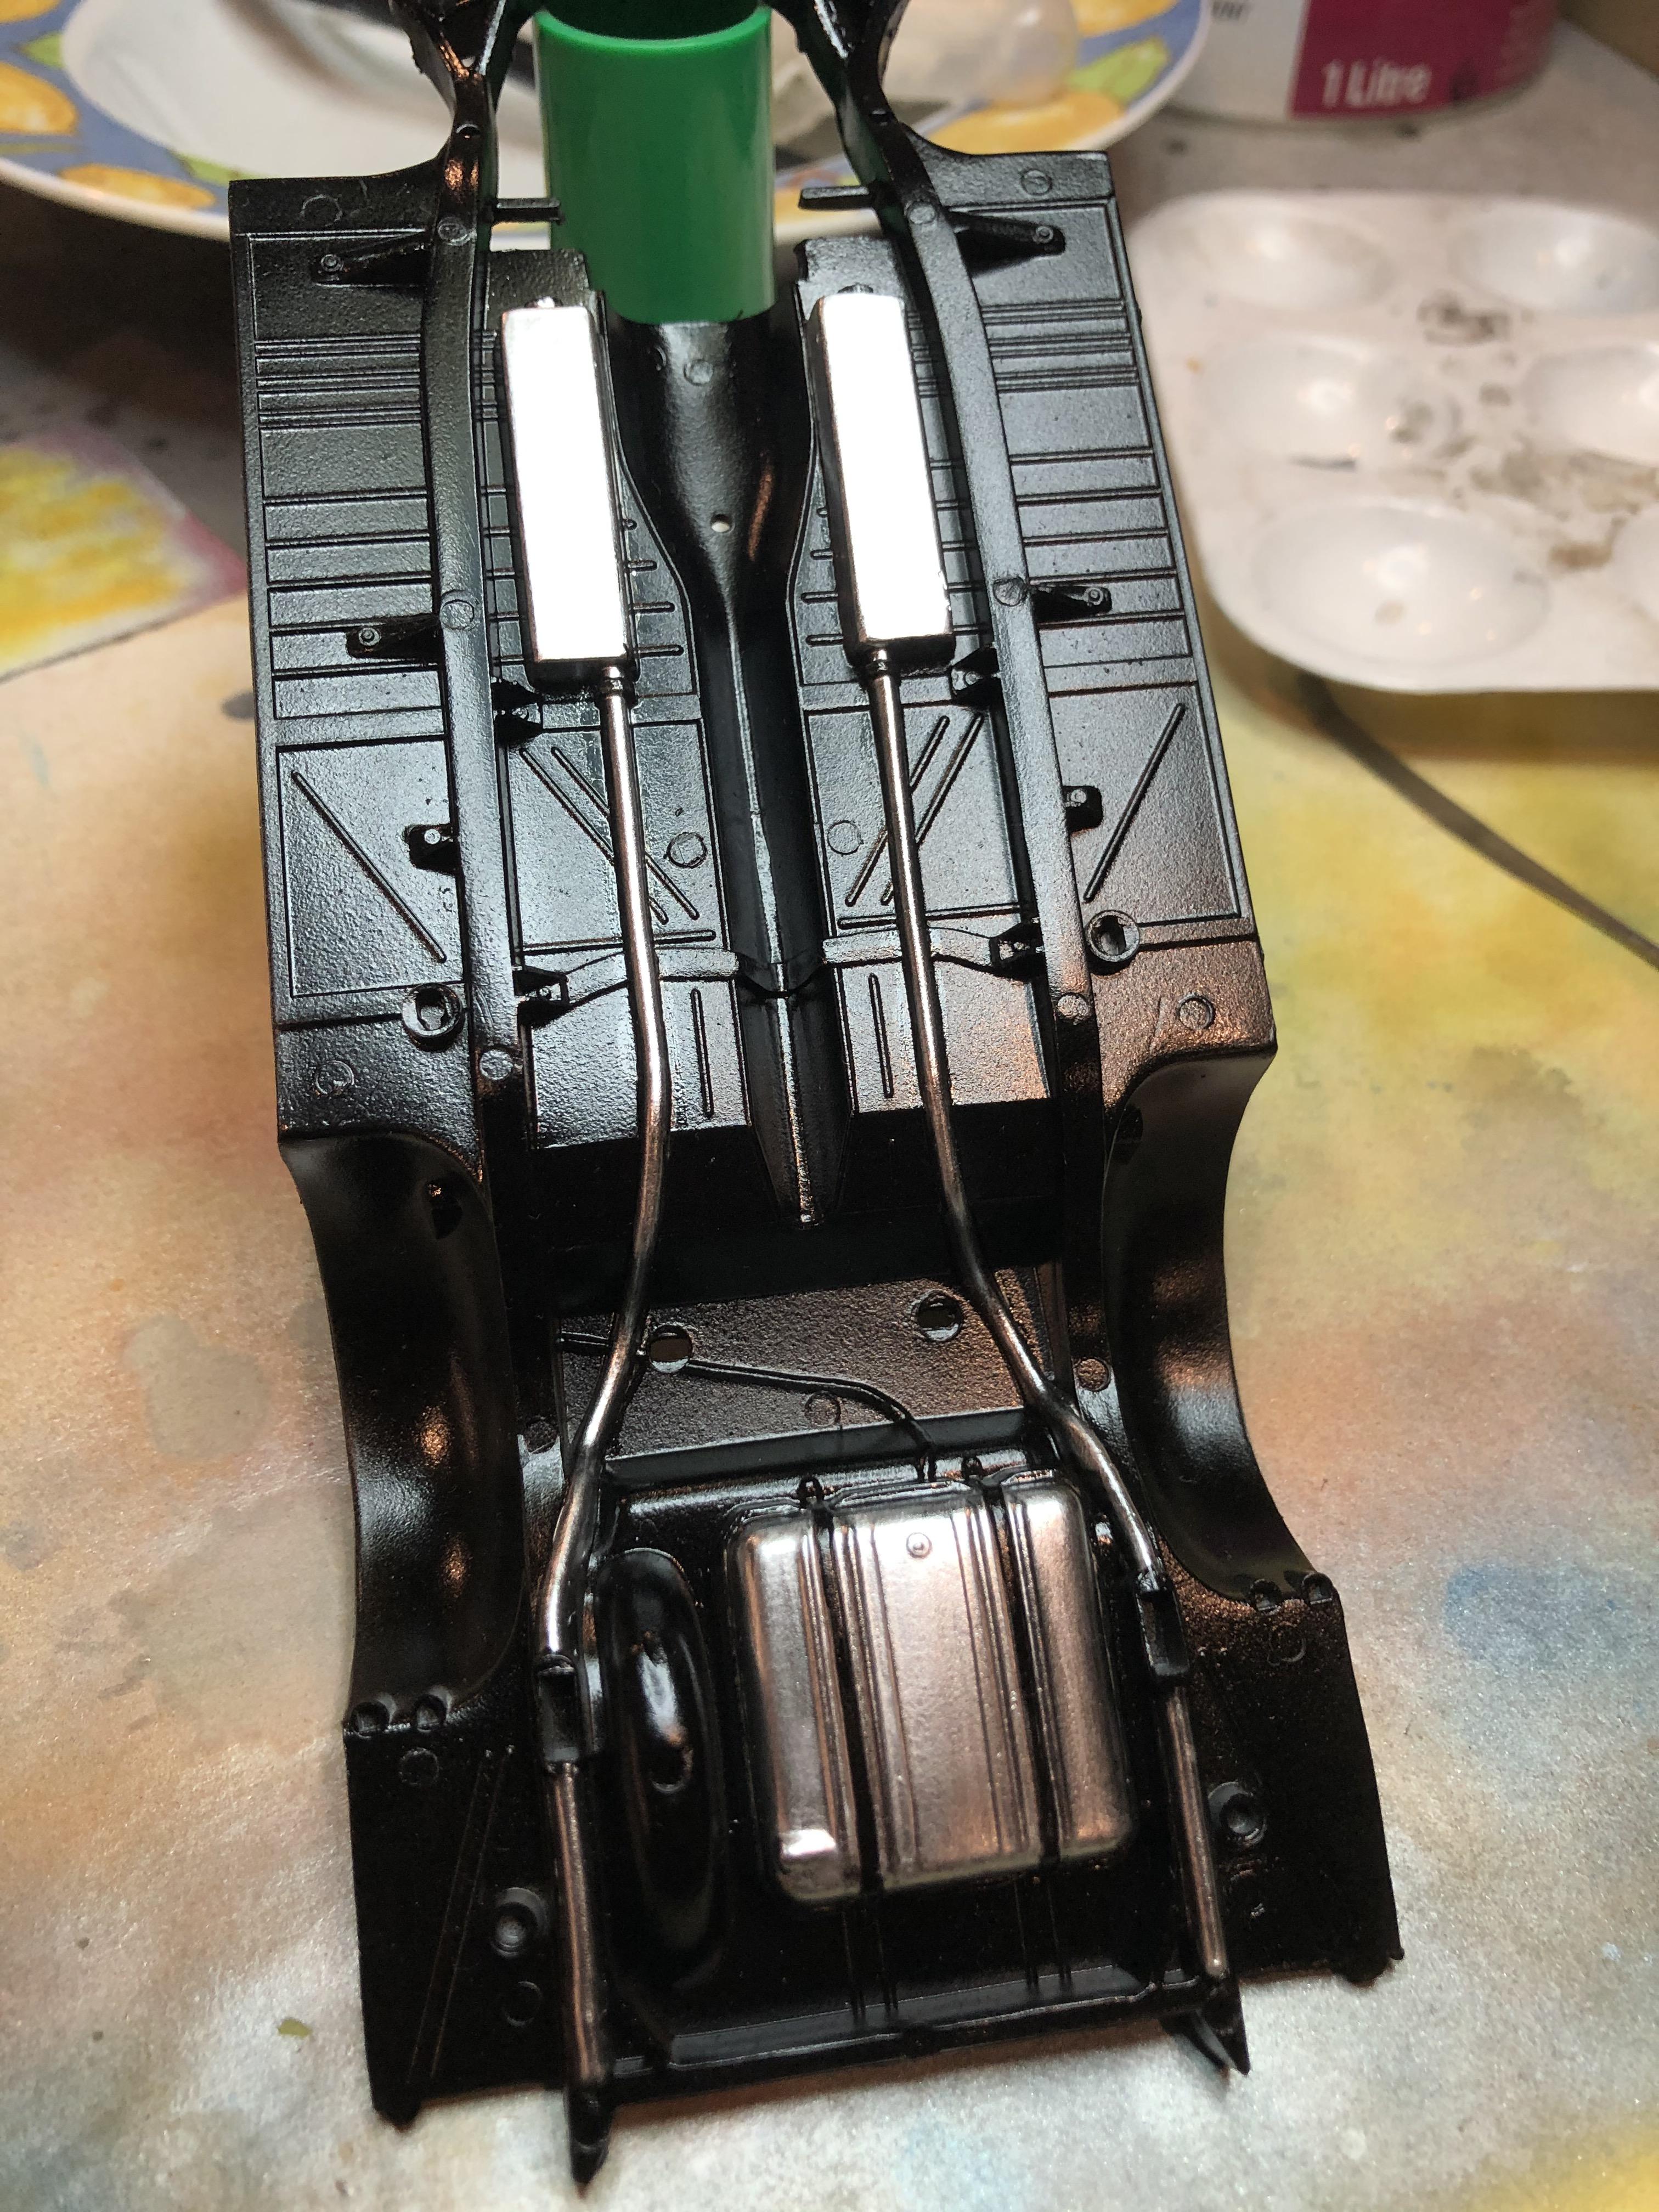
Just in case you can't see them all, there are 25 ejector pin marks on this piece!
I'm thinking a white interior with pale grey carpets and trim highlights for this one.
Cheers, D
ON the bench
Revell 1/24 '53 Corvette (building as '54)
Revell 1/24 BMW 507 Coupe and Cabrio
Italeri 1/48 Me262 B-1a/U1 Nightfighter
Monogram 1/24 '57 Chevy Nomad
Dragon 1/350 USS Frank Knox DD-742


