Feisty Ferrari's Campaign Proposal
Illinois, United States
Joined: August 30, 2005
KitMaker: 3,289 posts
Auto Modeler: 1,620 posts
Posted: Sunday, February 14, 2010 - 02:37 PM UTC
Quoted Text
Hermon, thanks! I'm just learning from the pro's (you guys) 
Ian, thanks for the tip, I'll try it on one of the pieces that won't be seen. This is more in the glass than on it, so if that doesn't work I'll do some searching on the sites.
I'd bet those are hairline cracks and no future is gonna fix that...contact the manufacturer and explain the problem{pic maybe too} to see if they can replace the clear tree.
-I say I have two kids- one son & one daughter...my wife says she has three- one son ,one daughter and one husband.
...and don't tell yourself you can't do it....it'll just take longer then
California, United States
Joined: October 21, 2007
KitMaker: 3,684 posts
Auto Modeler: 294 posts
Posted: Sunday, February 14, 2010 - 03:06 PM UTC
That's what I'm thinking now too, Bob. At first I thought maybe it was the plastic going into the mold from 2 sides and the line was from where the plastic met, but they look too straight for that. The kit was manufactured in 1988 and is OOP, so I'll just live with it. Thanks!
England - South East, United Kingdom
Joined: April 02, 2007
KitMaker: 35 posts
Auto Modeler: 20 posts
Posted: Monday, February 15, 2010 - 05:25 AM UTC
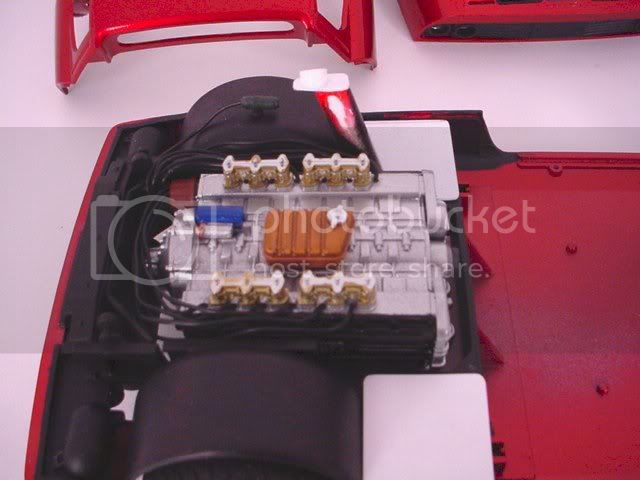
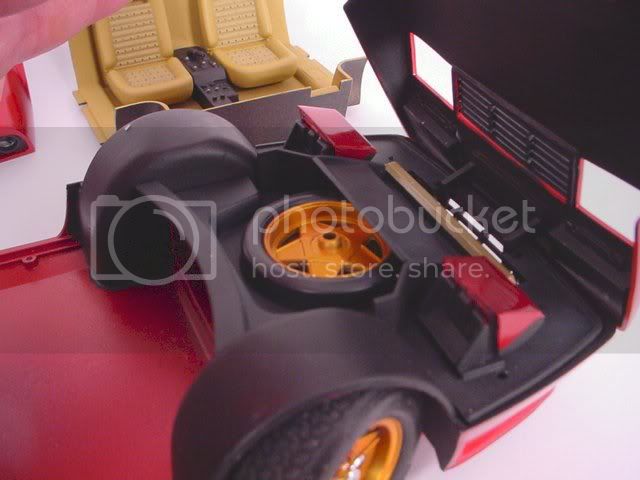
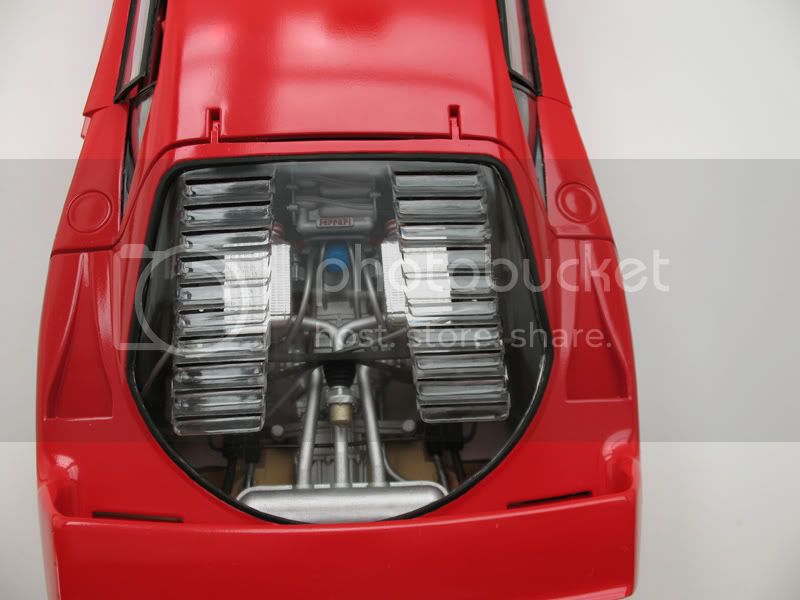
Some more progress shots from this weekend,
Engine bay done:

Brake disks:

England - South West, United Kingdom
Joined: August 20, 2007
KitMaker: 409 posts
Auto Modeler: 87 posts
Posted: Monday, February 15, 2010 - 07:58 AM UTC
Very nice James, coming along nicely.
Ian you've done a great job on that engine - must have taken some brush work to get into those crevases
I may be starting my next one soon
Cheers
Loobes
It's weird that photographers spend years or even a whole lifetime, trying to capture moments that added together, don't even amount to a couple of hours.
~James Lalropui Keivom
VISIT MY SITE ------>
Illinois, United States
Joined: August 30, 2005
KitMaker: 3,289 posts
Auto Modeler: 1,620 posts
Posted: Friday, February 19, 2010 - 02:09 PM UTC
Quoted Text
That's what I'm thinking now too, Bob. At first I thought maybe it was the plastic going into the mold from 2 sides and the line was from where the plastic met, but they look too straight for that. The kit was manufactured in 1988 and is OOP, so I'll just live with it. Thanks!
You might be surprised if it's been rereleased lately...the other option is break out the sanding sticks and work it out. I suggest starting with 600, then 800, then 1000...you get the idea. Once you get them semi transparent hit them with future and see if they're gone or not. If "not", it'll be something to live with but you'll know you tried at that point.
-I say I have two kids- one son & one daughter...my wife says she has three- one son ,one daughter and one husband.
...and don't tell yourself you can't do it....it'll just take longer then
England - South East, United Kingdom
Joined: April 02, 2007
KitMaker: 35 posts
Auto Modeler: 20 posts
Posted: Sunday, February 21, 2010 - 10:06 AM UTC
Finished the Enzo dash - had a major problem when I think I applied too much sol to the dial decals and they curled up and dried before I noticed. Decided to replace with some printed from photoshop and I hope no-one will notice once its inside the tub!

Illinois, United States
Joined: August 30, 2005
KitMaker: 3,289 posts
Auto Modeler: 1,620 posts
Posted: Friday, February 26, 2010 - 02:36 AM UTC
Uhg...having a bad! Somehow I managed to aquire two lil spots on the 330's windshield so I wet sanded with 1000 and then started to polish it with #1 novus to get it clear again..not close enough...so I pulled out the same polish I used on the old towncars headlights to make them clear again and nearly got it till I leaned in too heavy and put a small crack and some haze in the windshield....so, it's now clear again - sorta, I still have the same two tiny spots that I started out with{lovely} and have the new crack and haze.
My choices are 3 fold
-1 cuss alot{done!}
-2 dip the windshield in future and hope{but know better} that it clears up
-3 replace the windshield with another stock piece or clear sheet.
I tried to look up fujimi's website from the instructions and that's not going so well so it looks a though I'll need to make a new one out of sheet stock clear and hope she looks good.
-I say I have two kids- one son & one daughter...my wife says she has three- one son ,one daughter and one husband.
...and don't tell yourself you can't do it....it'll just take longer then
England - South East, United Kingdom
Joined: April 02, 2007
KitMaker: 35 posts
Auto Modeler: 20 posts
Posted: Sunday, February 28, 2010 - 09:29 AM UTC
England - South West, United Kingdom
Joined: August 20, 2007
KitMaker: 409 posts
Auto Modeler: 87 posts
Posted: Tuesday, March 02, 2010 - 07:33 AM UTC
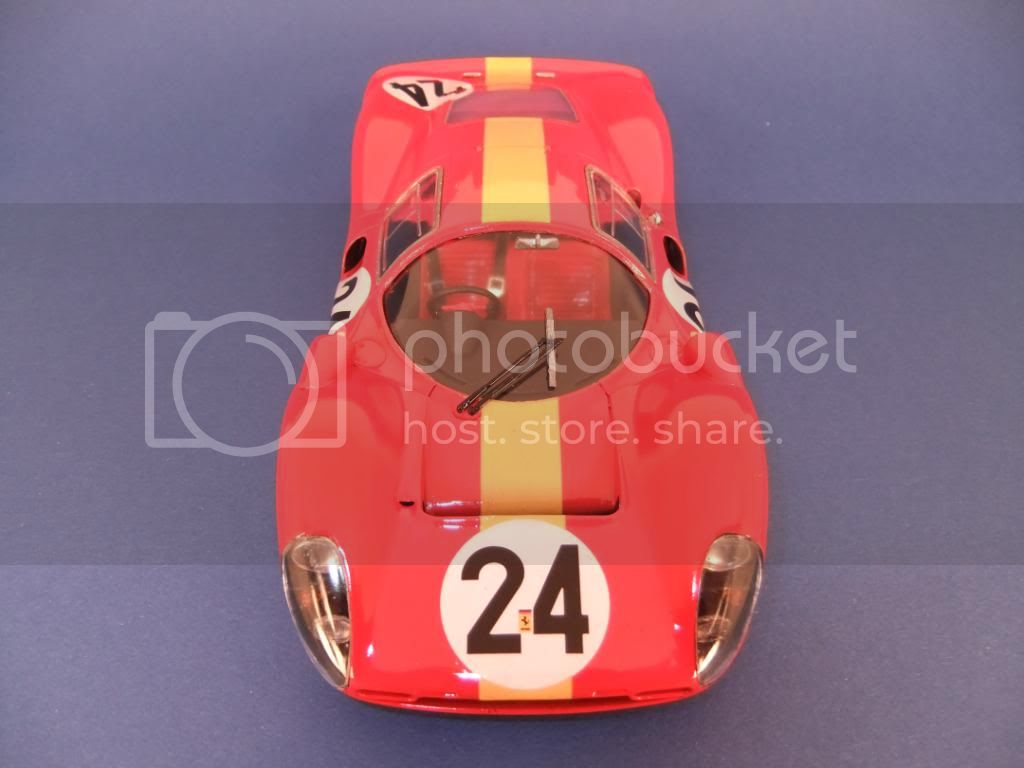
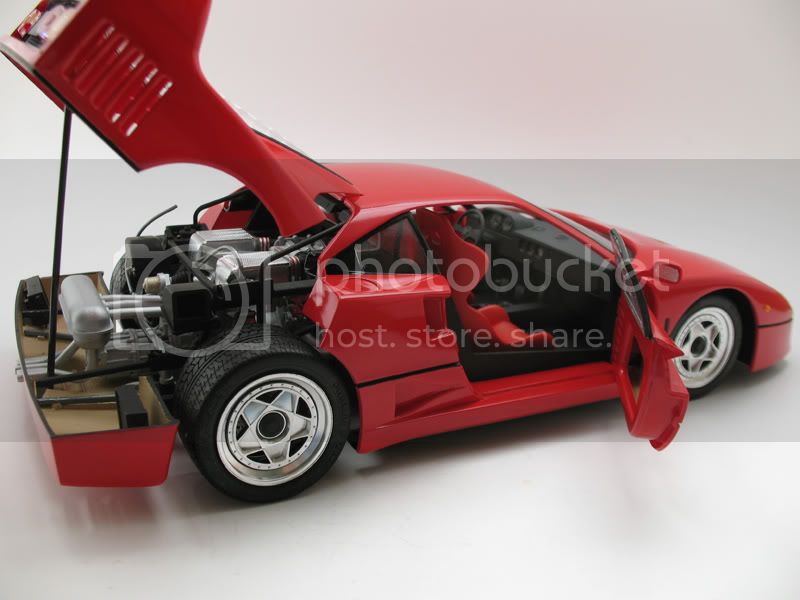
Very nice car there Ian, a beautiful finish you got there. Just one point though, the front indicator light should be painted orange - clear orange. Also the front lights would look better if you had painted them silver. Just my personal opinion.
Great model
Cheers
Loobes
It's weird that photographers spend years or even a whole lifetime, trying to capture moments that added together, don't even amount to a couple of hours.
~James Lalropui Keivom
VISIT MY SITE ------>
England - South East, United Kingdom
Joined: April 02, 2007
KitMaker: 35 posts
Auto Modeler: 20 posts
Posted: Tuesday, March 02, 2010 - 07:49 AM UTC
Quoted Text
Very nice car there Ian, a beautiful finish you got there. Just one point though, the front indicator light should be painted orange - clear orange. Also the front lights would look better if you had painted them silver. Just my personal opinion.
Great model
Cheers
Loobes
Thanks Lewis - I did say I made a few mistakes, and yes as you say there are some small indicator lights that Fujimi supplied in clear, not orange. I think the light wells are made of carbon fibre though, so should be dark gray.
Illinois, United States
Joined: August 30, 2005
KitMaker: 3,289 posts
Auto Modeler: 1,620 posts
Posted: Saturday, March 06, 2010 - 04:02 PM UTC
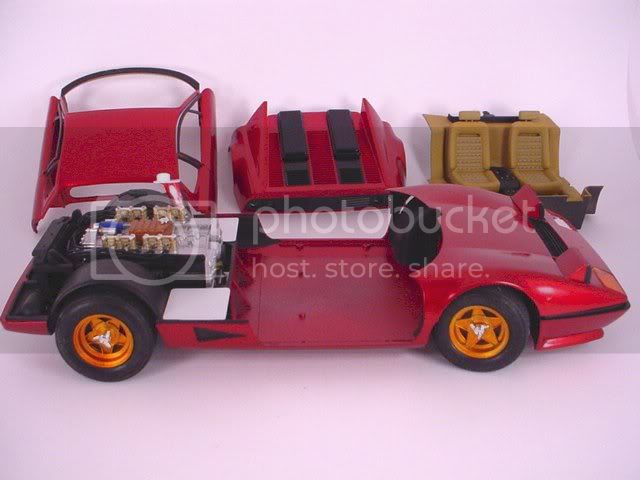
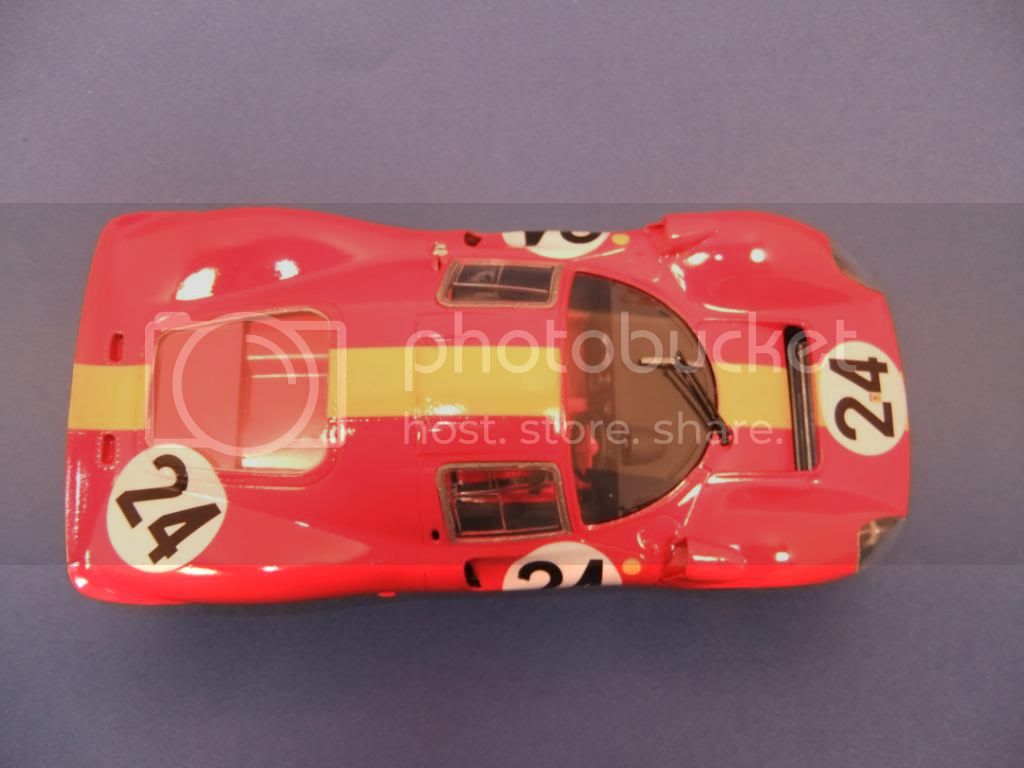
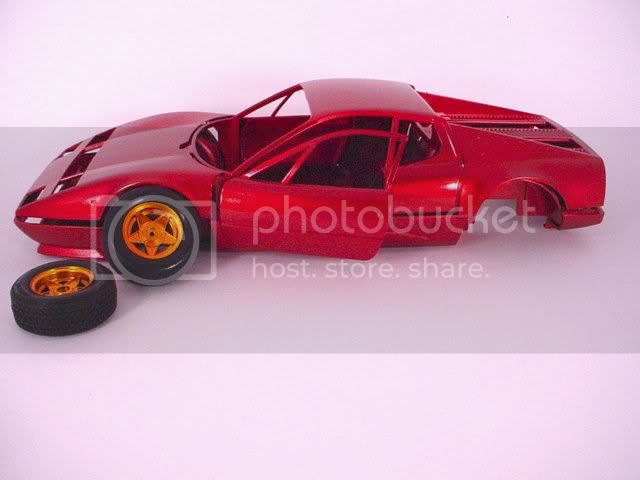
Ok, so while I'm cutting out a new windshield for the 330p4, I've been tinkering with this one.
This is the Fujimi 1/16 scale Ferrari BB512..it's a motorized kit, shows how to light it as well and actualy has a decent engine in it despite the gearbox....not too bad. Fit isn't the greatest, but still.
Here's where she's at so far-
-I say I have two kids- one son & one daughter...my wife says she has three- one son ,one daughter and one husband.
...and don't tell yourself you can't do it....it'll just take longer then
Illinois, United States
Joined: August 30, 2005
KitMaker: 3,289 posts
Auto Modeler: 1,620 posts
Posted: Saturday, March 13, 2010 - 10:35 AM UTC
-I say I have two kids- one son & one daughter...my wife says she has three- one son ,one daughter and one husband.
...and don't tell yourself you can't do it....it'll just take longer then
North Carolina, United States
Joined: November 28, 2005
KitMaker: 2,216 posts
Auto Modeler: 522 posts
Posted: Saturday, March 13, 2010 - 12:00 PM UTC
Bob, try some foil for the seatbelts. Chewing gum wrappers work well also and you can fold them into the right thickness for the scale.
Hermon

"Those who would give up Essential Liberty
to purchase a little Temporary Safety,
deserve neither Liberty nor Safety."
Benjamin Franklin
England - South West, United Kingdom
Joined: August 20, 2007
KitMaker: 409 posts
Auto Modeler: 87 posts
Posted: Sunday, March 14, 2010 - 01:10 AM UTC
Very nice build there Bob, shame about the other ferrari
Cheers
Loobes
It's weird that photographers spend years or even a whole lifetime, trying to capture moments that added together, don't even amount to a couple of hours.
~James Lalropui Keivom
VISIT MY SITE ------>
Illinois, United States
Joined: August 30, 2005
KitMaker: 3,289 posts
Auto Modeler: 1,620 posts
Posted: Monday, March 15, 2010 - 02:27 PM UTC
Thanks...I gotta button up one of them if nothing else!

I've tried one new windshield cut out so far for the 330...the next should be better.
-I say I have two kids- one son & one daughter...my wife says she has three- one son ,one daughter and one husband.
...and don't tell yourself you can't do it....it'll just take longer then
Illinois, United States
Joined: August 30, 2005
KitMaker: 3,289 posts
Auto Modeler: 1,620 posts
Posted: Saturday, April 03, 2010 - 03:55 AM UTC
-I say I have two kids- one son & one daughter...my wife says she has three- one son ,one daughter and one husband.
...and don't tell yourself you can't do it....it'll just take longer then
England - South West, United Kingdom
Joined: August 20, 2007
KitMaker: 409 posts
Auto Modeler: 87 posts
Posted: Monday, April 05, 2010 - 07:48 AM UTC
Excellent finish on that car Bob. One thing, have you got your camera set on Fluoresent or Tugsten?
It's weird that photographers spend years or even a whole lifetime, trying to capture moments that added together, don't even amount to a couple of hours.
~James Lalropui Keivom
VISIT MY SITE ------>
Illinois, United States
Joined: August 30, 2005
KitMaker: 3,289 posts
Auto Modeler: 1,620 posts
Posted: Monday, April 05, 2010 - 11:32 AM UTC
Flouresent #3...I'm given 3 flourescent settings{with no explination to the differences} and 1 incandescent. FL3 gave the best red of the car....still need to play with the new camera I guess......
-I say I have two kids- one son & one daughter...my wife says she has three- one son ,one daughter and one husband.
...and don't tell yourself you can't do it....it'll just take longer then
California, United States
Joined: October 21, 2007
KitMaker: 3,684 posts
Auto Modeler: 294 posts
Posted: Sunday, April 25, 2010 - 08:20 AM UTC
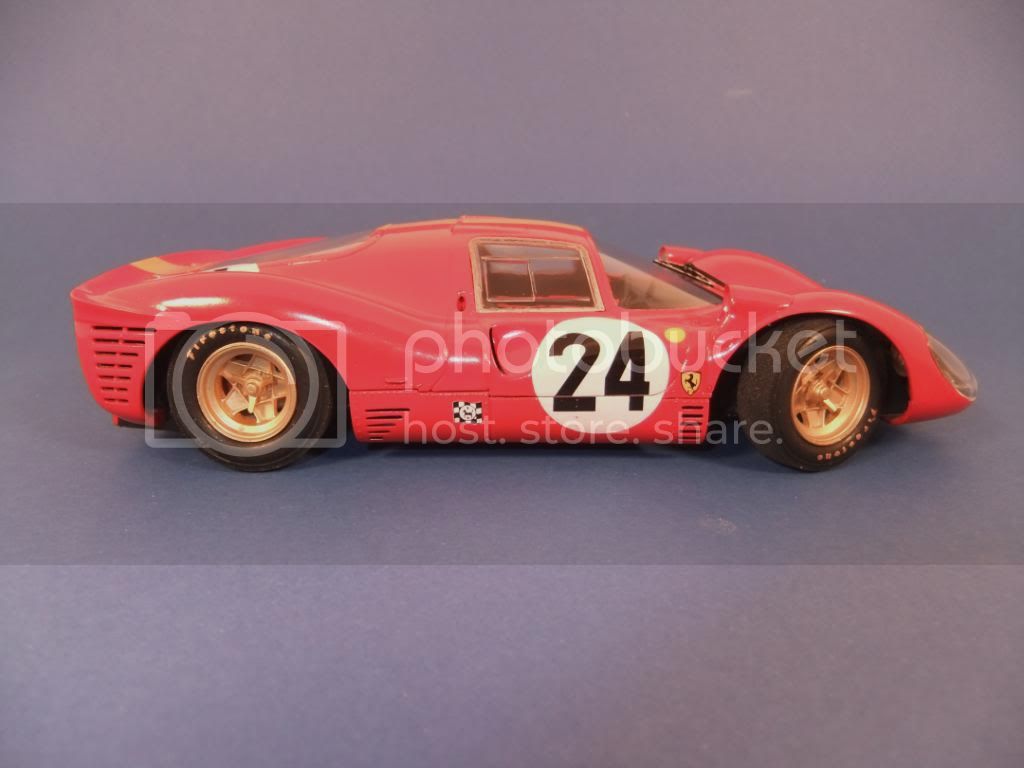
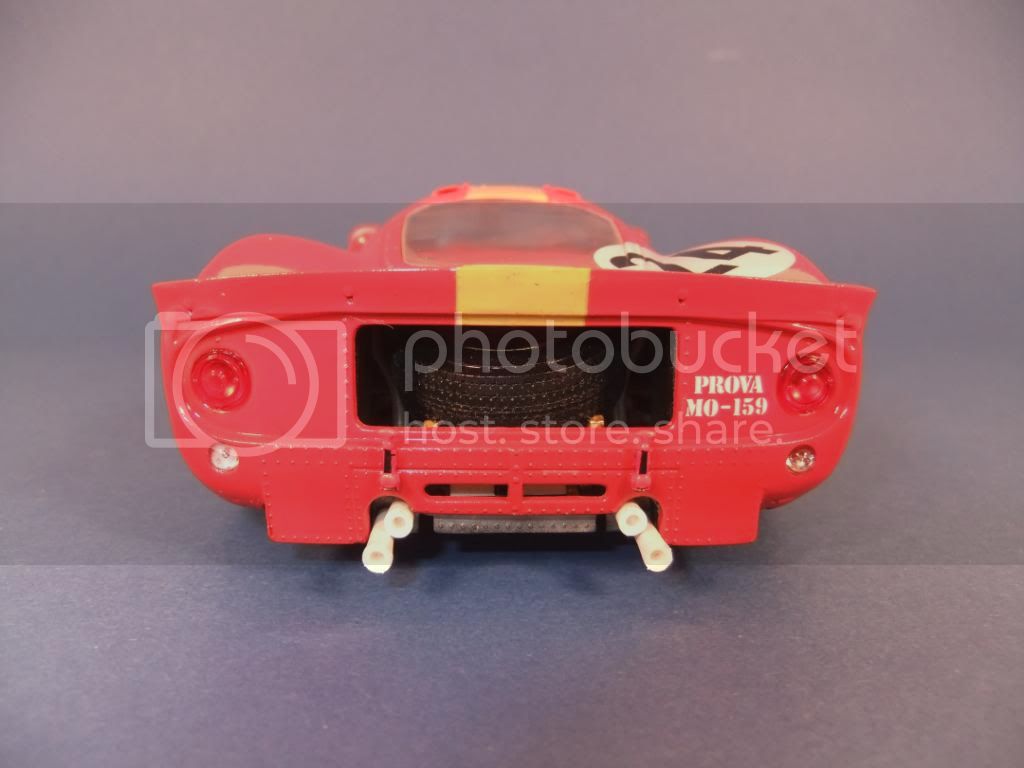
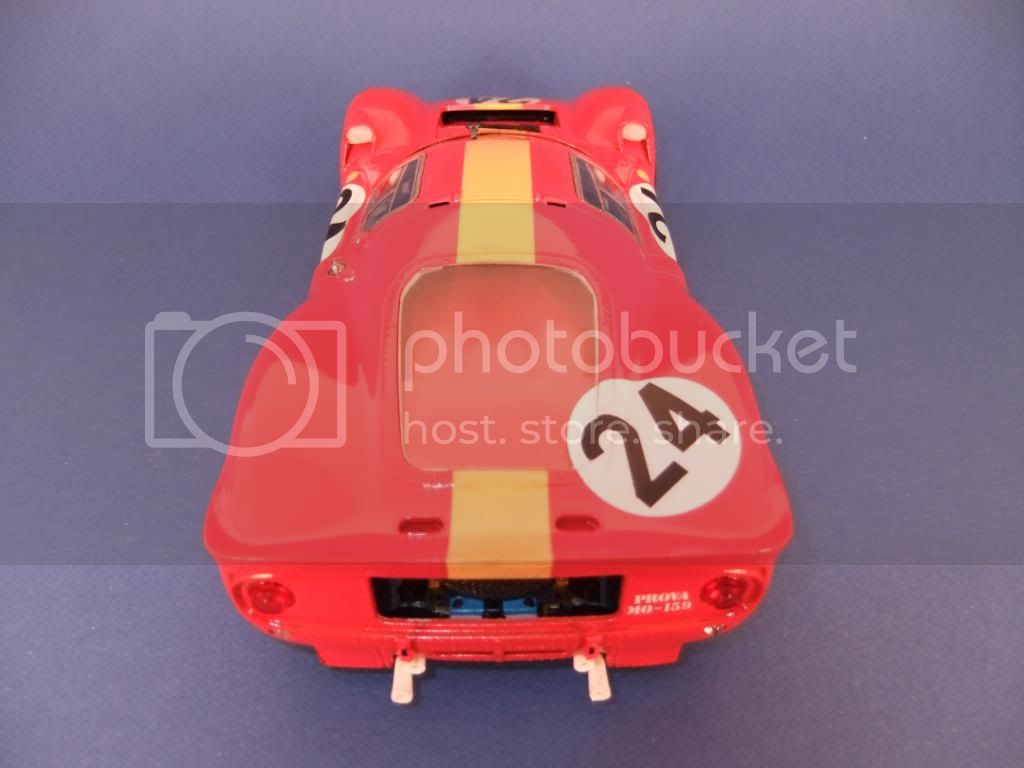
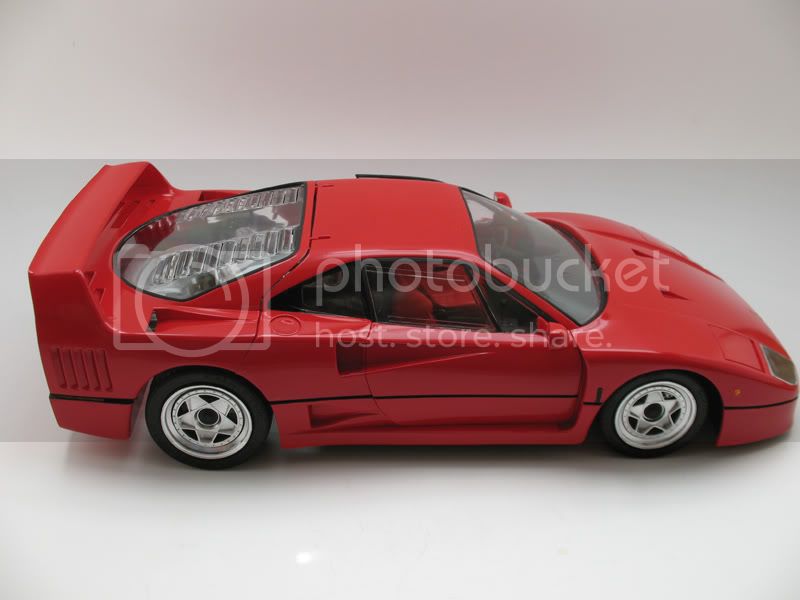
Woohoo, a milestone for me on two counts! First, my first auto build is complete. Second, this is probably the first build I've actually finished in a year or so. Group build complete
(just noticed....all the shots are of the passenger side...and yes, the drivers side is complete!
)
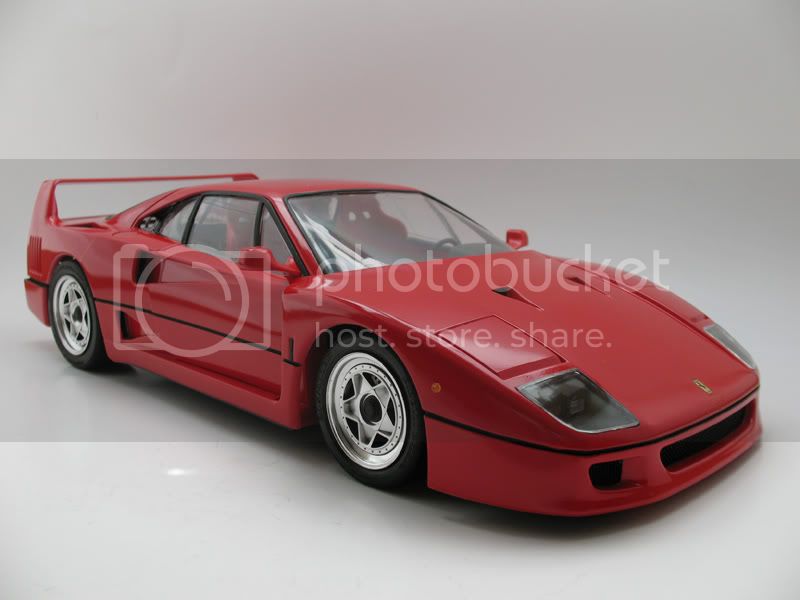
Thanks Lewis for the group build, and thanks everyone for all the help and great tips!
Illinois, United States
Joined: August 30, 2005
KitMaker: 3,289 posts
Auto Modeler: 1,620 posts
Posted: Monday, April 26, 2010 - 03:00 PM UTC
James, she looks great! Did you ever resolve that glass mark issue, or just live with it?{I didn't see it in the pics}
-I say I have two kids- one son & one daughter...my wife says she has three- one son ,one daughter and one husband.
...and don't tell yourself you can't do it....it'll just take longer then
California, United States
Joined: October 21, 2007
KitMaker: 3,684 posts
Auto Modeler: 294 posts
Posted: Tuesday, April 27, 2010 - 04:01 PM UTC
Thanks Bob
I followed your advice on the glass and polished it out and touched up with Future, I really need to look hard to find them now. Blended it in very well!
England - South West, United Kingdom
Joined: August 20, 2007
KitMaker: 409 posts
Auto Modeler: 87 posts
Posted: Tuesday, June 01, 2010 - 09:38 PM UTC
Very nice James - love the finish.
Just 1 Month Left to finish - remember to post in the gallery!
Cheers
Loobes
It's weird that photographers spend years or even a whole lifetime, trying to capture moments that added together, don't even amount to a couple of hours.
~James Lalropui Keivom
VISIT MY SITE ------>
California, United States
Joined: October 21, 2007
KitMaker: 3,684 posts
Auto Modeler: 294 posts
Posted: Wednesday, June 16, 2010 - 02:38 AM UTC
Thanks Lewis!
Only a couple of weeks left (no pressure
)...Let's see some more finished Ferrari's!
Ohio, United States
Joined: August 05, 2007
KitMaker: 258 posts
Auto Modeler: 2 posts
Posted: Thursday, June 17, 2010 - 03:30 PM UTC
Hi all,
I've been following this thread for a while now, and there are some beautiful builds here. I've been a Ferrari collector for 20+ years, mostly diecast, but I've got a sizable stack of kits as well. I figured I'd try to get a few of them built in the time that's remaining. I usually build armor, so I'm starting with a couple of easy kits. See the pictures below:
The kits


I hope to have some pictures of the finished cars soon. There's not a whole lot to these kits, but I want to do some additional detail painting on the interior.
Thanks for looking!
Mark

Ohio, United States
Joined: August 05, 2007
KitMaker: 258 posts
Auto Modeler: 2 posts
Posted: Thursday, June 24, 2010 - 06:32 PM UTC