Cars: Muscle Cars
60's & 70's Classics
Chev vs Hemi - The Rivalry Revival !
AussieReg
Staff MemberAssociate Editor
AUTOMODELER
#007
_VISITCOMMUNITY
Victoria, Australia
Joined: June 09, 2009
KitMaker: 8,156 posts
Auto Modeler: 2,953 posts
Posted: Friday, April 03, 2015 - 05:53 PM UTC
Hi folks! Great to see some of you are able to make some progress, nothing to report from me I'm afraid

Rob, very neat work on the 440. It's just such a shame to put so much effort into something that will end up at the wreckers yard after a couple of months on the road!

Sean, I had to adjust the brightness on my screen and put some soothing drops in my eyes when you unboxed that unit! I suppose when you produce a car that has no intrinsic appeal, you paint it that colour so that people will at least pay it some attention
Nice work so far, I'm looking forward to seeing where you take this one!

Cheers, D
Dragon164
#226
_VISITCOMMUNITY
British Columbia, Canada
Joined: February 20, 2012
KitMaker: 1,909 posts
Auto Modeler: 118 posts
Posted: Saturday, April 11, 2015 - 02:20 PM UTC
Thanks Damian!

I have started making the dipstick for the tranny. still have cooler lines to do.

Cheers Rob.
Hwa-Rang
_VISITCOMMUNITY
Kobenhavn, Denmark
Joined: June 29, 2004
KitMaker: 6,760 posts
Auto Modeler: 2,182 posts
Posted: Sunday, April 12, 2015 - 11:35 AM UTC
Very cool work there Rob.
Szmann
_VISITCOMMUNITY
Netherlands Antilles
Joined: September 02, 2014
KitMaker: 1,977 posts
Auto Modeler: 1,371 posts
Posted: Wednesday, April 15, 2015 - 09:49 PM UTC
Hi, guys.

Time for me to kick start this campaign.
I decided to start with the annoying Mopar - otherwise I will never touch it after the real one...
After two evenings work, it looks like I did nothing: I sanded down enough plastic to build another 1/48 model. Don't tell me it's Revell - their kit it is too accurate - it is Plymouth!


Those corners had a bad stepped molding line (now removed)
That much I managed to put together and the trouble already start:

My construction resembles now to an aircraft model: plenty to sand and plenty to fill - I ordered already a batch of Miliput and a case od Mr. Surfacer


I'll keep you posted... if I ever get anywhere with this build...
Cheers!
windysean
_VISITCOMMUNITY
Wisconsin, United States
Joined: September 11, 2009
KitMaker: 1,917 posts
Auto Modeler: 268 posts
Posted: Thursday, April 16, 2015 - 12:12 AM UTC
Yikes, Szmann! That's keeping you busy there! I'm glad you're handling it well.
-Sean H.
Szmann
_VISITCOMMUNITY
Netherlands Antilles
Joined: September 02, 2014
KitMaker: 1,977 posts
Auto Modeler: 1,371 posts
Posted: Saturday, April 18, 2015 - 05:03 AM UTC
Thanks for support, Sean. I will fight that bad mould to the last... Actually, I am almost over it. Thanks for following.
Eastrock
_VISITCOMMUNITY
Metro Manila, Philippines
Joined: June 30, 2014
KitMaker: 68 posts
Auto Modeler: 31 posts
Posted: Saturday, April 18, 2015 - 10:21 PM UTC
Rob - doing great on the engine details!!!

Gabriel - That's a lot of work on the body alone!!!

Here's mine final body coat done, paint still wet unable to wetsand for prepping the clear coat.


Engine done and fix to the chassis, there is a fitting problem in which I decide to assemble the engine on the chassis.


Thanks for looking
Szmann
_VISITCOMMUNITY
Netherlands Antilles
Joined: September 02, 2014
KitMaker: 1,977 posts
Auto Modeler: 1,371 posts
Posted: Monday, April 20, 2015 - 07:27 AM UTC
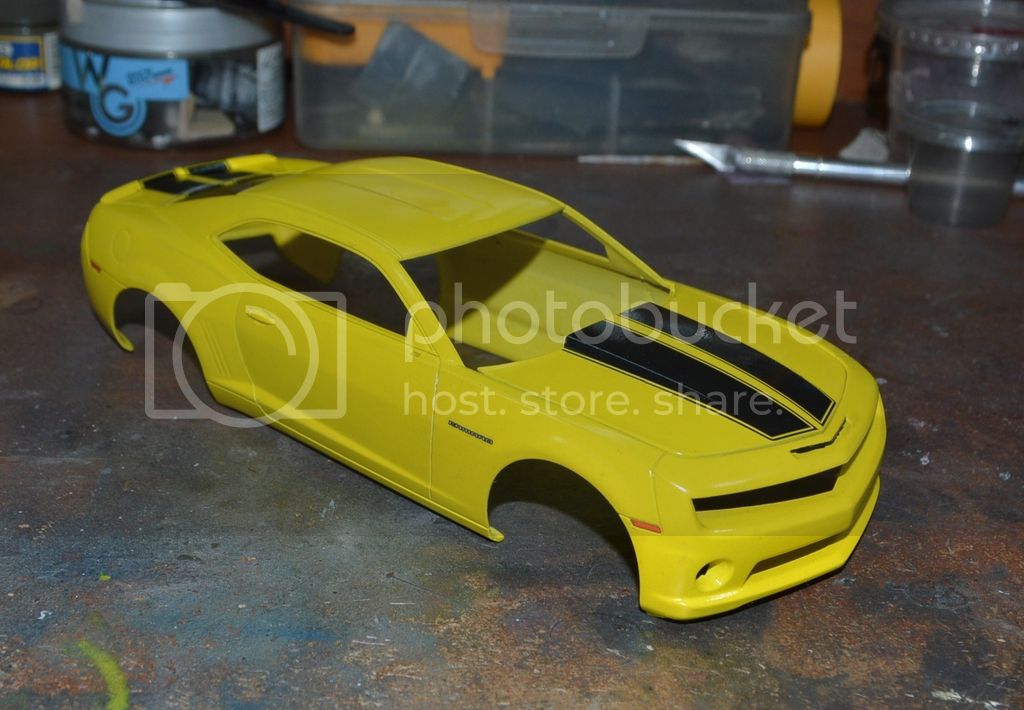
@Chester. Looks bold in yellow. I'm planning the second model of this series in white / orange, with white as body color.

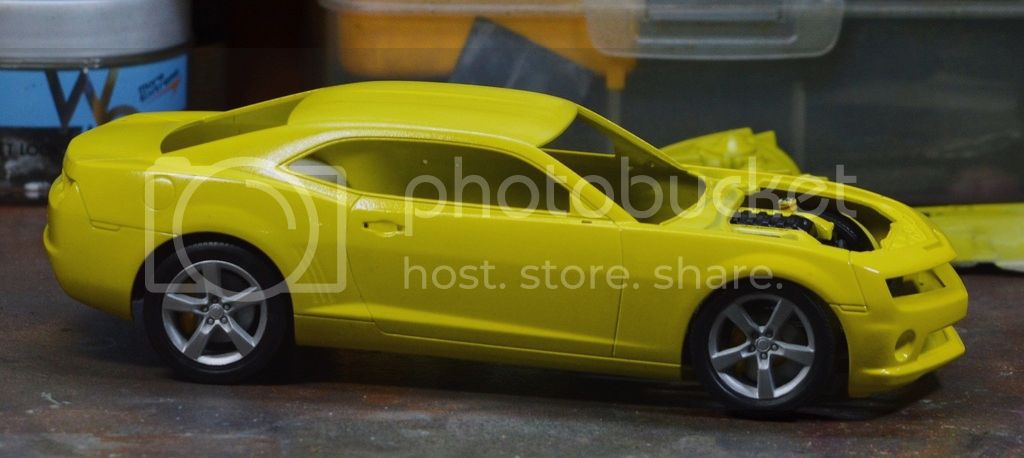
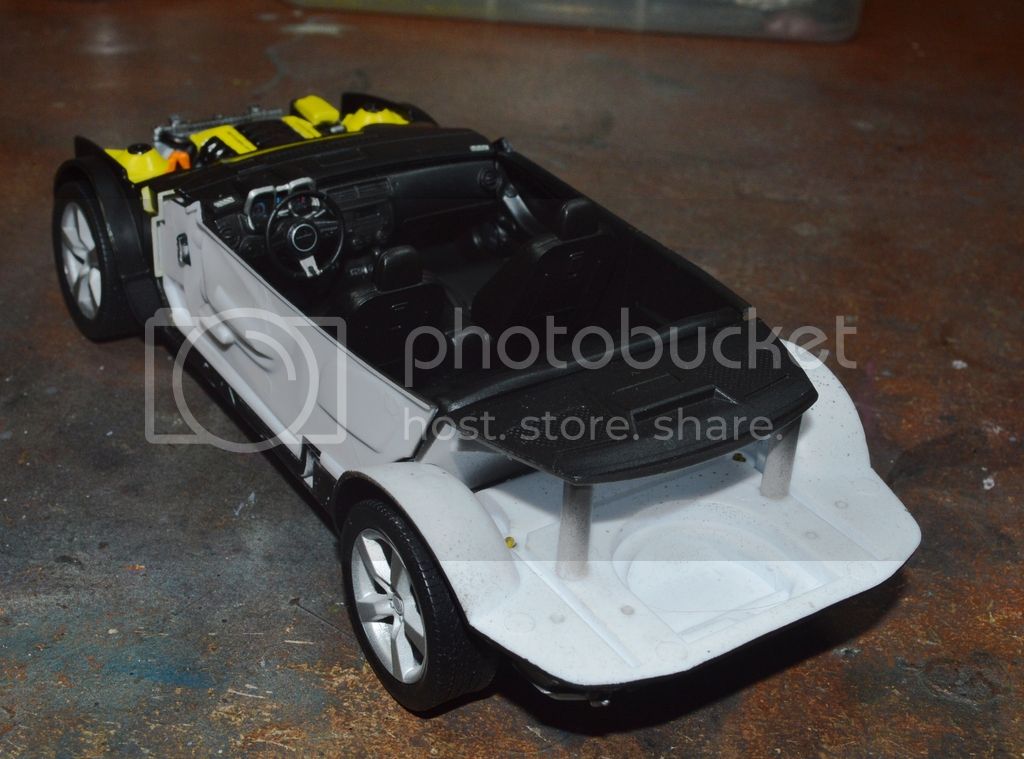
Meanwhile, I did some more sanding (1 1/2 hr of fiddling!):


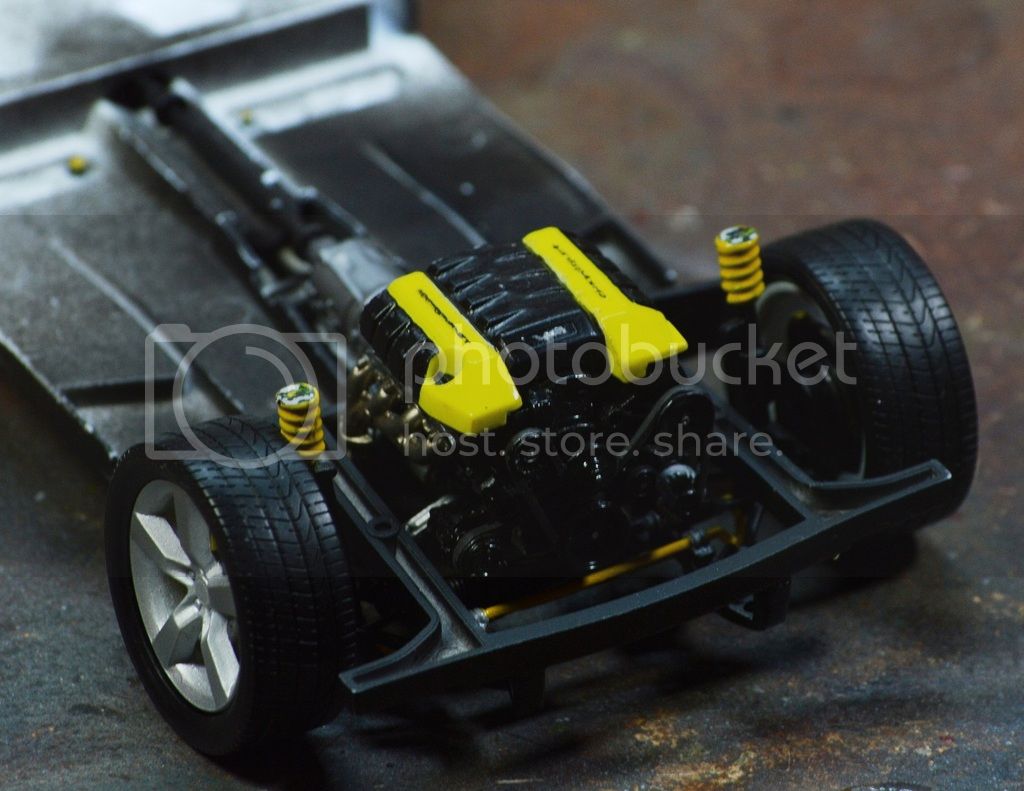
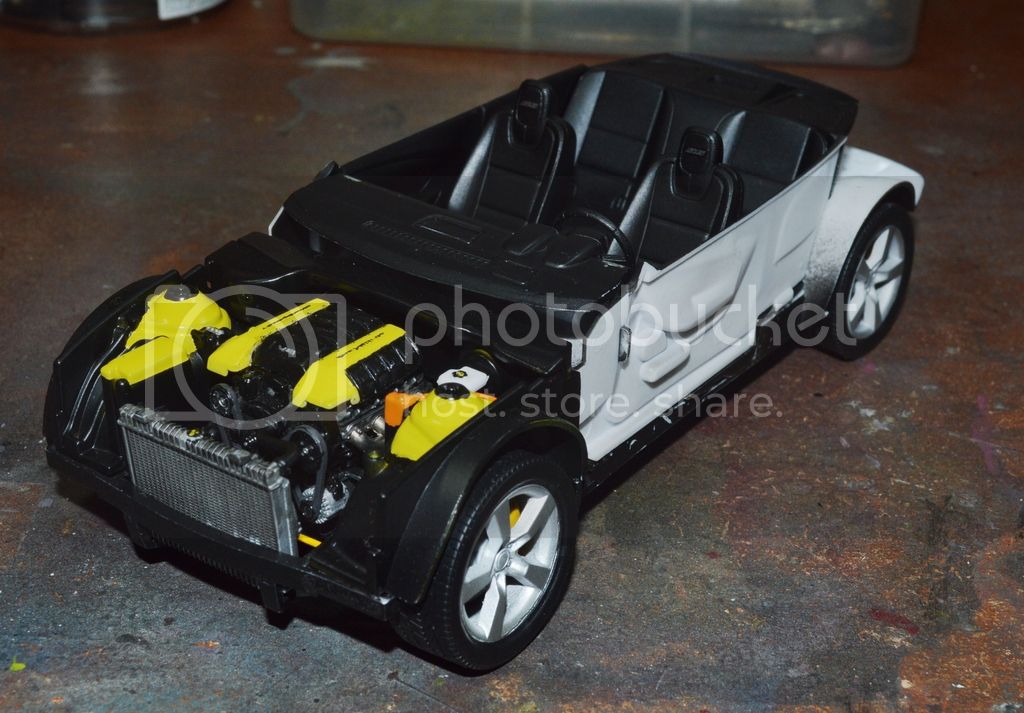
I finished also the engine; I decided to go easy on detailing as the hood is going to remain closed.


The chrome parts are of terrible quality as the thick layer emphasizes the abundant flash. The alternator was supposed to intensive aesthetic surgery.

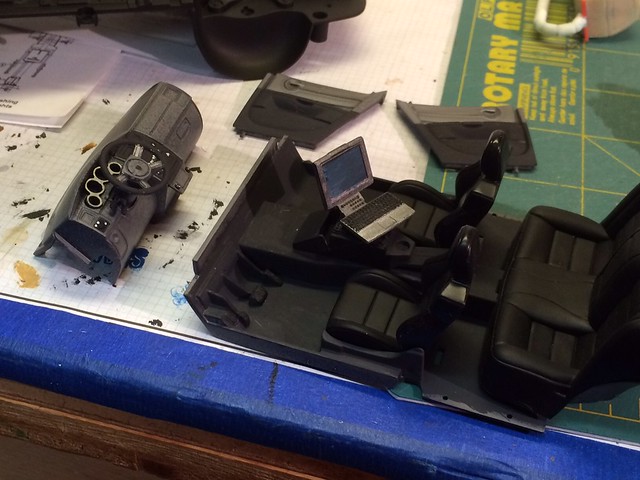
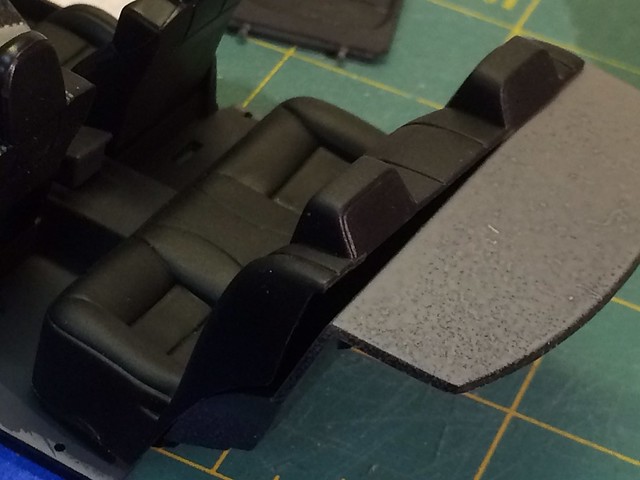
The following image summarizes the kit: while the seats are reproducing beautifully the leather texture and creases, the detail on the doors are so poor they look featureless!


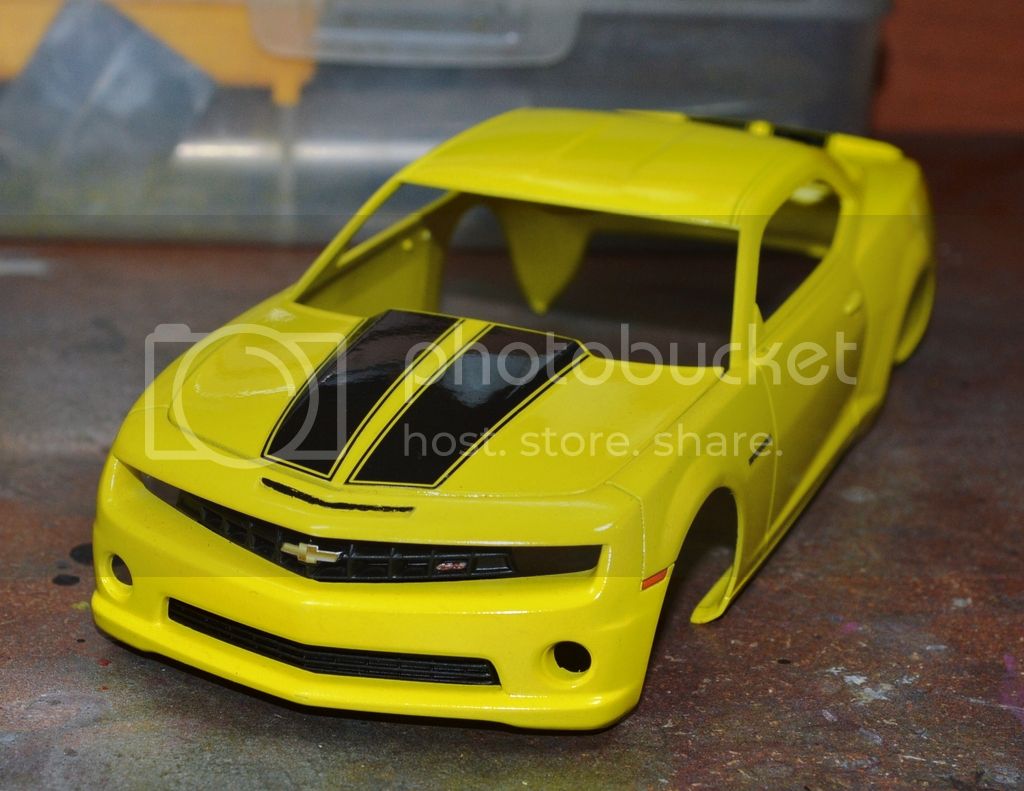
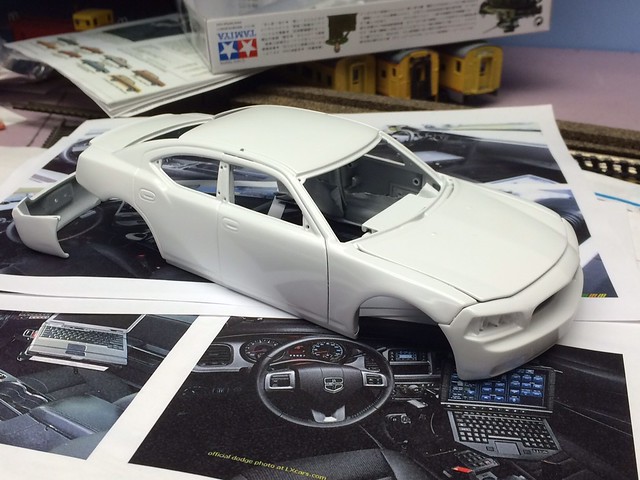
And because I had a little spare time during the weekend, I've tried e new (to me) technique: flat black as primer, softened with a coat of floor polish. A mask cut from self adhesive fret was subsequently added,then the "body" color sprayed over: the mask was removed while the paint still "wet." After the main color was dry, I applied another coat of floor polish. There is the result:

I'm not sure how much the picture shows, but under the eye there is a fine contrast between the rough black underneath and smooth red over it.

I intend to use this technique on the Superbird, but with a different color scheme: poison green over black (still waiting for the green paint to arrive and I have used what I had at hand...)

Thank you for following.
Hwa-Rang
_VISITCOMMUNITY
Kobenhavn, Denmark
Joined: June 29, 2004
KitMaker: 6,760 posts
Auto Modeler: 2,182 posts
Posted: Wednesday, April 22, 2015 - 02:54 PM UTC
Nice work boys.
Szmann
_VISITCOMMUNITY
Netherlands Antilles
Joined: September 02, 2014
KitMaker: 1,977 posts
Auto Modeler: 1,371 posts
Posted: Saturday, April 25, 2015 - 02:14 AM UTC
Hi, guys.

Ready for another update. It looks like Revell invented the self healing kit; new seam lines are just growing overnight...


After plenty cleaning, I've got this:


Dry fit: I'm almost there...


In between, a little work in the engine bay


And the graphic scheme, in final colouring.


Yeah, I have chosen the most toxic hue for the ugliest car ever built. It got to be the Devil's Saturday night underwear color...

I'll keep you posted - hopefully more progress with the incoming weekend

Thank you for following.

Gabriel
md72
#439
_VISITCOMMUNITY
Washington, United States
Joined: November 05, 2005
KitMaker: 4,950 posts
Auto Modeler: 555 posts
Posted: Monday, April 27, 2015 - 01:05 AM UTC
Hmm, the Chevy is strong with this one. Look, the model is causing the box to corrode...

AussieReg
Staff MemberAssociate Editor
AUTOMODELER
#007
_VISITCOMMUNITY
Victoria, Australia
Joined: June 09, 2009
KitMaker: 8,156 posts
Auto Modeler: 2,953 posts
Posted: Monday, April 27, 2015 - 06:20 PM UTC

Quoted Text

Hmm, the Chevy is strong with this one. Look, the model is causing the box to corrode..


Respect the badge you do not, a grave mistake this is, feel the wrath of the Bowtie you will !

💀
md72
#439
_VISITCOMMUNITY
Washington, United States
Joined: November 05, 2005
KitMaker: 4,950 posts
Auto Modeler: 555 posts
Posted: Monday, April 27, 2015 - 09:40 PM UTC
Wait a minute, I thought that this was a build for Chevys and Dodges. When did a ToYODA get into the mix?
Szmann
_VISITCOMMUNITY
Netherlands Antilles
Joined: September 02, 2014
KitMaker: 1,977 posts
Auto Modeler: 1,371 posts
Posted: Tuesday, April 28, 2015 - 06:18 AM UTC
Hi, guys.

I was lucky enough to have a three day weekend. I can count the blessings:

I found the LAST parting line (phew!)


The body under the second primer coat:


After some struggle with the masks, I've got the following result:


Somehow, the pitiful Superbird is crawling to the finish line... Following polishing and decals, then clear coating. Soon another update.

Thank you for following.

Gabriel
Hwa-Rang
_VISITCOMMUNITY
Kobenhavn, Denmark
Joined: June 29, 2004
KitMaker: 6,760 posts
Auto Modeler: 2,182 posts
Posted: Tuesday, April 28, 2015 - 11:57 AM UTC

Quoted Text

Hmm, the Chevy is strong with this one. Look, the model is causing the box to corrode...


Mark ,you better get started on that Camaro soon, less you open the box and find nothing but dust. With the box looking like that, it might already be to late. Don't sneeze, when you open it.
Dragon164
#226
_VISITCOMMUNITY
British Columbia, Canada
Joined: February 20, 2012
KitMaker: 1,909 posts
Auto Modeler: 118 posts
Posted: Sunday, May 03, 2015 - 09:05 AM UTC
Now, Now,
That is just the Powerful Chevy trying to release itself from it's cardboard prison.

Cheers Rob.
Eastrock
_VISITCOMMUNITY
Metro Manila, Philippines
Joined: June 30, 2014
KitMaker: 68 posts
Auto Modeler: 31 posts
Posted: Sunday, May 03, 2015 - 10:22 PM UTC
Gabriel - Awesome progress on your work, coming along great!!!

well well May the 4th be with you, D


Here's mine decals done and prepping up for first mist of gloss coat


Cheers!!!
Szmann
_VISITCOMMUNITY
Netherlands Antilles
Joined: September 02, 2014
KitMaker: 1,977 posts
Auto Modeler: 1,371 posts
Posted: Monday, May 04, 2015 - 06:24 AM UTC
Thanks, Chester.
I'm also almost done, but no photo evidence yet... I'll keep you updated.
Thanks to all followers.
Gabriel
Hwa-Rang
_VISITCOMMUNITY
Kobenhavn, Denmark
Joined: June 29, 2004
KitMaker: 6,760 posts
Auto Modeler: 2,182 posts
Posted: Wednesday, May 06, 2015 - 02:06 PM UTC
Got a lttle work done on the Corvette. Funny how it reminds me of an ugly fiberglass bathtub we had, when I was a kid. i used to fart a lot in that bathtub. Both looked and sounded like a Corvette.


Found some springs at work. Looks a lot better than the kit springs.


Body primed in Tamiya fine grey primer, then coated with Tamiya silver leaf which will be base for a blue metallic.


Interior done.


I do a little figure painting as well. Just finished this typical Chevy owner figure. The ever growing pile of repair bills, left him with nothing but what you see here. You can clearly see the unpaid bills sticking out of his coat pocket. If not for the Mopar owner, who drove by and gave the poor fellow the sausages, even his dog would have left him.


AussieReg
Staff MemberAssociate Editor
AUTOMODELER
#007
_VISITCOMMUNITY
Victoria, Australia
Joined: June 09, 2009
KitMaker: 8,156 posts
Auto Modeler: 2,953 posts
Posted: Thursday, May 07, 2015 - 01:44 AM UTC
Jesper, brilliant post my friend, I love starting the day with a smile!

Now of course a fart in a bathtub sounds just like a Corvette if you compare it with the silence of a MOPAR Hemi that won't even fire!
I'm guessing that the smell in that bathtub was the same "new car fragrance" that you get in every Chrysler/Plymouth/Dodge!

Great work on the 'Vette, looking good so far.

Chester and Gabriel, you guys are flying! Beautiful paint jobs on both builds.

Cheers, D
Szmann
_VISITCOMMUNITY
Netherlands Antilles
Joined: September 02, 2014
KitMaker: 1,977 posts
Auto Modeler: 1,371 posts
Posted: Thursday, May 07, 2015 - 06:04 AM UTC
Hi, guys.

@Jesper Nice try.
'Vette looks nice so far: I'm a little curious to see the blue metallic on it...

@ Damian: thanks. Unfortunately, I'm doing all that effort for a MOPAR! what a waste!

Cheers!
Eastrock
_VISITCOMMUNITY
Metro Manila, Philippines
Joined: June 30, 2014
KitMaker: 68 posts
Auto Modeler: 31 posts
Posted: Thursday, May 07, 2015 - 11:19 PM UTC
Thanks, D!!!

Jesper the vette looks great!!!

Here's the Bee, I'm almist there...

with the gloss coat already for curing then need to rub and wax it


Interior done


Cheers!!!
AussieReg
Staff MemberAssociate Editor
AUTOMODELER
#007
_VISITCOMMUNITY
Victoria, Australia
Joined: June 09, 2009
KitMaker: 8,156 posts
Auto Modeler: 2,953 posts
Posted: Friday, May 08, 2015 - 02:49 AM UTC
Looking great Chester!

Is that Sprue holding up the rear parcel shelf?
Eastrock
_VISITCOMMUNITY
Metro Manila, Philippines
Joined: June 30, 2014
KitMaker: 68 posts
Auto Modeler: 31 posts
Posted: Friday, May 08, 2015 - 10:56 AM UTC
Thanks, D!!! its a kit part that support the rear panel...

I just need a couple of days more, paint still wet in the inside...
windysean
_VISITCOMMUNITY
Wisconsin, United States
Joined: September 11, 2009
KitMaker: 1,917 posts
Auto Modeler: 268 posts
Posted: Sunday, May 17, 2015 - 08:59 PM UTC
Back to my beefy Hemi cop car. After many, many coats of gray primer over the steel body's lime green paint, then several coats of white primer, then 3 or 4 of white gloss with some sanding and buffing between coats... voila
Final paint by windysean, on Flickr

I'll add the police decals, then the plan is to partly build and spray gloss coats, or final build and brush on Pledge Future coats. I'm not normally a car guy, so I'm sweating the gloss finish. I know it's critical.
As for the interior, it's practically a snap-together kit, and I've seen what you guys are accomplishing here, so here's me trying to keep up
Hemi interior by windysean, on Flickr

The seats are molded in rubber, so the finish is very believable (at least for a police car or taxi, where the seats need to be hosed off once in a while), but they won't lie down nicely...
Hemi interior by windysean, on Flickr

anyway, it's just a hobby, right? No sense pulling my hair out.
Now, that Chevy model, a traditional plastic kit, is looking better and better!
Cheers!
-Sean H.