Chev vs Hemi - The Rivalry Revival !
AussieReg
 Associate Editor
#007
Victoria, Australia
Joined: June 09, 2009
KitMaker: 8,156 posts
Auto Modeler: 2,953 posts
Posted: Thursday, September 24, 2015 - 07:18 PM UTC
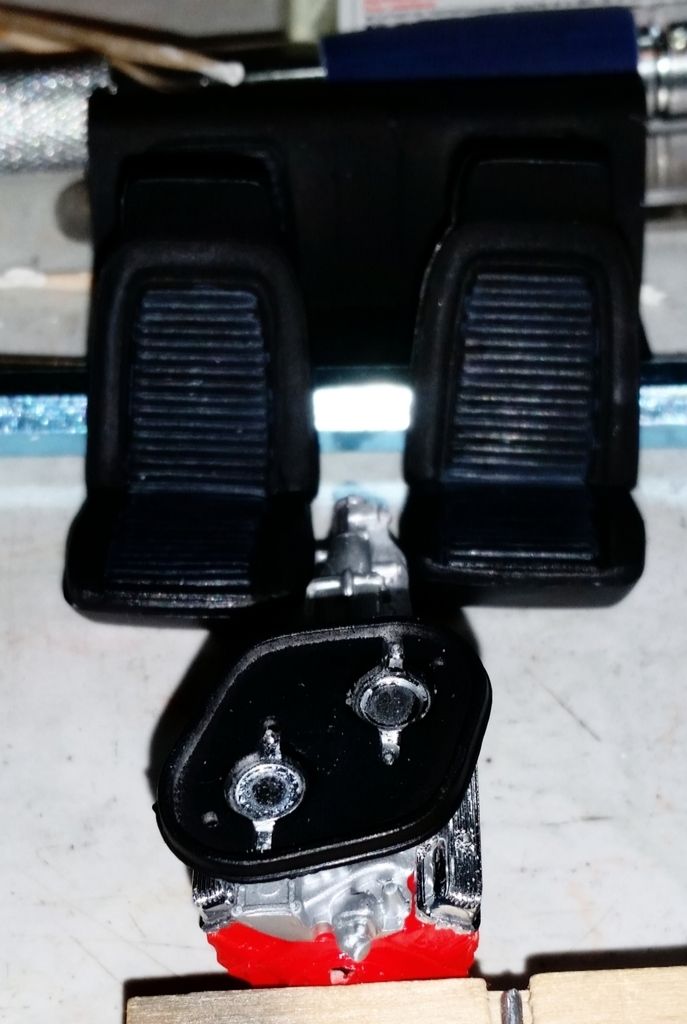
Photos as promised, Charger interior, underside and powerplant . . . . . . .


I've used the headers rather than the stock exhaust manifold, so I have some surgery to perform to get the exhaust pipe and manifold assembly to fit. More updates soon.
Cheers, D
ON the bench
Revell 1/24 '53 Corvette (building as '54)
Revell 1/24 BMW 507 Coupe and Cabrio
Italeri 1/48 Me262 B-1a/U1 Nightfighter
Monogram 1/24 '57 Chevy Nomad
Dragon 1/350 USS Frank Knox DD-742
Wisconsin, United States
Joined: September 11, 2009
KitMaker: 1,917 posts
Auto Modeler: 268 posts
Posted: Thursday, September 24, 2015 - 08:24 PM UTC
That's pretty sweet, Reg.
...but can you sleep at night knowing there's only white inside the door panels? Shouldn't there be primer and rust inhibitors in there?
(Also, the camera lens may have some oil on it.)
Great work! Thanks for letting us see what you've done.
Sean H.

Current: model railroad layout
Stalled a while ago:
. 1950's Chrome, WW II Twins
Last completed: Police Car
AussieReg
Associate Editor #007
Victoria, Australia
Joined: June 09, 2009
KitMaker: 8,156 posts
Auto Modeler: 2,953 posts
Posted: Friday, September 25, 2015 - 09:05 AM UTC
Quoted Text
That's pretty sweet, Reg.
Thanks Sean, I'm enjoying this pair of builds a lot.
Quoted Text
...but can you sleep at night knowing there's only white inside the door panels? Shouldn't there be primer and rust inhibitors in there?
It's a Charger, it will disintegrate into a small pile of rust within days of rolling off the line even if it's stainless steel or plastic!
Quoted Text
(Also, the camera lens may have some oil on it.)
Photos were taken with my iPad, I have been away from home for a week with work and took a basic modelling tool kit with me. That is why the focus is a bit furry. Possibly also the dark motel room, late evening, several glasses of red wine and beer . . . possibly . . . . , just sayin.
Cheers, D
ON the bench
Revell 1/24 '53 Corvette (building as '54)
Revell 1/24 BMW 507 Coupe and Cabrio
Italeri 1/48 Me262 B-1a/U1 Nightfighter
Monogram 1/24 '57 Chevy Nomad
Dragon 1/350 USS Frank Knox DD-742
Wisconsin, United States
Joined: September 11, 2009
KitMaker: 1,917 posts
Auto Modeler: 268 posts
Posted: Friday, September 25, 2015 - 07:37 PM UTC
Current: model railroad layout
Stalled a while ago:
. 1950's Chrome, WW II Twins
Last completed: Police Car
#439
Washington, United States
Joined: November 05, 2005
KitMaker: 4,950 posts
Auto Modeler: 555 posts
Posted: Tuesday, September 29, 2015 - 12:55 AM UTC
A little progress, it's starting to look like a Chevy:
The instructions said to paint the seats satin black, I did the field in flat black and the tufted parts in gloss black. Then I ran a wash of Panzer gray over the tufts and drybrushed gloss black over the tops to give the seats that showroom fresh Chevy look.
The Chevy is strong with the engine. Even after I cleaned the chrome off of the contact points no styrene glue would bond them. I finally held it together and super glued the parts in place. And why would anyone chrome parts on a Chevy, they're just gonna rust anyway.

Hanger Queens in Waiting:
Monogram 1/72 F8F-1
Corsair the Sky Pirate - 1/72 Ace A-7D
Century Series - Airfix 1/72 F-105G
Anti Shipping - Academy 1/72 PBJ-1D
Academy 1/72 F-84E
Kobenhavn, Denmark
Joined: June 29, 2004
KitMaker: 6,760 posts
Auto Modeler: 2,182 posts
Posted: Tuesday, September 29, 2015 - 11:06 AM UTC
Mark: Superglue, well isn't that what GM uses?
On the workbench:
MPC: 1972 Pontiac GTO
Revell: 1965 Mustang
Verlinden 120mm guard of the marine.
Revell: 2010 Camaro
Monogram: 1931 Rolls Royce
Italeri: LVT2 Amtrac
Kobenhavn, Denmark
Joined: June 29, 2004
KitMaker: 6,760 posts
Auto Modeler: 2,182 posts
Posted: Tuesday, September 29, 2015 - 11:20 AM UTC
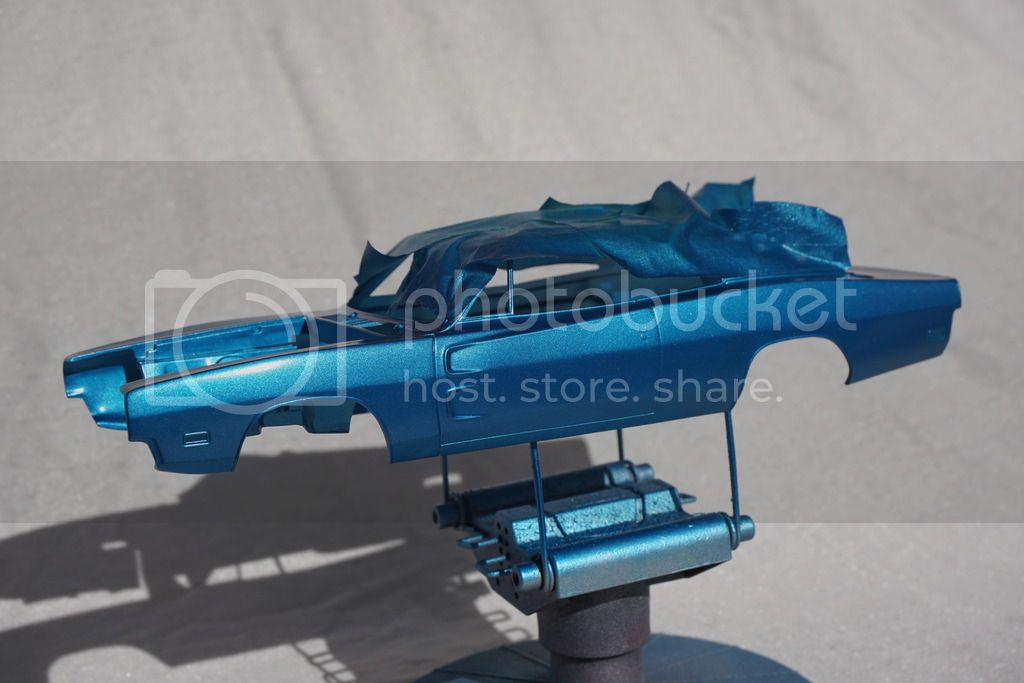
Some progress shots, from me.
Mighty Mopar Magnum 440

" BORDER="0">
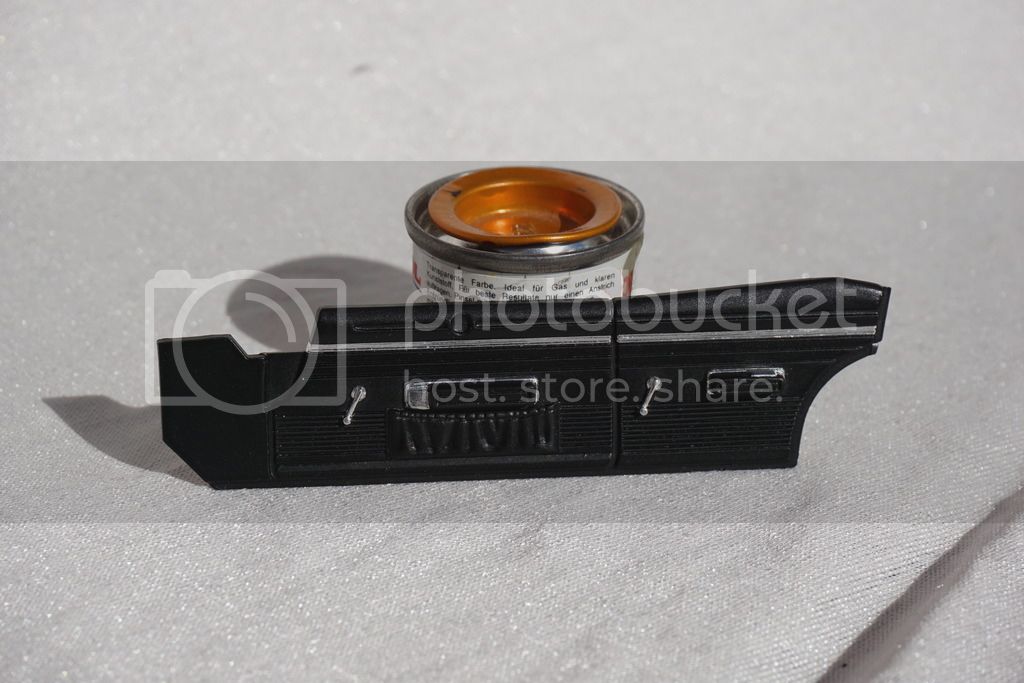
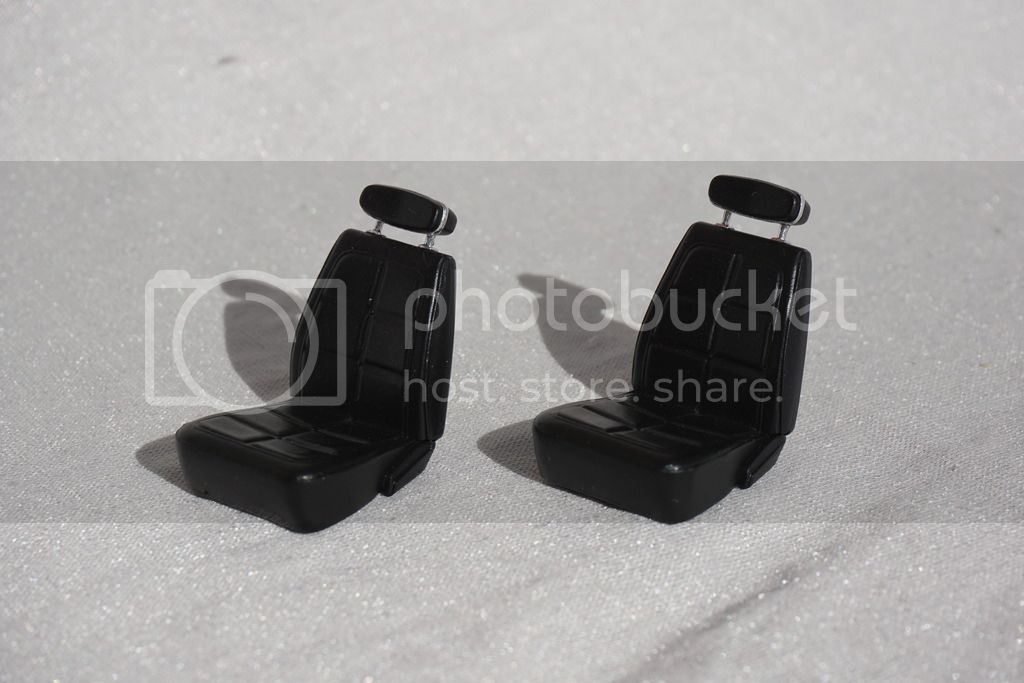
A wee bit if interior progress. Seats and door panels foiled.
" BORDER="0">
" BORDER="0">
" BORDER="0">
Contemplated painting the puny corvette "Little red Corvette" but then again, why kick somebody already lying down. I upgrated the Vette to the same color as Charger
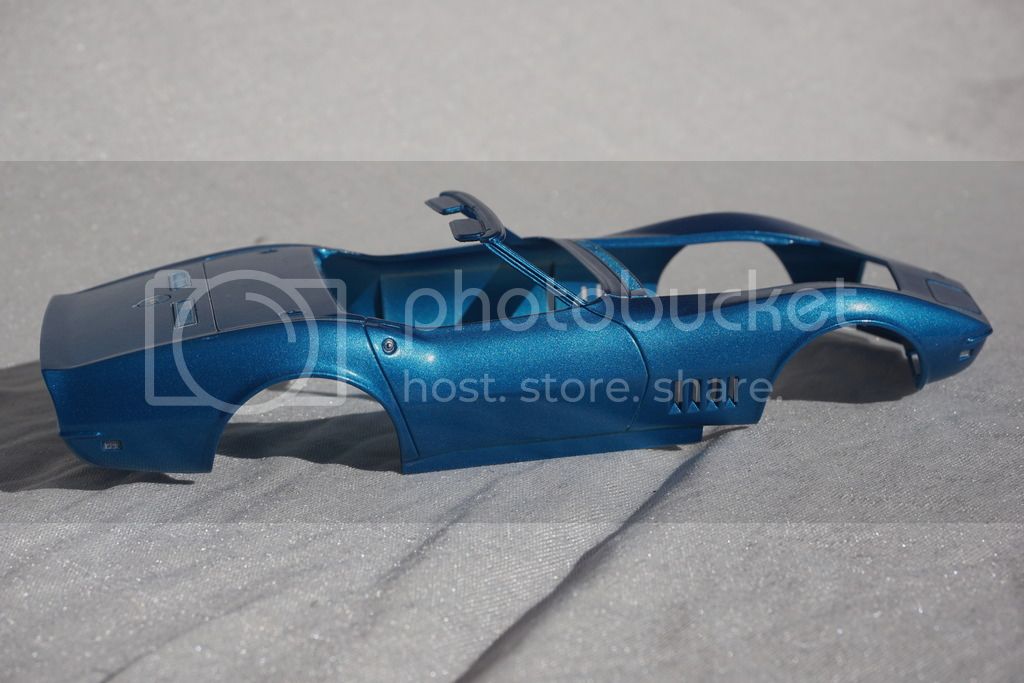
" BORDER="0">
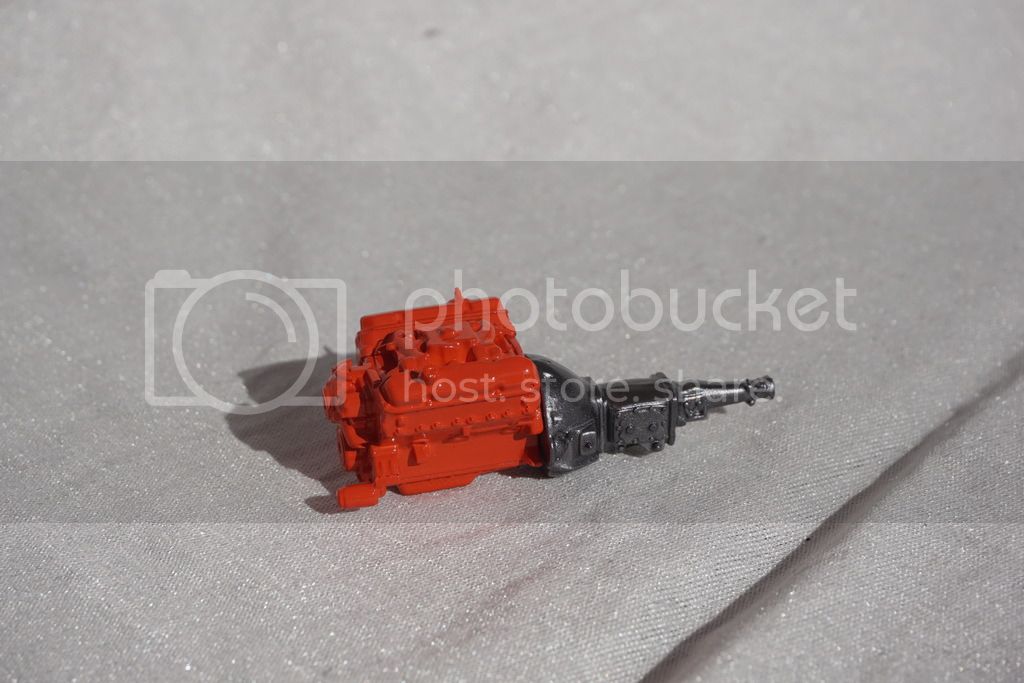
Engine, wheels and undercarriage done.
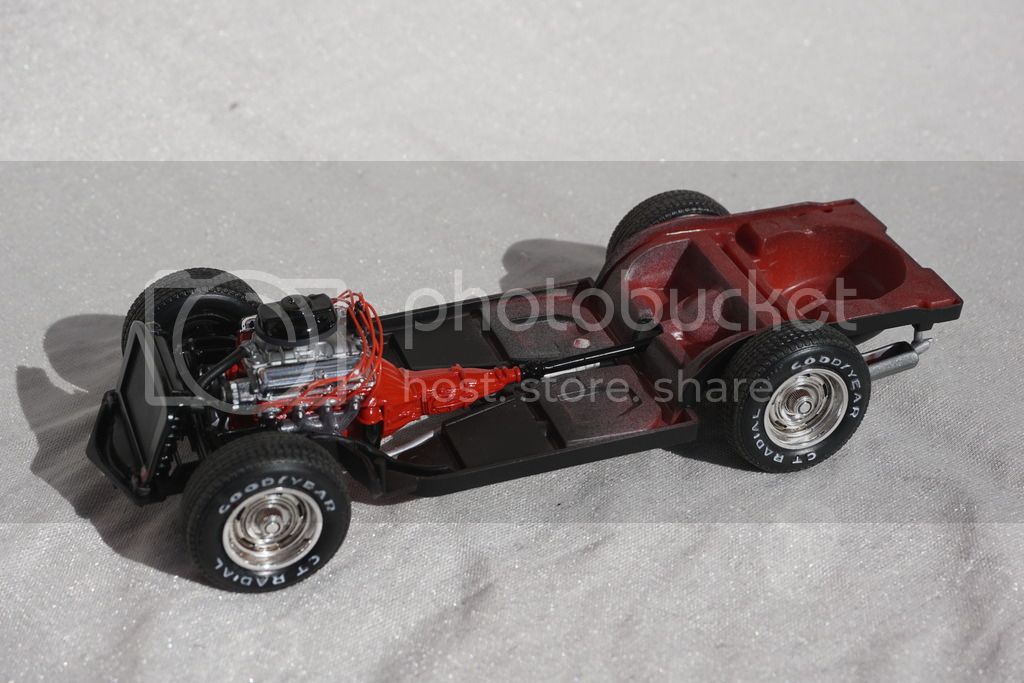
" BORDER="0">
On the workbench:
MPC: 1972 Pontiac GTO
Revell: 1965 Mustang
Verlinden 120mm guard of the marine.
Revell: 2010 Camaro
Monogram: 1931 Rolls Royce
Italeri: LVT2 Amtrac
AussieReg
Associate Editor #007
Victoria, Australia
Joined: June 09, 2009
KitMaker: 8,156 posts
Auto Modeler: 2,953 posts
Posted: Tuesday, September 29, 2015 - 07:03 PM UTC
Super Glue and Duct Tape, and STILL a higher quality car than the MOPAR brigade!
Mark, nice work on the interior, the extra effort pays off.
Jesper, great progress report. That blue looks really good, what paint/colour is it?
Cheers, D
ON the bench
Revell 1/24 '53 Corvette (building as '54)
Revell 1/24 BMW 507 Coupe and Cabrio
Italeri 1/48 Me262 B-1a/U1 Nightfighter
Monogram 1/24 '57 Chevy Nomad
Dragon 1/350 USS Frank Knox DD-742
Kobenhavn, Denmark
Joined: June 29, 2004
KitMaker: 6,760 posts
Auto Modeler: 2,182 posts
Posted: Tuesday, September 29, 2015 - 09:14 PM UTC
Damian: The blue is Tamiya TS-54 light metallic blue over Tamiya TS-30 silver leaf.
On the workbench:
MPC: 1972 Pontiac GTO
Revell: 1965 Mustang
Verlinden 120mm guard of the marine.
Revell: 2010 Camaro
Monogram: 1931 Rolls Royce
Italeri: LVT2 Amtrac
#439
Washington, United States
Joined: November 05, 2005
KitMaker: 4,950 posts
Auto Modeler: 555 posts
Posted: Wednesday, September 30, 2015 - 12:34 AM UTC
Had more trouble getting the distributor and coil on the engine last night. So where do I find 1/25 scale duct tape???

Hanger Queens in Waiting:
Monogram 1/72 F8F-1
Corsair the Sky Pirate - 1/72 Ace A-7D
Century Series - Airfix 1/72 F-105G
Anti Shipping - Academy 1/72 PBJ-1D
Academy 1/72 F-84E
Netherlands Antilles
Joined: September 02, 2014
KitMaker: 1,977 posts
Auto Modeler: 1,371 posts
Posted: Wednesday, September 30, 2015 - 08:18 AM UTC
Hi, guys.
I see nice progress there.
Jesper: lovely blue and the wiring on the engine looks great also.
I found time for another small paint job: I undercoated the whole body for applying masks and I masked and sprayed the hood. Like that we can have a peak at the final appearance. I can swear that is orange, not red...
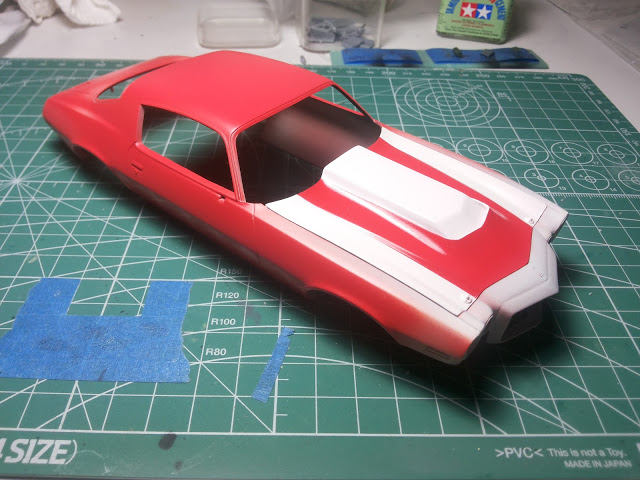
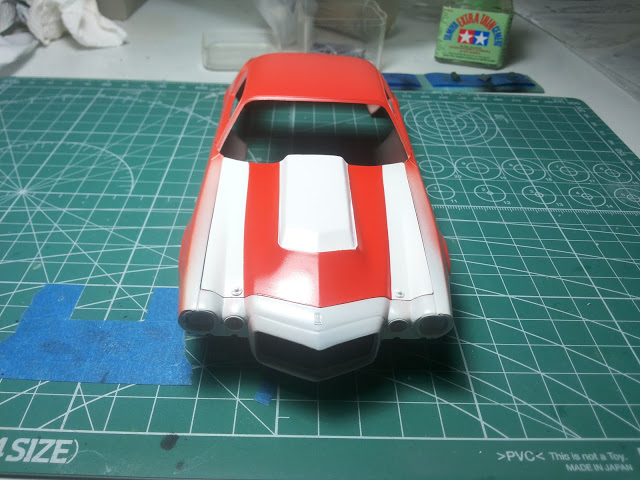
Waiting for the weekend to finish the body paint and maybe some chassis work...
Cheers, Gabriel

Gabriel
Many of my builds can be seen on YT in video format. Please check 'Panzergrau Models' Channel.
AussieReg
Associate Editor #007
Victoria, Australia
Joined: June 09, 2009
KitMaker: 8,156 posts
Auto Modeler: 2,953 posts
Posted: Wednesday, September 30, 2015 - 08:19 AM UTC
Looking great Gabriel, really neat work!
Cheers, D
ON the bench
Revell 1/24 '53 Corvette (building as '54)
Revell 1/24 BMW 507 Coupe and Cabrio
Italeri 1/48 Me262 B-1a/U1 Nightfighter
Monogram 1/24 '57 Chevy Nomad
Dragon 1/350 USS Frank Knox DD-742
Netherlands Antilles
Joined: September 02, 2014
KitMaker: 1,977 posts
Auto Modeler: 1,371 posts
Posted: Wednesday, September 30, 2015 - 08:42 AM UTC
Thank you, Damian.
This one suppose to be my "good" build, right?
It may be I'll leave the hood open, if I can improvise a support (I've checked already references).

Gabriel
Many of my builds can be seen on YT in video format. Please check 'Panzergrau Models' Channel.
#439
Washington, United States
Joined: November 05, 2005
KitMaker: 4,950 posts
Auto Modeler: 555 posts
Posted: Monday, October 05, 2015 - 08:57 PM UTC
Got a few minutes in on the Camaro last night. First, I had to re-glue the entire intake manifold back on... Told ya the Chevy was strong with this one. Then, following Damian's advice, I accurized the starter by duct taping it in place.

Hanger Queens in Waiting:
Monogram 1/72 F8F-1
Corsair the Sky Pirate - 1/72 Ace A-7D
Century Series - Airfix 1/72 F-105G
Anti Shipping - Academy 1/72 PBJ-1D
Academy 1/72 F-84E
Kobenhavn, Denmark
Joined: June 29, 2004
KitMaker: 6,760 posts
Auto Modeler: 2,182 posts
Posted: Monday, October 05, 2015 - 09:45 PM UTC
Mark, you are taking scale modeling to a whole new level of realism

On the workbench:
MPC: 1972 Pontiac GTO
Revell: 1965 Mustang
Verlinden 120mm guard of the marine.
Revell: 2010 Camaro
Monogram: 1931 Rolls Royce
Italeri: LVT2 Amtrac
Netherlands Antilles
Joined: September 02, 2014
KitMaker: 1,977 posts
Auto Modeler: 1,371 posts
Posted: Saturday, October 10, 2015 - 03:32 AM UTC
Hi, guys.
I found some time to do some interior work...
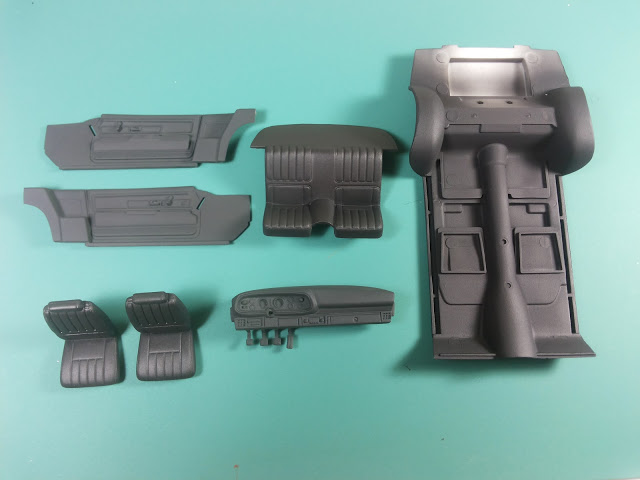
More updates hopefully after the weekend.
Cheers, Gabriel
Gabriel
Many of my builds can be seen on YT in video format. Please check 'Panzergrau Models' Channel.
AussieReg
Associate Editor #007
Victoria, Australia
Joined: June 09, 2009
KitMaker: 8,156 posts
Auto Modeler: 2,953 posts
Posted: Saturday, October 10, 2015 - 04:19 AM UTC
Nice finish on the interior Gabriel, what paint did you use there?
Mark, that engine will give you decades of reliable performance motoring, I'm glad you are enjoying assembling it so much!
Cheers, D
ON the bench
Revell 1/24 '53 Corvette (building as '54)
Revell 1/24 BMW 507 Coupe and Cabrio
Italeri 1/48 Me262 B-1a/U1 Nightfighter
Monogram 1/24 '57 Chevy Nomad
Dragon 1/350 USS Frank Knox DD-742
Netherlands Antilles
Joined: September 02, 2014
KitMaker: 1,977 posts
Auto Modeler: 1,371 posts
Posted: Wednesday, October 14, 2015 - 12:50 AM UTC
Hi, Guys.
@ Damian: There are 4 hues in there all variations of dark gray + blue, green, dark red and dark blue. Paints are cheap craft acrylics over Testors medium gray as primer.
Cheers, Gabriel.
Gabriel
Many of my builds can be seen on YT in video format. Please check 'Panzergrau Models' Channel.
AussieReg
Associate Editor #007
Victoria, Australia
Joined: June 09, 2009
KitMaker: 8,156 posts
Auto Modeler: 2,953 posts
Posted: Sunday, October 25, 2015 - 06:11 AM UTC
Small update on the GTO, detail painting with some chrome and flat aluminium. With the hood lined up at the front there is a large gap at the back, so I will fit a strip to get it a bit cleaner there before I start the exterior paint.


Cheers, D
ON the bench
Revell 1/24 '53 Corvette (building as '54)
Revell 1/24 BMW 507 Coupe and Cabrio
Italeri 1/48 Me262 B-1a/U1 Nightfighter
Monogram 1/24 '57 Chevy Nomad
Dragon 1/350 USS Frank Knox DD-742
Kobenhavn, Denmark
Joined: June 29, 2004
KitMaker: 6,760 posts
Auto Modeler: 2,182 posts
Posted: Tuesday, October 27, 2015 - 06:00 PM UTC
Damian, that's a mean looking hoodscoop.
On the workbench:
MPC: 1972 Pontiac GTO
Revell: 1965 Mustang
Verlinden 120mm guard of the marine.
Revell: 2010 Camaro
Monogram: 1931 Rolls Royce
Italeri: LVT2 Amtrac
#439
Washington, United States
Joined: November 05, 2005
KitMaker: 4,950 posts
Auto Modeler: 555 posts
Posted: Wednesday, October 28, 2015 - 03:06 AM UTC
I've had to abandon my Camaro for a few weeks while I travel to Malaysia. I go the engine in, added the exhaust pipes, got the radiator and shroud in and even hooked up one of the water lines. But it looks like I'll have to whip out the duct tape and super glue to fix the leaks in the exhaust and the top side water hose.

D, that is a fierce looking scoop. Based on the over spray, I'm guessing that you painted the ledge around the hood flat black. I did the same on the Camaro, but I'm wondering if the ledge should be body color instead. Any thoughts?
Hanger Queens in Waiting:
Monogram 1/72 F8F-1
Corsair the Sky Pirate - 1/72 Ace A-7D
Century Series - Airfix 1/72 F-105G
Anti Shipping - Academy 1/72 PBJ-1D
Academy 1/72 F-84E
Netherlands Antilles
Joined: September 02, 2014
KitMaker: 1,977 posts
Auto Modeler: 1,371 posts
Posted: Sunday, November 01, 2015 - 02:35 AM UTC
Hi, guys.
Damian, nice progress.
And some (very slow) progress on my build: engine in its frame:
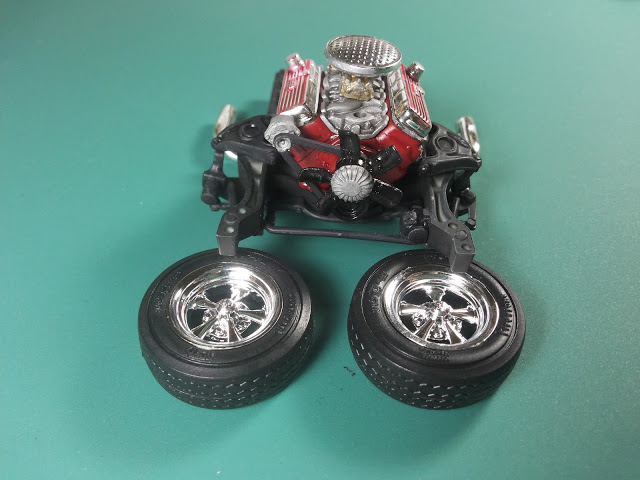

I don't see much more from this week-end
See you soon,
Gabriel
Gabriel
Many of my builds can be seen on YT in video format. Please check 'Panzergrau Models' Channel.
Kobenhavn, Denmark
Joined: June 29, 2004
KitMaker: 6,760 posts
Auto Modeler: 2,182 posts
Posted: Sunday, November 01, 2015 - 04:50 PM UTC
Looking good there Gabriel.
On the workbench:
MPC: 1972 Pontiac GTO
Revell: 1965 Mustang
Verlinden 120mm guard of the marine.
Revell: 2010 Camaro
Monogram: 1931 Rolls Royce
Italeri: LVT2 Amtrac
Netherlands Antilles
Joined: September 02, 2014
KitMaker: 1,977 posts
Auto Modeler: 1,371 posts
Posted: Sunday, November 01, 2015 - 11:22 PM UTC
Thank you, Jesper.
Just found out the hood has to be open

Cheers,
Gabriel
Gabriel
Many of my builds can be seen on YT in video format. Please check 'Panzergrau Models' Channel.
AussieReg
Associate Editor #007
Victoria, Australia
Joined: June 09, 2009
KitMaker: 8,156 posts
Auto Modeler: 2,953 posts
Posted: Monday, November 02, 2015 - 09:36 AM UTC
With the engine looking that nice Gabriel, you should have the hood open for sure. Very nice work.
Mark, I need to give the body a silver base coat before the candy red, so I will be masking the engine bay and painting the top ledge the same as the body.
Cheers, D
ON the bench
Revell 1/24 '53 Corvette (building as '54)
Revell 1/24 BMW 507 Coupe and Cabrio
Italeri 1/48 Me262 B-1a/U1 Nightfighter
Monogram 1/24 '57 Chevy Nomad
Dragon 1/350 USS Frank Knox DD-742


