

Go to automodeler.com for the current dynamic site!


The Garage
For general automotive modeling or non-modeling topics.
For general automotive modeling or non-modeling topics.
Hosted by Jim Starkweather
Blue Oval - Ford Motor Co. GB Build Thread

forest1000

Joined: December 14, 2014
KitMaker: 80 posts
Auto Modeler: 44 posts

Posted: Thursday, November 07, 2019 - 05:21 AM UTC
On my Thunderbat, I stripped the chrome parts with straight CLR and it only took about 15 minutes, with no scrubbing. Fewer fumes than OC and pretty quick.

Joel_W

Joined: December 04, 2010
KitMaker: 11,666 posts
Auto Modeler: 2,974 posts

Posted: Thursday, November 07, 2019 - 10:40 AM UTC
Quoted Text
Regarding stripping chrome:
I used to use oven cleaner and then a fellow builder suggested I try Purple Power (I get mine at WalMart). I think the reason I like it better than OC is that it's less caustic on the body and generally cheaper. It works just as good, if not a bit better than OC.
I still have OC on the shelf, but I use that to strip the paint from parts.
Anyhow, just a bit of opinion.
Mike
Mike,
For stripping just about any type of model paint Denatured Alcohol is super fast, and really cheap. Any hardware store carries it.
I'm not thrilled with the caustic issues of oven cleaner, so I'll see if my local Walmart has it in stock.
Joel


AussieReg

#007

Joined: June 09, 2009
KitMaker: 8,156 posts
Auto Modeler: 2,953 posts

Posted: Thursday, November 07, 2019 - 07:35 PM UTC
Gloss coat (SMS Super Clear) is down on the '36. Two tack coats followed by two good wet coats. The Wine Red obviously wasn't perfectly smooth because the clear has magnified the "orange peel." It came up beautifully over the SMS Super Silver, so I'm not inclined to strip it back and start again at this stage of the build. Loose dry fit once again.


Cheers, D
Cheers, D

Joel_W
Joined: December 04, 2010
KitMaker: 11,666 posts
Auto Modeler: 2,974 posts
Posted: Friday, November 08, 2019 - 06:09 AM UTC
D
The '36 still looks absolutely fantastic wearing her super gloss coat.
Joel
The '36 still looks absolutely fantastic wearing her super gloss coat.
Joel

md72

#439
Joined: November 05, 2005
KitMaker: 4,950 posts
Auto Modeler: 555 posts

Posted: Friday, November 08, 2019 - 04:26 PM UTC
Well I thought I had a FOOL-proof solution to my Ford Shield problem. Saw this in mu LHS for $30, got it online for abut $10 less.
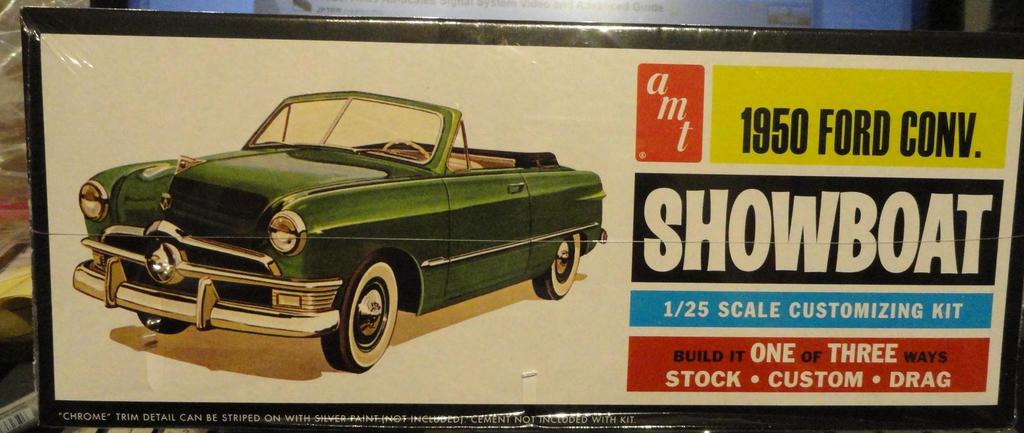
AMT's 3 in 1 1950 Ford Convertible Showboat. Look it had real Ford Shields in the kit.
Well it was a FOOL's errand.
The shields are molded into the body and hood.
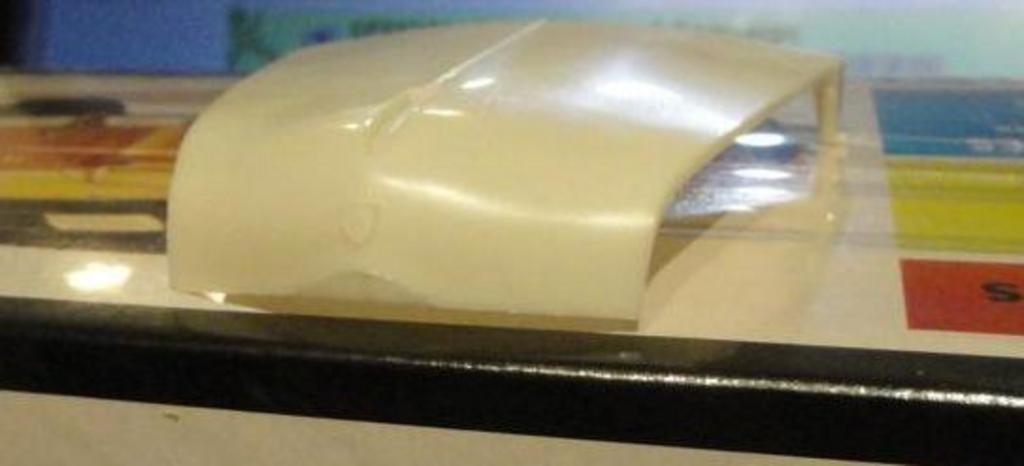
Maybe you can squint and see it.

At this point I'm $40-50 into kits trying to dress up an $8 sale kit.
The only good news is that the 50 hood nearly fits the 49 body, Just some pins on the hood hinges need sanded down and I can sand the front lip to match the straight line of the 51 grill and it has a locator for the hood ornament.
Unless I find some kind of decal, I just not going have a rear Ford Shield.
AMT's 3 in 1 1950 Ford Convertible Showboat. Look it had real Ford Shields in the kit.
Well it was a FOOL's errand.
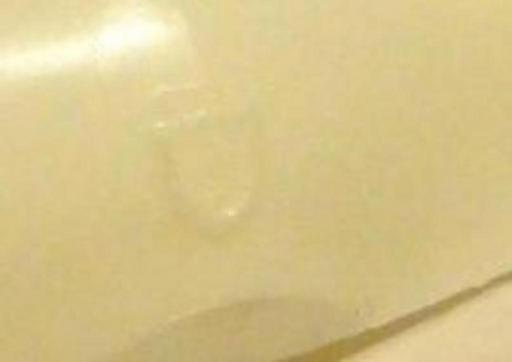
The shields are molded into the body and hood.
Maybe you can squint and see it.
At this point I'm $40-50 into kits trying to dress up an $8 sale kit.
The only good news is that the 50 hood nearly fits the 49 body, Just some pins on the hood hinges need sanded down and I can sand the front lip to match the straight line of the 51 grill and it has a locator for the hood ornament.
Unless I find some kind of decal, I just not going have a rear Ford Shield.

Joel_W
Joined: December 04, 2010
KitMaker: 11,666 posts
Auto Modeler: 2,974 posts
Posted: Saturday, November 09, 2019 - 02:02 AM UTC
Mark,
I really can feel your pain and frustration over issues like this. I've gone the same route more then a few times thinking that kit B will fix an issue with kit A, and I usually end up with another kit that just goes into the stash never to see the light of day.
the hood image shows just how poorly the Ford emblem is molded. I would think that you'd be better off just shaping some sheet plastic and painting it in the basic colors, as that emblem would be next to impossible to paint, or leave it off till eventually you find one, or more likely a decal shows up for another kit.
Joel

Dixon66
Joined: December 12, 2002
KitMaker: 1,500 posts
Auto Modeler: 645 posts

Posted: Saturday, November 09, 2019 - 08:54 AM UTC
Mark, if I may, I think your best bet at this point may be to print a decal on inkjet decal paper and glue that to a thin piece of styrene to give it a bit more dimension than just a decal.
AussieReg
#007
Joined: June 09, 2009
KitMaker: 8,156 posts
Auto Modeler: 2,953 posts
Posted: Sunday, November 10, 2019 - 12:00 AM UTC
Quoted Text
Mark, if I may, I think your best bet at this point may be to print a decal on inkjet decal paper and glue that to a thin piece of styrene to give it a bit more dimension than just a decal.
I am in agreement here, this method will give a prominent feature rather than an obvious decal.
Cheers, D
EDIT: Jim has fixed a bug in the system so I now have admin powers here in "The Garage" as well as the other Automodeler forums.
I have added the "State of Play" running update info to the first post of this thread and will keep it updated there as often as possible for anybody who wants a quick snapshot overview of the Group Build.
Dixon66
Joined: December 12, 2002
KitMaker: 1,500 posts
Auto Modeler: 645 posts
Posted: Sunday, November 10, 2019 - 12:25 AM UTC
Quoted Text
Mark, if I may, I think your best bet at this point may be to print a decal on inkjet decal paper and glue that to a thin piece of styrene to give it a bit more dimension than just a decal.
Meant to say apply it to a thin sheet of styrene. Was brain dead when I was posting.
Joel_W
Joined: December 04, 2010
KitMaker: 11,666 posts
Auto Modeler: 2,974 posts
Posted: Sunday, November 10, 2019 - 03:36 AM UTC
Agreed, that if it's possible to make your own decal, then add a thin plastic sheet backing. That will look a million times better then what was molded in the other kit.
And D,
Glad to read that Jim finally fixed that issue.
Joel
And D,
Glad to read that Jim finally fixed that issue.
Joel
forest1000
Joined: December 14, 2014
KitMaker: 80 posts
Auto Modeler: 44 posts
Posted: Sunday, November 10, 2019 - 02:00 PM UTC
Mark,
If you want the artwork done for a shield decal, I'll do it for you. Let me know.
If you want the artwork done for a shield decal, I'll do it for you. Let me know.

Cosimodo
#335

Joined: September 03, 2013
KitMaker: 1,808 posts
Auto Modeler: 701 posts

Posted: Monday, November 11, 2019 - 09:52 PM UTC
Damian, the two tone is looking great. I understand your reluctance to go back because of the effort and you may not get the silver as good, but once it's all done it will look pretty amazing.
Mark, the pitfalls of AMT kits. i think the suggested fixes should work though. Will be interested to see how it pans out.
cheers
Michael
Mark, the pitfalls of AMT kits. i think the suggested fixes should work though. Will be interested to see how it pans out.
cheers
Michael
Cosimodo
#335
Joined: September 03, 2013
KitMaker: 1,808 posts
Auto Modeler: 701 posts
Posted: Monday, November 11, 2019 - 10:01 PM UTC
A week and a bit of progress.
Got the white on the floor and then added the partial engine/gearbox plus suspension parts. this kit is a mixture of good - nice level of detail in the parts - but it would have so much better with a full BDA 1800 to stick under the bonnet.

Building a duet doesn't even matter when one is LHD, the other RHD since they make no allowance for steering.

There is nice PE set that you can get for the kit (there is some already in the box). It includes the rear axle brace.


The bash plate is part of the PE set.

Another great feature, is you get two different sets of tyres for the kit. Different tread and size.

So rolling bases complete.

Interior up next.
cheers
Michael
Got the white on the floor and then added the partial engine/gearbox plus suspension parts. this kit is a mixture of good - nice level of detail in the parts - but it would have so much better with a full BDA 1800 to stick under the bonnet.
Building a duet doesn't even matter when one is LHD, the other RHD since they make no allowance for steering.
There is nice PE set that you can get for the kit (there is some already in the box). It includes the rear axle brace.
The bash plate is part of the PE set.
Another great feature, is you get two different sets of tyres for the kit. Different tread and size.
So rolling bases complete.
Interior up next.
cheers
Michael
AussieReg
#007
Joined: June 09, 2009
KitMaker: 8,156 posts
Auto Modeler: 2,953 posts
Posted: Monday, November 11, 2019 - 11:01 PM UTC
Super neat work there Michael, great to see some PE included in the kits as well, it really adds some great features to the drive train.
Looking forward to more progress.
Cheers, D
Looking forward to more progress.
Cheers, D
Joel_W
Joined: December 04, 2010
KitMaker: 11,666 posts
Auto Modeler: 2,974 posts
Posted: Tuesday, November 12, 2019 - 12:08 PM UTC
Michael.
Those two rolling chassis' really look darn good. Actually, they look like they rolled off the assembly line as they're identical.
Joel
Those two rolling chassis' really look darn good. Actually, they look like they rolled off the assembly line as they're identical.
Joel
AussieReg
#007
Joined: June 09, 2009
KitMaker: 8,156 posts
Auto Modeler: 2,953 posts
Posted: Tuesday, November 12, 2019 - 03:19 PM UTC
A little bit of progress to report. I have finished the assembly and painting of the engine and radiator and test dry fitted them to the chassis, as well as dry fitting the shell and bonnet assemblies to make sure everything still goes together.


I also finished and fitted the front end leaf spring/axle assembly, torque arm assembly (radius rods) and the 4 wheel backing plates.

Cheers, D
I also finished and fitted the front end leaf spring/axle assembly, torque arm assembly (radius rods) and the 4 wheel backing plates.
Cheers, D
Joel_W
Joined: December 04, 2010
KitMaker: 11,666 posts
Auto Modeler: 2,974 posts
Posted: Wednesday, November 13, 2019 - 02:37 AM UTC
D,
Just love how the engine came out, and looks fitted to the chassis. The front suspension is looking good as it's starting to take shape.
Joel
Just love how the engine came out, and looks fitted to the chassis. The front suspension is looking good as it's starting to take shape.
Joel

Stickframe
#362
Joined: December 01, 2013
KitMaker: 1,661 posts
Auto Modeler: 431 posts

Posted: Wednesday, November 13, 2019 - 10:37 AM UTC
Michael and D, wow!
You guys sure do nice and clean work - a pleasure so see both projects. D, I really like your variations in colors on the engine - looks really convincing. Michael, these two look like they rolled off the assembly line together.
Looking forward to seeing what you guys do with them next -
Cheers and go team Ford!
Nick
Cosimodo
#335
Joined: September 03, 2013
KitMaker: 1,808 posts
Auto Modeler: 701 posts
Posted: Wednesday, November 13, 2019 - 11:40 AM UTC
Damian, Your engine looks amazing! Will you able to display it i.e. does the hood hinge? It would be a shame to hide it.
Joel and Nick, thanks for kind words about my Escorts. Doings duets is kinda of fun.
cheers
Michael
Joel and Nick, thanks for kind words about my Escorts. Doings duets is kinda of fun.
cheers
Michael
AussieReg
#007
Joined: June 09, 2009
KitMaker: 8,156 posts
Auto Modeler: 2,953 posts
Posted: Wednesday, November 13, 2019 - 12:12 PM UTC
Thanks guys, as always the feedback is very much appreciated!
I am building this one so that the whole hood and engine side cover assembly can be lifted off.
Cheers, D
Quoted Text
Damian, Your engine looks amazing! Will you able to display it i.e. does the hood hinge? It would be a shame to hide it.
I am building this one so that the whole hood and engine side cover assembly can be lifted off.
Cheers, D
forest1000
Joined: December 14, 2014
KitMaker: 80 posts
Auto Modeler: 44 posts
Posted: Wednesday, November 13, 2019 - 01:47 PM UTC
I have the body painted and decals are all on. I need to put the gloss coat on the body. The tires have the decals on them but I'm not happy with the results. The balance of the kit is painted and waiting for assembly. It took 3 nights to get all the decals on with a lot of mr mark softer.

AussieReg
#007
Joined: June 09, 2009
KitMaker: 8,156 posts
Auto Modeler: 2,953 posts
Posted: Wednesday, November 13, 2019 - 02:08 PM UTC
Great work David, those XOS decals fought valiantly, but you look to have tamed them beautifully. Looking forward to the next progress report!
Stats update:
6 weeks in, approaching 10,000 views and 300 posts
23 enlisted
13 builds in progress
2 builds completed
Cheers, D
Stats update:
6 weeks in, approaching 10,000 views and 300 posts
23 enlisted
13 builds in progress
2 builds completed
Cheers, D
Joel_W
Joined: December 04, 2010
KitMaker: 11,666 posts
Auto Modeler: 2,974 posts
Posted: Thursday, November 14, 2019 - 02:32 AM UTC
David,
The shell now decaled certainly looks the part, very nicely done.
I keep both Mr. Mark Setter and Softener in my decal toolkit for those (usually Asian sourced decals) that just won't conform to even Solvaset in my 3 part process. And those solutions do work wonders.
As for the kit tires, I've built a few Nascar kits years ago and I also went the decal route, but not the kit decals. The only way I got them to really look like they were painted on was to hand brush on a few heavy coats of Pledge, then decal, then more Pledge, then rub the gloss coat out, and finally a Matt coat. The process seemed to only work because the tires where so hard with very little bend to the touch.
Looking forward to your next update on Wild Bill's Mikey D's ride.
Joel
Joel_W
Joined: December 04, 2010
KitMaker: 11,666 posts
Auto Modeler: 2,974 posts
Posted: Thursday, November 14, 2019 - 09:12 AM UTC
It's been quite a few days since I last updated my Roush Trans Am JPS Mustang. Honestly, I haven't had much time of late between the same family issues that just never seem to get resolved, and now with the holidays approaching way to fast. But I've managed to get some work accomplished.
I still haven't rubbed out the clear coat as yet, but it's on the top of my "To Do" list this coming week. Instead, I started to focus on various parts and planning details like hoses, braided lines, and electrical lines.
I added the fuel cell, dry sump oil tank, and battery box in the trunk compartment and started to drill the necessary holes for the various lines, keeping in mind that the only viewing angle will be through the glass panel in the trunk lid that will be closed.
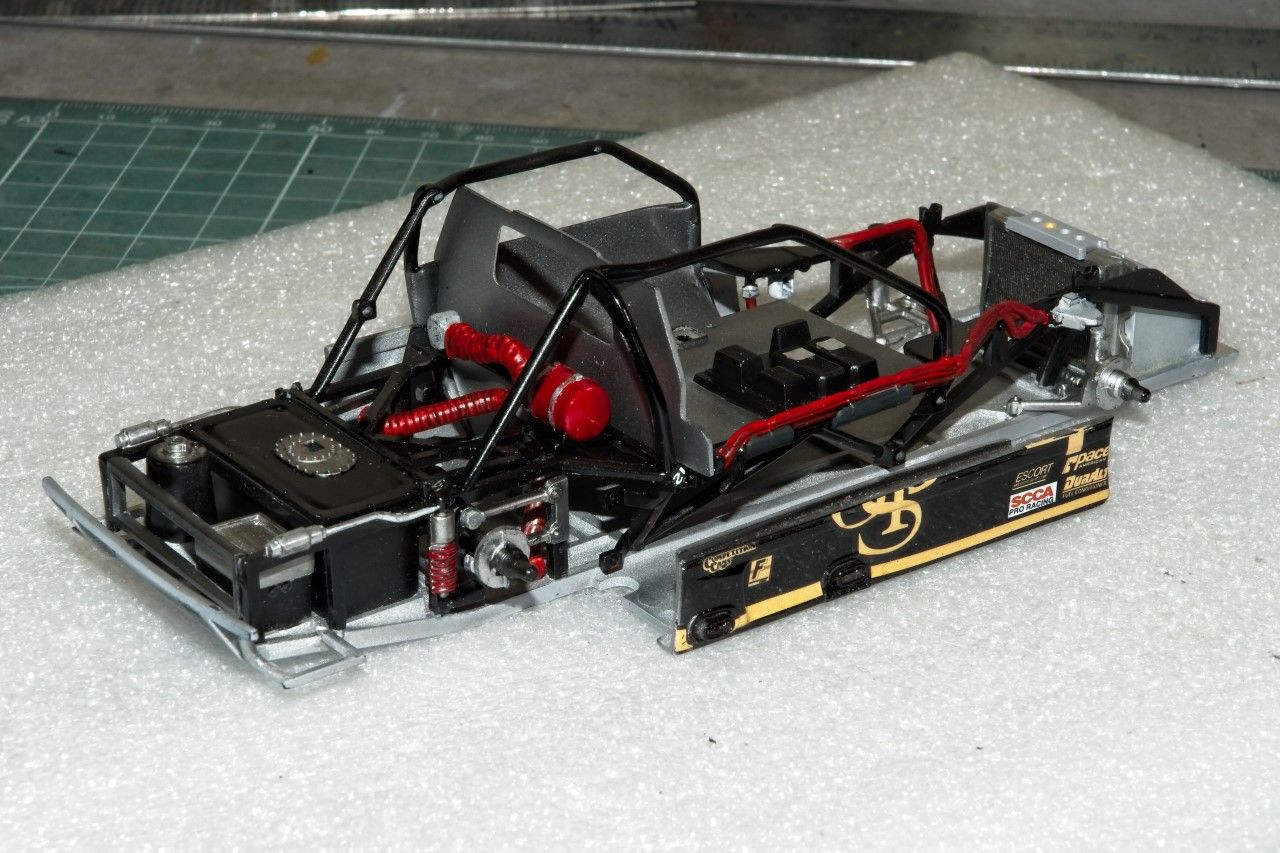
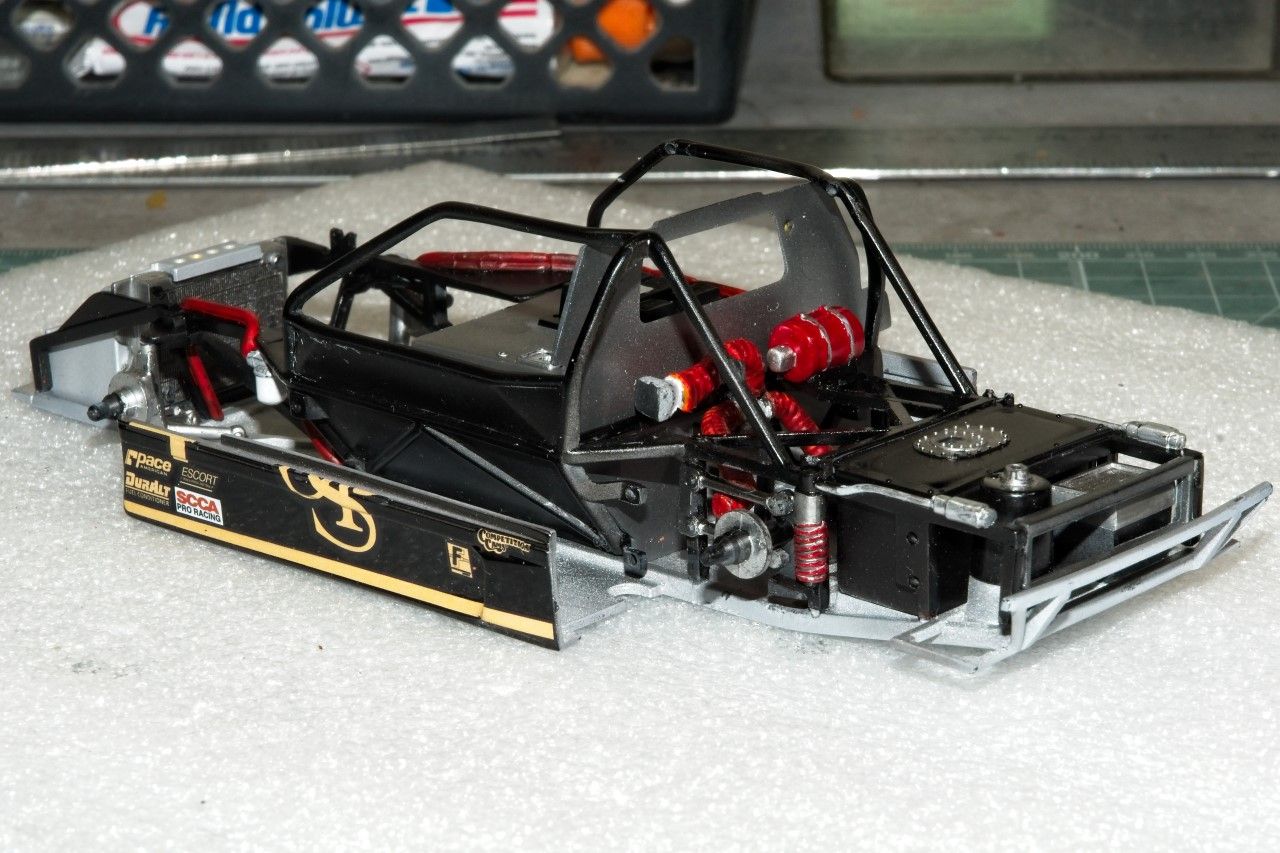
Then I started to focus on the driver's compartment by test fitting the rear bulkhead. There's still a few electrical boxes to be added as well as all the various wiring to add before it's glued into place. And then the right side Aluminum sheet cover that all the various lines etc. pass through rather then just being clamped to the driver compartment floor, plus the wiring for the electrical boxes on the top of it.

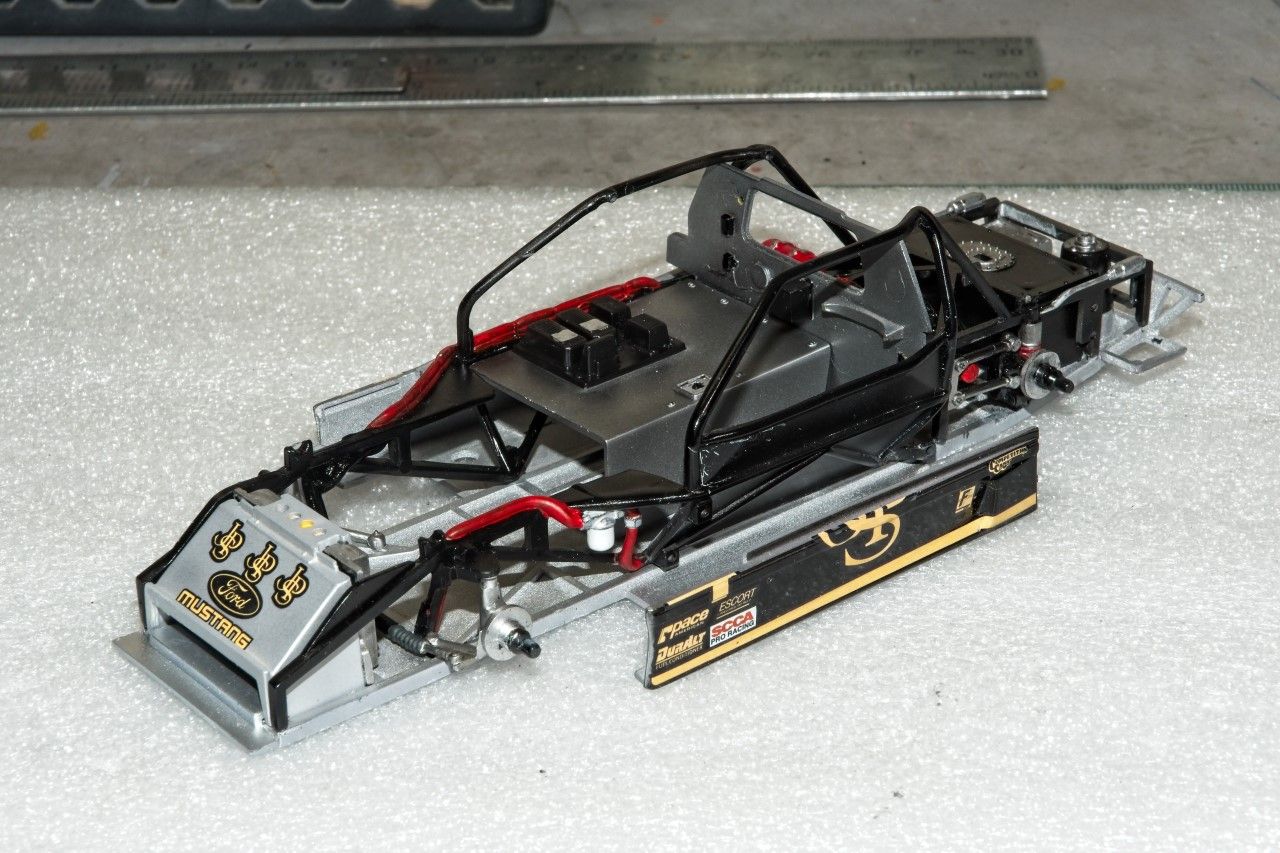
And that where I'm presently at.

Joel
I still haven't rubbed out the clear coat as yet, but it's on the top of my "To Do" list this coming week. Instead, I started to focus on various parts and planning details like hoses, braided lines, and electrical lines.
I added the fuel cell, dry sump oil tank, and battery box in the trunk compartment and started to drill the necessary holes for the various lines, keeping in mind that the only viewing angle will be through the glass panel in the trunk lid that will be closed.
Then I started to focus on the driver's compartment by test fitting the rear bulkhead. There's still a few electrical boxes to be added as well as all the various wiring to add before it's glued into place. And then the right side Aluminum sheet cover that all the various lines etc. pass through rather then just being clamped to the driver compartment floor, plus the wiring for the electrical boxes on the top of it.
And that where I'm presently at.
Joel
forest1000
Joined: December 14, 2014
KitMaker: 80 posts
Auto Modeler: 44 posts
Posted: Thursday, November 14, 2019 - 12:29 PM UTC
Quoted Text
David,
The shell now decaled certainly looks the part, very nicely done.
I keep both Mr. Mark Setter and Softener in my decal toolkit for those (usually Asian sourced decals) that just won't conform to even Solvaset in my 3 part process. And those solutions do work wonders.
As for the kit tires, I've built a few Nascar kits years ago and I also went the decal route, but not the kit decals. The only way I got them to really look like they were painted on was to hand brush on a few heavy coats of Pledge, then decal, then more Pledge, then rub the gloss coat out, and finally a Matt coat. The process seemed to only work because the tires where so hard with very little bend to the touch.
Looking forward to your next update on Wild Bill's Mikey D's ride.
Joel
Thanks Joel. I soaked the decals off last night and tried using a Sharpie oil marker but the result isn't satisfactory either.
Thanks Damian. I'm going to be moving on this little quicker now that the body is done.
 |

WEB HOSTING BY


Copyright ©2021 Auto Modeler and Kitmaker Network, a subsidiary of Silver Star Enterprises
All Rights Reserved. Please read our Conditions of Use and Privacy Policy.
All Rights Reserved. Please read our Conditions of Use and Privacy Policy.