The Garage
For general automotive modeling or non-modeling topics.
Blue Oval - Ford Motor Co. GB Build Thread
Joel_W
Staff MemberAssociate Editor
AUTOMODELER
_VISITCOMMUNITY
New York, United States
Joined: December 04, 2010
KitMaker: 11,666 posts
Auto Modeler: 2,974 posts
Posted: Wednesday, October 23, 2019 - 11:10 AM UTC
Well, it's been a while since I've last updated my Roush JPS Mustang build blog, but I've finally completed enough work for a decent update.

After striping off the old Red paint, and repainting the body sections Matt Black, next up was a wet sanding with Micro Mesh Emerycloth. I started with 6,000, then 8,000, and finished up with 12,000. The surfaces were now smooth enough for decaling as I don't use a clear gloss coat, it's decals right on top of the painted surface.

The kit decals were printed way back in 1991, and were in fairly good physical shape, but the gold color was a pale Yellow, so no matter what they were filed in my circular file. I had bought from Indy Cal's their decal sheet for the JPS Roush Mustang which has it's own slight issue with the Gold color. It's more of a Goldish Bisque, as Mike can't print true Gold nor Silver. But the color does look pretty good, and should work just fine.

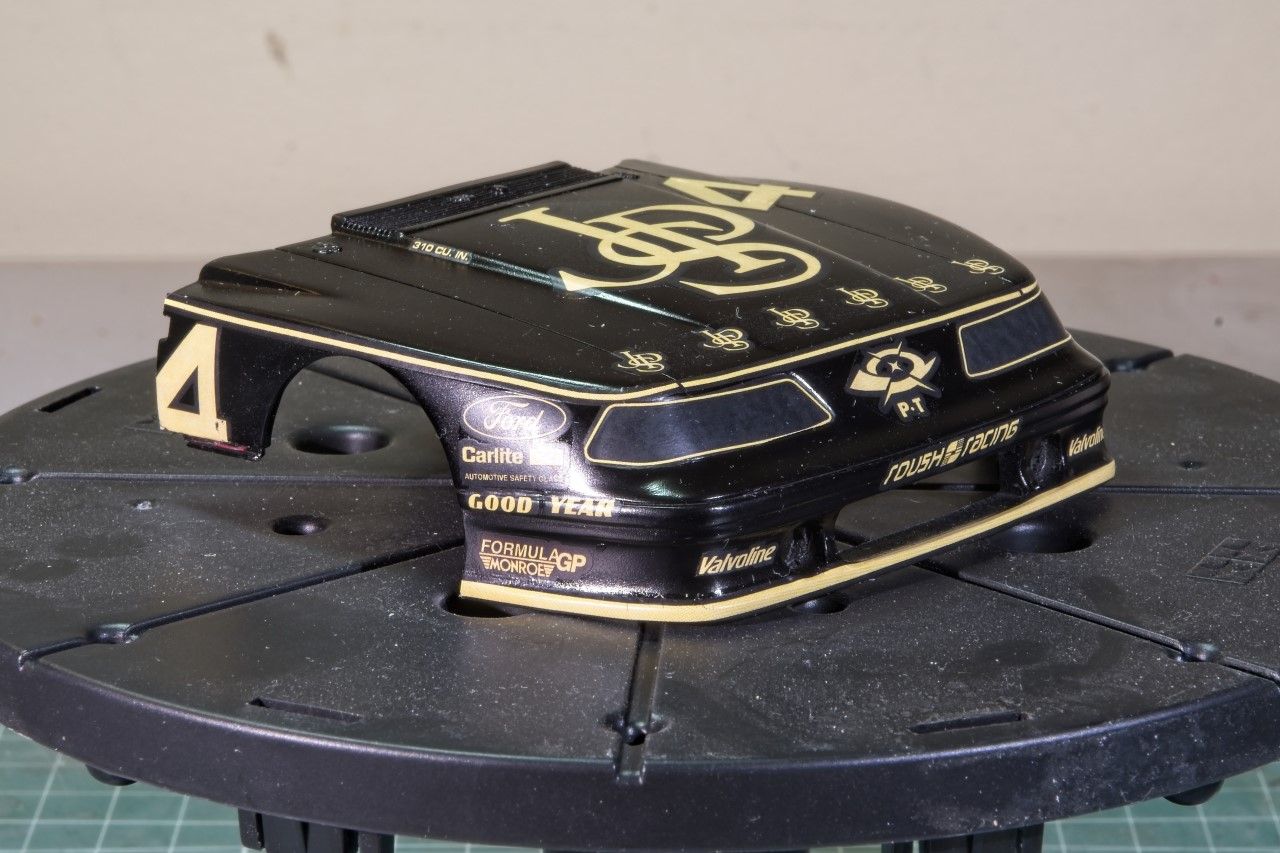
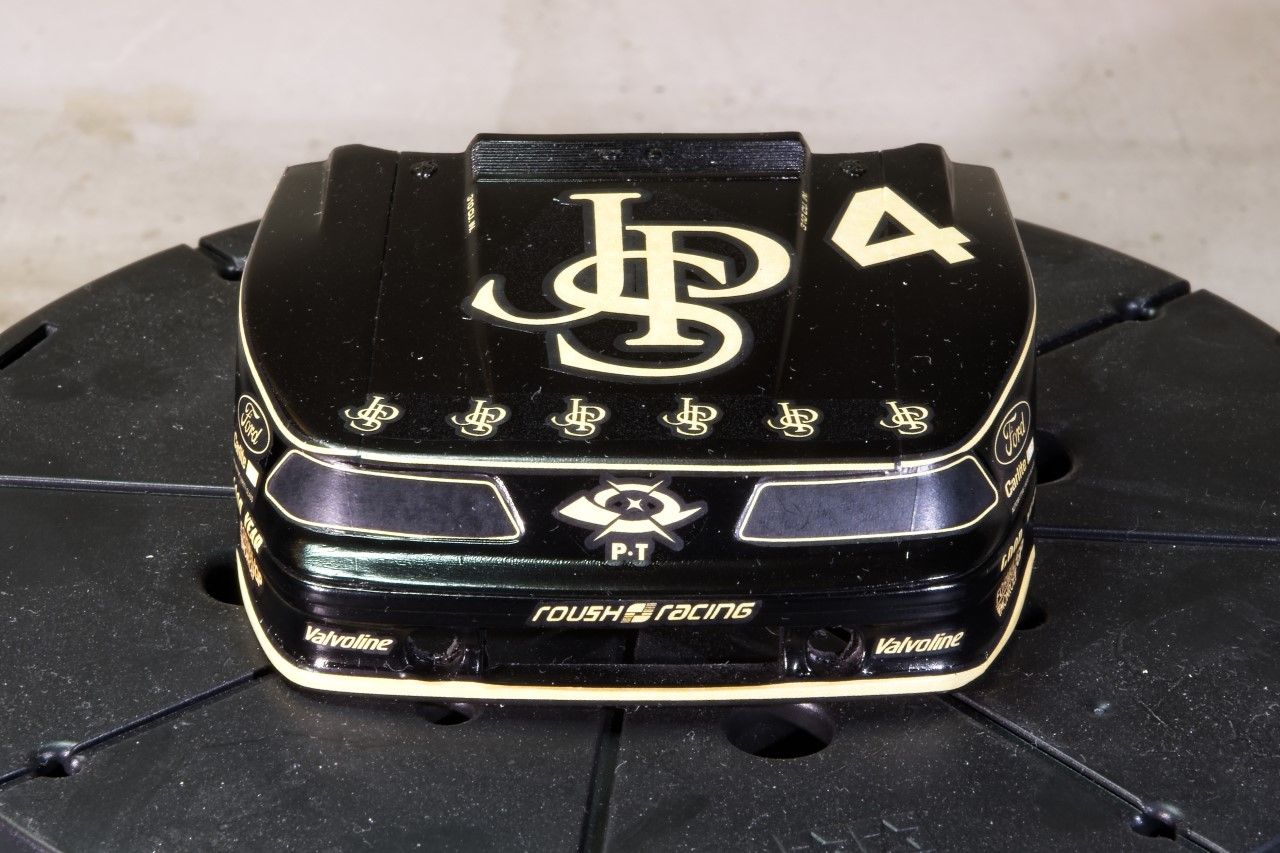
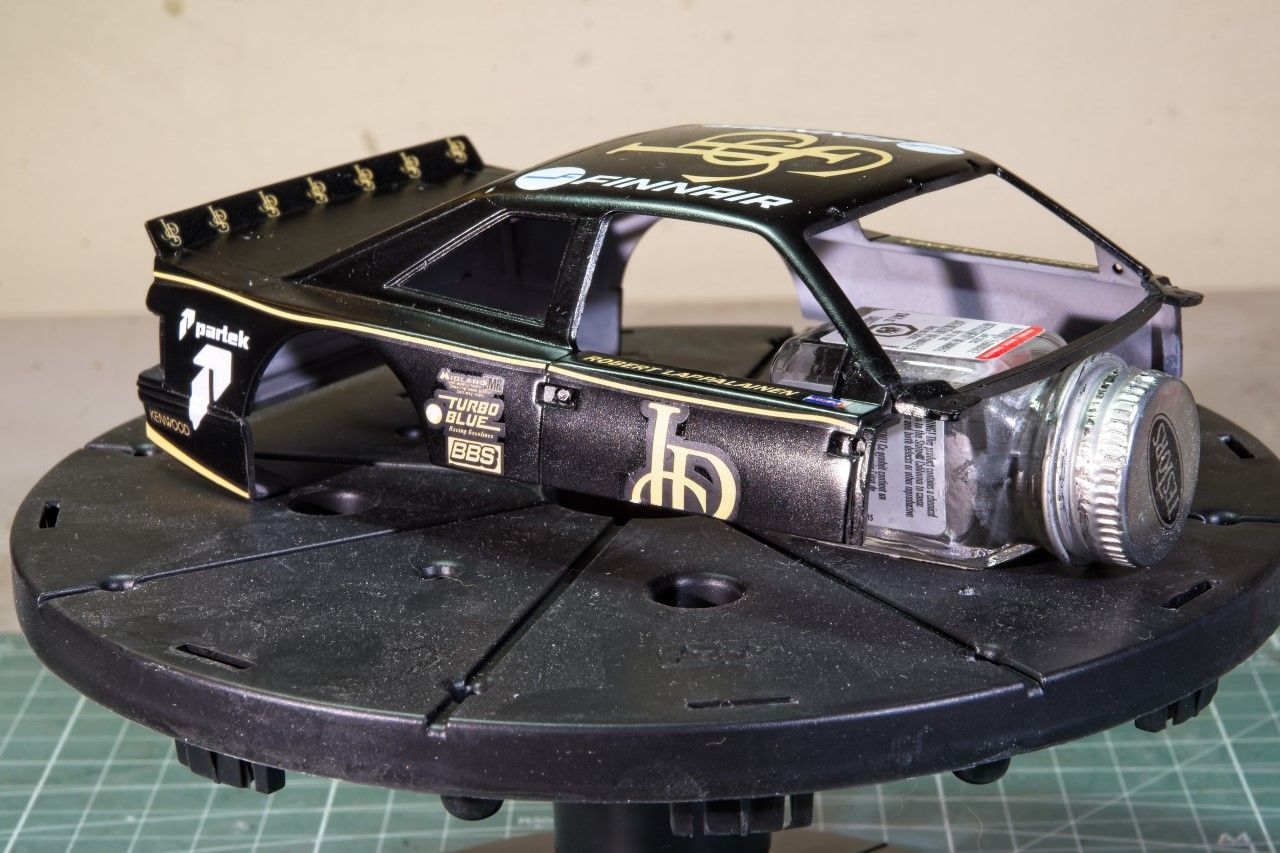
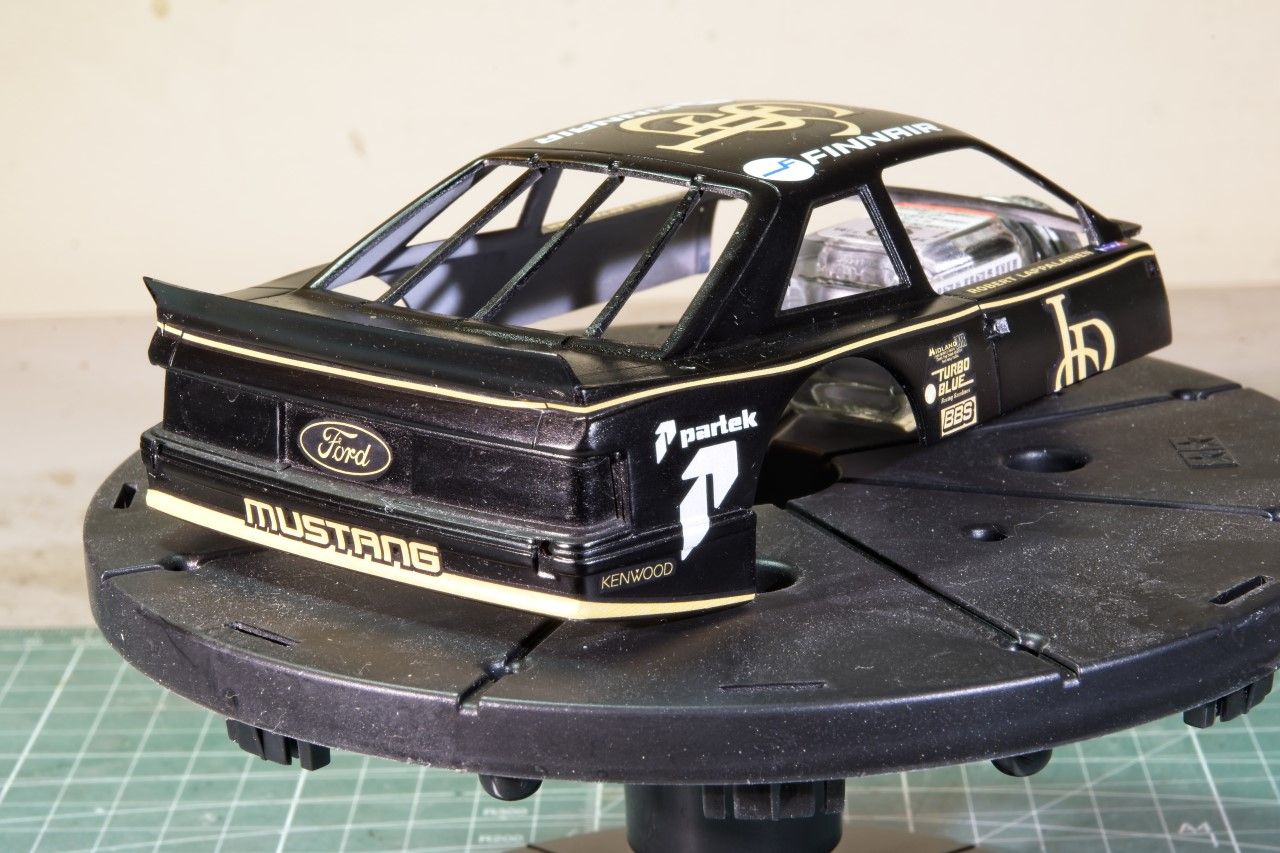
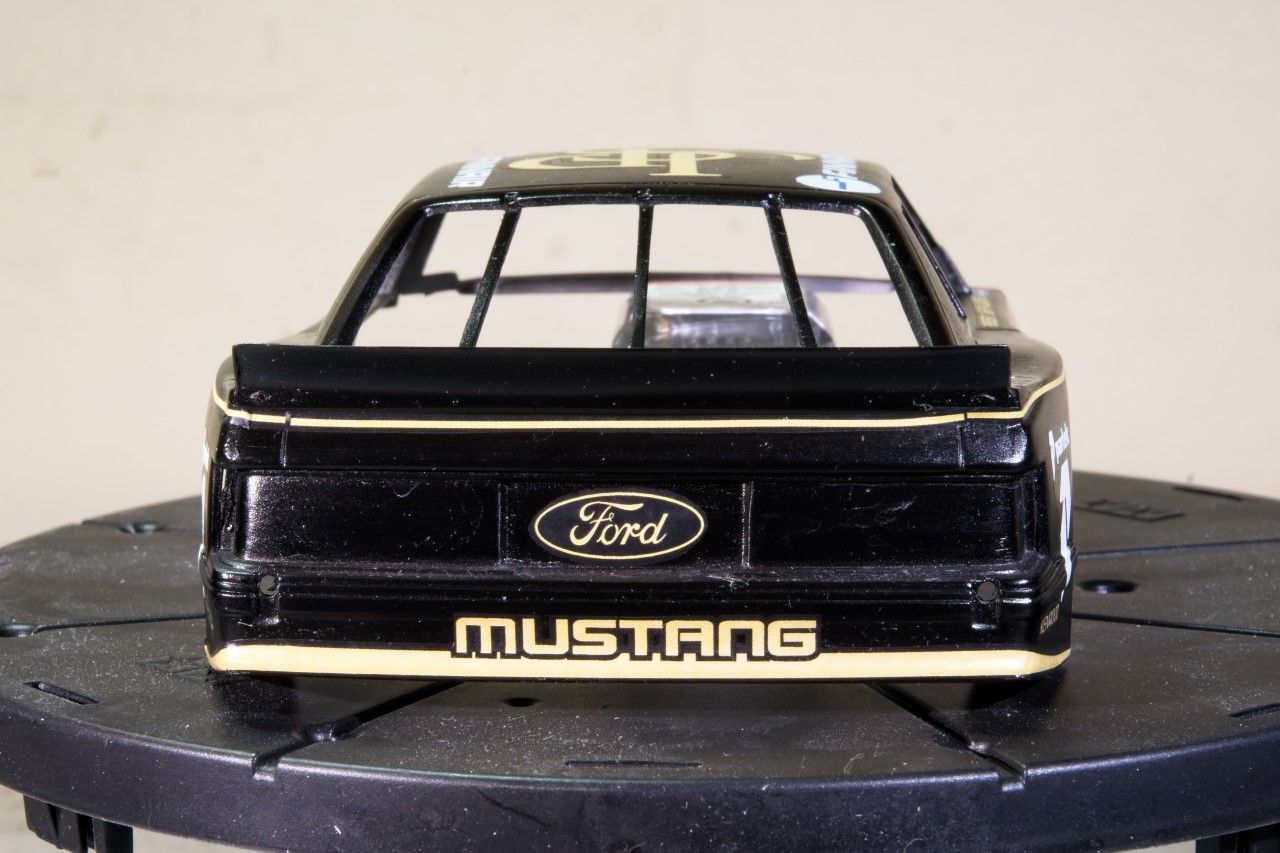
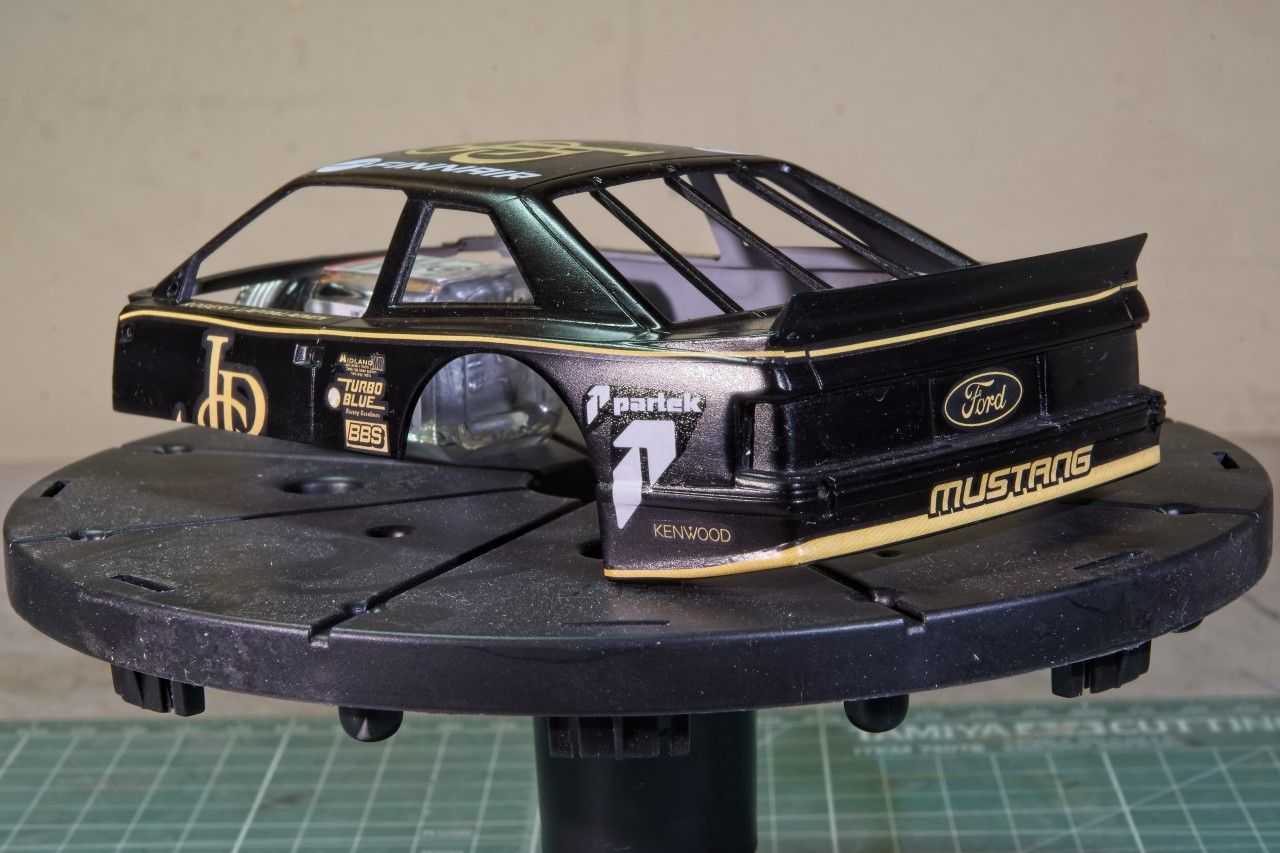
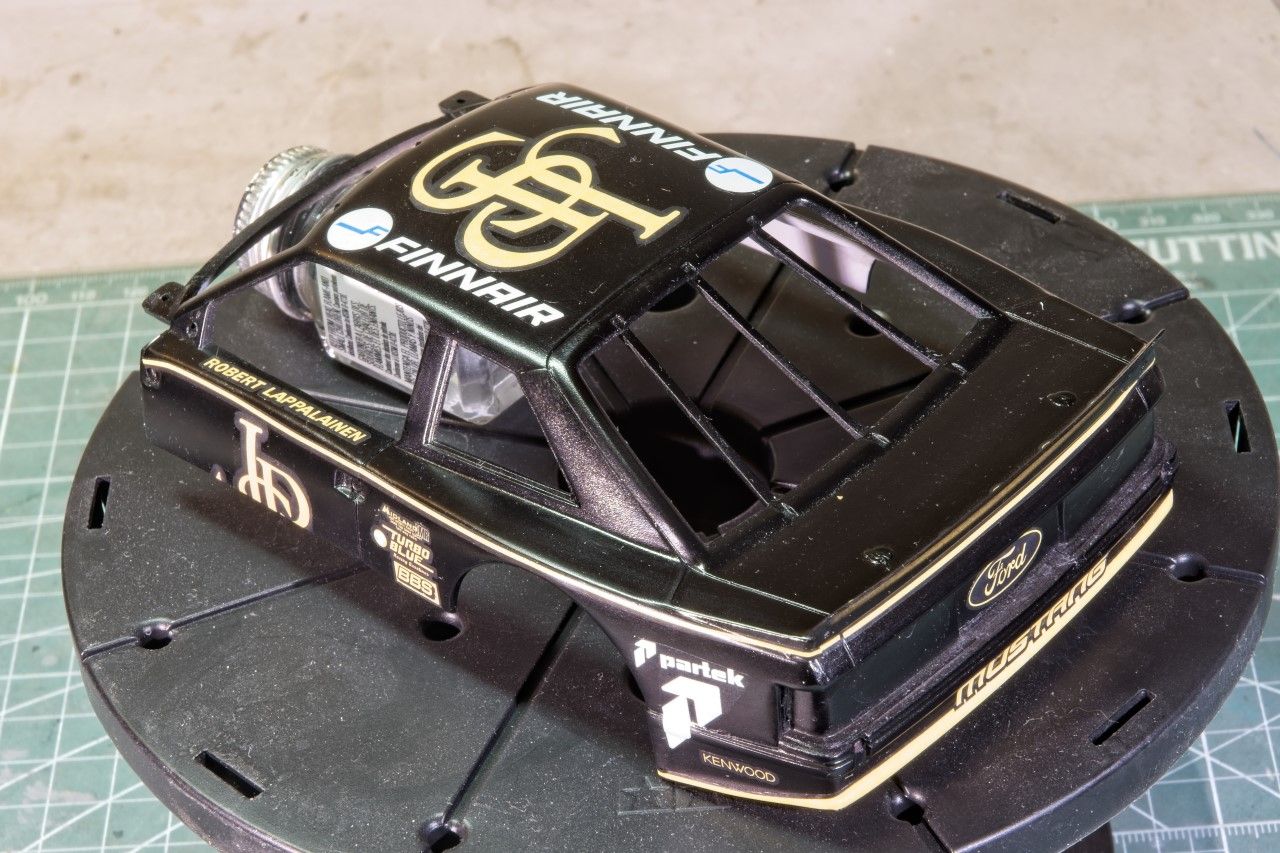
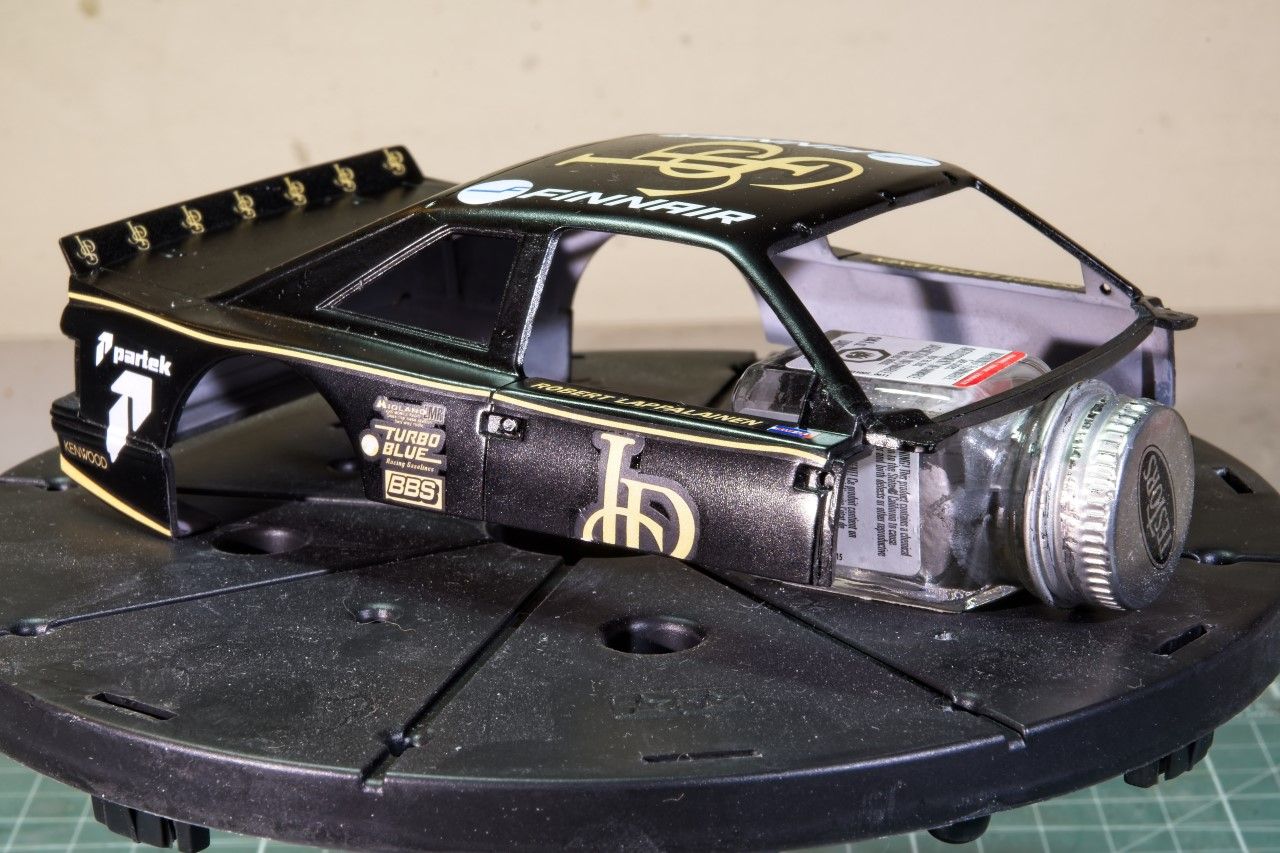
The other issue with these decals is that all the gold on every decal is outlined in Matt Black. There's just no way that I can trim away all of the black without damaging the "Gold" color, especially on the long stripes. I've seen these decals used on other builds, and the Matt Black does seem to disappear once a good gloss finish is applied. So that's my plan of attack. You'll easily see the Matt Black trim in the pictures at this stage of the body work. Also as usual, the decal sheet is just one big decal, so I had to cut out each decal separately. And the stripes wasn't the easiest thing for me to accomplish. Also for some strange reason, the decals seems a lot thicker then on past sheets I've used.

My decaling procedure is still Microscale Set under and over the decal, then Microscale Sol, and finally Solvaset. From start to finish it took 16 hours over 5 work days. One of my longer decaling jobs for sure.

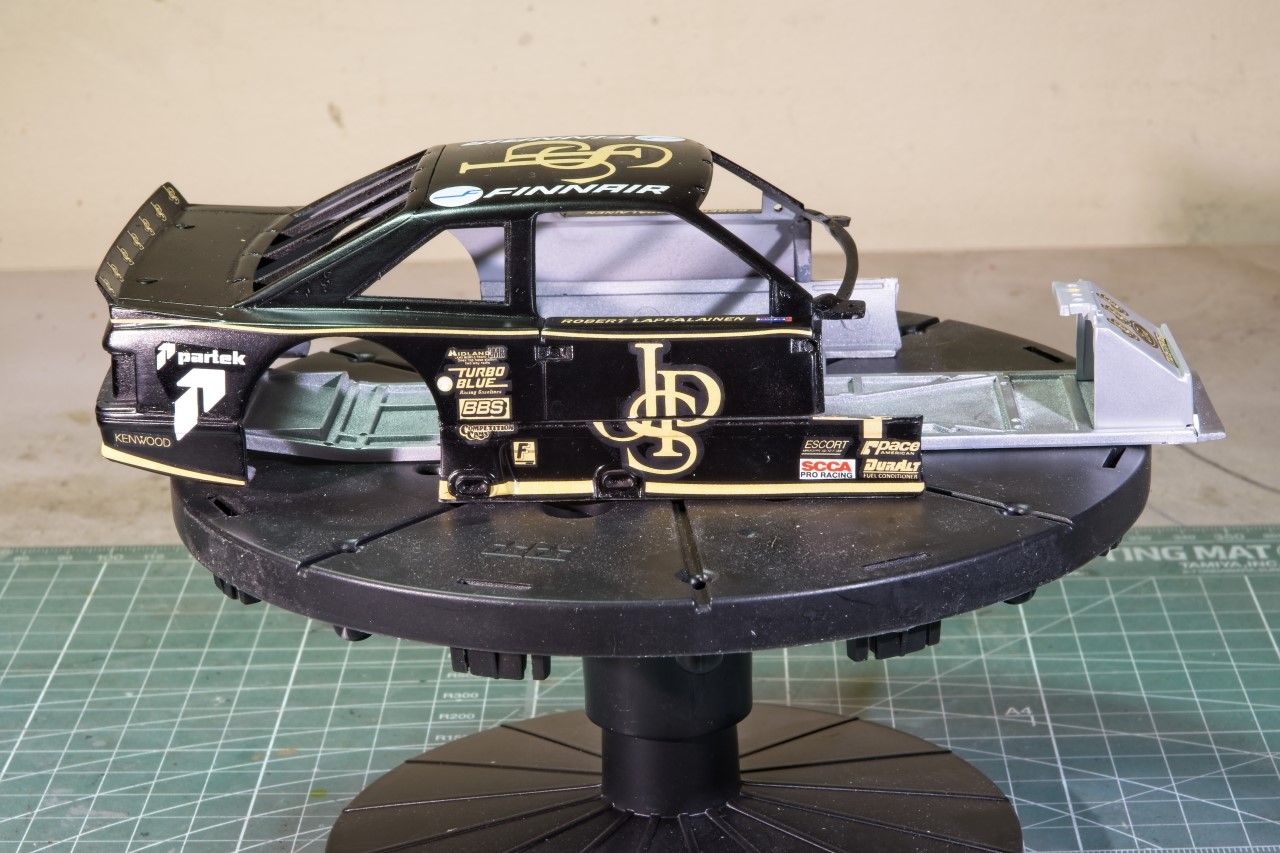
And just to make it a little more interesting there are several decals including the side numbers that had to be cut as they spanned across two body sections, and then correctly aligned.

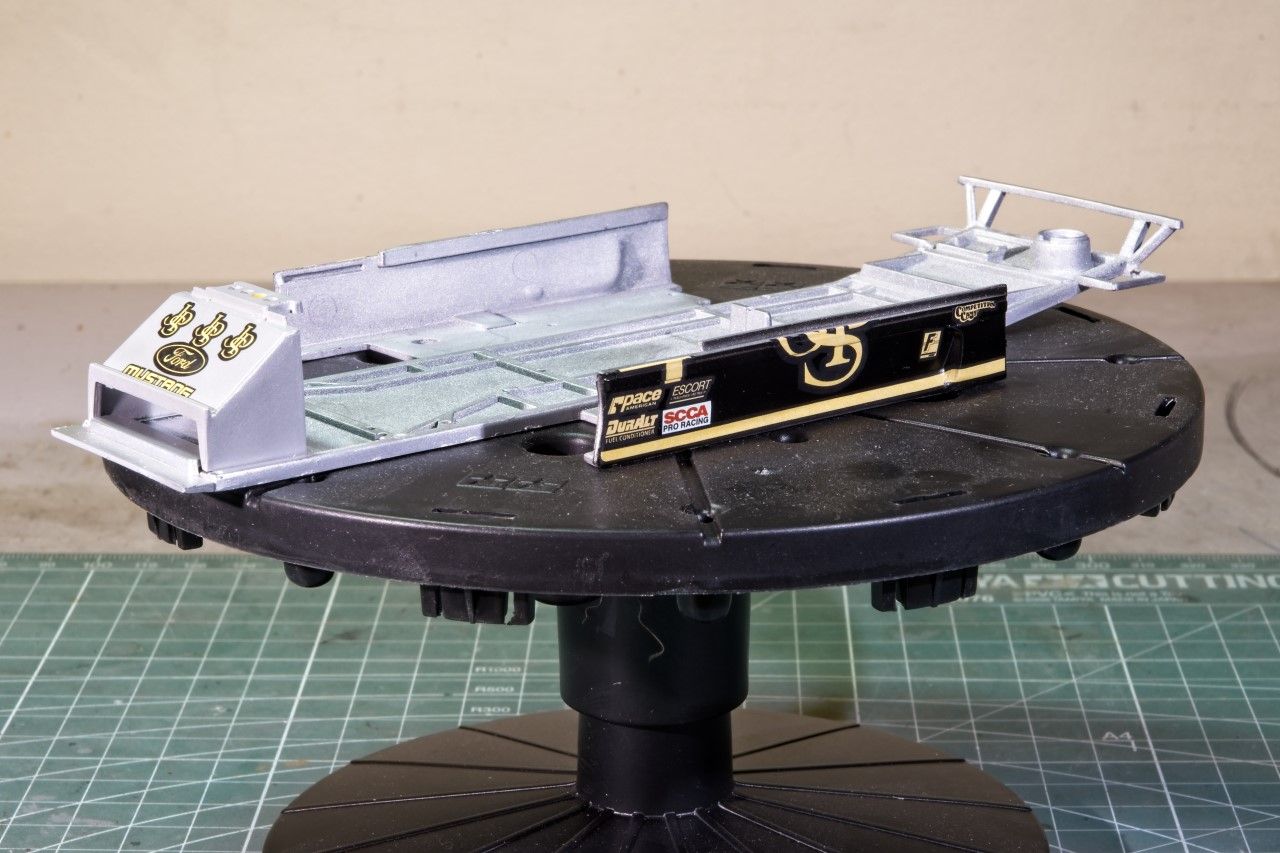
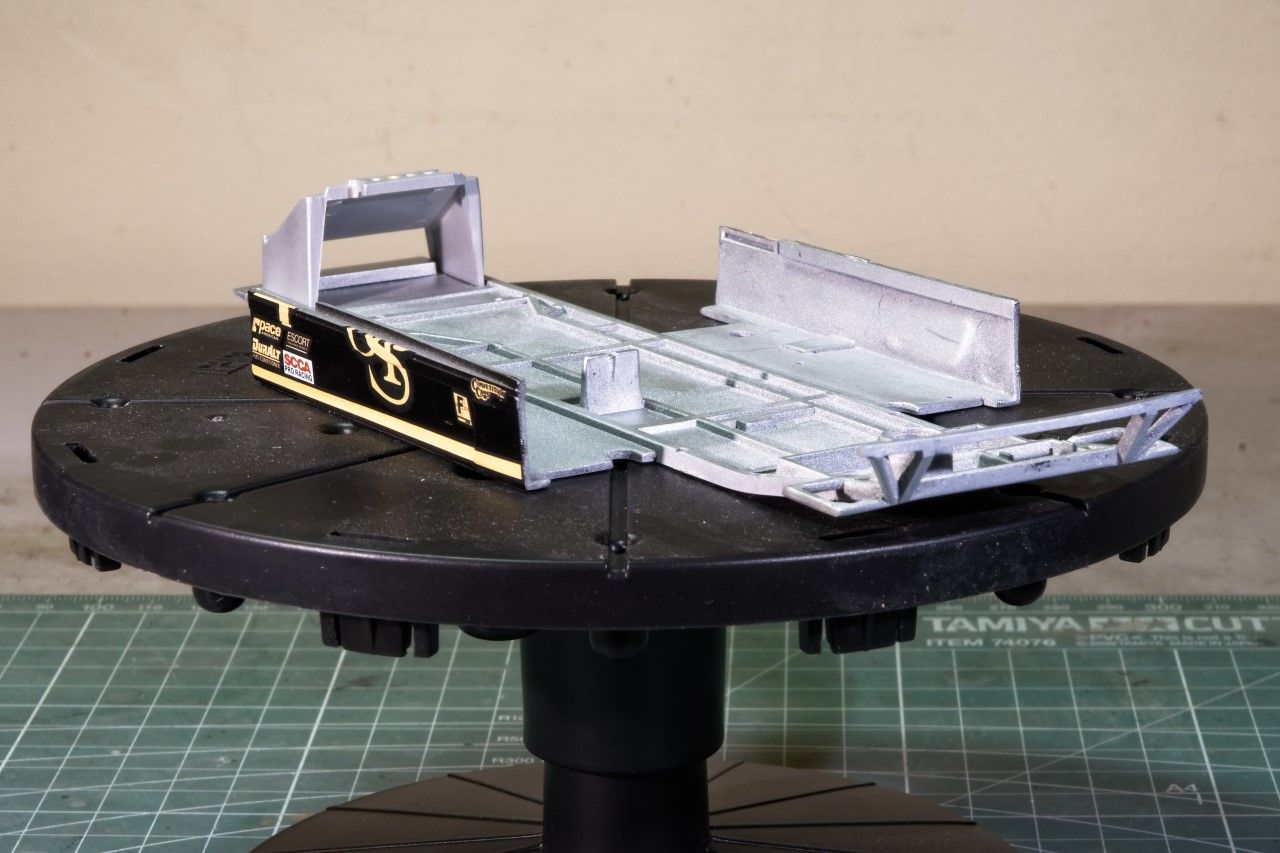
Here's some pictures of the body after the decaling has been completed. just keep in mind that there is no clear gloss as yet.

Joel


TacFireGuru
_VISITCOMMUNITY
Colorado, United States
Joined: December 25, 2004
KitMaker: 3,770 posts
Auto Modeler: 359 posts
Posted: Wednesday, October 23, 2019 - 01:10 PM UTC

Quoted Text


The Grabber Blue color does indeed look good on the cab. What type and brand of paint did you decide to use? Can't wait to see how she shines with a proper rubbing out.

Joel


Testors Rattle Can. Ultimately, I liked that color over a Tamiya and a Testors light blue.

I gave it a wet sanding this morning and then realized I forgot to add a poorly fitting part to the hood, so a bit of filler and another coat of the Grabber Blue in that area. Of course, I'll need to wet sand again, but that's okay.

Mike
TacFireGuru
_VISITCOMMUNITY
Colorado, United States
Joined: December 25, 2004
KitMaker: 3,770 posts
Auto Modeler: 359 posts
Posted: Wednesday, October 23, 2019 - 01:38 PM UTC
Fuel tanks and exhausts are added (exhausts were painted over with AK Extreme White Aluminum as I felt the Matt Alu was too dark).


Much more shine to the cab. I'll wet sand again with 2400 grit then work up to a couple more finer grits.


(Blurry unfortunately) Dark Alu for the grill and headlight bezels. The only thing I'm not certain about is the blue that can be seen behind the grill. Debating about gloss black on the two sides as the center will be "filled" with the silver radiator.


More to follow.

Mike
Joel_W
Staff MemberAssociate Editor
AUTOMODELER
_VISITCOMMUNITY
New York, United States
Joined: December 04, 2010
KitMaker: 11,666 posts
Auto Modeler: 2,974 posts
Posted: Thursday, October 24, 2019 - 12:08 AM UTC
Mike,
Excellent decision on changing the shade of Aluminum on those gas tanks. They certainly do look the part. Also not using the same shade of Aluminum as the exhaust system just adds a little extra to the realism look.

I concur with your decision to paint behind the grill with Matt Black, as the Grabber Blue just jumps out at me.

Joel
jimb
_VISITCOMMUNITY
New York, United States
Joined: August 25, 2006
KitMaker: 2,539 posts
Auto Modeler: 1,405 posts
Posted: Thursday, October 24, 2019 - 01:10 AM UTC
Mike,

Really nice looking LN8000.

Jim
Spruslayer
_VISITCOMMUNITY
Indiana, United States
Joined: May 26, 2017
KitMaker: 57 posts
Auto Modeler: 16 posts
Posted: Thursday, October 24, 2019 - 12:26 PM UTC
I made it to the end for this one
Enjoy the pics!
Sorry about the backwards pic🙄


AussieReg
Staff MemberAssociate Editor
AUTOMODELER
#007
_VISITCOMMUNITY
Victoria, Australia
Joined: June 09, 2009
KitMaker: 8,156 posts
Auto Modeler: 2,953 posts
Posted: Thursday, October 24, 2019 - 12:41 PM UTC
Nice clean build Mike, well done getting it finished!

Any comments on the kit? Any issues to deal with that we should know about?

Many thanks for joining in here, I hope you stick around and follow the rest of the builds progress.

Cheers, D
Spruslayer
_VISITCOMMUNITY
Indiana, United States
Joined: May 26, 2017
KitMaker: 57 posts
Auto Modeler: 16 posts
Posted: Thursday, October 24, 2019 - 04:02 PM UTC
Thank you Damian,this kit fits together well. The frame did have a small twist that I was able to straighten out. Because of that I was extra careful installing the rear axle and front suspension.this is my first Moebius vehicle kit and I am impressed
Hwa-Rang
_VISITCOMMUNITY
Kobenhavn, Denmark
Joined: June 29, 2004
KitMaker: 6,760 posts
Auto Modeler: 2,182 posts
Posted: Thursday, October 24, 2019 - 05:35 PM UTC
Mike H: I would definitely add the black paint behind the grill.

Mike T: Very nice work. Clean sharp build.

Dixon66
_VISITCOMMUNITY
New Hampshire, United States
Joined: December 12, 2002
KitMaker: 1,500 posts
Auto Modeler: 645 posts
Posted: Friday, October 25, 2019 - 12:19 AM UTC
Very nice Mike T. I'm going to have to try one of their kits.

Mike H., Coming along very nicely. I agree with Jesper, a quick search of online pictures show that it is not usually body color in that area.
Joel_W
Staff MemberAssociate Editor
AUTOMODELER
_VISITCOMMUNITY
New York, United States
Joined: December 04, 2010
KitMaker: 11,666 posts
Auto Modeler: 2,974 posts
Posted: Friday, October 25, 2019 - 01:45 AM UTC
Mike,
Well done. I'm not a truck kind of guy, but your build really has sparked my interest, as one doesn't see a model of a Utility truck that often here.

You're officially the 1st one to earn your GB ribbon.

Joel
Spruslayer
_VISITCOMMUNITY
Indiana, United States
Joined: May 26, 2017
KitMaker: 57 posts
Auto Modeler: 16 posts
Posted: Friday, October 25, 2019 - 03:01 AM UTC
Thank you everyone.Amelia Earharts Lockheed L-10 from Willams is on the bench now.Started it about a year ago but it went to the shelf of forgotten projects, gonna get that one done 🤔
PasiAhopelto
_VISITCOMMUNITY
Uusimaa, Finland
Joined: October 01, 2016
KitMaker: 514 posts
Auto Modeler: 44 posts
Posted: Friday, October 25, 2019 - 07:03 PM UTC
The Revell's 2017 Le Mans GT was quite disappointing for a new tool kit, but this few years older actually looks nicer in the box. So changed my mind, and will do


Not my favorite NASCAR era, but still interesting.
forest1000
_VISITCOMMUNITY
Ontario, Canada
Joined: December 14, 2014
KitMaker: 80 posts
Auto Modeler: 44 posts
Posted: Saturday, October 26, 2019 - 12:39 AM UTC
I like the subject. Looking forward to the photos and build.
Joel_W
Staff MemberAssociate Editor
AUTOMODELER
_VISITCOMMUNITY
New York, United States
Joined: December 04, 2010
KitMaker: 11,666 posts
Auto Modeler: 2,974 posts
Posted: Saturday, October 26, 2019 - 01:01 AM UTC
Pasi,
The Revell Ford GT has some real serious fit issues, mainly where the body shell is supposed to align with the chassis pan. I've seen a few builds where the builders got it close, but a space was still visible, and one by a excellent auto modeler that actually made a fillet for each side to close the gap. Some other fit issues as well. Revell also took the easy way out on the engine details and some suspension parts as well. Still, with a lot of work, you can build this into a very nice model. Personally, like you, I've passed on even attempting it, waiting for another manufacture to kit the car.

I do like your switch to Nascar, as this year I've started watching almost every race as I now record them.

Like you, the early years isn't my favorite era. I much prefer the pre-spec era. Still your '57 Ford should be an excellent build of an iconic car from the "good old days".

Looking forward to following your build from the green flag to crossing the finish line.

Joel
TacFireGuru
_VISITCOMMUNITY
Colorado, United States
Joined: December 25, 2004
KitMaker: 3,770 posts
Auto Modeler: 359 posts
Posted: Saturday, October 26, 2019 - 10:24 AM UTC
The cargo box is assembled. I've decided to keep it closed up.

Here it is in a mock-up.


And I've assembled (but not attached) the rear hydraulic ramp.


The box will be white (primed white now) with a flat black underside. Most of the parts are now painted and needing assembly and attaching.

More to follow.

Mike
TacFireGuru
_VISITCOMMUNITY
Colorado, United States
Joined: December 25, 2004
KitMaker: 3,770 posts
Auto Modeler: 359 posts
Posted: Saturday, October 26, 2019 - 12:02 PM UTC
Better picture from the side.


And from the front.


Mike
AussieReg
Staff MemberAssociate Editor
AUTOMODELER
#007
_VISITCOMMUNITY
Victoria, Australia
Joined: June 09, 2009
KitMaker: 8,156 posts
Auto Modeler: 2,953 posts
Posted: Sunday, October 27, 2019 - 12:16 AM UTC
Mike, your truck is coming together beautifully, a really nice clean build!

Pasi, you certainly won't see me complaining about your change of kits here, I'm a huge fan of the 50's series vehicles. It will be great to follow the progress on your '57 NASCAR, best of luck with the build.

Update on the state of play:

Aussiereg (Damian) - '36 Ford 5-Window Coupe - Primer and Paint stage
jimb (James) - '48 Deluxe Convertible - Body Prep, chassis and drive train assembly
Szmann (Gabriel) - '66 F-100 Flareside - Paint Stage
PasiAhopelto (Pasi) - '57 "Fireball Roberts" NASCAR - enlisted
md72 (Mark) - '51 Custom Coupe - Body Prep Work
Littorio (Luciano) - '65 Falcon Ranchero or '60 Starliner - enlisted
Dixon66 (David) - 1st Generation Bronco - enlisted
Joel_W (Joel) - '85 Mustang Roush Body - Shell clear coated, frame and tub detail painting
tinbanger (Richard) - '65 Mustang 2+2 Fastback - Primer
Cosimodo (Michael) - Escort RS1600 MkI 1973 RAC - enlisted
Ray_from_SA (Ray) - WRC Escort, Focus or Fiesta (or all 3 ??) - enlisted
Hwa-Rang (Jesper) - '65 Mustang 2+2 Fastback - enlisted
betheyn (Andy) - enlisted
accessdenied (Roger) -
Propster (Stephen) -
Hudson29 (Paul) -
Delbert (Delbert) - enlisted
bluebell914 (Patrick) - 66 GT40 enlisted
heavyjagdpanzer (Bill) - enlisted
Mechworker (Adam) -
IronHide (Arnel) - enlisted
Spruslayer (Mike) - '65 F-100 Service Truck - COMPLETED
forest1000 (David) - "Thunderbat" NASCAR - enlisted
TacFireGuru (Mike) - Louisville Delivery Truck - Painted, assembled, decals pending
roman (Roman) - enlisted
JClapp (Jonathan) - '15 Model T - Parts Prep
Merlin (Rowan) - '40 Standard Coupe - Chassis/Engine Painted
Nick (Stickframe) - IMSA Mustang - COMPLETED

Cheers, D
AussieReg
Staff MemberAssociate Editor
AUTOMODELER
#007
_VISITCOMMUNITY
Victoria, Australia
Joined: June 09, 2009
KitMaker: 8,156 posts
Auto Modeler: 2,953 posts
Posted: Sunday, October 27, 2019 - 01:19 AM UTC
Busy time at home the past few days so not much progress to speak of.

What I have been looking at is the front end panel fit (to avoid the problems I had with the stock '36) and how I want it to look finish wise. The reference image I am using shows the silver finish of the lower half continuing around the front, including the grille. I'm thinking of going down a slightly different path and painting the grille itself in the Wine Red to give the upper body a real "wedge" shape running from the bottom of the front grille to the lower rear end. Either way, I had to strip off the kit chrome on the grille, fit the upper grille mount, and then sand off the primer on the mating area of the lower body part to cement it in place.


Once this has set fully I will tidy up the join lines and then re-prime the whole area ready for the silver.

Cheers, D
Joel_W
Staff MemberAssociate Editor
AUTOMODELER
_VISITCOMMUNITY
New York, United States
Joined: December 04, 2010
KitMaker: 11,666 posts
Auto Modeler: 2,974 posts
Posted: Sunday, October 27, 2019 - 01:50 AM UTC
D,
So what you're planning is carry the Wine color across the grill and then down to the lower back. Sounds intriguing, and most tasteful. Looking forward to how it looks when done.

Joel
Joel_W
Staff MemberAssociate Editor
AUTOMODELER
_VISITCOMMUNITY
New York, United States
Joined: December 04, 2010
KitMaker: 11,666 posts
Auto Modeler: 2,974 posts
Posted: Sunday, October 27, 2019 - 01:53 AM UTC
Mike,
Nice choice of color for the box as it will contrast with the cab nicely. And the hydraulic ramp in the down position really adds that little bit extra of realism.

Have you decided on painting the inside of the grill Flat Black or just leave it as it is? I gather that in the real world it was painted just like the rest of the cab.

Joel
Dixon66
_VISITCOMMUNITY
New Hampshire, United States
Joined: December 12, 2002
KitMaker: 1,500 posts
Auto Modeler: 645 posts
Posted: Sunday, October 27, 2019 - 03:51 AM UTC
Damian, I can picture it. I think it will really pop.

Mike, that color combo looks appropriate to the era. Any plans on cab door markings?
TacFireGuru
_VISITCOMMUNITY
Colorado, United States
Joined: December 25, 2004
KitMaker: 3,770 posts
Auto Modeler: 359 posts
Posted: Sunday, October 27, 2019 - 10:21 AM UTC
Joel, the inner part has been painted flat black. Looks much better now.

David, I haven't given any thoughts to decals yet. I'm really not sure as I have nothing in the decal box for this. Something on the doors and sides of the box would be nice though.

Mike
Joel_W
Staff MemberAssociate Editor
AUTOMODELER
_VISITCOMMUNITY
New York, United States
Joined: December 04, 2010
KitMaker: 11,666 posts
Auto Modeler: 2,974 posts
Posted: Monday, October 28, 2019 - 12:21 AM UTC

Quoted Text

Joel, the inner part has been painted flat black. Looks much better now.

David, I haven't given any thoughts to decals yet. I'm really not sure as I have nothing in the decal box for this. Something on the doors and sides of the box would be nice though.

Mike


Mike,
Looking forward to a picture or two. I'm sure that it looks a million times better.

Agreed, that the box does indeed some kind of company name and or advertising. Rare these days to see a box with nothing on it but road dirt.

Joel
TacFireGuru
_VISITCOMMUNITY
Colorado, United States
Joined: December 25, 2004
KitMaker: 3,770 posts
Auto Modeler: 359 posts
Posted: Monday, October 28, 2019 - 04:13 AM UTC
I'm thinking about getting this set.


I like the Mason-Dixon decals.

Mike