The Garage
For general automotive modeling or non-modeling topics.
Blue Oval - Ford Motor Co. GB Build Thread
Stickframe
#362
_VISITCOMMUNITY
California, United States
Joined: December 01, 2013
KitMaker: 1,661 posts
Auto Modeler: 431 posts
Posted: Monday, October 14, 2019 - 12:11 PM UTC
HI guys,

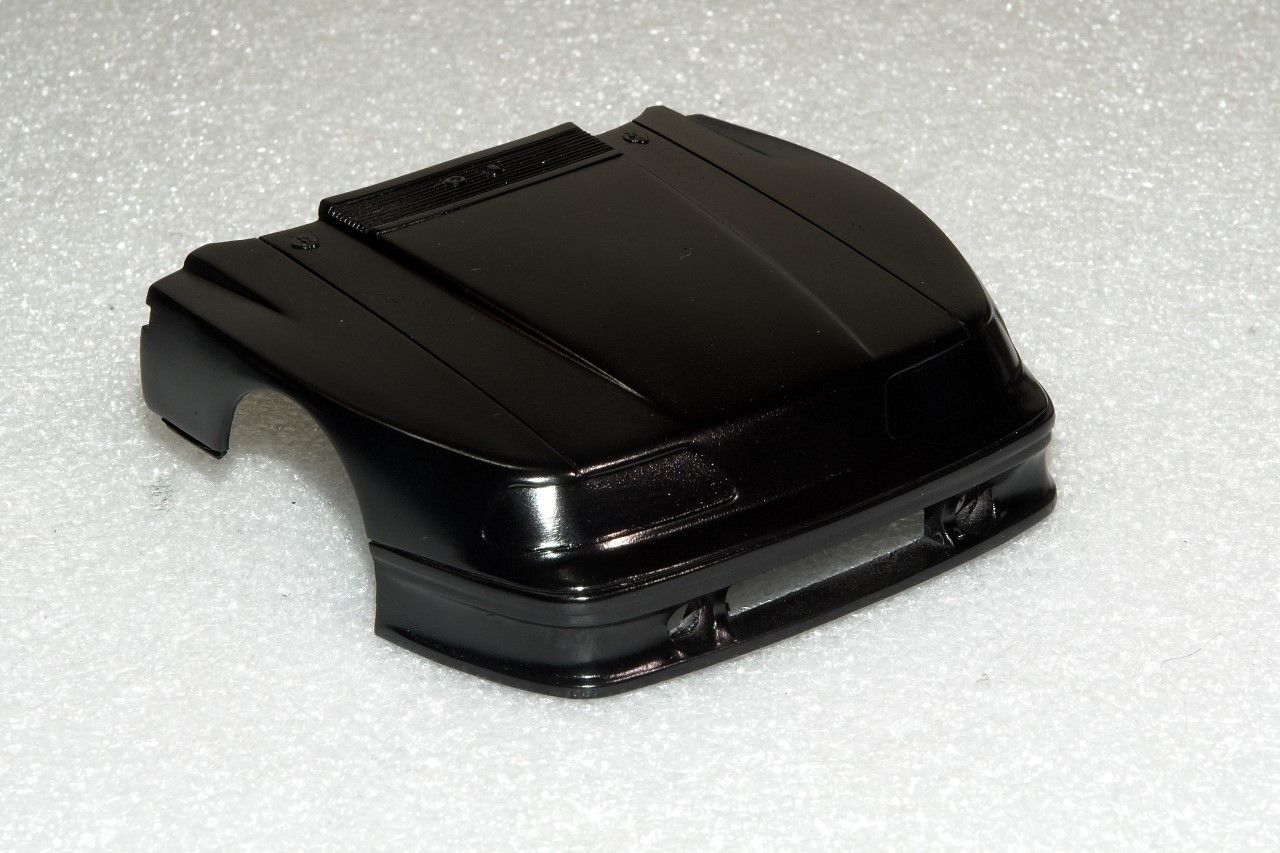
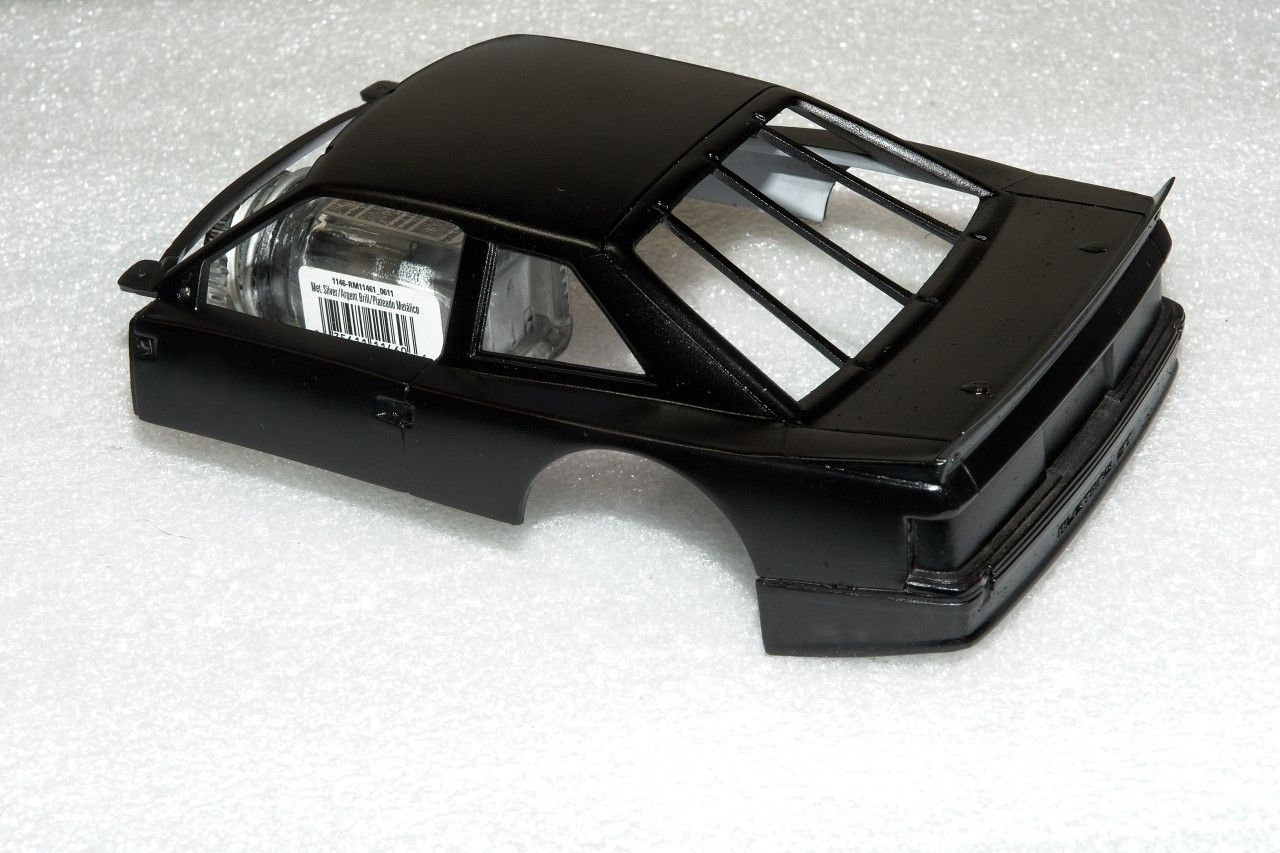
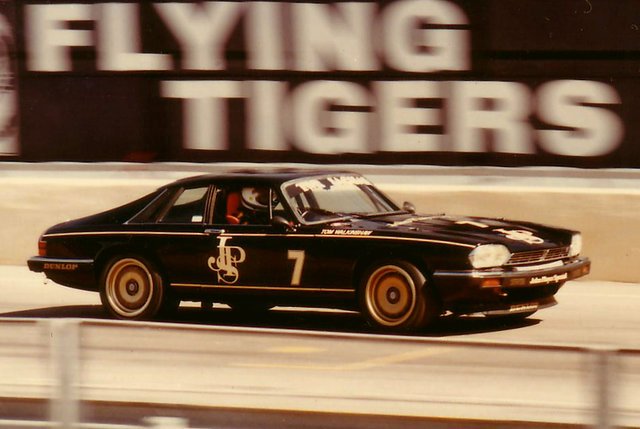
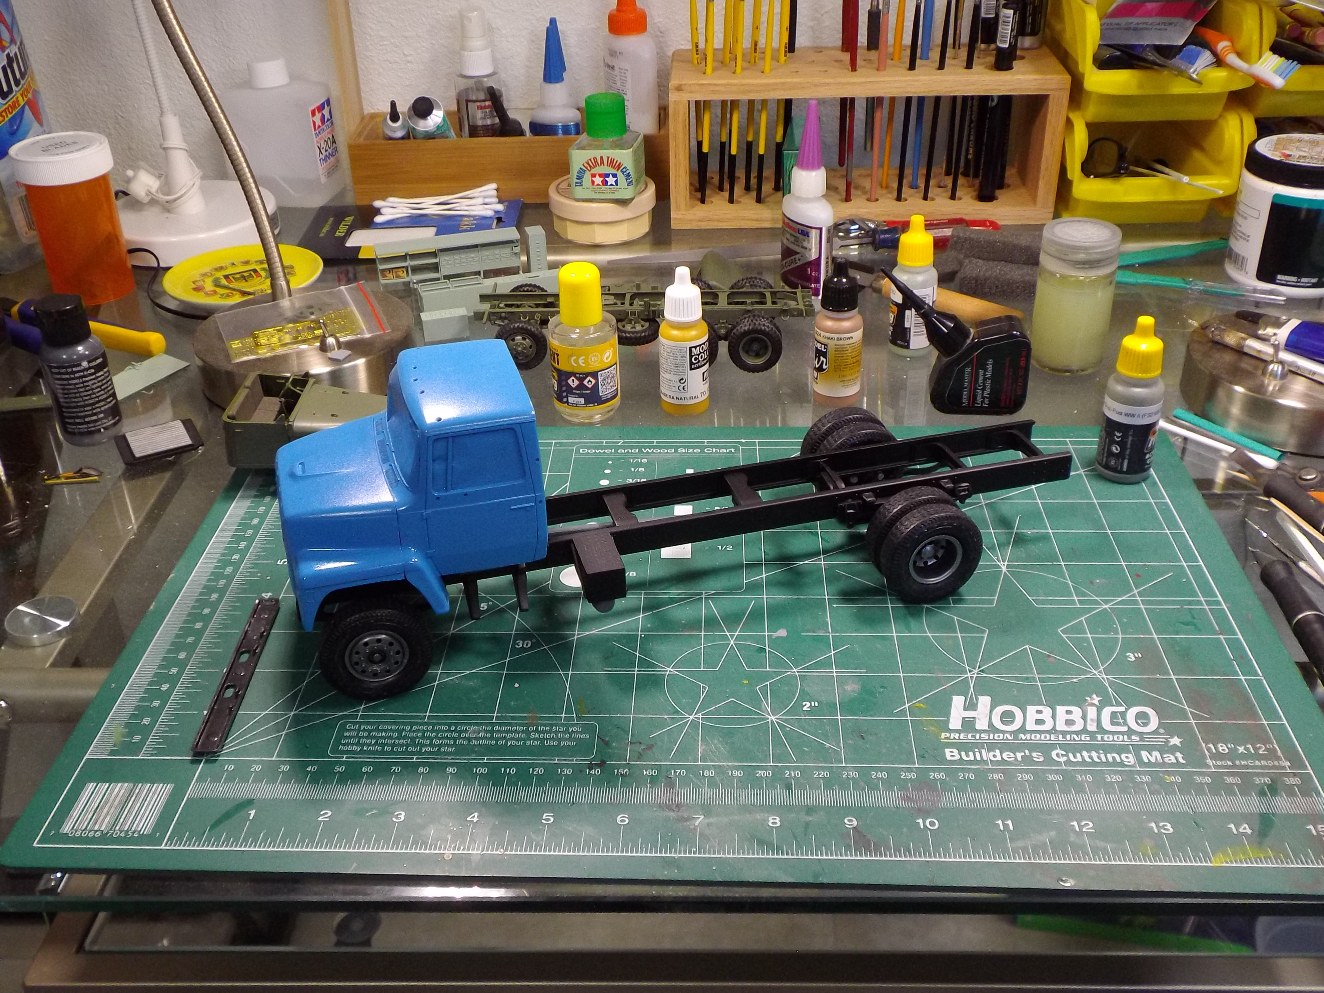
all sorts of big progress here! nice -I'm moving along with the IMSA Mustang. The base kit is pretty nice and includes a fair amount of detail as is. The chassis/body/layout is odd - the front is stretched way forward of the engine and axle, and the rear of the chassis rakes upward as it gets closer to the very end of body. All of this tempted me into adding some detail work. I looked the car up on line and found all sorts of interesting attributes - ranging from four link rear end to the unusual engine bay, and metal rocker panel above the exhaust on the driver's side. Please take a look:


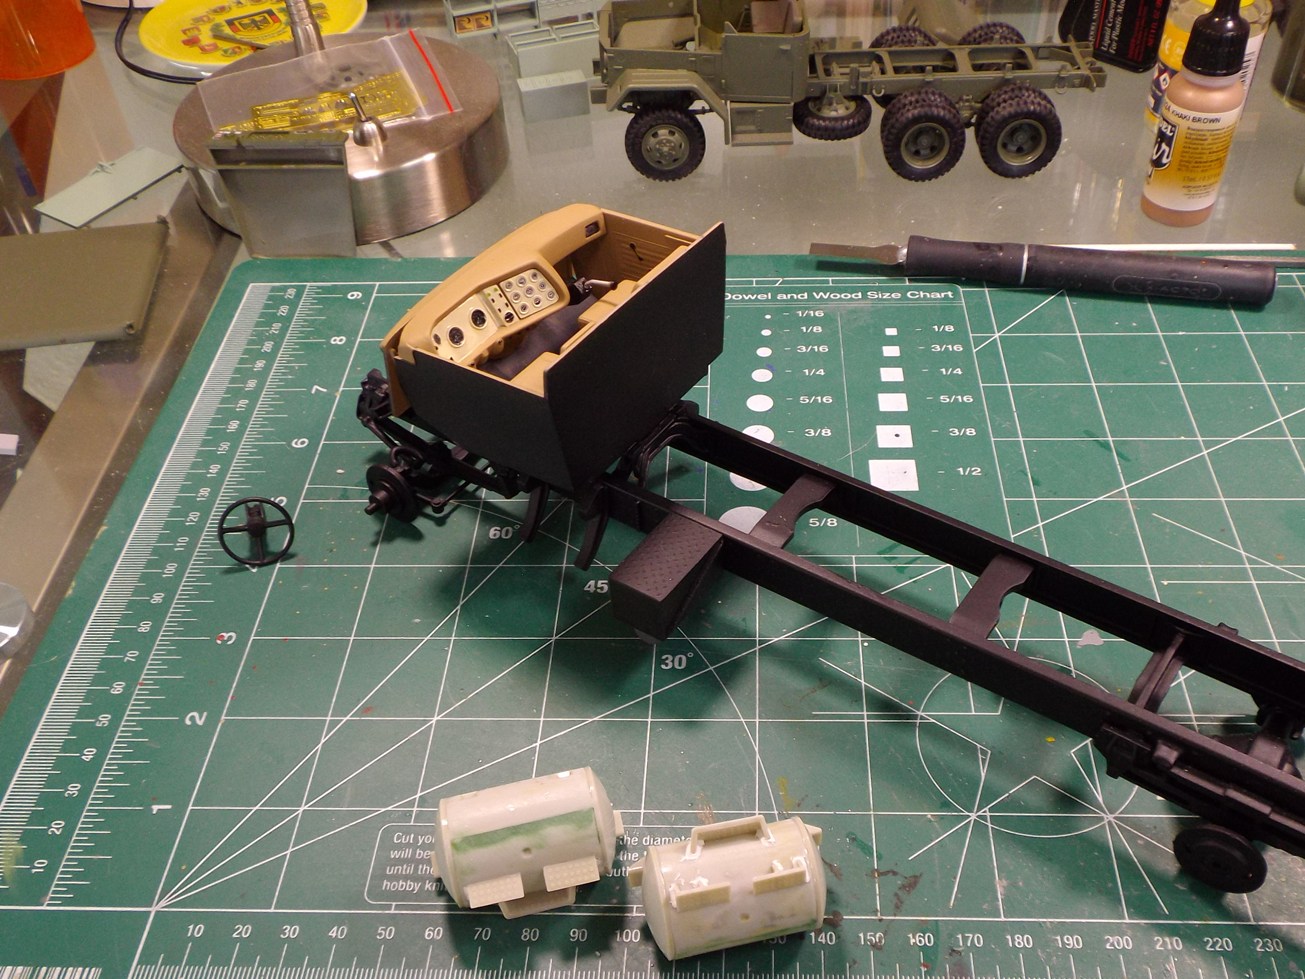
I started with the above so that you can get a sense of the complexity of this car - not what I thought when I started. Next, some suspension:


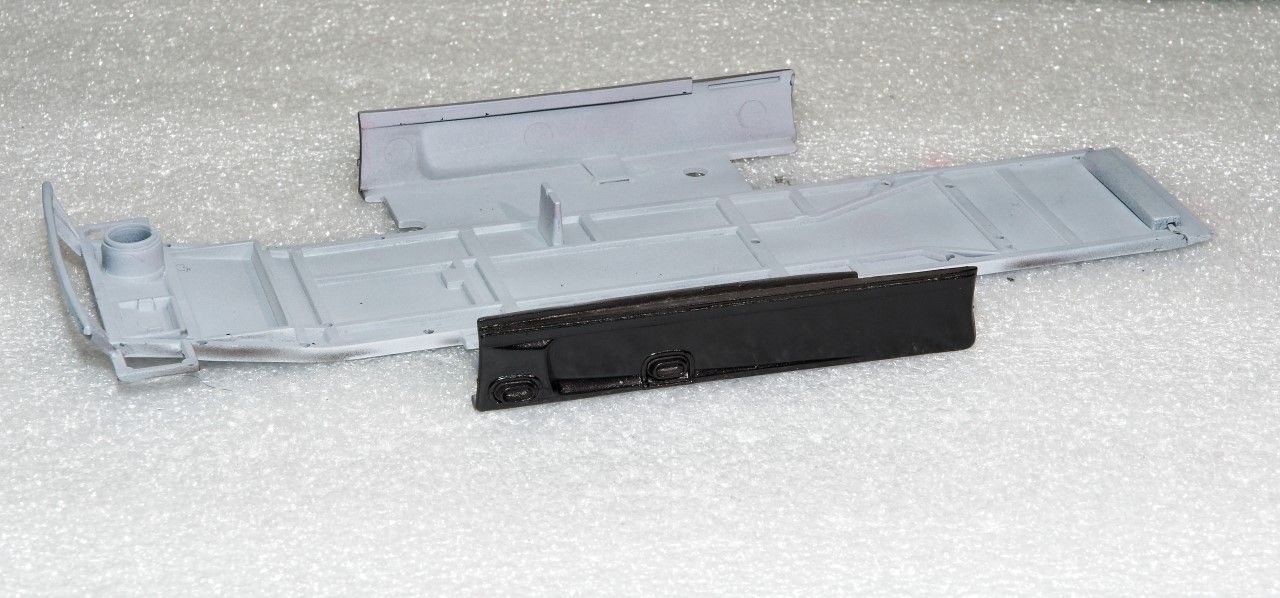
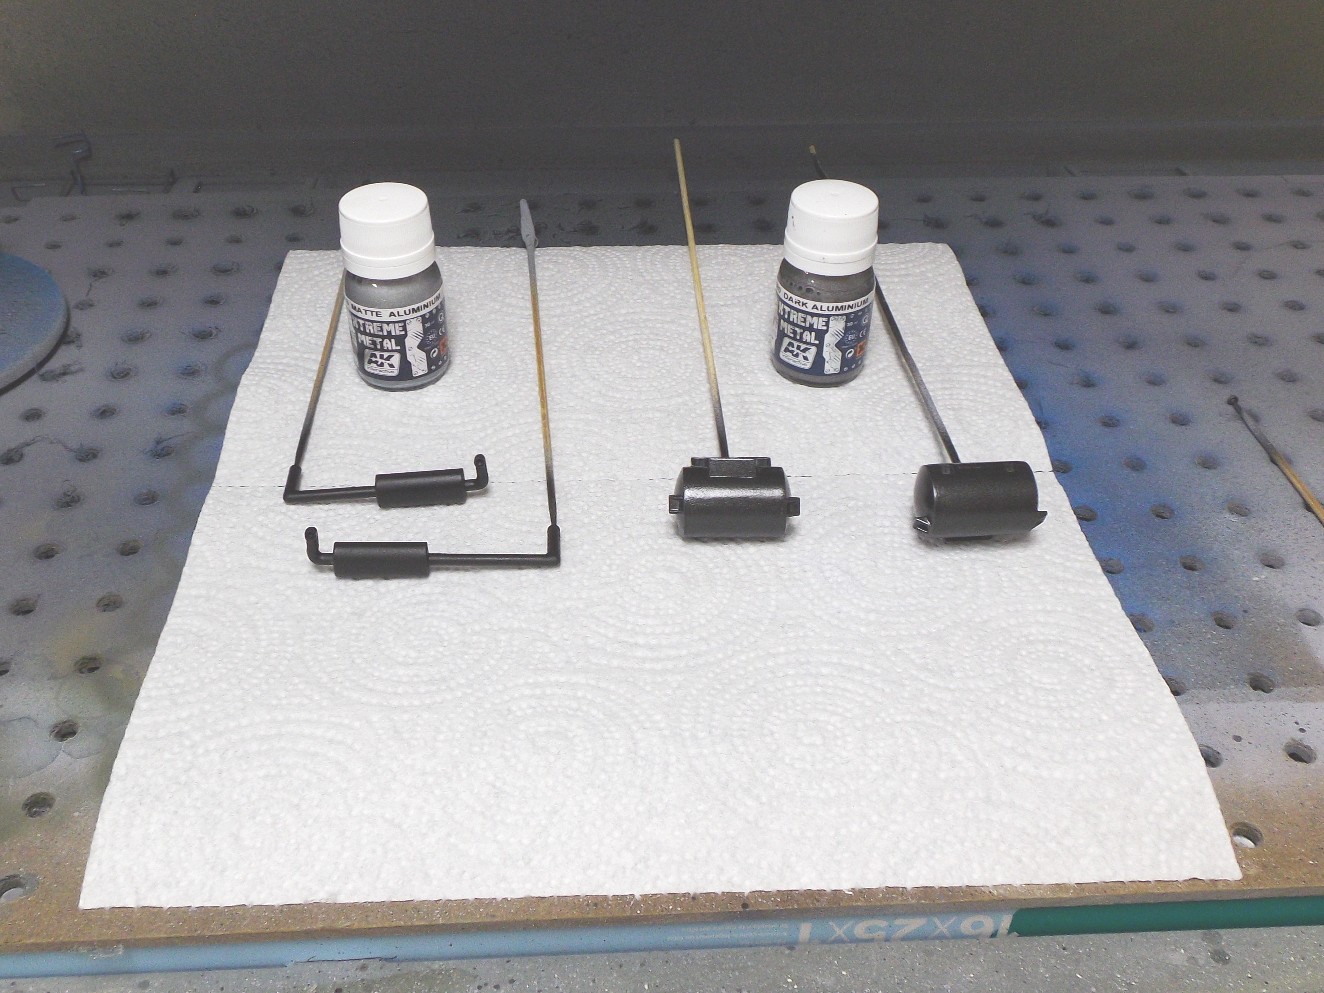
Despite all the room up front, radiators and screens are in the rear wheel wells (and yes, the real life screen is also set in metal rod cages) - this was some interesting scratch work!

Also, you can see, by opening up the rear deck, you are able to see the back of the roll cage - so, I added it (and the fuel cell) too -

Finally, the engine is pretty interesting too, with the turbo and coolers. If you look carefully you can see the various bits of hardware etc that I've added:


You can also just barely see the work "Ford" on the head -

Ok, keep going GB!

Nick


Joel_W
Staff MemberAssociate Editor
AUTOMODELER
_VISITCOMMUNITY
New York, United States
Joined: December 04, 2010
KitMaker: 11,666 posts
Auto Modeler: 2,974 posts
Posted: Tuesday, October 15, 2019 - 01:55 AM UTC
Nick,
Your detailing is just beyond normal. I'm starting to actually think that you're an Alien that does this just to drive us mortals insane. And in my case it's really working to a T.

There's a few kits that I'm now looking for: The Turbo Mustang you're building, the Zakspeed Mustang, and the Turbo Roush Whistler. I some how got myself hooked on IMSA and SCCA Tin Tops. And yes I already have a Camaro with Slixx decals, but there's no Olsmobile, Cougar, Challenger, etc., so I'm going to have to come up with some rational Plans of Attack.

Your detailing has as usual just blown me away. The 4 link front suspension is amazing especially since it's metal. Did you make that fabricated pcs yourself or did they come from other resources? Same goes for those intake grills.

One thing for sure, you've pushed the racing bar several notches higher my friend.

As a side note, I'm most likely one of the oldest offline auto sim racers, as at my age, it's the only racing I'll ever do. Anyway, I race in RaceRoom racer Experience, and I've found that they have an a small pack of SCCA and IMSA Mustangs, Camaros, and Corvettes, so I'm buying that pack. Should really be a handful as I've been driving a Porsche 911 or the Audi GT3 cars most of the time at US Iconic tracks.

Joel
Dixon66
_VISITCOMMUNITY
New Hampshire, United States
Joined: December 12, 2002
KitMaker: 1,500 posts
Auto Modeler: 645 posts
Posted: Tuesday, October 15, 2019 - 07:40 AM UTC
Nick,
I have this kit in the stash. Wow, just, wow.


Not sure I will ever build mine now........

J/K, it will be build, just not by an alien.
Hwa-Rang
_VISITCOMMUNITY
Kobenhavn, Denmark
Joined: June 29, 2004
KitMaker: 6,760 posts
Auto Modeler: 2,182 posts
Posted: Tuesday, October 15, 2019 - 11:58 PM UTC
Amazing detail work Nick. Very inspiring. I'll try to add just a little bit of extra detailing, on builds to come.
AussieReg
Staff MemberAssociate Editor
AUTOMODELER
#007
_VISITCOMMUNITY
Victoria, Australia
Joined: June 09, 2009
KitMaker: 8,156 posts
Auto Modeler: 2,953 posts
Posted: Wednesday, October 16, 2019 - 12:26 AM UTC
Not much to show on my build, still spot sanding, puttying, sanding and repriming to get those contour joins just right. I have also started looking at the custom twin exhaust on the 421 and working on a plan to bring the two pipes from the headers into the single exhaust on the underside. The kit has 2 short pipes and mufflers for this purpose, but I would need to grind the moulded exhaust off and repair the floor pan if I went down that path.

Joel, great recovery there, the stripping and repriming has set you up nicely for a new colour coat.

Mike, good start on the big rig, it will be great to see the chassis assembly coming together soon.

Nick, I'm not so sure about Alien, but definitely superhuman with the speed and quality of work you keep putting into the detailing. Like Joel, I'm interested in where all of these parts come from. Do you cut them yourself from flat sheet brass stock?

Cheers, D
Stickframe
#362
_VISITCOMMUNITY
California, United States
Joined: December 01, 2013
KitMaker: 1,661 posts
Auto Modeler: 431 posts
Posted: Wednesday, October 16, 2019 - 03:02 AM UTC
Hi Joel, glad you like the progress. This has been interesting to build, as I didn’t know much about the IMSA cars - they’re unique.

David you know, this is a pretty good kit without many problems. They seem to represent the original pretty well, and do so in a way that doesn’t cause headaches for the builder. Thanks for the note -

Hi Jesper, thanks and, I look forward to seeing your next detailed build!

Hi Damian, and for this reply, Joel, and David. Nope, not an alien haha -

The brackets for the four link are from Dirt Modeler - they make all sorts of unique and helpful bits that are useful for scratch and modification work. The four links are two pieces of 1/16” dia brass rod, bent generally in half. The base at the chassis is remnant brass etch from another kit.

The cowling mesh etc is scratch built using small dia metal rod, 1/16” aluminum tubing, metal mesh, lead foil from a wine bottle, and brass sheet drilled out.

I have kept extra etch sheets from armor kits and adapt parts as I need them. The duct tubing is from old iPhone/other electronic power cords.

Looking forward to seeing all the Ford GB updates!

Nick

Joel_W
Staff MemberAssociate Editor
AUTOMODELER
_VISITCOMMUNITY
New York, United States
Joined: December 04, 2010
KitMaker: 11,666 posts
Auto Modeler: 2,974 posts
Posted: Wednesday, October 16, 2019 - 04:07 AM UTC
Making slow but steady progress trying to get back to where I was before the big DISCOVERY.

Yesterday I was ready to apply the Black color coat. so I Decided to open the last bottle I have of Gravity's standard racing Black: GC 101 Anthracite Black. Then I discovered that I have already opened it, and used about 1/4+ of the bottle. Just couldn't remember when. Oh well, I thought that I still have enough for the job at hand. But it's going to be close.

Heard a little voice reminding me that many moons ago when I 1st got back into modeling and tried my hand at cars, I bought a good dozen or so bottles of Zero paints. And Black was one of those colors. Sure enough the bottle was still in its section, but it was opened as well. Zero paints use the same plastic sealing plug under the cap as Mr. Hobby does, and the metal cap also has a sealing ring. The bottles are twice as large as Gravity's which is a good thing as it was half empty. Still, more then enough for the task at hand.

Setup up my spray booth, reached for my Grex .5mm AB, and then shook up the paint & loaded the color up. Set the compressor to 18 psi, and moved to the spray booth.

Couldn't tell the difference between the Zero paint and the Gravity paints I now use. A few tack coats, then at least 4 wet coats. A quick check to see if I missed or screwed up. But everything looked pretty good, so all three parts went into my drying bin. I kept on opening the lid every few hours to let the gas escape, and the smell was way stronger then Gravity's aroma. The gassing seemed to take quite a bit longer, but by the next afternoon that stage of the drying process was over.

I'd wait a good 3 more days for the Acrylic Lacquer to cure, then it's time to prepare the parts for decaling.


Thanks to all for stopping by and checking out my progress to date. It's always greatly appreciated.

Joel

TacFireGuru
_VISITCOMMUNITY
Colorado, United States
Joined: December 25, 2004
KitMaker: 3,770 posts
Auto Modeler: 359 posts
Posted: Wednesday, October 16, 2019 - 11:07 AM UTC
I got a fair amount of the "cockpit" done today.

Gauges are a mix of 1/48 scale aircraft gauges (those nine on the right) and some I pulled off the internet, printed on regular paper, glued, and Future'd (speedo/tach/one other).

I really like the contrast between the Khaki Brown dash and Ivory insert.


The two fuel tanks are assembled, cleaned up, and now primed (in the raw state in the pic). Now that they're primed, I have a little more clean up to do, then...they'll either get painted Gunship Gray OR I'll black-base them and then paint them using AK's Dark Aluminum. IF the AK paint works, then most everything that would be chrome will be DA (rims, grill, light bezels, et cetera).

I'm thinking the box will be white and the cab a blue (Ford Engine Blue or a Light Blue. I don't want the cab too dark.

More to follow.

Mike
AussieReg
Staff MemberAssociate Editor
AUTOMODELER
#007
_VISITCOMMUNITY
Victoria, Australia
Joined: June 09, 2009
KitMaker: 8,156 posts
Auto Modeler: 2,953 posts
Posted: Wednesday, October 16, 2019 - 11:19 AM UTC
Really neat work on the office there Mike, and I totally agree with the colour scheme. The contrast between the two tones is spot on!

Great idea with the gauges as well. I've seen guys print fabric patterns on printer paper, lock it in with hairspray, then white glue it down to the seats. It comes up very nicely indeed if done properly and opens up a whole new world of interior options. I'm tempted to give it a try on a spare seat with a "worn leather" look.

Cheers, D
Hwa-Rang
_VISITCOMMUNITY
Kobenhavn, Denmark
Joined: June 29, 2004
KitMaker: 6,760 posts
Auto Modeler: 2,182 posts
Posted: Wednesday, October 16, 2019 - 07:37 PM UTC
Nice smooth paint job Joel.

Great choice of color Mike. Nice work, on the gauges.
Joel_W
Staff MemberAssociate Editor
AUTOMODELER
_VISITCOMMUNITY
New York, United States
Joined: December 04, 2010
KitMaker: 11,666 posts
Auto Modeler: 2,974 posts
Posted: Thursday, October 17, 2019 - 12:01 AM UTC
Nick,
I'm really impressed how you scratched out so many of those details vs just buying them.

I did have to laugh about your comment of not knowing a lot about IMSA. The History of IMSA puts just about any other racing organization to shame for over complexity and constantly changing classes and the rules. Even the SCCA Trans Am was a no brainer compared to IMSA.

Basically at the beginning of IMSA time there were just 4 Touring classes to emulate the European FIA Touring series, which today is even more complex then IMSA.

GTO, GTU, TO, & TU

the easy apart is that the O stood for engine displacement over 2,500cc and U under 2,500 cc displacement. The GTs were the Professional sports types like Vettes, Mustangs, Camaros, Challengers that also ran in the SCCA Trans Am series. These were showroom cars that were completely and professionally modified for the track by professional teams like Penske and HOllman & Moody. The T classes were basically your feeder classes of guys who liked to race but certainly weren't professionals, nor could they build those type of cars with their budgets. Then the series expanded to include the Camel GTs, the 1st generation Prototypes.

Lots has changed over the years as today IMSA is just 4 main classes and 3 separate series. So it's just as confusing today as it was way back in 1971. But I truly love IMSA racing.

The Mustang that you're building was originally designed for the GTO class, but today would have no home as it doesn't fit any of the top two classes including either prototype classes.

Joel
Joel_W
Staff MemberAssociate Editor
AUTOMODELER
_VISITCOMMUNITY
New York, United States
Joined: December 04, 2010
KitMaker: 11,666 posts
Auto Modeler: 2,974 posts
Posted: Thursday, October 17, 2019 - 12:08 AM UTC
Mike,
I'm truly impressed with how your cab is coming out. The Gauges looks great, and the two tone color scheme looks as real as it can get in modeling.

Looking forward to how those Gas tanks come out with the AK Metallics. I'm really having a hard time finding a range of Metallics to meet my needs that are carried by one or more of the online resources I use for my modeling needs. I've been a true Alcad user, but the paints are AB only.

Joel
AussieReg
Staff MemberAssociate Editor
AUTOMODELER
#007
_VISITCOMMUNITY
Victoria, Australia
Joined: June 09, 2009
KitMaker: 8,156 posts
Auto Modeler: 2,953 posts
Posted: Friday, October 18, 2019 - 02:43 PM UTC
Well my marathon sand/putty/prime/rinse/repeat session is over and I've put some colour on the body shell.

Silver first for the bottom half of the two-tone scheme.


Masked up for the red upper colour.


Nothing like a nice drop of red!


The scary part, unmasking!


And a bit of playing around with images for a different way to show the progress.


There are a few small touch-ups to do where the red bled under the mask, but nothing major.

I'm happy with this colour combination, so now I can move on with painting the other parts and starting on the clear gloss for the body.

Cheers, D
Joel_W
Staff MemberAssociate Editor
AUTOMODELER
_VISITCOMMUNITY
New York, United States
Joined: December 04, 2010
KitMaker: 11,666 posts
Auto Modeler: 2,974 posts
Posted: Saturday, October 19, 2019 - 01:30 AM UTC
D,
Not that's one impressive shell. I'd say for sure that you nailed it.

Joel
Stickframe
#362
_VISITCOMMUNITY
California, United States
Joined: December 01, 2013
KitMaker: 1,661 posts
Auto Modeler: 431 posts
Posted: Sunday, October 20, 2019 - 11:00 AM UTC
Hi D - I like to see all the pics of that paintwork! Looks great! Your patience with the bodywork has really paid off -

And Joel, good to see you’re having more luck with the mustang! Look forward to seeing what you do next

Cheers
Nick
Joel_W
Staff MemberAssociate Editor
AUTOMODELER
_VISITCOMMUNITY
New York, United States
Joined: December 04, 2010
KitMaker: 11,666 posts
Auto Modeler: 2,974 posts
Posted: Sunday, October 20, 2019 - 12:51 PM UTC

Quoted Text


And Joel, good to see you’re having more luck with the mustang! Look forward to seeing what you do next

Cheers
Nick


Nick,

Next up should be an open wheeler, Ford powered of course, or Another Ford Tin Top. Right now I'm over my head in decaling the JPS Mustang. 8 hours into it, and I still haven't finished any one of the 3 main areas. Hope to put up my 1st decal update in a few days max.

Joel
AussieReg
Staff MemberAssociate Editor
AUTOMODELER
#007
_VISITCOMMUNITY
Victoria, Australia
Joined: June 09, 2009
KitMaker: 8,156 posts
Auto Modeler: 2,953 posts
Posted: Sunday, October 20, 2019 - 03:23 PM UTC
Joel, I'm really looking forward to that shell with the decals on it.

We had a few JPS cars running around in the touring car series in the 80's with that cool black/gold scheme including BMWs and this XJ-S Jag.


Cheers, D
AussieReg
Staff MemberAssociate Editor
AUTOMODELER
#007
_VISITCOMMUNITY
Victoria, Australia
Joined: June 09, 2009
KitMaker: 8,156 posts
Auto Modeler: 2,953 posts
Posted: Sunday, October 20, 2019 - 04:47 PM UTC
Group Build Update time, 3 weeks in today and already ticked past 4000 views, and pushing towards 200 posts. This is excellent stuff folks!

I've copied the list from the lead-in thread to give a snap-shot of where the various builds are at:

Aussiereg (Damian) - '36 Ford 5-Window Coupe - Primer and Paint stage
jimb (James) - '48 Deluxe Convertible - Body Prep
Szmann (Gabriel) - '66 F-100 Flareside - Paint Stage
PasiAhopelto (Pasi) - Mercury Cyclone - enlisted
md72 (Mark) - '51 Custom Coupe - Body Prep Work
Littorio (Luciano) - '65 Falcon Ranchero or '60 Starliner - enlisted
Dixon66 (David) - 1st Generation Bronco - enlisted
Joel_W (Joel) - '85 Mustang Roush Body - Decal Stage
tinbanger (Richard) - '65 Mustang 2+2 Fastback - Primer
Cosimodo (Michael) - Escort RS1600 MkI 1973 RAC - enlisted
Ray_from_SA (Ray) - WRC Escort, Focus or Fiesta (or all 3 ??) - enlisted
Hwa-Rang (Jesper) - '65 Mustang 2+2 Fastback - enlisted
betheyn (Andy) - enlisted
accessdenied (Roger) -
Propster (Stephen) -
Hudson29 (Paul) -
Delbert (Delbert) - enlisted
bluebell914 (Patrick) - 66 GT40 enlisted
heavyjagdpanzer (Bill) - enlisted
Mechworker (Adam) -
IronHide (Arnel) - enlisted
Spruslayer (Mike) - '65 F-100 Service Truck - Painted, final assembly
forest1000 (David) - "Thunderbat" NASCAR - enlisted
TacFireGuru (Mike) - Louisville Delivery Truck - Paint Stage
roman (Roman) - enlisted
JClapp (Jonathan) - '15 Model T - Parts Prep
Merlin (Rowan) - '40 Standard Coupe - Chassis/Engine Painted
Nick (Stickframe) - IMSA Mustang - scratching details

I will try to keep this list updated as more builds commence and progress is made.

Cheers, D
Szmann
_VISITCOMMUNITY
Netherlands Antilles
Joined: September 02, 2014
KitMaker: 1,977 posts
Auto Modeler: 1,371 posts
Posted: Sunday, October 20, 2019 - 10:25 PM UTC
Nick, What can I say?! I'm blown away as anybody else with that detailing. Inspirational.

David, the interior looks good with these gauges added to it. Neat job!

Damian, Very nice color combo. I like the way you presented the step-by-step - it is of big help for beginner and it is much appreciated.

Gabriel
Hwa-Rang
_VISITCOMMUNITY
Kobenhavn, Denmark
Joined: June 29, 2004
KitMaker: 6,760 posts
Auto Modeler: 2,182 posts
Posted: Sunday, October 20, 2019 - 10:45 PM UTC
Damian: your efforts certainly paid off. Great choice of color.
Joel_W
Staff MemberAssociate Editor
AUTOMODELER
_VISITCOMMUNITY
New York, United States
Joined: December 04, 2010
KitMaker: 11,666 posts
Auto Modeler: 2,974 posts
Posted: Monday, October 21, 2019 - 08:21 AM UTC
D,
Great pic of that Jag in the JPS livery. And while I'm in the decal stage, I've done almost nothing else but prime and start to paint the roll cage. Honestly, I'm months out from crossing the finish line.

I'm just super impressed how our GB is moving right along. I'm really hoping that those other enlistees start their builds sooner then later.

Joel
TacFireGuru
_VISITCOMMUNITY
Colorado, United States
Joined: December 25, 2004
KitMaker: 3,770 posts
Auto Modeler: 359 posts
Posted: Tuesday, October 22, 2019 - 05:49 AM UTC
Well, I finally chose my cab's color. Grabber Blue.

Ugh, and much wet sanding coming up.


Mufflers/exhaust on the left currently painted semi-gloss black and I'll use matt aluminum as the final color, and
Fuel tanks on the right currently painted metallic black and I'll use the dark aluminum as their final color. I'll post another picture of the "after" final colors later.


Mike
Merlin
Staff MemberSenior Editor
AEROSCALE
#017
_VISITCOMMUNITY
United Kingdom
Joined: June 11, 2003
KitMaker: 17,582 posts
Auto Modeler: 388 posts
Posted: Tuesday, October 22, 2019 - 06:55 AM UTC
Hi all

Wow! Some spectacular progress since I last had a chance to look in! The fix on those dreadful seams in Damian's model is just superb - and I love the colour scheme!

I'm afraid my estimate for getting back underway on my own build is looking over-optimistic - it'll probably be more like mid-November at the earliest, the way things are going. But at least I got enough done in my initial push to be confident that it'll all fit together neatly when I do finally have the chance to spend some time on it.

All the best

Rowan
AussieReg
Staff MemberAssociate Editor
AUTOMODELER
#007
_VISITCOMMUNITY
Victoria, Australia
Joined: June 09, 2009
KitMaker: 8,156 posts
Auto Modeler: 2,953 posts
Posted: Tuesday, October 22, 2019 - 11:12 PM UTC
Mike, great shade of blue there! It will polish up nicely with a good wet sand, and the Xtreme Metal shades you have chosen will work beautifully. This is one of my favourite metallic paints now, so easy to use.

Thanks Rowan, I appreciate the feedback! Sounds like you're keeping busy there with Aeroscale business! Any time to play the new stringy-things while you tinker with the wingy-things?

I've had a little time to work on the small parts on my '36. Detail painted the tub and added in the levers and pedals, painted the dashboard and fitted the gauges, detail painted the engine and installed the manifold and carb assemblies, and painted the steering wheel and column and fire extinguisher.

I have also assembled the rims and tyres and will follow up with detail painting the manufacturers logos with white acrylic.

These items all need a little touching up and a pin wash to pop the details.


Cheers, D
Joel_W
Staff MemberAssociate Editor
AUTOMODELER
_VISITCOMMUNITY
New York, United States
Joined: December 04, 2010
KitMaker: 11,666 posts
Auto Modeler: 2,974 posts
Posted: Wednesday, October 23, 2019 - 01:28 AM UTC
Mike,
The Grabber Blue color does indeed look good on the cab. What type and brand of paint did you decide to use? Can't wait to see how she shines with a proper rubbing out.

D, the engine, and bits & pcs really do look quite good. The recessed panel line wash really adds so much to those parts. So far every update & post has really been most impressive.


As for me, I'm still decaling both the front and rear clip, and the chassis pan as well. Believe, the stripping takes forever & is a lot harder then it looks. But I'm almost there after a solid 12 hrs. of decaling. Still hoping to post a update by tomorrow as I've been constantly on the go with family issues relating to my Mother-n-law.

Joel