

Mark & David,
Thanks guys for your Thumbs up, it's always greatly appreciated.
As for the harness assembly, it's more of a type-O on my part. The package is for 5 way harnesses, or you could do 4 way as well. As you can see it's a 5 way, otherwise the latch would have to be on one of the front belts.
Mark, I can't tell you how many times I rub right through the primer (even spots on the color coat) and needs to repaint. But with the primer if it's just a small spot then I really don't bother.
David, The 1st cuts are always the scariest by far. Believe me I know that only two well. I'm planning on converting the Beemax Porsche 935 K2 into a 935 79 with one of Calvin's conversion sets, and I've got a lot of body cutting to do. The final car of the 935 trio will be the 935 K3 that Beemax still hasn't released.
Joel


Go to automodeler.com for the current dynamic site!
The Garage
For general automotive modeling or non-modeling topics.
For general automotive modeling or non-modeling topics.
Hosted by Jim Starkweather
Blue Oval - Ford Motor Co. GB Build Thread

Joel_W

Joined: December 04, 2010
KitMaker: 11,666 posts
Auto Modeler: 2,974 posts

Posted: Tuesday, December 24, 2019 - 06:34 AM UTC


Merlin

#017

Joined: June 11, 2003
KitMaker: 17,582 posts
Auto Modeler: 388 posts

Posted: Tuesday, December 24, 2019 - 09:09 AM UTC
Hi Joel
Fantastic work as always! It's looking awesome!
I've got a couple of days off work now, so that'll be the cue for another hunt for my Coupe's decals! If I've had no luck finding them by New Year's day, I'll don my station-wagon cap and get started on the '57 Del Rio.
All the best
Rowan
Fantastic work as always! It's looking awesome!
I've got a couple of days off work now, so that'll be the cue for another hunt for my Coupe's decals! If I've had no luck finding them by New Year's day, I'll don my station-wagon cap and get started on the '57 Del Rio.
All the best
Rowan

Joel_W
Joined: December 04, 2010
KitMaker: 11,666 posts
Auto Modeler: 2,974 posts
Posted: Tuesday, December 24, 2019 - 11:55 AM UTC
Rowan,
Wow!! a few days off in a row. Good luck on the hunt, but like I've said before. it won't show up till you don't need them right away.
Joel
Wow!! a few days off in a row. Good luck on the hunt, but like I've said before. it won't show up till you don't need them right away.
Joel

Dixon66
Joined: December 12, 2002
KitMaker: 1,500 posts
Auto Modeler: 645 posts

Posted: Tuesday, December 24, 2019 - 12:16 PM UTC
Managed to salvage two pics off the old SD card. The first cut is not the deepest, the song is wrong. Shallow scoring and then the razor saw turned this:
Into this.
Finished the front cuts today as well.
Revell, of course, released a sister kit that has both the front and rear flares molded in, but what is the fun in that?
Fourteen coming for dinner tomorrow so probably not going to hit parts with the primer until Thursday evening. Hope to start assembling the chassis on Friday evening.
Joel_W
Joined: December 04, 2010
KitMaker: 11,666 posts
Auto Modeler: 2,974 posts
Posted: Wednesday, December 25, 2019 - 02:18 AM UTC
David,
Glad that you were able to salvage at least two pictures, which is way better then none.
Your cutting method certainly worked just fine as you achieved the needed results.
My current method of cutting off pcs is to 1st tape along the cut line with a few layers of masking tape for thickness and a new cut edge. Then I use my Tamiya scribing tool with light then firm passes. Most of the time I can remove the cut pc that way if the plastic isn't to thick. If it is, I just switch over to a hobby saw after I've got a deep guide line.
Joel

AussieReg
#007

Joined: June 09, 2009
KitMaker: 8,156 posts
Auto Modeler: 2,953 posts

Posted: Wednesday, December 25, 2019 - 10:39 AM UTC
Great to see progress on a few of the builds here guys!
David, neat work on the wheel arch mod, it shaped out beautifully.
Mark, I love the body style of your '51, looking forward to seeing some colour on it!
Rowan, good luck with the decal hunt mate! It sounds like your bench is like mine, multiple kits open for inspection and review, so it's likely you have scooped them up and put the decals away in another box. I'm sure that they will turn up, but having the '57 Wagon on the bench ready to hit the field as an alternative is pretty cool!
Cheers, and Merry Christmas, D


TacFireGuru
Joined: December 25, 2004
KitMaker: 3,770 posts
Auto Modeler: 359 posts

Posted: Wednesday, December 25, 2019 - 02:41 PM UTC
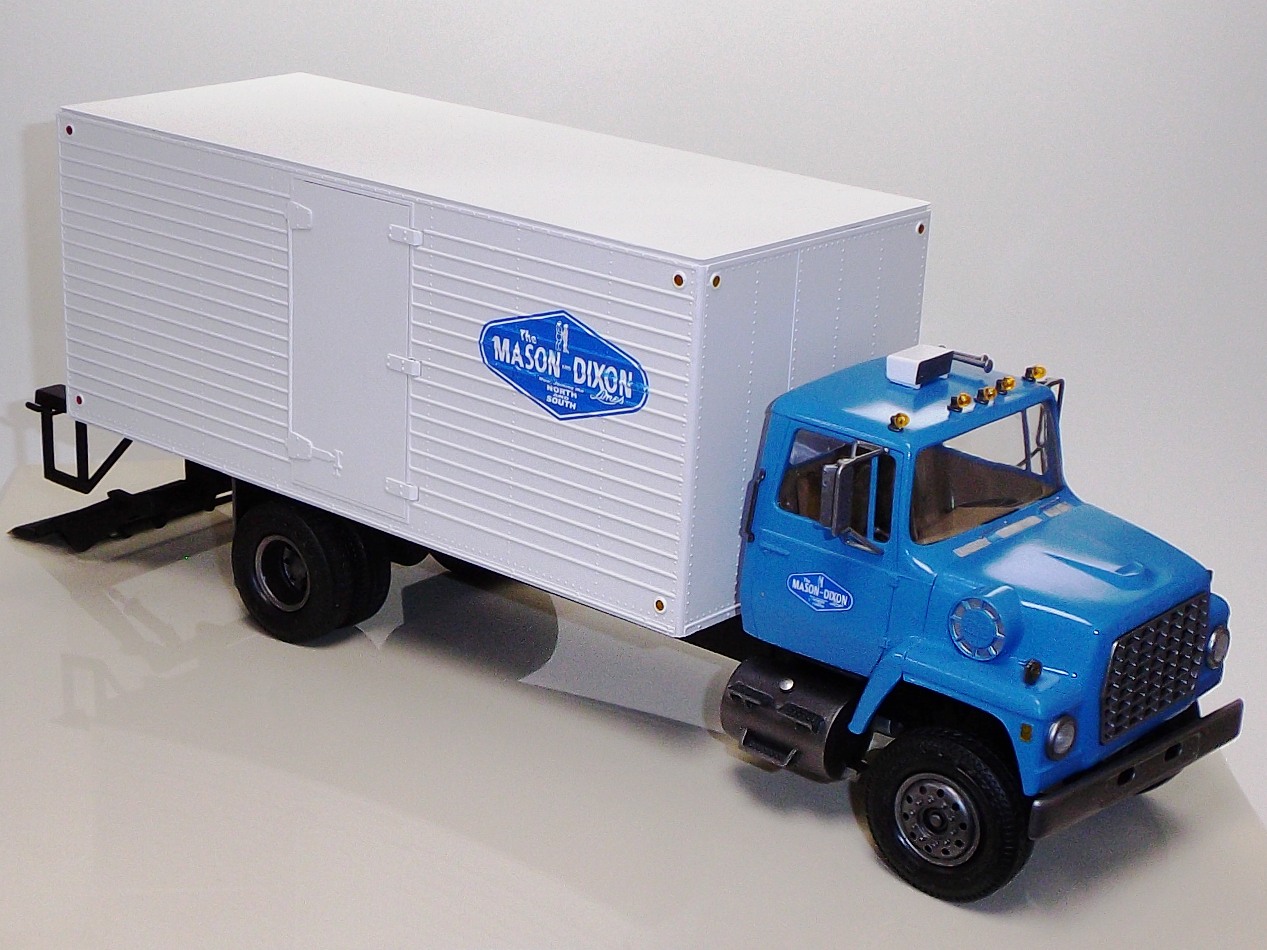
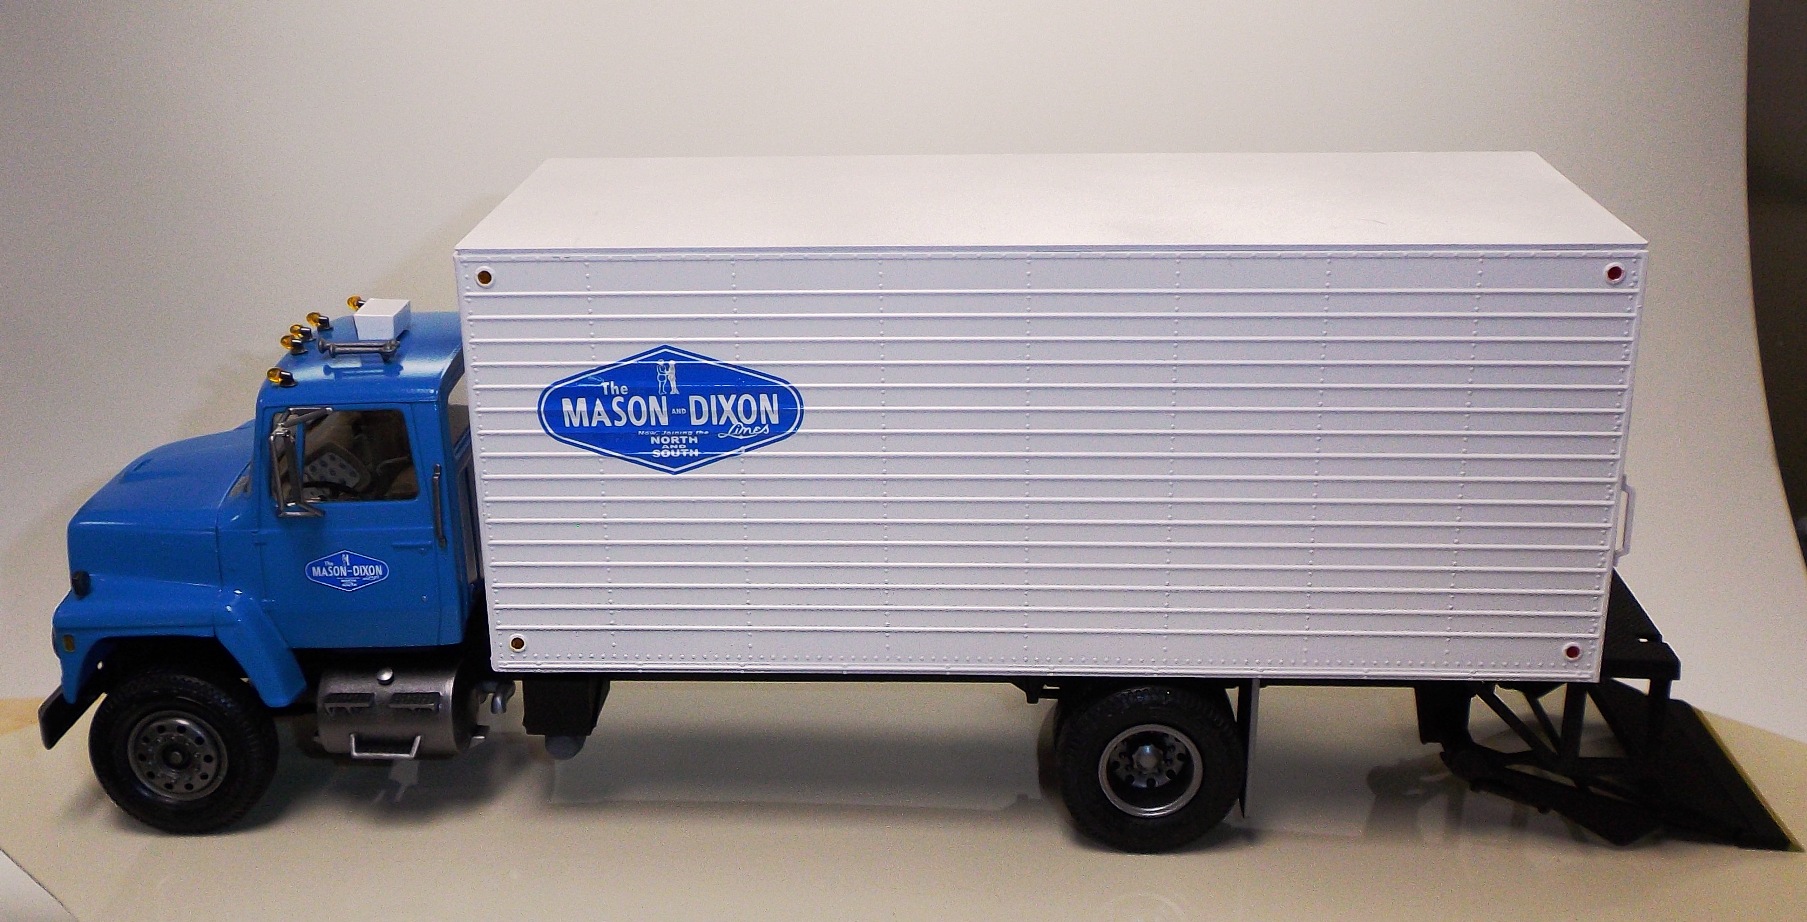
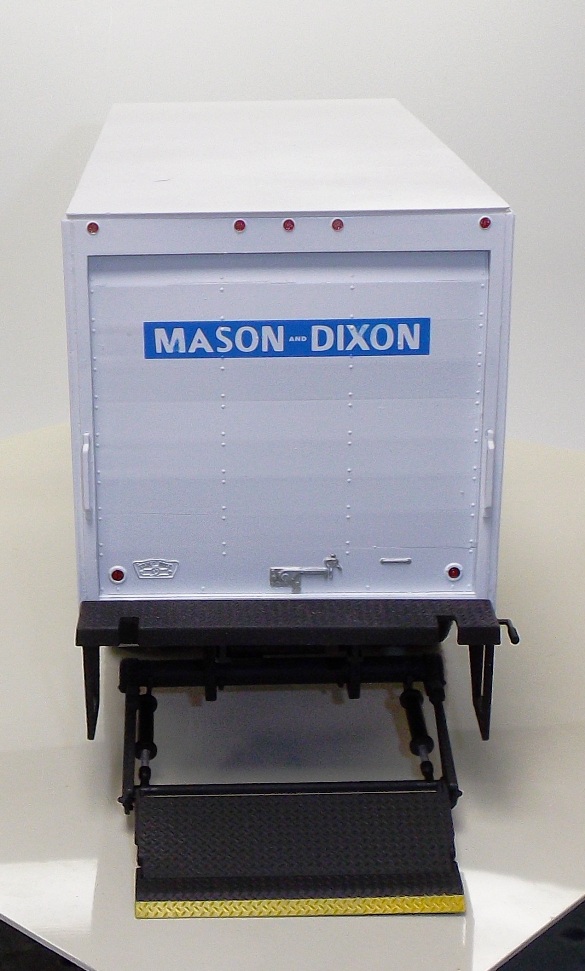
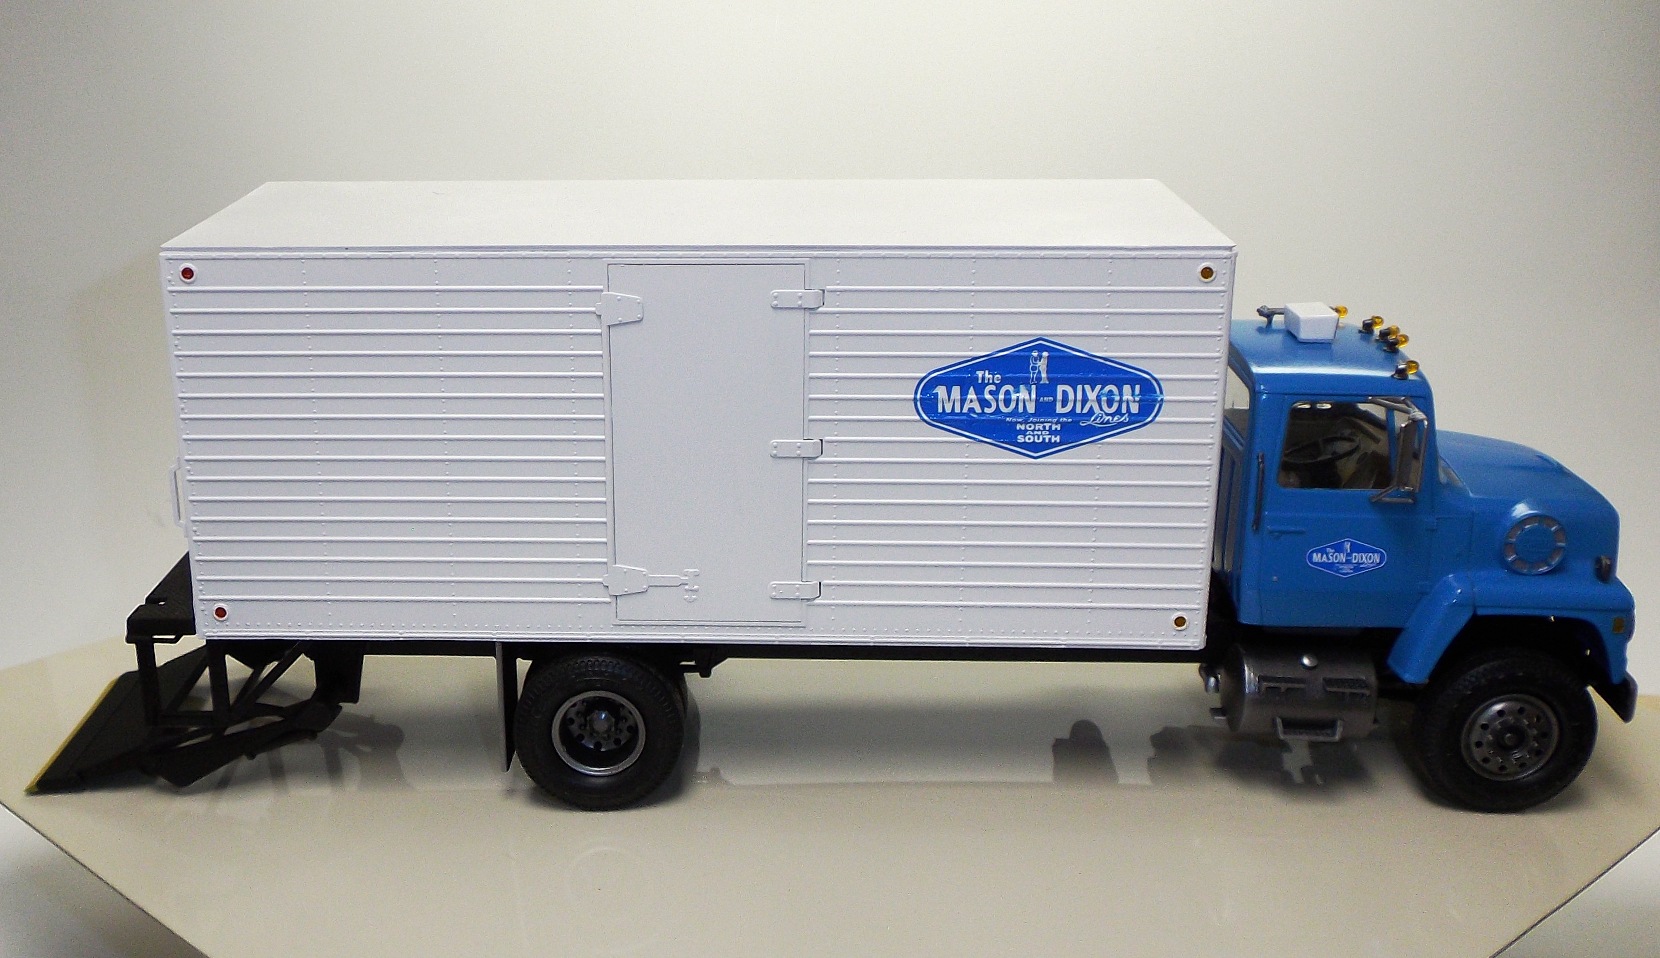
Time to call the Louisville done.
Mike

Mike


md72

#439
Joined: November 05, 2005
KitMaker: 4,950 posts
Auto Modeler: 555 posts

Posted: Wednesday, December 25, 2019 - 03:12 PM UTC
Great work, it looks ready to start making deliveries. 

Dixon66
Joined: December 12, 2002
KitMaker: 1,500 posts
Auto Modeler: 645 posts
Posted: Thursday, December 26, 2019 - 12:27 AM UTC
Looks great Mike, the color palette and the details are spot on.
Joel_W
Joined: December 04, 2010
KitMaker: 11,666 posts
Auto Modeler: 2,974 posts
Posted: Thursday, December 26, 2019 - 01:59 AM UTC
Mike,
Just an outstanding build of your Ford Louisville Delivery Truck, The rear loading plate really adds a lot to your build, as well as setting it apart from so many other builds.
And of course congratulations on earning your GB Ribbon as the 3rd Ford build to cross the finish line.
Joel
Just an outstanding build of your Ford Louisville Delivery Truck, The rear loading plate really adds a lot to your build, as well as setting it apart from so many other builds.
And of course congratulations on earning your GB Ribbon as the 3rd Ford build to cross the finish line.
Joel

Hwa-Rang

Joined: June 29, 2004
KitMaker: 6,760 posts
Auto Modeler: 2,182 posts

Posted: Thursday, December 26, 2019 - 05:09 AM UTC
Great progress and Great looking finished models.
AussieReg
#007
Joined: June 09, 2009
KitMaker: 8,156 posts
Auto Modeler: 2,953 posts
Posted: Thursday, December 26, 2019 - 10:30 AM UTC
Super build Mike, really neat work and great attention to the fine details. Thanks for joining in and sharing so much detail during your progress, and congrats on getting this one completed and on the display shelf!
On that note, time for the "State of Play" as we approach the half way mark here:
3 months in, approaching 18,000 views and over 400 posts
23 enlisted
12 builds in progress
4 builds completed
Aussiereg (Damian) - '36 Ford 5-Window Coupe - COMPLETED
Spruslayer (Mike) - '65 F-100 Service Truck - COMPLETED
TacFireGuru (Mike) - Louisville Delivery Truck - COMPLETED
Stickframe (Nick) - IMSA Mustang - COMPLETED
jimb (James) - '48 Deluxe Convertible - Body Prep, chassis and drive train assembly
Szmann (Gabriel) - '66 F-100 Flareside - Paint Stage
PasiAhopelto (Pasi) - '57 "Fireball Roberts" NASCAR - Body Painted
md72 (Mark) - '51 Custom Coupe - Body primed, engine underway
Dixon66 (David) - 1st Generation Bronco - Parts Prep and body mods
Joel_W (Joel) - '85 Mustang Roush Body - Shell decalled and clear coated, interior and engine bay detailing
tinbanger (Richard) - '65 Mustang 2+2 Fastback - Primer
Cosimodo (Michael) - Escort RS1600 MkI 1973 RAC - Body Prep Work and drive train assembly, interior detailing
Hwa-Rang (Jesper) - '65 Mustang 2+2 Fastback - Body Prep Work
forest1000 (David) - "Thunderbat" NASCAR - Painted, decals on, assembly pending
JClapp (Jonathan) - '15 Model T - Parts Prep
Merlin (Rowan) - '40 Standard Coupe - Chassis/Engine Painted, Decals AWOL
Littorio (Luciano) - '65 Falcon Ranchero or '60 Starliner - enlisted
Ray_from_SA (Ray) - WRC Escort, Focus or Fiesta (or all 3 ??) - enlisted
betheyn (Andy) - enlisted
Delbert (Delbert) - enlisted
bluebell914 (Patrick) - 66 GT40 enlisted
heavyjagdpanzer (Bill) - Mustang "Blue Max" Funny Car - enlisted
roman (Roman) - enlisted
IronOwl (Sascha) - enlisted
Mechworker (Adam) -
IronHide (Arnel) -
accessdenied (Roger) -
Propster (Stephen) -
Hudson29 (Paul) -
Cheers, D
Dixon66
Joined: December 12, 2002
KitMaker: 1,500 posts
Auto Modeler: 645 posts
Posted: Thursday, December 26, 2019 - 11:07 AM UTC
Thanks for the update Damian, perhaps separate/order the completed, in progress and no updates?
TacFireGuru
Joined: December 25, 2004
KitMaker: 3,770 posts
Auto Modeler: 359 posts
Posted: Thursday, December 26, 2019 - 11:32 AM UTC
I appreciate the compliments folks...means a LOT! This kit would have probably sat on the shelf for a long time had the "Blue Oval" build not come along. Seemed quite fitting.
Two photos uploaded in the Gallery
Looking forward to the next AutoModeler Group Build!
Mike
Two photos uploaded in the Gallery
Looking forward to the next AutoModeler Group Build!
Mike
AussieReg
#007
Joined: June 09, 2009
KitMaker: 8,156 posts
Auto Modeler: 2,953 posts
Posted: Thursday, December 26, 2019 - 11:34 AM UTC
Quoted Text
Thanks for the update Damian, perhaps separate/order the completed, in progress and no updates?
Thanks David, you went and appealed to my vague sense of OCD! All sorted, thanks for the push!
Cheers, D
EDIT: Cross-checking numbers to go full OCD! Pasi, you need to jump on the GROUP BUILD PAGE and sign up otherwise we can't award your ribbon.
Joel_W
Joined: December 04, 2010
KitMaker: 11,666 posts
Auto Modeler: 2,974 posts
Posted: Thursday, December 26, 2019 - 11:59 AM UTC
Quoted Text
I appreciate the compliments folks...means a LOT! This kit would have probably sat on the shelf for a long time had the "Blue Oval" build not come along. Seemed quite fitting.
Two photos uploaded in the Gallery
Looking forward to the next AutoModeler Group Build!
Mike
Mike,
No need to have posted the two completed pictures in the GB gallery, as we waved that rule for posting them in the GB thread so that everyone reading the forum thread can see them.
Joel
Joel_W
Joined: December 04, 2010
KitMaker: 11,666 posts
Auto Modeler: 2,974 posts
Posted: Thursday, December 26, 2019 - 12:01 PM UTC
Damian,
My apologies for forgetting to include you in my list of completed builds for the GB. Of all people to do that do. I guess I should be shot in the morning for that screw up.
Joel
My apologies for forgetting to include you in my list of completed builds for the GB. Of all people to do that do. I guess I should be shot in the morning
for that screw up.Joel
AussieReg
#007
Joined: June 09, 2009
KitMaker: 8,156 posts
Auto Modeler: 2,953 posts
Posted: Thursday, December 26, 2019 - 12:06 PM UTC
Quoted Text
Damian,
My apologies for forgetting to include you in my list of completed builds for the GB. Of all people to do that do. I guess I should be shot in the morning
Joel
All good mate! I'm only little, I tend to sit in the corner quietly and I'm easy to miss


Now that the Christmas chaos has passed, it will be good to see some more progress made on the builds here.
Cheers, D

Cosimodo
#335

Joined: September 03, 2013
KitMaker: 1,808 posts
Auto Modeler: 701 posts

Posted: Thursday, December 26, 2019 - 09:11 PM UTC
It took a while to find my last post, back on page 14 I found it. Not much of an update but added some seatbelts which took way longer than I hoped. the fabric was very messy, very fine fibres that frayed endlessly. But they're done so i have finished the interior.


Body shell up next.
cheers
Michael
Body shell up next.
cheers
Michael
Cosimodo
#335
Joined: September 03, 2013
KitMaker: 1,808 posts
Auto Modeler: 701 posts
Posted: Thursday, December 26, 2019 - 09:13 PM UTC
Mike great build on the truck. I like the cab blue and the simplicity of the logos.
cheers
Michael
cheers
Michael
Dixon66
Joined: December 12, 2002
KitMaker: 1,500 posts
Auto Modeler: 645 posts
Posted: Friday, December 27, 2019 - 12:04 AM UTC
Quoted Text
Quoted TextThanks for the update Damian, perhaps separate/order the completed, in progress and no updates?
Thanks David, you went and appealed to my vague sense of OCD! All sorted, thanks for the push!
Cheers, D
EDIT: Cross-checking numbers to go full OCD! Pasi, you need to jump on the GROUP BUILD PAGE and sign up otherwise we can't award your ribbon.
I joke that I have CDO, which is OCD but with the letters in the correct order.

Joel_W
Joined: December 04, 2010
KitMaker: 11,666 posts
Auto Modeler: 2,974 posts
Posted: Friday, December 27, 2019 - 02:08 AM UTC
Michael,
Both interiors really look the part. As for the harness assembly, I'd say you did one excellent job.
I've tried about every type of belt material from several of these specialty companies, and I was pretty shocked at how they varied as well as the quality of the material used.
Eduard's are colored PE which I really don't like, as even shaping them is a issue and they tend to be difficult to glue with any stress on them.
Like you found out, most of the cloth belts seem to fray and are a real PIA to work with. The Beemax detail up sets use a fabric that doesn't seem to fray, but these kits cost almost as much as the model does, so I rarely use them except on occasions when there's PE I really want as well.
I've found that the Tamiya and HGW sets, while expensive, especially the HGW ones that cost $24, both contain enough parts for 2 or 3 sets. The belts are actually a paper type product that you cut out of a main sheet.
One area that I'm really looking at is just buying the PE separately, then making my own belts from medical tape. I've seen this done a few times, and they do look good.
Joel
Cosimodo
#335
Joined: September 03, 2013
KitMaker: 1,808 posts
Auto Modeler: 701 posts
Posted: Saturday, December 28, 2019 - 03:40 PM UTC
Quoted Text
Michael,
Both interiors really look the part. As for the harness assembly, I'd say you did one excellent job.
I've tried about every type of belt material from several of these specialty companies, and I was pretty shocked at how they varied as well as the quality of the material used.
Eduard's are colored PE which I really don't like, as even shaping them is a issue and they tend to be difficult to glue with any stress on them.
Like you found out, most of the cloth belts seem to fray and are a real PIA to work with. The Beemax detail up sets use a fabric that doesn't seem to fray, but these kits cost almost as much as the model does, so I rarely use them except on occasions when there's PE I really want as well.
I've found that the Tamiya and HGW sets, while expensive, especially the HGW ones that cost $24, both contain enough parts for 2 or 3 sets. The belts are actually a paper type product that you cut out of a main sheet.
One area that I'm really looking at is just buying the PE separately, then making my own belts from medical tape. I've seen this done a few times, and they do look good.
Joel
Thanks Joel. I didn't know that HGW did belts for cars. I have used them for planes previously and I think they are very good. I will have a look into that.
cheers
Michael
Cosimodo
#335
Joined: September 03, 2013
KitMaker: 1,808 posts
Auto Modeler: 701 posts
Posted: Saturday, December 28, 2019 - 03:48 PM UTC
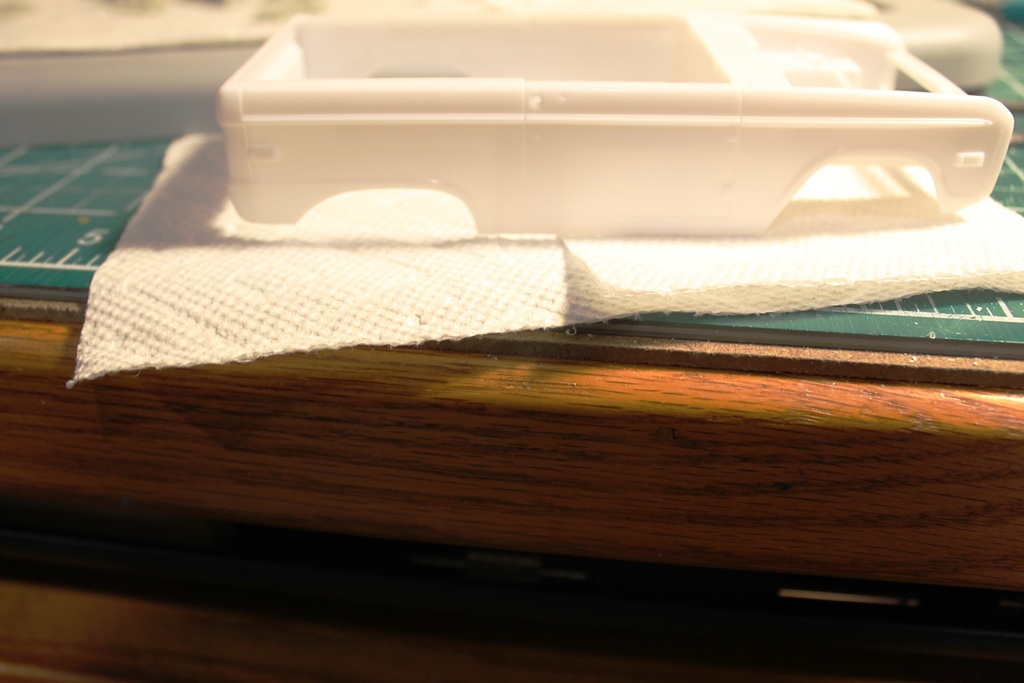
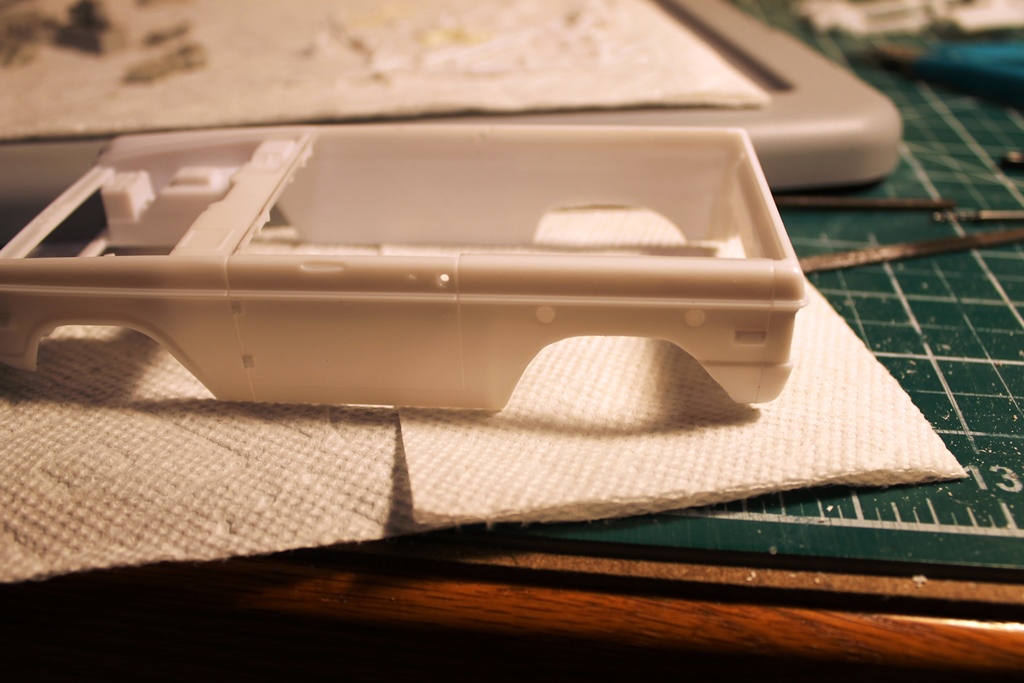
I have decided to paint the bodies one at a time so I don't get myself confused. Some primer on the body using a method copied from others here, a combo of MrSurfacer 1500 and MrColor Levelling Finisher.


I will smooth down tomorrow and put some colour on it.
cheers
Michael
I will smooth down tomorrow and put some colour on it.
cheers
Michael
Joel_W
Joined: December 04, 2010
KitMaker: 11,666 posts
Auto Modeler: 2,974 posts
Posted: Sunday, December 29, 2019 - 03:06 AM UTC
Michael,
The primer coat sure looks mighty impressive. Looking forward to seeing some color on the body next.
Joel
The primer coat sure looks mighty impressive. Looking forward to seeing some color on the body next.
Joel
 |

WEB HOSTING BY


Copyright ©2021 Auto Modeler and Kitmaker Network, a subsidiary of Silver Star Enterprises
All Rights Reserved. Please read our Conditions of Use and Privacy Policy.
All Rights Reserved. Please read our Conditions of Use and Privacy Policy.