

Patrick, great looking F1 car. Really realistic.
Jim


Go to automodeler.com for the current dynamic site!
The Garage
For general automotive modeling or non-modeling topics.
For general automotive modeling or non-modeling topics.
Hosted by Jim Starkweather
Strip, Track & Trail Official Build Thread

jimb

Joined: August 25, 2006
KitMaker: 2,539 posts
Auto Modeler: 1,405 posts

Posted: Tuesday, June 09, 2020 - 12:11 AM UTC


AussieReg

#007

Joined: June 09, 2009
KitMaker: 8,156 posts
Auto Modeler: 2,953 posts

Posted: Tuesday, June 09, 2020 - 02:10 AM UTC
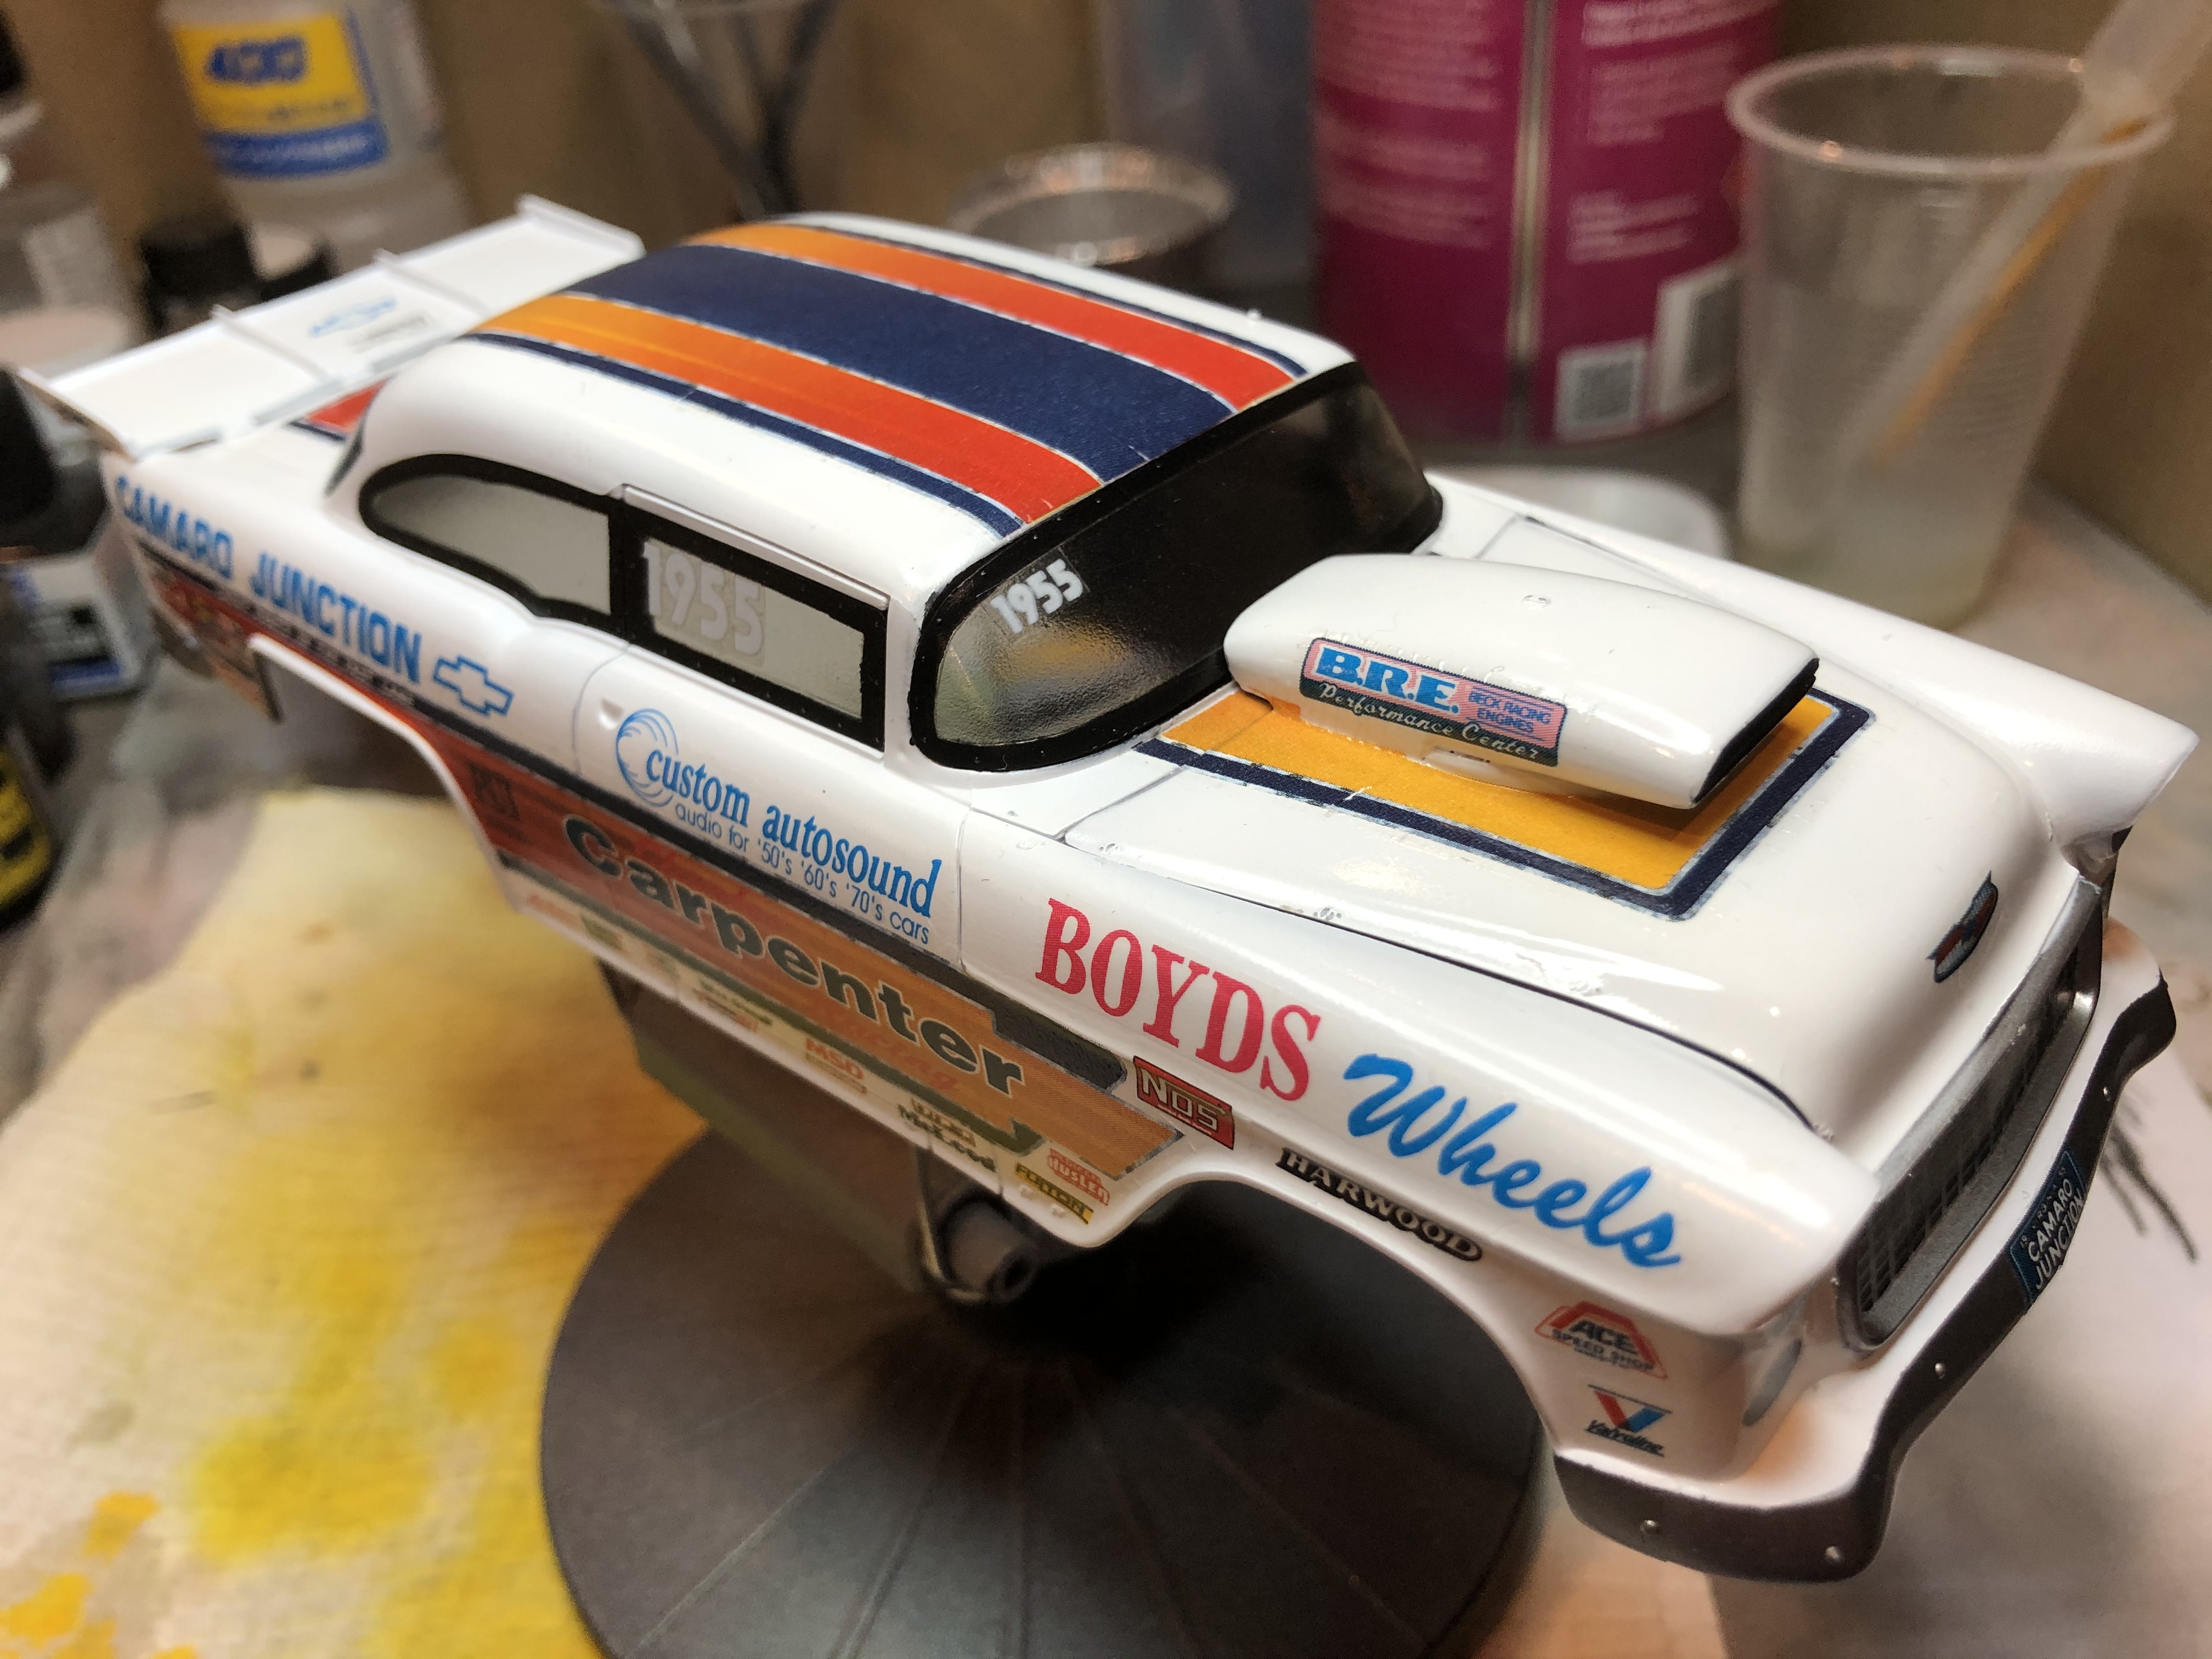
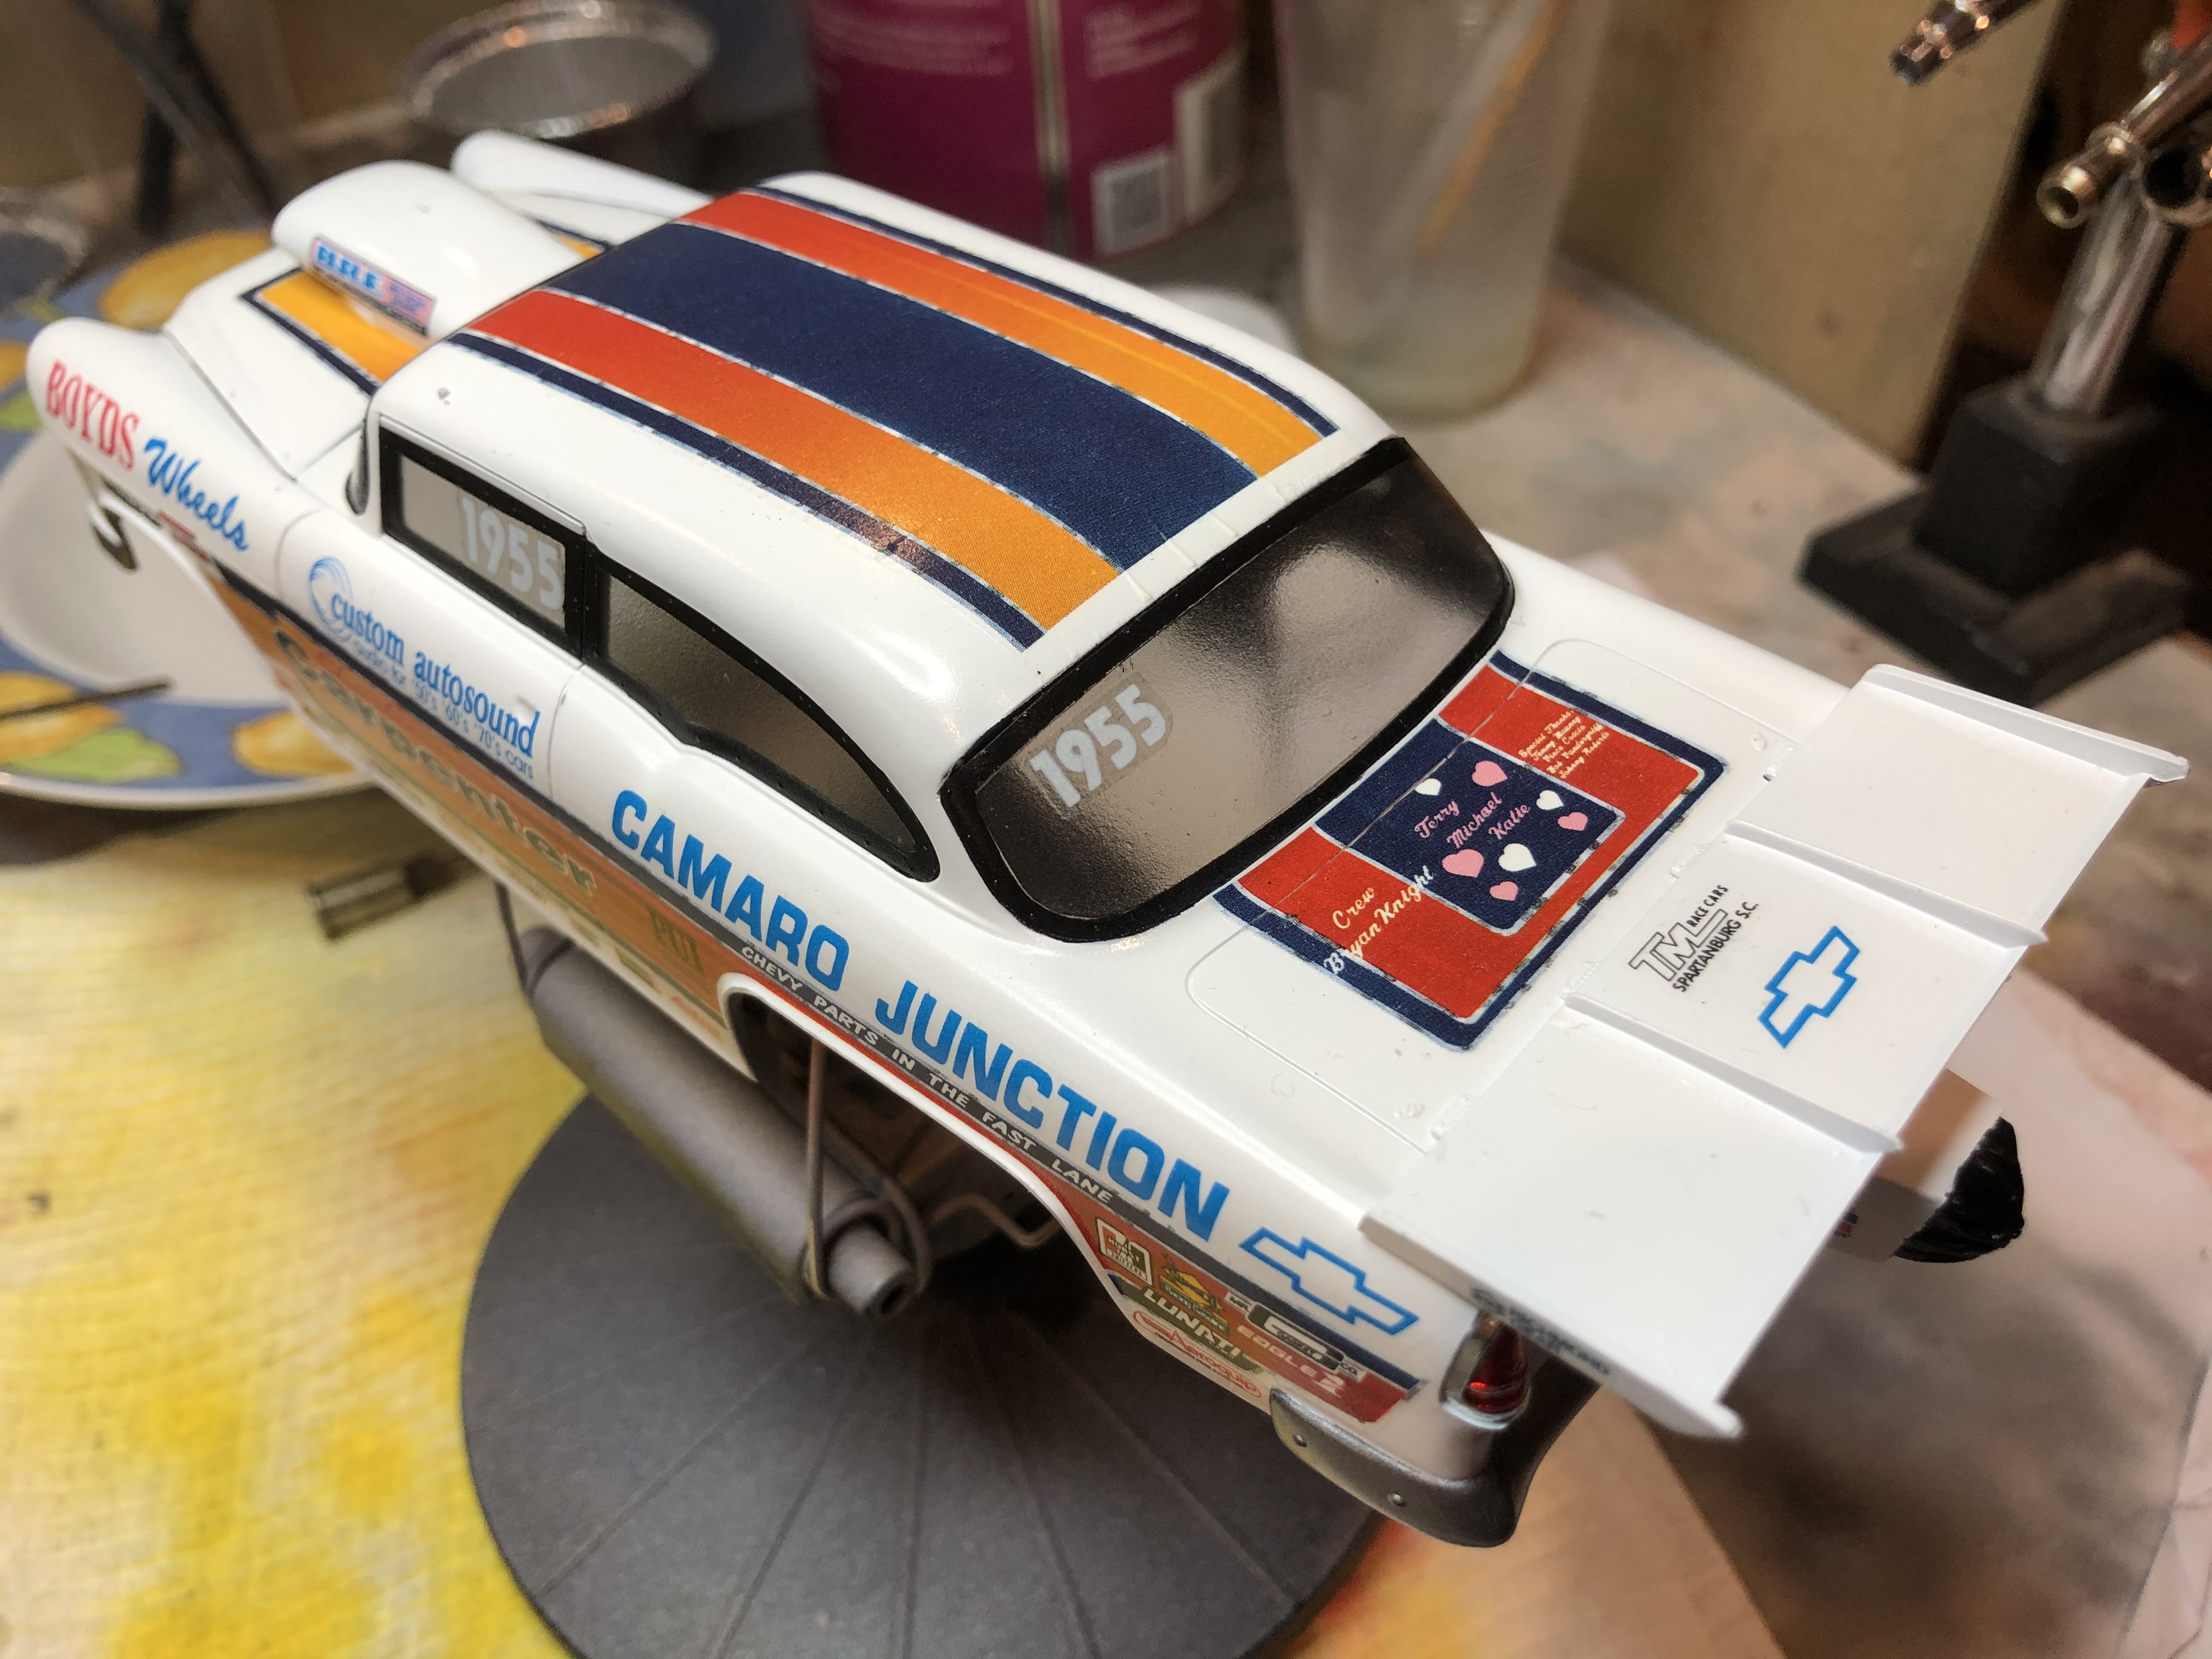
The '55 Pro Sports got a couple of coats of Alclad Aqua Gloss which has cured for a couple of days now. It will get a fine wet sand and then a couple more coats. The windows have frosted slightly but the wet sand and further coats should clear them up.
Cheers, D
Cheers, D

Joel_W
Joined: December 04, 2010
KitMaker: 11,666 posts
Auto Modeler: 2,974 posts

Posted: Tuesday, June 09, 2020 - 02:52 AM UTC
D,
The shell is starting to really shine up. I was concerned about the frosted glass, but after hearing your plan, I've got complete confidence in you to bring out a perfect clear shine.
Joel
The shell is starting to really shine up. I was concerned about the frosted glass, but after hearing your plan, I've got complete confidence in you to bring out a perfect clear shine.
Joel

Joel_W
Joined: December 04, 2010
KitMaker: 11,666 posts
Auto Modeler: 2,974 posts
Posted: Tuesday, June 09, 2020 - 02:58 AM UTC
Patrick
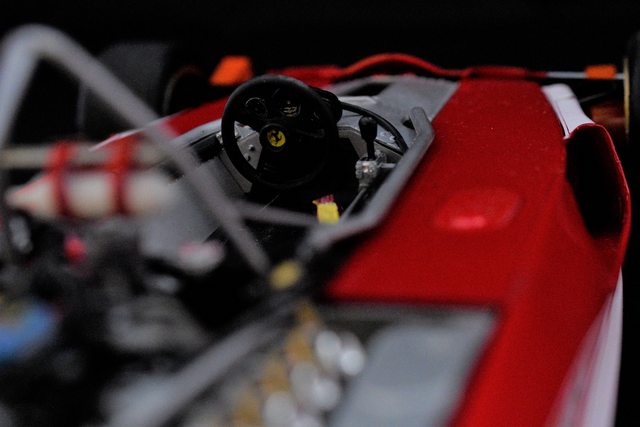
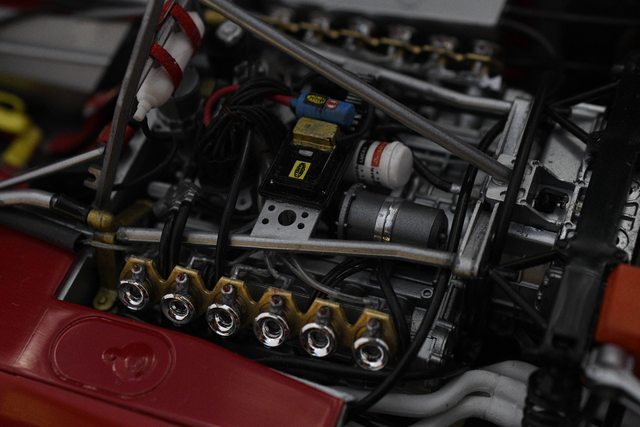
I personally can't wait to see your finished set of pictures. The ones you posted clearly show the results of your skill set. The finish is just dead on perfect. I love the over head pic looking down into the cockpit. the harness assembly really has that material look to it, and the electronic parts and wires directly behind the seat really grabbed my attention.
Well done my friend, very well done.
Joel

md72

#439
Joined: November 05, 2005
KitMaker: 4,950 posts
Auto Modeler: 555 posts

Posted: Tuesday, June 09, 2020 - 03:02 AM UTC
OK then. I normally build wingy things, not shiny things. This build was melting my mind. Maybe it's OCD, but I couldn't wrap my head around the instructions for this racer. It's not like an airplane, you build up the insides, close up the fuselage, add the wins and the elevators, smooth everything out, prime, paint, decal and you're done. Even the stock cars I've built followed a simple process; engine, chassis, interior, body shell and you're done. For this racer, you build a bit, paint a bit, add decals in the middle, build some more, paint some more, more decals. There's an expensive bottle of paint waiting for this,I didn't want to use half of redecorating the filter in my spray booth.
I ended up having to flow chart all of the steps and map out the priming, painting, masking, more painting, decaling, sub-assemblies, decals, more assemblies, more decals.
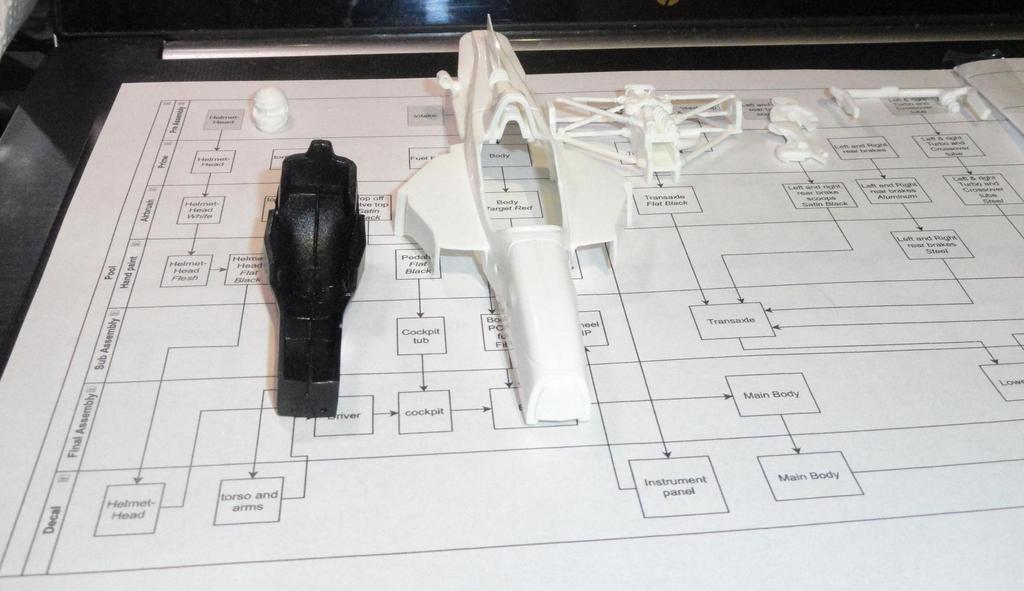

Now it all looks so simple and I can group together the painting for each color without having to clean and reload the same color for each step.
I was even able to gather up all of the same color sub-assemblies and get them glued up within an hour.
I ended up having to flow chart all of the steps and map out the priming, painting, masking, more painting, decaling, sub-assemblies, decals, more assemblies, more decals.
Now it all looks so simple and I can group together the painting for each color without having to clean and reload the same color for each step.
I was even able to gather up all of the same color sub-assemblies and get them glued up within an hour.


Dixon66
Joined: December 12, 2002
KitMaker: 1,500 posts
Auto Modeler: 645 posts

Posted: Tuesday, June 09, 2020 - 06:59 AM UTC
Mark, that is brilliant! I will be stealing this, I'm good with Visio. LOL
md72
#439
Joined: November 05, 2005
KitMaker: 4,950 posts
Auto Modeler: 555 posts
Posted: Tuesday, June 09, 2020 - 07:43 AM UTC
I've abused Visio in the past, but it's not on my home computer. I had to download Diagrams.IO and use their swim lane charts for this. I think that 80% of the value was just thinking each step through. But 80% of the effort was beating the tool into submission.
But now I can see what parts need to get to the paint shop for primer. Almost of all the sub-assemblies laying on the char are ready for primer, along with a handful of loose parts. Then I can sort the prime parts by finish coat. And hopefully load the ab up once for each color.
But now I can see what parts need to get to the paint shop for primer. Almost of all the sub-assemblies laying on the char are ready for primer, along with a handful of loose parts. Then I can sort the prime parts by finish coat. And hopefully load the ab up once for each color.

rv1963
Joined: December 07, 2004
KitMaker: 1,888 posts
Auto Modeler: 806 posts

Posted: Tuesday, June 09, 2020 - 08:31 AM UTC
Michael. Congrats on the beautiful finish of your Ferrari. Damian. Clear coat already that means your are getting close to the end well done.
Time for an update on the mustang, The first pic shows a side shot of the firewall installed and the second shot shows how much material i added about 1/4 of an inch, the next 2 shots shows how much further the new firewall pushes into the engine compartment. I did this to close up the huge gap behind the engine and to make then engine not look so small in there.
I will have to remove those inner fender wells as Mustangs don't really have those they have shock towers that extend way into the engine compartment, still plenty of work in that engine compartment to do, once i get those shock towers done it will look so much better. All comments welcome.
Joel_W
Joined: December 04, 2010
KitMaker: 11,666 posts
Auto Modeler: 2,974 posts
Posted: Tuesday, June 09, 2020 - 09:37 AM UTC
Mark,
In all my years modeling, I've never seen a flow chart like that before. Now that's impressive. But it's just to much like work. I'm use to loading, cleaning, loading, and Cleaning over and over as I work on different assemblies. But that just me.
Joel
In all my years modeling, I've never seen a flow chart like that before. Now that's impressive. But it's just to much like work. I'm use to loading, cleaning, loading, and Cleaning over and over as I work on different assemblies. But that just me.
Joel
Joel_W
Joined: December 04, 2010
KitMaker: 11,666 posts
Auto Modeler: 2,974 posts
Posted: Tuesday, June 09, 2020 - 09:38 AM UTC
Robert,
Nice fix to the fire wall. It does make a big difference for sure.
Looking forward to how you handle those Shock towers.
Joel
Nice fix to the fire wall. It does make a big difference for sure.
Looking forward to how you handle those Shock towers.
Joel
rv1963
Joined: December 07, 2004
KitMaker: 1,888 posts
Auto Modeler: 806 posts
Posted: Tuesday, June 09, 2020 - 10:52 AM UTC
Thanks Joel, Those shock towers are going to be much more difficult than the firewall, but i will take my time and get it done.

pnance26
Joined: January 22, 2016
KitMaker: 766 posts
Auto Modeler: 140 posts

Posted: Tuesday, June 09, 2020 - 10:59 AM UTC
If you were talking to me, thanks! If not, how you know my confirmation name is Michael?

Cosimodo
#335

Joined: September 03, 2013
KitMaker: 1,808 posts
Auto Modeler: 701 posts

Posted: Tuesday, June 09, 2020 - 11:50 AM UTC
This is so much going on in this campaign it's hard to keep track. First off
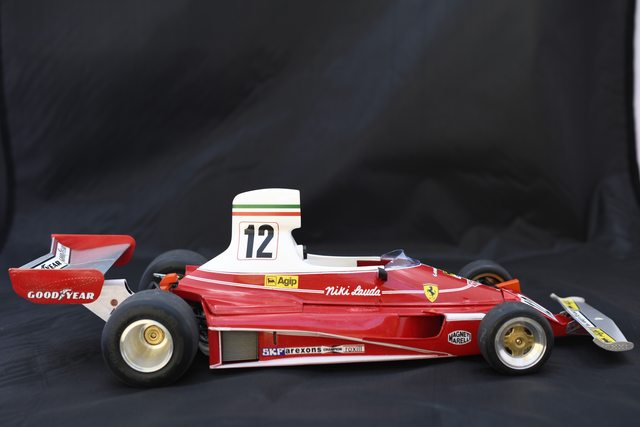
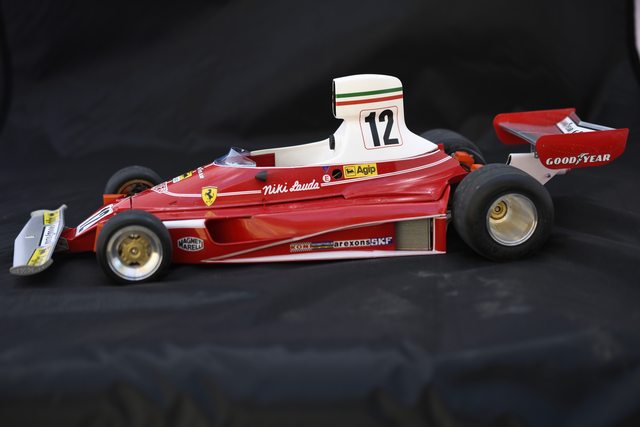
Congratulations Patrick on the Ferrari. It looks great and since you turned that kit around in 3 months is amazing. And even better if your confirmation name is Michael, someone made a great choice!
Mark, that flowchart is scary. I have trouble enough with instructions but that would certainly send down the wrong lane!
Damian, the Chevy is looking very tasty. I would love to hear that beast run, especially if doesn't have pipes.
Robert, nice start to build #2.
Richard, to good some action back on the Mercedes. Nice detail work on the engine.
And thanks for all the kind comments about the Porsche's engine. Very much appreciated.
cheers
Michael
rv1963
Joined: December 07, 2004
KitMaker: 1,888 posts
Auto Modeler: 806 posts
Posted: Tuesday, June 09, 2020 - 12:17 PM UTC
Good question Patrick i was talking to you about the finish of your Ferrari but i just put the wrong name to it we have so many builds going on here sorry.
md72
#439
Joined: November 05, 2005
KitMaker: 4,950 posts
Auto Modeler: 555 posts
Posted: Tuesday, June 09, 2020 - 03:02 PM UTC
Didn't mean to scare you guys. But I was scared about messing up on this kit. So I ended up with a familiar work took to organize the build. Perhaps some of you can do it in your head, I couldn't this time.
Each lane in the swim chart is for a similar process. The top lane is pre-assembly, anything that ought to be glued together before before painting, like the head/helmet that needed to have the glue line sanded out. Next was priming, anything that needed primer before a finish coat; the metal bits and the body bits. Following that is Airbrushing, if I'm industriously lazy, I only have to set the airbrush up 7 times, once for each color. Then there's hand painting, all the bits that don't lend themselves to airbrushing. Finally I get to the major sub-assemblies, followed by some mid build decaling. And at last, the final assembly and final decaling.
As I said, I just blitzed through the pre-assemblies and now I'm setting up to get primer on stuff.
rv1963
Joined: December 07, 2004
KitMaker: 1,888 posts
Auto Modeler: 806 posts
Posted: Tuesday, June 09, 2020 - 03:22 PM UTC
Mark. I think your flow chart is a great idea if you are not shore of the process on how to go about the build.
I do not consider myself a great model builder just average but i have been building model cars for about 40 years after that long i better damn well know the process i need to go about the build.
DO what ever works for you, good luck on your build.
I do not consider myself a great model builder just average but i have been building model cars for about 40 years after that long i better damn well know the process i need to go about the build.
DO what ever works for you, good luck on your build.
pnance26
Joined: January 22, 2016
KitMaker: 766 posts
Auto Modeler: 140 posts
Posted: Tuesday, June 09, 2020 - 03:52 PM UTC
Some photos from the booth...
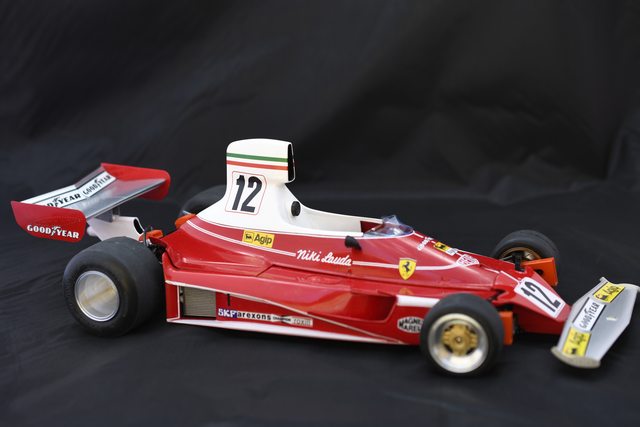
Your comments are always welcome.
Your comments are always welcome.
md72
#439
Joined: November 05, 2005
KitMaker: 4,950 posts
Auto Modeler: 555 posts
Posted: Tuesday, June 09, 2020 - 05:38 PM UTC
Beautiful! If I do 1/4 as well as that I'll be extra pleased.
AussieReg
#007
Joined: June 09, 2009
KitMaker: 8,156 posts
Auto Modeler: 2,953 posts
Posted: Wednesday, June 10, 2020 - 12:48 AM UTC
Mark, great to see your build making some real progress here, and the flow chart is an excellent tool. This is pretty much what I try to do in my head, but inevitably a few parts are missed from each stage so the airbrush gets reloaded a day or two later. I have a notebook on the bench, and I also often use a red pen to circle stages in the instruction sheets where I think it would be best to throw paint around.
Patrick, great photos of a really lovely build. Many thanks once again for joining in here and sharing so much detail during your build progress. I look forward to seeing more of your work here.
Robert, neat work on the firewall, it will certainly make a difference once the engine bay starts to fill out. I'm very keen to see how you work around the inner fender wall surgery as well, sounds like some interesting modifications in store for your Mustang!
Cheers, D
Dixon66
Joined: December 12, 2002
KitMaker: 1,500 posts
Auto Modeler: 645 posts
Posted: Wednesday, June 10, 2020 - 12:52 AM UTC
Excellent work Patrick!
Joel_W
Joined: December 04, 2010
KitMaker: 11,666 posts
Auto Modeler: 2,974 posts
Posted: Wednesday, June 10, 2020 - 01:10 AM UTC
Patrick,
Simply an outstanding build of a very difficult Tamiya 1/12 scale that's been around for a while. Paint and decaling is just perfect. I'd say you nailed it for sure. 
Joel
Simply an outstanding build of a very difficult Tamiya 1/12 scale that's been around for a while. Paint and decaling is just perfect. I'd say you nailed it for sure.
Joel
Joel_W
Joined: December 04, 2010
KitMaker: 11,666 posts
Auto Modeler: 2,974 posts
Posted: Wednesday, June 10, 2020 - 01:22 AM UTC
Just a quick update on the Audi R8 paint progress. I air brushed on the Gravity Audi Silver which is a Metallic not anything like the Silvers and chromes I use from Mr. Color. And it looked horrid  , actually worse then Horrid. The Metallic flakes are just way to large IMHO! I tried to live with it for a day, but the more I looked at it, the more I truly hated it.
It got to the point last night that I 1st tried to rub out the paint with 8,000 then 12,000 but that didn't really help. So out came the bottle of 70% Iso Alcohol and I've been slowly removing the paint and primer with Qtips and paper towel. So I'm back to square #1. I can't find 91% anywhere as it's sold out like everything else is due to the Pandemic.
I'll be priming again, the switching to the Red scheme for the other team car. I'm saving my bottle of Mr. Color Super Metallic Silver or their Silver for the Saber Mercedes C9 if I can't find another paint scheme and decals available here in the States.
Joel
, actually worse then Horrid. The Metallic flakes are just way to large IMHO! I tried to live with it for a day, but the more I looked at it, the more I truly hated it. It got to the point last night that I 1st tried to rub out the paint with 8,000 then 12,000 but that didn't really help. So out came the bottle of 70% Iso Alcohol and I've been slowly removing the paint and primer with Qtips and paper towel. So I'm back to square #1. I can't find 91% anywhere as it's sold out like everything else is due to the Pandemic.
I'll be priming again, the switching to the Red scheme for the other team car. I'm saving my bottle of Mr. Color Super Metallic Silver or their Silver for the Saber Mercedes C9 if I can't find another paint scheme and decals available here in the States.
Joel

heavyjagdpanzer
Joined: February 17, 2013
KitMaker: 173 posts
Auto Modeler: 46 posts

Posted: Wednesday, June 10, 2020 - 02:50 AM UTC
Patrick Nance, What a beautiful model, the engine is so complex!
Dixon66
Joined: December 12, 2002
KitMaker: 1,500 posts
Auto Modeler: 645 posts
Posted: Wednesday, June 10, 2020 - 06:47 AM UTC
Quoted Text
Just a quick update on the Audi R8 paint progress. I air brushed on the Gravity Audi Silver which is a Metallic not anything like the Silvers and chromes I use from Mr. Color. And it looked horrid
It got to the point last night that I 1st tried to rub out the paint with 8,000 then 12,000 but that didn't really help. So out came the bottle of 70% Iso Alcohol and I've been slowly removing the paint and primer with Qtips and paper towel. So I'm back to square #1. I can't find 91% anywhere as it's sold out like everything else is due to the Pandemic.
I'll be priming again, the switching to the Red scheme for the other team car. I'm saving my bottle of Mr. Color Super Metallic Silver or their Silver for the Saber Mercedes C9 if I can't find another paint scheme and decals available here in the States.
Joel
I agree on metallic looking out of scale. Don't like them and actively avoid them, unless I accidentally get one, which I did on the SCCA Mustang. I hate it and I feel it ruined the look.
I've started exterior detail painting and decals on it. Interior is assembled and waiting for a supply of panel line wash to arrive. I tried printing decals on white background Micromark inkjet paper and sealed them last night. I will try applying some of them tonight. Since I'm not liking the way this is turning out, I've been reluctant to take pictures.
heavyjagdpanzer
Joined: February 17, 2013
KitMaker: 173 posts
Auto Modeler: 46 posts
Posted: Wednesday, June 10, 2020 - 11:00 AM UTC
I finely got the body completely painted. Next,decals.

 |

WEB HOSTING BY


Copyright ©2021 Auto Modeler and Kitmaker Network, a subsidiary of Silver Star Enterprises
All Rights Reserved. Please read our Conditions of Use and Privacy Policy.
All Rights Reserved. Please read our Conditions of Use and Privacy Policy.