

David & Robert,
I gotta admit that I also like the Red way better then the Metallic Silver. I now have 3 different brands of Metallic Silver, and I dislike the size of the flakes in all three of them.
Joel


Go to automodeler.com for the current dynamic site!
The Garage
For general automotive modeling or non-modeling topics.
For general automotive modeling or non-modeling topics.
Hosted by Jim Starkweather
Strip, Track & Trail Official Build Thread

Joel_W

Joined: December 04, 2010
KitMaker: 11,666 posts
Auto Modeler: 2,974 posts

Posted: Sunday, June 14, 2020 - 02:56 AM UTC


bomber14
Joined: February 02, 2015
KitMaker: 330 posts
Auto Modeler: 23 posts

Posted: Monday, June 15, 2020 - 07:02 AM UTC
just an update on the lorenzen build- still waiting for the paint to dry 
Joel_W
Joined: December 04, 2010
KitMaker: 11,666 posts
Auto Modeler: 2,974 posts
Posted: Monday, June 15, 2020 - 09:21 AM UTC
Joe
Sounds like a good plan to me.
Joel
Sounds like a good plan to me.
Joel

AussieReg

#007

Joined: June 09, 2009
KitMaker: 8,156 posts
Auto Modeler: 2,953 posts

Posted: Monday, June 15, 2020 - 09:59 AM UTC
Quoted Text
just an update on the lorenzen build- still waiting for the paint to dry
Joe, you can't rush perfection!


bomber14
Joined: February 02, 2015
KitMaker: 330 posts
Auto Modeler: 23 posts
Posted: Tuesday, June 16, 2020 - 12:43 AM UTC
what's that saying about watching paint dry? it is really taking a long time for this enamel to gas out. the paint is almost there but i don't want to risk wet sanding it too soon. the chassis is rolling and waiting, i have to cut out side windows and i can tell from dry fitting the body/chassis before painting that it is going to give me trouble to put together.
joe.
joe.
Joel_W
Joined: December 04, 2010
KitMaker: 11,666 posts
Auto Modeler: 2,974 posts
Posted: Tuesday, June 16, 2020 - 01:44 AM UTC
Joe,
I'd never have left the world of enamels if they dried way faster then they actually do considering the amount of paint we apply when painting a car body. Now in my old aircraft days, I was basically an enamel type of guy as we used so much less paint. Only took a few days for the paint to dry, and we never rubbed it out where it had to be rock hard and fully cured.
joel
Joel_W
Joined: December 04, 2010
KitMaker: 11,666 posts
Auto Modeler: 2,974 posts
Posted: Friday, June 19, 2020 - 03:29 AM UTC
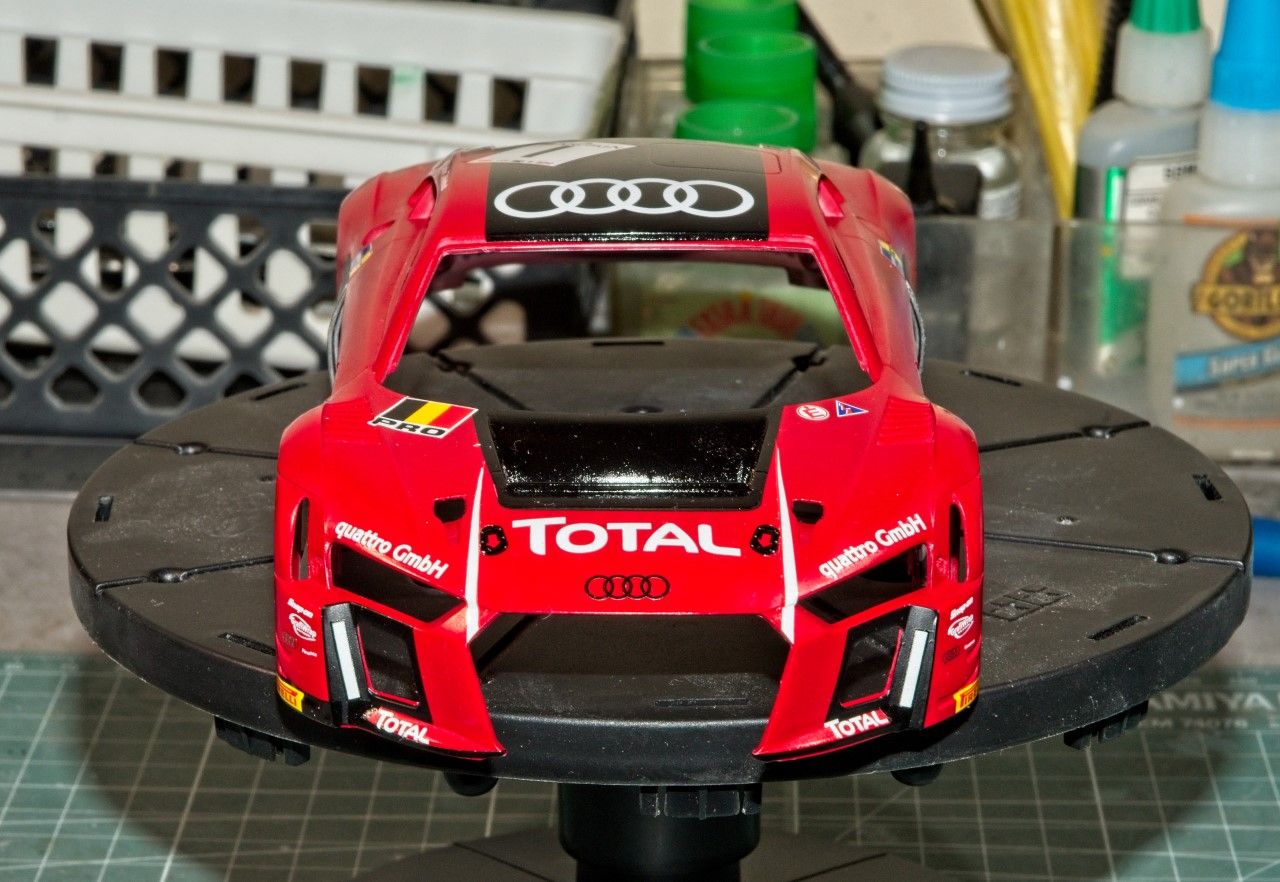
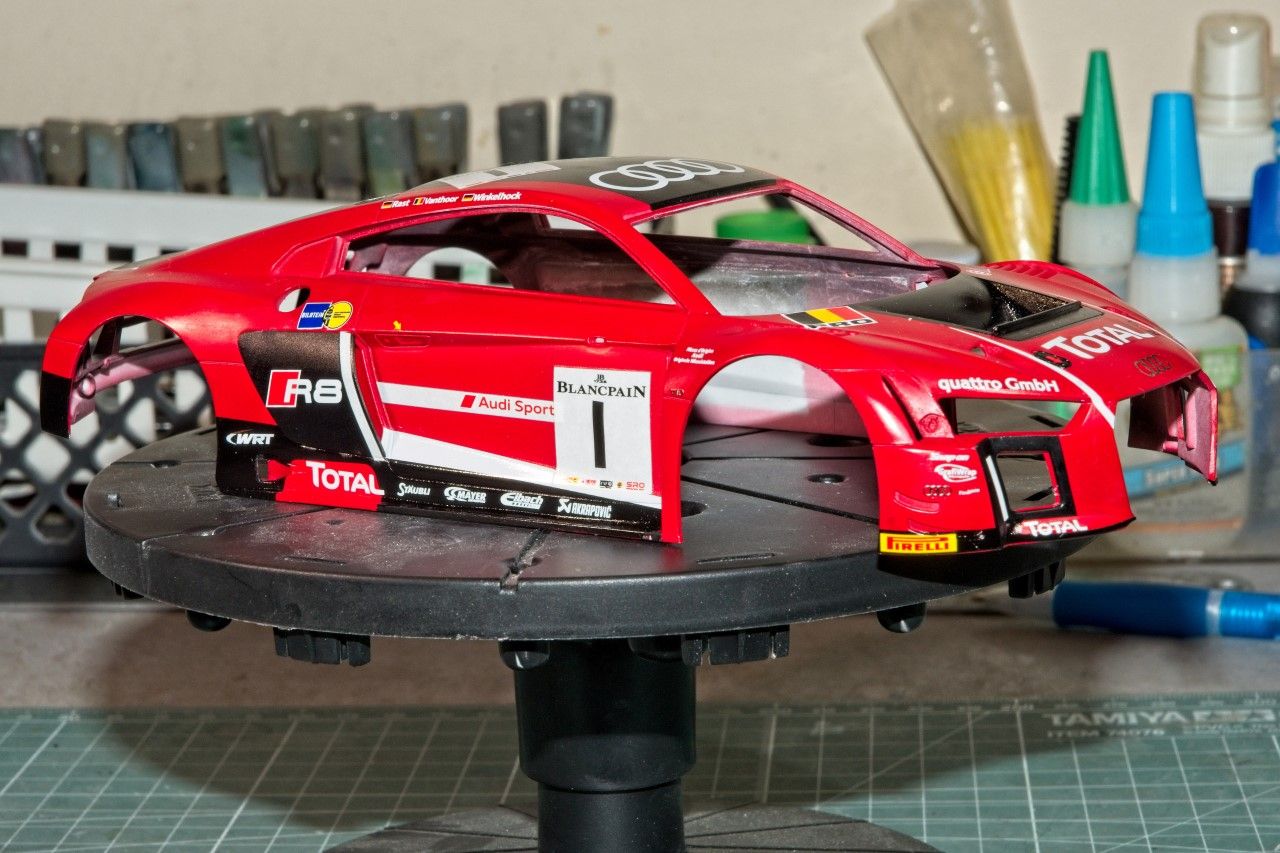
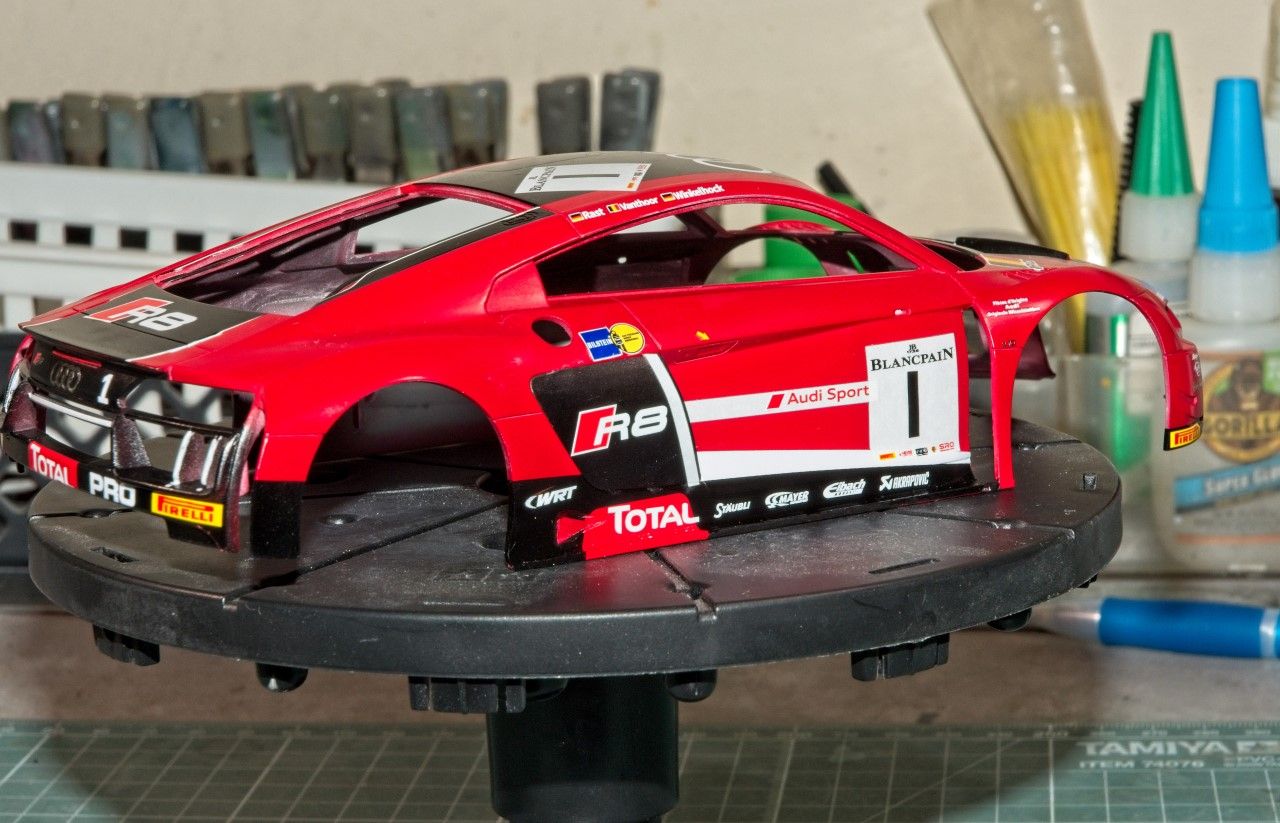
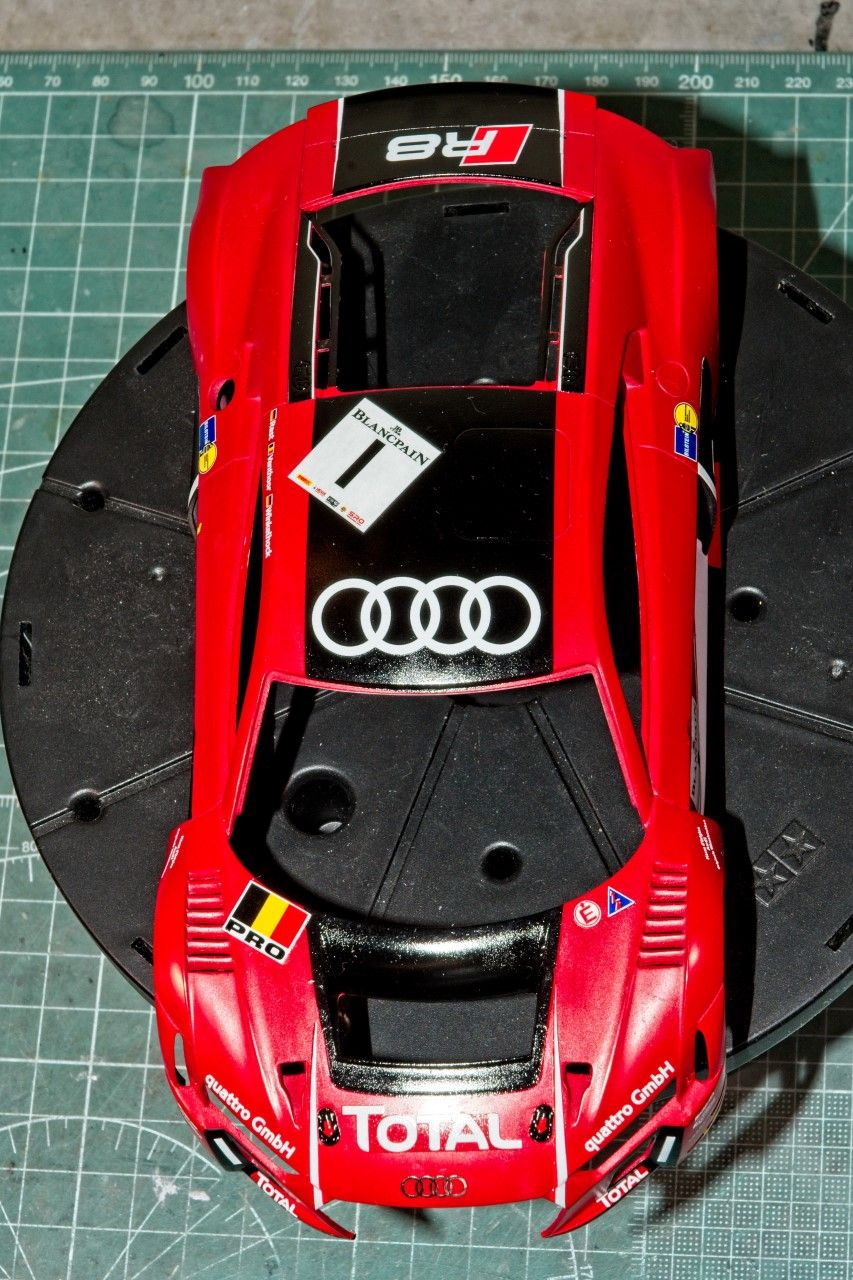
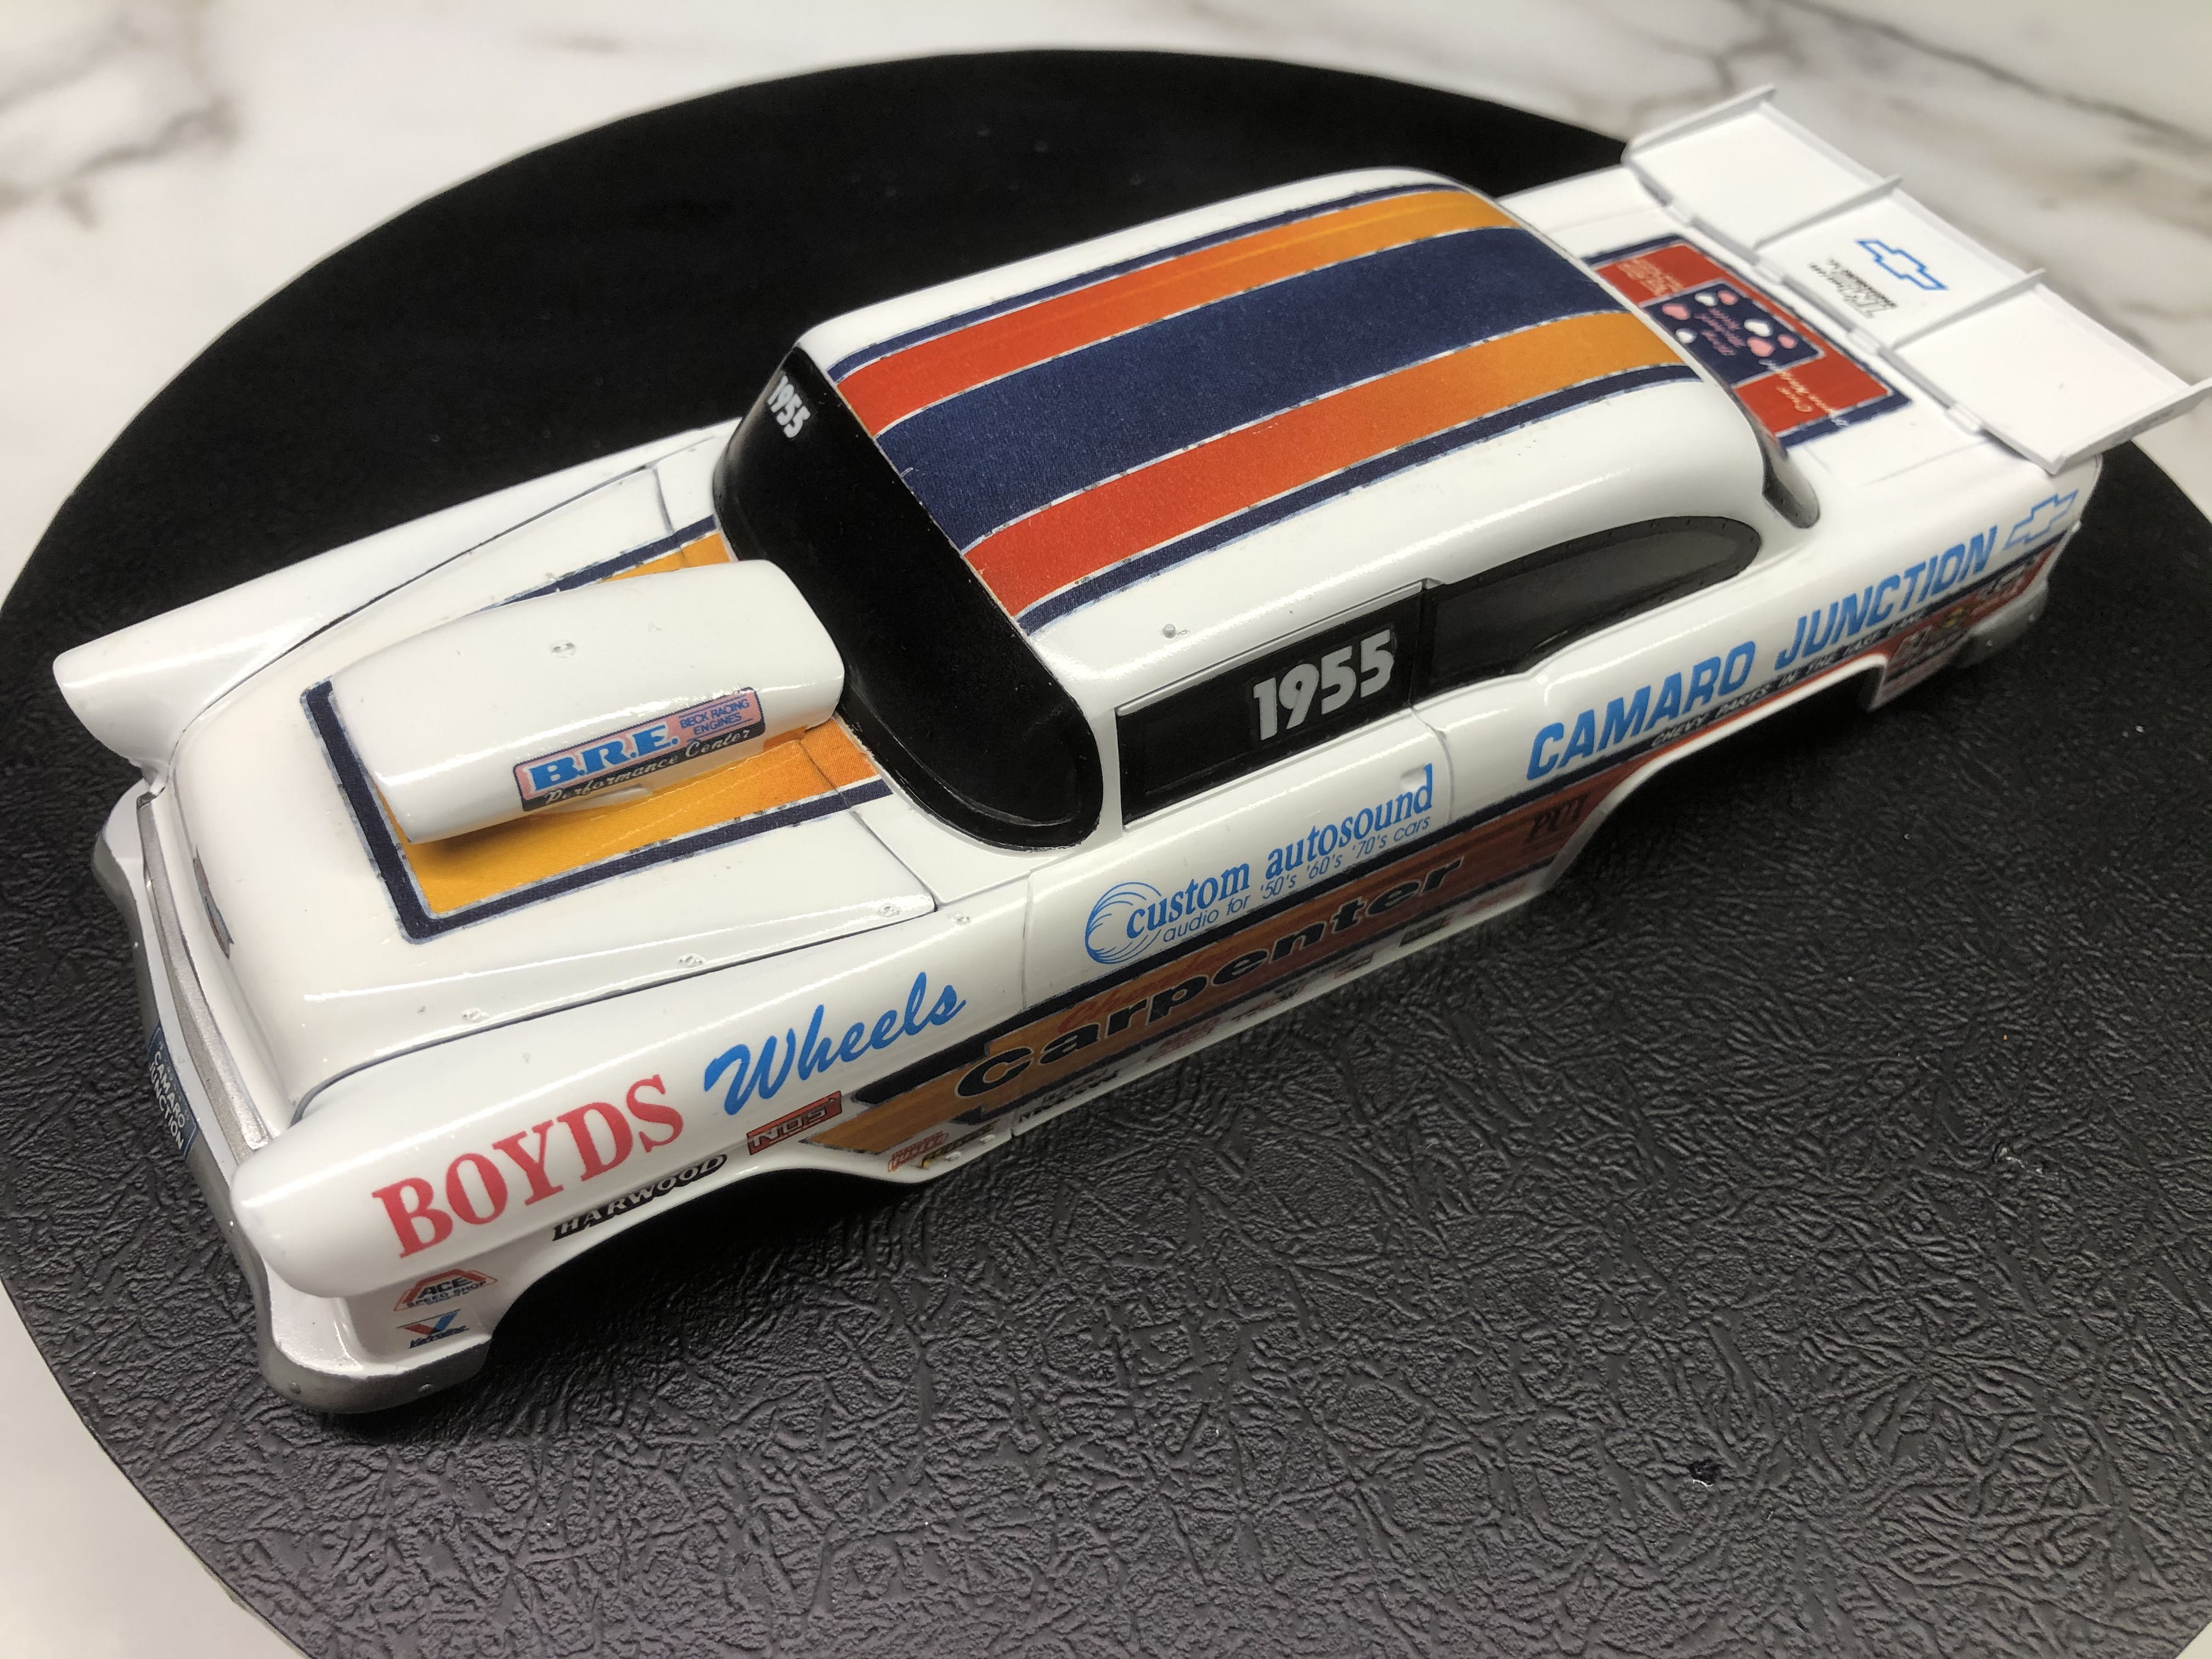
Been spending hours everyday this week just decaling the main body shell, as this kit has broken the record for the most decals applied to a shell by a huge margin. At this point I've applied 75 decals or so including the several layered decals.
As for the decals themselves, I'm just super impressed with their overall quality. I've used Beemax, Nunu, and Platz which are all basically the same company, but it's my understanding that Beemax has left the group and gone out on it's own. The decals are thin, but not so thin as they stretch or tear at the slightest touch. The registration and colors are just dead on perfect, with literally no bleed through of the deep Red body color through any of the white decals. And all were the perfect size. Like I said before, they're the equal to any AM decals I've ever used.
As usual, I applied every decal using the Paul Budzik process of Microset, Microsol, & Solvaset without a single issue.
Here's the body shell after decaling. I haven't cleaned it as yet to get it ready for the glosscoat process so there is a little post decaling stains that needs to be removed.
Joel

Dixon66
Joined: December 12, 2002
KitMaker: 1,500 posts
Auto Modeler: 645 posts

Posted: Friday, June 19, 2020 - 07:38 AM UTC
Great work, that thing is a monster!

rv1963
Joined: December 07, 2004
KitMaker: 1,888 posts
Auto Modeler: 806 posts

Posted: Friday, June 19, 2020 - 12:01 PM UTC
Joel, Nice work on those decals they all look great, really looks like a race car now.
bomber14
Joined: February 02, 2015
KitMaker: 330 posts
Auto Modeler: 23 posts
Posted: Friday, June 19, 2020 - 01:30 PM UTC
Quoted Text
Joe,
I'd never have left the world of enamels if they dried way faster then they actually do considering the amount of paint we apply when painting a car body. Now in my old aircraft days, I was basically an enamel type of guy as we used so much less paint. Only took a few days for the paint to dry, and we never rubbed it out where it had to be rock hard and fully cured.
joel
yes true joel. i think the reason it is taking so long ie because i shot it through the airbrush. i sprayed out more layers with the airbrush than i would have with the rattle can if you can believe that. i will check it tomorrow, i think it should be ready.
that's some decal job joel. i use the same method of solvent except i keep the solve a set for the more uncooperative decals.

Cosimodo

#335

Joined: September 03, 2013
KitMaker: 1,808 posts
Auto Modeler: 701 posts

Posted: Friday, June 19, 2020 - 04:06 PM UTC
Beautiful work Joel. Real patience shown there and it has paid off because I'm sure you will have that painted on look when you put the gloss coat on.
cheers
Michael
cheers
Michael
AussieReg
#007
Joined: June 09, 2009
KitMaker: 8,156 posts
Auto Modeler: 2,953 posts
Posted: Friday, June 19, 2020 - 10:46 PM UTC
Saturday night rolls around again, and the progress reports keep coming in! Things have calmed down somewhat, but we are still 10 days from the half way mark and I didn't expect the frantic pace we saw at the start to carry through.
Running update on builds
12 weeks in, 36 pages with almost 19,000 views and 900 posts
21 enlisted (plus 1, Jesper sign in please mate!)
14 builds in progress
8 completed builds
Szmann (Gabriel) - NASCAR - Chev Monte Carlo (Tony Stewart) - 1/25 AMT/ERTL kit - COMPLETED
Stickframe (Nick) - ENDURANCE - McLaren F1 GTR Longtail - 1/24 Aoshima kit - COMPLETED
Szmann (Gabriel) - NASCAR - Pontiac Grand Prix (Kyle Petty) - 1/24 Revell/Monogram kit - COMPLETED
rv1963 (Robert) - STRAIGHTLINE - '37 Chevy Gasser - 1/25 AMT kit- COMPLETED
jimb (Jim) - STRAIGHTLINE - '57 Ford Sedan Gasser - COMPLETED
Joel_W (Joel) - FORMULA 1 - Lotus 99T Honda (Ayrton Senna 1987) - 1/20 Tamiya kit - COMPLETED
pnance26 (Patrick) - FORMULA 1 - Ferrari 312T - 1/12 Tamiya kit - COMPLETED
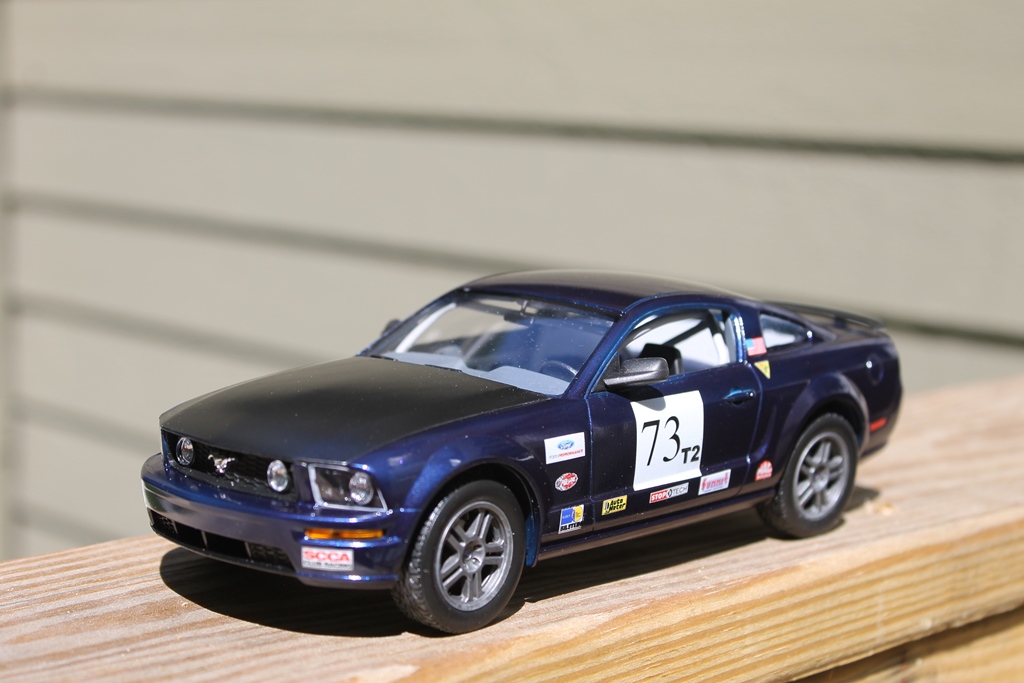
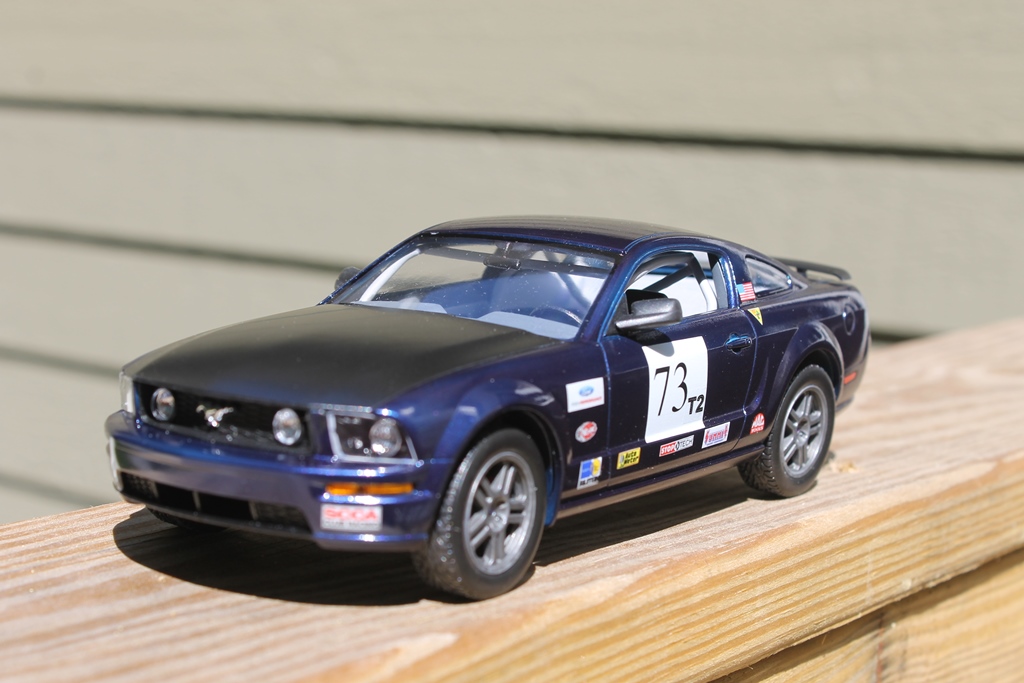
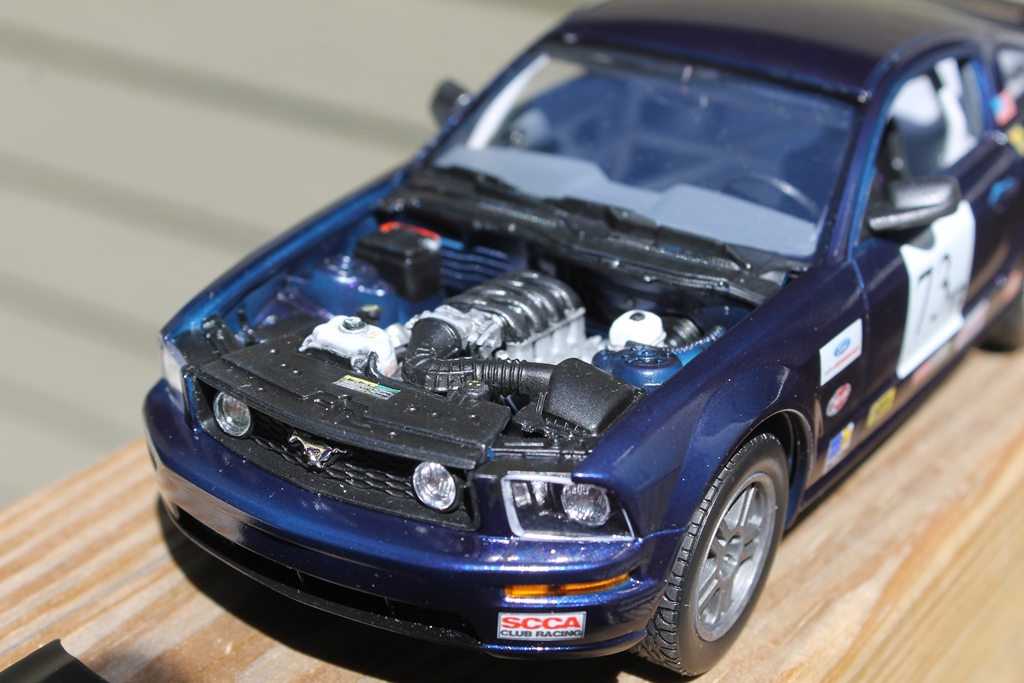
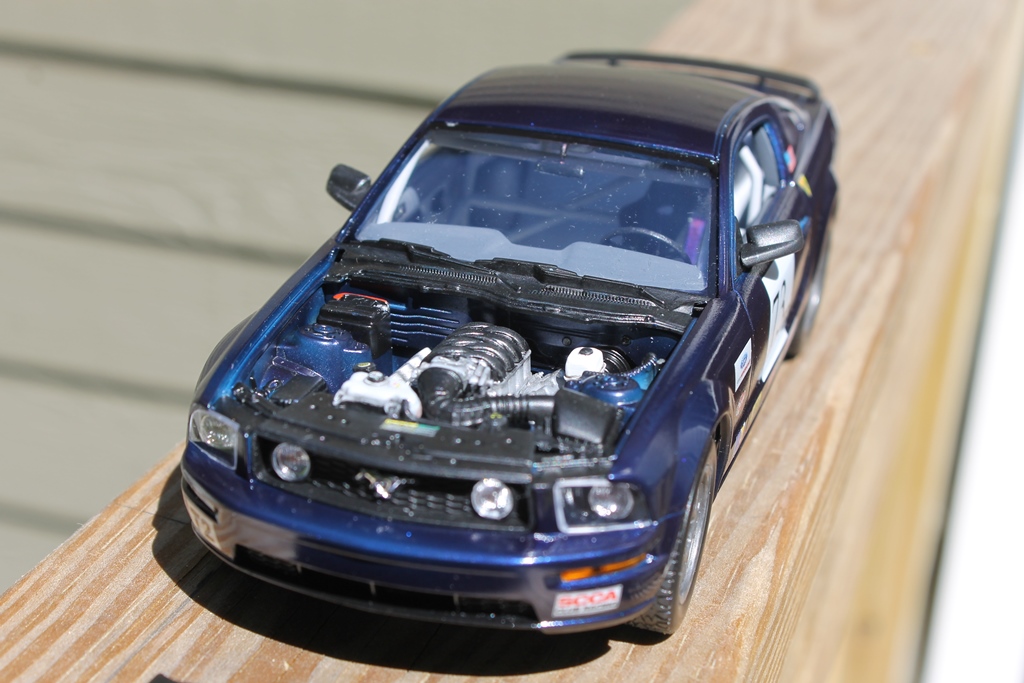
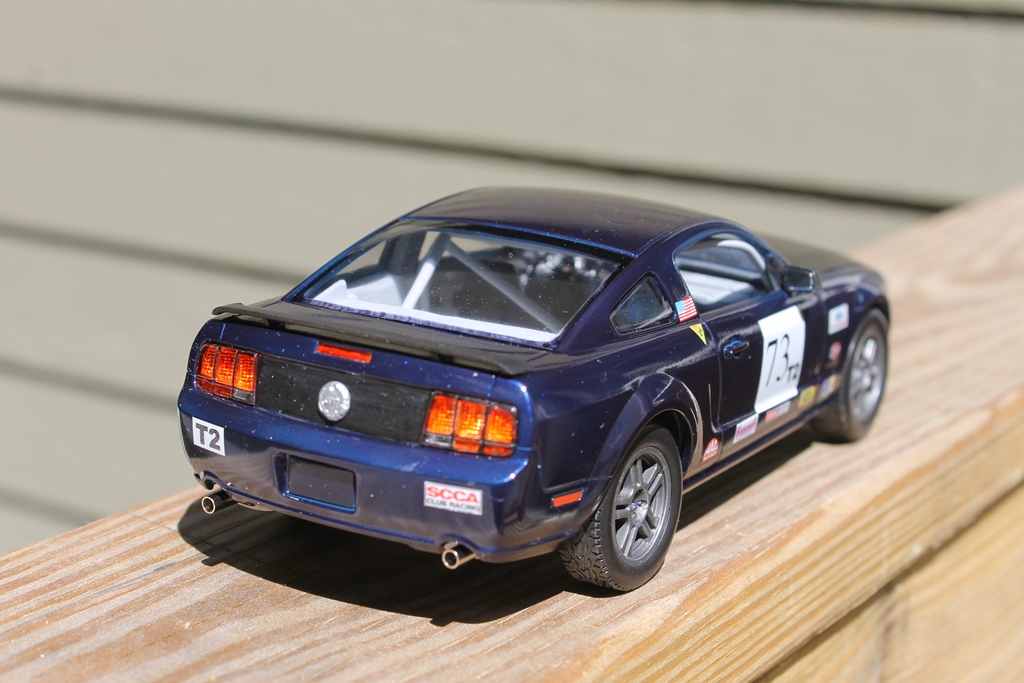
Dixon66 (David) - TOURING GROUP 2 - 2006 Mustang GT- 1/25 Revell kit - COMPLETED
Aussiereg (Damian) - STRAIGHTLINE - '55 Chev Pro Sportsman (Charles Carpenter) - 1/25 Revell kit - Engine bay detailing, rolling chassis assembly. Body finished
Joel_W (Joel) - GT3 - Audi R8 LMS (2015) - 1/24 NuNu kit - Body painted and decalled, rolling chassis commenced
Joel_W (Joel) - INDY - enlisted - Lola T-8800 Newman Haas (Mario Andretti 1988) - 1/25 AMT kit
Dixon66 (David) - ENDURANCE GROUP 5 - Zakspeed Capri - 1/24 Tamiya kit - Body painted and decalled ready for clear, underside and interior complete
tinbanger (Richard) - GRAND PRIX - 1914 Mercedes Racer - 1/16 Lindberg kit - Engine painted, chassis started, major panel works under way, custom milled wheels/tyres and sheetmetal panels started
md72 (Mark) - INDY - Target Reynard (Jimmy Vasser) - 1/25 Revell kit - Parts Prep, sub assemblies started
Szmann (Gabriel) - FORMULA 1 - Tyrrell P34 (Monaco 1977 #4) - 1/20 Tamiya kit kit - Engine complete, chassis plate and outer shell paint/decals
Hwa-Rang (Jesper) - NASCAR - (TBA)
PasiAhopelto (Pasi) - NASCAR - enlisted - Olds 442 (Donnie Allison) - 1/25 Salvinos JR kit
forest1000 (David) - FORMULA 1 - enlisted - Williams Renault (Jaques Villeneuve) - 1/24 Revell/Monogram kit
Cosimodo (Michael) - ENDURANCE - 1971 Porsche 917/20 - 1/12 MFH kit - Steps 1-8 of 26 completed, engine in tube frame, rear stowage assembly
bluebell914 (Patrick) - ENDURANCE - enlisted - Ferrari P4 or 512S
2002hummer (Darrell) - GRAND PRIX - Lotus Super Seven (Tamiya) - Engine assembled and painted
TacFireGuru (Mike) - NASCAR - enlisted - Chev Monte Carlo (Home Depot)
Lakota (Don) - ENDURANCE - Corvette C7.R - 1/25 Revell kit - Engine assembled, floor pan/chassis under way
RedwingNev (Neil) - GRAND PRIX - enlisted - Lotus 79 (1978 Mario Andretti?) - 1/20 Tamiya kit
heavyjagdpanzer (Bill) - STRAIGHTLINE - Blue Max Funny Car - 1/25 Revell kit - Rolling chassis completed, body painted
bmwh548 (Radu) - RALLY - '99 WRC Subaru Impreza - 1/24 Tamiya kit - Wheels and tyres
bomber14 (Joe) - STOCK CAR - '60 Ford Starliner - AMT/ERTL kit - Rolling chassis/interior done, body paint under way
rv1963 (Robert) - TRANS-AM - '73 Mustang - 1/25 MPC kit- Parts prep, front end modifications
pnance26 (Patrick) - ENDURANCE - Porsche 956 Le Mans 1984 - 1/24 Tamiya kit - Engine assembled and painted
If anybody has changed or firmed up their proposed builds, or spotted anything wrong in the list, please let me know.
Cheers, D
Running update on builds
12 weeks in, 36 pages with almost 19,000 views and 900 posts
21 enlisted (plus 1, Jesper sign in please mate!)
14 builds in progress
8 completed builds
Szmann (Gabriel) - NASCAR - Chev Monte Carlo (Tony Stewart) - 1/25 AMT/ERTL kit - COMPLETED
Stickframe (Nick) - ENDURANCE - McLaren F1 GTR Longtail - 1/24 Aoshima kit - COMPLETED
Szmann (Gabriel) - NASCAR - Pontiac Grand Prix (Kyle Petty) - 1/24 Revell/Monogram kit - COMPLETED
rv1963 (Robert) - STRAIGHTLINE - '37 Chevy Gasser - 1/25 AMT kit- COMPLETED
jimb (Jim) - STRAIGHTLINE - '57 Ford Sedan Gasser - COMPLETED
Joel_W (Joel) - FORMULA 1 - Lotus 99T Honda (Ayrton Senna 1987) - 1/20 Tamiya kit - COMPLETED
pnance26 (Patrick) - FORMULA 1 - Ferrari 312T - 1/12 Tamiya kit - COMPLETED
Dixon66 (David) - TOURING GROUP 2 - 2006 Mustang GT- 1/25 Revell kit - COMPLETED
Aussiereg (Damian) - STRAIGHTLINE - '55 Chev Pro Sportsman (Charles Carpenter) - 1/25 Revell kit - Engine bay detailing, rolling chassis assembly. Body finished
Joel_W (Joel) - GT3 - Audi R8 LMS (2015) - 1/24 NuNu kit - Body painted and decalled, rolling chassis commenced
Joel_W (Joel) - INDY - enlisted - Lola T-8800 Newman Haas (Mario Andretti 1988) - 1/25 AMT kit
Dixon66 (David) - ENDURANCE GROUP 5 - Zakspeed Capri - 1/24 Tamiya kit - Body painted and decalled ready for clear, underside and interior complete
tinbanger (Richard) - GRAND PRIX - 1914 Mercedes Racer - 1/16 Lindberg kit - Engine painted, chassis started, major panel works under way, custom milled wheels/tyres and sheetmetal panels started
md72 (Mark) - INDY - Target Reynard (Jimmy Vasser) - 1/25 Revell kit - Parts Prep, sub assemblies started
Szmann (Gabriel) - FORMULA 1 - Tyrrell P34 (Monaco 1977 #4) - 1/20 Tamiya kit kit - Engine complete, chassis plate and outer shell paint/decals
Hwa-Rang (Jesper) - NASCAR - (TBA)
PasiAhopelto (Pasi) - NASCAR - enlisted - Olds 442 (Donnie Allison) - 1/25 Salvinos JR kit
forest1000 (David) - FORMULA 1 - enlisted - Williams Renault (Jaques Villeneuve) - 1/24 Revell/Monogram kit
Cosimodo (Michael) - ENDURANCE - 1971 Porsche 917/20 - 1/12 MFH kit - Steps 1-8 of 26 completed, engine in tube frame, rear stowage assembly
bluebell914 (Patrick) - ENDURANCE - enlisted - Ferrari P4 or 512S
2002hummer (Darrell) - GRAND PRIX - Lotus Super Seven (Tamiya) - Engine assembled and painted
TacFireGuru (Mike) - NASCAR - enlisted - Chev Monte Carlo (Home Depot)
Lakota (Don) - ENDURANCE - Corvette C7.R - 1/25 Revell kit - Engine assembled, floor pan/chassis under way
RedwingNev (Neil) - GRAND PRIX - enlisted - Lotus 79 (1978 Mario Andretti?) - 1/20 Tamiya kit
heavyjagdpanzer (Bill) - STRAIGHTLINE - Blue Max Funny Car - 1/25 Revell kit - Rolling chassis completed, body painted
bmwh548 (Radu) - RALLY - '99 WRC Subaru Impreza - 1/24 Tamiya kit - Wheels and tyres
bomber14 (Joe) - STOCK CAR - '60 Ford Starliner - AMT/ERTL kit - Rolling chassis/interior done, body paint under way
rv1963 (Robert) - TRANS-AM - '73 Mustang - 1/25 MPC kit- Parts prep, front end modifications
pnance26 (Patrick) - ENDURANCE - Porsche 956 Le Mans 1984 - 1/24 Tamiya kit - Engine assembled and painted
If anybody has changed or firmed up their proposed builds, or spotted anything wrong in the list, please let me know.
Cheers, D
Joel_W
Joined: December 04, 2010
KitMaker: 11,666 posts
Auto Modeler: 2,974 posts
Posted: Saturday, June 20, 2020 - 01:08 AM UTC
David, Robert, & Joe,
Thanks guys for your thumbs up, it's greatly appreciated.
Like I said, this is the toughest decaling effort to date, but the decals just made it a great experience that I truly enjoyed as decaling is one of my favorite parts of the build.
joel
Thanks guys for your thumbs up, it's greatly appreciated.
Like I said, this is the toughest decaling effort to date, but the decals just made it a great experience that I truly enjoyed as decaling is one of my favorite parts of the build.
joel
Joel_W
Joined: December 04, 2010
KitMaker: 11,666 posts
Auto Modeler: 2,974 posts
Posted: Saturday, June 20, 2020 - 01:15 AM UTC
Joe,
I've found that the Solvaset as the final step for almost all the decals really makes a difference as there's just never any silvering or flash, and the decals fully settle into every nook & cranny.
Since it's step #3, I'm able to use a lighter coat rather then what I use for really difficult decals, and then having to work them till they finally settle into their new home.
Joel
Dixon66
Joined: December 12, 2002
KitMaker: 1,500 posts
Auto Modeler: 645 posts
Posted: Saturday, June 20, 2020 - 02:32 AM UTC
I've only ever used the Microset/Microsol one two punch. I do have Mr. Mark Softer for the ones that really need it, but rarely use it.
Anyway, I'm calling the Mustang done. I did rush it a little at the end, but it didn't come out as bad as I thought it was going to.
Anyway, I'm calling the Mustang done. I did rush it a little at the end, but it didn't come out as bad as I thought it was going to.
Joel_W
Joined: December 04, 2010
KitMaker: 11,666 posts
Auto Modeler: 2,974 posts
Posted: Saturday, June 20, 2020 - 05:08 AM UTC
David,
Your 'Stang looks darn good to me. Congrats on one excellent build.
Joel
Your 'Stang looks darn good to me. Congrats on one excellent build.
Joel
Dixon66
Joined: December 12, 2002
KitMaker: 1,500 posts
Auto Modeler: 645 posts
Posted: Saturday, June 20, 2020 - 06:21 AM UTC
Thanks Joel.
I had some extra time today so the Capri got several coats of Jager Orange, Tangerine would be a better description. I think it was my best paint job to date.
I had some extra time today so the Capri got several coats of Jager Orange, Tangerine would be a better description. I think it was my best paint job to date.

heavyjagdpanzer
Joined: February 17, 2013
KitMaker: 173 posts
Auto Modeler: 46 posts

Posted: Saturday, June 20, 2020 - 12:43 PM UTC
Solvaset is the best!
Cosimodo
#335
Joined: September 03, 2013
KitMaker: 1,808 posts
Auto Modeler: 701 posts
Posted: Saturday, June 20, 2020 - 04:51 PM UTC
Top Mustang David!
Love the colour and it has a real aggressive stance. Looks like the great track car it is.
cheers
Michael
Love the colour and it has a real aggressive stance. Looks like the great track car it is.
cheers
Michael
Cosimodo
#335
Joined: September 03, 2013
KitMaker: 1,808 posts
Auto Modeler: 701 posts
Posted: Saturday, June 20, 2020 - 04:56 PM UTC
Steps 6, 7 and 8 complete and another page of instructions.
This wasn't without an immense amount of frustration on my part for making an error in the chassis assembly and taking a long time to recognise that which causes elsewhere. But it's been rectified but not the paintwork in some parts.
Here we are with stage 3 of the chassis, the suspension, axles and storage.


cheers
Michael
This wasn't without an immense amount of frustration on my part for making an error in the chassis assembly and taking a long time to recognise that which causes elsewhere. But it's been rectified but not the paintwork in some parts.
Here we are with stage 3 of the chassis, the suspension, axles and storage.
cheers
Michael
Joel_W
Joined: December 04, 2010
KitMaker: 11,666 posts
Auto Modeler: 2,974 posts
Posted: Sunday, June 21, 2020 - 12:50 AM UTC
Michael,
Looking real good Sir. I'm more then impressed. Are those two "storage tanks" for gas? If so, the weight distribution must have been a major issue as they went through a load of fuel.
Joel
Looking real good Sir. I'm more then impressed. Are those two "storage tanks" for gas? If so, the weight distribution must have been a major issue as they went through a load of fuel.
Joel
AussieReg
#007
Joined: June 09, 2009
KitMaker: 8,156 posts
Auto Modeler: 2,953 posts
Posted: Sunday, June 21, 2020 - 12:51 AM UTC
Great Pony David, congrats on getting it done! I'm really glad that you pushed through and that you're happy with the result! I'm looking forward to the progress shots of the Tangerine Capri as well.
Michael, well done on the sleuth work to find out where things went wrong, and even better work getting it rectified so cleanly.
I've updated the last update post, if that makes sense
Cheers, D
Michael, well done on the sleuth work to find out where things went wrong, and even better work getting it rectified so cleanly.
I've updated the last update post, if that makes sense
Cheers, D
AussieReg
#007
Joined: June 09, 2009
KitMaker: 8,156 posts
Auto Modeler: 2,953 posts
Posted: Sunday, June 21, 2020 - 02:04 AM UTC
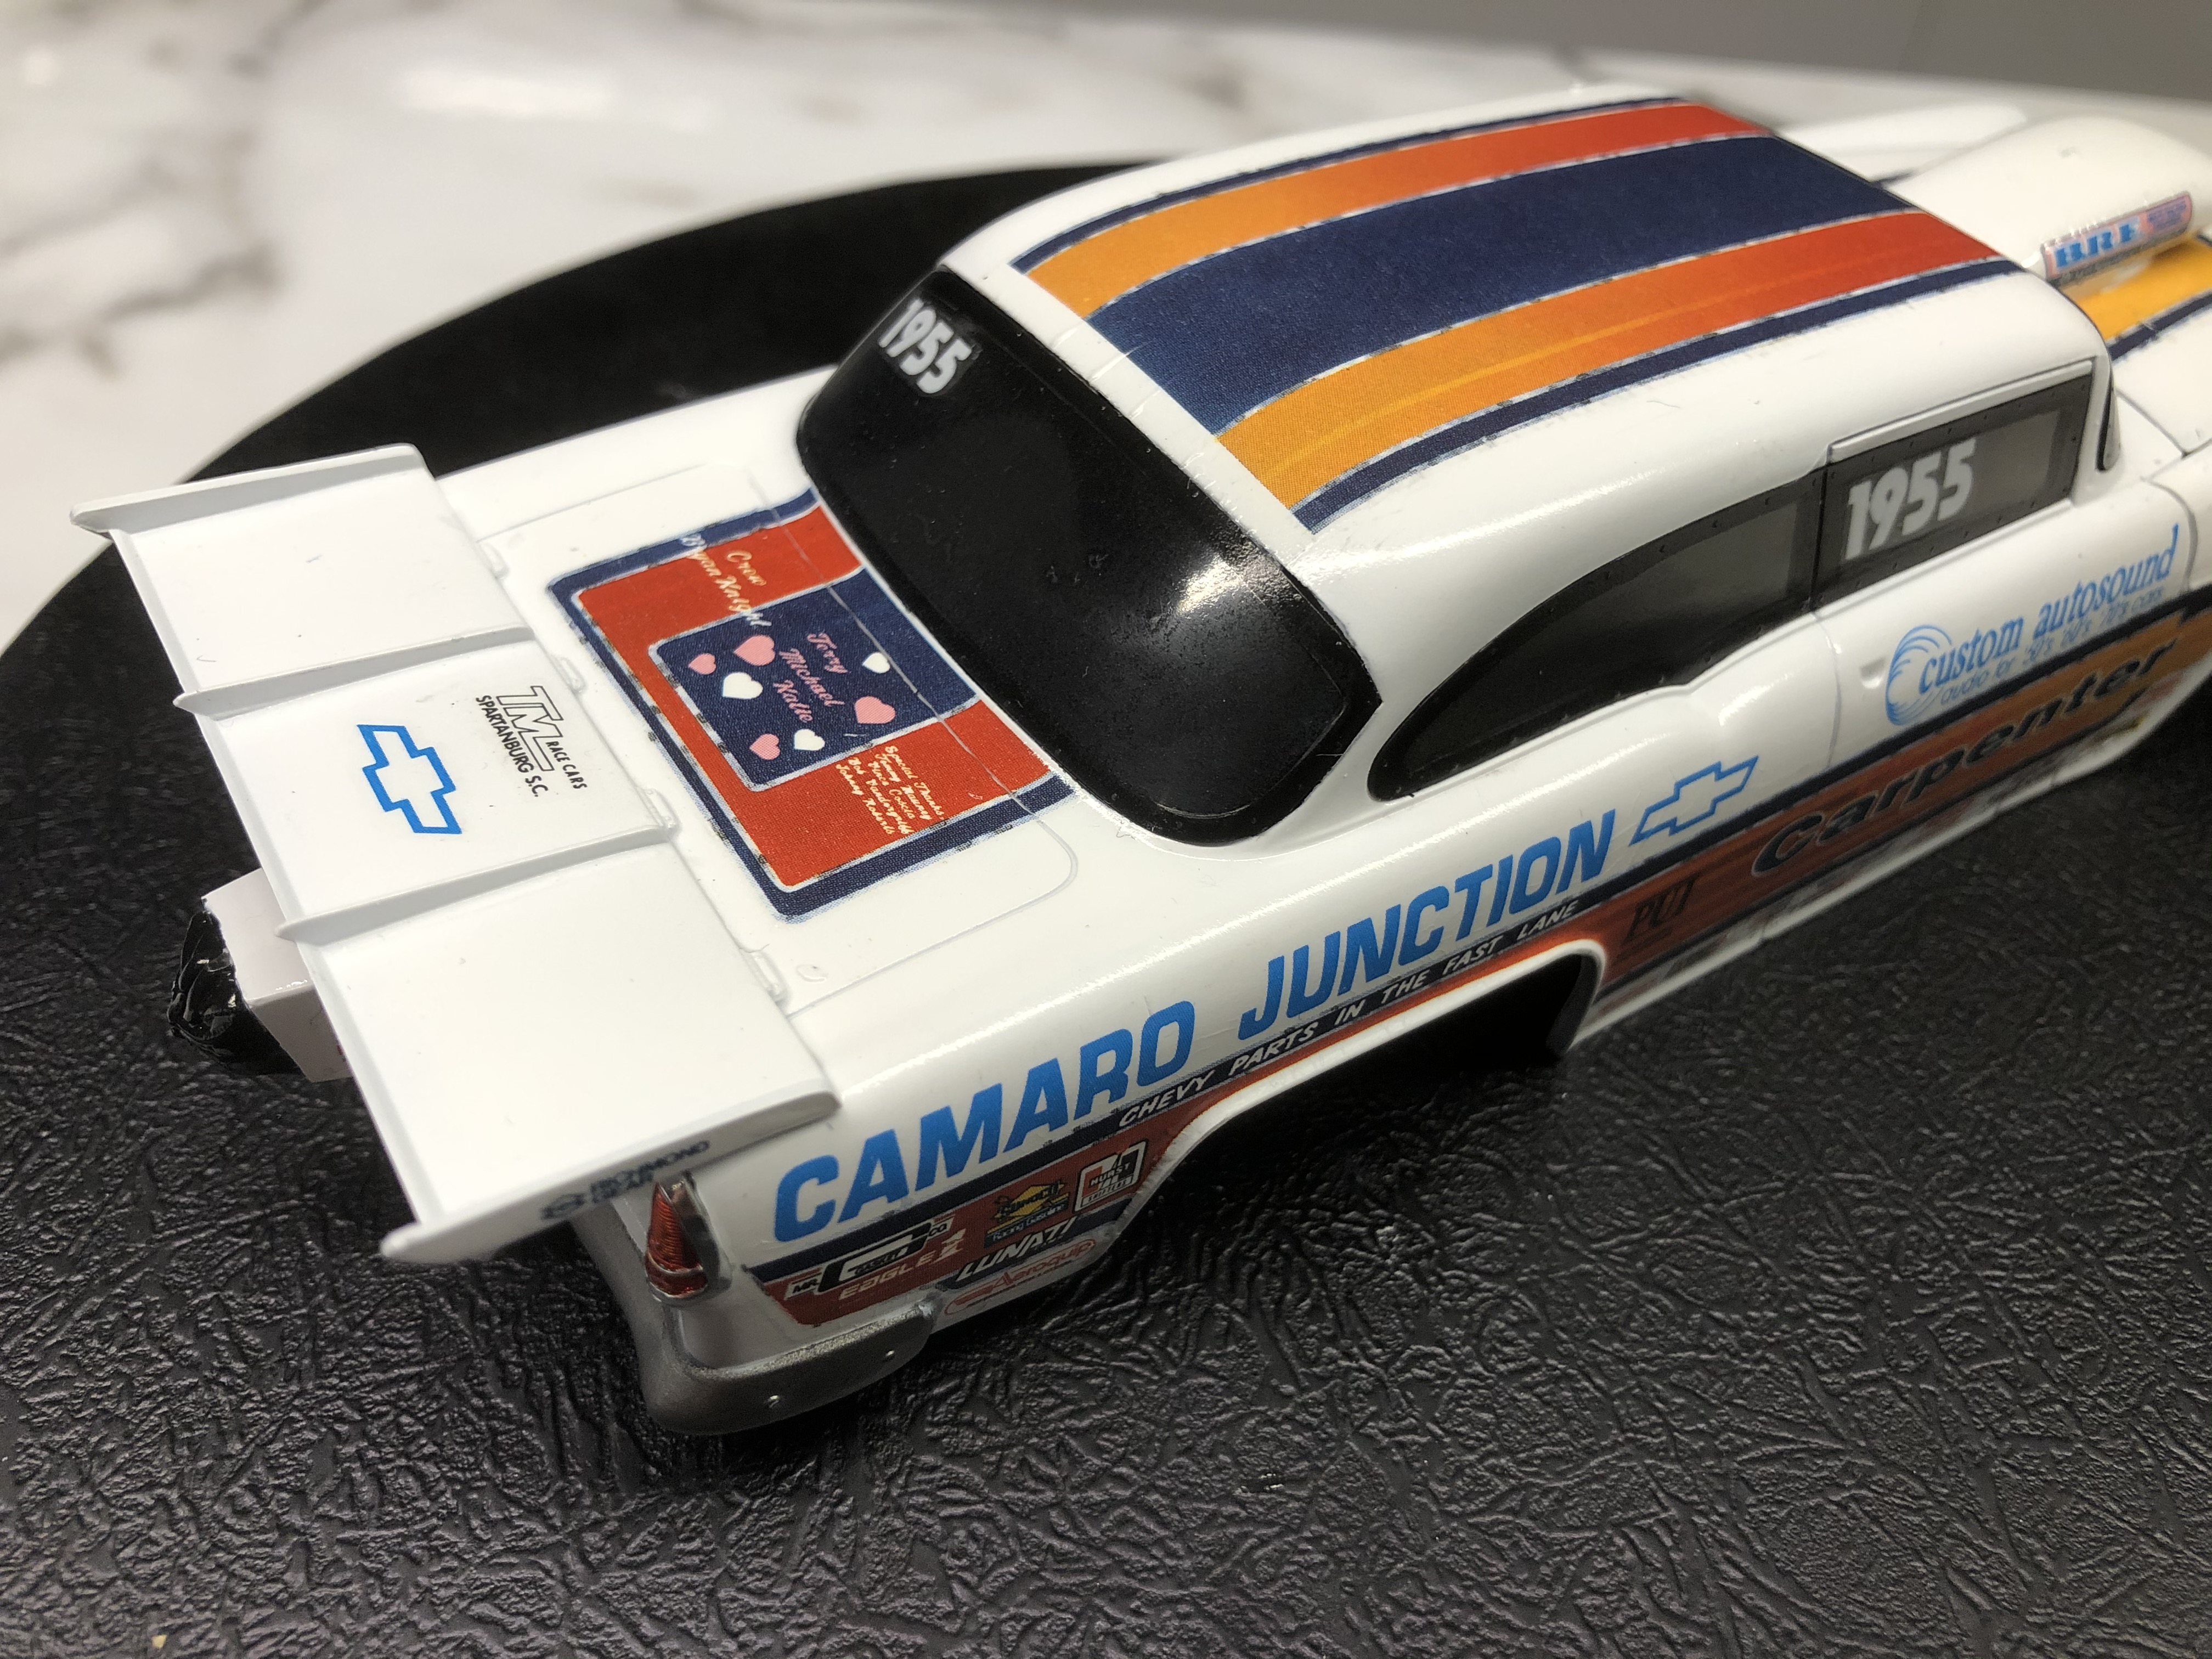
Time for a little update on my '55 Pro Sportsman. I've been struggling with the tube frames around the engine bay. They fit very tightly around the headers, and if I have glued the headers on slightly out of position the tube frames press against them and won't sit neatly in position. I am playing around with them and doing some "In Field Styling Modifications" and they are almost there.
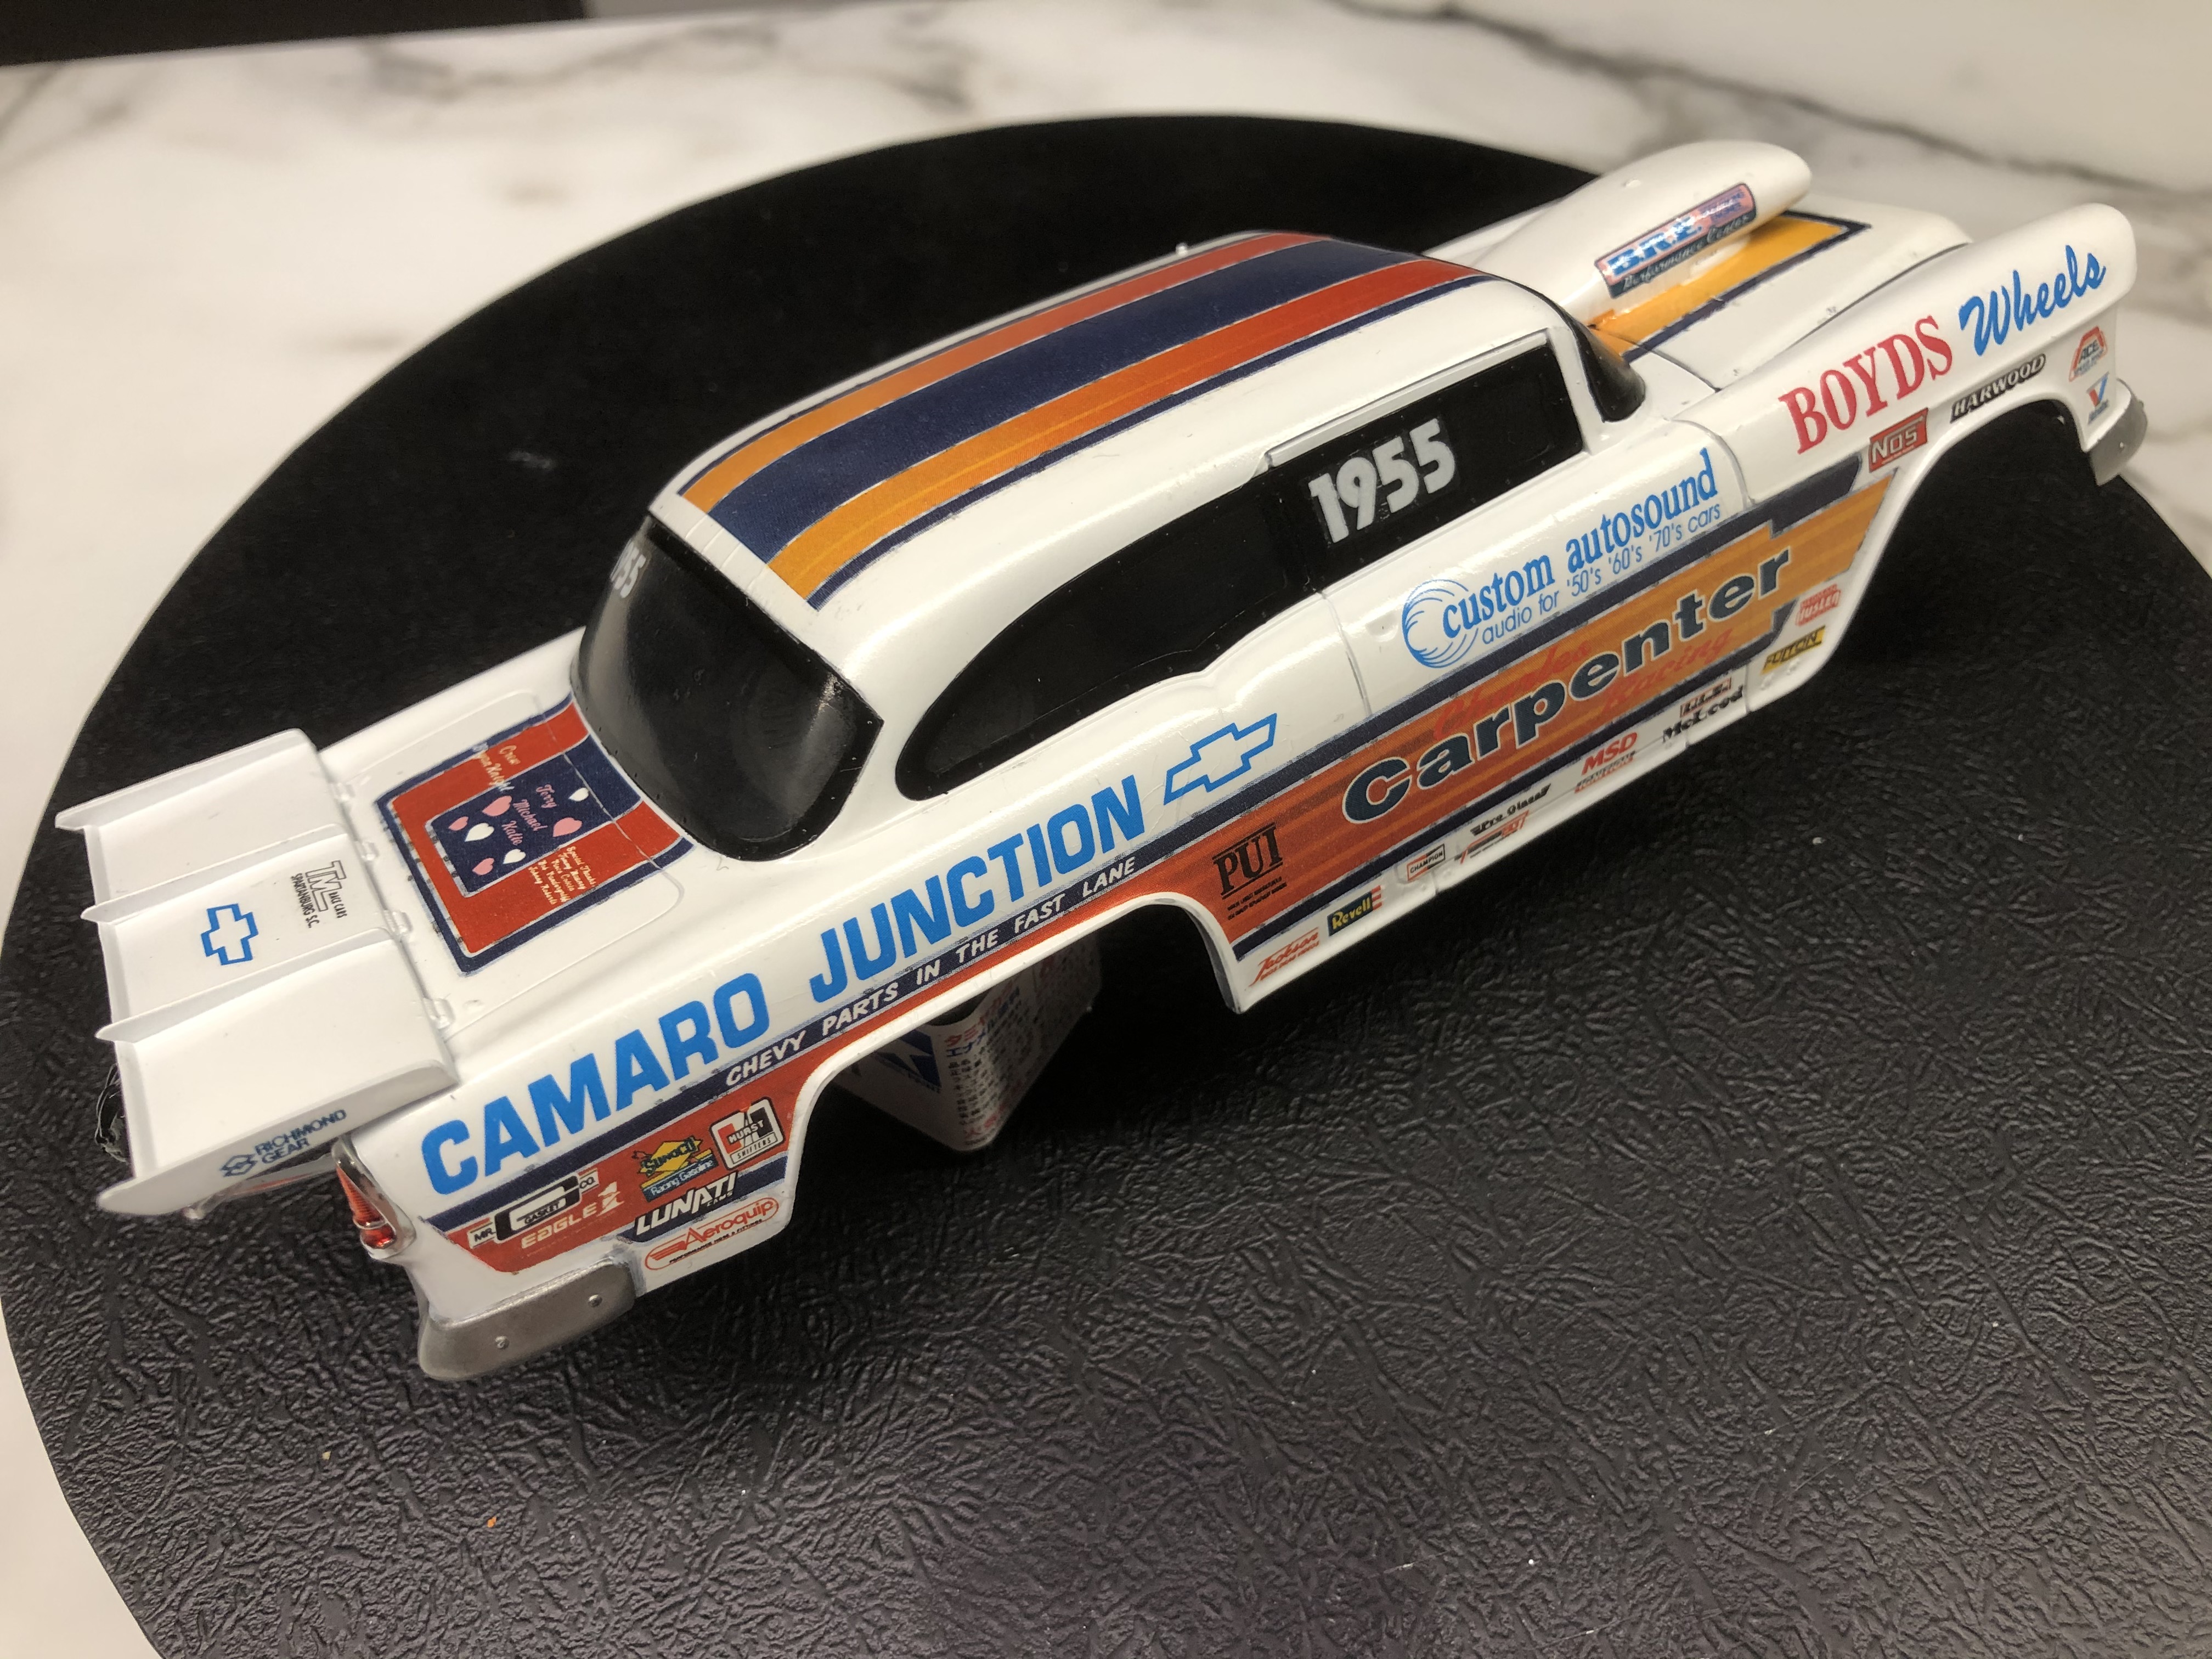
In the meantime, I have given the shell a couple more coats of Alclad Aqua Gloss and some fine wet sanding, and I'm pretty please with where it's at now. All I might do is a touch more sanding on the clear parts, and then I need to add the drag chute cables.

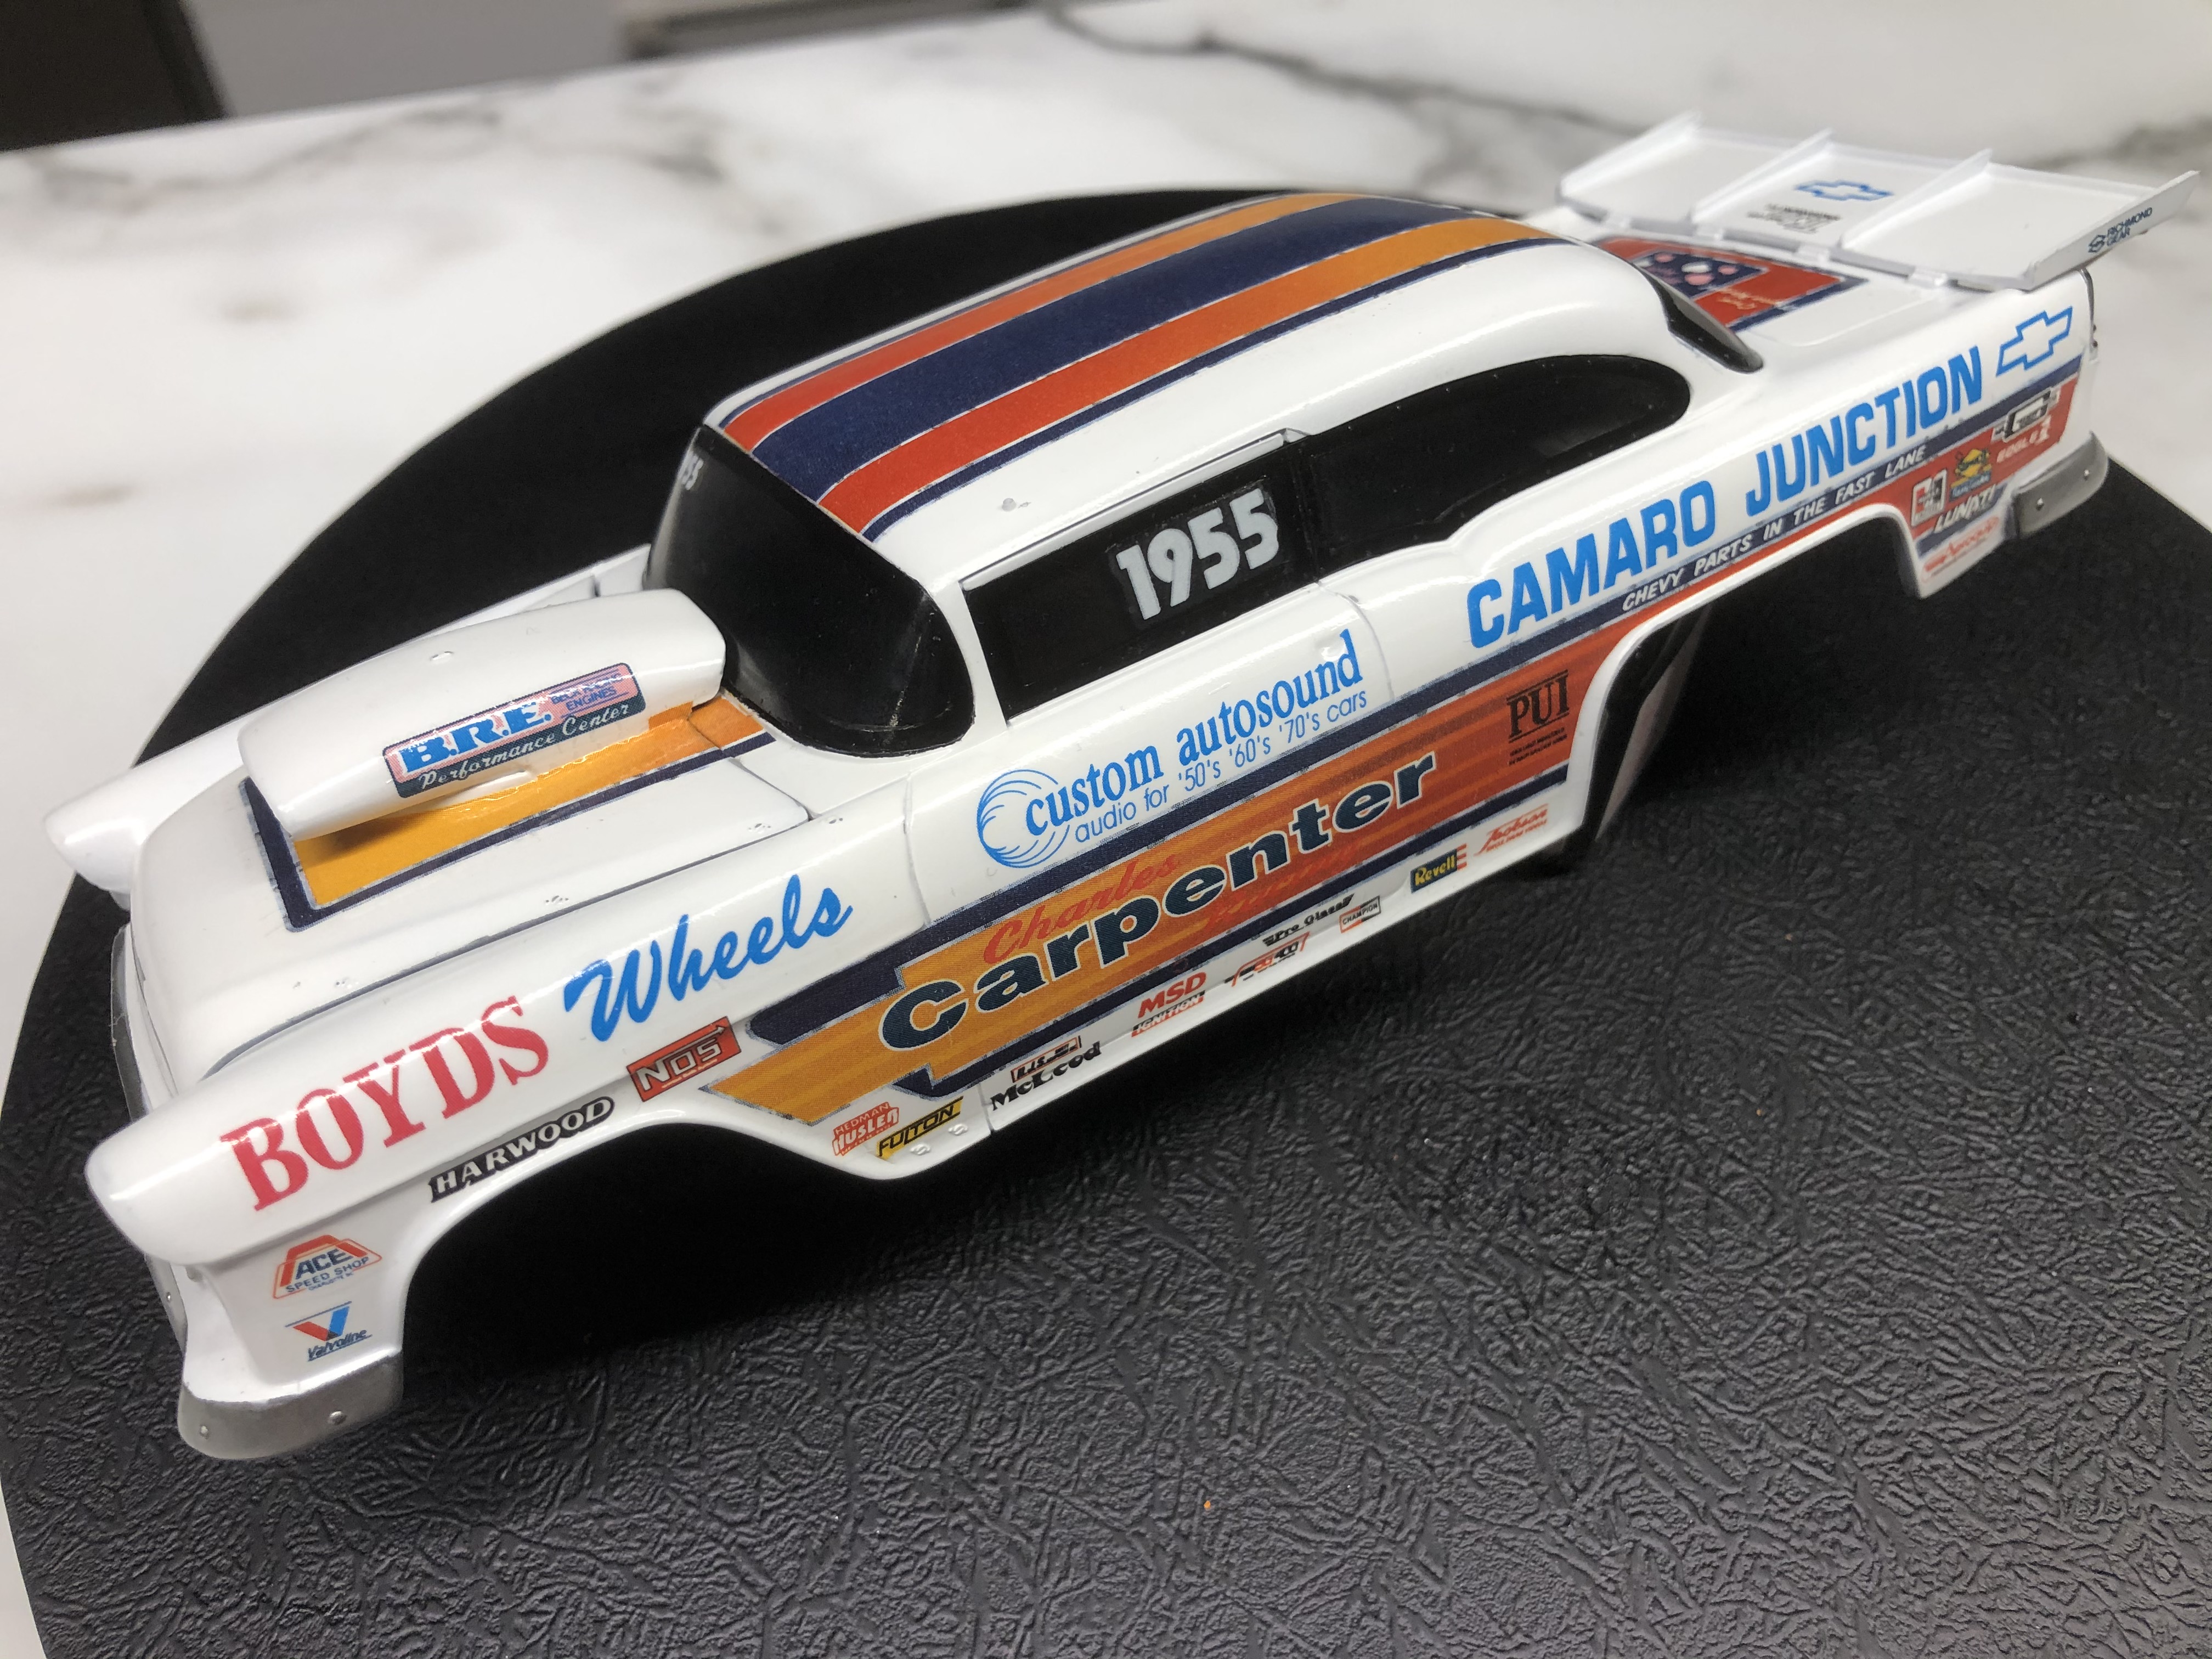
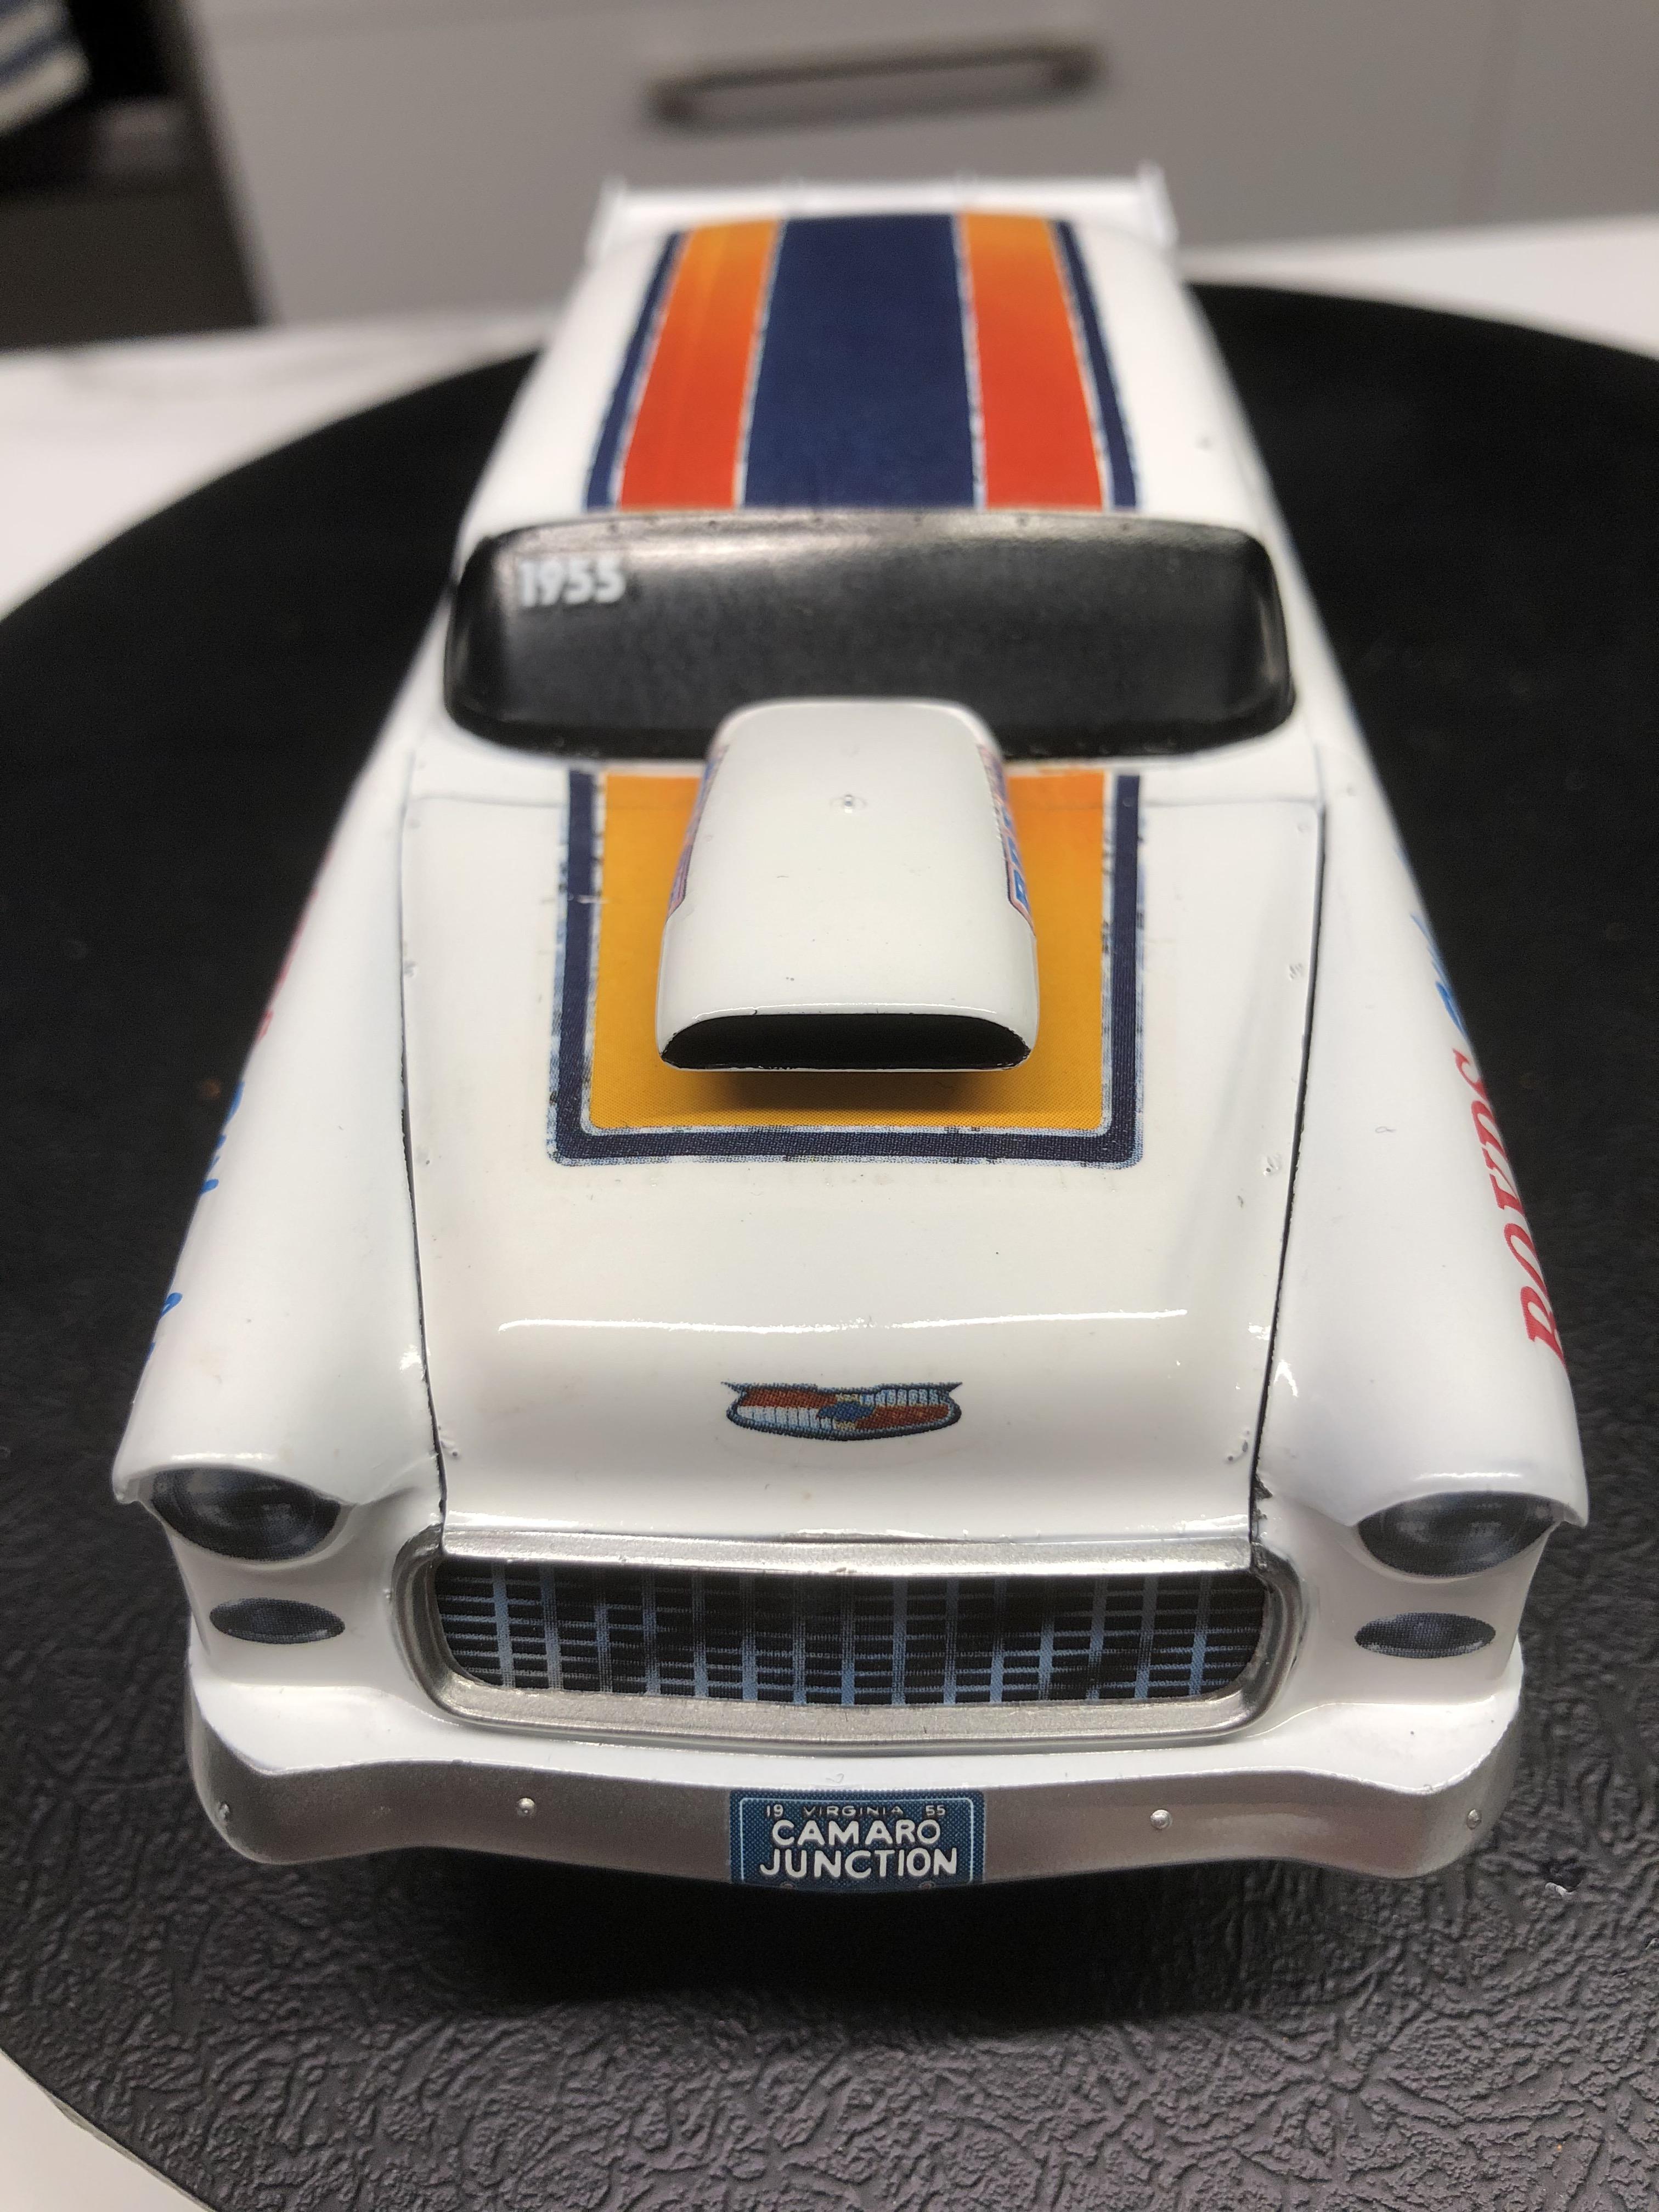
Cheers, D
In the meantime, I have given the shell a couple more coats of Alclad Aqua Gloss and some fine wet sanding, and I'm pretty please with where it's at now. All I might do is a touch more sanding on the clear parts, and then I need to add the drag chute cables.
Cheers, D
Joel_W
Joined: December 04, 2010
KitMaker: 11,666 posts
Auto Modeler: 2,974 posts
Posted: Sunday, June 21, 2020 - 02:37 AM UTC
D,
The finish is really looking quite good. Looking forward to seeing a pic or two of the engine bay on how the tubing turns out.
Joel
The finish is really looking quite good. Looking forward to seeing a pic or two of the engine bay on how the tubing turns out.
Joel
Dixon66
Joined: December 12, 2002
KitMaker: 1,500 posts
Auto Modeler: 645 posts
Posted: Sunday, June 21, 2020 - 07:12 AM UTC
Thanks D. Yours it looking quite good too and glad you are happy with the way it is coming out.
Looking forward to seeing the tube chassis.
Looking forward to seeing the tube chassis.
 |

WEB HOSTING BY


Copyright ©2021 Auto Modeler and Kitmaker Network, a subsidiary of Silver Star Enterprises
All Rights Reserved. Please read our Conditions of Use and Privacy Policy.
All Rights Reserved. Please read our Conditions of Use and Privacy Policy.