Strip, Track & Trail Official Build Thread
California, United States
Joined: January 22, 2016
KitMaker: 766 posts
Auto Modeler: 140 posts
Posted: Wednesday, May 20, 2020 - 11:06 AM UTC
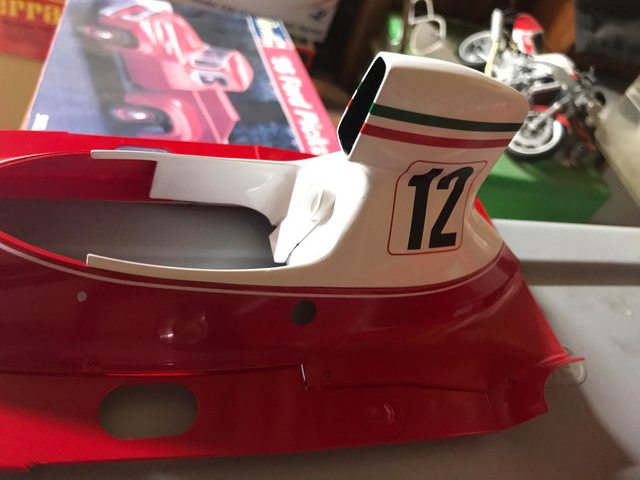
I'm not chroming... I am trying to avoid a "chrome look". The wings on a Ferrari are an alloy and gets polished. The kit parts look too "chromy" and I was looking for something more realistic... thus the Molotow look from Chris that I may not have shown you all.
I can post the photo again of the three choices versus the kit part.
first photo is top- kit chrome, middle-Bare Metal Foil, bottom- Gloss Aluminum
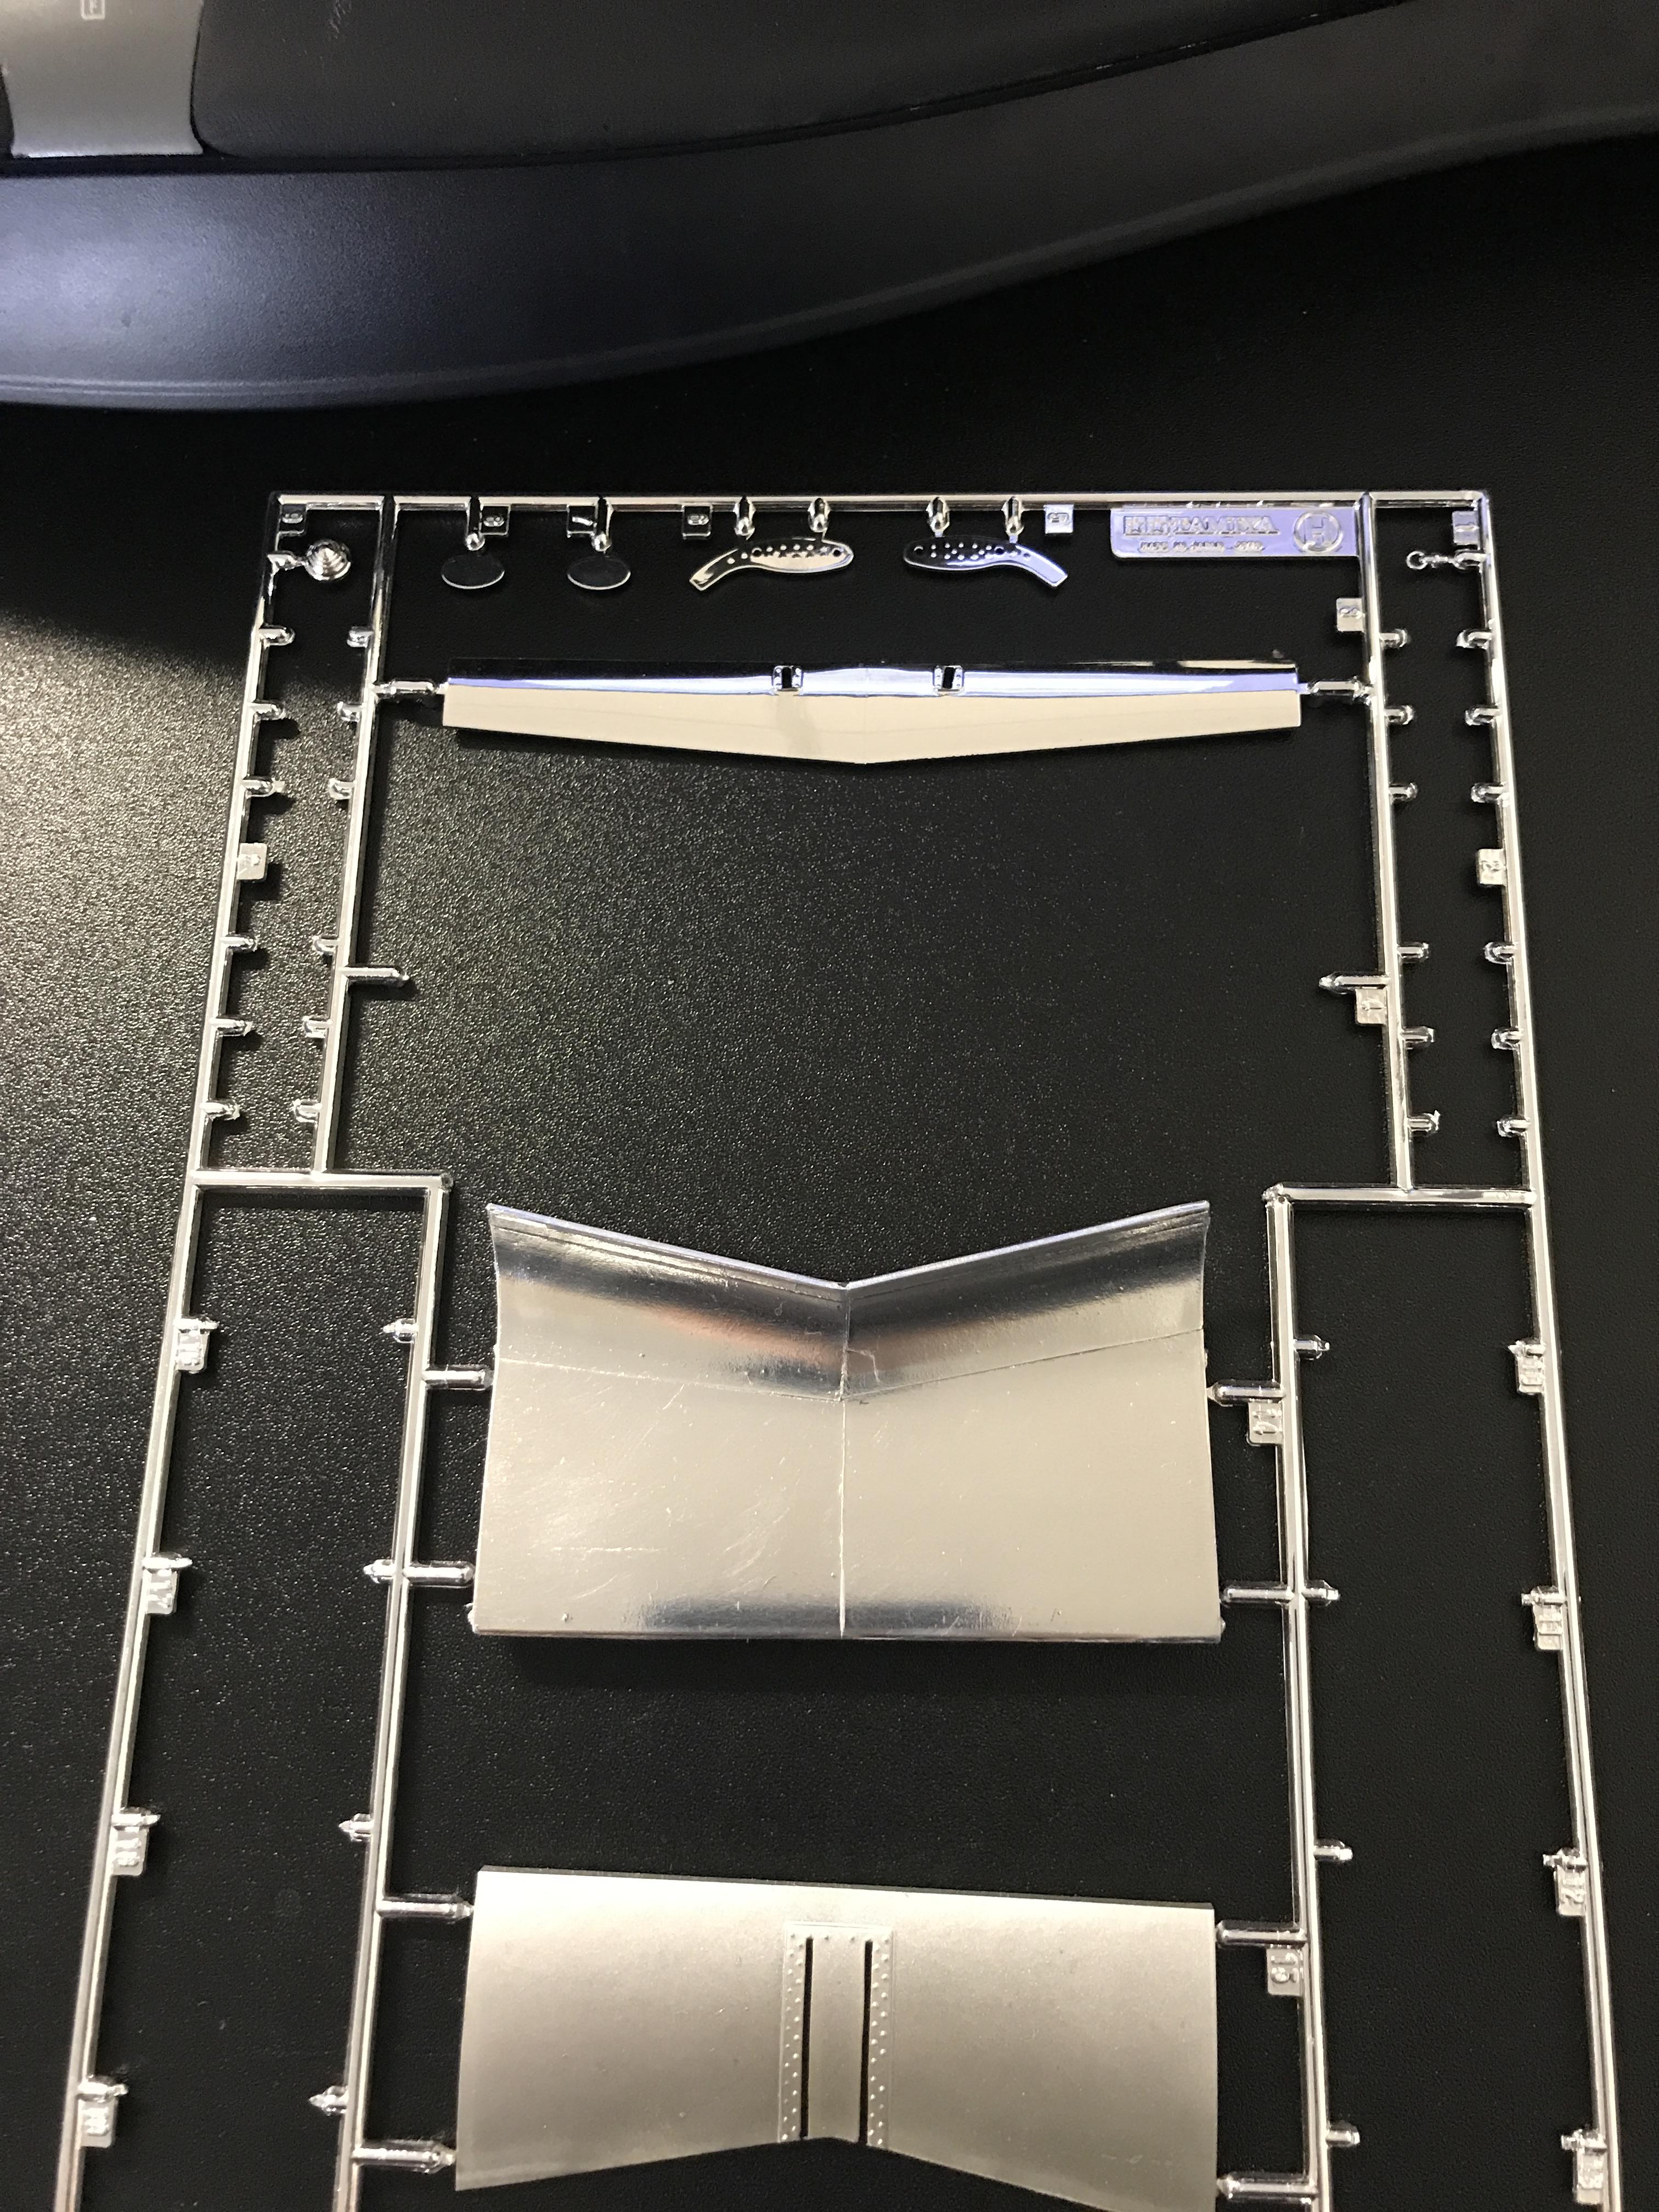
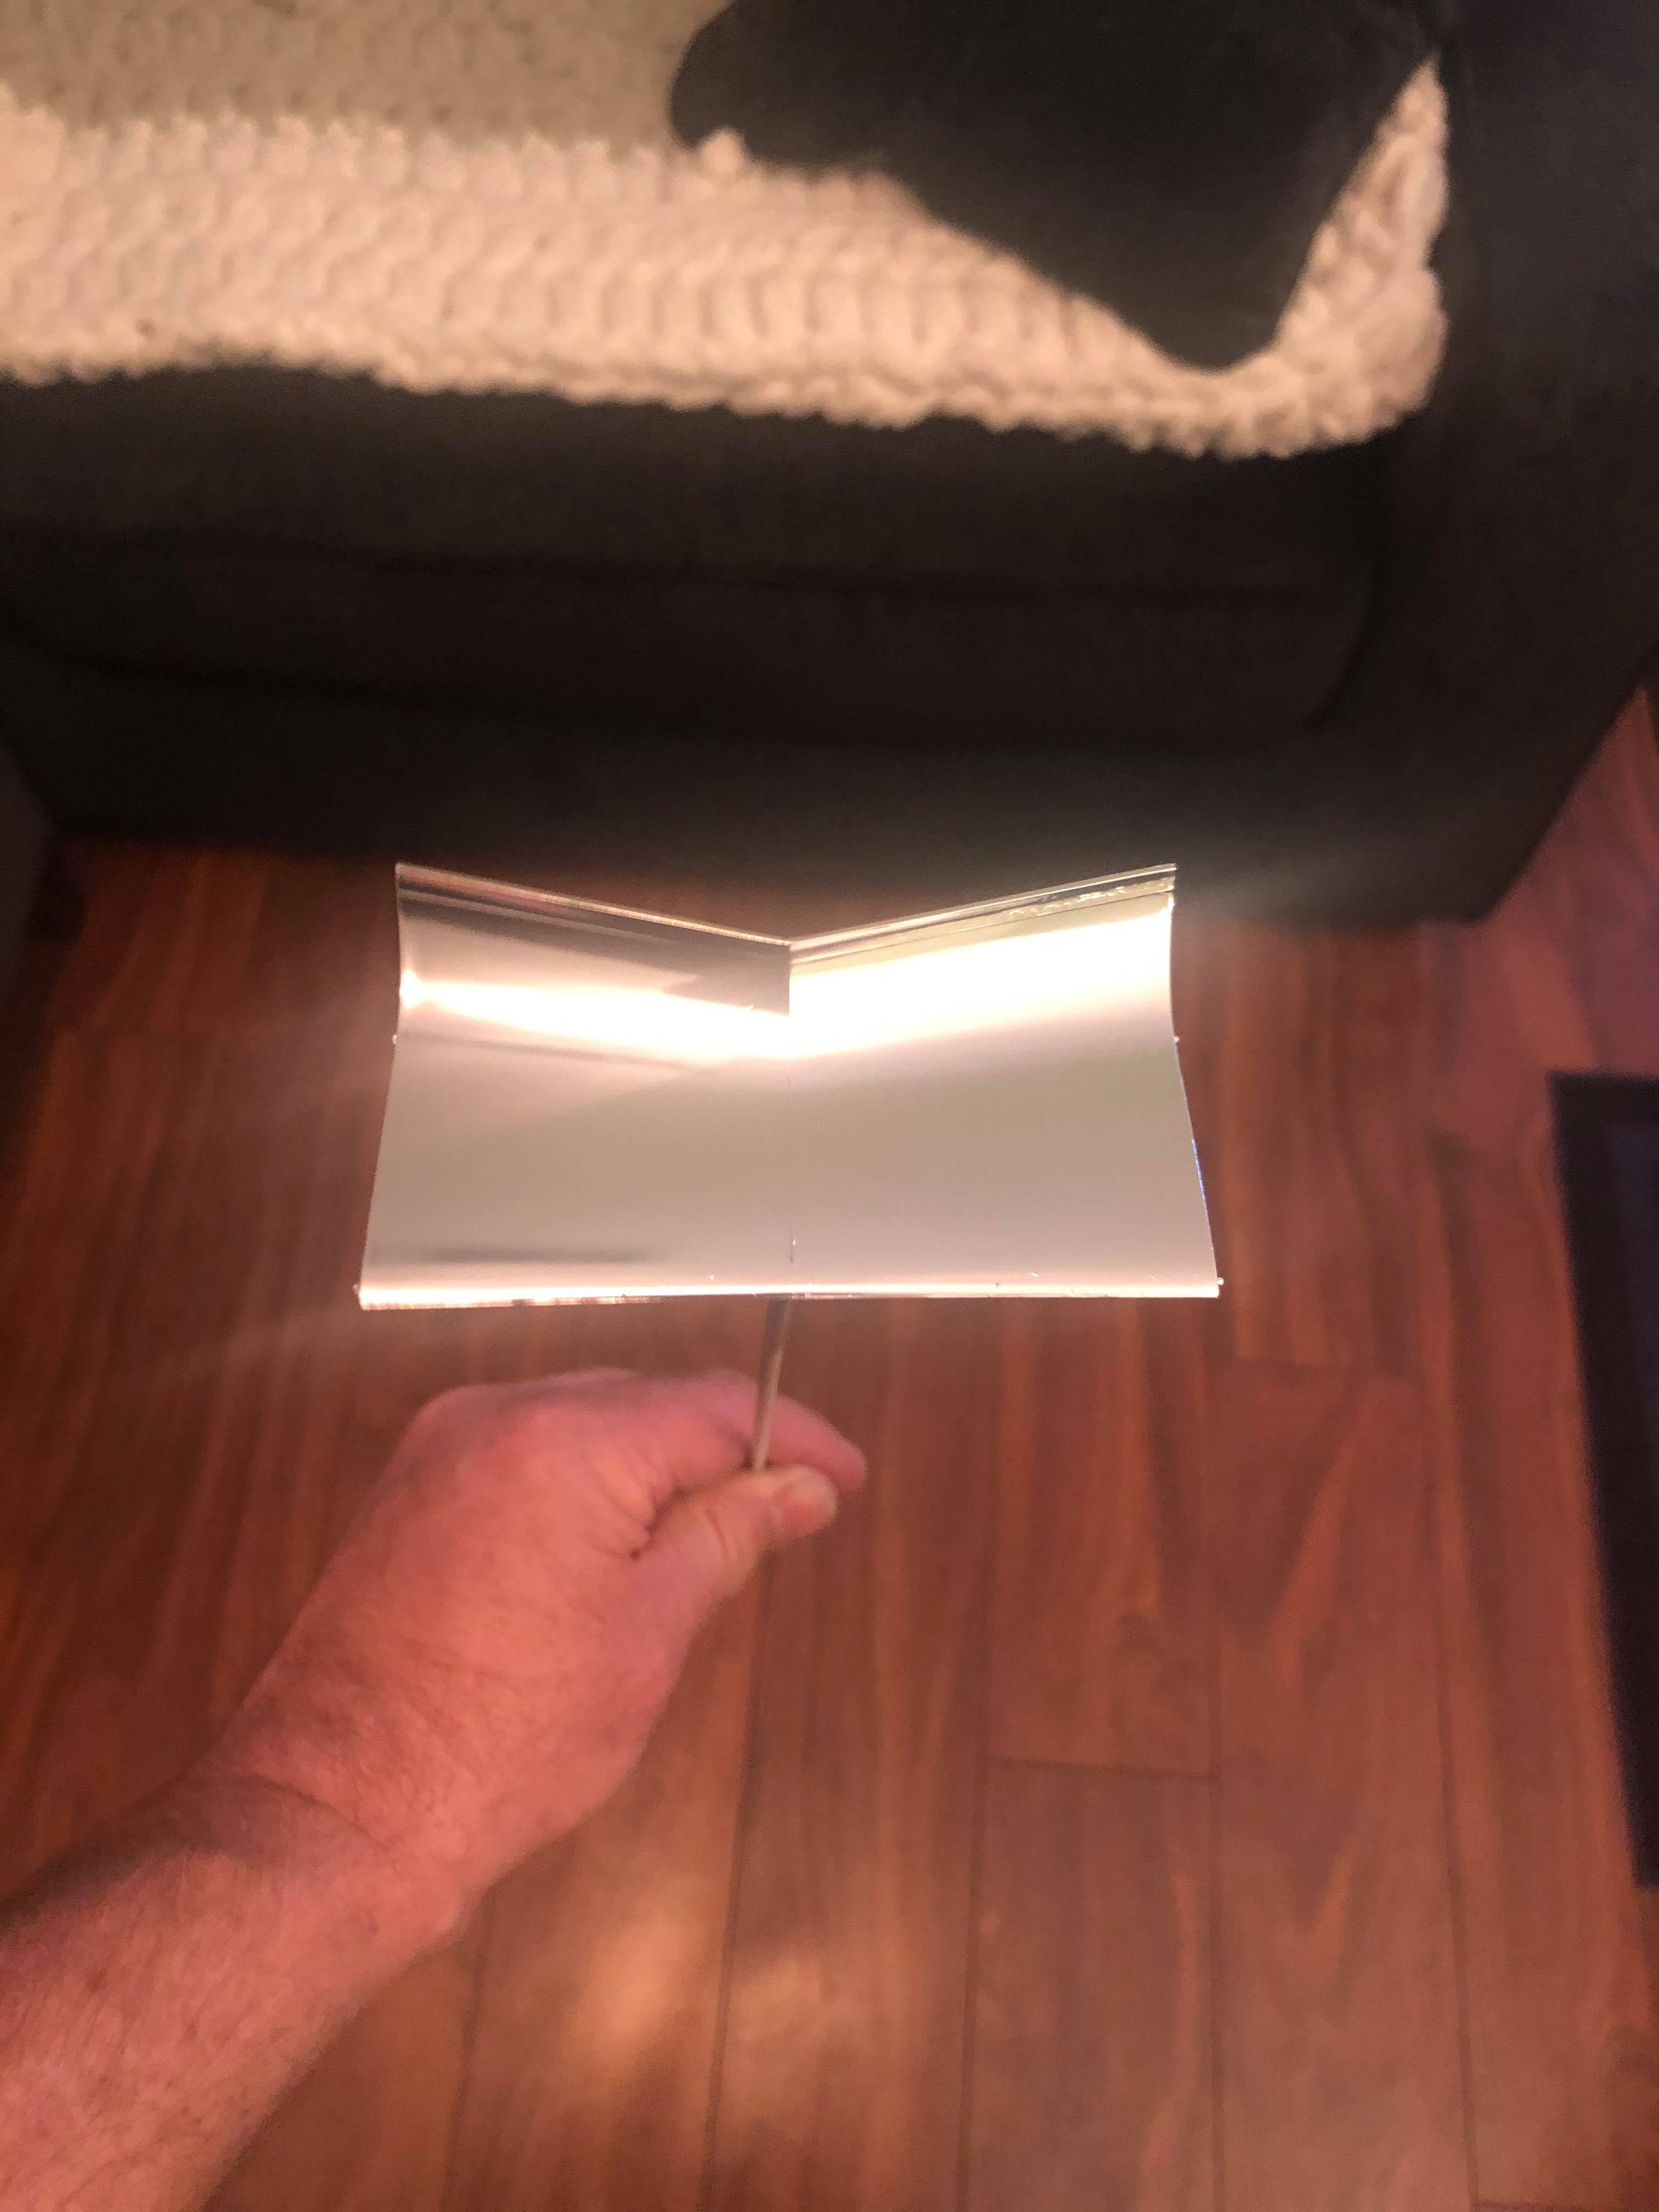
Second photo- Molotow through spray brush...
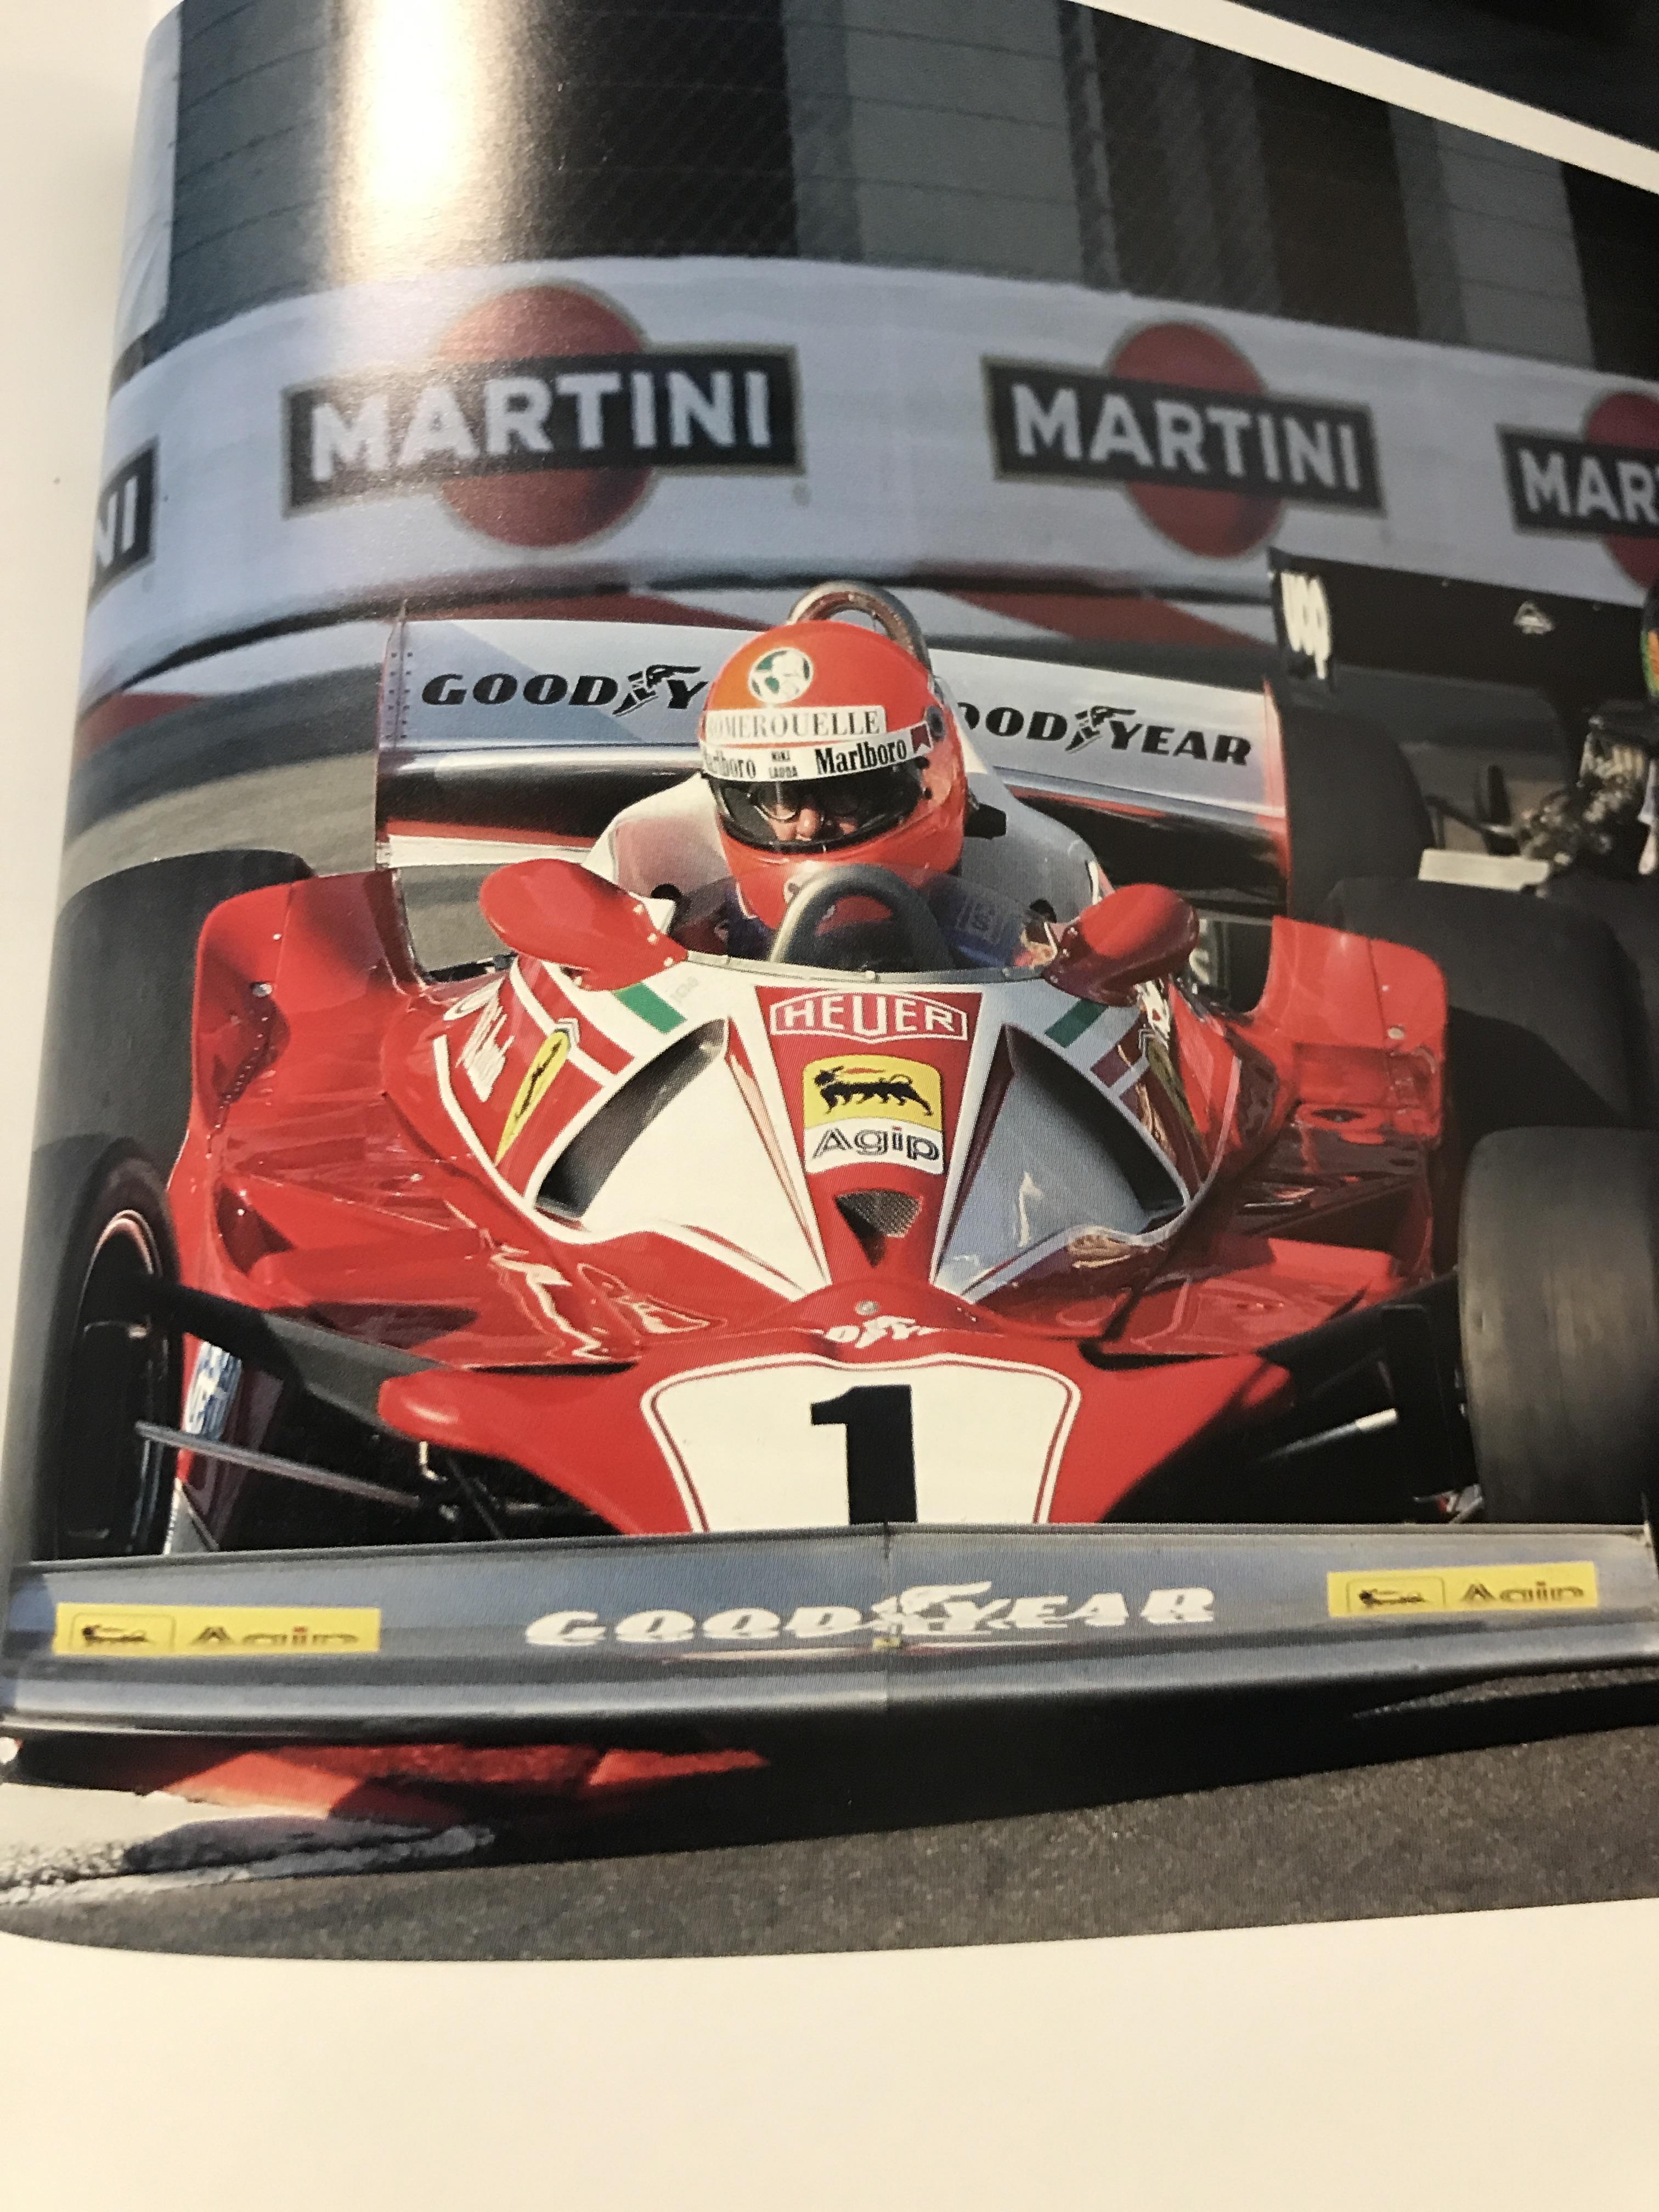
Last photo... actual car...
Hope this muddies things up or maybe gets me back on track.
I swear, my life suddenly took a left turn today.
Just completed-
1/24th Tamiya Porsche 956 Skoal Bandit
In the works:
1/12th Protar Ferrari 312T2 (shelved for time being)
ERTL D-8 Caterpillar Bulldozer
AussieReg
 Associate Editor
#007
Victoria, Australia
Joined: June 09, 2009
KitMaker: 8,156 posts
Auto Modeler: 2,953 posts
Posted: Wednesday, May 20, 2020 - 11:12 AM UTC
Quoted Text
I'm not chroming... I am trying to avoid a "chrome look". The wings on a Ferrari are an alloy and gets polished. The kit parts look too "chromy" and I was looking for something more realistic... thus the Molotow look from Chris that I may not have shown you all.
How about trying a satin or flat clear over the kit chrome to tone it down?
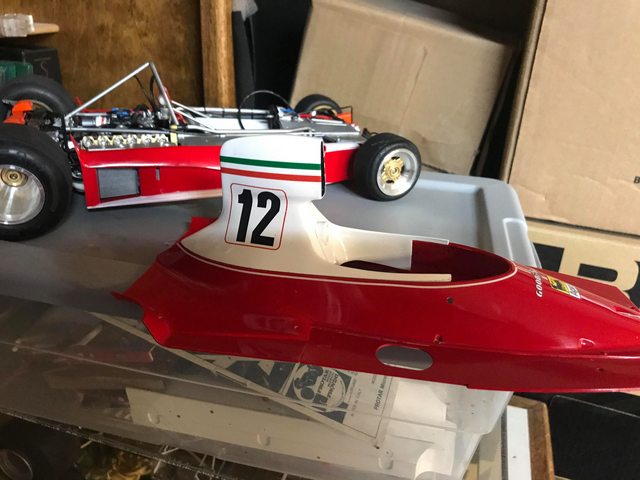
The red finish on the body looks beautifully smooth, you won't have any problems getting the decals to settle down there at all!
Cheers, D
ON the bench
Revell 1/24 '53 Corvette (building as '54)
Revell 1/24 BMW 507 Coupe and Cabrio
Italeri 1/48 Me262 B-1a/U1 Nightfighter
Monogram 1/24 '57 Chevy Nomad
Dragon 1/350 USS Frank Knox DD-742
California, United States
Joined: January 22, 2016
KitMaker: 766 posts
Auto Modeler: 140 posts
Posted: Wednesday, May 20, 2020 - 11:31 AM UTC
Quoted Text
Quoted Text
I'm not chroming... I am trying to avoid a "chrome look". The wings on a Ferrari are an alloy and gets polished. The kit parts look too "chromy" and I was looking for something more realistic... thus the Molotow look from Chris that I may not have shown you all.
How about trying a satin or flat clear over the kit chrome to tone it down?
The red finish on the body looks beautifully smooth, you won't have any problems getting the decals to settle down there at all!
Cheers, D
Thank you.
Just completed-
1/24th Tamiya Porsche 956 Skoal Bandit
In the works:
1/12th Protar Ferrari 312T2 (shelved for time being)
ERTL D-8 Caterpillar Bulldozer
Netherlands Antilles
Joined: September 02, 2014
KitMaker: 1,977 posts
Auto Modeler: 1,371 posts
Posted: Wednesday, May 20, 2020 - 11:32 AM UTC
Quoted Text
Quoted Text
I'm not chroming... I am trying to avoid a "chrome look". The wings on a Ferrari are an alloy and gets polished. The kit parts look too "chromy" and I was looking for something more realistic... thus the Molotow look from Chris that I may not have shown you all.
How about trying a satin or flat clear over the kit chrome to tone it down?
The red finish on the body looks beautifully smooth, you won't have any problems getting the decals to settle down there at all!
Cheers, D
OK, I must have missed something, sorry!
Either the way described by
Damian, or the plain old enamel:


Gabriel

Gabriel
Many of my builds can be seen on YT in video format. Please check 'Panzergrau Models' Channel.
California, United States
Joined: January 22, 2016
KitMaker: 766 posts
Auto Modeler: 140 posts
Posted: Wednesday, May 20, 2020 - 11:35 AM UTC
All things to consider...
Just completed-
1/24th Tamiya Porsche 956 Skoal Bandit
In the works:
1/12th Protar Ferrari 312T2 (shelved for time being)
ERTL D-8 Caterpillar Bulldozer
#335
Auckland, New Zealand
Joined: September 03, 2013
KitMaker: 1,808 posts
Auto Modeler: 701 posts
Posted: Wednesday, May 20, 2020 - 07:41 PM UTC
Twenty three pages on this campaign already. That is just amazing.
Anyway, I get to make my first summary build post. I am running a separate build blog for this build of Porsche 917/20, famously known as the Pink Pig.
I thought I would keep the campaign updated as I completed each step, which means I have completed Step 1, of 26, which is the engine.


cheers
Michael
Campaign:
Strip, Track and Trail - Porsche 917/20 - On the bench
Phantoms at 60 - F-4J Marines
Below 1000 tons - M50 minesweeper - Sailed for duty
AussieReg
Associate Editor #007
Victoria, Australia
Joined: June 09, 2009
KitMaker: 8,156 posts
Auto Modeler: 2,953 posts
Posted: Thursday, May 21, 2020 - 01:29 AM UTC
Simply stunning Michael, nothing more to add!
Cheers, D
ON the bench
Revell 1/24 '53 Corvette (building as '54)
Revell 1/24 BMW 507 Coupe and Cabrio
Italeri 1/48 Me262 B-1a/U1 Nightfighter
Monogram 1/24 '57 Chevy Nomad
Dragon 1/350 USS Frank Knox DD-742
Joel_W
Associate Editor New York, United States
Joined: December 04, 2010
KitMaker: 11,666 posts
Auto Modeler: 2,974 posts
Posted: Thursday, May 21, 2020 - 01:46 AM UTC
Patrick,
I'm not a fan of kit chroming unless it's trim or a bumper as it just doesn't look all that realistic. On nearly all races cars it's not chrome, it's highly polished stainless Steel or some other high tech alloy.
I've found the Alcad2 Chrome not to be anywhere as shiny as plated Model Chrome. Alcad does make a lot of different shades of Metallics. I think I have 6 plus smoke (never used to date). On the Alcad site they break up their colors into shine levels, and suggest what primer/basecoat will give you the type and intensity of shine you're looking for. One of my favorites is Aircraft Aluminum over Gloss Black ( no primer coat). A really beautiful shine close to Chrome but 1 or 2 steps down in intensity. A few things to note about those shiny Alcads, you can't mask over them, nor should you seal them as then they just look like silver paint.
As for the Molotov inks as they call them. I have a fine marker always manage to mess up the area by using to much. I'm really interested in following your application method, and then just how long they take to dry as I believe the base is enamel, but I'm not sure.
the more options we have, the better it is for all of us, as each seems to have it's plus and minuses.
And as Gabriel said LC stands for Lacquer Thinner, AB stands for Air Brush, as it's just easier for me to use letters then spell out the full word or words. So just call me lazy, which I certain am.
Joel
On my Workbench:
Monogram 1/24 scale 427 Shelby Cobra
Just Completed:
Beemax 1/24 scale BMW M3 E30 1992 Evolution II
Joel_W
Associate Editor New York, United States
Joined: December 04, 2010
KitMaker: 11,666 posts
Auto Modeler: 2,974 posts
Posted: Thursday, May 21, 2020 - 01:55 AM UTC
Michael,
I've been following along in your build blog as well as here. I usually do a cross blog, but some how I forgot to start one for the Lotus 99t, something I do regret as I've found that non GB members don't usually stop by, and it's really hard to follow any one build as we group everything together into one big thread.
Your engine as I've posted numerous times is simply amazing. The detail is beyond anything I've seen in model form to date, and I've been around for nearly a million years. But that's only half of the equation. All that detail means nothing if one doesn't have the skills to build it as it was designed to be built. And my friend, your skill level is way beyond that. As I've said before, just add gas, oil, an hook up the battery. I'm sure that it would fire right up.
Joel
On my Workbench:
Monogram 1/24 scale 427 Shelby Cobra
Just Completed:
Beemax 1/24 scale BMW M3 E30 1992 Evolution II
New Jersey, United States
Joined: February 02, 2015
KitMaker: 330 posts
Auto Modeler: 23 posts
Posted: Thursday, May 21, 2020 - 04:17 AM UTC
Michael- outstanding job on the engine. the distributor and wires look great, are they pre wired ans what did you use for the ties?
joe
California, United States
Joined: January 22, 2016
KitMaker: 766 posts
Auto Modeler: 140 posts
Posted: Thursday, May 21, 2020 - 11:01 AM UTC
Just completed-
1/24th Tamiya Porsche 956 Skoal Bandit
In the works:
1/12th Protar Ferrari 312T2 (shelved for time being)
ERTL D-8 Caterpillar Bulldozer
California, United States
Joined: January 22, 2016
KitMaker: 766 posts
Auto Modeler: 140 posts
Posted: Thursday, May 21, 2020 - 11:30 AM UTC
24 spark plugs? What the hell is this? A hemi Porsche?
Great looking engine. Very clean!
Just completed-
1/24th Tamiya Porsche 956 Skoal Bandit
In the works:
1/12th Protar Ferrari 312T2 (shelved for time being)
ERTL D-8 Caterpillar Bulldozer
Joel_W
Associate Editor New York, United States
Joined: December 04, 2010
KitMaker: 11,666 posts
Auto Modeler: 2,974 posts
Posted: Thursday, May 21, 2020 - 11:36 AM UTC
Patrick,
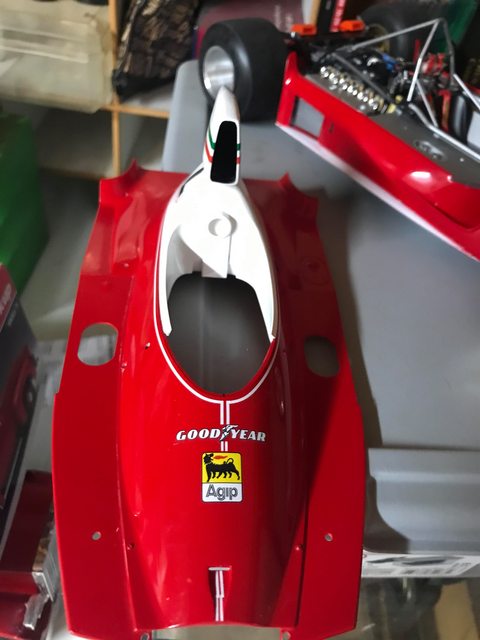
Maybe there isn't a single starting point to aid your decaling, but the finished product looks simply outstanding.
Joel
On my Workbench:
Monogram 1/24 scale 427 Shelby Cobra
Just Completed:
Beemax 1/24 scale BMW M3 E30 1992 Evolution II
California, United States
Joined: January 22, 2016
KitMaker: 766 posts
Auto Modeler: 140 posts
Posted: Thursday, May 21, 2020 - 12:30 PM UTC
Quoted Text
Patrick,
Maybe there isn't a single starting point to aid your decaling, but the finished product looks simply outstanding.
Joel
Thanks, Joel! There is about 8 to 10 hours left in this project. I need to finish the main body decals (there are about twice as many as what you see), finish the right pod, do the left pod, finish building, filling, and painting the rear wing support, then do the wings which are still up in the air (every pun intended). Chris tells me that after two weeks, the Molotow still smudges. So it might become a BMF project. At least we know we can peel that off.
Thanks a bunch!
Just completed-
1/24th Tamiya Porsche 956 Skoal Bandit
In the works:
1/12th Protar Ferrari 312T2 (shelved for time being)
ERTL D-8 Caterpillar Bulldozer
Joel_W
Associate Editor New York, United States
Joined: December 04, 2010
KitMaker: 11,666 posts
Auto Modeler: 2,974 posts
Posted: Friday, May 22, 2020 - 12:46 AM UTC
Patrick,
I love decaling. It's my favorite part of the model building process. I always enjoy the ride. Just take your time and every decal will look just like the ones that you already applied. And one great thing about decaling, is that I can always blame the decal for issues. Can't beat that.
If Chris says that the Molotow still smudges after a full week, then it's gotta be enamel based. That really does concern me as you can have issues for a very long time.
Going with BMF will work just fine, except which foil? I have Chrome, which is like chrome plated parts, and Mat Aluminum which is exactly that. I'm not familiar with their full line as I've only used it twice, and once was a complete failure totally on my part.
This is one of the reasons why I like the Alcad2 line. they've got a color/finish for just about any needs, and on their site they tell you the best base to apply it, and why. I've also started testing Mr. Color's Metalizers and love them, as I thin them myself so I can also hand paint with them as needed.
Joel
On my Workbench:
Monogram 1/24 scale 427 Shelby Cobra
Just Completed:
Beemax 1/24 scale BMW M3 E30 1992 Evolution II
Georgia, United States
Joined: February 17, 2013
KitMaker: 173 posts
Auto Modeler: 46 posts
Posted: Friday, May 22, 2020 - 03:08 AM UTC
Michael Mitchell ,beautiful engine! The wiring and hoses look so realistic.
On the bench, Blue Max, Mustang Funny car.
Airfix Hotspur glinder.
AussieReg
Associate Editor #007
Victoria, Australia
Joined: June 09, 2009
KitMaker: 8,156 posts
Auto Modeler: 2,953 posts
Posted: Friday, May 22, 2020 - 03:12 AM UTC
Friday night down under, time to take a deep breath after a busy week and enjoy a glass of JD and some bench time.
I've started on the decals on the '55, but will save photos until the first session has settled down.
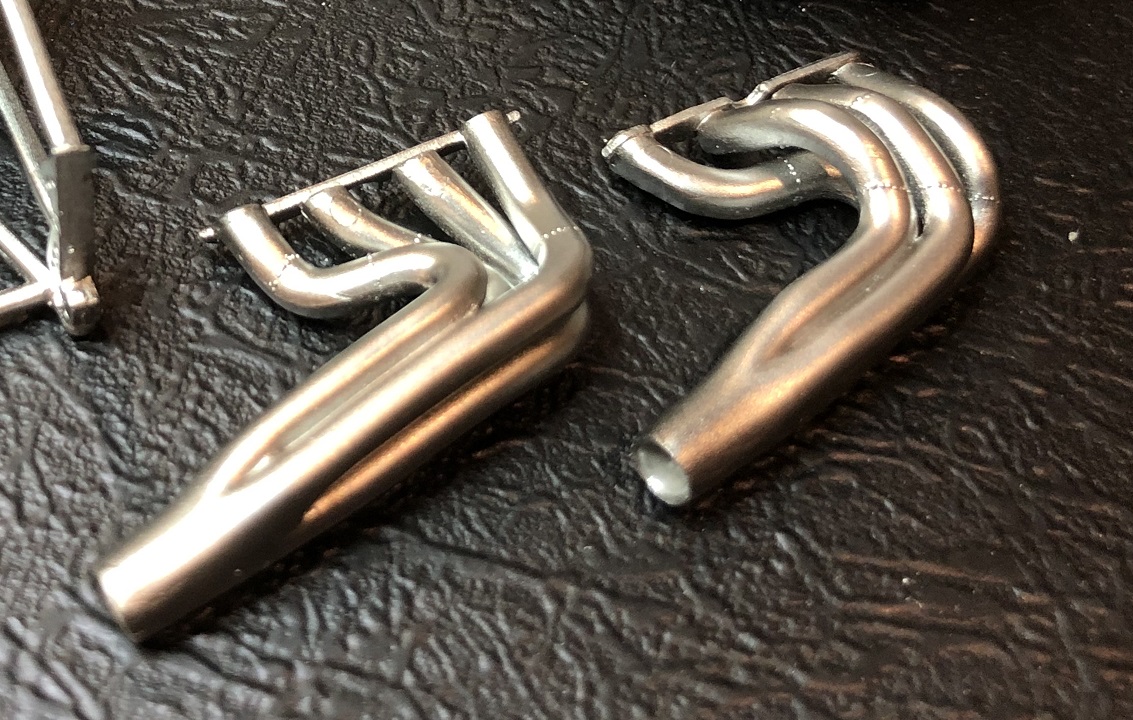
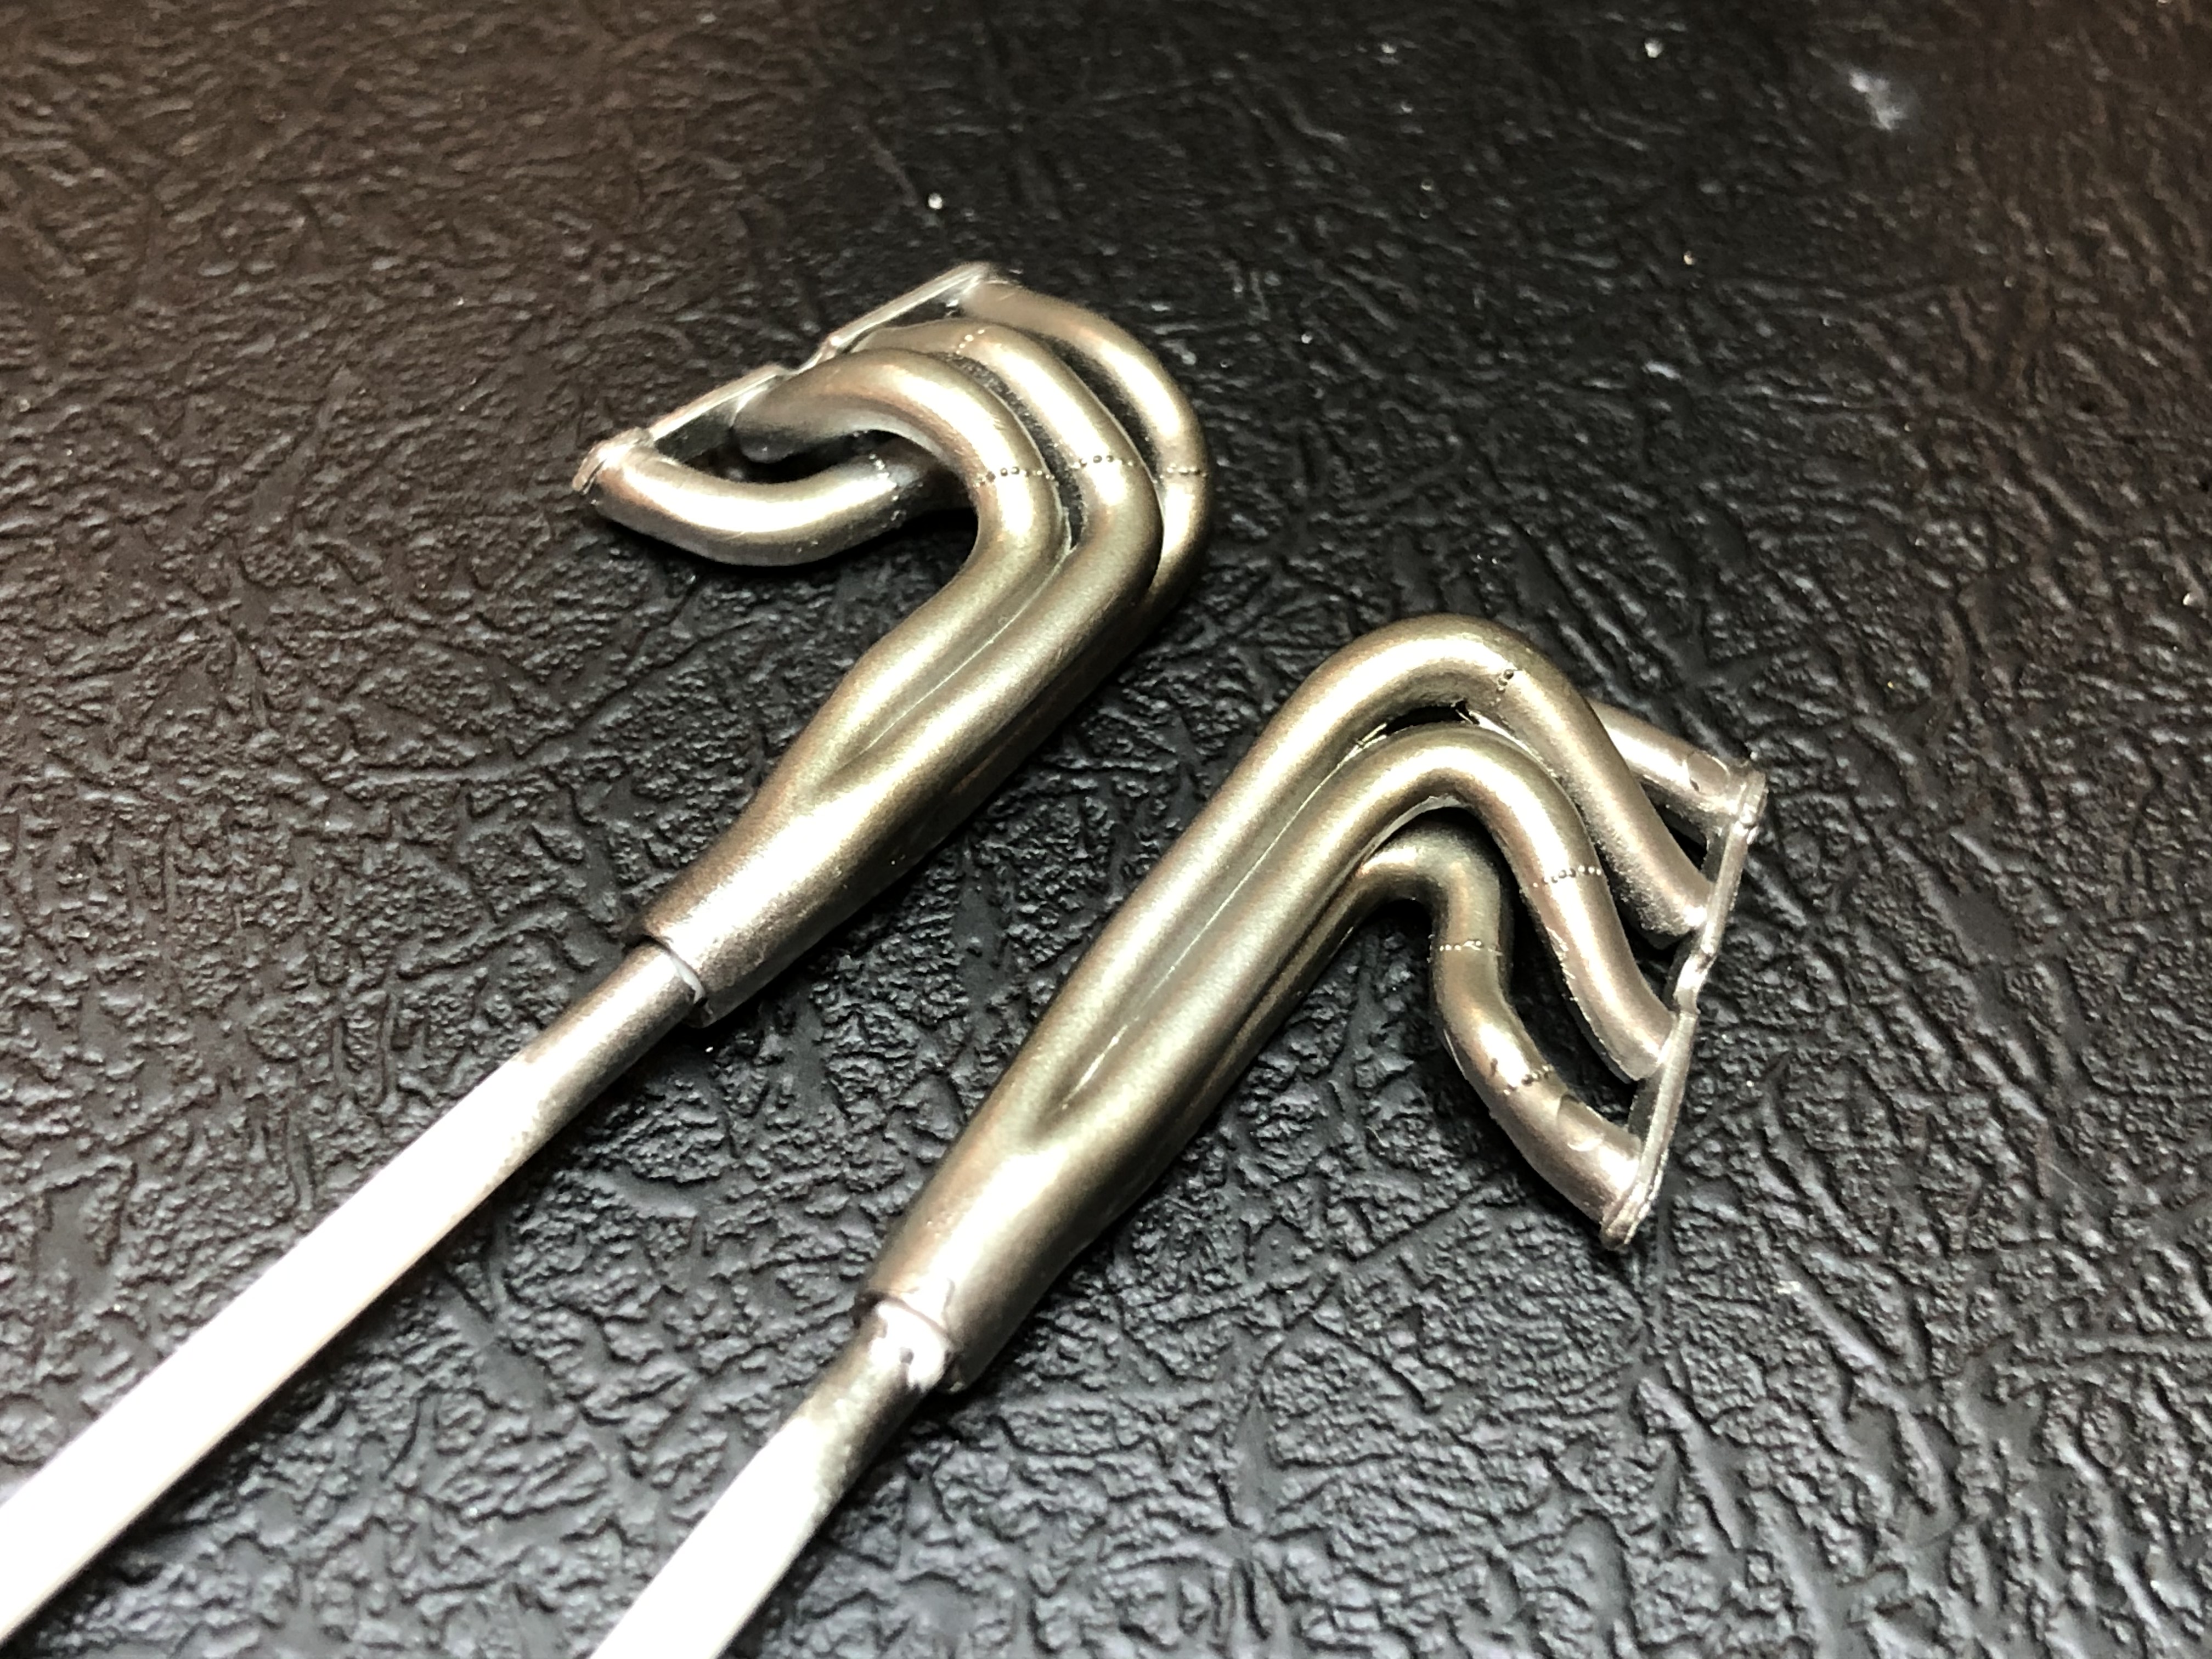
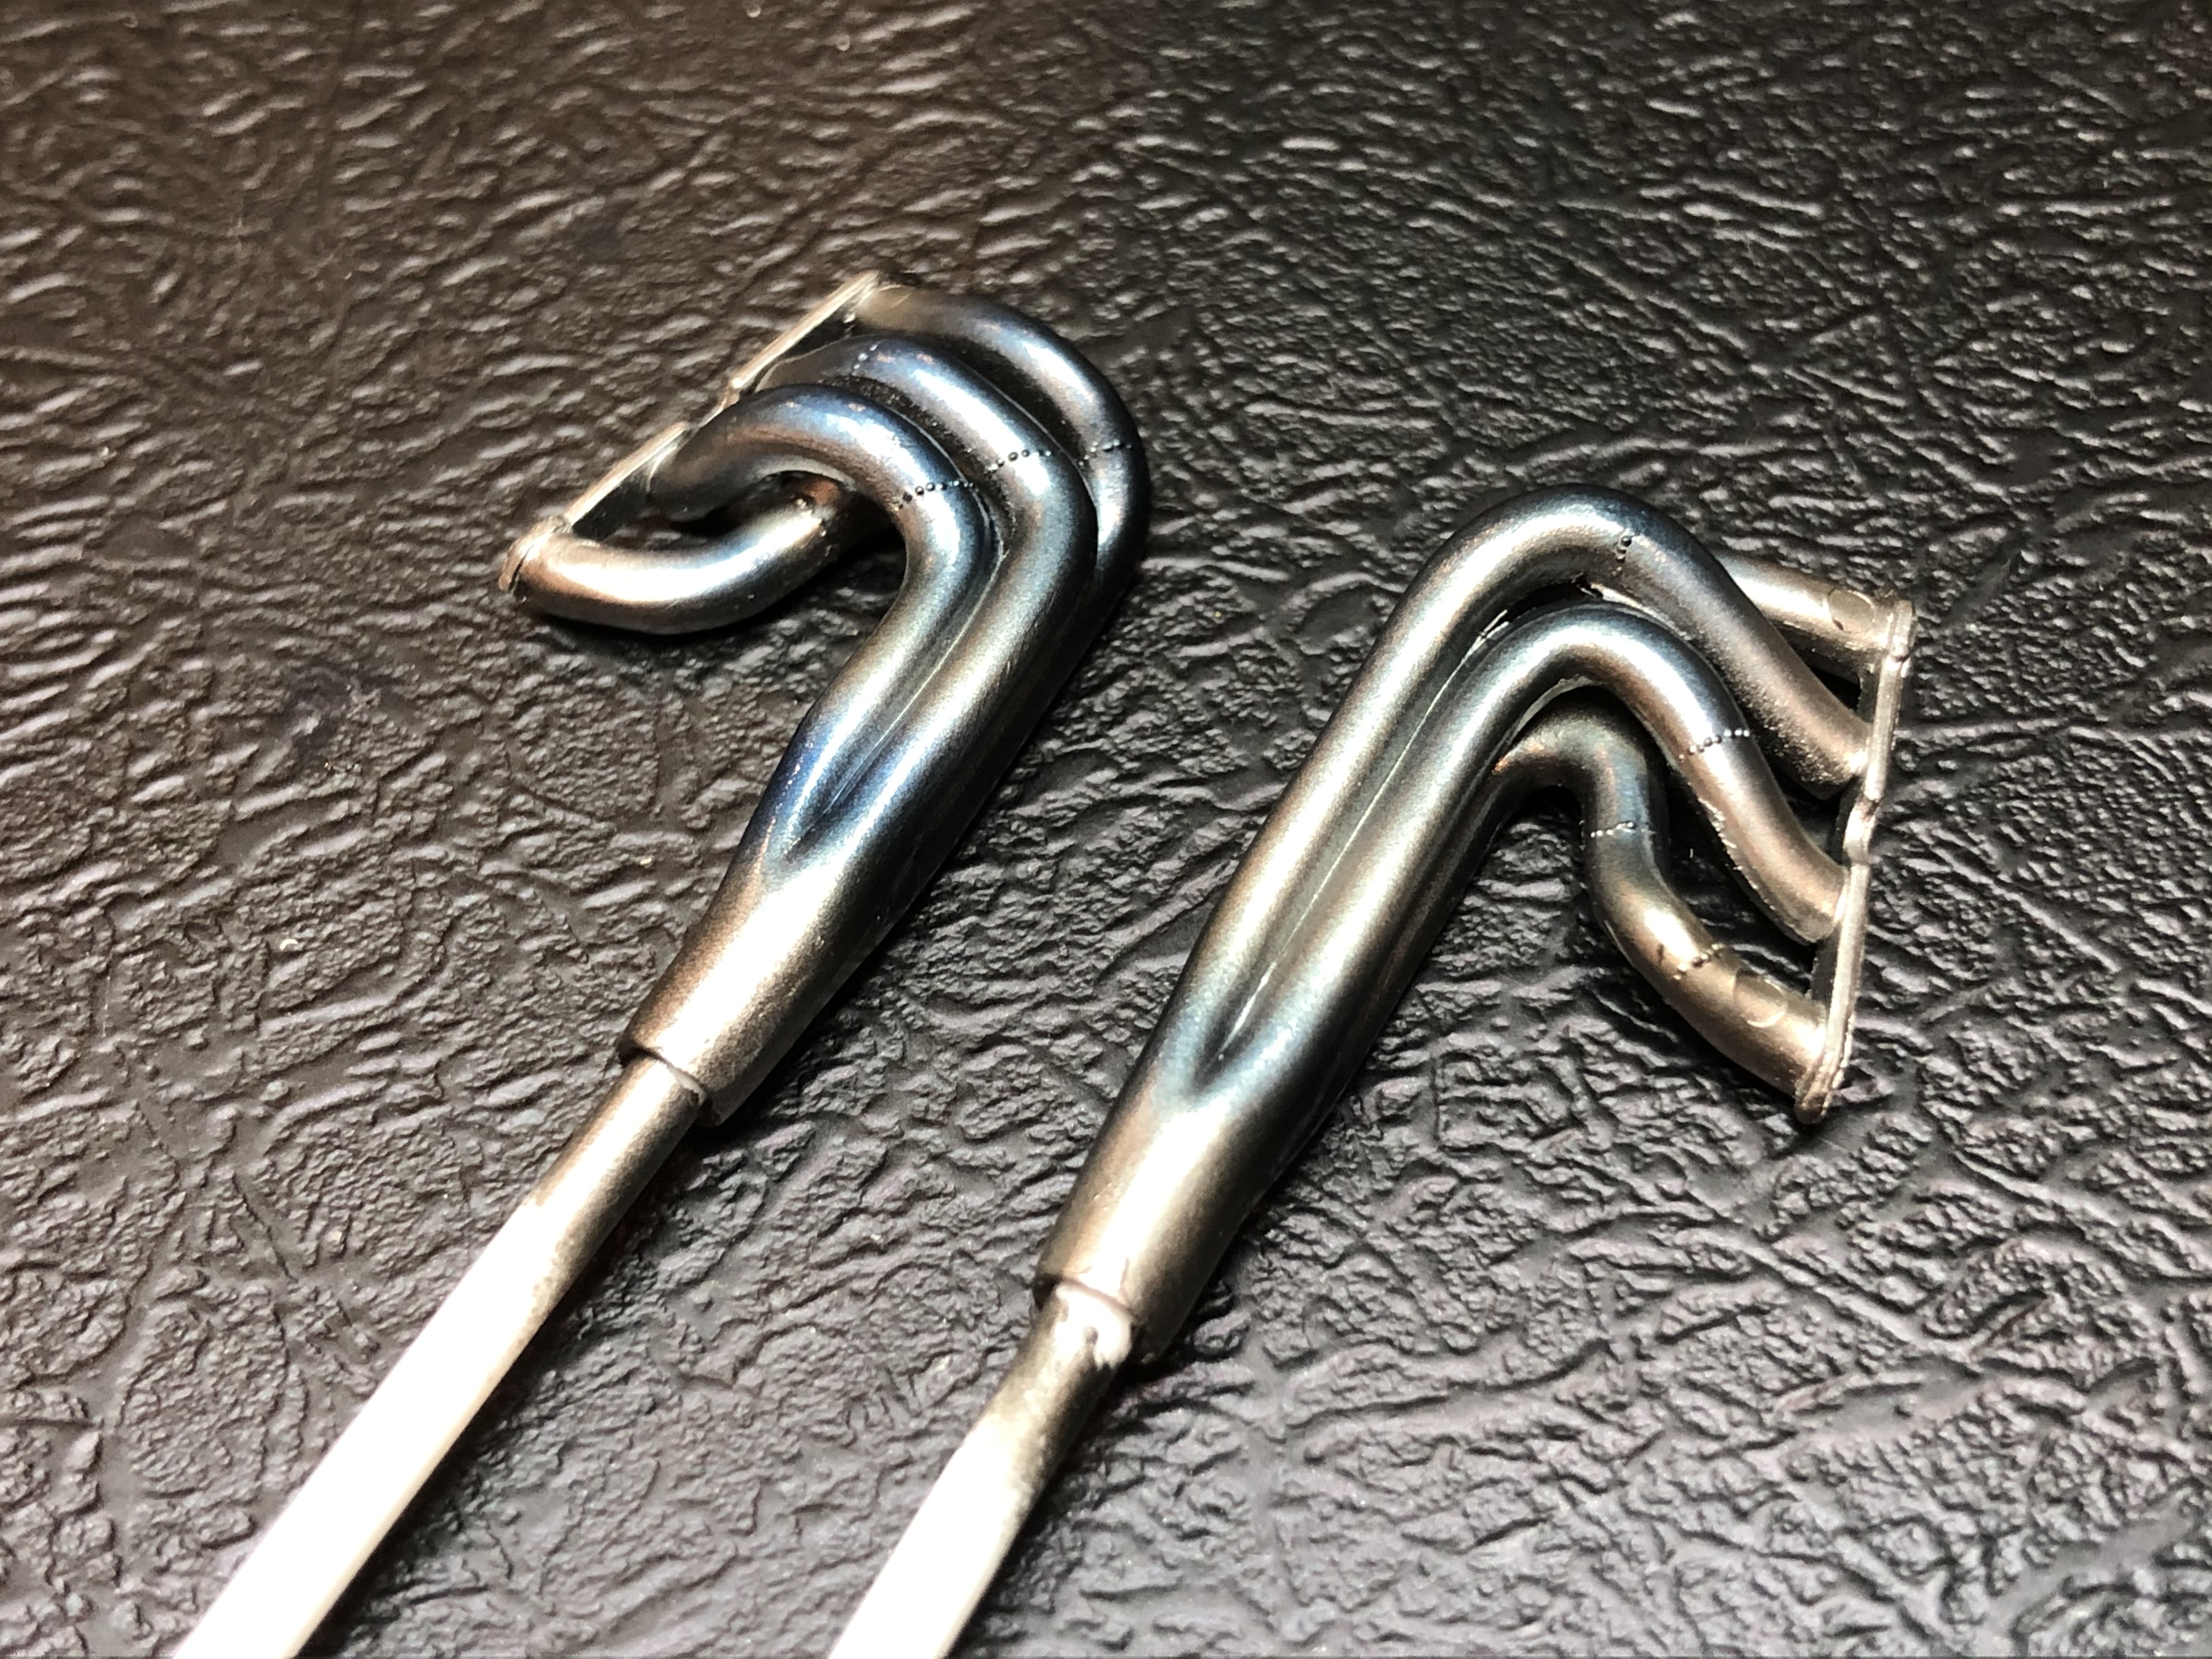
The airbrush was fired up to do some detail painting on the exhausts and accessories, as well as some work on a 1/48 P-47.
After black primer, the headers got a coat of SMS Stainless Steel, and tonight I shot some AK Xtreme Metal "Burnt Metal" then some SMS Clear Blue.
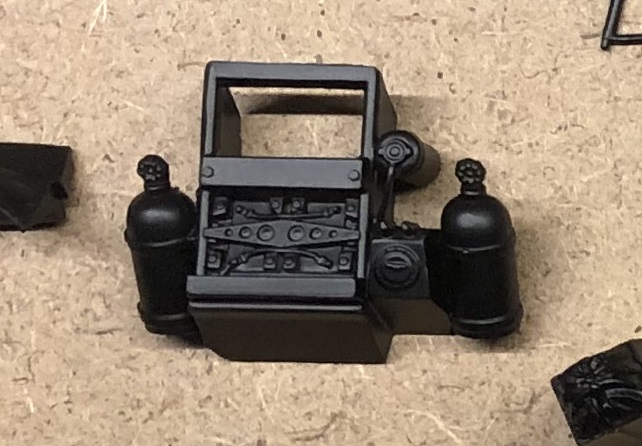
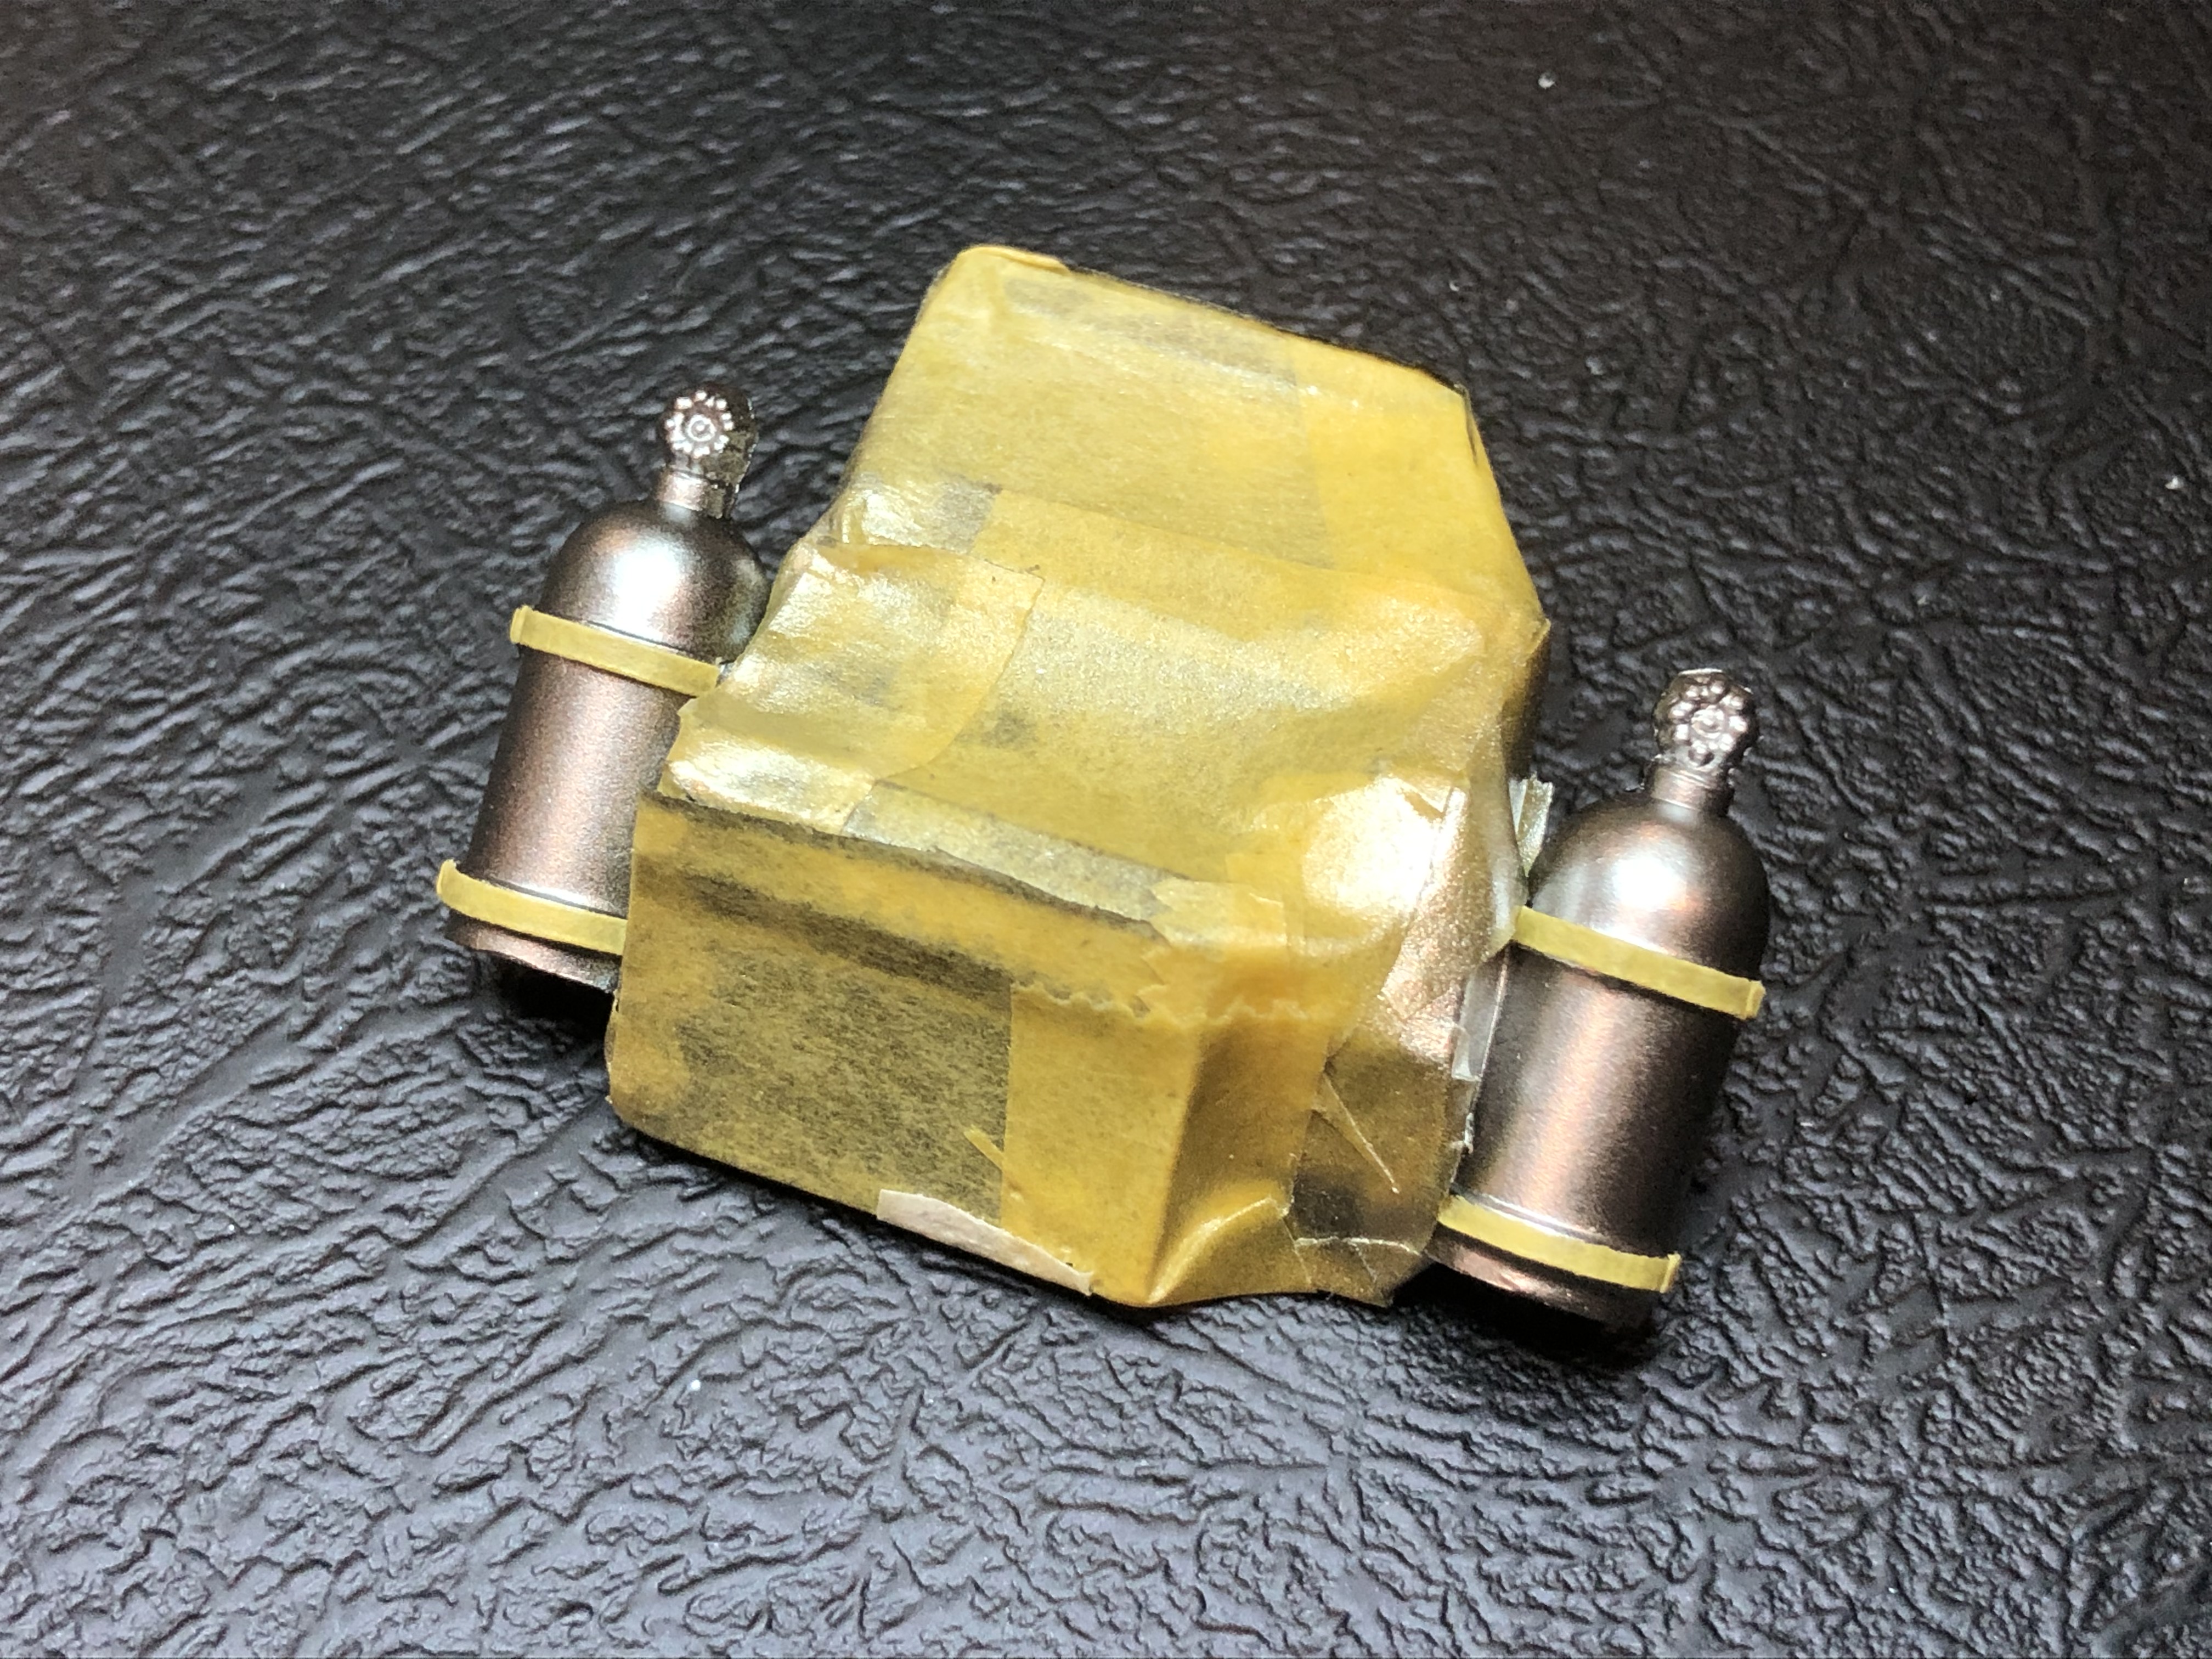
The Nitrous bottles got a shot of SMS Super Silver, then I masked the hold-down straps and shot some SMS Clear Blue.
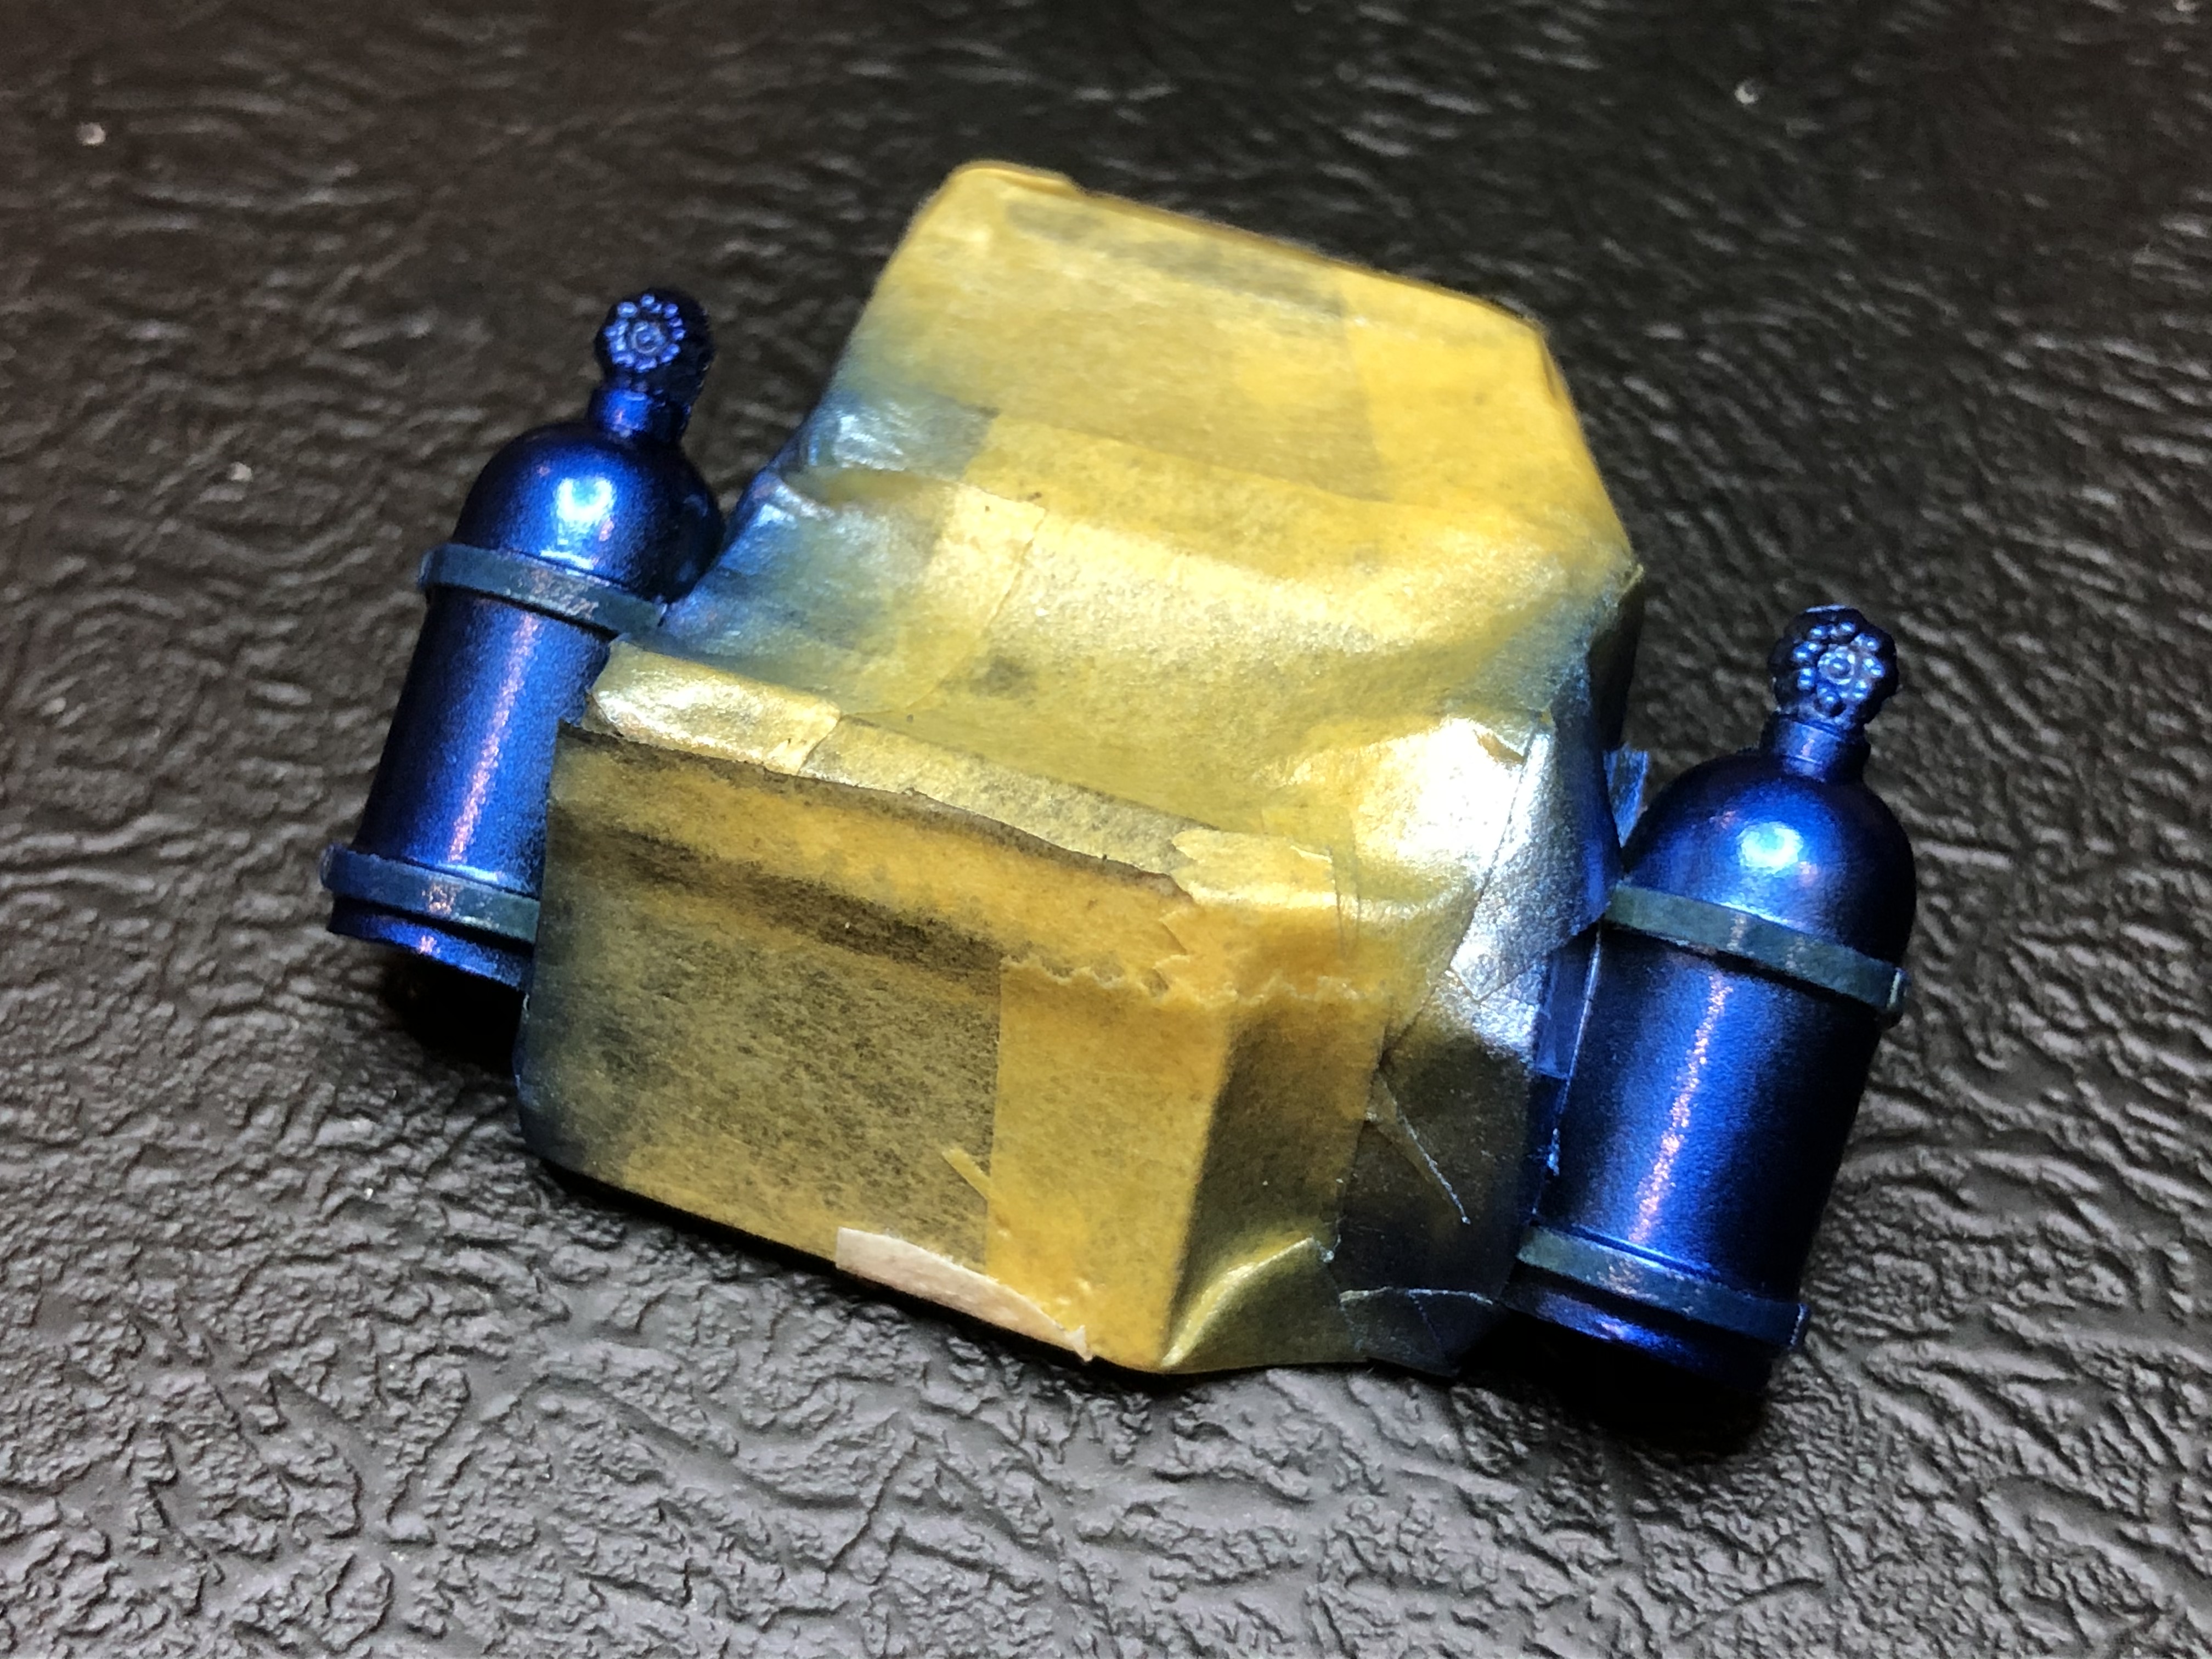
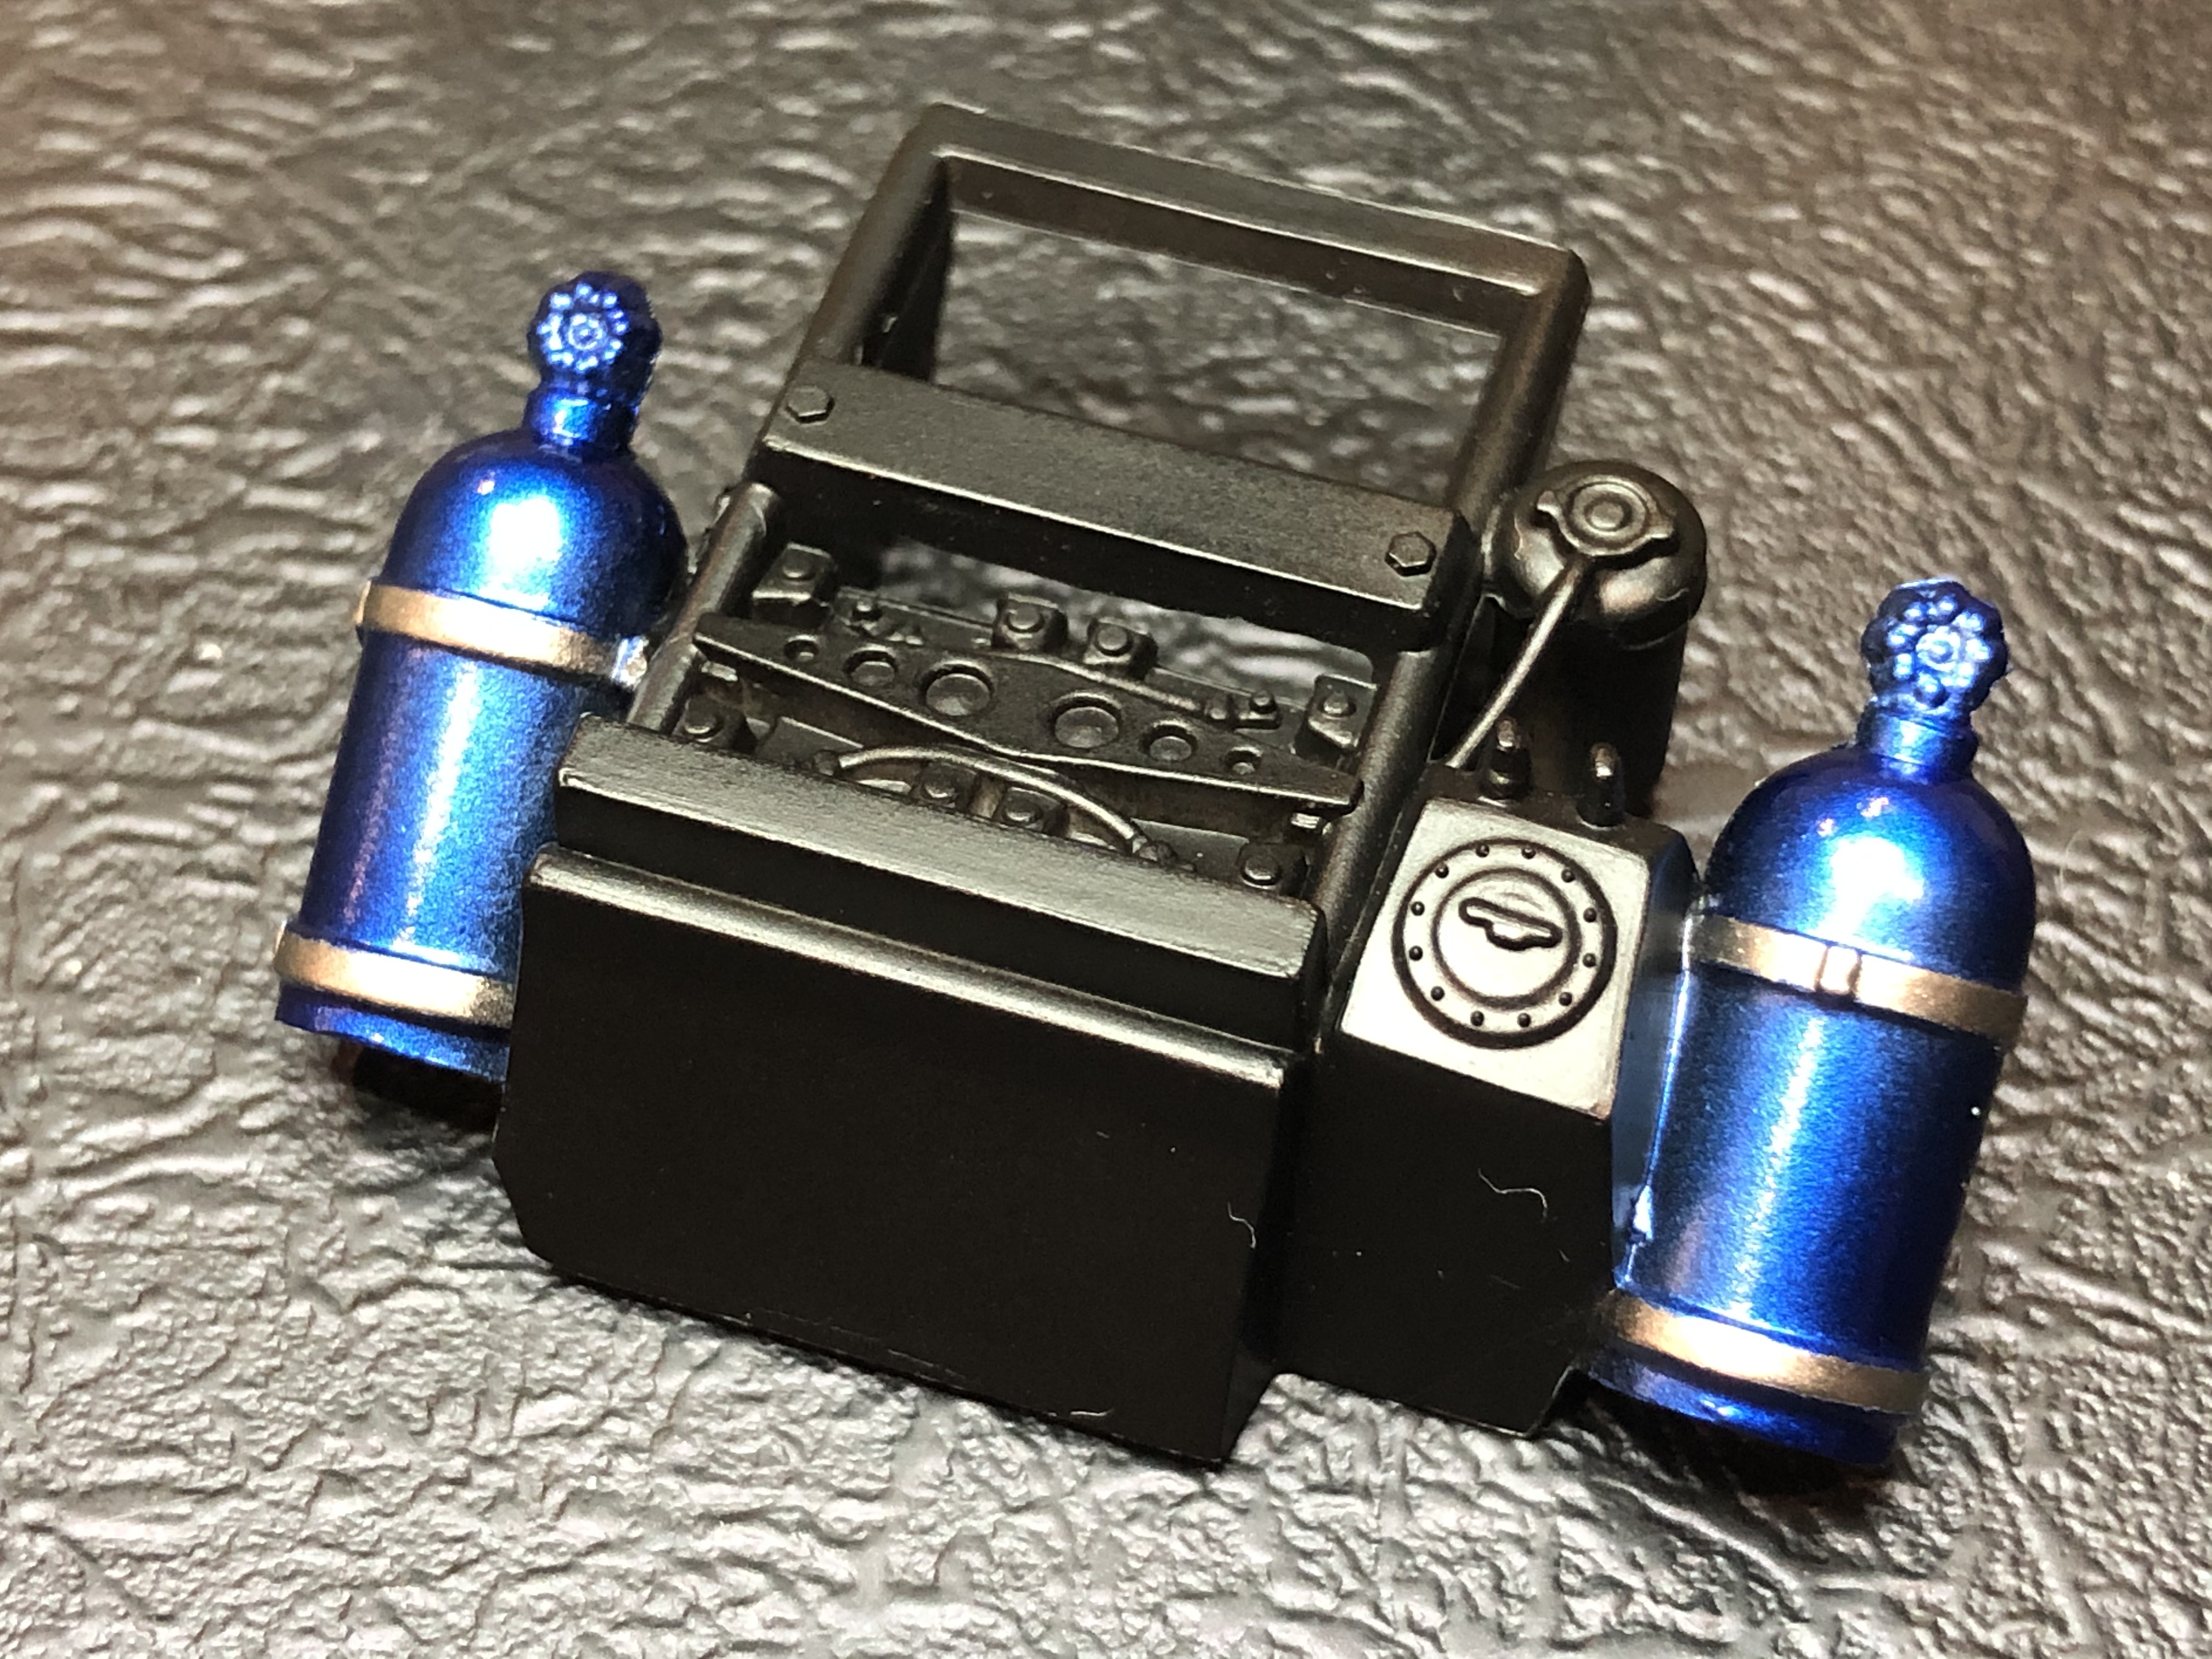
More decals and detail painting to come.
Cheers, D
ON the bench
Revell 1/24 '53 Corvette (building as '54)
Revell 1/24 BMW 507 Coupe and Cabrio
Italeri 1/48 Me262 B-1a/U1 Nightfighter
Monogram 1/24 '57 Chevy Nomad
Dragon 1/350 USS Frank Knox DD-742
Georgia, United States
Joined: February 17, 2013
KitMaker: 173 posts
Auto Modeler: 46 posts
Posted: Friday, May 22, 2020 - 03:18 AM UTC
Quoted Text
24 spark plugs? What the hell is this? A hemi Porsche?
Great looking engine. Very clean!
Patrick Nance, actually, they were.

On the bench, Blue Max, Mustang Funny car.
Airfix Hotspur glinder.
Joel_W
Associate Editor New York, United States
Joined: December 04, 2010
KitMaker: 11,666 posts
Auto Modeler: 2,974 posts
Posted: Friday, May 22, 2020 - 03:30 AM UTC
Bill,
Great photo. I'm just surprised that there's only one intake and exhaust valve per cylinder.
Joel
On my Workbench:
Monogram 1/24 scale 427 Shelby Cobra
Just Completed:
Beemax 1/24 scale BMW M3 E30 1992 Evolution II
Joel_W
Associate Editor New York, United States
Joined: December 04, 2010
KitMaker: 11,666 posts
Auto Modeler: 2,974 posts
Posted: Friday, May 22, 2020 - 03:31 AM UTC
D,
those exhaust headers look great.
Joel
On my Workbench:
Monogram 1/24 scale 427 Shelby Cobra
Just Completed:
Beemax 1/24 scale BMW M3 E30 1992 Evolution II
New York, United States
Joined: December 07, 2004
KitMaker: 1,888 posts
Auto Modeler: 806 posts
Posted: Friday, May 22, 2020 - 05:24 AM UTC
Nice work Damian on those headers, i like the heat stains.
California, United States
Joined: January 22, 2016
KitMaker: 766 posts
Auto Modeler: 140 posts
Posted: Friday, May 22, 2020 - 05:33 AM UTC
I have always admired people who can do that work on the exhausts!
Great work, Damian!
Just completed-
1/24th Tamiya Porsche 956 Skoal Bandit
In the works:
1/12th Protar Ferrari 312T2 (shelved for time being)
ERTL D-8 Caterpillar Bulldozer
New Hampshire, United States
Joined: December 12, 2002
KitMaker: 1,500 posts
Auto Modeler: 645 posts
Posted: Friday, May 22, 2020 - 06:46 AM UTC
Michael, that engine looks ready to start.
Great work Patrick, your decal placements look great.
Damian, those heat stains look 1:1 to me.
Not much of an update on mine. Been working in the yard and doing more honey do items most days.
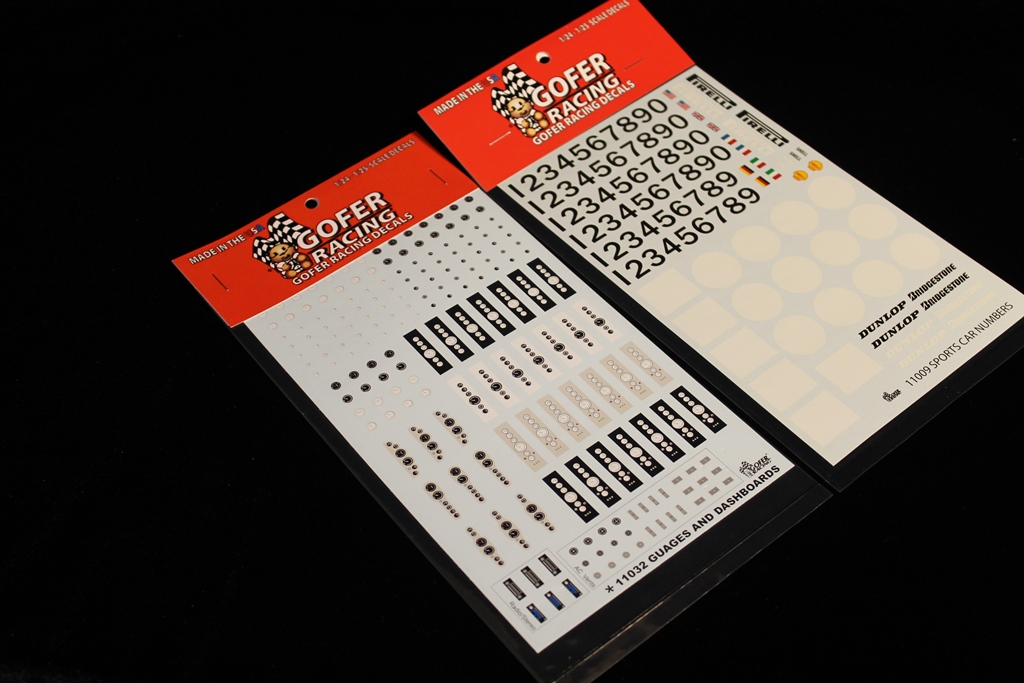
Primer laid down on the underside and suspension, I doubt you want to see pictures of gray plastic. Decals for the number roundels and dash (not sure I'm going to use them though), arrived today.
More primering tomorrow and then the fun begins.
I love the smell of Tenax in the morning....It smells like a day off work.
I drive a Jeep, but i still bleed Ford Blue....
New York, United States
Joined: December 07, 2004
KitMaker: 1,888 posts
Auto Modeler: 806 posts
Posted: Friday, May 22, 2020 - 10:47 AM UTC
New York, United States
Joined: December 07, 2004
KitMaker: 1,888 posts
Auto Modeler: 806 posts
Posted: Friday, May 22, 2020 - 10:52 AM UTC
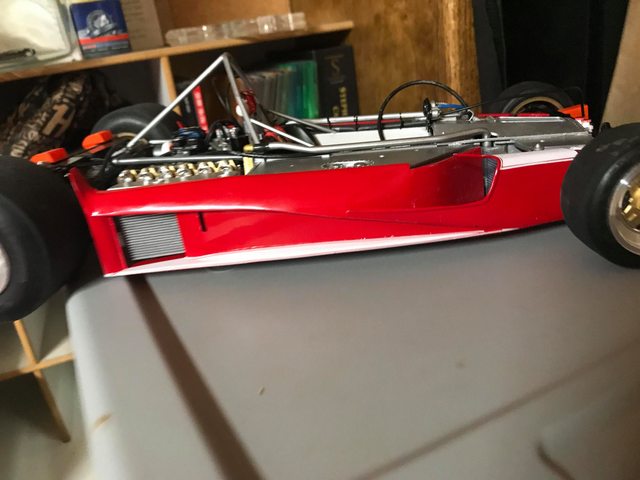
Outstanding work on those decals Patrick, decals are much harder to do with all those curves of a Ferrari.