

Jim,
Now I'm even more impressed that you got those decals to look that good.
joel


Go to automodeler.com for the current dynamic site!
The Garage
For general automotive modeling or non-modeling topics.
For general automotive modeling or non-modeling topics.
Hosted by Jim Starkweather
Strip, Track & Trail Official Build Thread

Joel_W

Joined: December 04, 2010
KitMaker: 11,666 posts
Auto Modeler: 2,974 posts

Posted: Thursday, May 14, 2020 - 11:10 AM UTC


Szmann

Joined: September 02, 2014
KitMaker: 1,977 posts
Auto Modeler: 1,371 posts

Posted: Thursday, May 14, 2020 - 01:21 PM UTC
Ugh, great work here!
I'm getting busy at work and it's difficult to keep pace with all the builds.
Robert, nice orange applied over white - it is one of my favourite colour schemes, especially if some black comes in...
As Damian noted already, these "Ford A Prototype" headlamps look excellent there!
The frame also look good and the aluminum work it's exquisite! Excellent!
Patrick, I'm glad you had the guts to redo the res paint. Second application looks so much better and the reflection has now the beautiful hard edge we're all after! Great!
Joe, nice work on the bench. The texture of the belts looks great.
As Joel said it already, the quality AND quantity of the updates it's amazing. KUTGW!
Gabriel

AussieReg

#007

Joined: June 09, 2009
KitMaker: 8,156 posts
Auto Modeler: 2,953 posts

Posted: Thursday, May 14, 2020 - 04:10 PM UTC


Dixon66
Joined: December 12, 2002
KitMaker: 1,500 posts
Auto Modeler: 645 posts

Posted: Thursday, May 14, 2020 - 10:58 PM UTC
Coming along nicely D.
I haven't been in the workshop for a couple days while I have been outside doing yardwork and honey-do stuff. Should be back in this weekend to start the roll cage build.
I haven't been in the workshop for a couple days while I have been outside doing yardwork and honey-do stuff. Should be back in this weekend to start the roll cage build.

jimb
Joined: August 25, 2006
KitMaker: 2,539 posts
Auto Modeler: 1,405 posts

Posted: Thursday, May 14, 2020 - 11:47 PM UTC
Quoted Text
Jim,
Now I'm even more impressed that you got those decals to look that good.
joel
It wasn't that hard, Joel, as new Revell decals are really good. They do take forever to come off the backing paper, though.
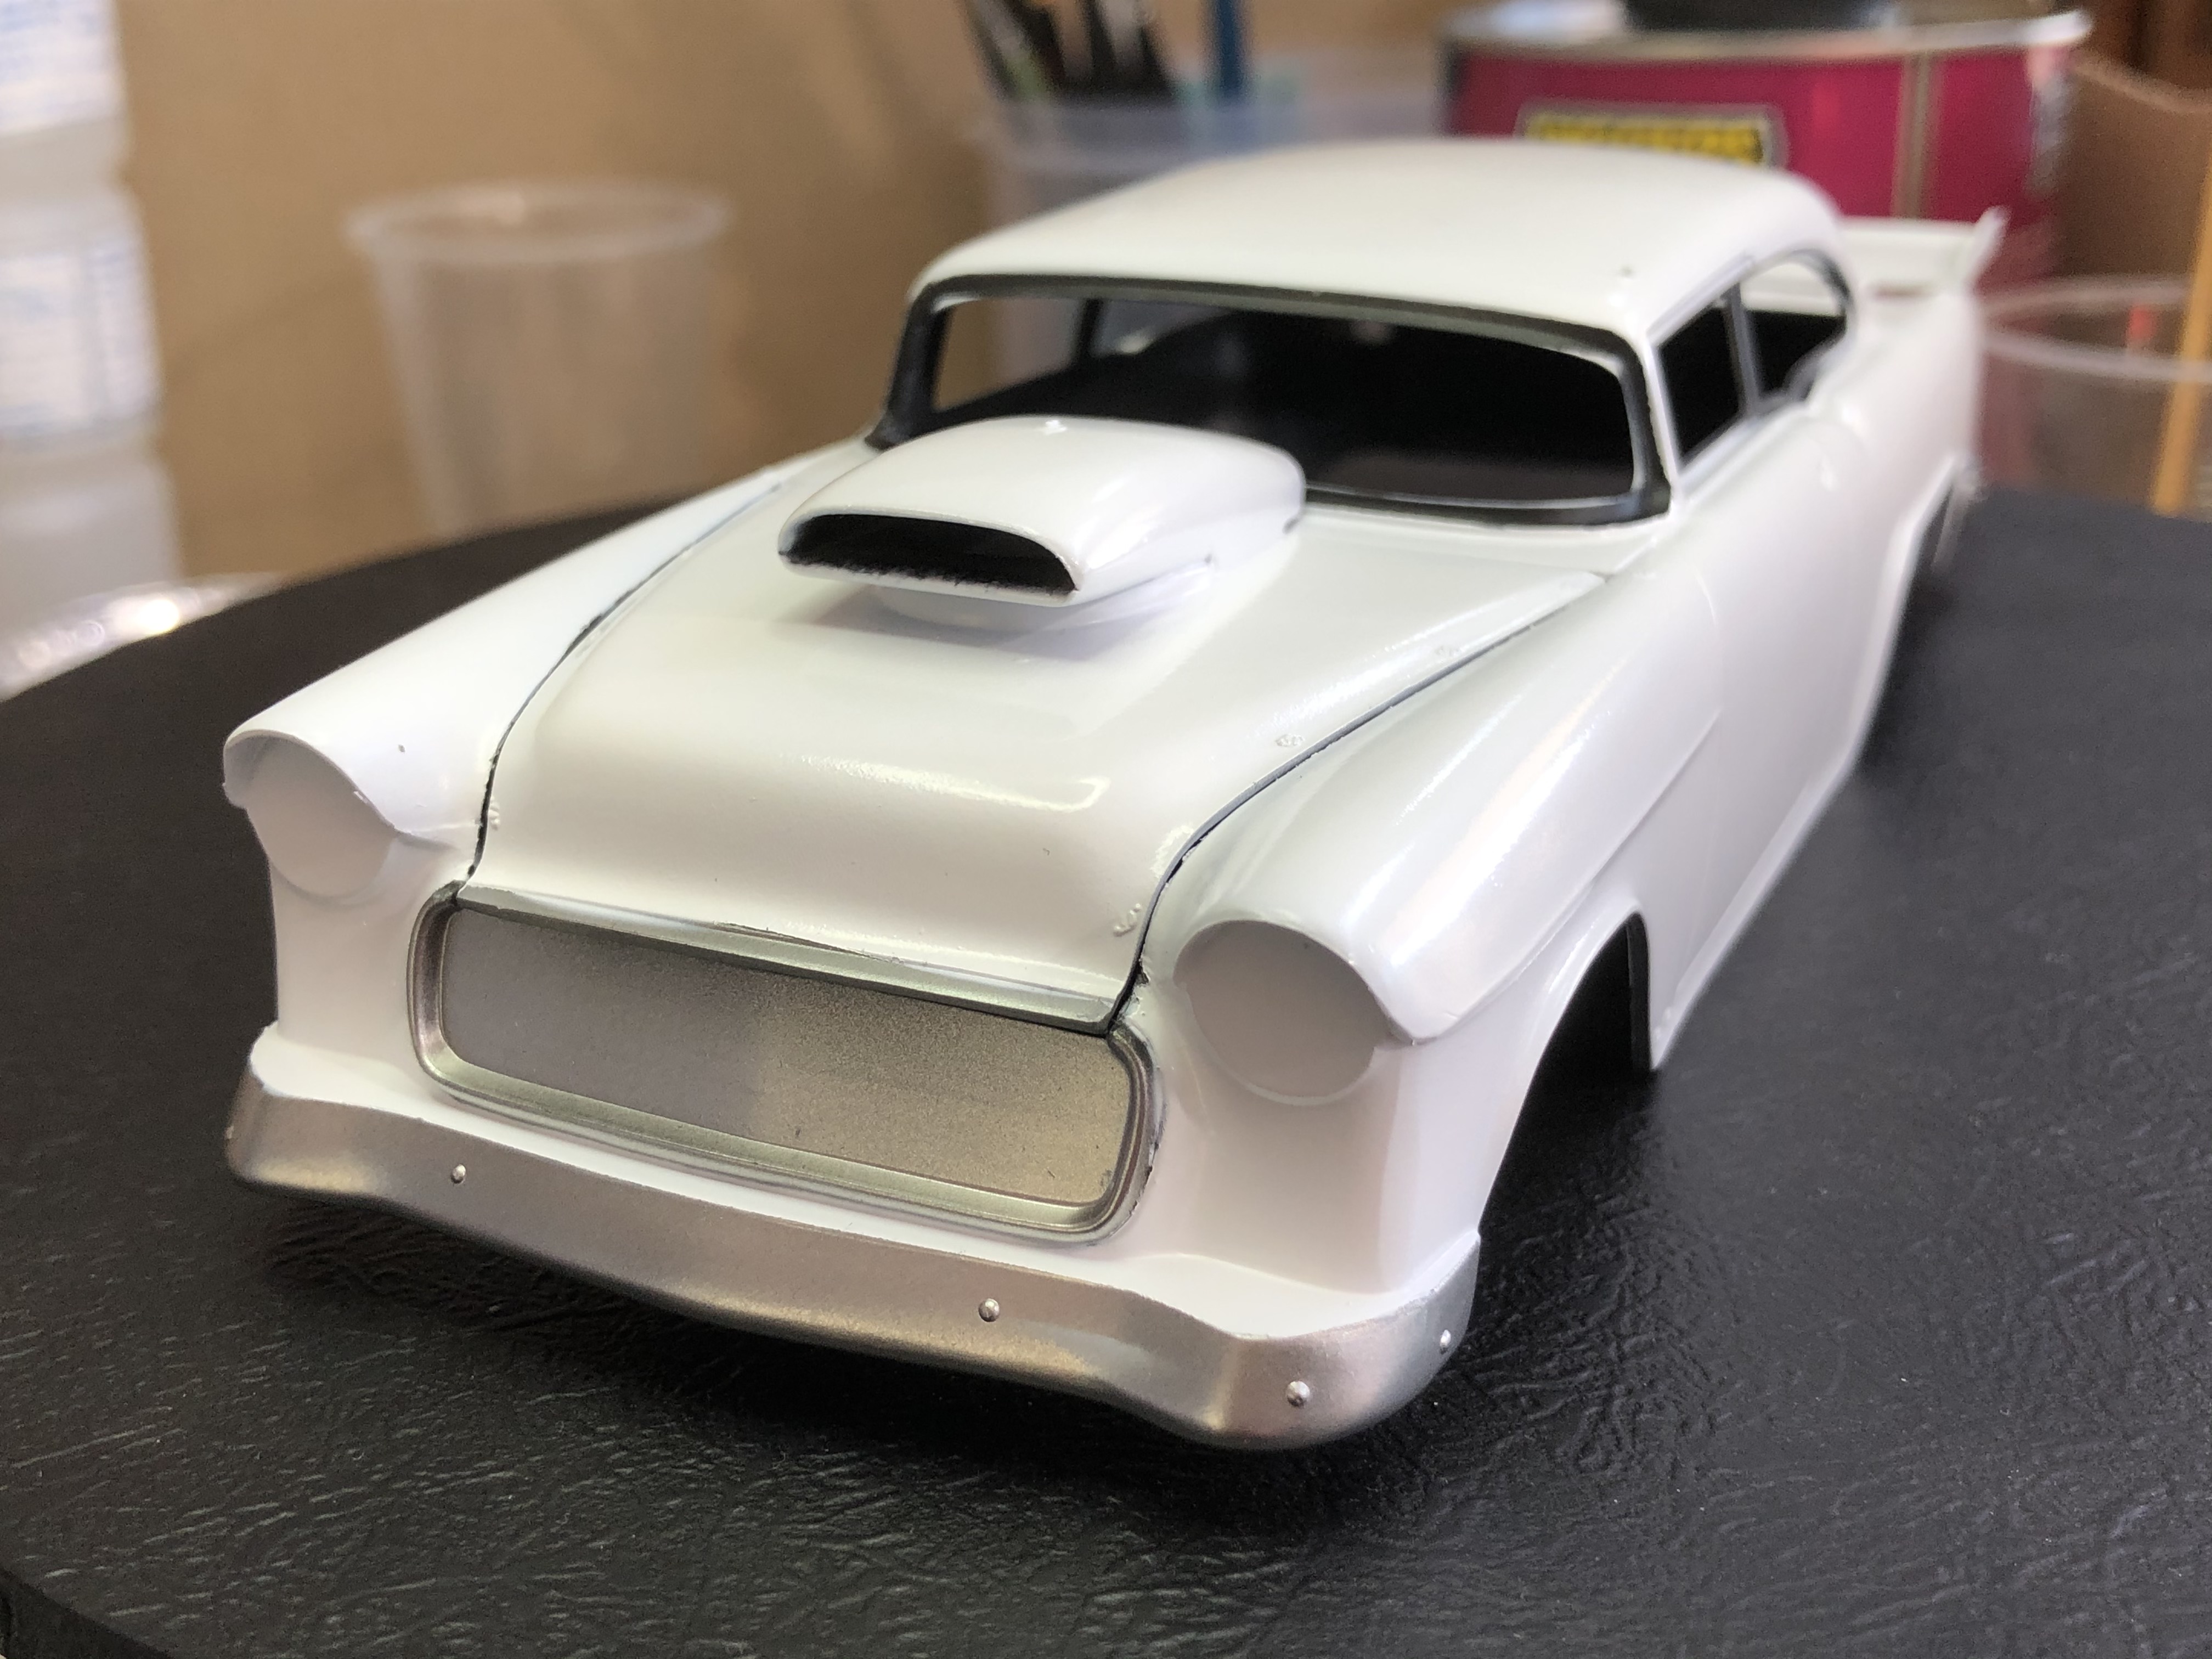
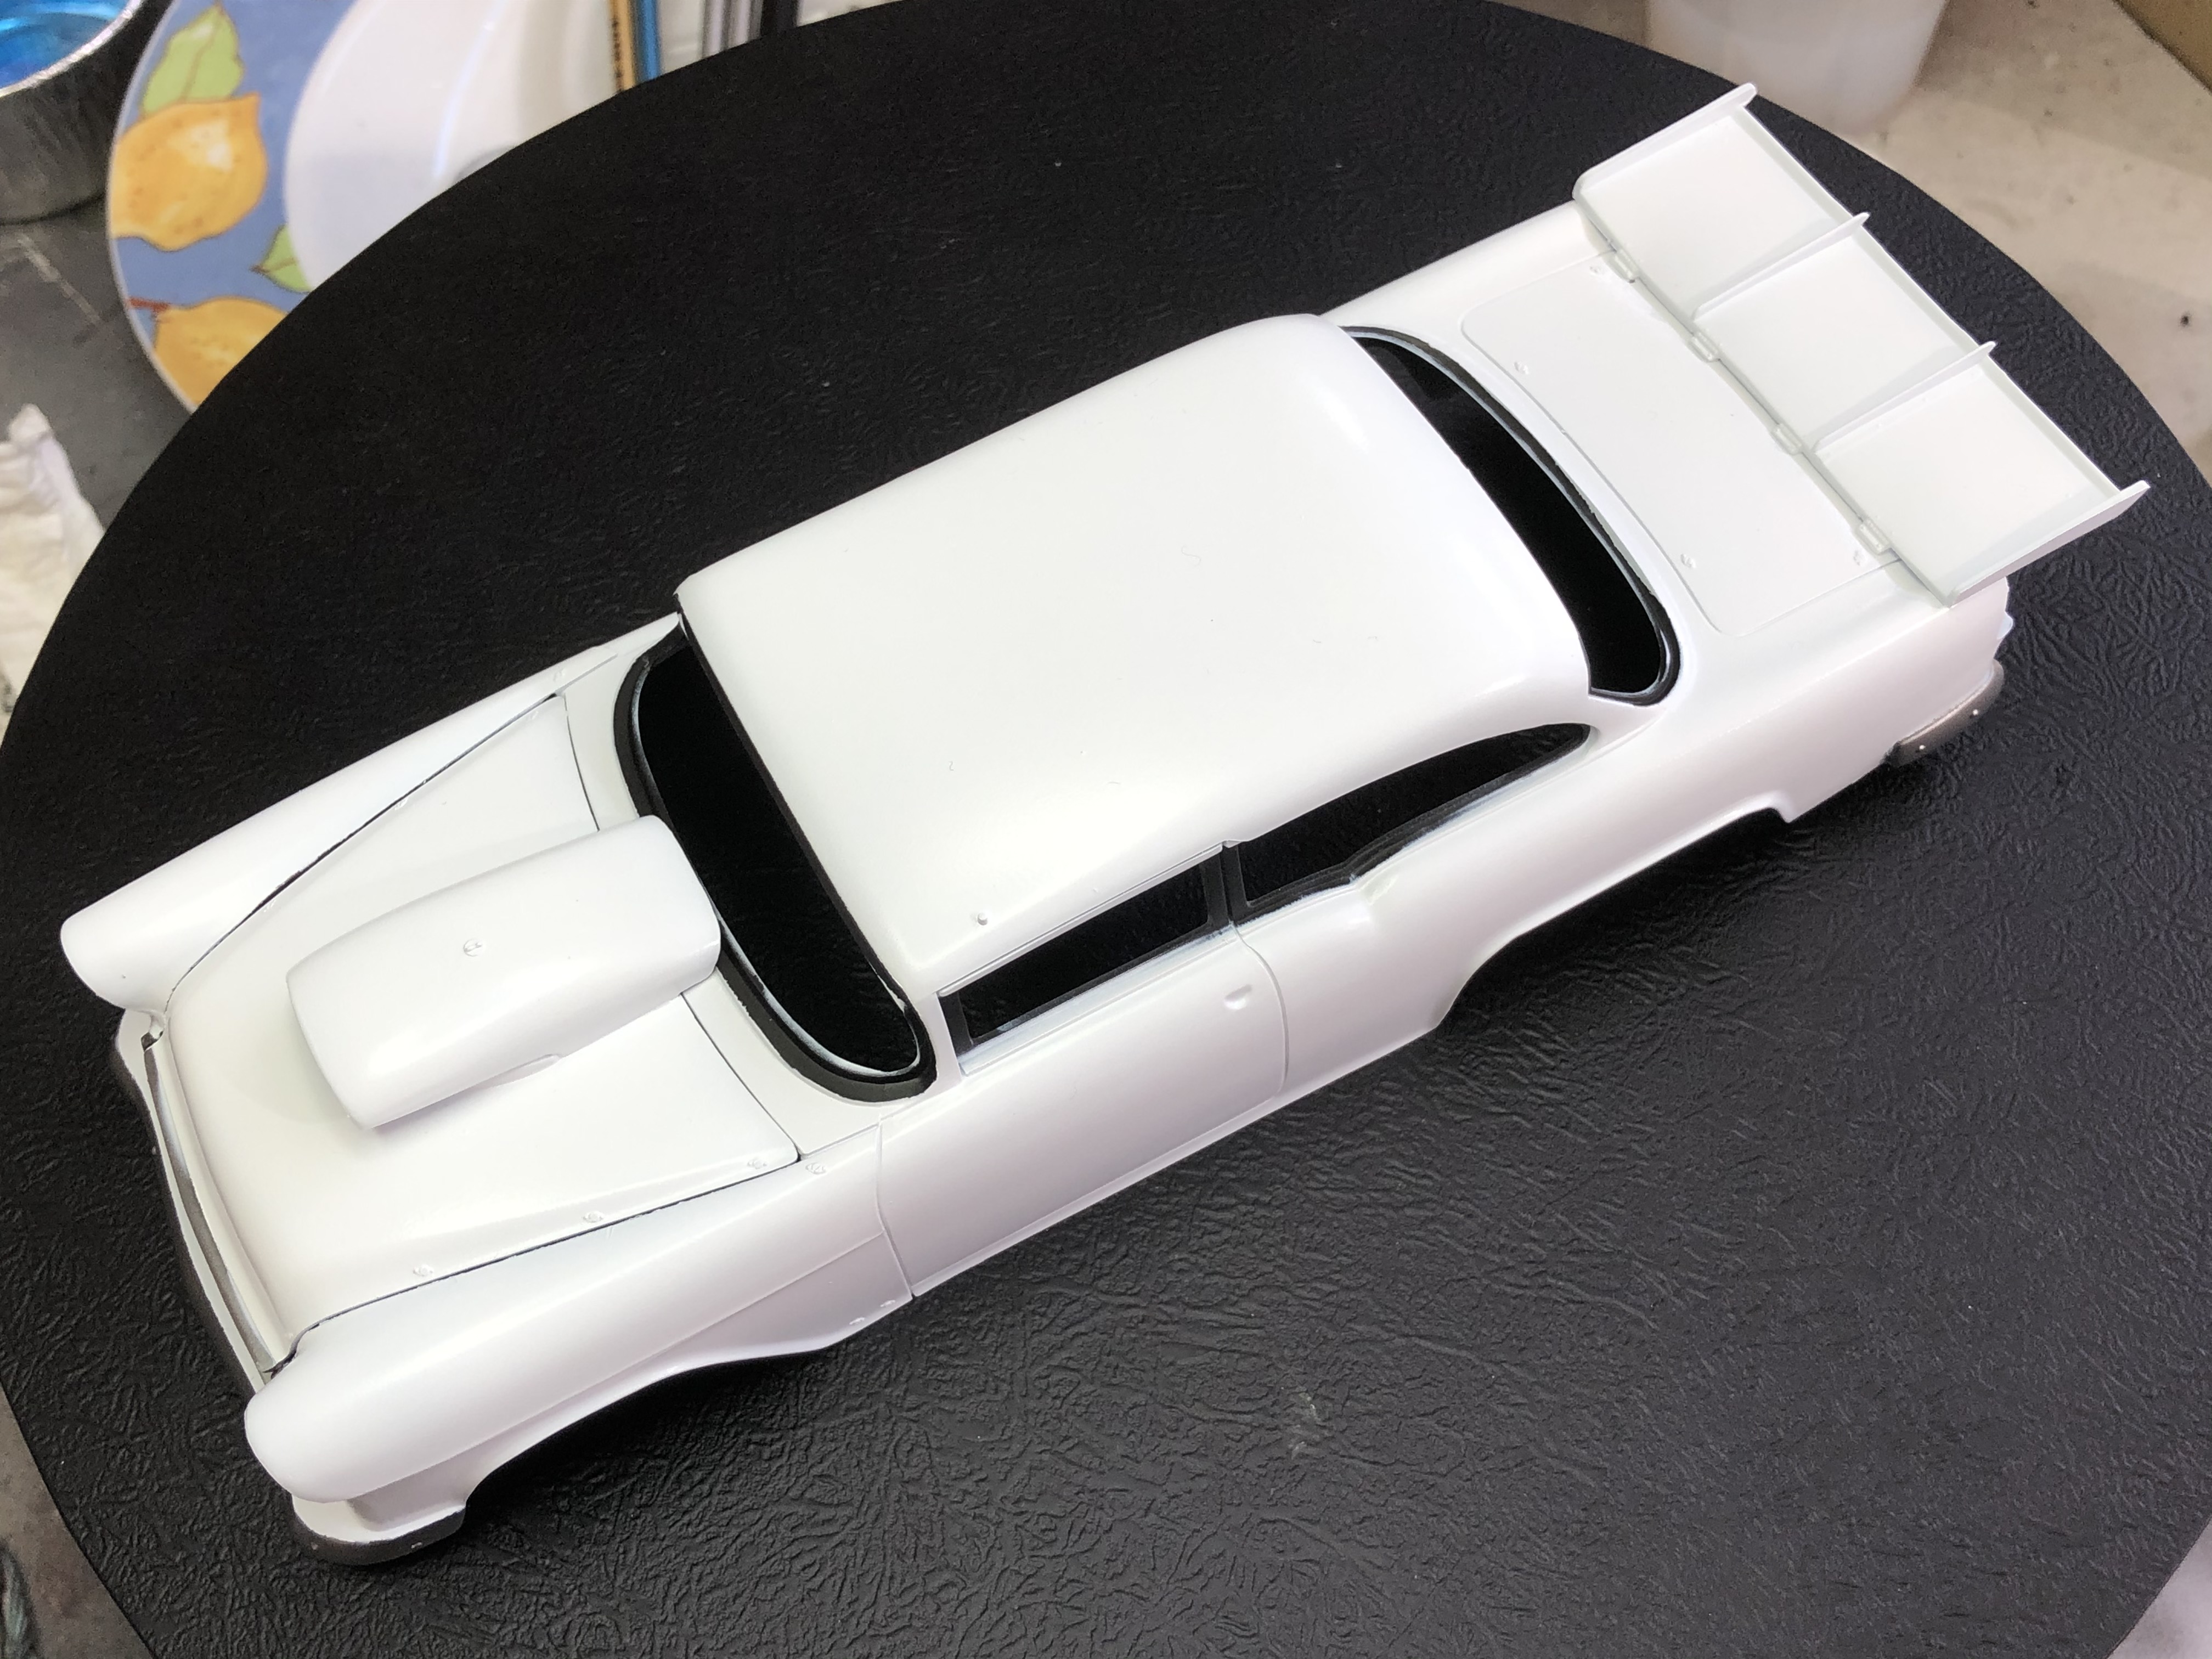
D, that Chevy looks like it's going to fly! Nice color choice.
Jim
AussieReg
#007
Joined: June 09, 2009
KitMaker: 8,156 posts
Auto Modeler: 2,953 posts
Posted: Friday, May 15, 2020 - 12:13 AM UTC
Thanks guys!
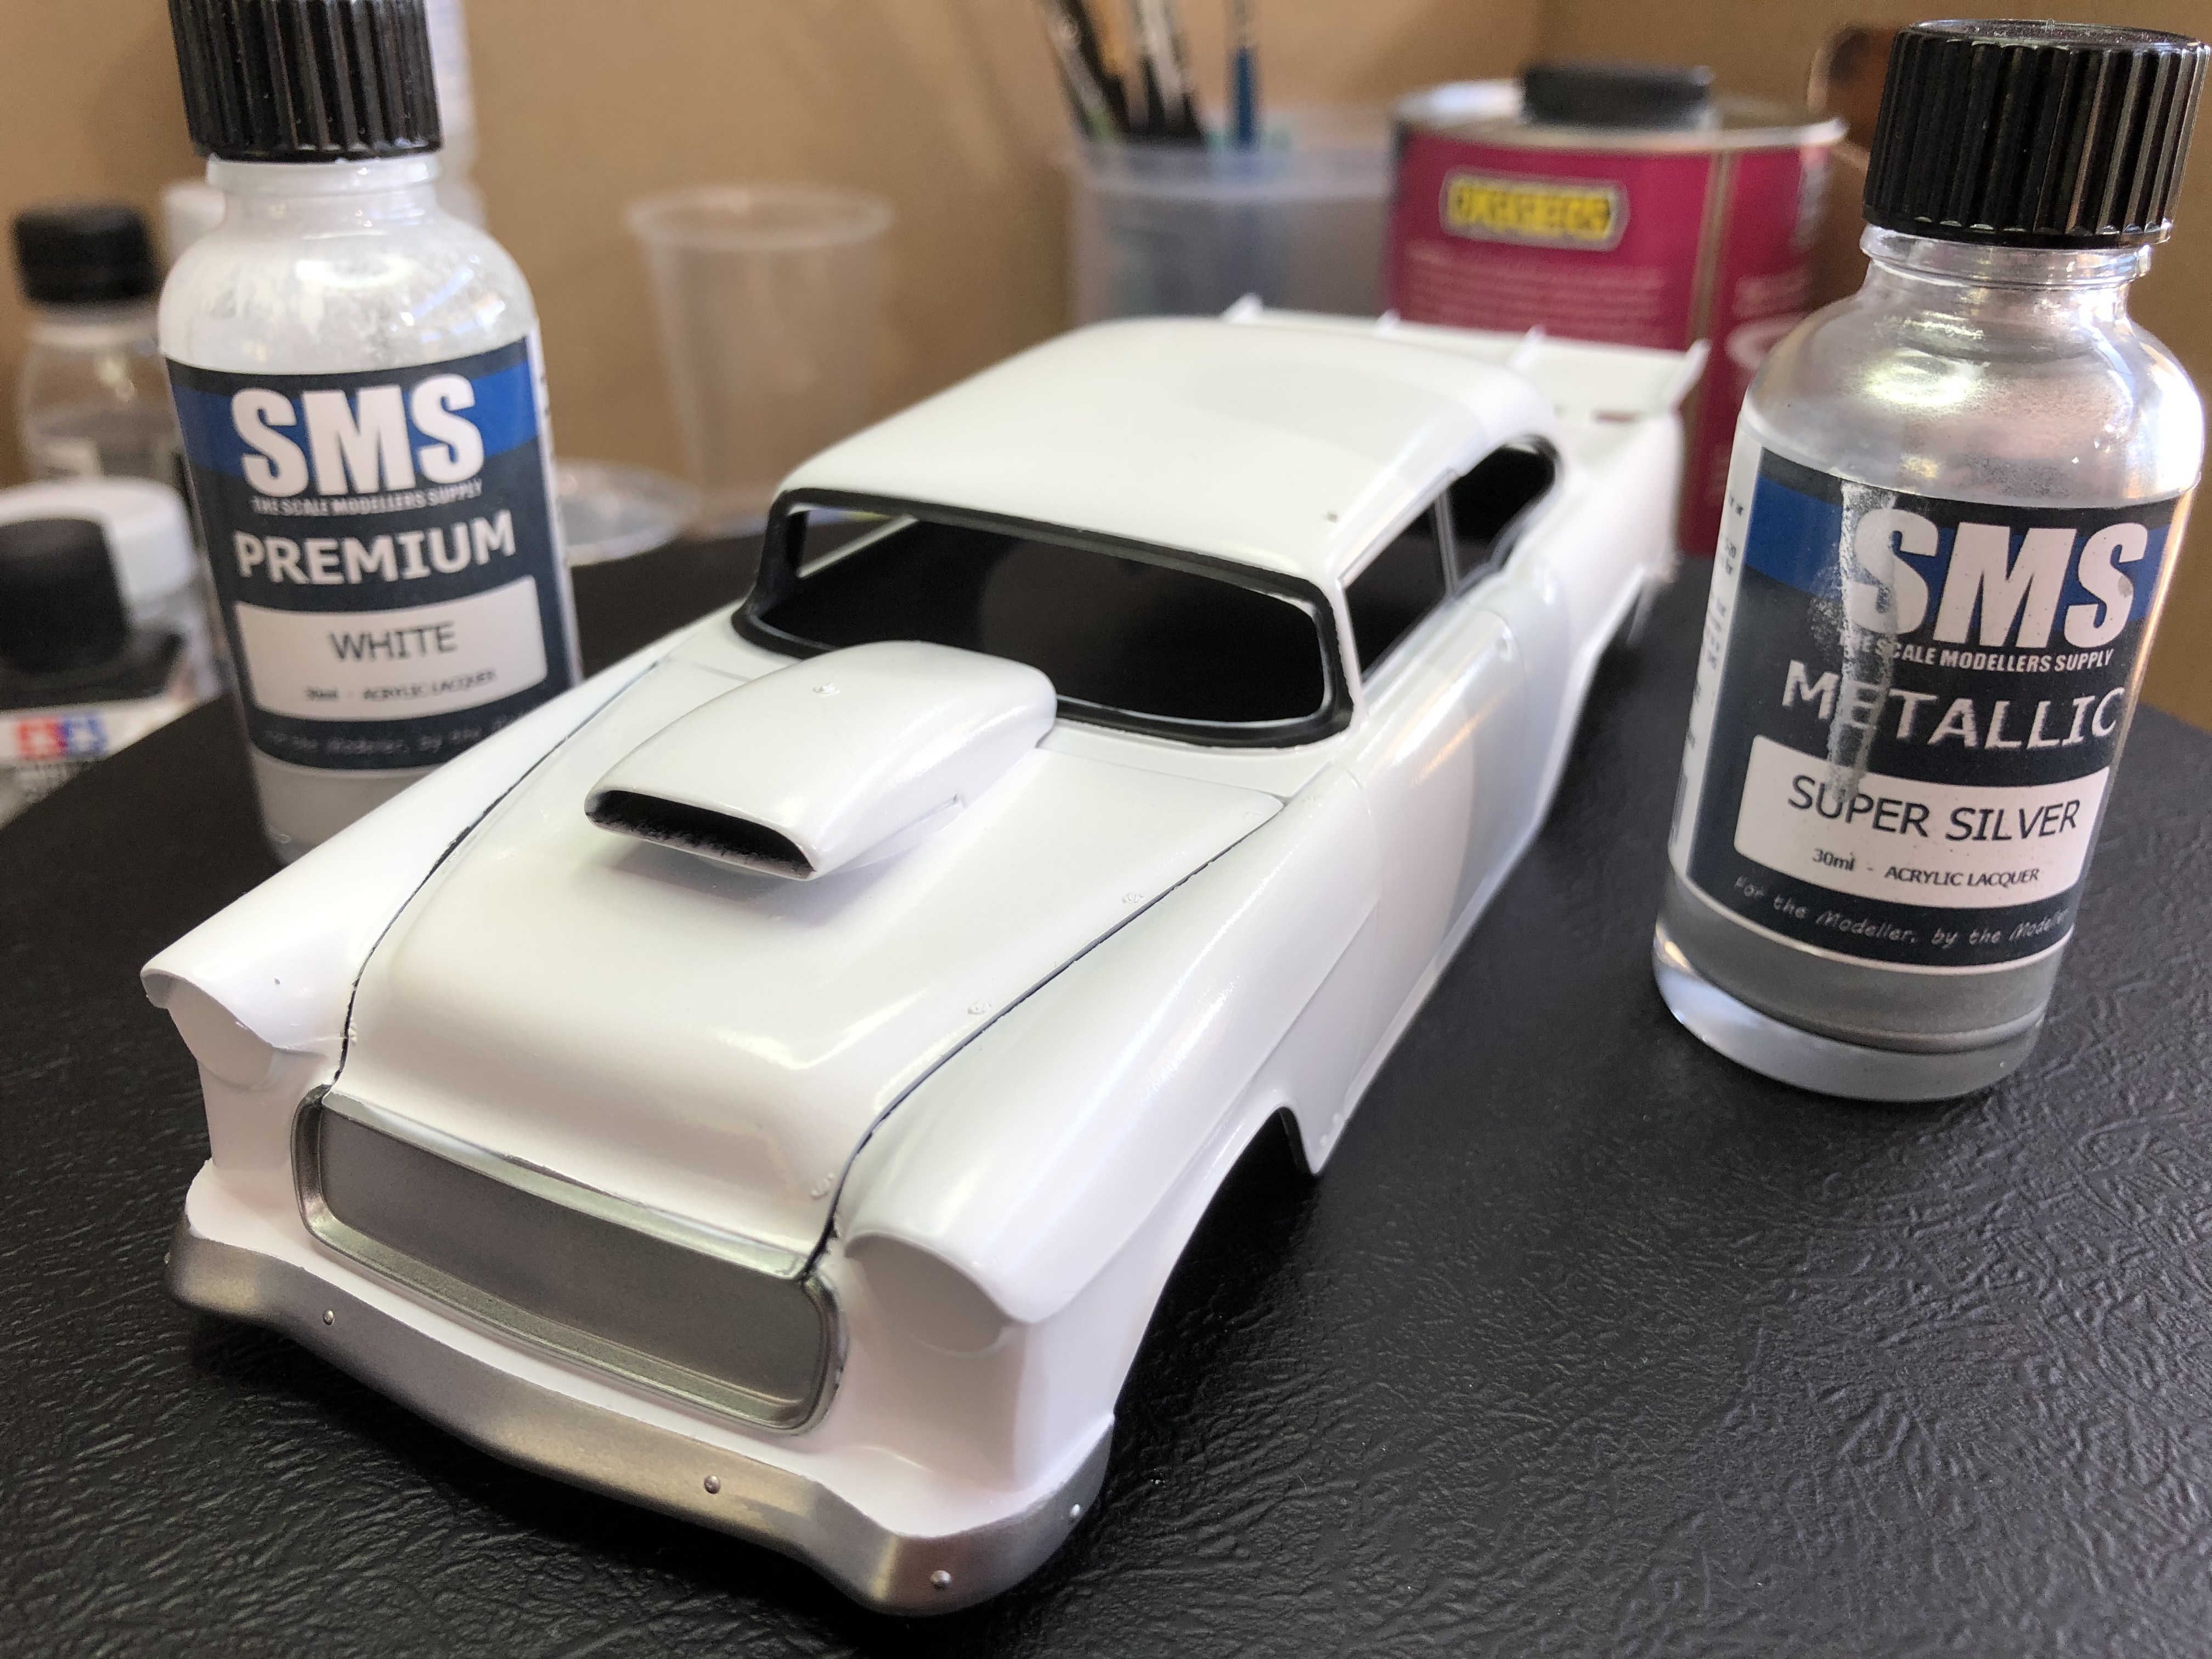
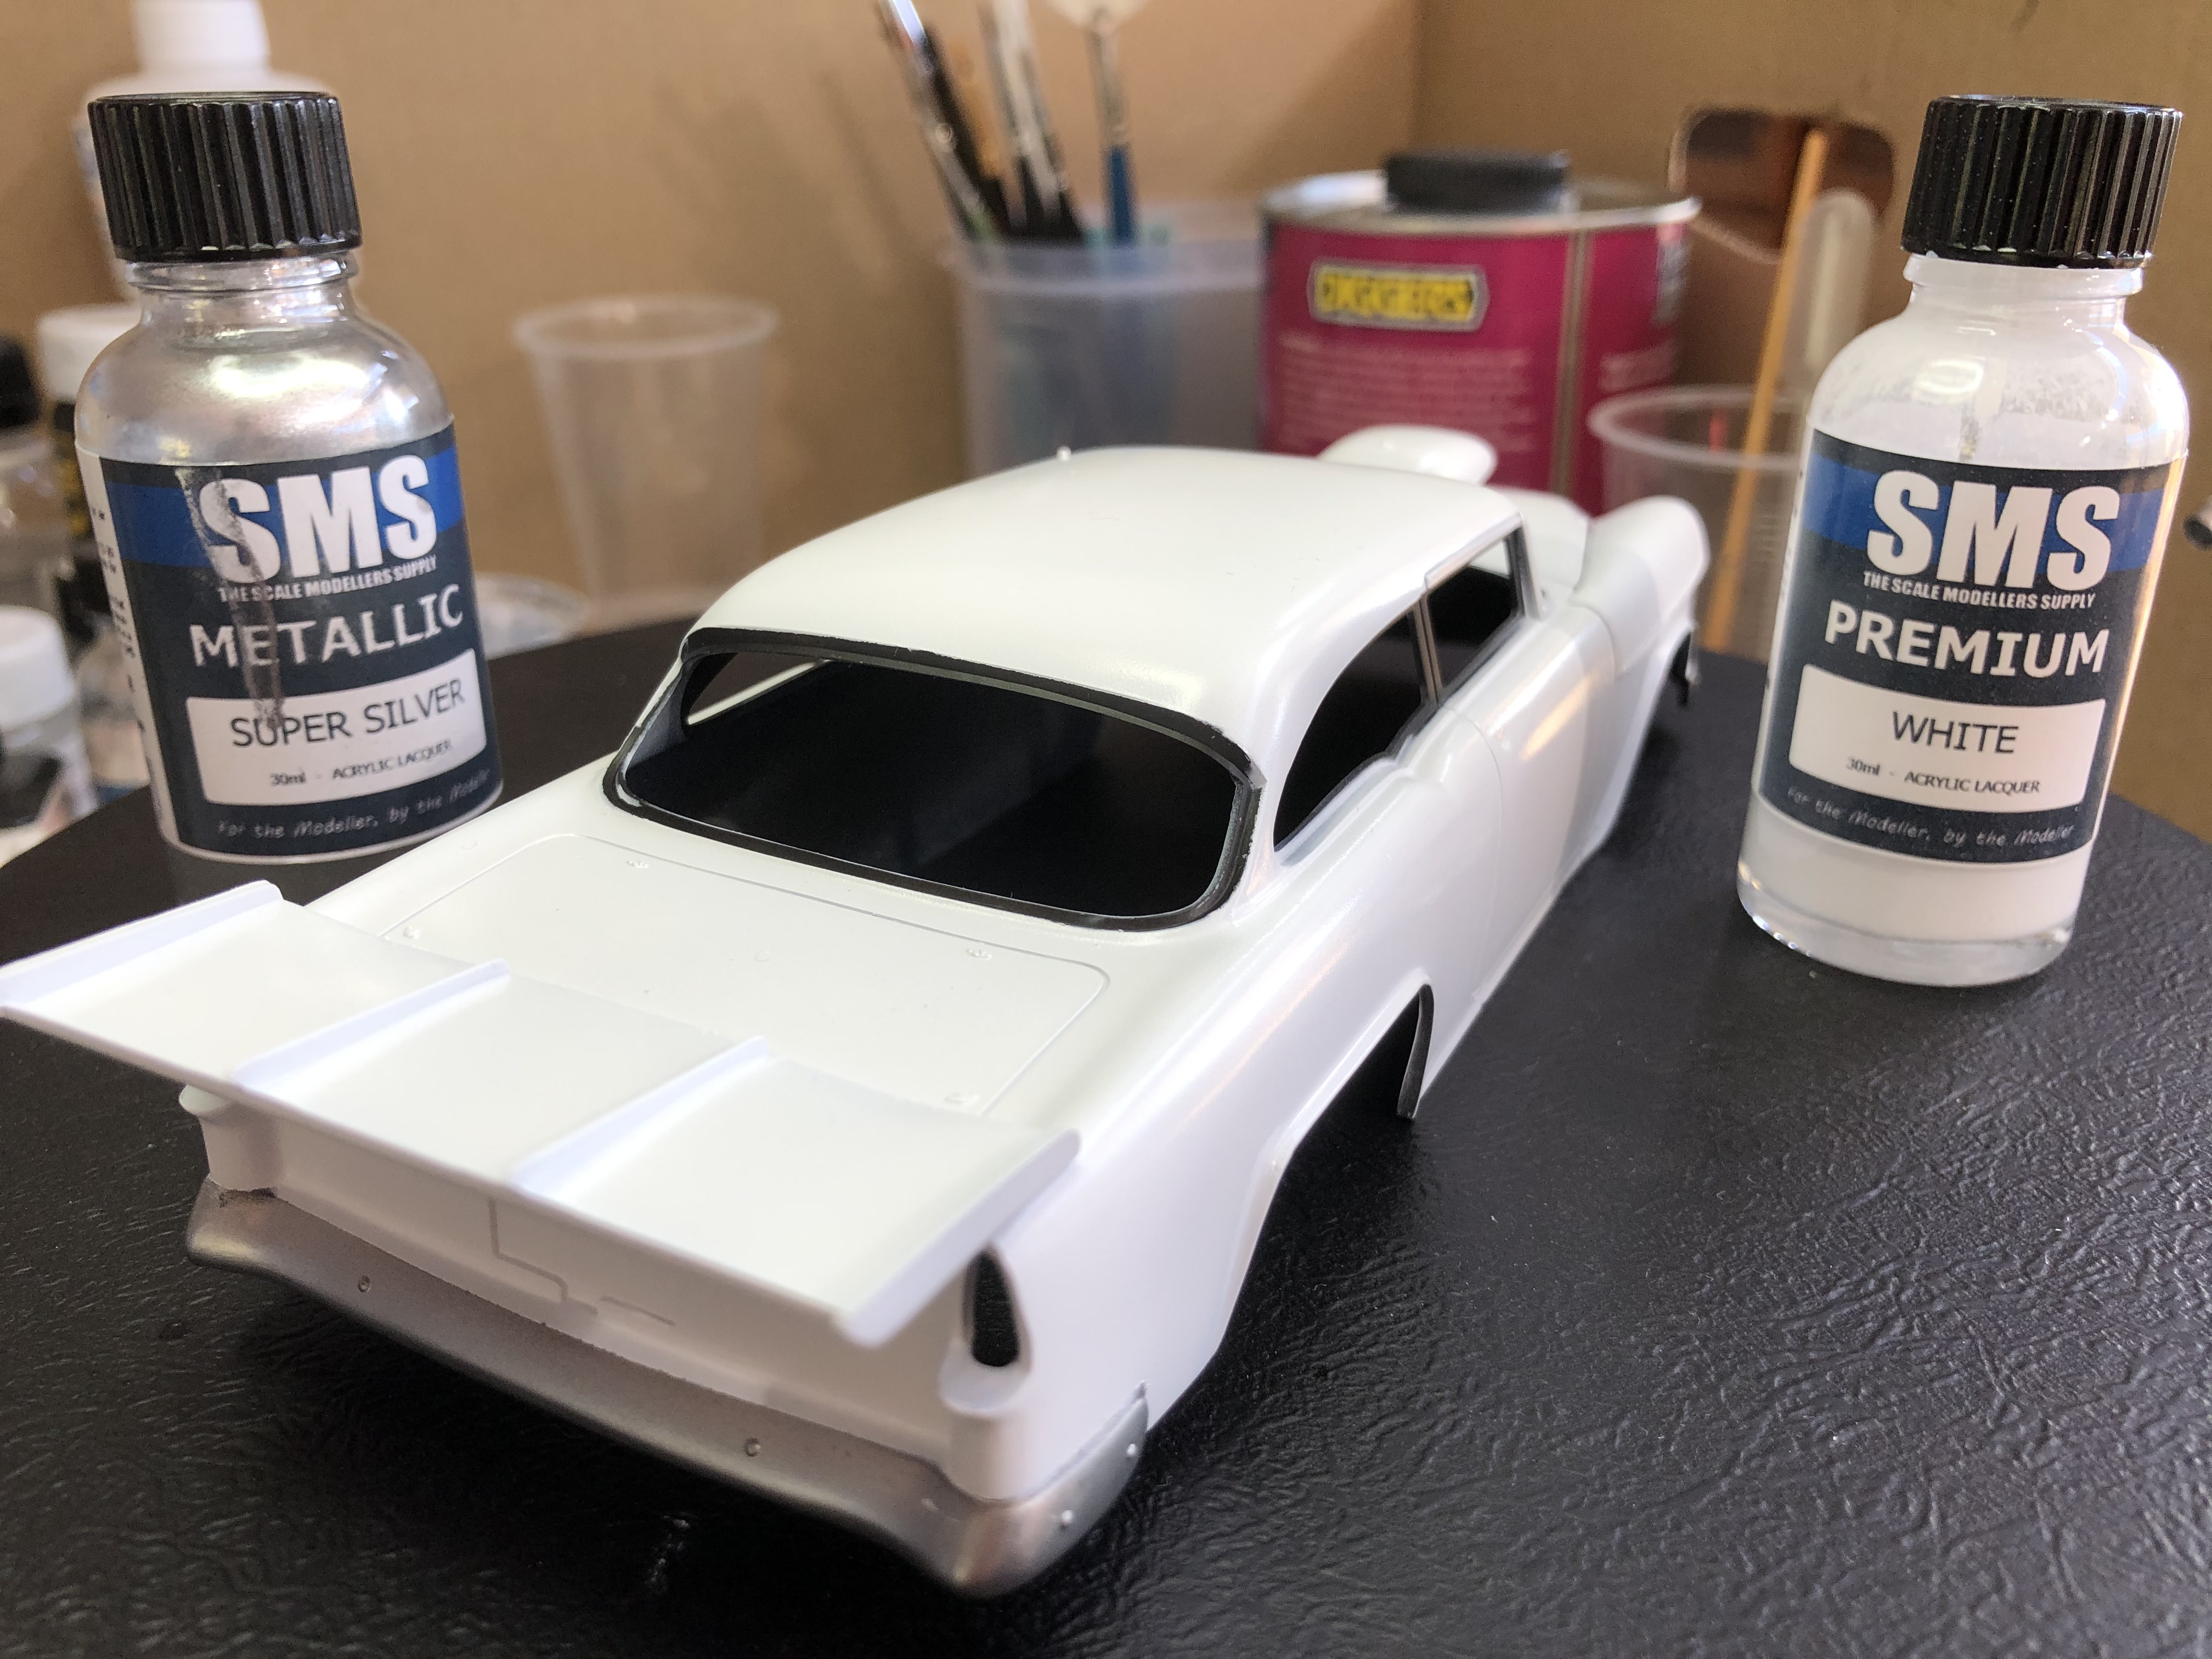
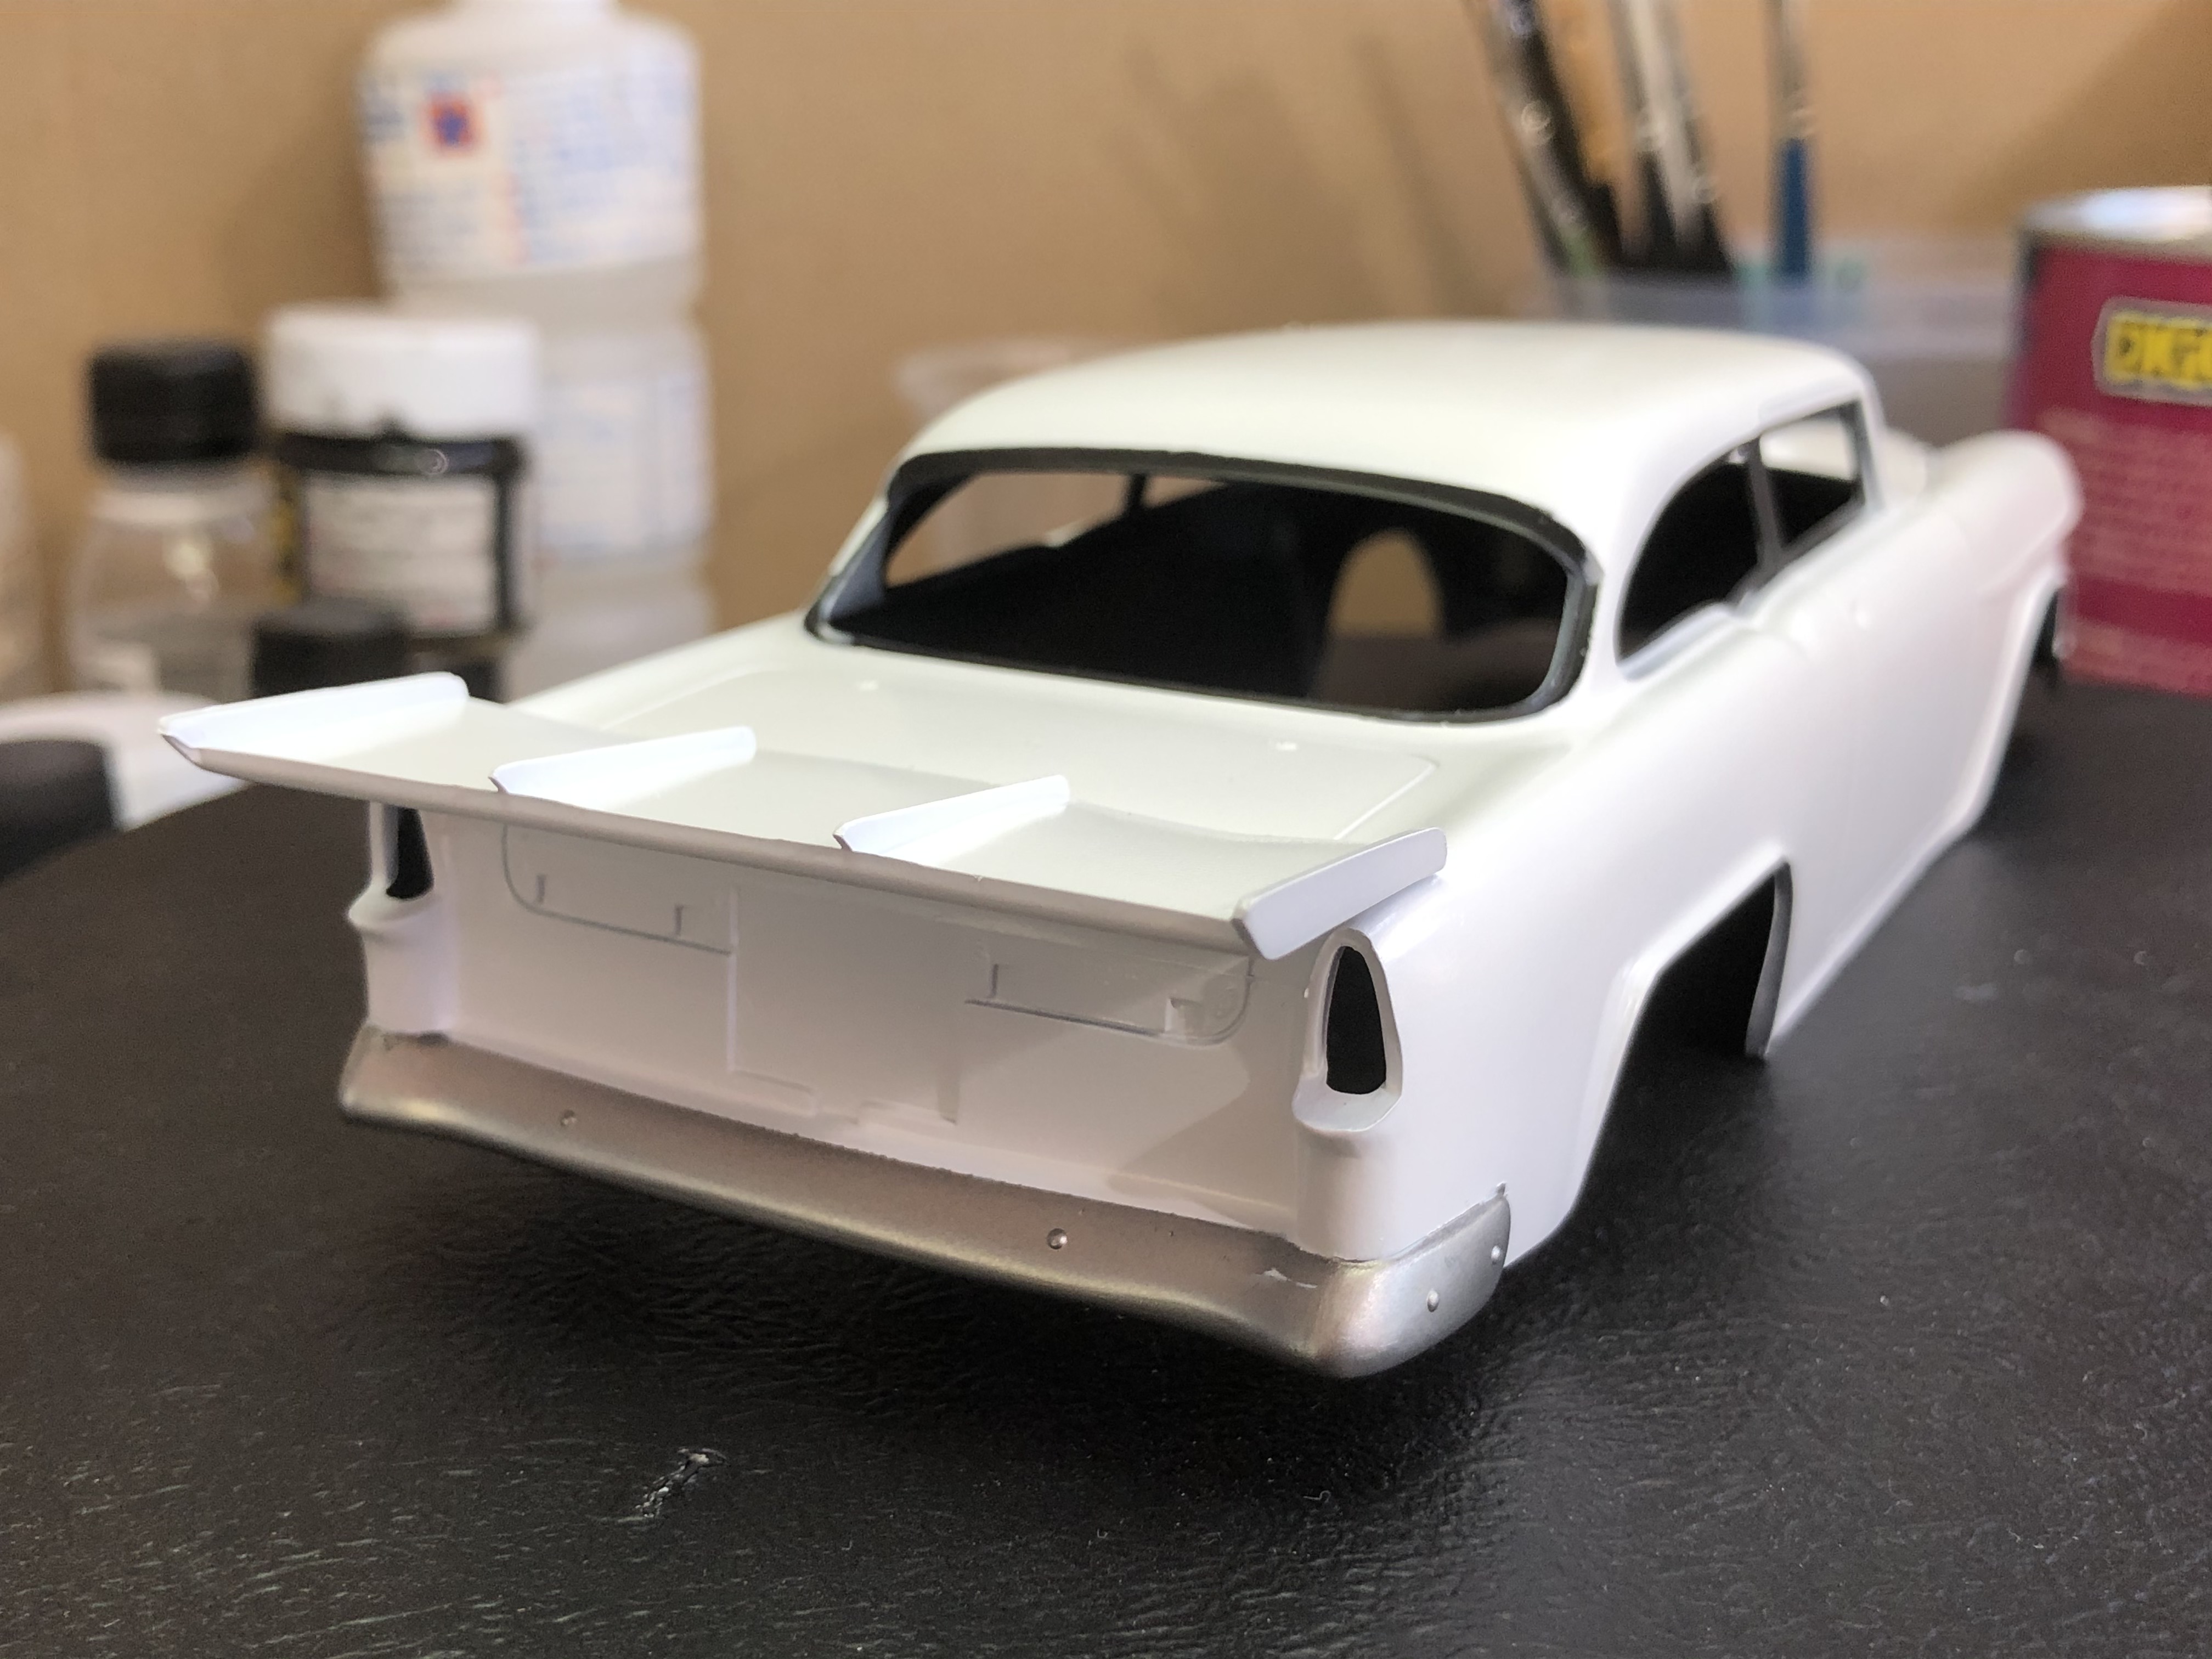
The kit part for the parachute pack at the back end had a small raised profile for the drag chute attachment cables on the underside which was undersized and would be invisible on the finished build.
Looking at reference images the cables are quite large and hang down noticeably.
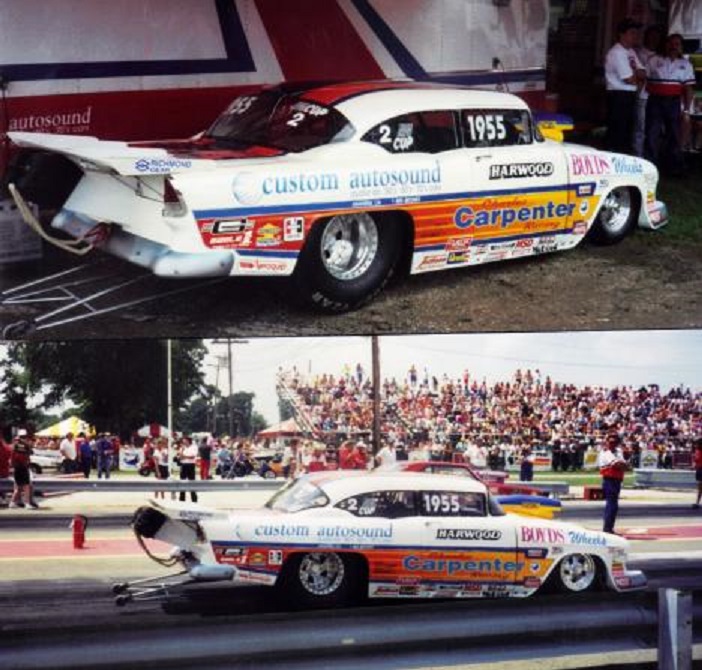
I shaved the cable off the kit part and will add a couple of braided lines for the attachment cables, and fine wire for the release cables, once everything is together.
The instructions have you painting the chute box silver, but all of the reference images show it being white. White it shall be!
Cheers, D
The kit part for the parachute pack at the back end had a small raised profile for the drag chute attachment cables on the underside which was undersized and would be invisible on the finished build.
Looking at reference images the cables are quite large and hang down noticeably.
I shaved the cable off the kit part and will add a couple of braided lines for the attachment cables, and fine wire for the release cables, once everything is together.
The instructions have you painting the chute box silver, but all of the reference images show it being white. White it shall be!
Cheers, D
Joel_W
Joined: December 04, 2010
KitMaker: 11,666 posts
Auto Modeler: 2,974 posts
Posted: Friday, May 15, 2020 - 01:44 AM UTC
D,
Looking forward to seeing how those scratched "Cute" cables turnout. And as for the base White color. It really looks quite good to me.
Joel
Looking forward to seeing how those scratched "Cute" cables turnout. And as for the base White color. It really looks quite good to me.
Joel
Szmann
Joined: September 02, 2014
KitMaker: 1,977 posts
Auto Modeler: 1,371 posts
Posted: Friday, May 15, 2020 - 04:10 AM UTC
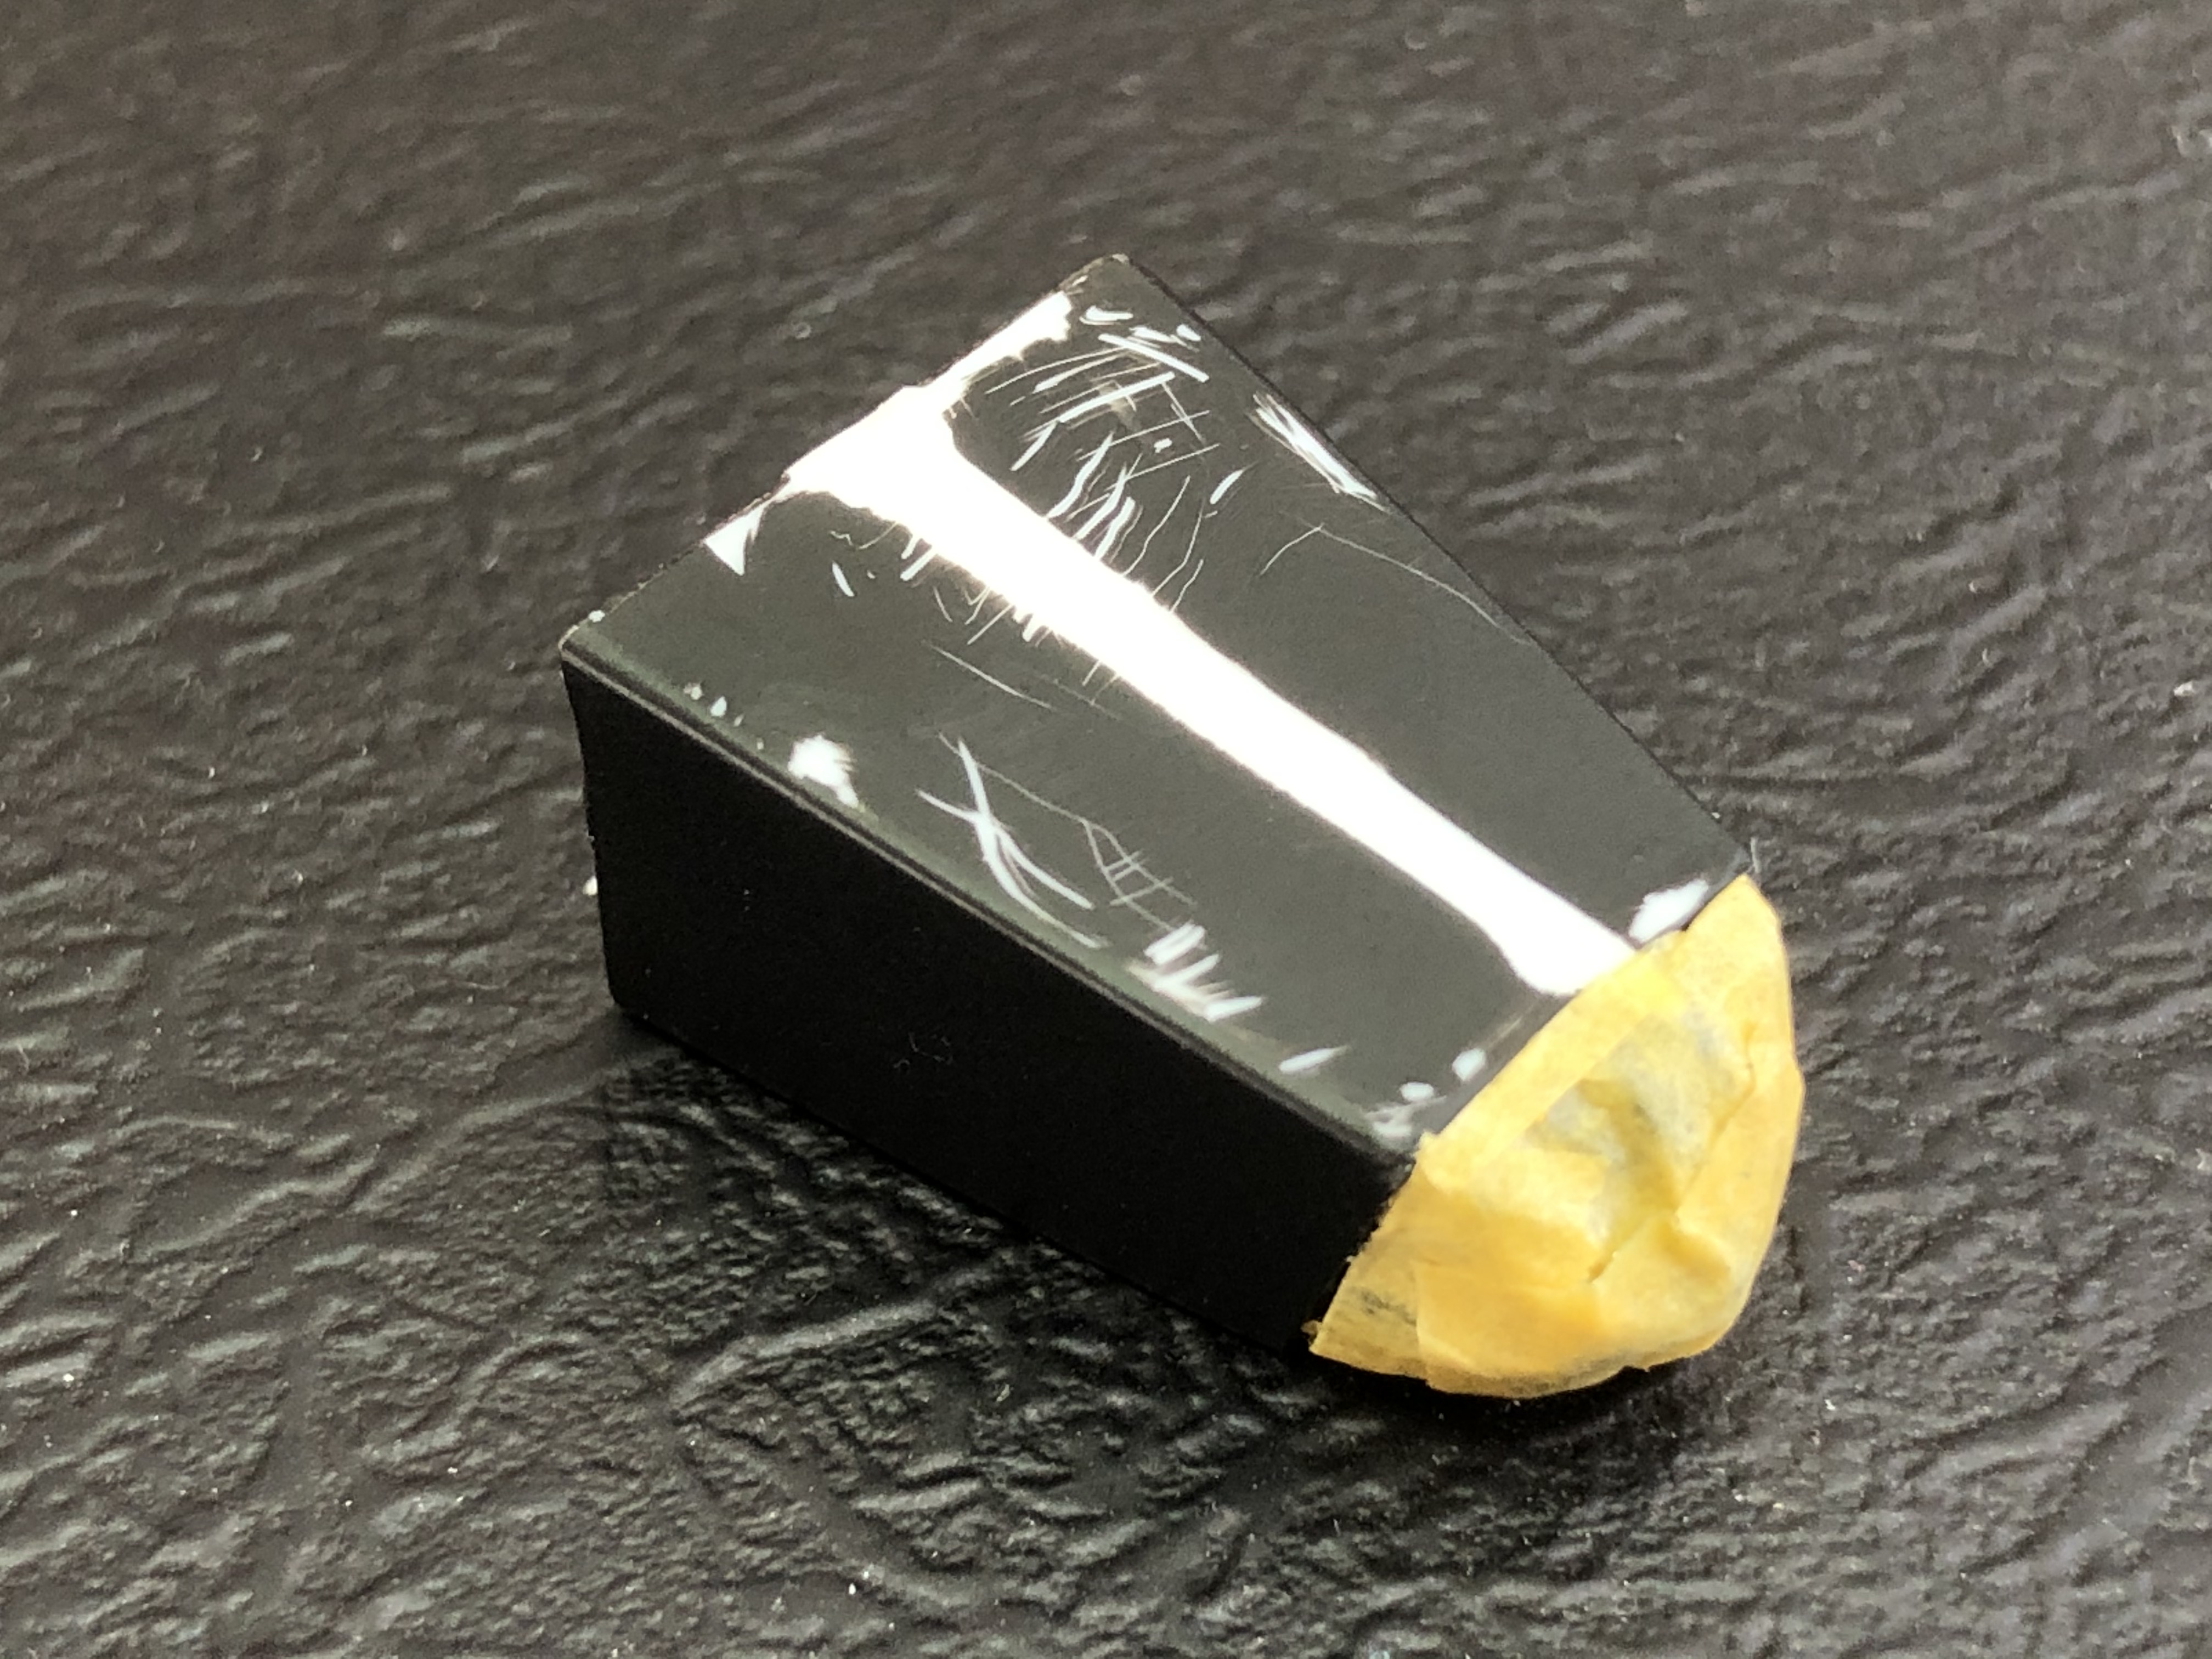
Damian, the satiny smooth white looks perfect for an acrylic lacquer. That's what I'm going to use for the white areas on my P34 as well, but from another brand.
The whole build looks really neat and well worked. Great!
Gabriel
The whole build looks really neat and well worked. Great!
Gabriel

rv1963
Joined: December 07, 2004
KitMaker: 1,888 posts
Auto Modeler: 806 posts
Posted: Friday, May 15, 2020 - 05:23 AM UTC
Thanks guys, Damian your paint work and taping look good nice and smooth. Small up date got some color and a little detail painting to the dash board.


pnance26
Joined: January 22, 2016
KitMaker: 766 posts
Auto Modeler: 140 posts

Posted: Friday, May 15, 2020 - 10:16 AM UTC
Damian Rigby,
Watching this one!
This was my version of 57 Chevy pro modified...
Can't wait to see your finished product!
Watching this one!
This was my version of 57 Chevy pro modified...
Can't wait to see your finished product!
Joel_W
Joined: December 04, 2010
KitMaker: 11,666 posts
Auto Modeler: 2,974 posts
Posted: Friday, May 15, 2020 - 10:53 AM UTC
Robert,
the dash is simple in design, but perfectly executed. It really looks the part.
Joel
the dash is simple in design, but perfectly executed. It really looks the part.
Joel
Joel_W
Joined: December 04, 2010
KitMaker: 11,666 posts
Auto Modeler: 2,974 posts
Posted: Friday, May 15, 2020 - 10:57 AM UTC
Patrick,
Now that's one very impressive diorama. As for the decals, that's really effective thinking out of the box. I'm sure that Terry Labonte would approve.
Joel
Now that's one very impressive diorama. As for the decals, that's really effective thinking out of the box. I'm sure that Terry Labonte would approve.
Joel
pnance26
Joined: January 22, 2016
KitMaker: 766 posts
Auto Modeler: 140 posts
Posted: Friday, May 15, 2020 - 11:18 AM UTC
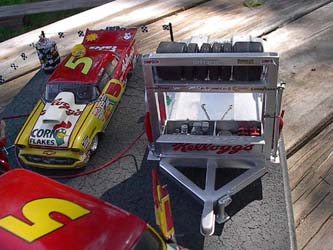
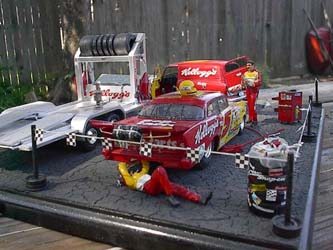
I've got a few more shots if you want to see them...
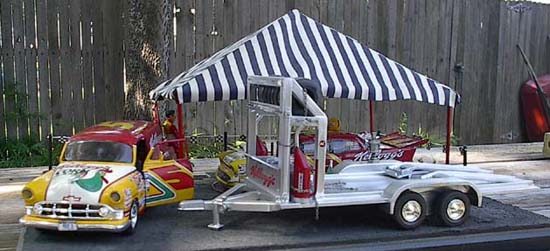
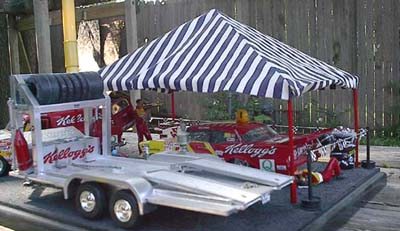
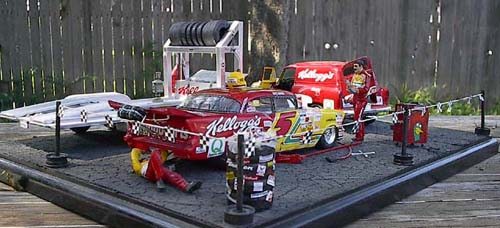
It was based on the premise that Terry's dad, Bob, got into straight line instead of circle track racing. And the boys went that way...
The panel is a '53 Chevy. The toolboxes are from a Fujimi Garage kit. The trailer was a straight lay. I built the racks and the tool box. There is a compressor in the toolbox. Chains with come-alongs are on the trailer.
The trash can is stacked up tires with an insert. The "rope line" posts are round stock in wheels and the line itself is actually dental floss.
I had a lot of fun opening up the doors on the panel truck.
I have all the parts somewhere. I should reconstruct it some day!
Szmann
Joined: September 02, 2014
KitMaker: 1,977 posts
Auto Modeler: 1,371 posts
Posted: Friday, May 15, 2020 - 12:16 PM UTC
Robert, simple but effective dash! Any intention of pin-washing those panel lines?
Patrick, impressive diorama! Thanks for sharing!
Gabriel
Patrick, impressive diorama! Thanks for sharing!
Gabriel
pnance26
Joined: January 22, 2016
KitMaker: 766 posts
Auto Modeler: 140 posts
Posted: Friday, May 15, 2020 - 12:55 PM UTC
Didn't mean to hijack the build thread.
AussieReg
#007
Joined: June 09, 2009
KitMaker: 8,156 posts
Auto Modeler: 2,953 posts
Posted: Friday, May 15, 2020 - 01:27 PM UTC
Quoted Text
Didn't mean to hijack the build thread.
Hijack all you want if youre going to show us that sort of work, especially if its full of Chevys! 😎
Brilliant stuff, love it!
Cheers, D
Joel_W
Joined: December 04, 2010
KitMaker: 11,666 posts
Auto Modeler: 2,974 posts
Posted: Saturday, May 16, 2020 - 01:51 AM UTC
Patrick,
I'd love to see more pictures of your diorama. Just a fantastic concept for sure.
joel
I'd love to see more pictures of your diorama. Just a fantastic concept for sure.
joel
pnance26
Joined: January 22, 2016
KitMaker: 766 posts
Auto Modeler: 140 posts
Posted: Saturday, May 16, 2020 - 02:44 AM UTC
Joel,
You have now seen all 5 photos that exist! The parts are around somewhere. After the Ferrari project, I may have to resurrect this using Kevin Harvick driving a Ford Mustang funny car ala John Force!
I know I can build a better pop-up now!
You have now seen all 5 photos that exist! The parts are around somewhere. After the Ferrari project, I may have to resurrect this using Kevin Harvick driving a Ford Mustang funny car ala John Force!
I know I can build a better pop-up now!
Joel_W
Joined: December 04, 2010
KitMaker: 11,666 posts
Auto Modeler: 2,974 posts
Posted: Saturday, May 16, 2020 - 03:25 AM UTC
Patrick,
Now I'd for one would sure love to see that.
joel
Now I'd for one would sure love to see that.
joel
pnance26
Joined: January 22, 2016
KitMaker: 766 posts
Auto Modeler: 140 posts
Posted: Saturday, May 16, 2020 - 03:34 AM UTC
Quoted Text
Patrick,
Now I'd for one would sure love to see that.
joel
Uh oh...
Szmann
Joined: September 02, 2014
KitMaker: 1,977 posts
Auto Modeler: 1,371 posts
Posted: Saturday, May 16, 2020 - 11:10 AM UTC
Since this build it is part of the GB, I'm making a quick pit-stop here. More detailed info in the dedicated thread.
Main body parts, transmission and engine in advanced stages:


Gabriel
Main body parts, transmission and engine in advanced stages:
Gabriel
pnance26
Joined: January 22, 2016
KitMaker: 766 posts
Auto Modeler: 140 posts
Posted: Saturday, May 16, 2020 - 11:23 AM UTC
Quoted Text
Patrick,
Now that's one very impressive diorama. As for the decals, that's really effective thinking out of the box. I'm sure that Terry Labonte would approve.
Joel
They were quite a chore if I remember correctly... especially around the scoop on the hood and the curved hood of the panel van.
Dixon66
Joined: December 12, 2002
KitMaker: 1,500 posts
Auto Modeler: 645 posts
Posted: Saturday, May 16, 2020 - 12:25 PM UTC
You'll have to do a mini Kevin Harvick ALA the Mobile 1 commercials.
Joel_W
Joined: December 04, 2010
KitMaker: 11,666 posts
Auto Modeler: 2,974 posts
Posted: Sunday, May 17, 2020 - 02:40 AM UTC
Gabriel,
Excellent start on your Tyrell P34. Will be following the build much more closely in your build thread.
the weather here is finally dry enough to clear coat the Lotus shell and body panels, and do a lot of coming together with various sub-assemblies.
Joel
Excellent start on your Tyrell P34. Will be following the build much more closely in your build thread.
the weather here is finally dry enough to clear coat the Lotus shell and body panels, and do a lot of coming together with various sub-assemblies.
Joel
Joel_W
Joined: December 04, 2010
KitMaker: 11,666 posts
Auto Modeler: 2,974 posts
Posted: Sunday, May 17, 2020 - 10:40 AM UTC
Finally, I've got enough done once again for a small update on the Lotus 99t.
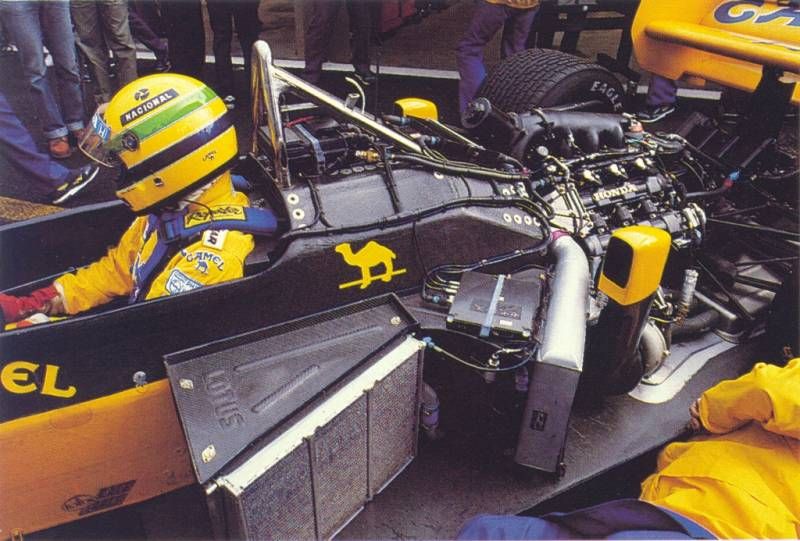
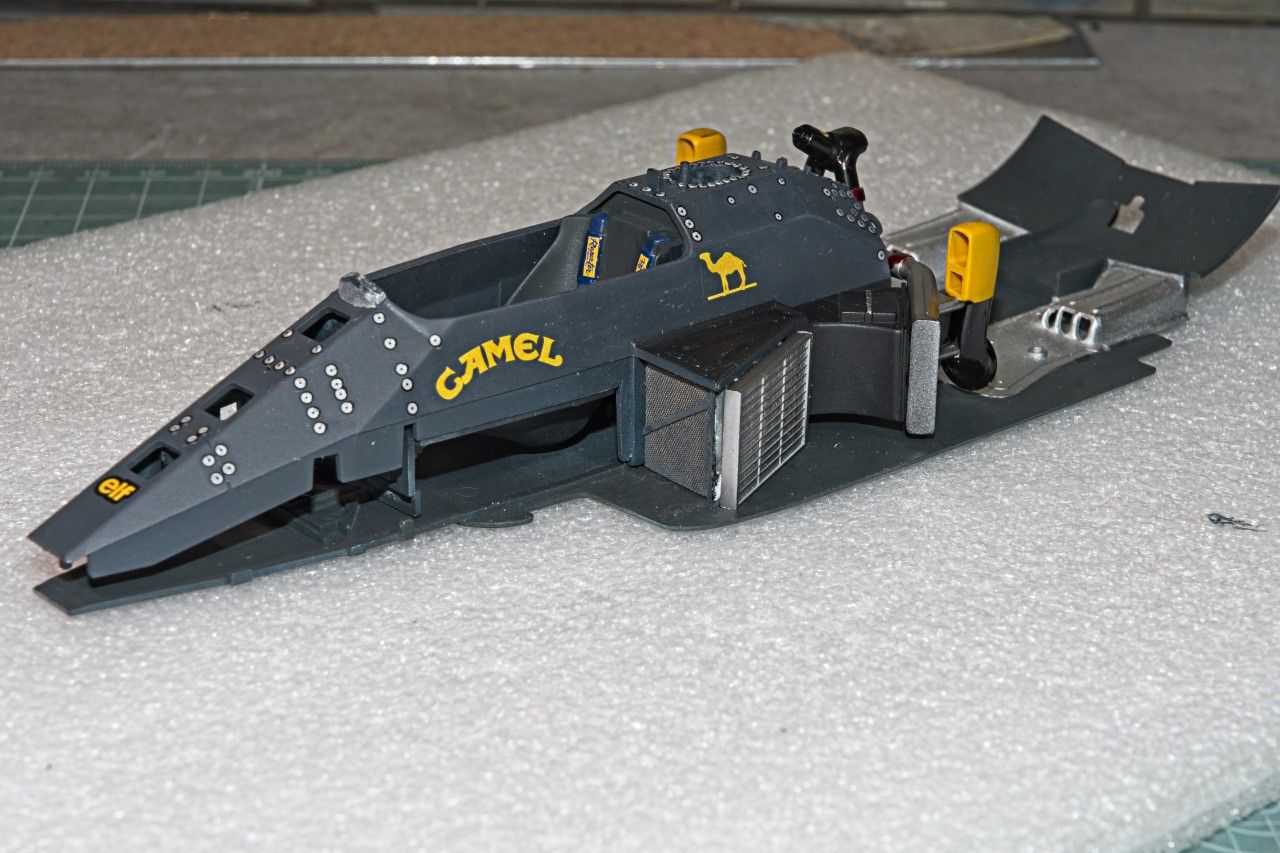
With most of the rear suspension, engine, transaxle, minus brakes done and installed, I next focused my efforts on the 4 radiators, and twin turbo intakes. The main radiators are right behind the driver's compartment, and have two rather large aluminum tubes and filter assembly. Attached to them are the twin turbo air intakes. And right in ront of them are another pair of radiators. All the parts were given a base coat of Tamiya X-1 Gloss Black. I opted for Alcad 2 Duraluminum As the shinier finish is what I was looking for. The intakes were previiously primed and painted with the Gravity Lotus Camel Yellow on the upper half, and Tamiya Semi Gloss Black on the lower half.
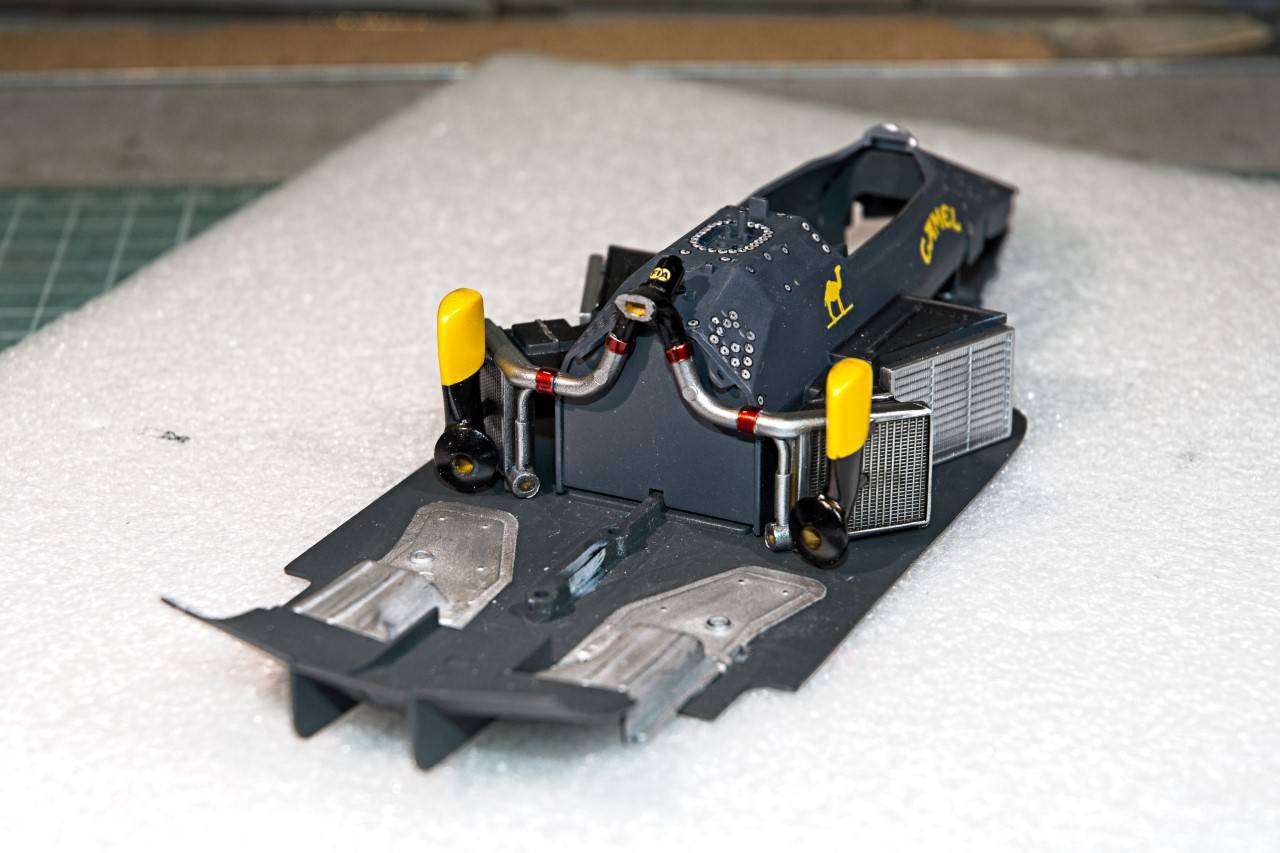
the 2nd pair of radiators haven't recieved their Tamiya black panel wash as yet, so they look way to bright and new. Also the top of one of the intakes has a little black over spray that needs to be removed.
there is a main opening in the front of the radiator pods that Tamiya just left open, and completely void of details.
Research shows that there is a protective screen in both sides of the intakes.
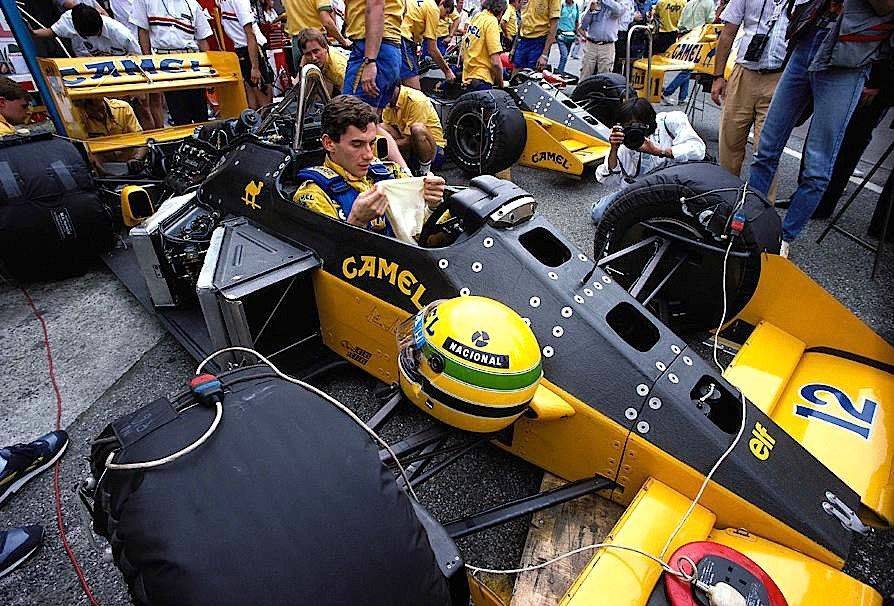
In the above picture you can see quite a large Aluminum frame around the screen. Yet in the picture below the screen is completely incased within the mouth of the opening.
so I scratched out two screens based on a few other pictures of the incased version from sheet plastic and a piece of screening from a coffee filter. Right now the screening is just dry fitted along with all the radiators, as a final edging of paint is still needed to fully cover the white sheet plastic edge.
The drivers compartment is just about completed, but it's about as bare bones as one can get, so I haven't included a picture of it with this update.
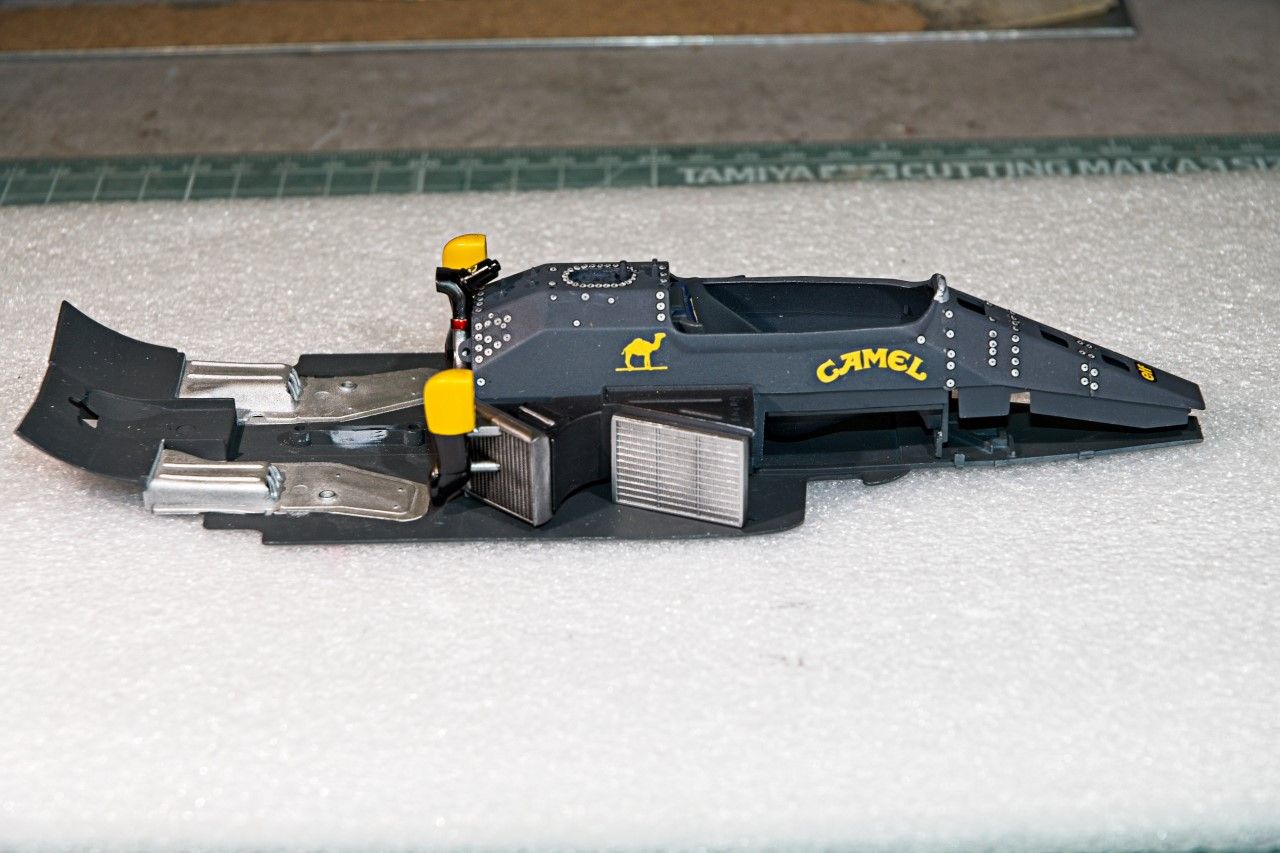
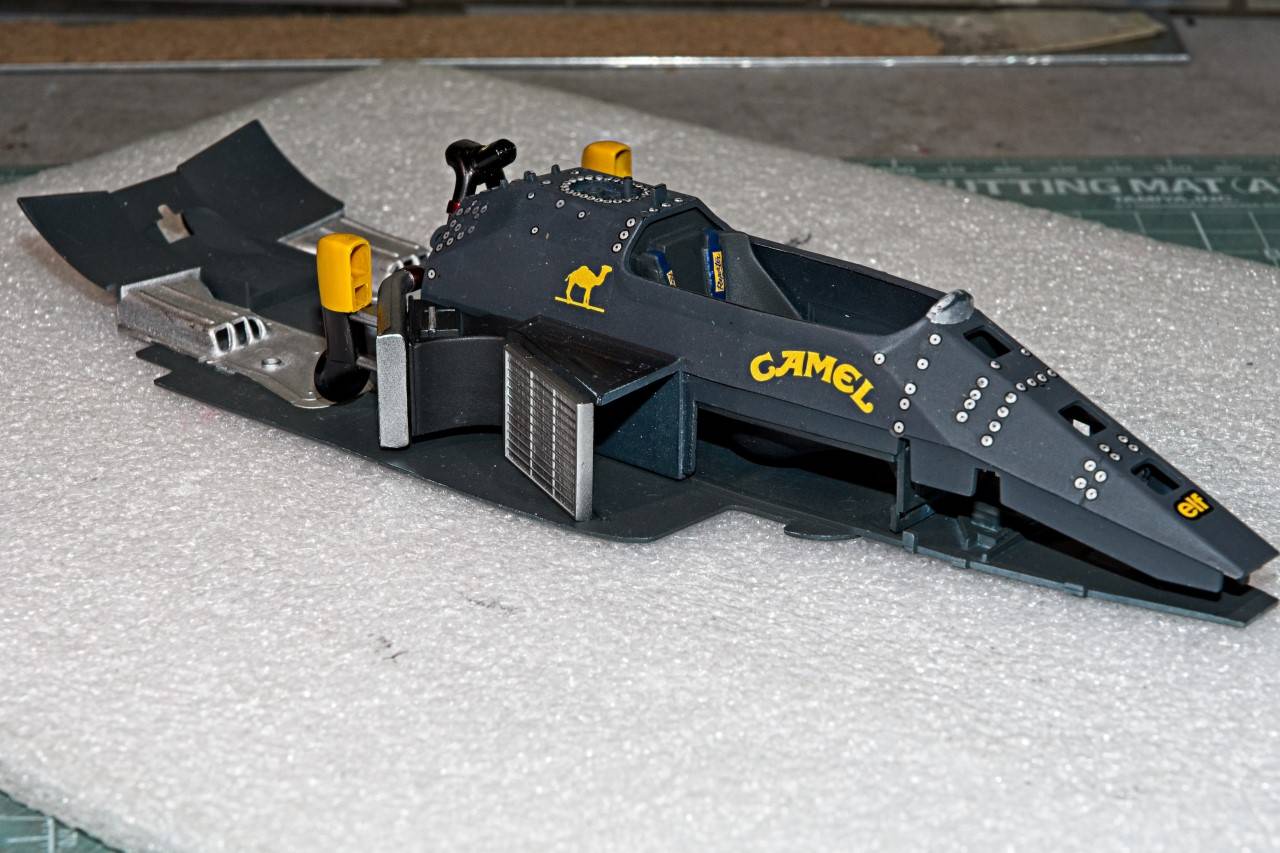
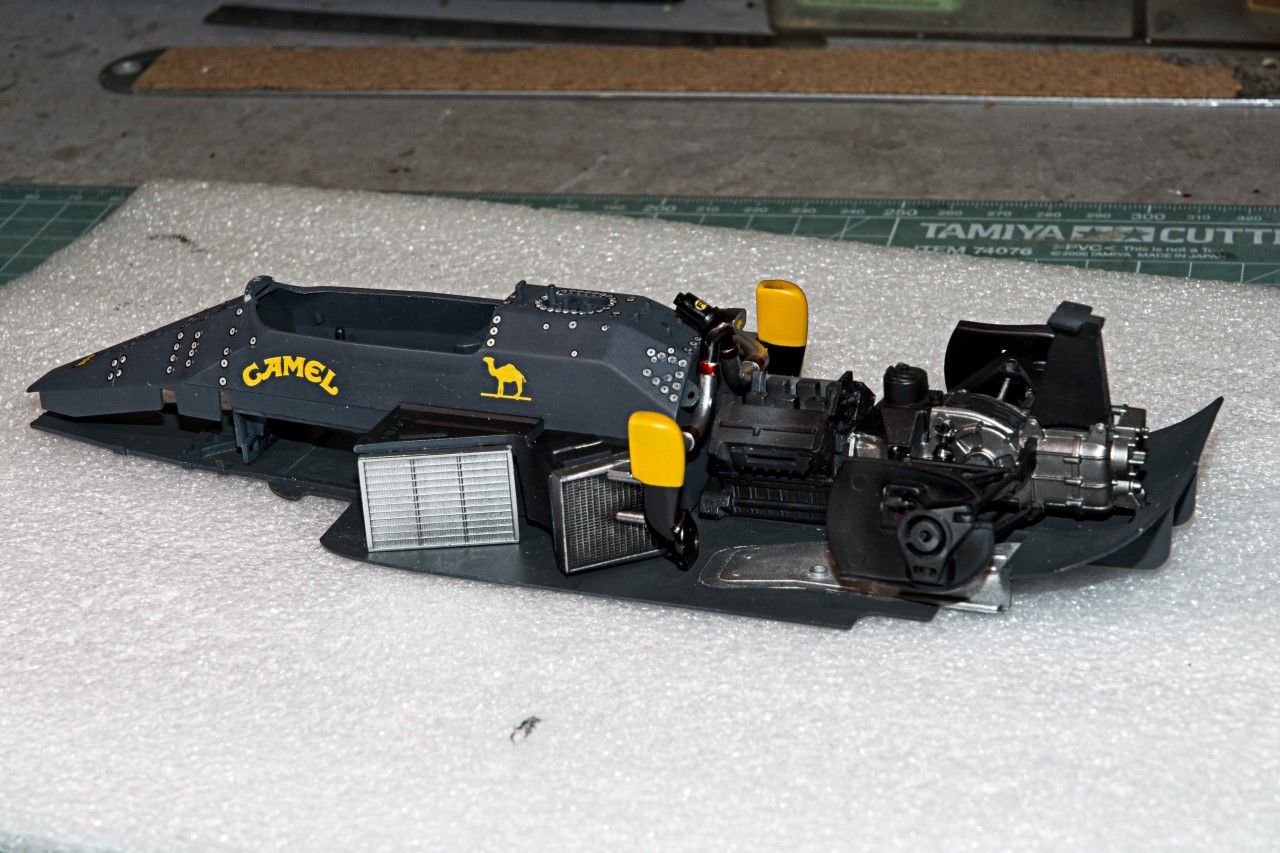
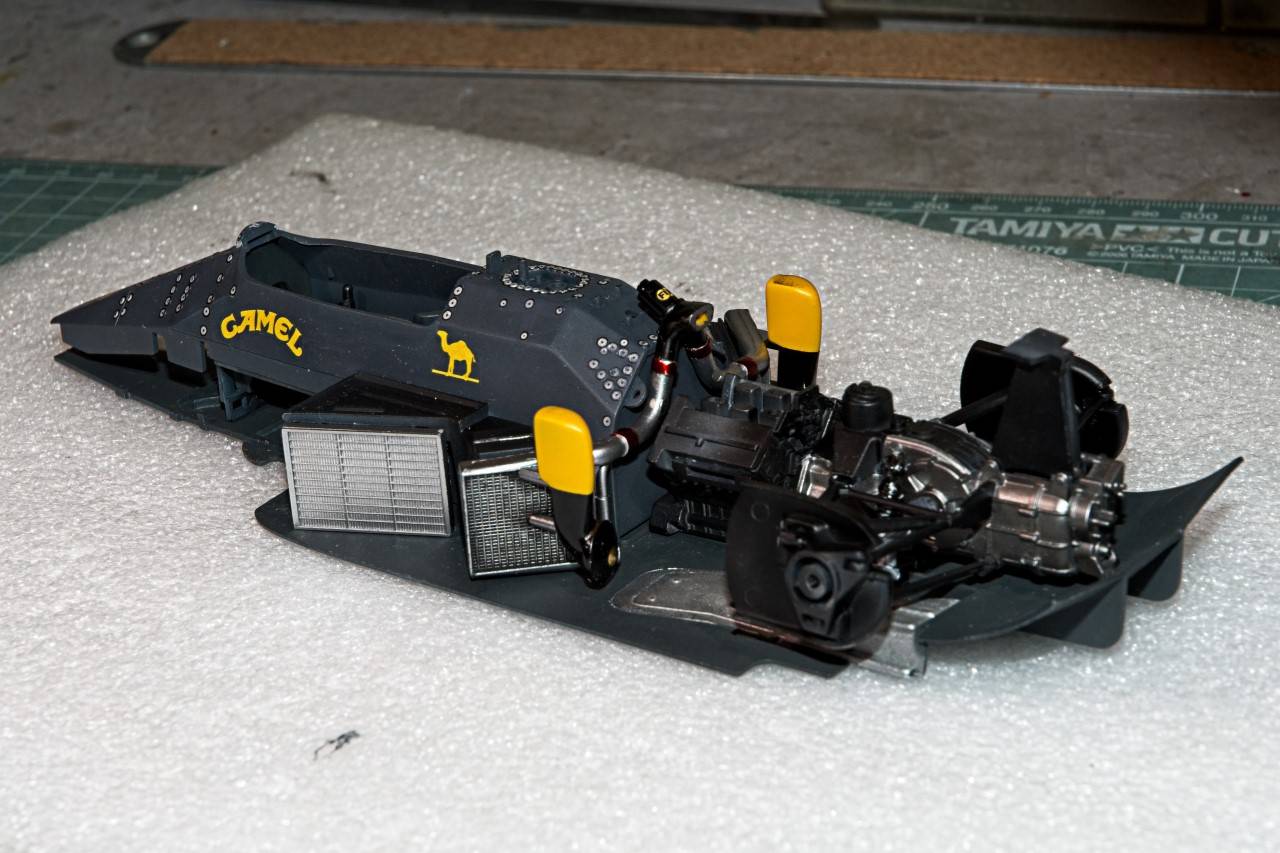
And here's a few pictures of how the chassis is very slowly shaping with the engine block, transaxle. and rear suspenion also dry fitted.
Thanks for stopping by and checking out my prograss to date. As always, it's greatly appreciated.
Joel
With most of the rear suspension, engine, transaxle, minus brakes done and installed, I next focused my efforts on the 4 radiators, and twin turbo intakes. The main radiators are right behind the driver's compartment, and have two rather large aluminum tubes and filter assembly. Attached to them are the twin turbo air intakes. And right in ront of them are another pair of radiators. All the parts were given a base coat of Tamiya X-1 Gloss Black. I opted for Alcad 2 Duraluminum As the shinier finish is what I was looking for. The intakes were previiously primed and painted with the Gravity Lotus Camel Yellow on the upper half, and Tamiya Semi Gloss Black on the lower half.
the 2nd pair of radiators haven't recieved their Tamiya black panel wash as yet, so they look way to bright and new. Also the top of one of the intakes has a little black over spray that needs to be removed.
there is a main opening in the front of the radiator pods that Tamiya just left open, and completely void of details.
Research shows that there is a protective screen in both sides of the intakes.
In the above picture you can see quite a large Aluminum frame around the screen. Yet in the picture below the screen is completely incased within the mouth of the opening.
so I scratched out two screens based on a few other pictures of the incased version from sheet plastic and a piece of screening from a coffee filter. Right now the screening is just dry fitted along with all the radiators, as a final edging of paint is still needed to fully cover the white sheet plastic edge.
The drivers compartment is just about completed, but it's about as bare bones as one can get, so I haven't included a picture of it with this update.
And here's a few pictures of how the chassis is very slowly shaping with the engine block, transaxle. and rear suspenion also dry fitted.
Thanks for stopping by and checking out my prograss to date. As always, it's greatly appreciated.
Joel
 |

WEB HOSTING BY


Copyright ©2021 Auto Modeler and Kitmaker Network, a subsidiary of Silver Star Enterprises
All Rights Reserved. Please read our Conditions of Use and Privacy Policy.
All Rights Reserved. Please read our Conditions of Use and Privacy Policy.