The Garage
For general automotive modeling or non-modeling topics.
Strip, Track & Trail Official Build Thread
pnance26
_VISITCOMMUNITY
California, United States
Joined: January 22, 2016
KitMaker: 766 posts
Auto Modeler: 140 posts
Posted: Friday, May 08, 2020 - 03:13 PM UTC

Quoted Text

Robert, I can actually see the pearl white, and it's pretty much the same my real life car looks like. In contrast with orange should look superb!

Damian, you've got a mighty grip on those metallic colours. As Joel noted it already, the exhaust headers really look diamond!

New GB entry. It wasn't to be the cheeky VW, it is going to be the monstrous Tyrrell P34 1/20, 1977 Monaco GP, #4 by Tamiya. I'm gonna do the entry post here, for conformity, but I'm going to open separate thread. Probably I'm going to start working on it not before Sunday, but the entry remains definitive.

Gabriel


1/12th scale is monstrous dude! Come on up to the big league! LOL!
AussieReg
Staff MemberAssociate Editor
AUTOMODELER
#007
_VISITCOMMUNITY
Victoria, Australia
Joined: June 09, 2009
KitMaker: 8,156 posts
Auto Modeler: 2,953 posts
Posted: Saturday, May 09, 2020 - 12:00 AM UTC
We have a new entrant in the mix now, welcome to Carlos from Spain! I'm sure you will enjoy the Group Build, what are you planning to build?

Running update on builds

5 weeks in, almost 8,500 views and over 400 posts
22 enlisted (plus 1, Jesper sign in please mate!)
13 builds in progress
3 completed builds

Szmann (Gabriel) - NASCAR - Chev Monte Carlo (Tony Stewart) - 1/25 AMT/ERTL kit - COMPLETED
Stickframe (Nick) - ENDURANCE - McLaren F1 GTR Longtail - 1/24 Aoshima kit - COMPLETED
Szmann (Gabriel) - NASCAR - Pontiac Grand Prix (Kyle Petty) - 1/24 Revell/Monogram kit - COMPLETED

Aussiereg (Damian) - 
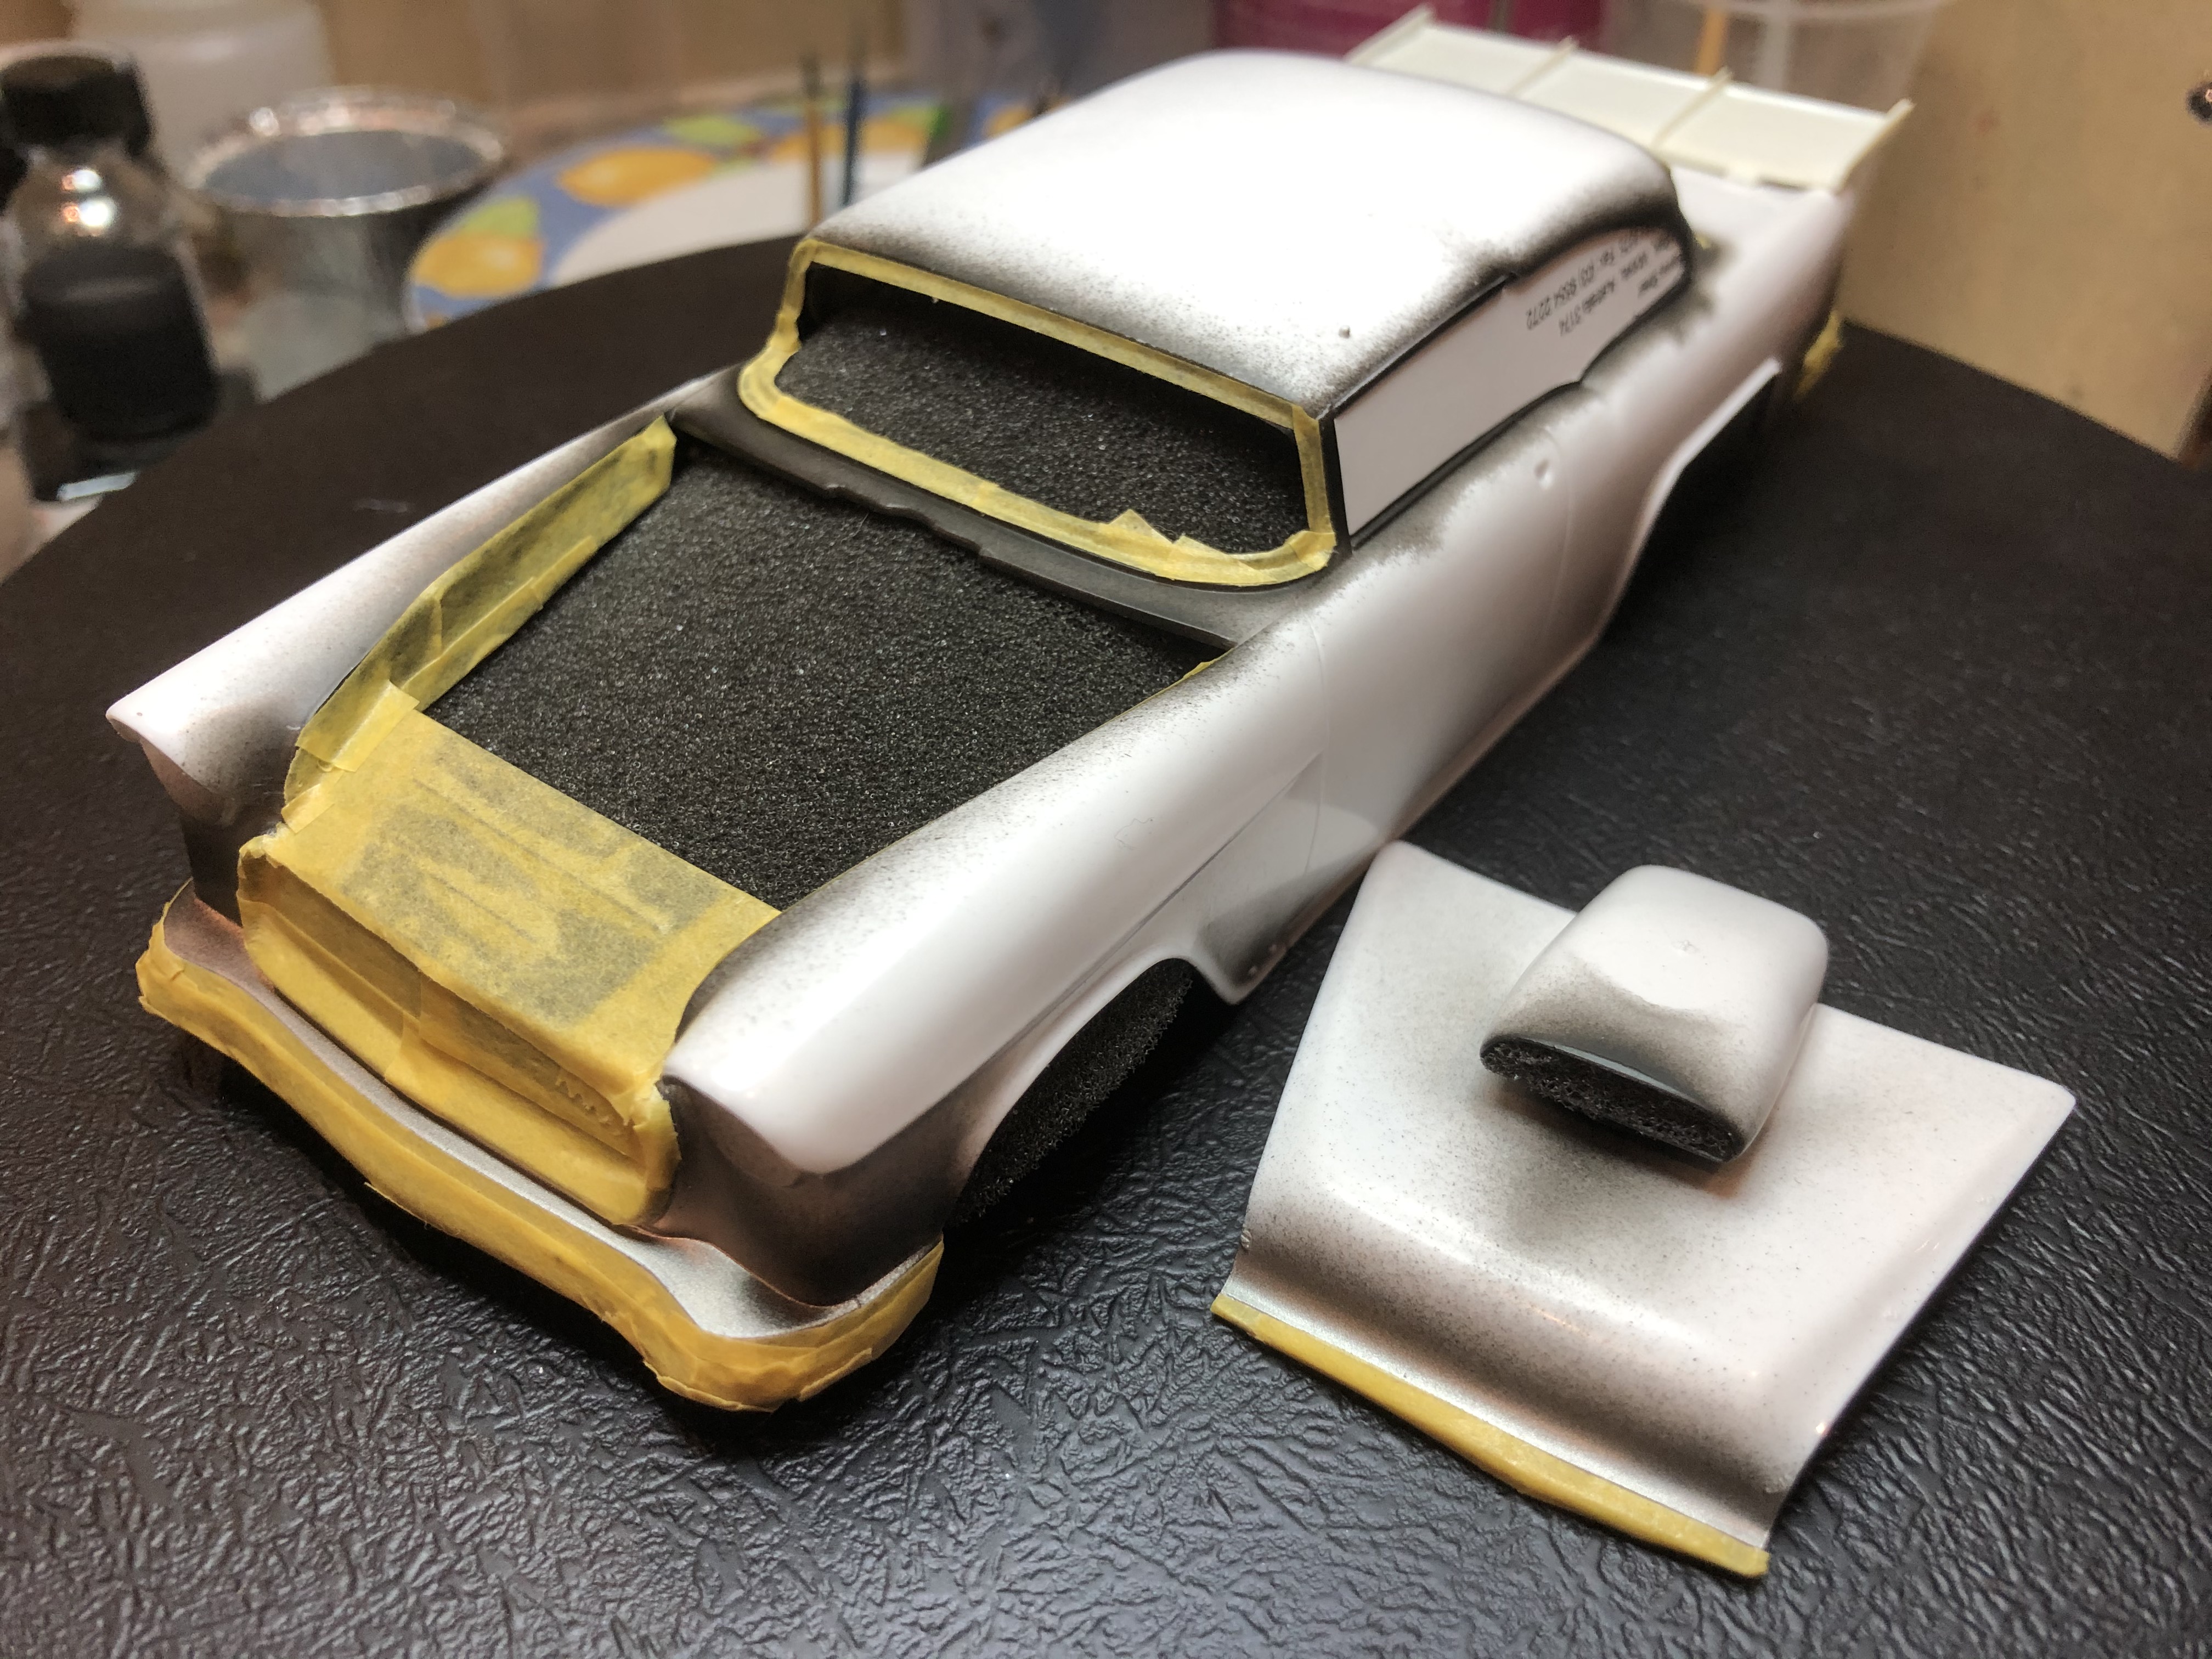
STRAIGHTLINE - '55 Chev Pro Sportsman (Charles Carpenter) - 1/25 Revell kit - Primer and paint started
Joel_W (Joel) - 
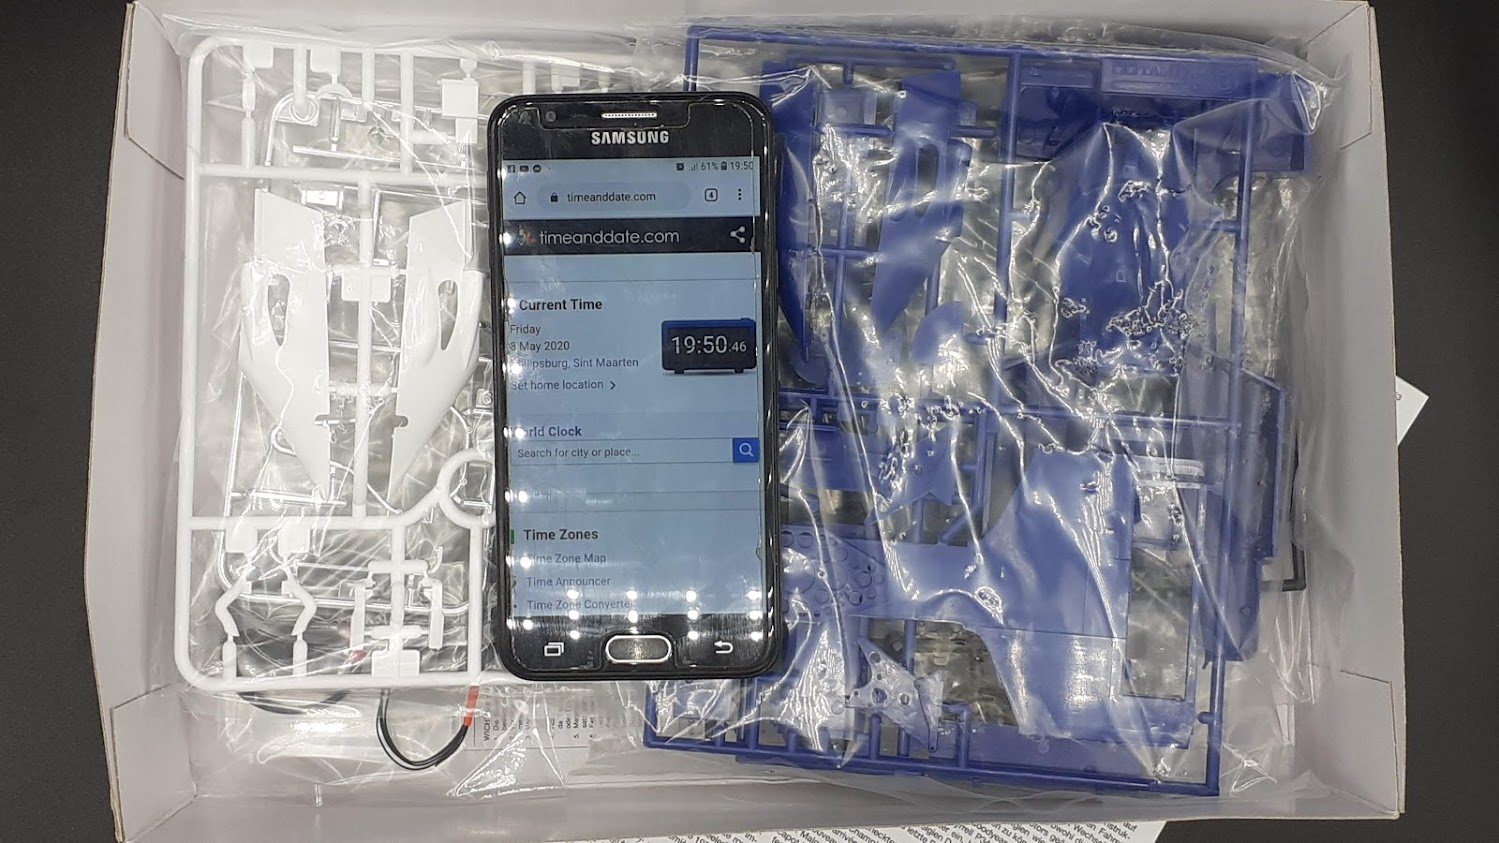
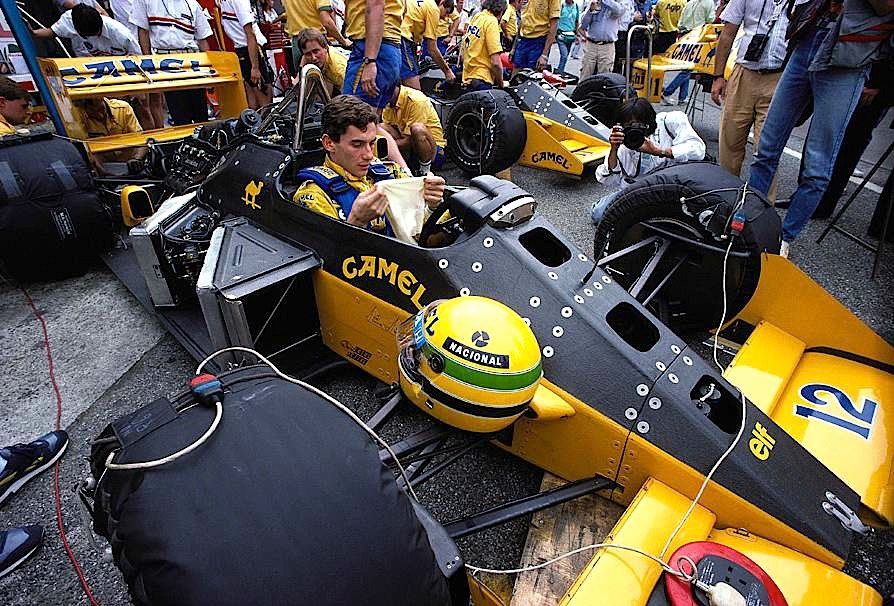
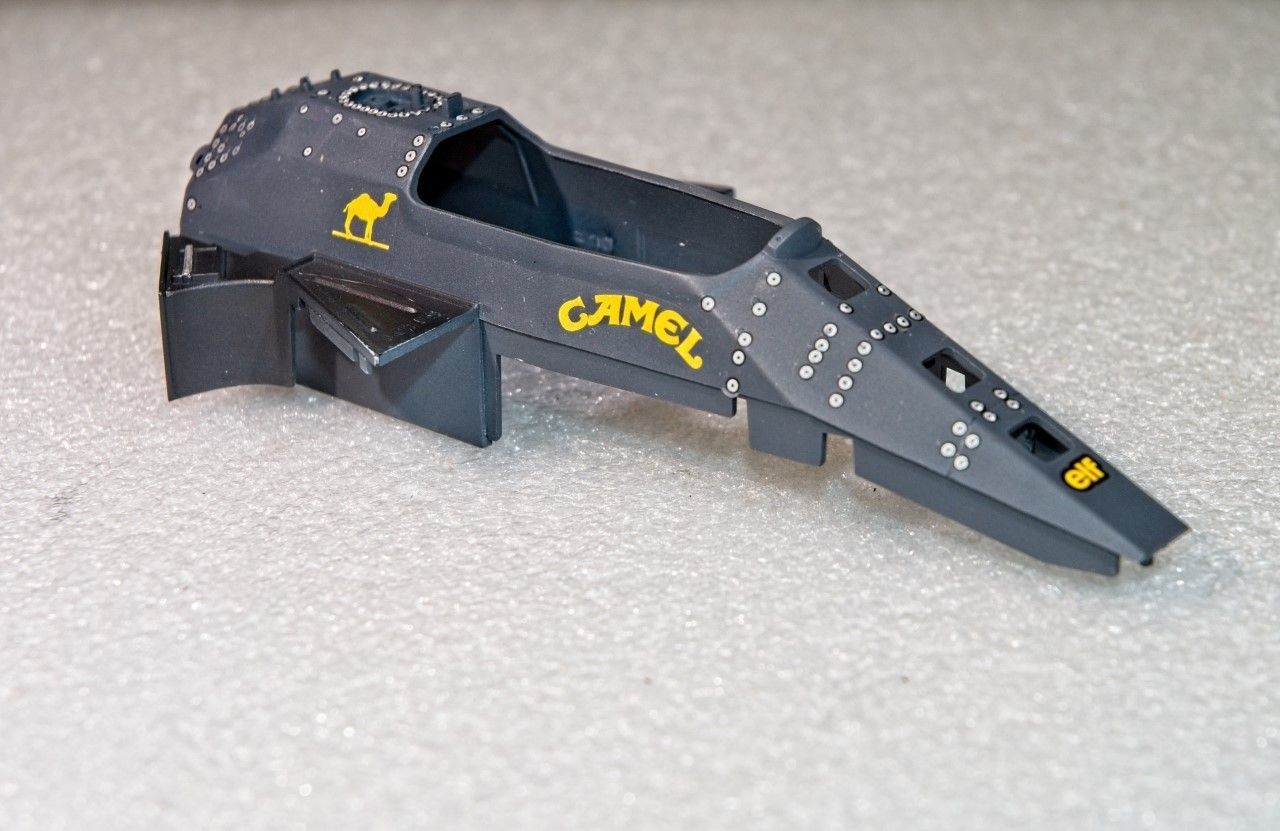
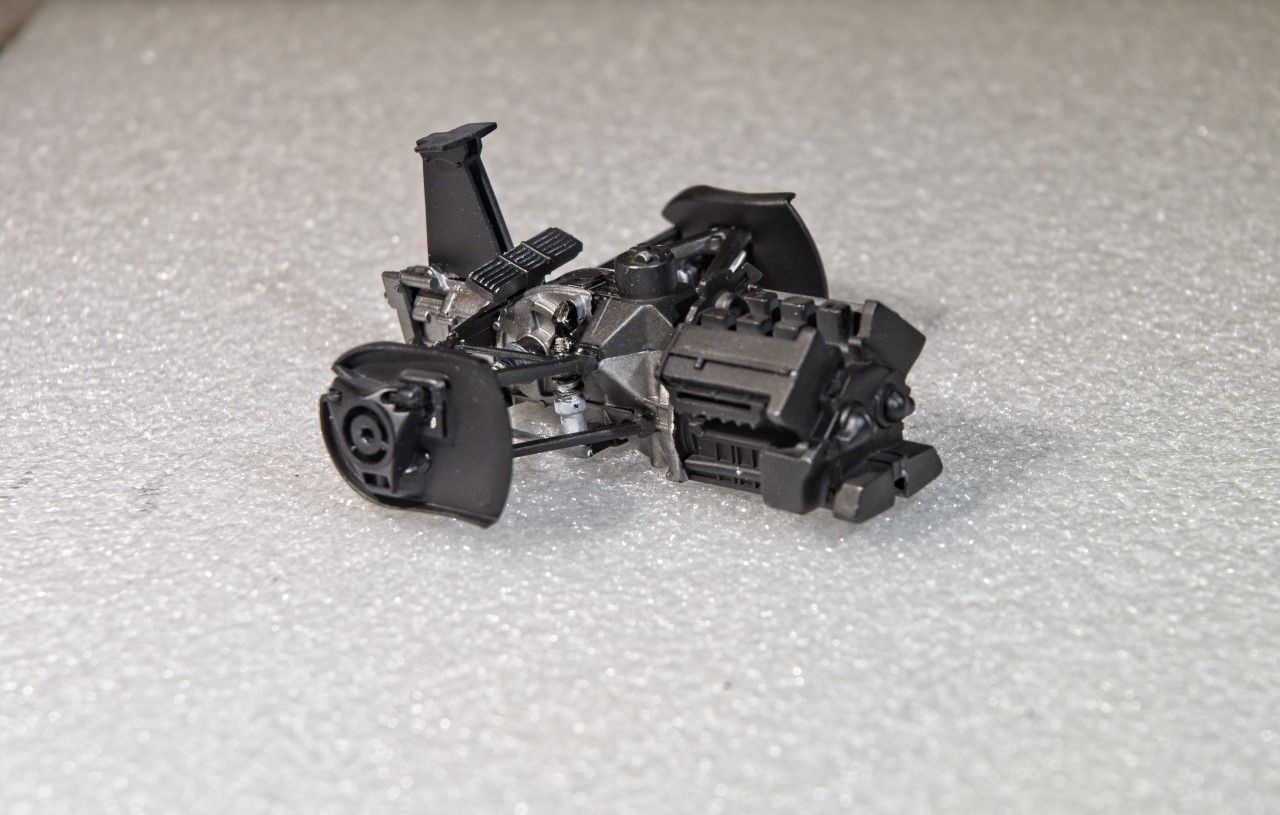
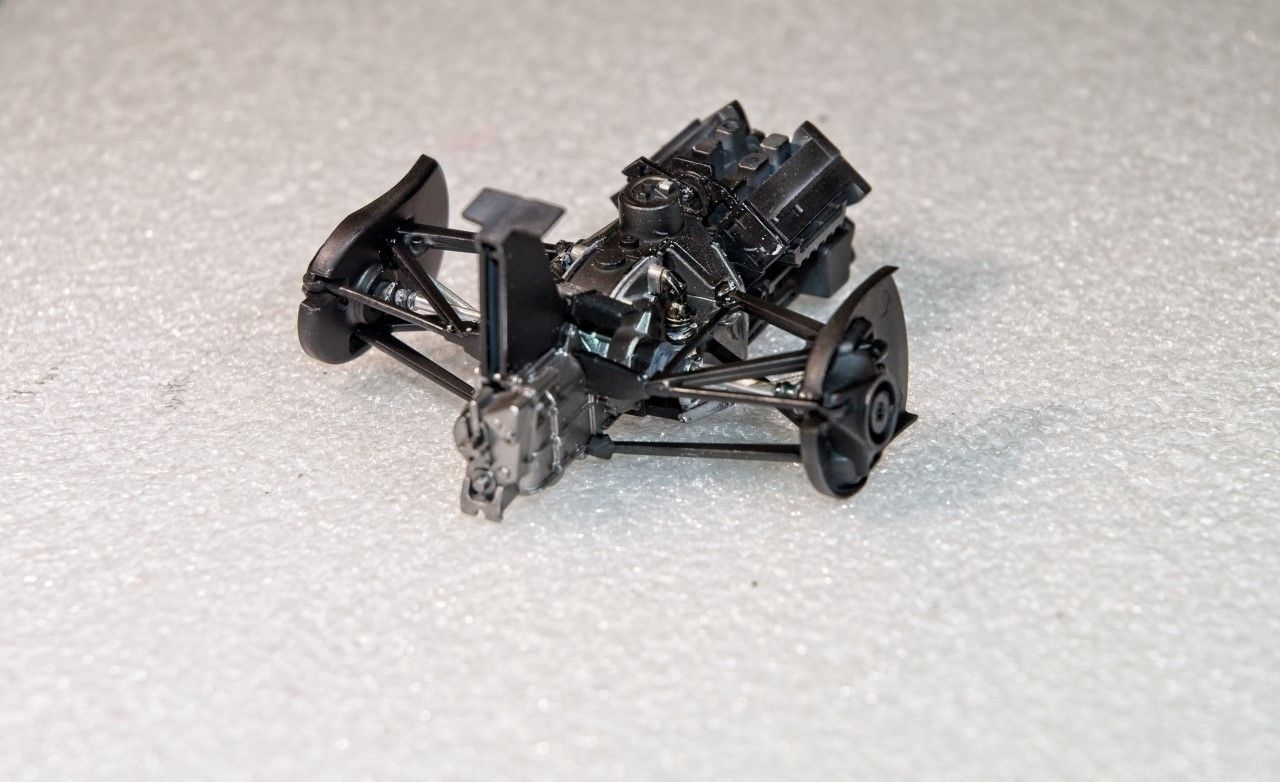
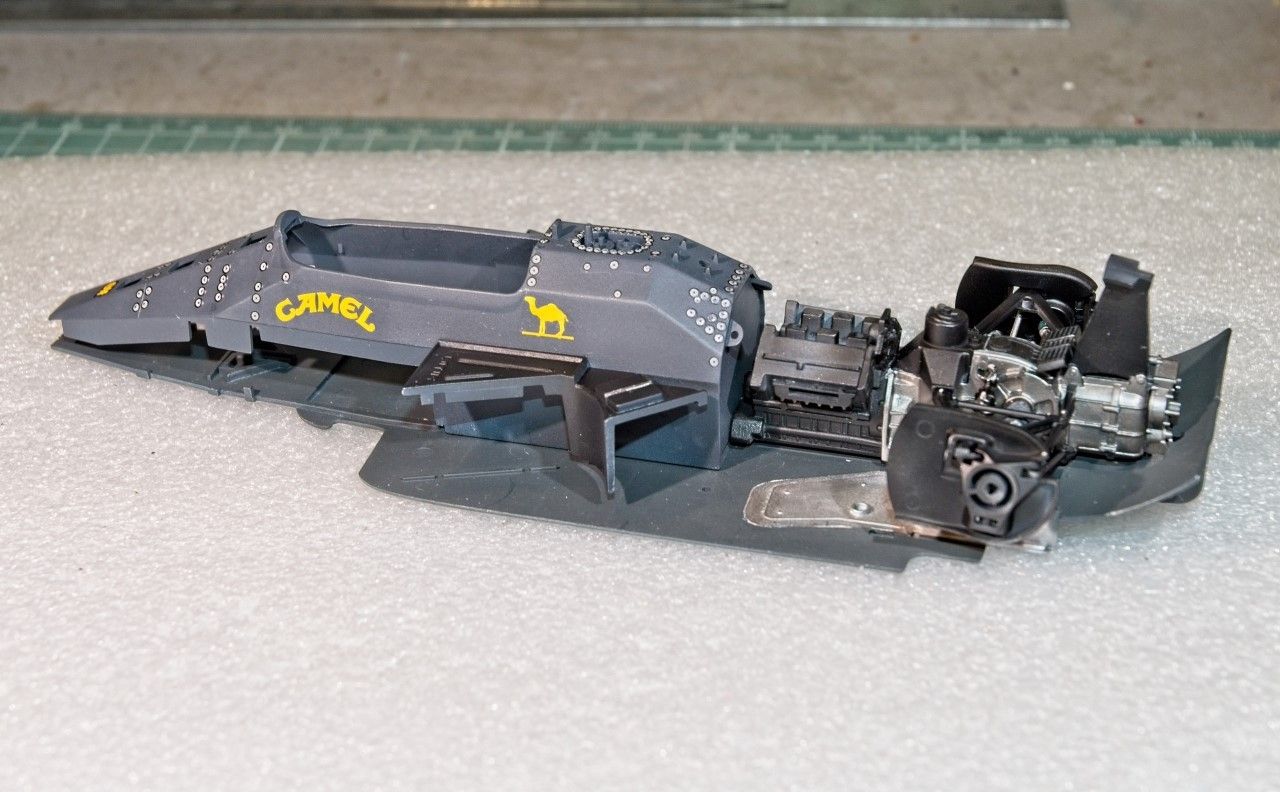
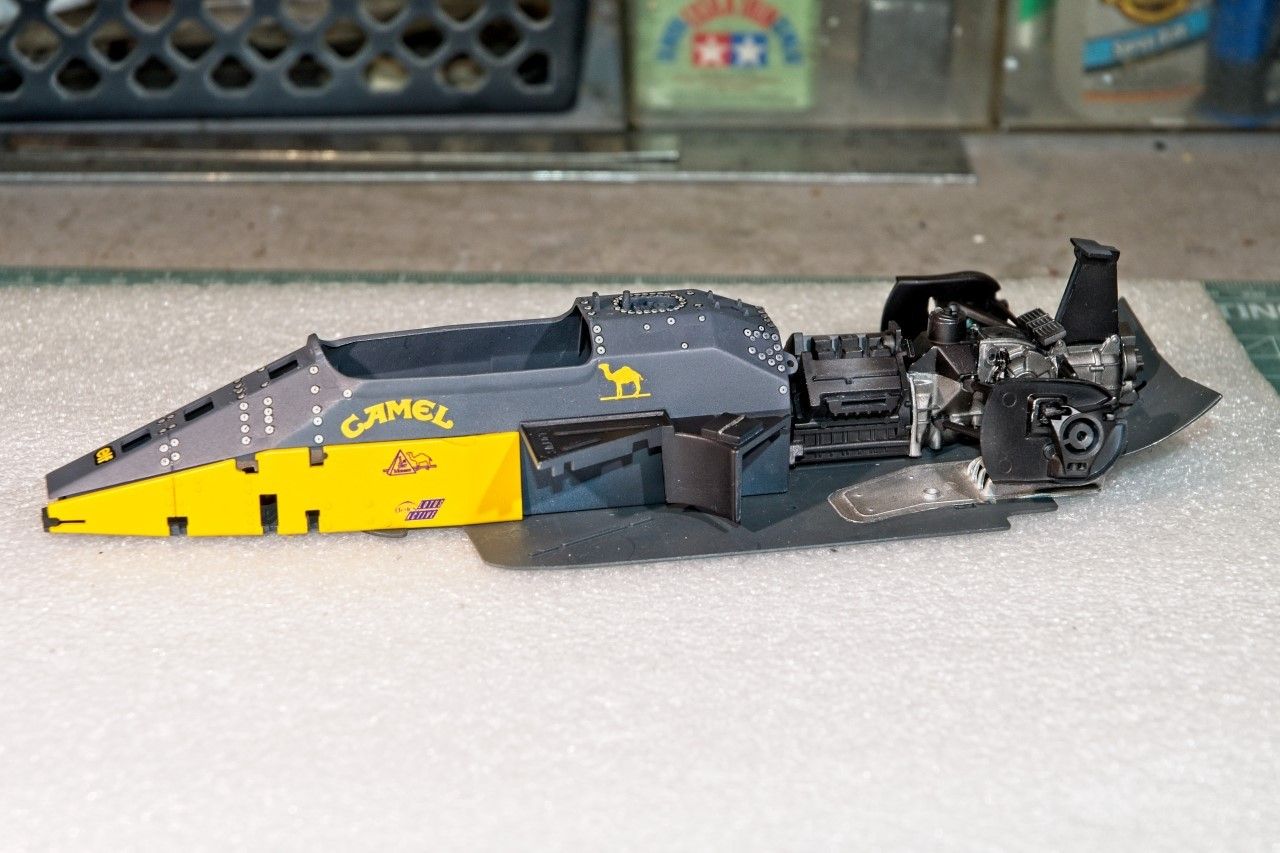
FORMULA 1 - Lotus 99T Honda (Ayrton Senna 1987) - 1/20 Tamiya kit - Body/inner shell painted & decalled, chassis plate/engine/drivetrain painting
Joel_W (Joel) - INDY - enlisted - Lola T-8800 Newman Haas (Mario Andretti 1988) - 1/25 AMT kit
Dixon66 (David) - ENDURANCE GROUP 5 - Zakspeed Capri - 1/24 Tamiya kit - Paint on order, body in primer, underside and interior complete
tinbanger (Richard) - GRAND PRIX - 1914 Mercedes Racer - 1/16 Lindberg kit - Engine and chassis started, major panel works under way, custom milled wheels/tyres and sheetmetal panels started
md72 (Mark) - INDY - enlisted - Target Reynard (Jimmy Vasser) - 1/25 Revell kit
Szmann (Gabriel) - FORMULA 1 - Tyrrell P34 (Monaco 1977 #4) - 1/20 Tamiya kit kit - Unpacked and patiently waiting
Hwa-Rang (Jesper) - NASCAR - (TBA)
PasiAhopelto (Pasi) - NASCAR - enlisted - Olds 442 (Donnie Allison) - 1/25 Salvinos JR kit
forest1000 (David) - FORMULA 1 - enlisted - Williams Renault (Jaques Villeneuve) - 1/24 Revell/Monogram kit
jimb (Jim) - STRAIGHTLINE - '57 Ford Sedan Gasser - Rolling chassis assembled, interior paint and test fit under way
Cosimodo (Michael) - ENDURANCE - 1971 Porsche 917/20 - 1/12 MFH kit - Unloaded from packing crates, parts clean-up, paint and engine assembly commenced
bluebell914 (Patrick) - ENDURANCE - enlisted - Ferrari P4 or 512S
2002hummer (Darrell) - GRAND PRIX - enlisted - Lotus Super Seven (Tamiya)
TacFireGuru (Mike) - NASCAR - enlisted - Chev Monte Carlo (Home Depot)
Lakota (Don) - ENDURANCE - Corvette C7.R - 1/25 Revell kit - Engine assembled, floor pan/chassis under way
RedwingNev (Neil) - GRAND PRIX - enlisted - Lotus 79 (1978 Mario Andretti?) - 1/20 Tamiya kit
rv1963 (Robert) - 
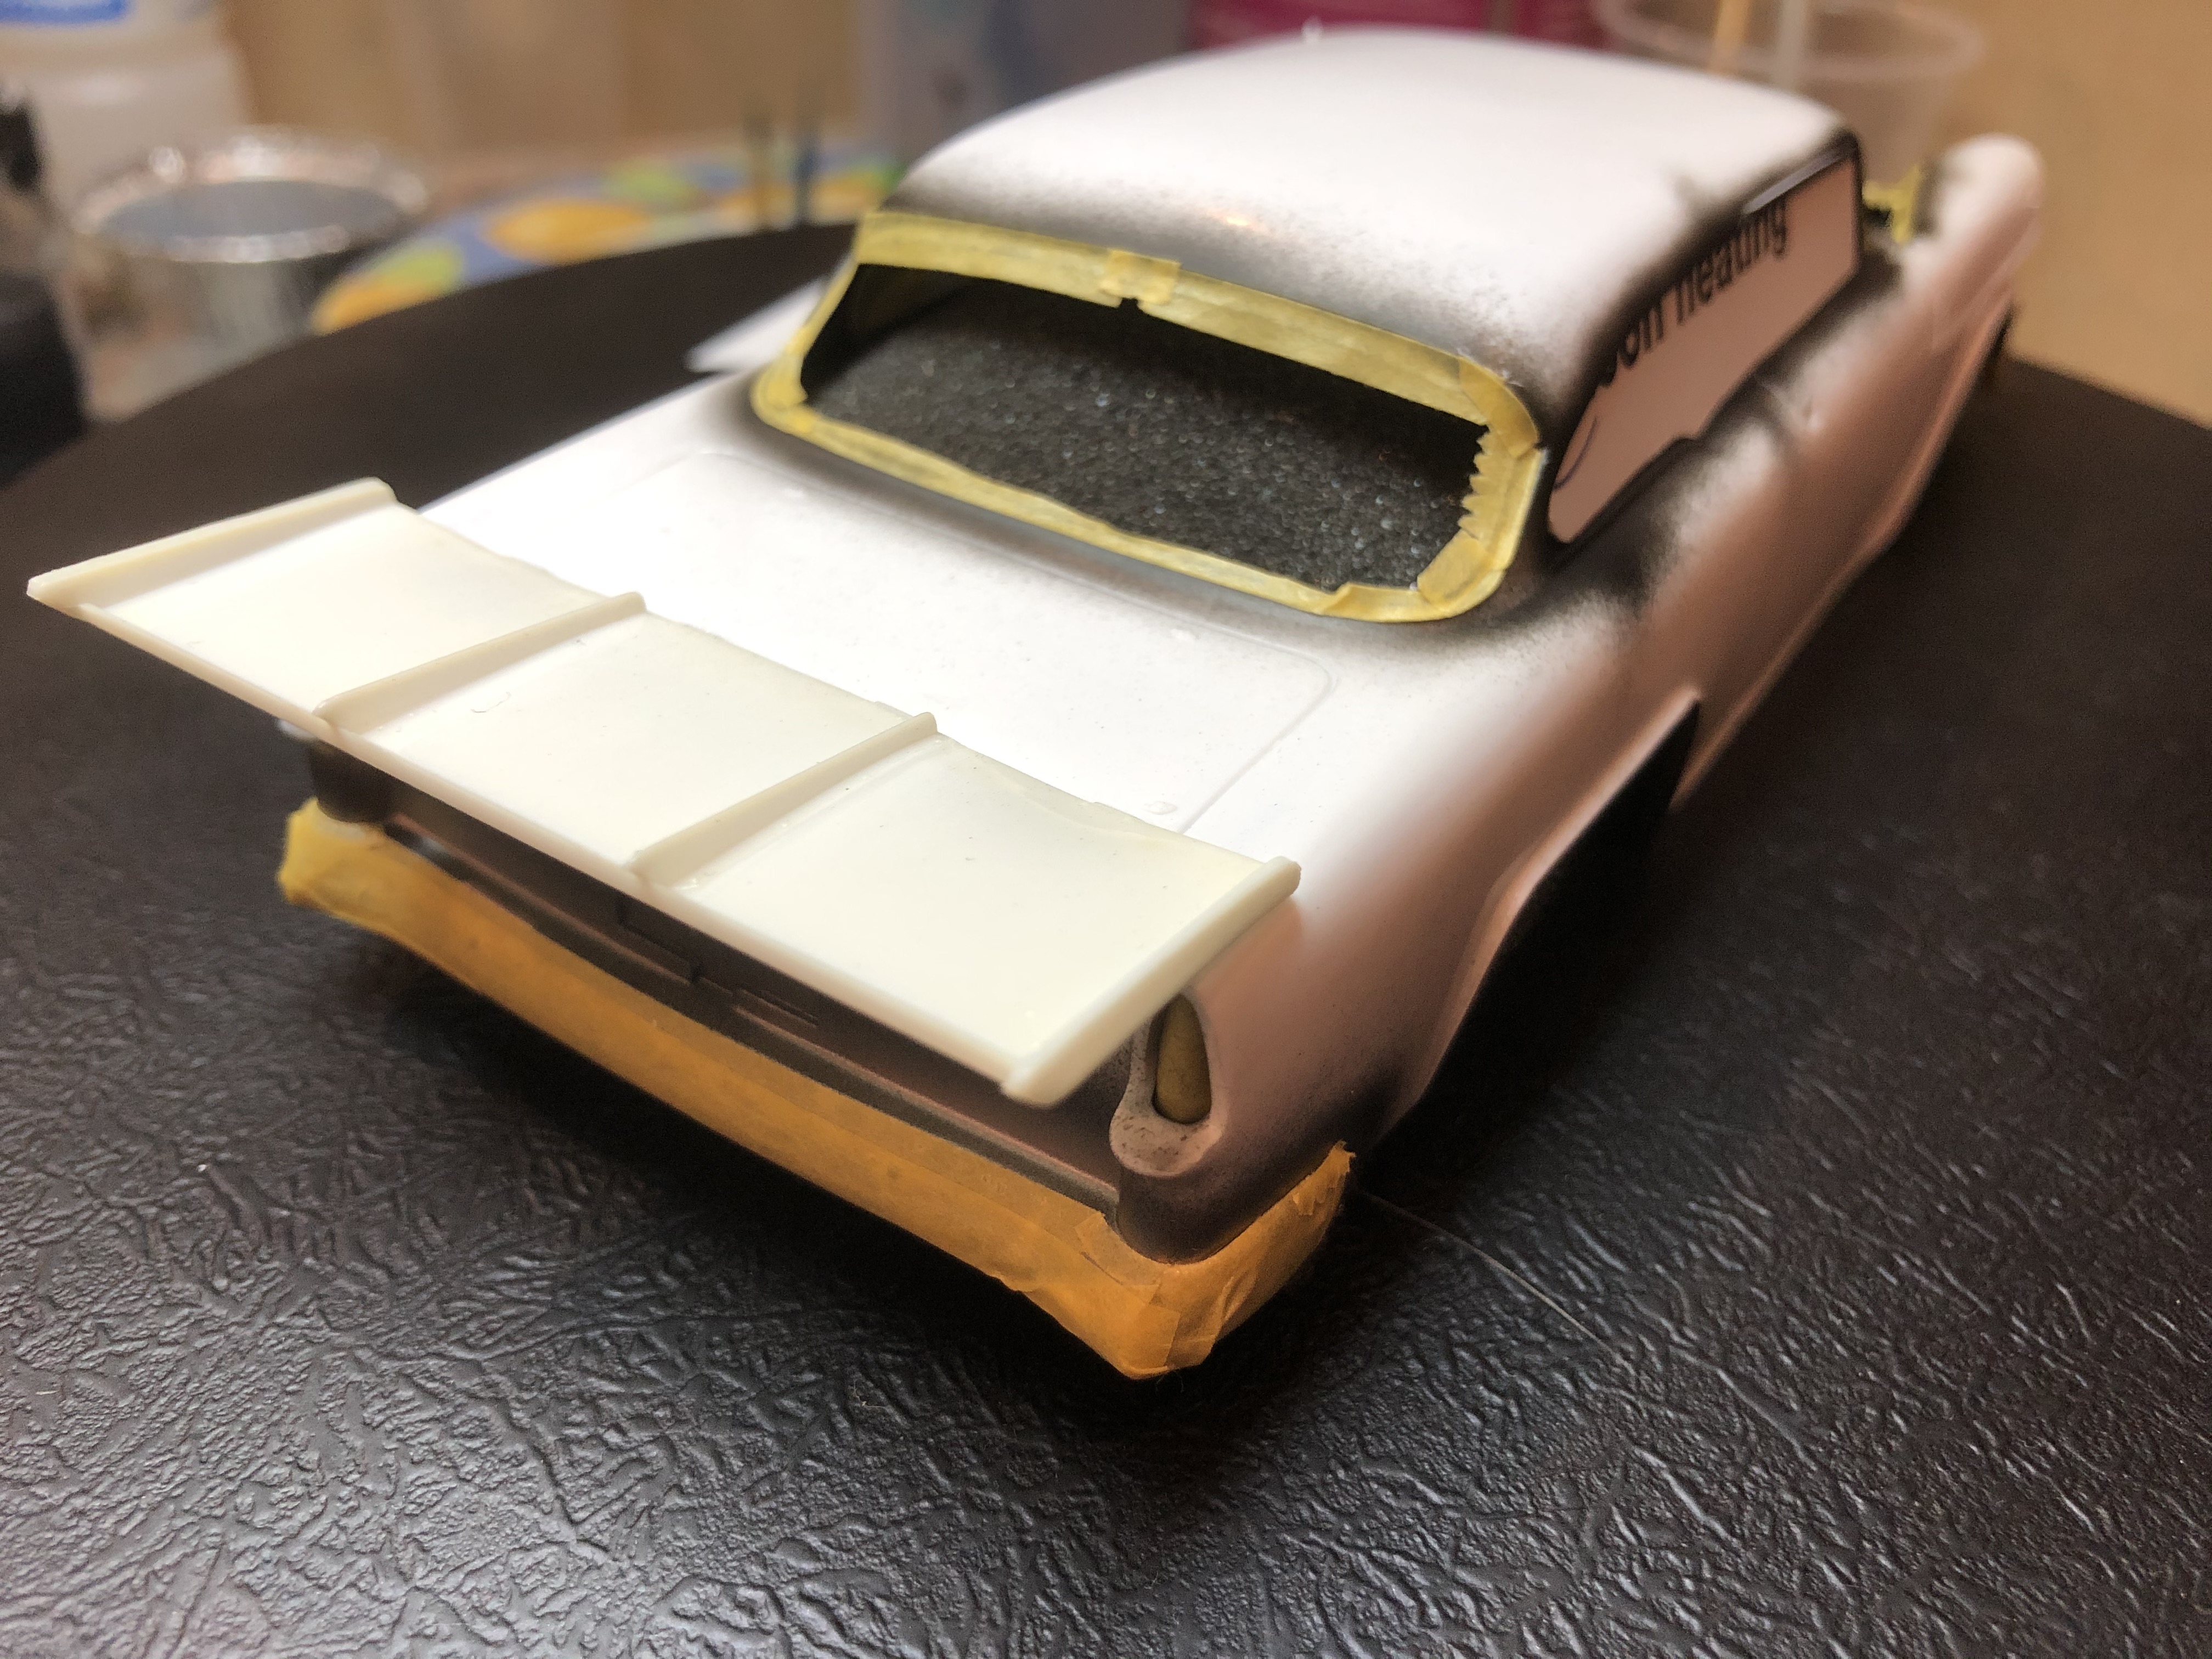
STRAIGHTLINE - '37 Chevy Gasser - 1/25 AMT kit- Engine complete with 3D printed & custom milled parts, body paint started
heavyjagdpanzer (Bill) - STRAIGHTLINE - Blue Max Funny Car - 1/25 Revell kit - Engine, Cockpit and Cage completed
bmwh548 (Radu) - RALLY - '99 WRC Subaru Impreza - 1/24 Tamiya kit - Wheels and tyres
pnance26 (Patrick) - FORMULA 1 - Ferrari 312T - 1/12 Tamiya kit - Rolling chassis/engine/drivetrain complete, body paint under way
bomber14 (Joe) - STOCK CAR - '60 Ford Starliner - AMT/ERTL kit - Body modifications
Torpon (Carlos) - TBA - enlisted - TBA


If anybody has changed or firmed up their proposed builds, or spotted anything wrong in the list, please let me know.

Cheers, D
Szmann
_VISITCOMMUNITY
Netherlands Antilles
Joined: September 02, 2014
KitMaker: 1,977 posts
Auto Modeler: 1,371 posts
Posted: Saturday, May 09, 2020 - 01:15 AM UTC
D., the VW leaves the scene... if I finish the Tyrrell, I start the Porsche Newman, and if I finish that one too, I start the Lotus. These builds are bind by contract

Gabriel
Szmann
_VISITCOMMUNITY
Netherlands Antilles
Joined: September 02, 2014
KitMaker: 1,977 posts
Auto Modeler: 1,371 posts
Posted: Saturday, May 09, 2020 - 04:15 AM UTC
Here's my third entry in GB:


The conformity pic:


... and the link to the separate topic:

https://automodeler.kitmaker.net/forums/285150&page=1#2396140

Gabriel
Joel_W
Staff MemberAssociate Editor
AUTOMODELER
_VISITCOMMUNITY
New York, United States
Joined: December 04, 2010
KitMaker: 11,666 posts
Auto Modeler: 2,974 posts
Posted: Saturday, May 09, 2020 - 05:27 AM UTC
Gabriel,
The Tamiya P-34 1977 ver is an excellent kit. You're going to really enjoy the build.

I'm naturally looking forward to following your build.

Joel
Dixon66
_VISITCOMMUNITY
New Hampshire, United States
Joined: December 12, 2002
KitMaker: 1,500 posts
Auto Modeler: 645 posts
Posted: Saturday, May 09, 2020 - 06:37 AM UTC
Speaking of the Tyrrell P34, anyone ever try the Fujimi 1/20 one?
Joel_W
Staff MemberAssociate Editor
AUTOMODELER
_VISITCOMMUNITY
New York, United States
Joined: December 04, 2010
KitMaker: 11,666 posts
Auto Modeler: 2,974 posts
Posted: Saturday, May 09, 2020 - 06:43 AM UTC
Work slowly continues on my Lotus 99t build as I concentrated on finishing the basic painting and then the decaling on the Carbon Fiber inner shell.

The two electrical boxes molded on top of the inner radiator ducting had their straps painted Aluminum using AMMO Mig Acrylic paints.

Then I added the Camel and the few logos needed using the Tamiya decals. They're certainly thicker then the Indy Cal decals, and required more effort to get them to lay down correctly. BTW, the ELF decal with the Black trim around it on the nose, is how it's supposed to be in real life. Not sure why they designed it that way.

Next came the very tedious task of decaling the dozens of rivets that hold the tub together. You can see in real life that they were quite large and certainly very noticeable.


My 1st attempt was to try and hand paint the rivets on, but that was just wishful thinking as no two looked the same. So after 3 or 4 attempts I just removed the paint with Iso alcohol on a Q tip since I was using Acrylic paint for the test. The only viable option was to use the Tamiya decals. I wasn't to confident in getting them to all lay down over the raised rivets, especially since the decals were in small groups.

Every decal did eventually settle down into the nooks and crannies with a liberal use of Solvaset. Of course I should have sanded down the rivets to almost nothing, but honestly it just didn't occur to me to take that route. Once down and dried, the decals didn't have any flash or silvering issues, but the glossy Tamiya decal film looked horrendous, and the rivets were just to bright. So I very lightly dry brushed all the rivets with Tamiya German Dark Gray, then air brushed on my all time favorite Matt clearcoat: Testors Dullcoat diluted 1:1 with #400 leveling Thinner. the results are exactly what I was hoping for.


I also managed to finish the rear suspension subassembly minus the disc brakes.


I still haven't gotten around to rubbing out all the body panels and the main shell as yet as I keep on getting involved in other projects with this build.

Here's a few pictures of how the shell, engine/transaxle, chassis plate come together.


and one last picture with a outer side panel dry fitted.


Thanks to all for checking out my build to date. As always, it's greatly appreciated.

Joel


Dixon66
_VISITCOMMUNITY
New Hampshire, United States
Joined: December 12, 2002
KitMaker: 1,500 posts
Auto Modeler: 645 posts
Posted: Saturday, May 09, 2020 - 08:26 AM UTC
Well Joel, they came out great, to the fact that I didn't realize they were decals until I read the text.
Joel_W
Staff MemberAssociate Editor
AUTOMODELER
_VISITCOMMUNITY
New York, United States
Joined: December 04, 2010
KitMaker: 11,666 posts
Auto Modeler: 2,974 posts
Posted: Saturday, May 09, 2020 - 08:45 AM UTC
David,
Thanks. That's some thumbs up.

Joel
Joel_W
Staff MemberAssociate Editor
AUTOMODELER
_VISITCOMMUNITY
New York, United States
Joined: December 04, 2010
KitMaker: 11,666 posts
Auto Modeler: 2,974 posts
Posted: Saturday, May 09, 2020 - 08:46 AM UTC
One thing I didn't mention was just how close I actually got to the Carbon Fiber color of Senna's car. Basically it was pure luck on my part.

Joel
Cosimodo
#335
_VISITCOMMUNITY
Auckland, New Zealand
Joined: September 03, 2013
KitMaker: 1,808 posts
Auto Modeler: 701 posts
Posted: Saturday, May 09, 2020 - 09:39 AM UTC
The Lotus is looking great. I love the way you dealt with decals and toning them down. They look just like the picture as does the yellow.

Cheers
Michael
Joel_W
Staff MemberAssociate Editor
AUTOMODELER
_VISITCOMMUNITY
New York, United States
Joined: December 04, 2010
KitMaker: 11,666 posts
Auto Modeler: 2,974 posts
Posted: Saturday, May 09, 2020 - 10:17 AM UTC
Thanks Michael
I actually used my aircraft modeling weathering techniques.

Joel
Szmann
_VISITCOMMUNITY
Netherlands Antilles
Joined: September 02, 2014
KitMaker: 1,977 posts
Auto Modeler: 1,371 posts
Posted: Saturday, May 09, 2020 - 11:03 AM UTC
Joel, you did again a great job in blending these decals into the paint scheme. They look pretty much like the original picture.
The dry-fitting of the body reveals very nicely the incoming completed build.

Gabriel
AussieReg
Staff MemberAssociate Editor
AUTOMODELER
#007
_VISITCOMMUNITY
Victoria, Australia
Joined: June 09, 2009
KitMaker: 8,156 posts
Auto Modeler: 2,953 posts
Posted: Saturday, May 09, 2020 - 11:13 AM UTC

Quoted Text

D., the VW leaves the scene...


Sad that the VW misses the race, but the Tyrrell will be another great build log to follow! List revised.

Rob, lovely work so far on the body, looking forward to the second colour going on!

Joel, your build is coming together very nicely. The decals and weathering on the inner shell came up beautifully, and the aircraft weathering experience really paid off here.

Cheers, D
heavyjagdpanzer
_VISITCOMMUNITY
Georgia, United States
Joined: February 17, 2013
KitMaker: 173 posts
Auto Modeler: 46 posts
Posted: Saturday, May 09, 2020 - 11:55 AM UTC
Joel, that rivet detail really looks good.
heavyjagdpanzer
_VISITCOMMUNITY
Georgia, United States
Joined: February 17, 2013
KitMaker: 173 posts
Auto Modeler: 46 posts
Posted: Saturday, May 09, 2020 - 11:59 AM UTC
Cockpit detail before I put the roll cage on.


heavyjagdpanzer
_VISITCOMMUNITY
Georgia, United States
Joined: February 17, 2013
KitMaker: 173 posts
Auto Modeler: 46 posts
Posted: Saturday, May 09, 2020 - 12:03 PM UTC
My close up photography is not the best. I am using aperture priority and F36 is the best I can get. Do I need another lens that can get to F40?
Joel_W
Staff MemberAssociate Editor
AUTOMODELER
_VISITCOMMUNITY
New York, United States
Joined: December 04, 2010
KitMaker: 11,666 posts
Auto Modeler: 2,974 posts
Posted: Saturday, May 09, 2020 - 12:10 PM UTC
Bill,
Your cockpit detailing is just amazing. You did a fantastic job. It's hard to impress old guys, but you sure did impress me, and I'm the oldest guy on this board.

Joel
Joel_W
Staff MemberAssociate Editor
AUTOMODELER
_VISITCOMMUNITY
New York, United States
Joined: December 04, 2010
KitMaker: 11,666 posts
Auto Modeler: 2,974 posts
Posted: Saturday, May 09, 2020 - 12:14 PM UTC
Michael, Gabriel, D, & Bill,

Thanks guys so much for your collective thumbs up. I'm really enjoying this build as the car is so different in design and concept. I'm planning on doing some engine bay detailing, as well as a little much needed scratch building for the front end, but nothing major. More in line with my enhancing philosophy.
Joel
heavyjagdpanzer
_VISITCOMMUNITY
Georgia, United States
Joined: February 17, 2013
KitMaker: 173 posts
Auto Modeler: 46 posts
Posted: Saturday, May 09, 2020 - 01:05 PM UTC

Quoted Text

Bill,
Your cockpit detailing is just amazing. You did a fantastic job. It's hard to impress old guys, but you sure did impress me, and I'm the oldest guy on this board.

Joel


Thank you Joel. I am 62, so I am getting on up there.
Szmann
_VISITCOMMUNITY
Netherlands Antilles
Joined: September 02, 2014
KitMaker: 1,977 posts
Auto Modeler: 1,371 posts
Posted: Saturday, May 09, 2020 - 01:38 PM UTC
Bill, your cockpit looks awesome!
Yes, macro it's always a bit of a pain. However, a photo tent works miracles. You can set the light to minimum for max exposure / depth. Since I have one, I snap the WIP pictures with my cheap Samsung phone (single camera). Yes, with my semi-pro Lumix the pictures are much better pixel by pixel, since the thing has macro mode, but I use it only for final pictures, since it is too cumbersome for WIPs.

Gabiel
rv1963
_VISITCOMMUNITY
New York, United States
Joined: December 07, 2004
KitMaker: 1,888 posts
Auto Modeler: 806 posts
Posted: Saturday, May 09, 2020 - 02:02 PM UTC
Nice work Bill, joel as others have said those rivets do look great coming together nice.
Joel_W
Staff MemberAssociate Editor
AUTOMODELER
_VISITCOMMUNITY
New York, United States
Joined: December 04, 2010
KitMaker: 11,666 posts
Auto Modeler: 2,974 posts
Posted: Sunday, May 10, 2020 - 02:04 AM UTC
Thanks Robert. Those decal rivets took 3 days as you constantly had to adjust each decal so that it stayed centered over each group of raised rivets. Would have been much easier to simply sand them flush. Decals would have laid down perfectly with the Solvaset in no time flat. Betcha I would have gotten the whole inner tub riveted in one session, not 3 full work sessions.

Joel
AussieReg
Staff MemberAssociate Editor
AUTOMODELER
#007
_VISITCOMMUNITY
Victoria, Australia
Joined: June 09, 2009
KitMaker: 8,156 posts
Auto Modeler: 2,953 posts
Posted: Sunday, May 10, 2020 - 03:07 AM UTC

Quoted Text

Would have been much easier to simply sand them flush.


Old saying, "Hindsight is always 20/20 vision"

Save it up for the next build, and good info for the rest of us!

Small update for me, a couple of hours and a couple of glasses of a nice Shiraz tonight, masked up the bumpers and chrome trims, and window recesses, ready now for grey primer.


The great work rate and standard continues to impress me in this Group Build, obviously the subject matter is quite high on most peoples preference list!

Cheers, D
Szmann
_VISITCOMMUNITY
Netherlands Antilles
Joined: September 02, 2014
KitMaker: 1,977 posts
Auto Modeler: 1,371 posts
Posted: Sunday, May 10, 2020 - 04:45 AM UTC
Looking nice, D.
That rear air foil makes it look like a futuristic flying car from the '60s and that is cool ;0

Gabriel