

As far as appyling a base coat of clear coat, It's just easier as I said to AB a very lite sealing coat or two of the color paint 1st. And as a added benefit you don't have to stop and cleanout your AB before moving on to the color coats.
Joel


Go to automodeler.com for the current dynamic site!
The Garage
For general automotive modeling or non-modeling topics.
For general automotive modeling or non-modeling topics.
Hosted by Jim Starkweather
Strip, Track & Trail Official Build Thread

Joel_W

Joined: December 04, 2010
KitMaker: 11,666 posts
Auto Modeler: 2,974 posts

Posted: Tuesday, May 12, 2020 - 04:09 AM UTC


Dixon66
Joined: December 12, 2002
KitMaker: 1,500 posts
Auto Modeler: 645 posts

Posted: Tuesday, May 12, 2020 - 04:28 AM UTC
Quoted Text
Quoted TextWe have an expression here "just bustin' your chops". Picking on you for the sake of picking on you.
Indeed, down here we call it "Hanging 5h1t on each other" and it is a national pastime! A healthy dose of banter is good for the soul, especially with the state of play around the world right now.
"Prime Time" for the '55 tonight.
A day or so to set up, then a fine wet sand and ready for the top coat. There are quite a few very fine details on the body of this one, panel fasteners and such, so my wet sanding will need to be prior to the statutory Shiraz!
Cheers, D
As long as you know there was no offense intended mate.
Primer coat looks good on the shoebox too.
I've never tried using either a clear or the base color over the edges of tape. I've always used light coats of the next color and also sprayed from over the tape onto the section that needed the paint as opposed to spraying into the tape edge. Usually the only bleed under is at panel lines only even though I burnish with a rounded off toothpick or .8mm metal pin that has a rounded end.

rv1963
Joined: December 07, 2004
KitMaker: 1,888 posts
Auto Modeler: 806 posts

Posted: Tuesday, May 12, 2020 - 10:36 AM UTC
Time for an update, well i got the orange coat done looks more like a copper orange to me, not great but not to bad. I did just a small amount of touch up, the inside of the body and the under side of the hood is also done. All comments welcome.


pnance26
Joined: January 22, 2016
KitMaker: 766 posts
Auto Modeler: 140 posts

Posted: Tuesday, May 12, 2020 - 10:38 AM UTC
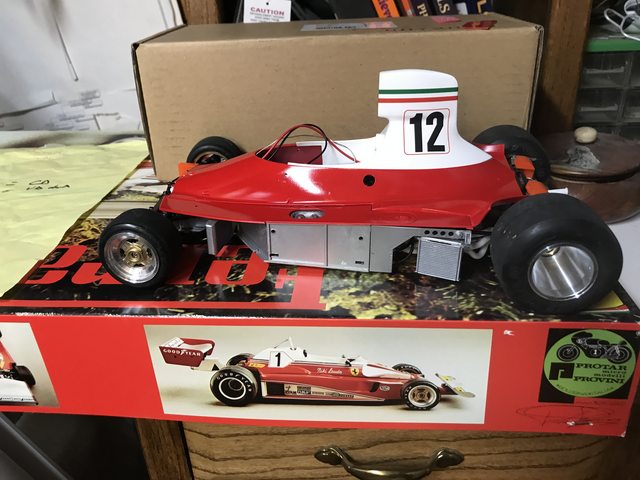
Starting to look like the 312T it should be! Will buff out the main body tomorrow...

AussieReg

#007

Joined: June 09, 2009
KitMaker: 8,156 posts
Auto Modeler: 2,953 posts

Posted: Tuesday, May 12, 2020 - 11:24 AM UTC
Robert, definitely more of a copper tone in that, and plenty of bling, I like it! The masking looks to have lifted nicely without taking up any paint, good job!
Patrick, coming together very well now. Adding some decals always lifts the picture and gives you renewed energy.
Cheers, D
Patrick, coming together very well now. Adding some decals always lifts the picture and gives you renewed energy.
Cheers, D

Joel_W
Joined: December 04, 2010
KitMaker: 11,666 posts
Auto Modeler: 2,974 posts
Posted: Tuesday, May 12, 2020 - 11:25 AM UTC
Robert,
The Orange is mind blowing good. Super impressive paint scheme for sure.
Joel
The Orange is mind blowing good. Super impressive paint scheme for sure.
Joel
Joel_W
Joined: December 04, 2010
KitMaker: 11,666 posts
Auto Modeler: 2,974 posts
Posted: Tuesday, May 12, 2020 - 11:27 AM UTC
Patrick,
Your 312T is really starting to look like the real deal. I've been following your build since day one on our other list, and the results of your efforts really are paying off in Spades.
joel
Your 312T is really starting to look like the real deal. I've been following your build since day one on our other list, and the results of your efforts really are paying off in Spades.
joel
rv1963
Joined: December 07, 2004
KitMaker: 1,888 posts
Auto Modeler: 806 posts
Posted: Tuesday, May 12, 2020 - 11:46 AM UTC
Thanks guys, well it's on to the chassis and interior.
AussieReg
#007
Joined: June 09, 2009
KitMaker: 8,156 posts
Auto Modeler: 2,953 posts
Posted: Tuesday, May 12, 2020 - 12:00 PM UTC
Quoted Text
Thanks guys, well it's on to the chassis and interior.
Robert, I just remembered that you relocated those headlights from the nose onto the fenders and faired them in. They came up beautifully, like they grew there! Lovely work!
Cheers, D
Dixon66
Joined: December 12, 2002
KitMaker: 1,500 posts
Auto Modeler: 645 posts
Posted: Tuesday, May 12, 2020 - 12:44 PM UTC
Robert, the demarcations look good, you obviously did a real good job on the marking and paint application.
Patrick, that is coming along nicely.
Patrick, that is coming along nicely.
pnance26
Joined: January 22, 2016
KitMaker: 766 posts
Auto Modeler: 140 posts
Posted: Tuesday, May 12, 2020 - 04:10 PM UTC
Damian, As much as people hate to do decaling, to me it does two things... really shows off the car and also tells me it is time to start thinking along the lines of a new project.
That will be the 312T2 in 1/12th from Protar. It is a much different kit from the Tamiya and has about 600 parts.
Joel
Thanks for the kind words. It really has been a project and I appreciate your following along!
David,
Thanks to you as well for the nice words.
To all,
I went out and looked at the side pods and am not happy with the paint. I have also run out of time off and have to go back to work Thursda. Of course, I thought about blowing it off and just mushing through and leaving the paint but I really have put some time and effort in, so I think I'm going to hold off on the sidepods and do them justice by concentrating on the main cowling and getting all the other stuff done. It's not going to get done this week, so why not wait and do it right! Right?
That's what I thought! LOL! I always do this so I am not going to fall prey to my own weaknesses!
Patience... patience... patience. I am trying to rise above mediocrity!
AussieReg
#007
Joined: June 09, 2009
KitMaker: 8,156 posts
Auto Modeler: 2,953 posts
Posted: Tuesday, May 12, 2020 - 04:20 PM UTC
Quoted Text
It's not going to get done this week, so why not wait and do it right! Right?
Too true! You will regret it if you rush and do a sub-par job. It will jump out and slap you every time you look at the kit on display.
Cheers, D
Joel_W
Joined: December 04, 2010
KitMaker: 11,666 posts
Auto Modeler: 2,974 posts
Posted: Wednesday, May 13, 2020 - 01:26 AM UTC
Patrick,
I do remember the Protar kits, and they're not what I could call cutting edge new. I'll be following along as you Beat the Beast into an exacting miniature Ferrari.
Joel
I do remember the Protar kits, and they're not what I could call cutting edge new. I'll be following along as you Beat the Beast into an exacting miniature Ferrari.
Joel
rv1963
Joined: December 07, 2004
KitMaker: 1,888 posts
Auto Modeler: 806 posts
Posted: Wednesday, May 13, 2020 - 11:57 AM UTC
Time for an update, first pic shows the chassis engine side up, i filled the gaps between the rails with epoxy sculpt, the second pic shows the chassis under side, i removed all the poorly molded detail on the gas tank and chassis rails and filled in all the low spots, i also removed the front bumper brackets and running boards.
The last pic shoes the interior bucket painted flat black and i installed 2 aluminum panels one on the floor and one for the rear area. There will be a lot of custom work on this interior. All comments welcome.


The last pic shoes the interior bucket painted flat black and i installed 2 aluminum panels one on the floor and one for the rear area. There will be a lot of custom work on this interior. All comments welcome.

jimb
Joined: August 25, 2006
KitMaker: 2,539 posts
Auto Modeler: 1,405 posts

Posted: Wednesday, May 13, 2020 - 11:57 AM UTC
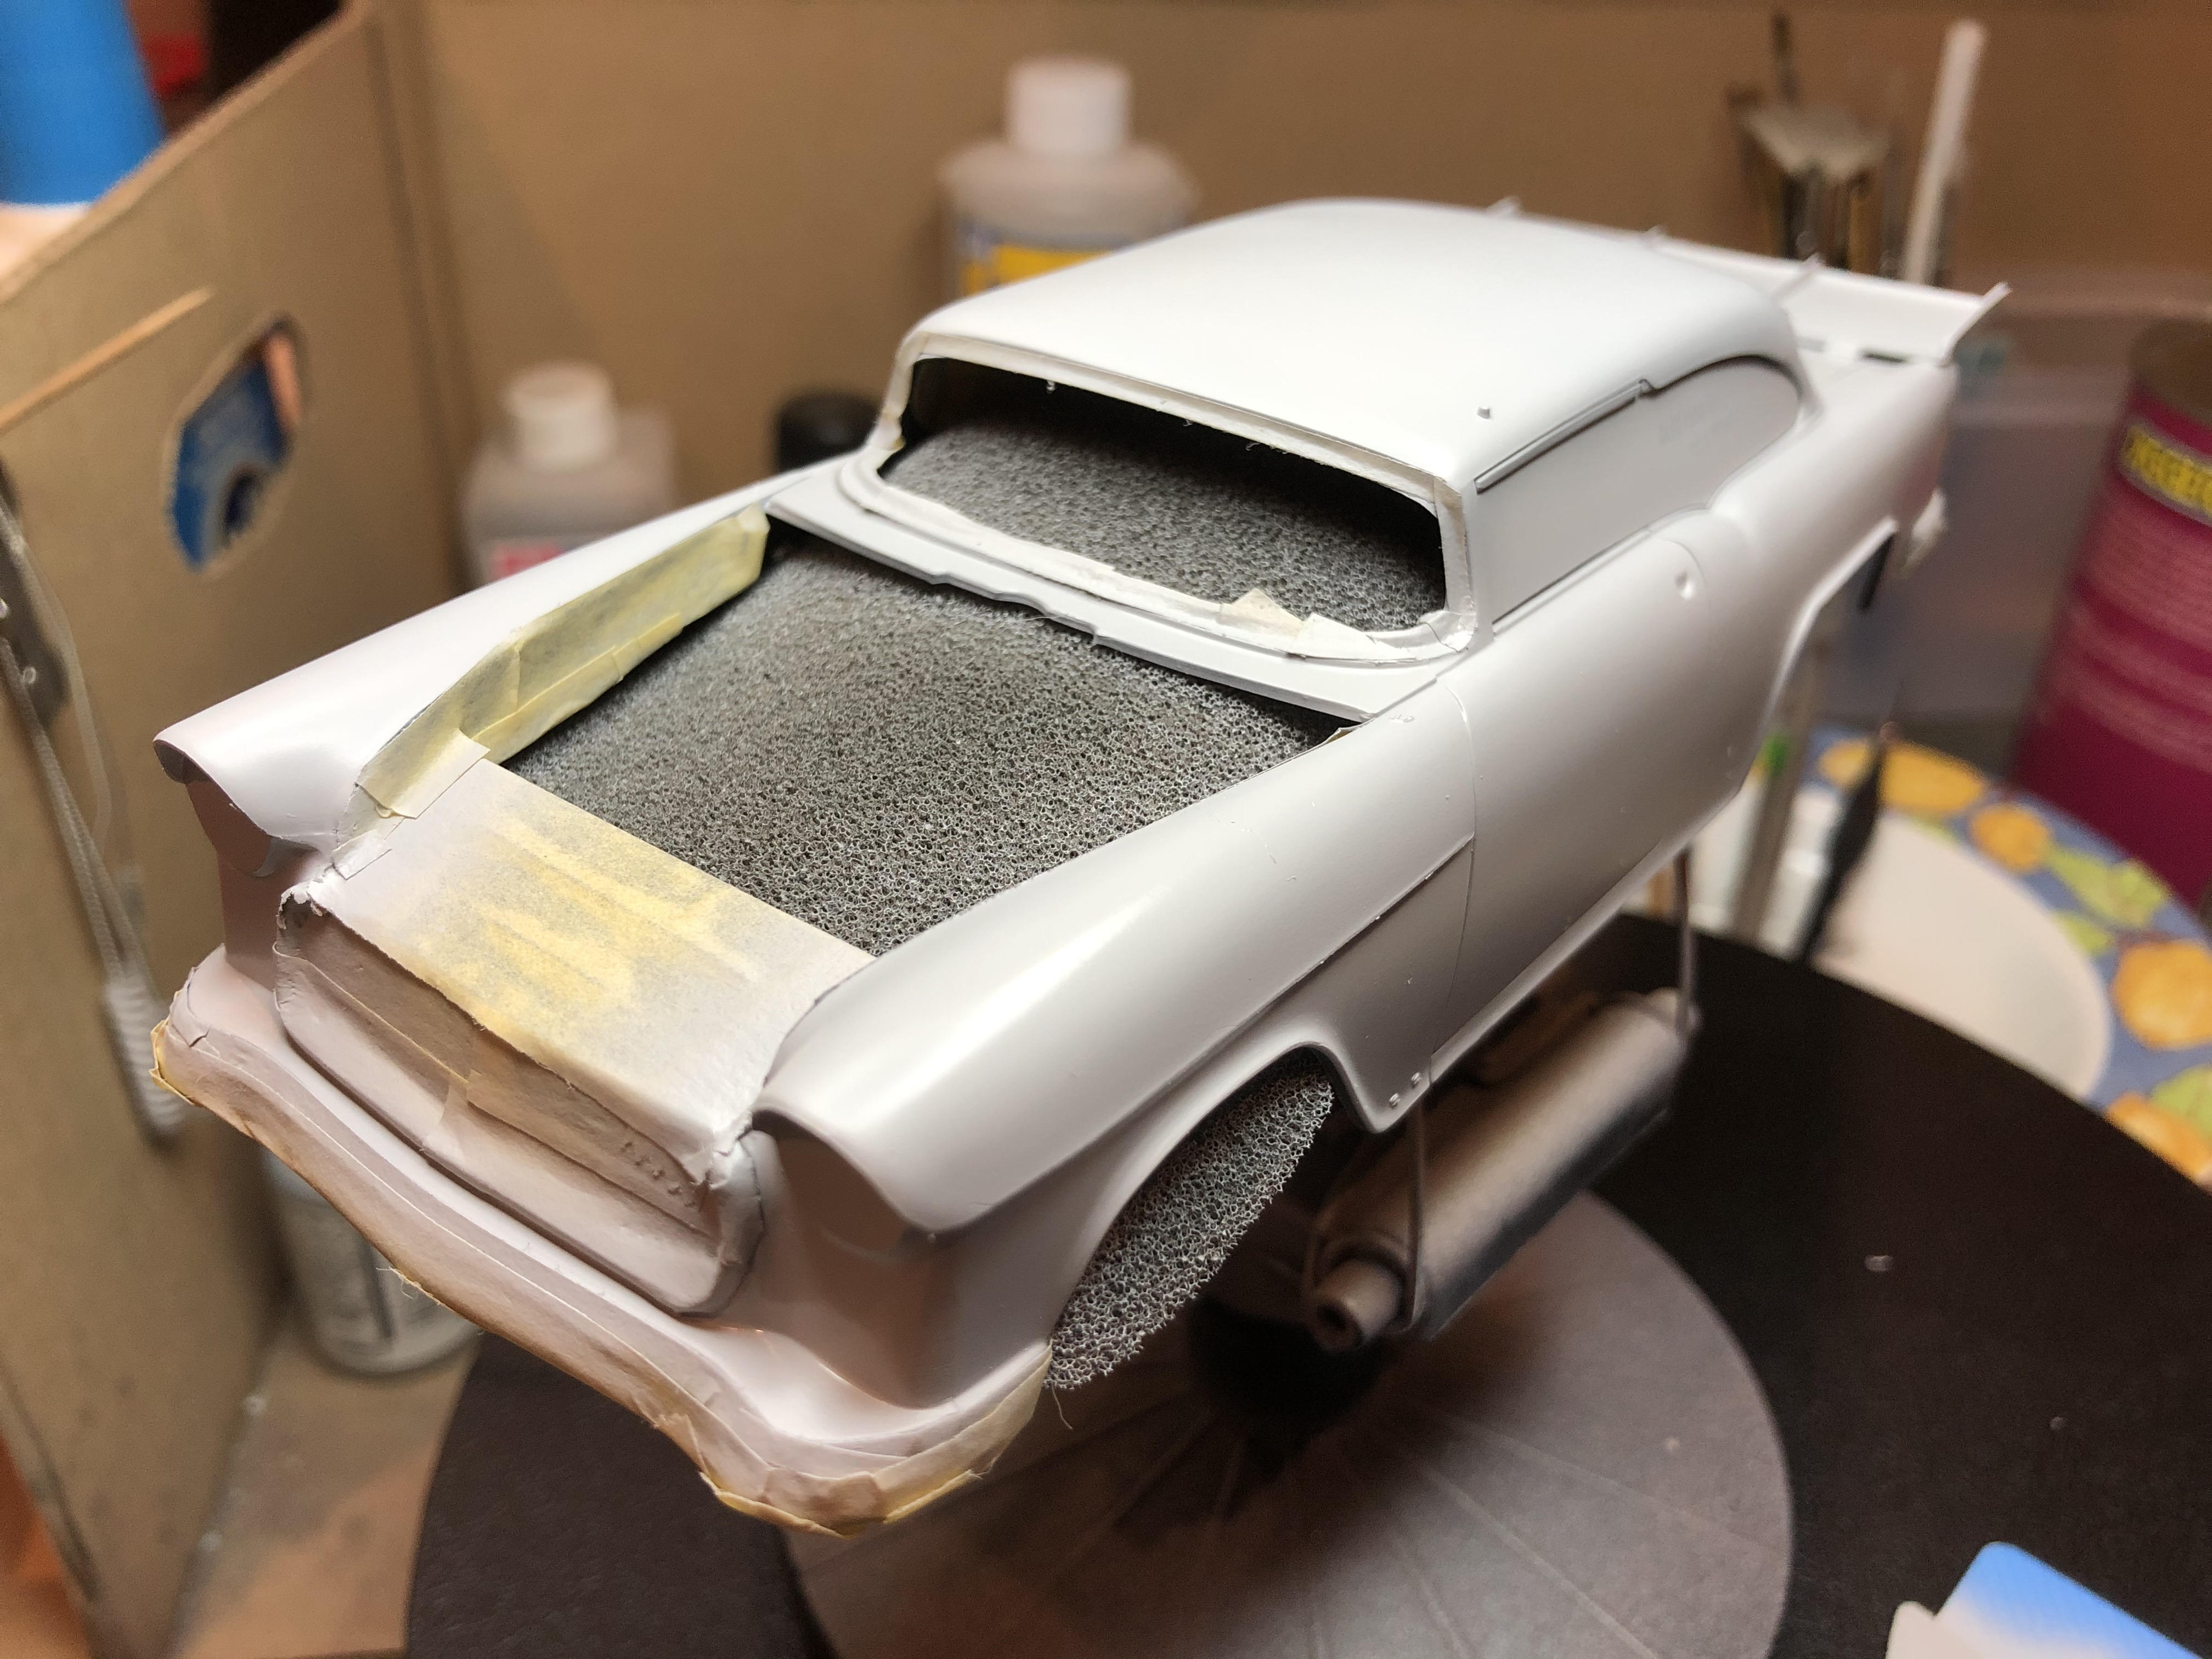
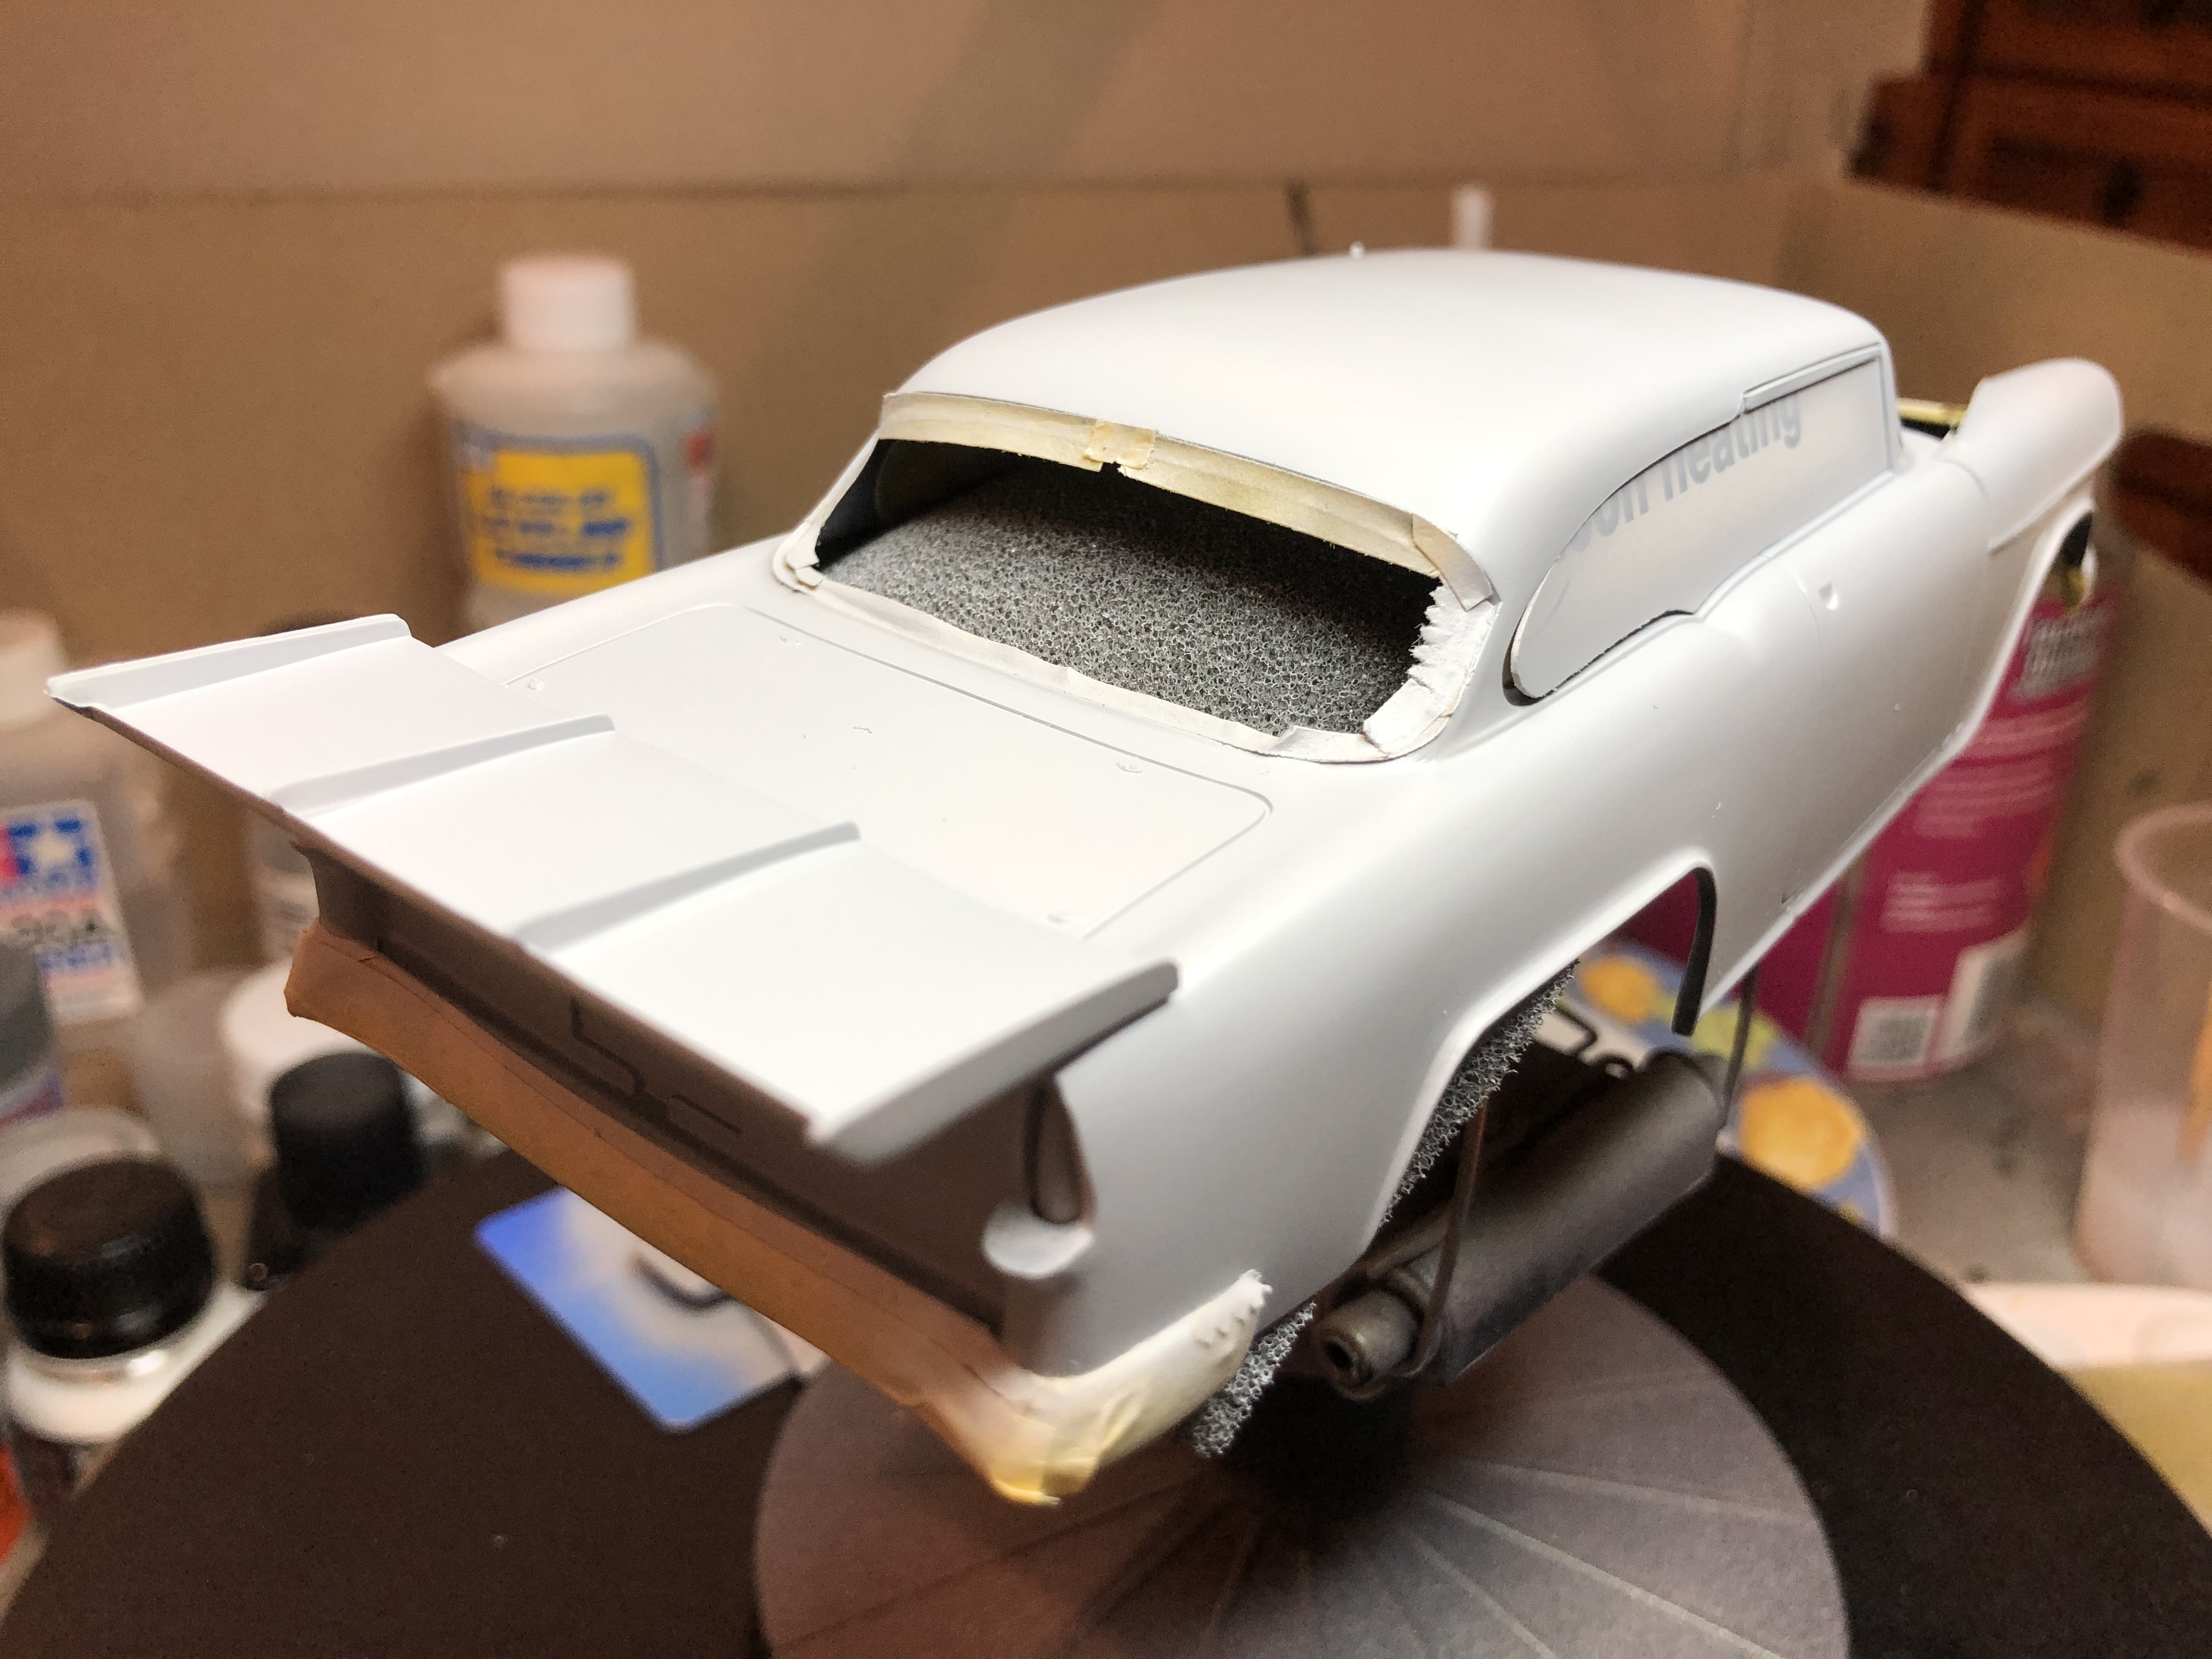
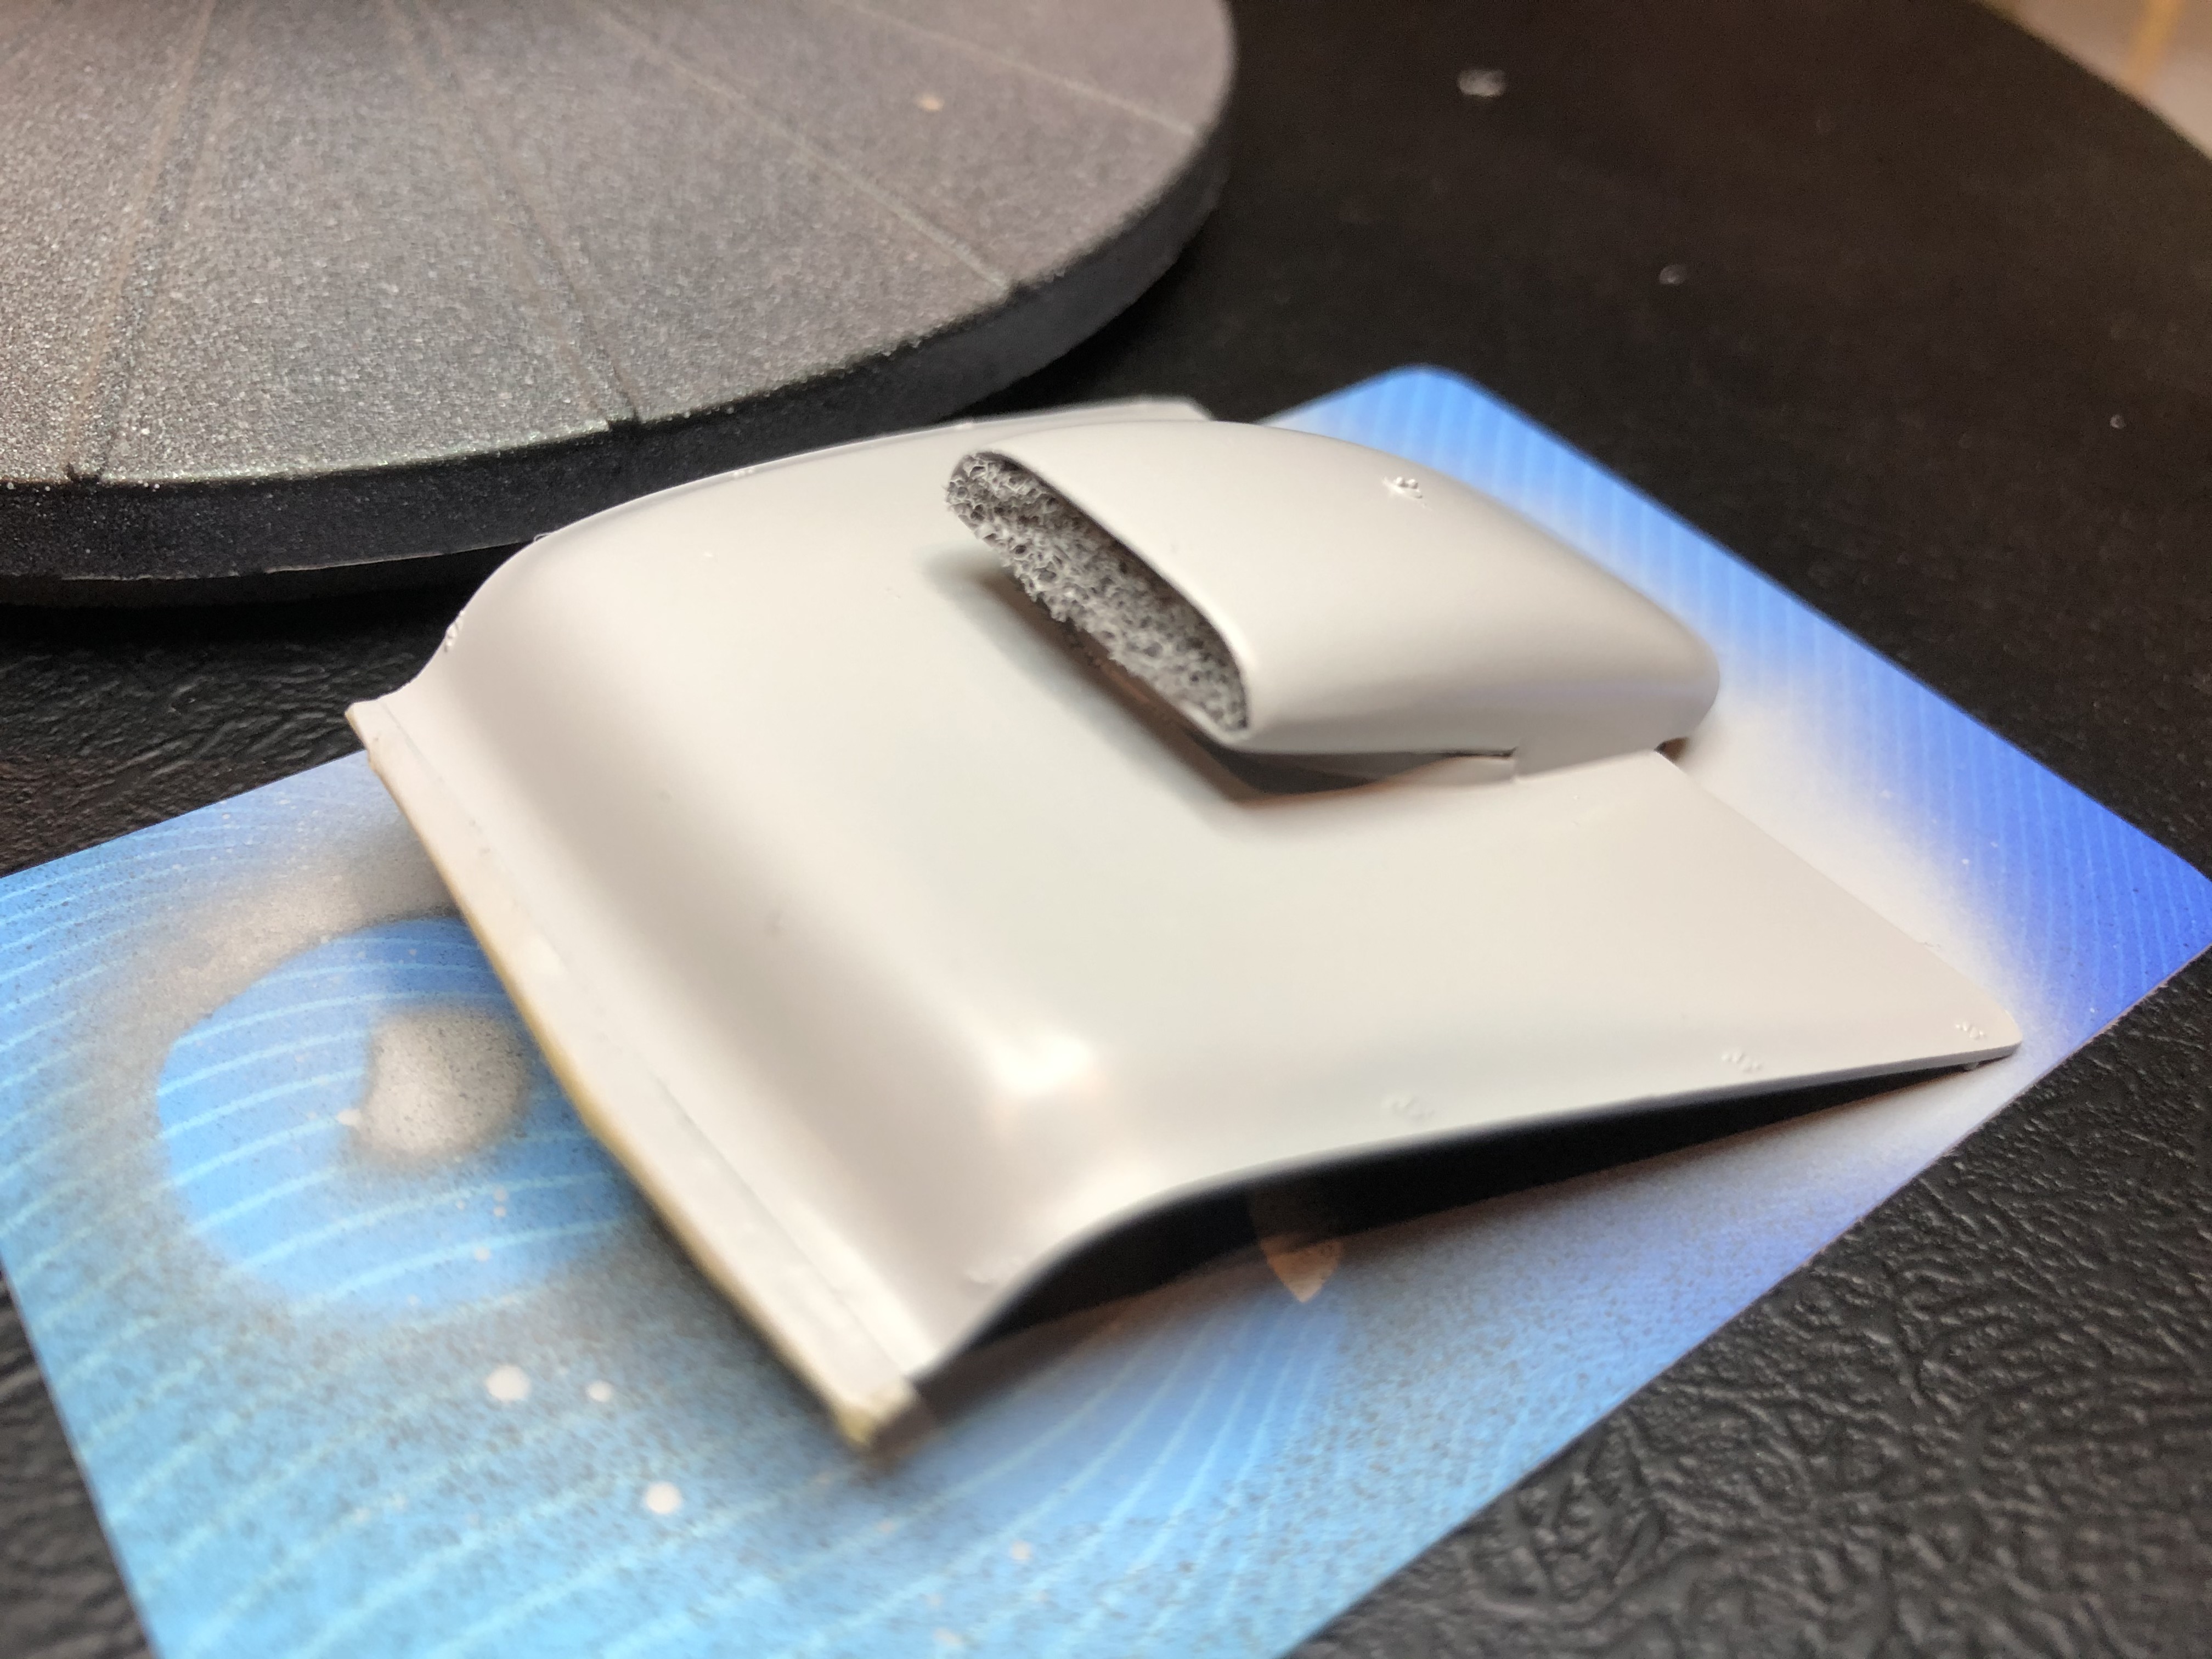
Well, I haven't forgotten about this Group Build. I finished up the interior & engine bay on the '57 Gasser.

Next step will be to get some color on the body. Hoping to successfully do a blue & white two-tone.
Jim
Next step will be to get some color on the body. Hoping to successfully do a blue & white two-tone.
Jim

bomber14
Joined: February 02, 2015
KitMaker: 330 posts
Auto Modeler: 23 posts

Posted: Wednesday, May 13, 2020 - 12:29 PM UTC
robert very nice metal work. i am impressed on how neatly you fit it into the tub.
patrick looking real good so far. the paint looks good to me, and decals are always my favorite part of the build.
james i like it so far. the interior looks real nice. i like the split bench, did it come like that or did you have to cut it?
i did a little seat work myself the last couple days.
[ ][/img]
made the bolster out of styrene rod heated and bent into shape. the belt material is medical tape colored with a black sharpie.
moving to the engine bay, could anyone suggest how to scratch make the terminal connections for the battery? i want to add the positive and negative wires. i already glued the battery into the engine compartment.
joe
patrick looking real good so far. the paint looks good to me, and decals are always my favorite part of the build.
james i like it so far. the interior looks real nice. i like the split bench, did it come like that or did you have to cut it?
i did a little seat work myself the last couple days.
[
][/img] made the bolster out of styrene rod heated and bent into shape. the belt material is medical tape colored with a black sharpie.
moving to the engine bay, could anyone suggest how to scratch make the terminal connections for the battery? i want to add the positive and negative wires. i already glued the battery into the engine compartment.
joe
jimb
Joined: August 25, 2006
KitMaker: 2,539 posts
Auto Modeler: 1,405 posts
Posted: Wednesday, May 13, 2020 - 12:52 PM UTC
Thanks, Joe. Your seat looks awesome. The seat in my gasser is right from the kit. No modification needed.
Jim
Jim
AussieReg
#007
Joined: June 09, 2009
KitMaker: 8,156 posts
Auto Modeler: 2,953 posts
Posted: Wednesday, May 13, 2020 - 01:04 PM UTC
Robert, neat work with the Aluminium sheet there, I've never seen that applied to an interior tub! Looking forward to watching it evolve.
Jim, lovely looking interior, the colour combination you chose works really well.
Joe, nice scratch work on the seat, and the texture on the medical tape works really well for the harness straps. I have seen battery terminal clamps built up from very thin strips of household foil. First the circular clamp around the battery terminal post, then a second strip around the end of the lead. Hope this makes sense.
Cheers, D
pnance26
Joined: January 22, 2016
KitMaker: 766 posts
Auto Modeler: 140 posts
Posted: Wednesday, May 13, 2020 - 01:52 PM UTC
Joel,
To me, Protar laid the ground work for Tamiya with the use of real screws and real working suspensions. I've built two and the worst thing is the instruction manual. It really sucks.
I'll post a photo later!
To me, Protar laid the ground work for Tamiya with the use of real screws and real working suspensions. I've built two and the worst thing is the instruction manual. It really sucks.
I'll post a photo later!
rv1963
Joined: December 07, 2004
KitMaker: 1,888 posts
Auto Modeler: 806 posts
Posted: Wednesday, May 13, 2020 - 01:53 PM UTC
James nice work on that interior and engine bay, that's a really good model kit.
Joe The front seat and belts look great i like the sharpie idea.
Joe to get a good fit on those panels i make a template out of a paper folder first than transfer it to the aluminum.
Joe The front seat and belts look great i like the sharpie idea.
Joe to get a good fit on those panels i make a template out of a paper folder first than transfer it to the aluminum.
pnance26
Joined: January 22, 2016
KitMaker: 766 posts
Auto Modeler: 140 posts
Posted: Wednesday, May 13, 2020 - 02:39 PM UTC
I was not happy with the main body work so I sanded it from 1500 grit to 12000, wet sanded the 1500 and 2000.
Using warmed rattle cans, I shot 2 mist coats 20 minutes apart and then 20 minutes later, one nice wet coat.
I still have to buff out the paint but I'm really, really happy. Unless I build a clean room, I don't know if I can get it much more dust free!
So that's it for me until next Thursday (not tomorrow) when my week off starts again. I will do the sidepods and nose then. Will try to work on the wings and rear wing mount as well. That is the punch list before moving on!

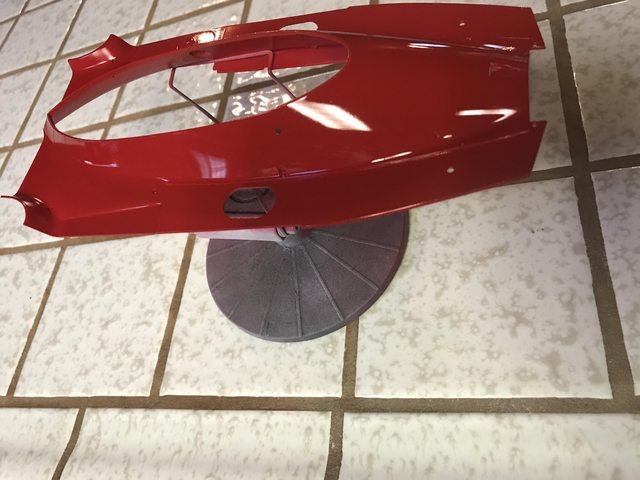
Your comments and criticisms are ALWAYS welcome!
Using warmed rattle cans, I shot 2 mist coats 20 minutes apart and then 20 minutes later, one nice wet coat.
I still have to buff out the paint but I'm really, really happy. Unless I build a clean room, I don't know if I can get it much more dust free!
So that's it for me until next Thursday (not tomorrow) when my week off starts again. I will do the sidepods and nose then. Will try to work on the wings and rear wing mount as well. That is the punch list before moving on!
Your comments and criticisms are ALWAYS welcome!
jimb
Joined: August 25, 2006
KitMaker: 2,539 posts
Auto Modeler: 1,405 posts
Posted: Thursday, May 14, 2020 - 12:01 AM UTC
Thanks, guys, I appreciate it. Robert, yes, it is a nice kit. I'm enjoying the build so far.
Patrick, nice paint work.
Jim
Patrick, nice paint work.
Jim
Dixon66
Joined: December 12, 2002
KitMaker: 1,500 posts
Auto Modeler: 645 posts
Posted: Thursday, May 14, 2020 - 12:51 AM UTC
Great updates guys.
Joe and James, funny that you both have split benches in there.
Robert, I hate the frames that are open in the engine bay and usually use sheet stock followed by a thin putty coat.
Patrick, that red looks so deep already. Wow.
Joe and James, funny that you both have split benches in there.
Robert, I hate the frames that are open in the engine bay and usually use sheet stock followed by a thin putty coat.
Patrick, that red looks so deep already. Wow.
Joel_W
Joined: December 04, 2010
KitMaker: 11,666 posts
Auto Modeler: 2,974 posts
Posted: Thursday, May 14, 2020 - 03:34 AM UTC
Just read through all the updates, and I'm truly impressed both in the quantity, and certainly the quality of the work. One this is for sure, as a group, our building standards just keep on getting higher and higher.
Patrick: Excellent decision about the main body paint. The resanding and prep, followed by how you use a Rattle can certainly looks darn good in the picture. After you polishing, I have no doubt it will be darn near perfect. Af sor a dust free way to paint, I gave up long ago. I just clean my spray booth filters, change the taped on paper towel, wipe down the sides and top, then wet the paper towel base covering, and hope for the best.
Looking forward to seeing those Protar instuctions.
Robert: I keep on forgeting to use my Apoxie Sculp mold. Your results look great. I'm assuming that you just leveled it off with a damp piece of paper towel. And your interior bucket with the Aluminum inserts. really look the part, because nothing reproduces Metal then the actual stuff does.
James: Glad to see the update. Your interior is really coming together quite nicely. Gotta say that the fabric seats look absolutely fantastic.
Joe: Impressive finish on the front benchseat. As for the seatbelts, I've heard about the medical cloth tape, but never tried it. I do like how it looks. Just might give that technique a try as well, as the AM harness sets are getting over priced. I'd rather just buy the hardware for half the price.
Joel
jimb
Joined: August 25, 2006
KitMaker: 2,539 posts
Auto Modeler: 1,405 posts
Posted: Thursday, May 14, 2020 - 09:08 AM UTC
Thanks for the comments, guys.
David, it is kind of ironic that both Joe & I are using split bench seats in our cars. His is modified, while mine is straight from the kit.
Joel, the fabric decals for the seats & door panels come in the kit. There are decals for the rear seat, too; but I'm not using the rear seat (obviously). They are the same decals that are in the Revell 1957 Custom 300 Sedan & police car kits.
Jim
 |

WEB HOSTING BY


Copyright ©2021 Auto Modeler and Kitmaker Network, a subsidiary of Silver Star Enterprises
All Rights Reserved. Please read our Conditions of Use and Privacy Policy.
All Rights Reserved. Please read our Conditions of Use and Privacy Policy.