The Garage
For general automotive modeling or non-modeling topics.
Strip, Track & Trail Official Build Thread
AussieReg
Staff MemberAssociate Editor
AUTOMODELER
#007
_VISITCOMMUNITY
Victoria, Australia
Joined: June 09, 2009
KitMaker: 8,156 posts
Auto Modeler: 2,953 posts
Posted: Sunday, July 26, 2020 - 10:47 PM UTC

Quoted Text

That is an awesome looking car Damian!
Not something I would think of trying but your finish and detailing are superb. Love the final detail around the parachute with the cables and cord! I think you've lifted your game to a whole new level.

cheers
Michael


Thanks Michael, you know I just soak up the inspiration from watching you guys and try to lift my game a bit with each build. This one, I agree it took me up a few notches, but it really was a very nice kit to build being a much more recent release than the majority of Tri-5 kits I battle with.

Cheers, D
Joel_W
Staff MemberAssociate Editor
AUTOMODELER
_VISITCOMMUNITY
New York, United States
Joined: December 04, 2010
KitMaker: 11,666 posts
Auto Modeler: 2,974 posts
Posted: Monday, July 27, 2020 - 12:23 AM UTC
D,
A winner for sure as it crossed the finish line. I'd say you took this old kit and brought it up to standards.

New techniques learned, and after market parts used to kick it up a few more notches just made following your build all the more enjoyable for me to follow. Can't wait to see your next build using these techniques and parts, and maybe a few more as well.

Joel
jimb
_VISITCOMMUNITY
New York, United States
Joined: August 25, 2006
KitMaker: 2,539 posts
Auto Modeler: 1,405 posts
Posted: Monday, July 27, 2020 - 12:29 AM UTC
Awesome looking '55 dragger, D.! That car really looks like it can "haul the mail", or is it the post Down Under? Anyway, great job. The extra details really make it stand out in the crowd.

Might have to try my hand at those distributors one of these days.

Jim
pnance26
_VISITCOMMUNITY
California, United States
Joined: January 22, 2016
KitMaker: 766 posts
Auto Modeler: 140 posts
Posted: Monday, July 27, 2020 - 01:23 AM UTC
As I look at my own builds lately, it just seems something goes wrong on every one and I seem to develop a negative attitude and become very picky.

I forget this is a hobby and should be "fun". And losing that perspective makes me very critical of myself and others.

That said, good job, Damian. Working with decals seems to be getting the best of me as well. My little Porsche is suffering because of either A) I am getting too stupid to get it right or B) I need a new supplier as this is the third kit where I have had trouble using AM decals from one source. I am beginning to think that may be the issue. And until I can find a source that has the variety of decals and scales in anything but NASCAR and NHRA, I may be stuck.

Any suggestions of alternative decal suppliers?
Dixon66
_VISITCOMMUNITY
New Hampshire, United States
Joined: December 12, 2002
KitMaker: 1,500 posts
Auto Modeler: 645 posts
Posted: Monday, July 27, 2020 - 02:47 AM UTC
Nice finish Damian, the timing lights are crossed.

The extra details you added sure look right and bring your work up even higher. Great job!
Joel_W
Staff MemberAssociate Editor
AUTOMODELER
_VISITCOMMUNITY
New York, United States
Joined: December 04, 2010
KitMaker: 11,666 posts
Auto Modeler: 2,974 posts
Posted: Monday, July 27, 2020 - 09:46 AM UTC
Patrick,
Like you I use Indy Cal decals as my go to source because they're USA based. After that it's Spot in Spain, Hiroboy and Grand Prix Models in London, and HLJ in Japan. All of those resources requires UPS, Fed Ex, or DHL. Otherwise it takes months to get what you ordered.

Same with ebay. There's plenty of AM decals, but all are out of country.

What is your decal application method? Maybe we can spot something that is causing your issues.

Joel
pnance26
_VISITCOMMUNITY
California, United States
Joined: January 22, 2016
KitMaker: 766 posts
Auto Modeler: 140 posts
Posted: Monday, July 27, 2020 - 11:54 AM UTC

Quoted Text

Patrick,
Like you I use Indy Cal decals as my go to source because they're USA based. After that it's Spot in Spain, Hiroboy and Grand Prix Models in Loudon, and HLJ in Japan. All of those resources requires UPS, Fed Ex, or DHL. Otherwise it takes months to get what our ordered.

Same with ebay. There's plenty of AM decals, but all are out of country.

What is your decal application method? Maybe we can spot something that is causing your issues.

joel

Joel


I'll try to get a photo for you... a close up. This is the third time that a wrinkle has appeared.

I'll describe the process tomorrow with a photograph.
pnance26
_VISITCOMMUNITY
California, United States
Joined: January 22, 2016
KitMaker: 766 posts
Auto Modeler: 140 posts
Posted: Tuesday, July 28, 2020 - 02:16 AM UTC
Okay, time for show and then tell Patrick what he is doing wrong...

Process: 1) trim the decal as close as possible 2) use warm water to free decal from sheet; 3) MicroSet on surface; 4) apply decal; 5) use cotton tip swab to remove excess fluids and to flatten decal if possible; 6) apply liberal amount of MicroSol; 7) leave it the eff alone for several hours; cut or poke small holes in areas that are raised.

The wrinkle appeared after MicroSol was applied and would not flatten out...

This is the result and I think it looks like crap. I know the surface underneath was smooth. This is not my first rodeo but this is ridiculous.


Suggestions? I am tired of having great paint jobs ruined. Decaling was one of my favorite things!

What's going wrong?
Joel_W
Staff MemberAssociate Editor
AUTOMODELER
_VISITCOMMUNITY
New York, United States
Joined: December 04, 2010
KitMaker: 11,666 posts
Auto Modeler: 2,974 posts
Posted: Tuesday, July 28, 2020 - 04:39 AM UTC
Been a good 10 days since my last update, but work has slowly but consistently going on as I'm finally on the last lap with the finish line in sight.

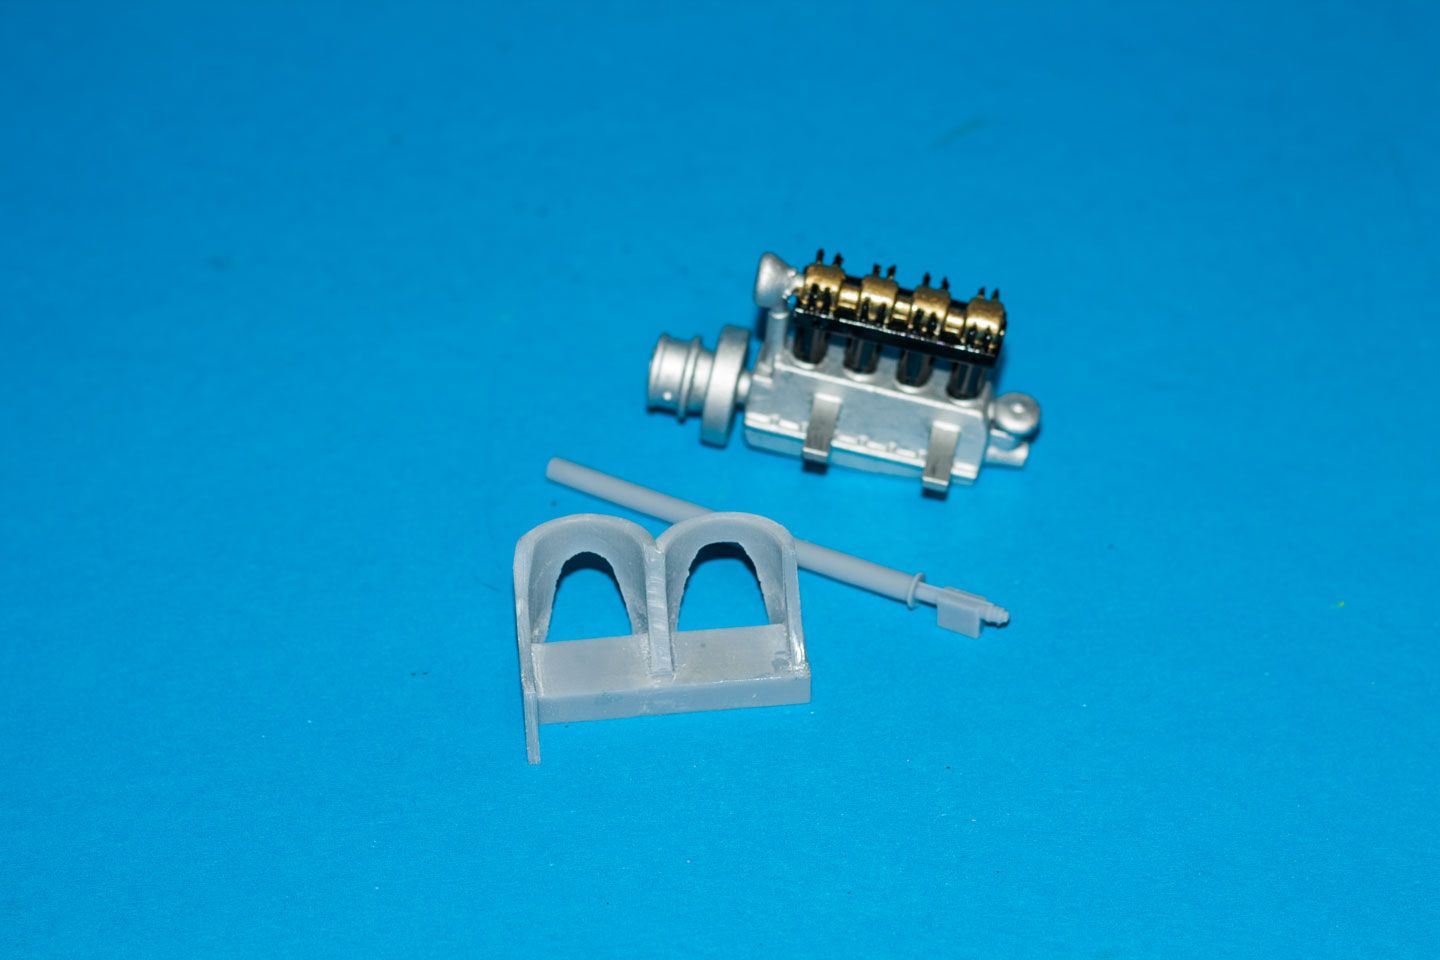
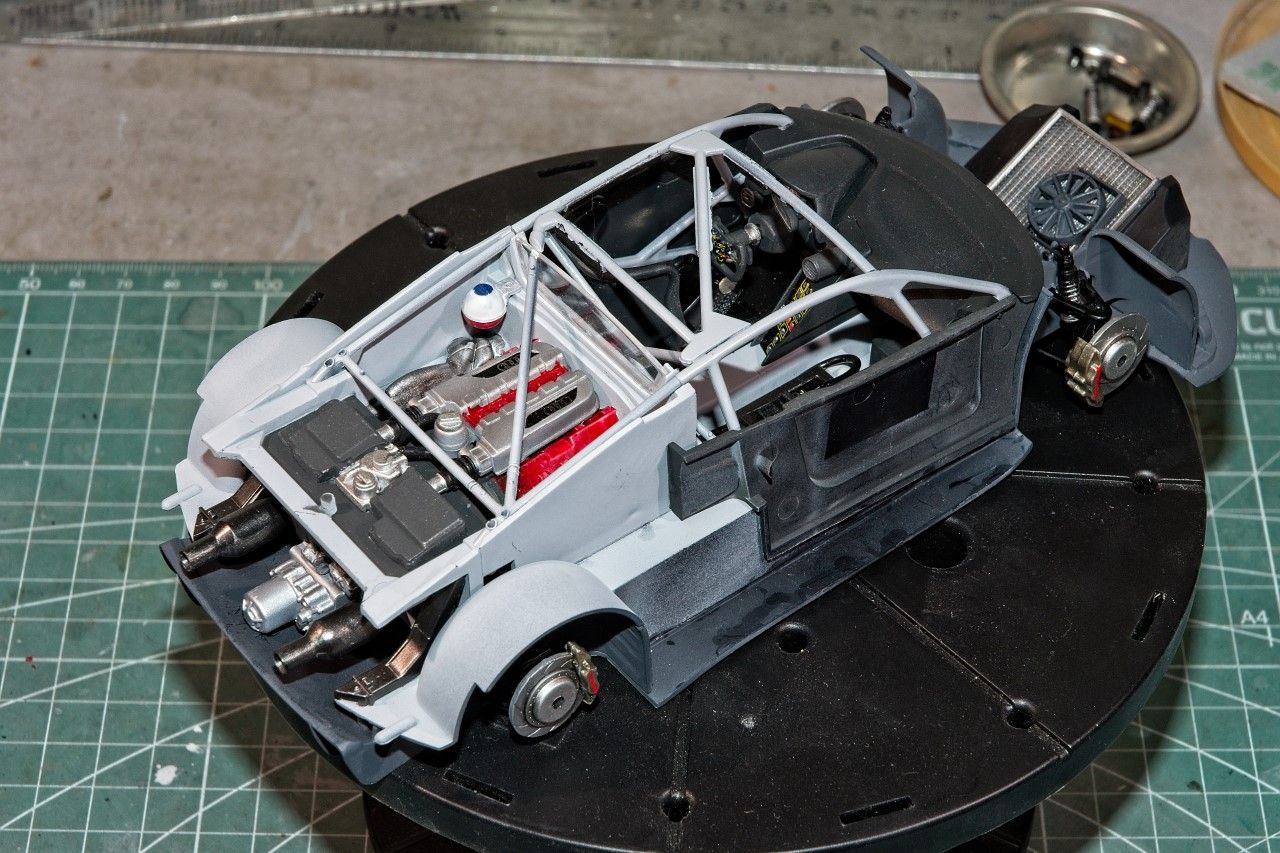
The driver's compartment was the last of the sub assemblies required to assemble the full chassis. All that was left to add was the side panels which were previously painted with Tamiya Nato Black. Since this build is a curbside model on Steroids, there's just enough added details to the bottom of the chassis and suspension to make the build have just a little more visual interest to both the builder and viewer. The radiator and fan assembly is just a glue and drop in fit. The driver's cockpit needed perfect alignment and a nudge here and there, but it did literally pop into place.


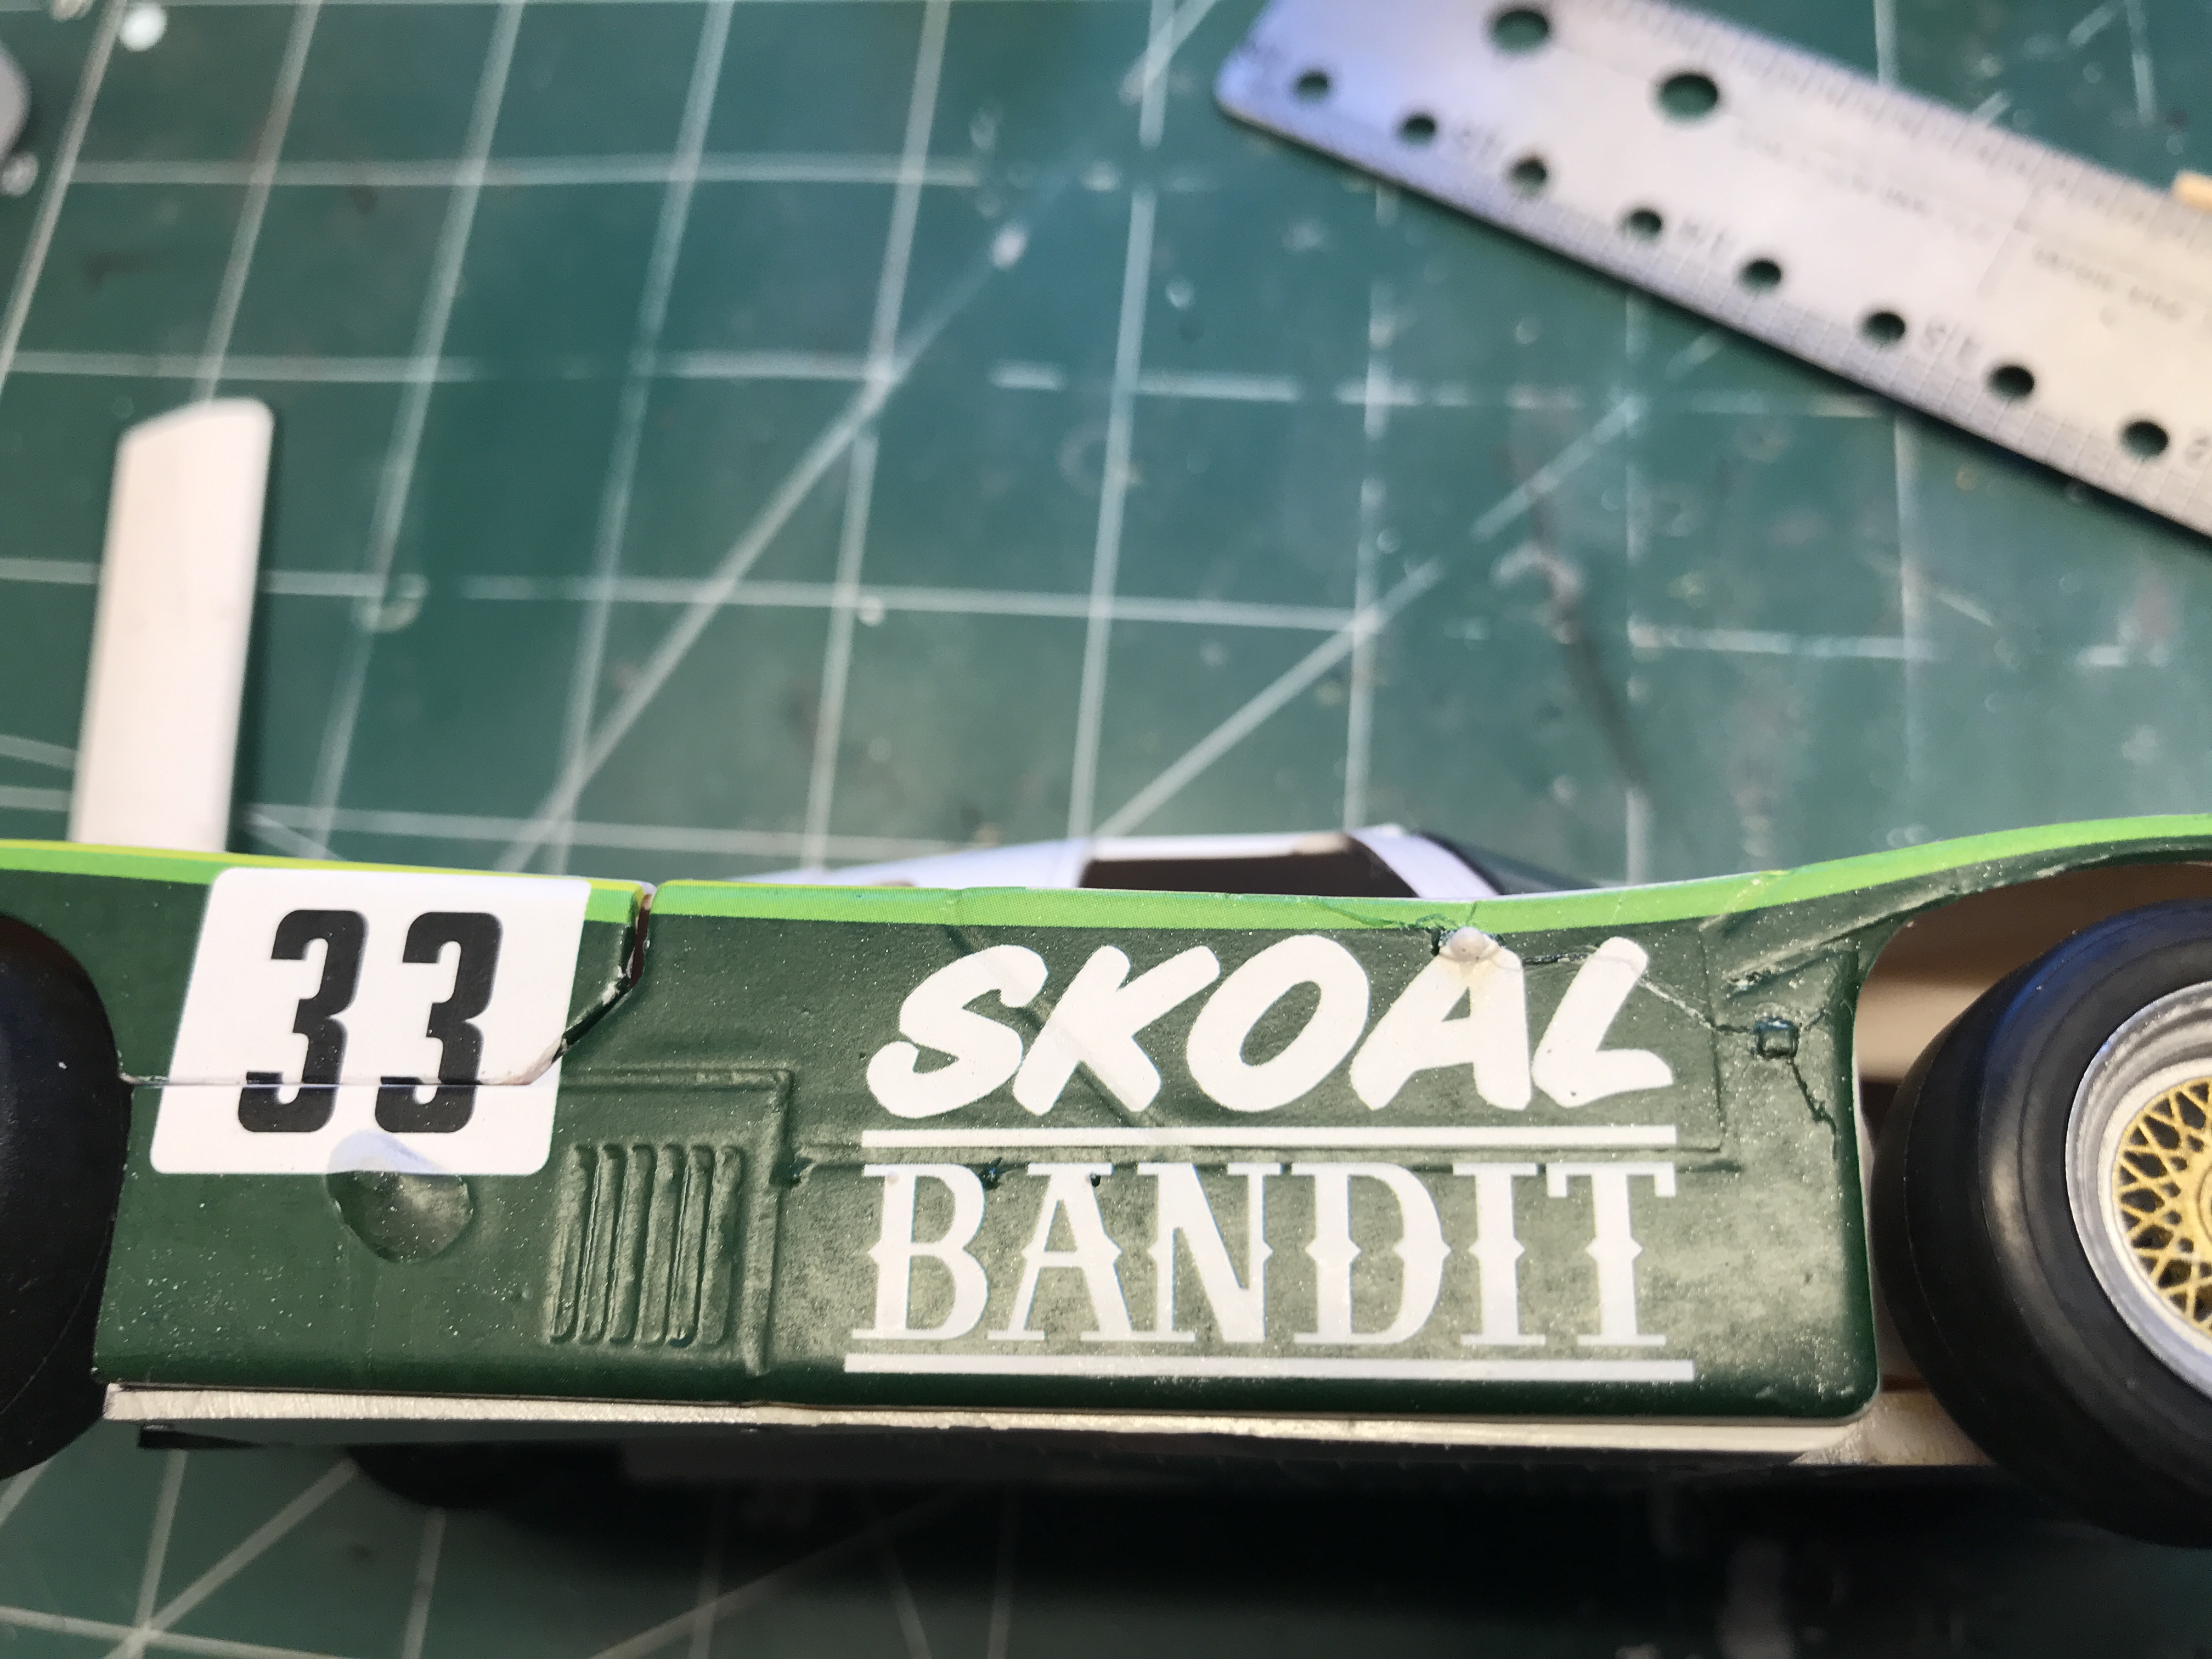
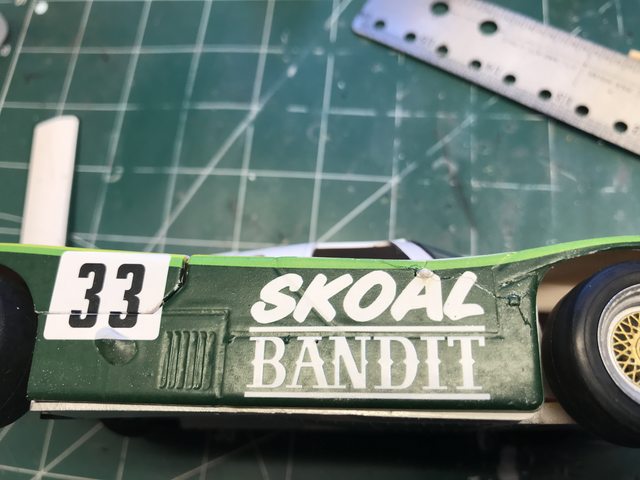
Since the topside of the sill plates will be hidden from view once the body is attached, I really didn't pay any attention to how it looks during construction.


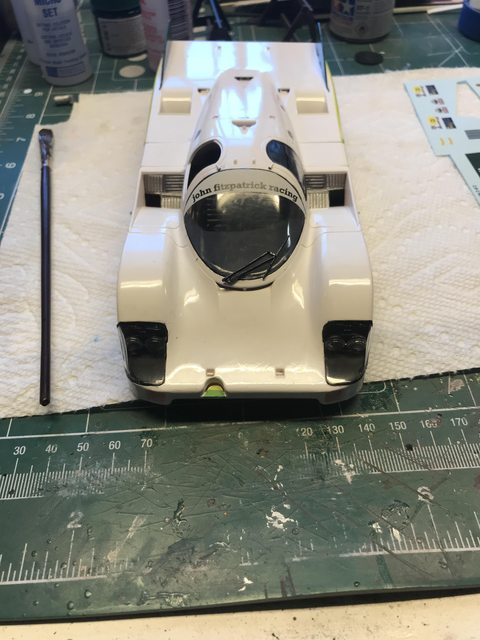
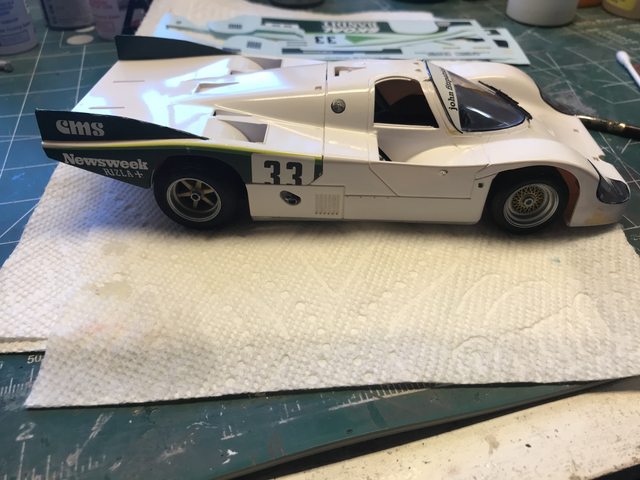
Next up was getting the shell ready for final assembly. So out came a piece of Micro Mesh #12,000, and a very light wet sanding to just smooth out any high or rough spots in the clear Gloss finish. Then the polishing proceeded with the 3 part Gravity polishing pastes, and finally their liquid wax.

Honestly, this is the best finish I've ever attained to date.


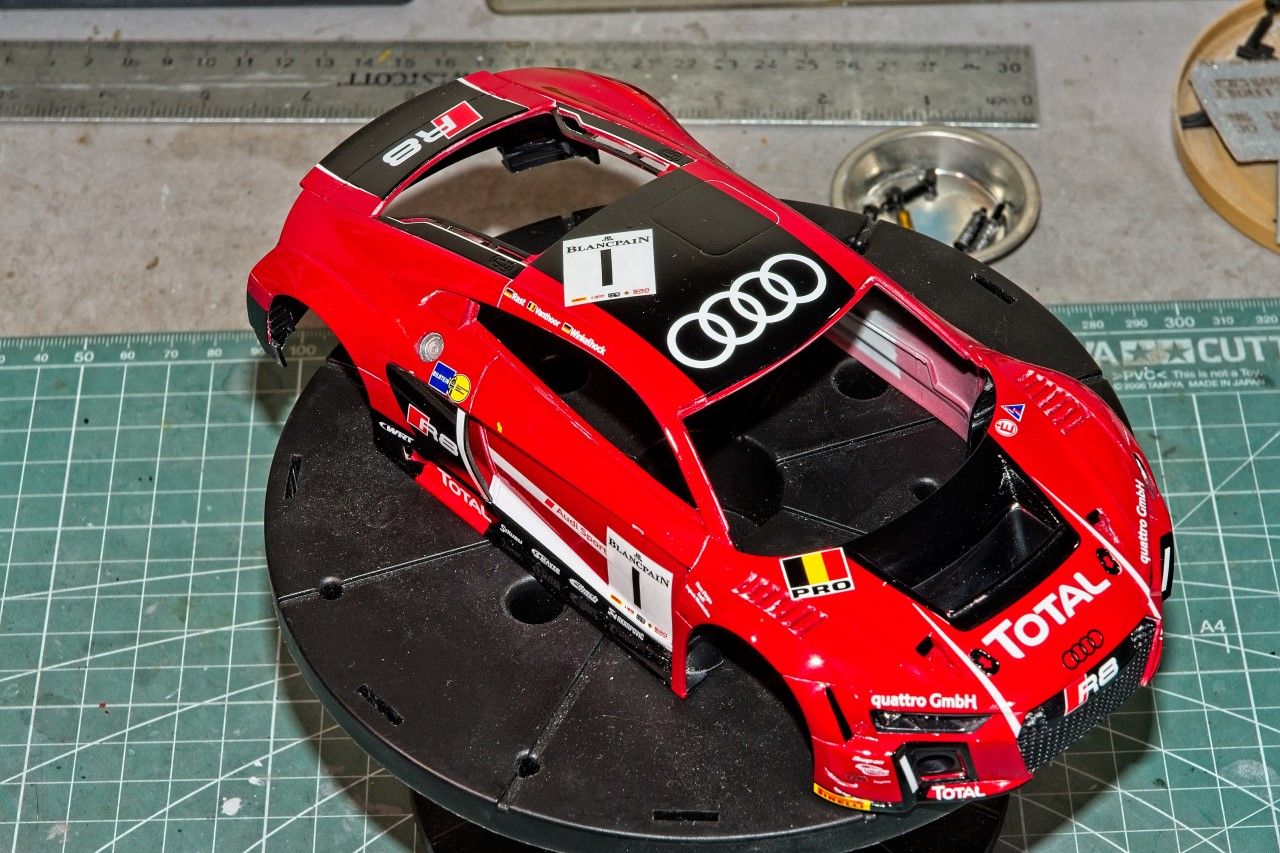
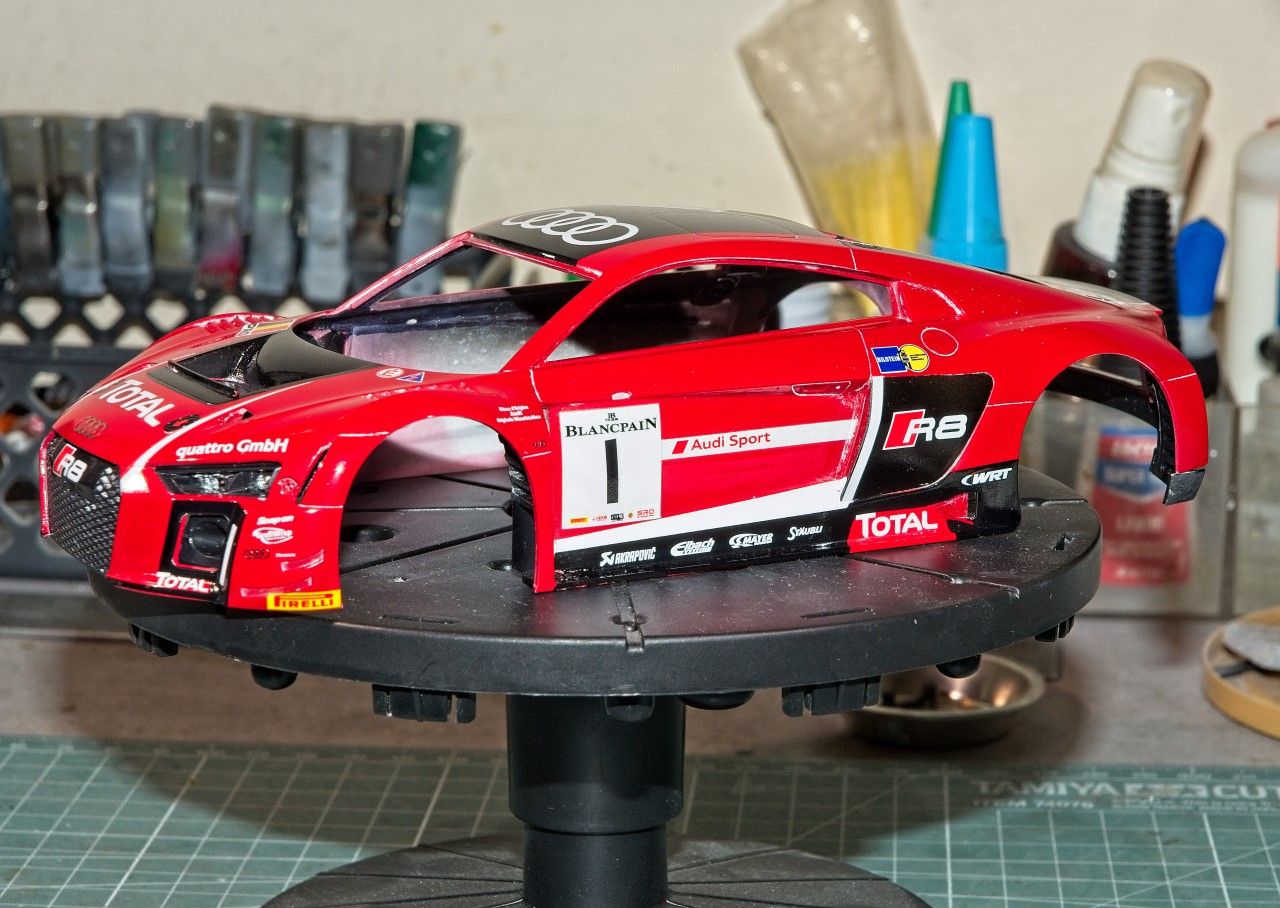
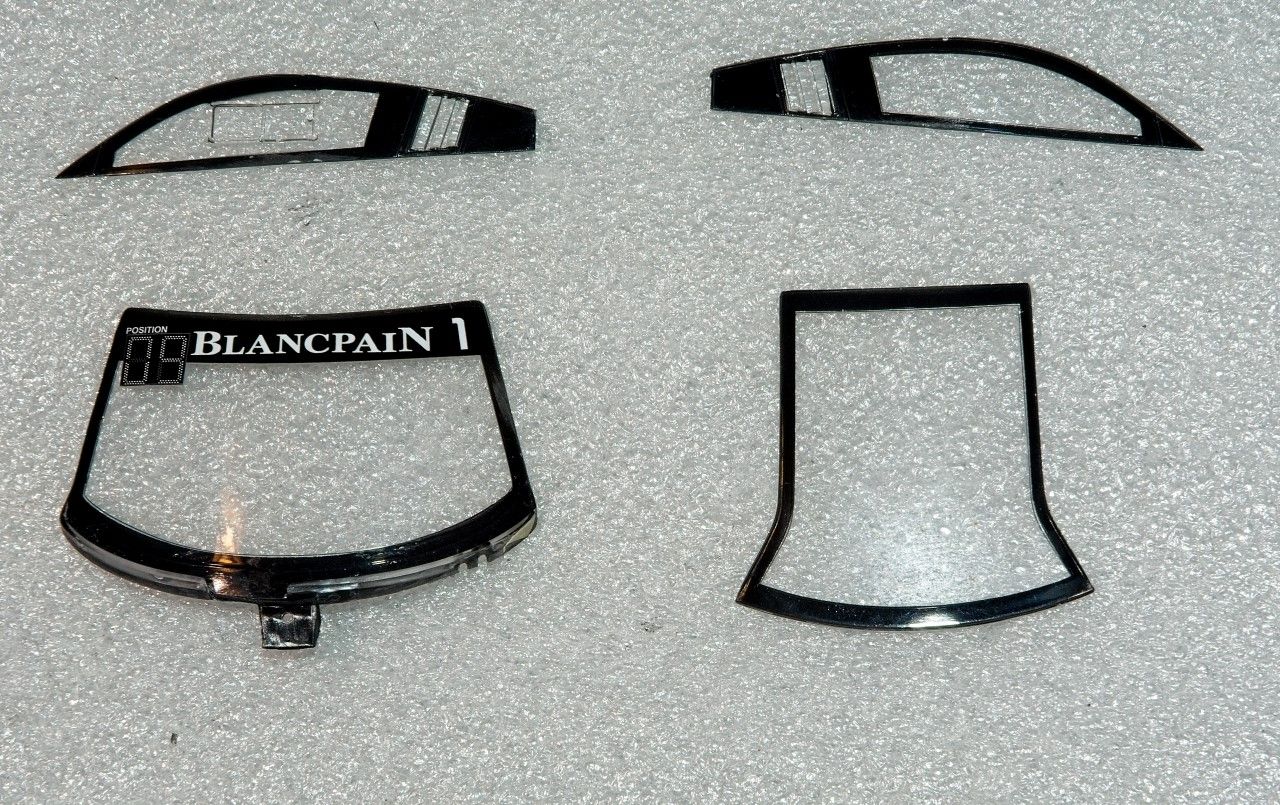
The four main glass pieces: front windsheild, rear window, and both side windows have a rubber gasket between each of them and the body. Nunu supplies these as sectioned decals, but I opted to go with the Decalas masks instead. Each one fit like a glove. I Airbrushed on plain old Mr. Color Matt Black as it will look glossy no matter what as you view them through the glass. After masking, I didn't have a single touch up. Another world record for me.


I still have the two side air intakes directly behind the side windows to install, which are painted, decaled, polished, and waxed. All the lights, lenses, and misc. parts are next, so there's still a fair amount of work to accomplish before i cross the finish line.

And thanks to all for stopping by and checking out my progress to date. It's always much appreciated.

Joel
Joel_W
Staff MemberAssociate Editor
AUTOMODELER
_VISITCOMMUNITY
New York, United States
Joined: December 04, 2010
KitMaker: 11,666 posts
Auto Modeler: 2,974 posts
Posted: Tuesday, July 28, 2020 - 04:46 AM UTC
Patrick,
from your description of your decaling procedures, leaving the decal alone after applying Micro Sol seems to be the issue. Any wrinkles and or trapped air causing bubbles needs to be worked out while the decal is still wet, once dry the only option is cutting or using a pin on bubbles.

I very lightly roll/work a decal after applying Set, and then after Sol till the decal is perfect. I even do that with Solvaset.

I'm no expert by any means, and as I've said numerous times, I've adopted Paul Budzik's decaling process. His decaling video is less then 10 min and will answer all your questions and concerns. It's the best I've ever seen.

joel
pnance26
_VISITCOMMUNITY
California, United States
Joined: January 22, 2016
KitMaker: 766 posts
Auto Modeler: 140 posts
Posted: Tuesday, July 28, 2020 - 05:22 AM UTC

Quoted Text

Patrick,
from your description of your decaling procedures, leaving the decal alone after applying Micro Sol seems to be the issue. Any wrinkles and or trapped air causing bubbles needs to be worked out while the decal is still wet, once dry the only option is cutting or using a pin on bubbles.

I very lightly roll/work a decal after applying Set, and then after Sol till the decal is perfect. I even do that with Solvaset.

I'm no expert by any means, and as I've said numerous times, I've adopted Paul Budzik's decaling process. His decaling video is less then 10 min and will answer all your questions and concerns. It's the best I've ever seen.

joel


Thanks, Joel. It's just too bad that I learned about two builds too late. I'll give that video a watch!

Now I wish I had a computer or tablet out in the workshop so I could watch while building!
Joel_W
Staff MemberAssociate Editor
AUTOMODELER
_VISITCOMMUNITY
New York, United States
Joined: December 04, 2010
KitMaker: 11,666 posts
Auto Modeler: 2,974 posts
Posted: Tuesday, July 28, 2020 - 06:10 AM UTC
Patrick,
You can watch You Tube on your cell as it's an app. I do it all the time.

Joel
pnance26
_VISITCOMMUNITY
California, United States
Joined: January 22, 2016
KitMaker: 766 posts
Auto Modeler: 140 posts
Posted: Tuesday, July 28, 2020 - 08:15 AM UTC

Quoted Text

Patrick,
You can watch You Tube on your cell as it's an app. I do it all the time.

Joel


Yeah, I know... I was just looking for an excuse...
pnance26
_VISITCOMMUNITY
California, United States
Joined: January 22, 2016
KitMaker: 766 posts
Auto Modeler: 140 posts
Posted: Wednesday, July 29, 2020 - 03:24 AM UTC
So what is the best way to remove decals without stripping the entire paint job?

Any and all advice considered...

This is what I am dealing with...


Joel_W
Staff MemberAssociate Editor
AUTOMODELER
_VISITCOMMUNITY
New York, United States
Joined: December 04, 2010
KitMaker: 11,666 posts
Auto Modeler: 2,974 posts
Posted: Wednesday, July 29, 2020 - 04:15 AM UTC
Patrick,
If you haven't sealed the decals as yet, then try the strongest sticking masking tape that you have.

I really never had any luck removing decals with any chemical without damaging the paint, so I can't help you with step 2 if step 1 doesn't do the trick. But those decals really look like they're down pretty darn good.

joel
pnance26
_VISITCOMMUNITY
California, United States
Joined: January 22, 2016
KitMaker: 766 posts
Auto Modeler: 140 posts
Posted: Wednesday, July 29, 2020 - 04:42 AM UTC
Yeah, unfortunately, I may have been too good at applying MicroSol. If I have to strip this bad boy and start over again, it's only about 3 hours and a portion of rattle can. I did get the flat blackkkkkkkkk... hold on. Damn it. I glued on of the headlight lens and the windshield in place...

Anybody got an extra body for a 1984 Porsche 956?

I may have to move on to the T2 project and write this one off for a while!
Joel_W
Staff MemberAssociate Editor
AUTOMODELER
_VISITCOMMUNITY
New York, United States
Joined: December 04, 2010
KitMaker: 11,666 posts
Auto Modeler: 2,974 posts
Posted: Wednesday, July 29, 2020 - 05:53 AM UTC
Patrick,
What did you glue the headlight lenses on with? if you used CA, they make a Debonder. I used it once or twice and eventually it does work. Extra Thin, just another application of it, and work a blade into the seam, the lens should pop off.

Joel
pnance26
_VISITCOMMUNITY
California, United States
Joined: January 22, 2016
KitMaker: 766 posts
Auto Modeler: 140 posts
Posted: Thursday, July 30, 2020 - 06:06 AM UTC

Quoted Text

Patrick,
What did you glue the headlight lenses on with? if you used CA, they make a Debonder. I used it once or twice and eventually it does work. Extra Thin, just another application of it, and work a blade into the seam, the lens should pop off.

Joel


I NEVER use CA on clear parts... I always use a white glue. I learned that lesson too, too well! LOL!
pnance26
_VISITCOMMUNITY
California, United States
Joined: January 22, 2016
KitMaker: 766 posts
Auto Modeler: 140 posts
Posted: Thursday, July 30, 2020 - 06:09 AM UTC
By the way, Joel, your build is looking very, very nice. Well done! I am glad a roll cage was included. I just realized there isn't one in the Porsche 956 I'm building. I guess in 1984, no one ever rolled their cars...

Either that or Tamiya was just lazy.
tinbanger
_VISITCOMMUNITY
Ontario, Canada
Joined: February 04, 2008
KitMaker: 2,507 posts
Auto Modeler: 409 posts
Posted: Thursday, July 30, 2020 - 07:32 AM UTC
Here is an update on my build:-


Some painting done on the motor.
I have resin printed the seat sub-frame(kit had a bench seat) and also the steering box and column which was not included in the kit.
Keep up the great builds every one!
Joel_W
Staff MemberAssociate Editor
AUTOMODELER
_VISITCOMMUNITY
New York, United States
Joined: December 04, 2010
KitMaker: 11,666 posts
Auto Modeler: 2,974 posts
Posted: Thursday, July 30, 2020 - 10:50 AM UTC
Patrick,
Thanks for your thumbs up. It's greatly appreciated.

As for the 956, there wasn't a separate roll cage. Back in those days nearly all the prototype cars had a curved top section from the windshield to the engine compartment. A car that rolled and landed upside down in theory would just roll onto it's side.

At one point the 956 was banned in the USA by IMSA as the drivers feet were in front of the front axle line. Porsche actually extended the front wheels so that the drivers feet were behind the axle line.

Joel
pnance26
_VISITCOMMUNITY
California, United States
Joined: January 22, 2016
KitMaker: 766 posts
Auto Modeler: 140 posts
Posted: Thursday, July 30, 2020 - 11:30 AM UTC
That’s great info!

The tape trick worked! Thanks everyone!

So I am going little by little... will let you all see finished product!

Know what I hate? Doing trim on windows. I really hate it.
pnance26
_VISITCOMMUNITY
California, United States
Joined: January 22, 2016
KitMaker: 766 posts
Auto Modeler: 140 posts
Posted: Thursday, July 30, 2020 - 02:17 PM UTC
Closing in on the finish line!

I will make a decision soon about what happens next. I need to finish a rebuild of an Alfa Romeo 179 which is a [auto-censored]e car. But it is torn down and stripped needs a repaint.

Here is where we are today on the Tamiya 1/24 Fitzpatrick Racing Porsche 956 Skoal Bandit from LeMans 1984.


Your comments are always welcome!
Joel_W
Staff MemberAssociate Editor
AUTOMODELER
_VISITCOMMUNITY
New York, United States
Joined: December 04, 2010
KitMaker: 11,666 posts
Auto Modeler: 2,974 posts
Posted: Friday, July 31, 2020 - 12:56 AM UTC
Patrick,
Nicely done on the stripping of those huge side decals. Looking forward to seeing how the re-decaling comes out.

Is the rebuild of the Alfa Romeo 179 the Italeri 1/12 scale kit?. I've often looked at it as a reasonable entry into 1/12 scale, but I'm not a big fan of Italeri kits as nearly all are older kits from other manufactures.

Joel
pnance26
_VISITCOMMUNITY
California, United States
Joined: January 22, 2016
KitMaker: 766 posts
Auto Modeler: 140 posts
Posted: Friday, July 31, 2020 - 03:51 AM UTC

Quoted Text

Patrick,
Nicely done on the stripping of those huge side decals. Looking forward to seeing how the re-decaling comes out.

Is the rebuild of the Alfa Romeo 179 the Italeri 1/12 scale kit?. I've often looked at it as a reasonable entry into 1/12 scale, but I'm not a big fan of Italeri kits as nearly all are older kits from other manufactures.

Joel


Thanks to you and the others for the advice as to stripping those decals. I didn't realize that the decal film would pull up so easily.

As to the Alfa Romeo 179C, it is the Italeri kit, but when I bought it over 30 years ago, it was a Protar kit. It was my first 1/12th scale kit. It has a lot of screws for attachment points which takes away from the smooth lines of the kit.

It is a complex kit with all the correct framing for the side pods.

I think first order of business is to clean my desk... and I mean clean it. It is beyond time... maybe even a fresh coat of white paint. I should have bought a new cutting mat as mine, for some reason, while sitting on a flat surface has developed "rolls". I have no idea why... any suggestions on how to flatten it out again?

Thanks again and I will try to have this done by this Saturday. If the styrene gods smile on me favorably, I may get a third build done by the October deadline! I think it will be the 1/12th Ferrari 312T2 from Protar. It is the old kit.