

Thanks Robert, Joel, Gabriel and Nick, it was fun building it.
Joel, yes, all the joints were "fishmouthed" with a narrow round file after scribing a line on the end with an x-acto blade. Only one of the joints I'm not really happy with. The upper door bar on the left side, I'll throw a little perfect putty in it before primer.
Gabriel, all the rods were bent by hand, no heat applied. Works real well as you can see. I was also able to adjust the angles much easier that way too. The bars that run forward from the main hoop down to the chassis are two 45 degree bends and then the down tubes were bent inwards as they would be on the real thing. Basically slightly wider at the floor than at the roof. The joint from those to the main hoop were reinforced with a little bit of brass rod inside.
Nick, that GTR looks great! You really make them come alive.


Go to automodeler.com for the current dynamic site!
The Garage
For general automotive modeling or non-modeling topics.
For general automotive modeling or non-modeling topics.
Hosted by Jim Starkweather
Strip, Track & Trail Official Build Thread

Dixon66

Joined: December 12, 2002
KitMaker: 1,500 posts
Auto Modeler: 645 posts

Posted: Tuesday, April 21, 2020 - 08:31 AM UTC

Cosimodo

#335

Joined: September 03, 2013
KitMaker: 1,808 posts
Auto Modeler: 701 posts

Posted: Tuesday, April 21, 2020 - 11:56 AM UTC
Great work on the roll cage extension, David. You may not see it but it sure looks more like the real cage.
Nick, another quick turnaround. The McLaren is an amazing machine, with a rare BMW powertrain. The lockdown is doing wonders for your productivity.
cheers
Michael
Nick, another quick turnaround. The McLaren is an amazing machine, with a rare BMW powertrain. The lockdown is doing wonders for your productivity.
cheers
Michael

AussieReg

#007

Joined: June 09, 2009
KitMaker: 8,156 posts
Auto Modeler: 2,953 posts

Posted: Tuesday, April 21, 2020 - 12:10 PM UTC
David, lovely work on the roll cage, it looks great and will definitely add to the end result when compared with the kit offer. I see that you cold-formed the bends by hand, are they solid rod or tube profile? Is there any deformation at the bends?
Nick, you're smashing through these kits at a frightening pace lately, and no compromising the quality of the builds! Super job on the McLaren, congrats on being the second across the line (and only 3 weeks in!).
Cheers, D
Nick, you're smashing through these kits at a frightening pace lately, and no compromising the quality of the builds! Super job on the McLaren, congrats on being the second across the line (and only 3 weeks in!).
Cheers, D

Dixon66
Joined: December 12, 2002
KitMaker: 1,500 posts
Auto Modeler: 645 posts
Posted: Tuesday, April 21, 2020 - 12:20 PM UTC
Thanks Michael and Damian, solid rod and no deformation that I can see (some of my .080 stock has a slight ovoid look to it, I tried to grab the roundest).
Parts are drying after degreasing this evening. Hoping to hit at least the chassis and inner body shell with 1500 Gray tomorrow. Outer body will get 1500 Gray and after sanding the second coat will be 1500 White. Jagermeister Orange arrived a week or so ago, still waiting on the decals to arrive from Asia. I'll be waiting to paint the body shell until after I've confirmed the decals were are received without damage.
I got some 5 point harness etch, need to figure out what I'm going to use as belt material.
Modified the seat after dinner too. The lap belt holes were coming in from the rear instead of the sides. Plugged the holes and cut slots in the sides.

Joel_W
Joined: December 04, 2010
KitMaker: 11,666 posts
Auto Modeler: 2,974 posts

Posted: Wednesday, April 22, 2020 - 02:14 AM UTC
David,
I for one would be very interested in seeing you seat modifications and how it all comes together. Don't laugh, but seats, and harnesses are my biggest weak point by far.
Joel
I for one would be very interested in seeing you seat modifications and how it all comes together. Don't laugh, but seats, and harnesses are my biggest weak point by far.
Joel

Dixon66
Joined: December 12, 2002
KitMaker: 1,500 posts
Auto Modeler: 645 posts
Posted: Wednesday, April 22, 2020 - 07:09 AM UTC
Not much to it Joel, I'll try to remember to take a picture or two.
Joel_W
Joined: December 04, 2010
KitMaker: 11,666 posts
Auto Modeler: 2,974 posts
Posted: Wednesday, April 22, 2020 - 08:52 AM UTC
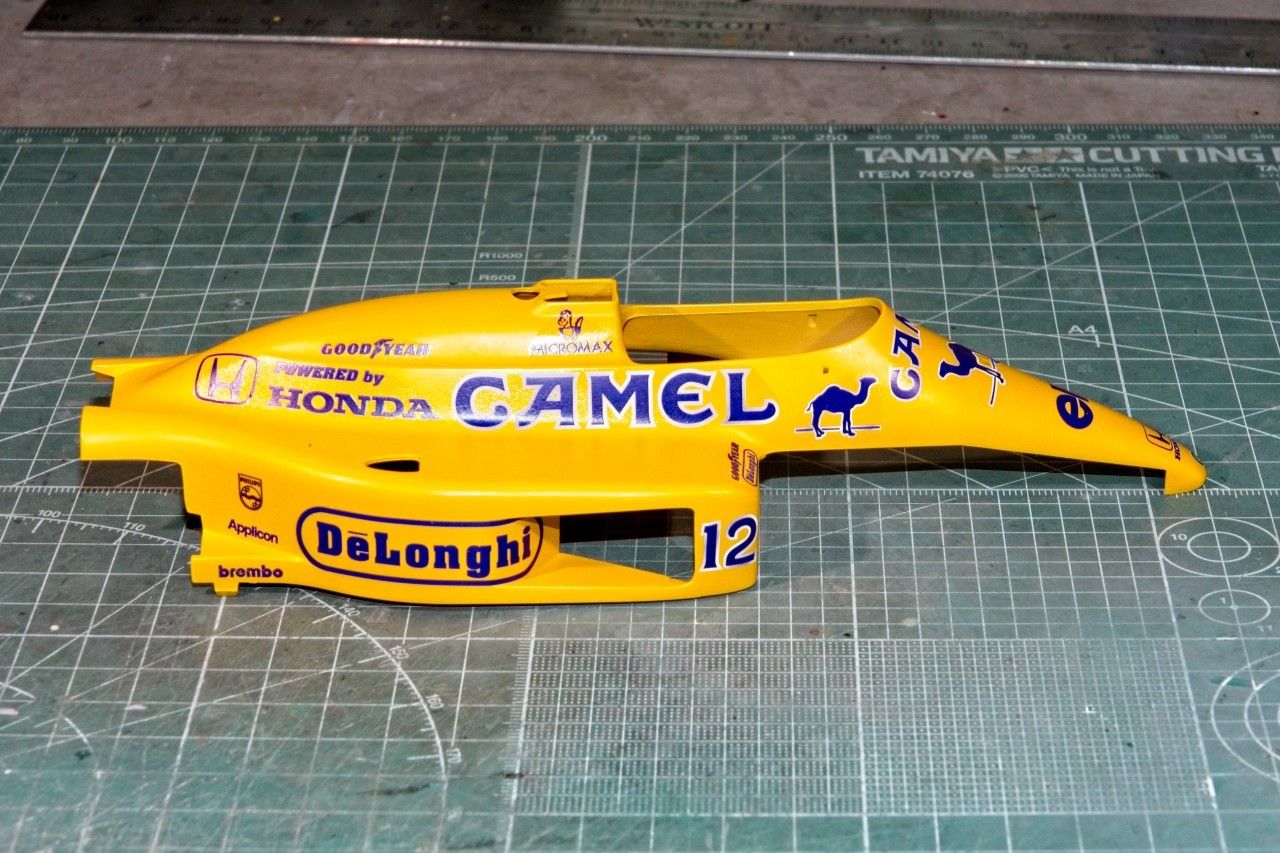
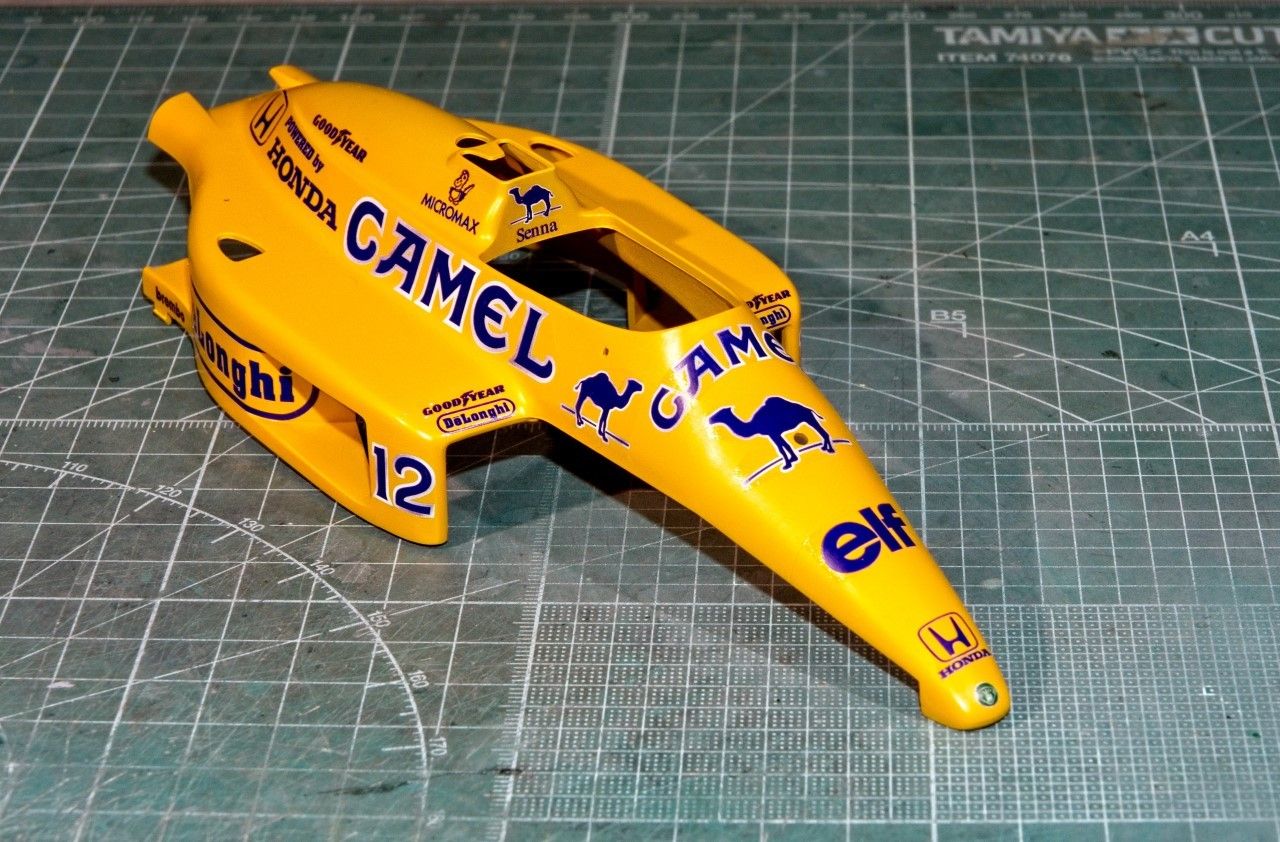
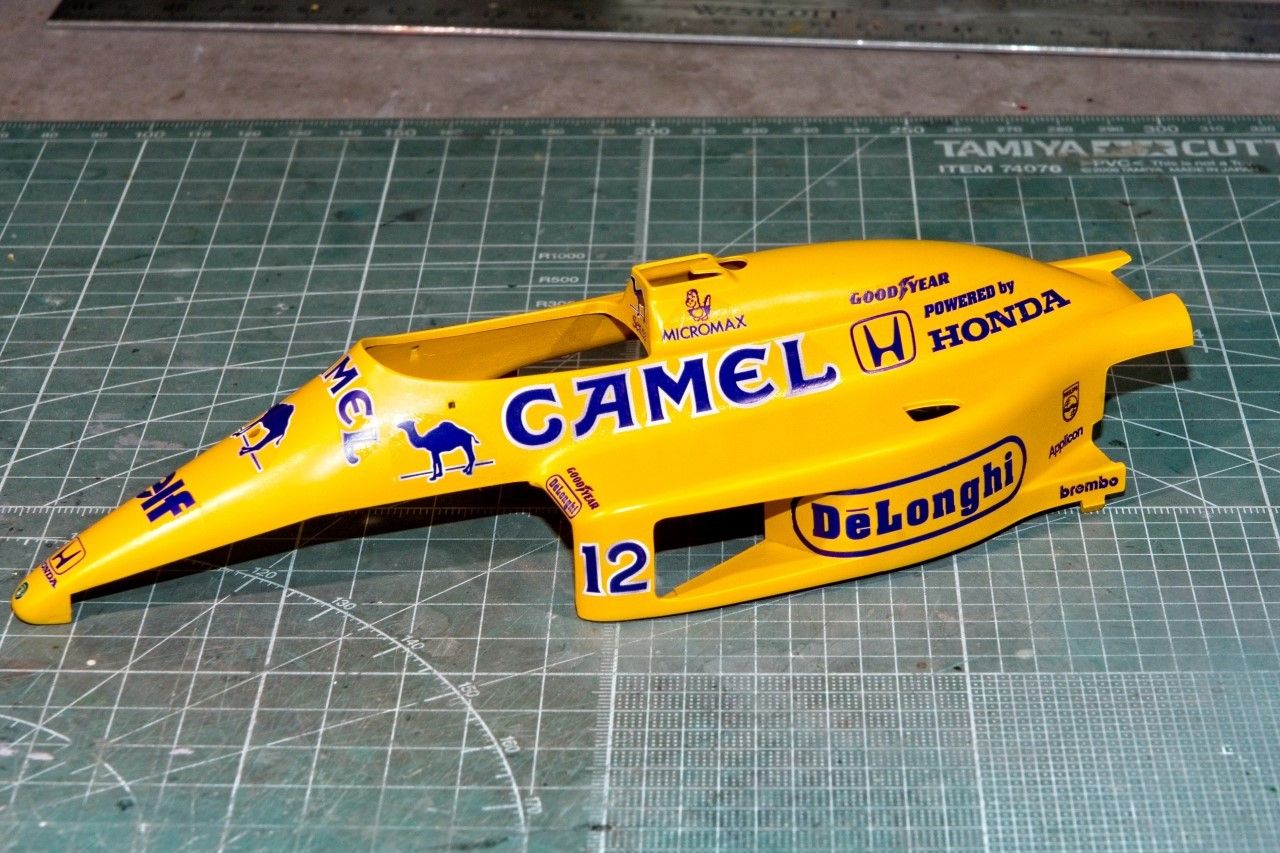
I've spent the last several work sessions since my last update concentrating on applying the decals to the outer body shell, front, and rear wing. There are several more decals that need to be applied to the interior composite front shell. The after market decals are by Indy Cal, and as usual the sheet is just one large decal, so you have to cut each one out. Takes a lot of time to trim as carefully as you can, but the efort is really worth the reward. The decals as always lay down perfectly with no issues.
The Yellow Camel color of the body really provides a great base for the dark Blue decals with Sivler borders.
The front wing was by far the easiest to decal. I still have to paint the rubber gaskets that run along the side plates that help to channel the air from front to back. but that will have to wait till the clear gloss has been applied.
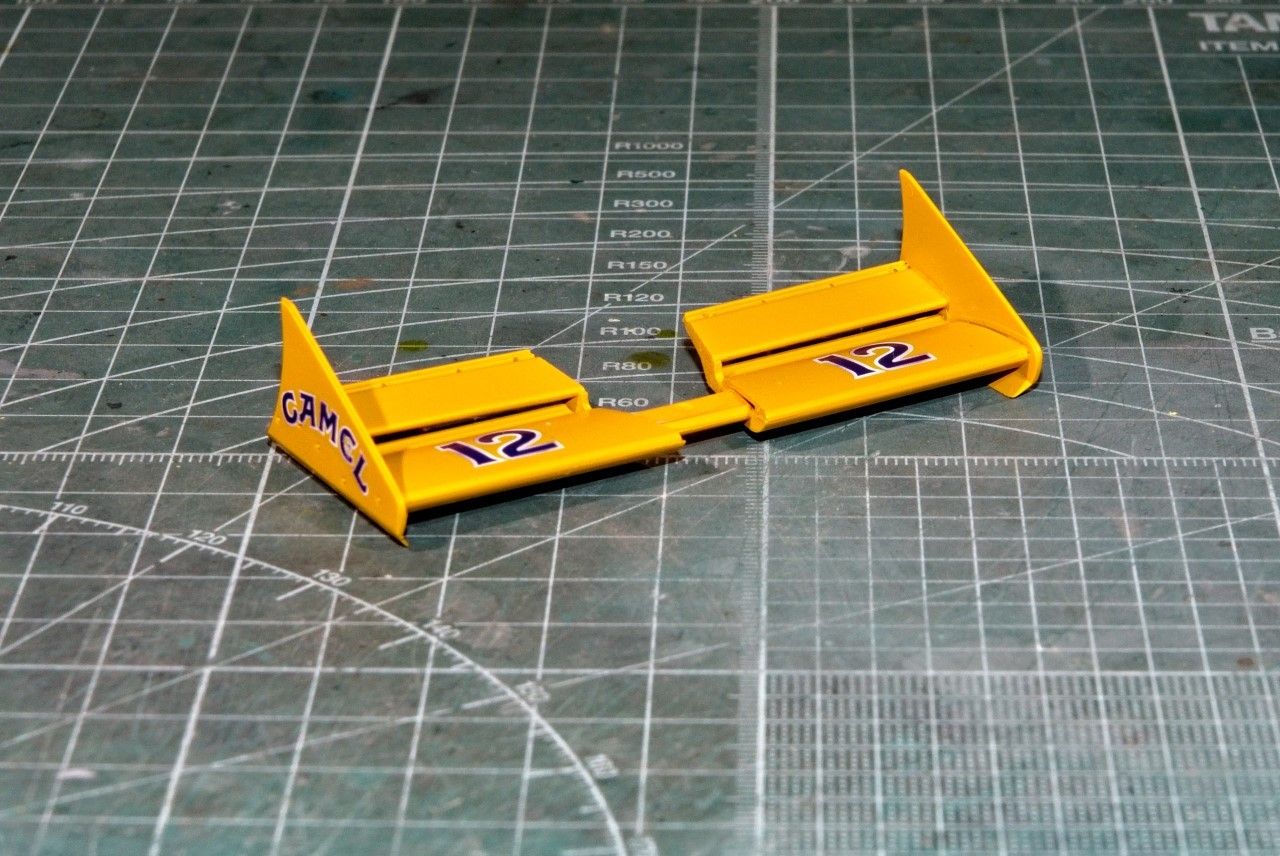
As easy as the front wing was to decal, the rear wing was that much harder. For one thing the wing assembly has 4 separate wings. The top two have the Camel logo split between them. I decided that the best way to handle this is to cut the decals each into 2 pieces. Indy Cal has the separation between the decals, so it was a no brainer.


The forth wing panel goes between the top two and the bottom wing. I had to leave it off for now as the wing is split into two pieces as the wing supports from the Transaxle is glued to the inside of the wing.
I've started working on the chassis and interior shell. The first thing that I noticed was that the bottom of the chassis had several sink channels from molding issues. So a few applications of Bondo Glazing, followed by sanding has taken care of that issue.

Thanks to all for taking the time to checkout my build to date.
Joel
The Yellow Camel color of the body really provides a great base for the dark Blue decals with Sivler borders.
The front wing was by far the easiest to decal. I still have to paint the rubber gaskets that run along the side plates that help to channel the air from front to back. but that will have to wait till the clear gloss has been applied.
As easy as the front wing was to decal, the rear wing was that much harder. For one thing the wing assembly has 4 separate wings. The top two have the Camel logo split between them. I decided that the best way to handle this is to cut the decals each into 2 pieces. Indy Cal has the separation between the decals, so it was a no brainer.
The forth wing panel goes between the top two and the bottom wing. I had to leave it off for now as the wing is split into two pieces as the wing supports from the Transaxle is glued to the inside of the wing.
I've started working on the chassis and interior shell. The first thing that I noticed was that the bottom of the chassis had several sink channels from molding issues. So a few applications of Bondo Glazing, followed by sanding has taken care of that issue.
Thanks to all for taking the time to checkout my build to date.
Joel
Dixon66
Joined: December 12, 2002
KitMaker: 1,500 posts
Auto Modeler: 645 posts
Posted: Wednesday, April 22, 2020 - 09:44 AM UTC
You're right Joel, the blue and silver really contrast nicely with the yellow. Very nice application on all, especially the rear wing. This is going to shine under a coat of gloss.
AussieReg
#007
Joined: June 09, 2009
KitMaker: 8,156 posts
Auto Modeler: 2,953 posts
Posted: Wednesday, April 22, 2020 - 10:52 AM UTC
Those decals look spot on Joel, beautiful work mate!
Cheers, D
Cheers, D
Cosimodo
#335
Joined: September 03, 2013
KitMaker: 1,808 posts
Auto Modeler: 701 posts
Posted: Wednesday, April 22, 2020 - 01:45 PM UTC
That is just an awesome job on the Lotus, Joel. I think you have nailed the colour and the decals look painted on.
cheers
Michael
cheers
Michael

Szmann

Joined: September 02, 2014
KitMaker: 1,977 posts
Auto Modeler: 1,371 posts

Posted: Wednesday, April 22, 2020 - 03:13 PM UTC
Nick, why you were such in a rush to finish the campaign? LOL!
Nice detailing and, indeed, funny thing, my modelling trainee asked me how she can replicate a blue reflex black, because she wanted the Weissach Porsche to look like on the box art, not like in reality. In reality, the Weissach it's metallic carbon black, while on the box art it's shiny black with blue waters. Eventually she opted for a Candy blue over gunmetal. The effect it's very nice indeed.
Now, technically speaking, black color it's a very dark blue. We can say by extension that midnight blue it's a light black?
However, nice build and beautiful detailing against a very rapid conclusion. That it a very nice performance indeed.! Well done!
Joel, you put yourself in trouble by constantly keeping high standard. Now you cannot step down Not that you want, naturally, quite the opposite. Just teasing!
Perfect decal application, what one can say? ANd you're right, the contrast between yellow and dark blue it's striking!
Gabriel
Nice detailing and, indeed, funny thing, my modelling trainee asked me how she can replicate a blue reflex black, because she wanted the Weissach Porsche to look like on the box art, not like in reality. In reality, the Weissach it's metallic carbon black, while on the box art it's shiny black with blue waters. Eventually she opted for a Candy blue over gunmetal. The effect it's very nice indeed.
Now, technically speaking, black color it's a very dark blue. We can say by extension that midnight blue it's a light black?
However, nice build and beautiful detailing against a very rapid conclusion. That it a very nice performance indeed.! Well done!
Joel, you put yourself in trouble by constantly keeping high standard. Now you cannot step down
Not that you want, naturally, quite the opposite. Just teasing!Perfect decal application, what one can say? ANd you're right, the contrast between yellow and dark blue it's striking!
Gabriel

rv1963
Joined: December 07, 2004
KitMaker: 1,888 posts
Auto Modeler: 806 posts
Posted: Wednesday, April 22, 2020 - 10:28 PM UTC
Joel those blue decals really contrast nice next to that yellow body, nice neat work.
Joel_W
Joined: December 04, 2010
KitMaker: 11,666 posts
Auto Modeler: 2,974 posts
Posted: Thursday, April 23, 2020 - 01:29 AM UTC
D, David, Michael, Gabriel, & Robert, thanks so much for your praise on the decaling. Honestly, it's my favorite part of modeling building. You really get the best bang for buck when you step back and take a look. The model just takes on a whole new personality of it's own.
Joel
Joel

2002hummer
#257

Joined: October 11, 2011
KitMaker: 812 posts
Auto Modeler: 108 posts

Posted: Thursday, April 23, 2020 - 02:52 PM UTC
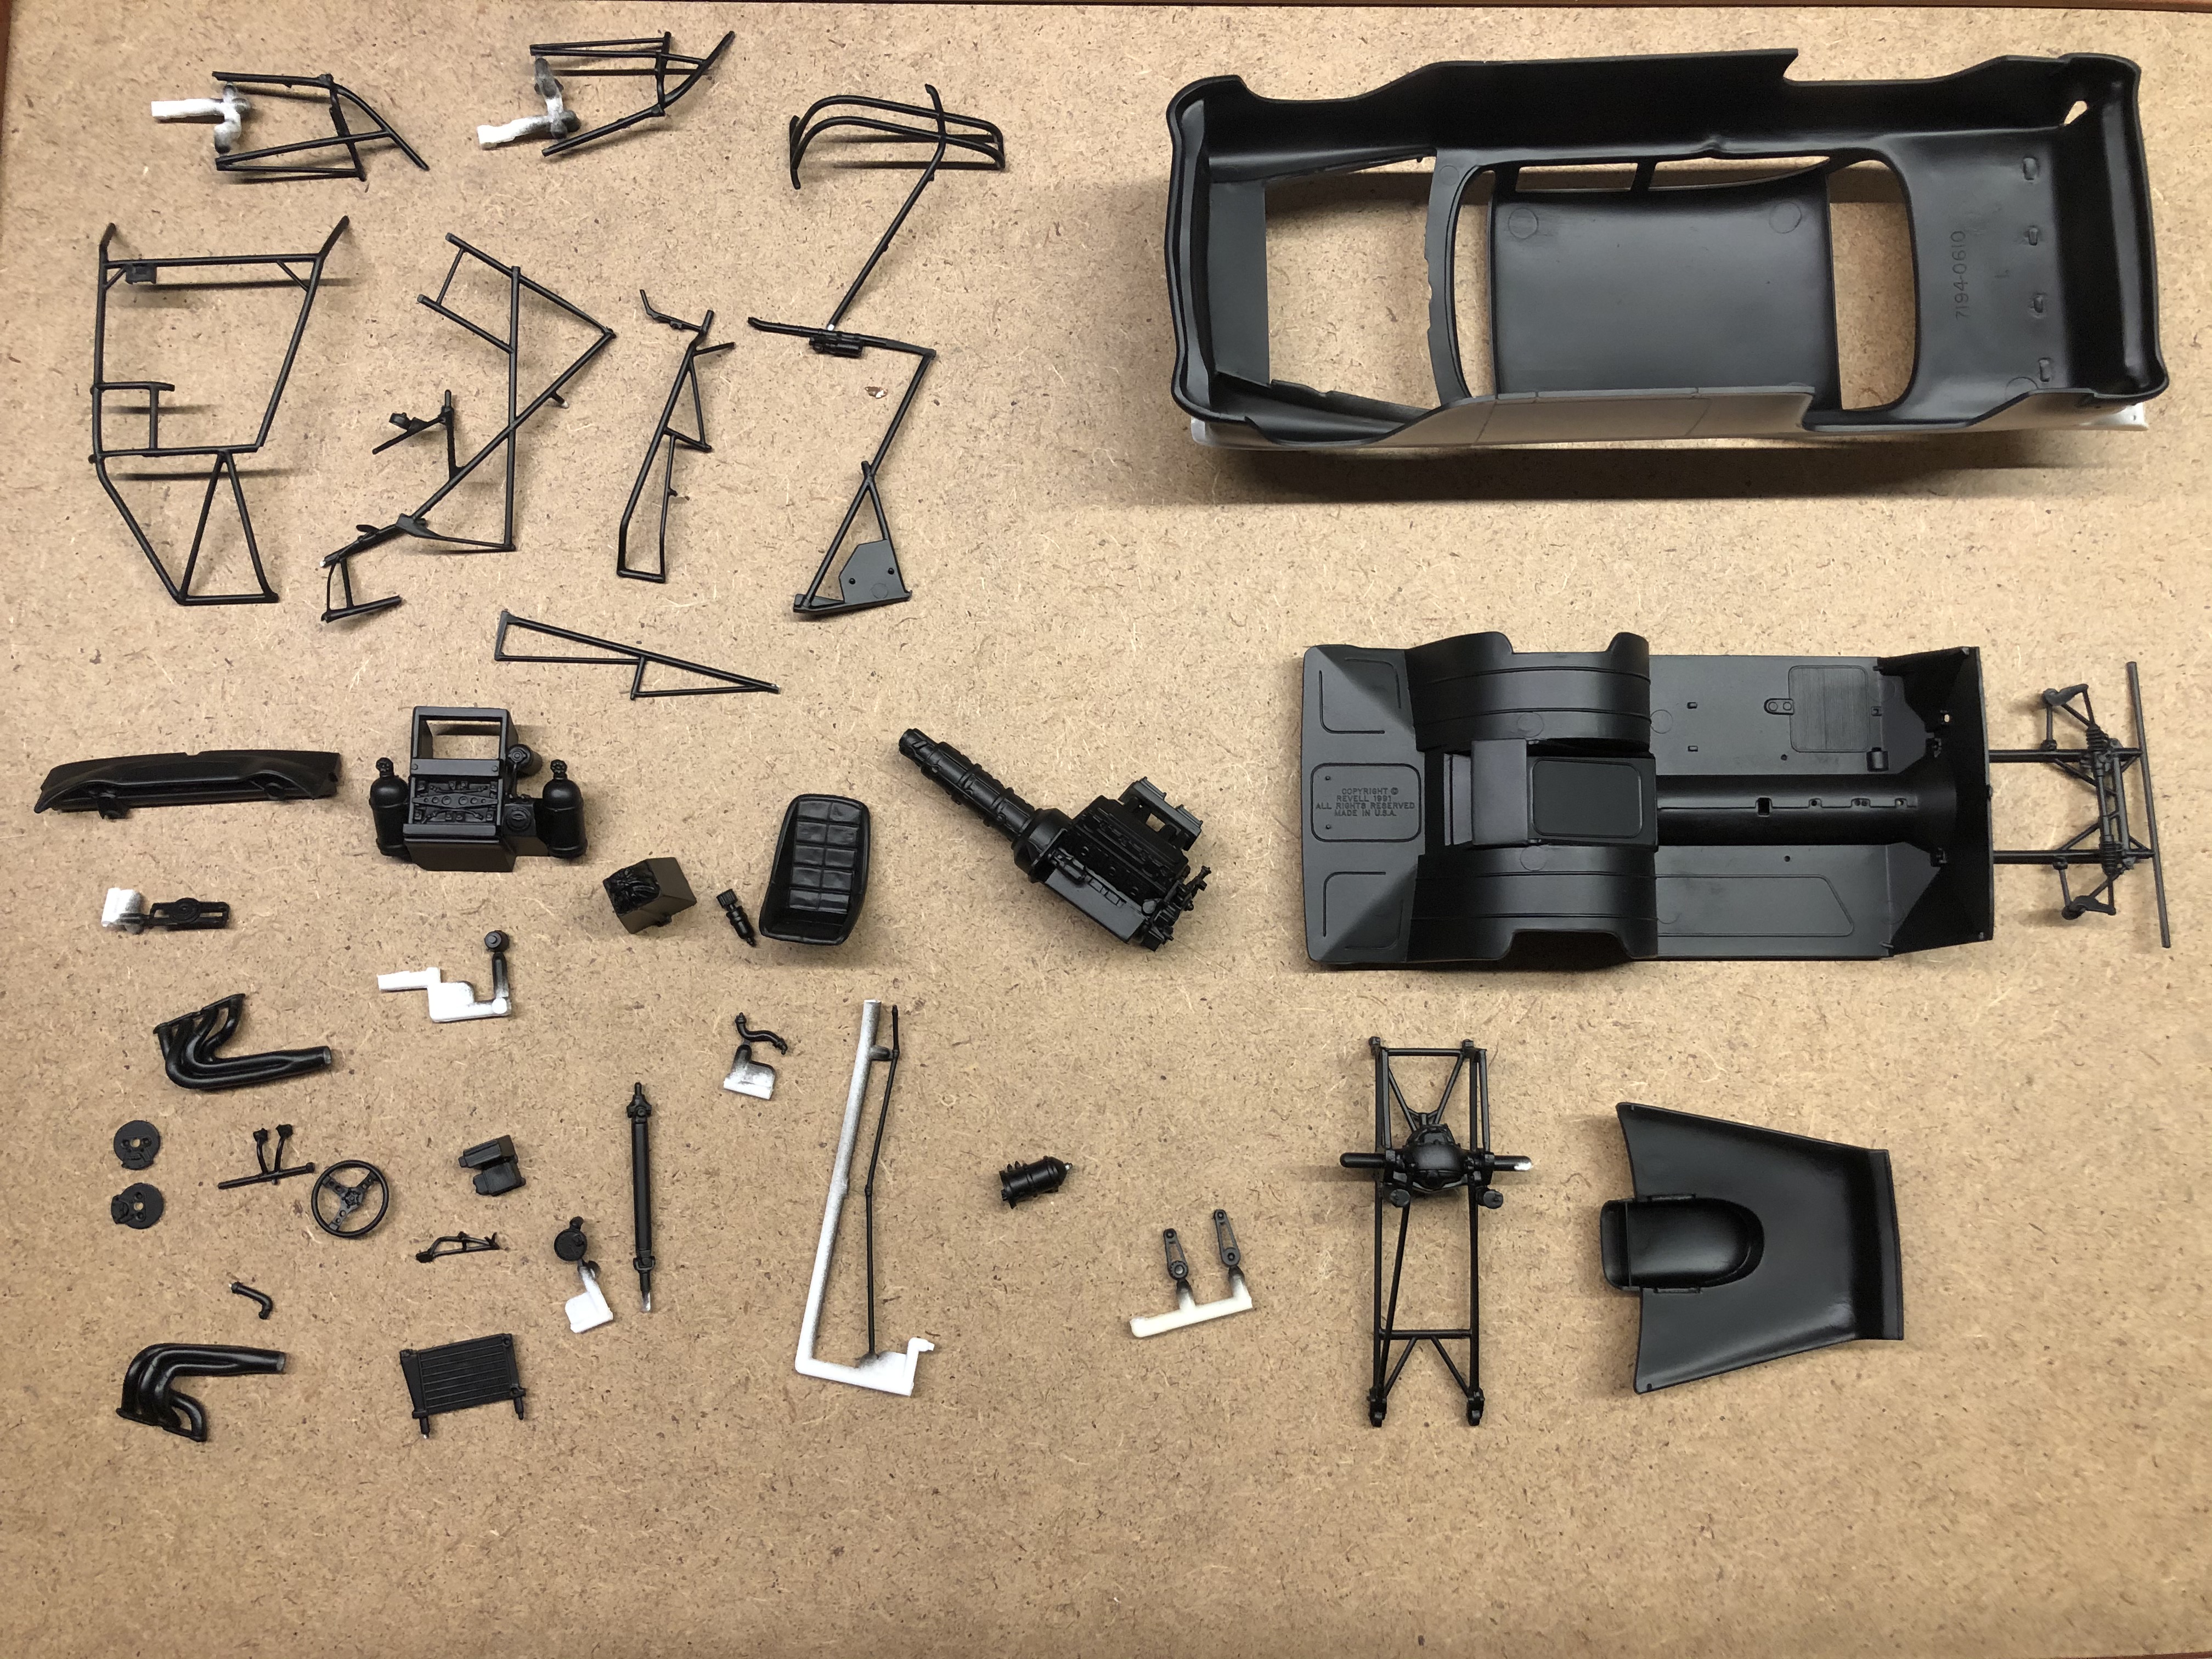
I just realized that I have not put my starting pictures in the forum here they are,without a date on them, I hope that is acceptable.


AussieReg
#007
Joined: June 09, 2009
KitMaker: 8,156 posts
Auto Modeler: 2,953 posts
Posted: Thursday, April 23, 2020 - 03:12 PM UTC
Quoted Text
I just realized that I have not put my starting pictures in the forum here they are,without a date on them, I hope that is acceptable.
Great to see your kit sneaking up to the bench Darrell, looking forward to some progress reports once you get started.
Cheers, D
Joel_W
Joined: December 04, 2010
KitMaker: 11,666 posts
Auto Modeler: 2,974 posts
Posted: Friday, April 24, 2020 - 01:14 AM UTC
Darrell,
Now there's one Tamiya kit you just don't see very often. The Lotus 7 was a really great little car for the club racer as it was light and handled extremely well. Lotus manufactured the car from the mid 50's to the 70s, so there was never any shortage of them to be had.,
I'm really looking forward to your build.
Joel
Dixon66
Joined: December 12, 2002
KitMaker: 1,500 posts
Auto Modeler: 645 posts
Posted: Friday, April 24, 2020 - 03:42 AM UTC
Quoted Text
Darrell,
Now there's one Tamiya kit you just don't see very often. The Lotus 7 was a really great little car for the club racer as it was light and handled extremely well. Lotus manufactured the car from the mid 50's to the 70s, so there was never any shortage of them to be had.,
I'm really looking forward to your build.
Joel
I just built one last year. Darrell's will come out better as mine was just thrown together to get me back into the auto side of building. In a year and a half of spending time on this site with you folks I've learned so much and my skills are starting to improve on the glossy side of building.
Case in point, the primer MSF 1500 gray coat on the Capri came out nearly flawless (I never used to prime anything), just two dust bunnies that when sanded out with 3000 didn't even go down to bare plastic.
White 1500 MSF will hopefully go on tonight or tomorrow morning. Orange will wait until the decals actually get here (if they do
 ).
).Chassis is primed and I'll be mixing a custom red/orange for the underpan and front subframe (based on what I can find for the sister cars and a diecast of the Jagermeister 1) to lay down later today.
Joel_W
Joined: December 04, 2010
KitMaker: 11,666 posts
Auto Modeler: 2,974 posts
Posted: Friday, April 24, 2020 - 06:20 AM UTC
David,
No better summation of what our site is all about then it's helped you improve your skills.
I use to use MSF 1200 but one time Sprue Brothers was out, so I decided to try the 1500. At 1st I thinned it 1:1 and loved it. Instantly, it became my go to primer, so I bought a few more bottles as well as their Black 1500 which I use as a color, not a primer. One day it occurred to me why my primer was so much thicker then my paint. So I opted for 2:3 and I've never looked back. I do brush on some straight out of the bottle primer when I want to start to blend in some putty when I use Bondo Glazing. My go to putty is Tamiya Gray, so it's usually not a problem.
Looking forward to seeing your Jägermeister chassis. BTW, my order from Spot Models of Spain has been missing for more then 3 wks via last day of tracking was 4/1. Yesterday the USPS said it's in Pittsburgh and headed my way with delivery eta for Saturday. Now that makes no sense except the USPS is involved. Why did my package from Spain fly right over NYC & Newark NJ and end up in Pittsburgh only to be trucked back to NYC and then out to Suffolk county LI. No wonder they're going broke.
Hopefully, your decal order will be here shortly. I mention Spot models because they have the largest selection of AM decals in stock that I've ever seen, and they deal with all the decal companies in Asia. Try them next time.
Joel
Dixon66
Joined: December 12, 2002
KitMaker: 1,500 posts
Auto Modeler: 645 posts
Posted: Friday, April 24, 2020 - 10:15 AM UTC
Spot didn't have the decals in stock that I was looking for.
AussieReg
#007
Joined: June 09, 2009
KitMaker: 8,156 posts
Auto Modeler: 2,953 posts
Posted: Friday, April 24, 2020 - 11:11 AM UTC
We have a new runner in the race!
Patrick (pnance26) has joined and will be building one of his growing collection of Ferrari F1 kits.
Welcome to the Group Build Patrick, best of luck with your build!
Cheers, D
Patrick (pnance26) has joined and will be building one of his growing collection of Ferrari F1 kits.
Welcome to the Group Build Patrick, best of luck with your build!
Cheers, D

tinbanger
Joined: February 04, 2008
KitMaker: 2,507 posts
Auto Modeler: 409 posts

Posted: Friday, April 24, 2020 - 12:03 PM UTC
Congratulations to all builder for completing their build!
Away a week and three more pages of posts!
Great work every one!
I have been fabricating more brass parts for the hood:-
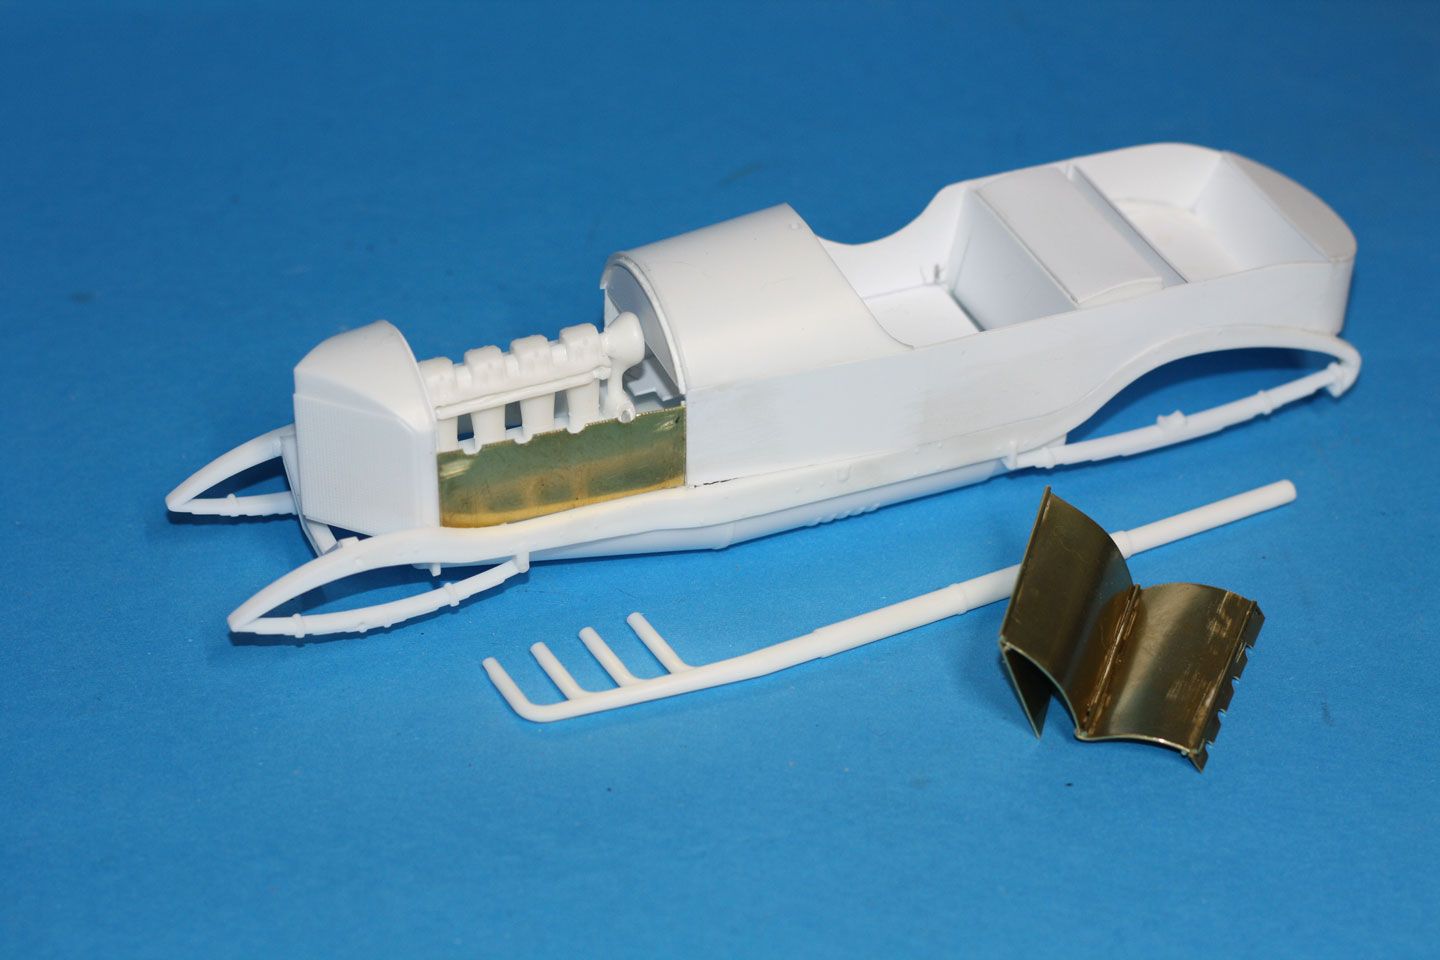
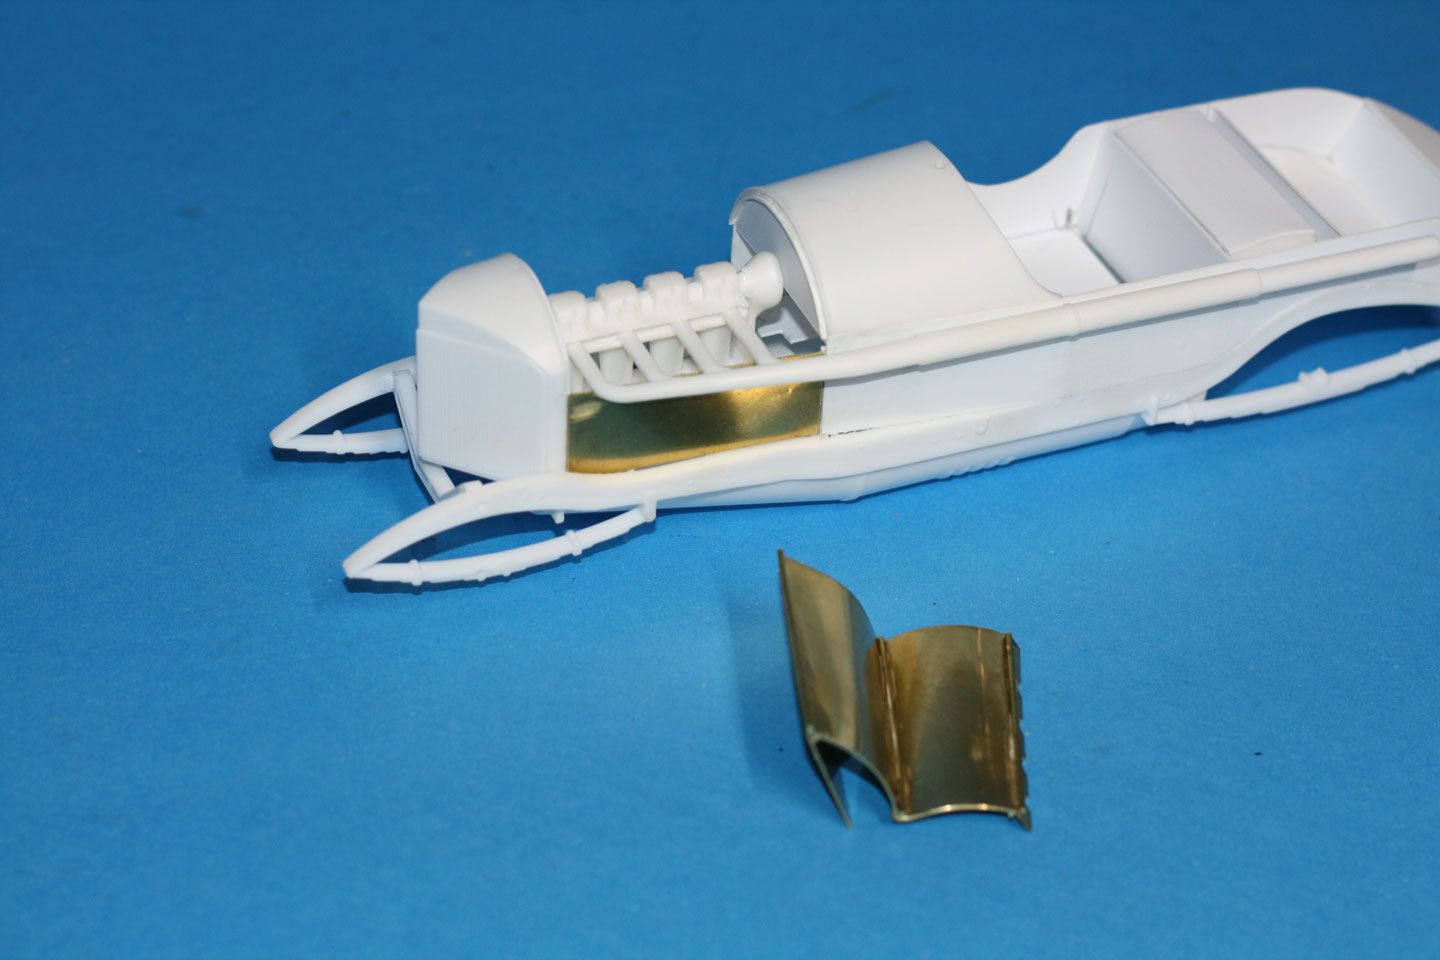
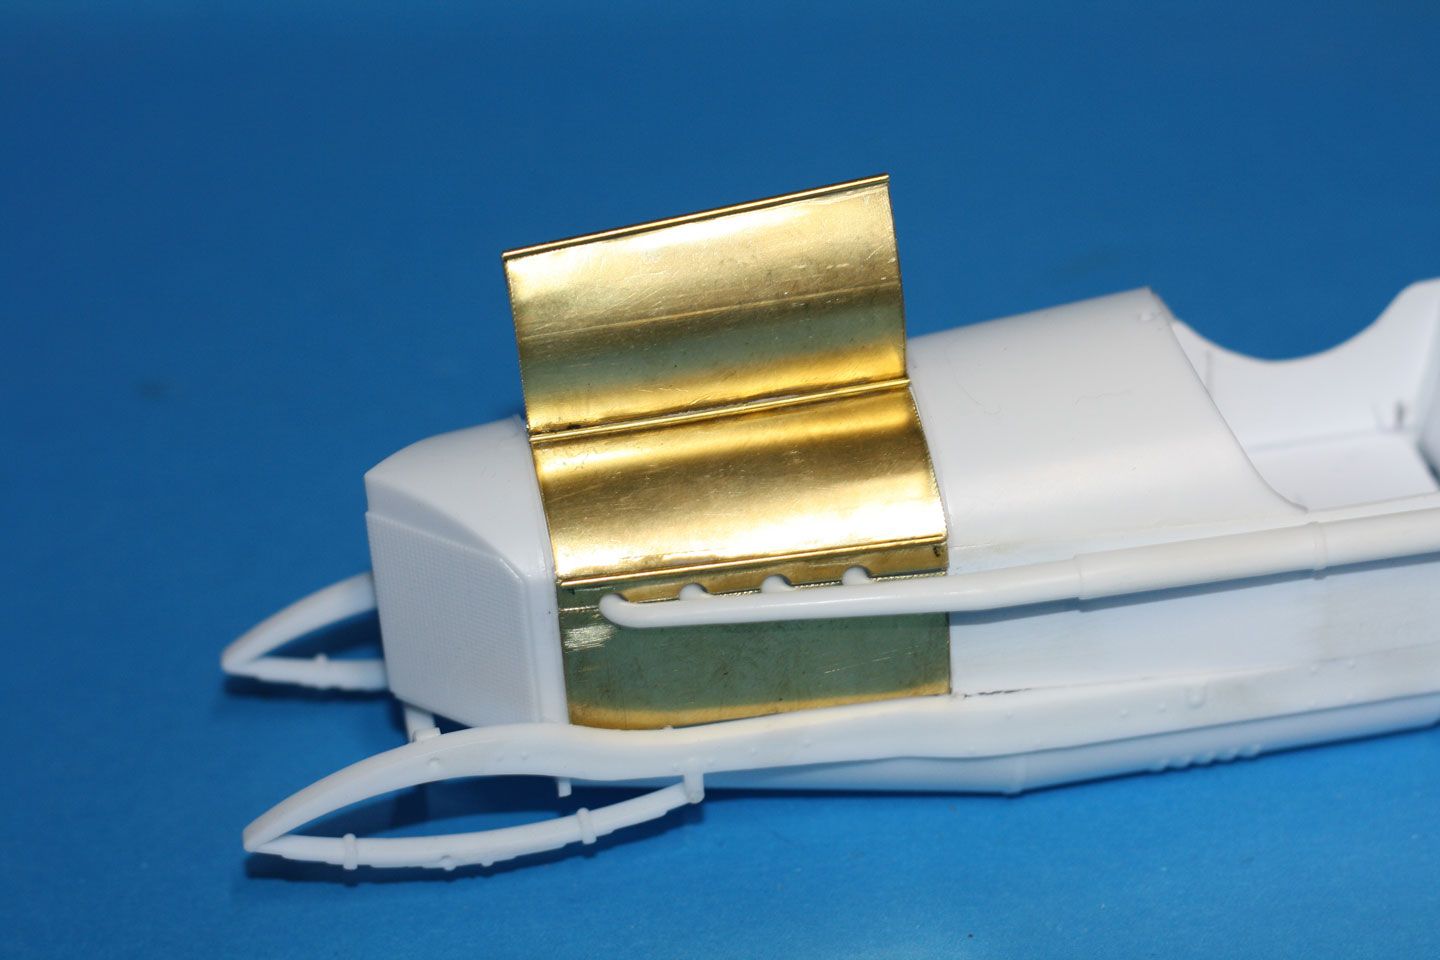

The hood is built open to show the motor and removable to allow further detailing.

Away a week and three more pages of posts!
Great work every one!
I have been fabricating more brass parts for the hood:-
The hood is built open to show the motor and removable to allow further detailing.
AussieReg
#007
Joined: June 09, 2009
KitMaker: 8,156 posts
Auto Modeler: 2,953 posts
Posted: Friday, April 24, 2020 - 12:41 PM UTC
More really nice metallurgy there Richard, beautiful work!
Cheers, D
Cheers, D
Szmann
Joined: September 02, 2014
KitMaker: 1,977 posts
Auto Modeler: 1,371 posts
Posted: Friday, April 24, 2020 - 02:41 PM UTC
Patrick, welcome to the campaign. Yes, looking forward to seeing some F1 builds...
Richard that foldable engine cover it's insane. Absolutely magnificent fabrication skills!
For conformity, a few pics with my completed NASCAR Kyle Petty build


You can find more pictures (and more ranting) in the dedicated thread...
Gabriel
Richard that foldable engine cover it's insane. Absolutely magnificent fabrication skills!
For conformity, a few pics with my completed NASCAR Kyle Petty build
You can find more pictures (and more ranting) in the dedicated thread...
Gabriel
Dixon66
Joined: December 12, 2002
KitMaker: 1,500 posts
Auto Modeler: 645 posts
Posted: Friday, April 24, 2020 - 10:32 PM UTC
That came out absolutely phenomenal Gabriel!
AussieReg
#007
Joined: June 09, 2009
KitMaker: 8,156 posts
Auto Modeler: 2,953 posts
Posted: Saturday, April 25, 2020 - 12:32 AM UTC
Beautiful finish Gabriel, another gem in the display cabinet!
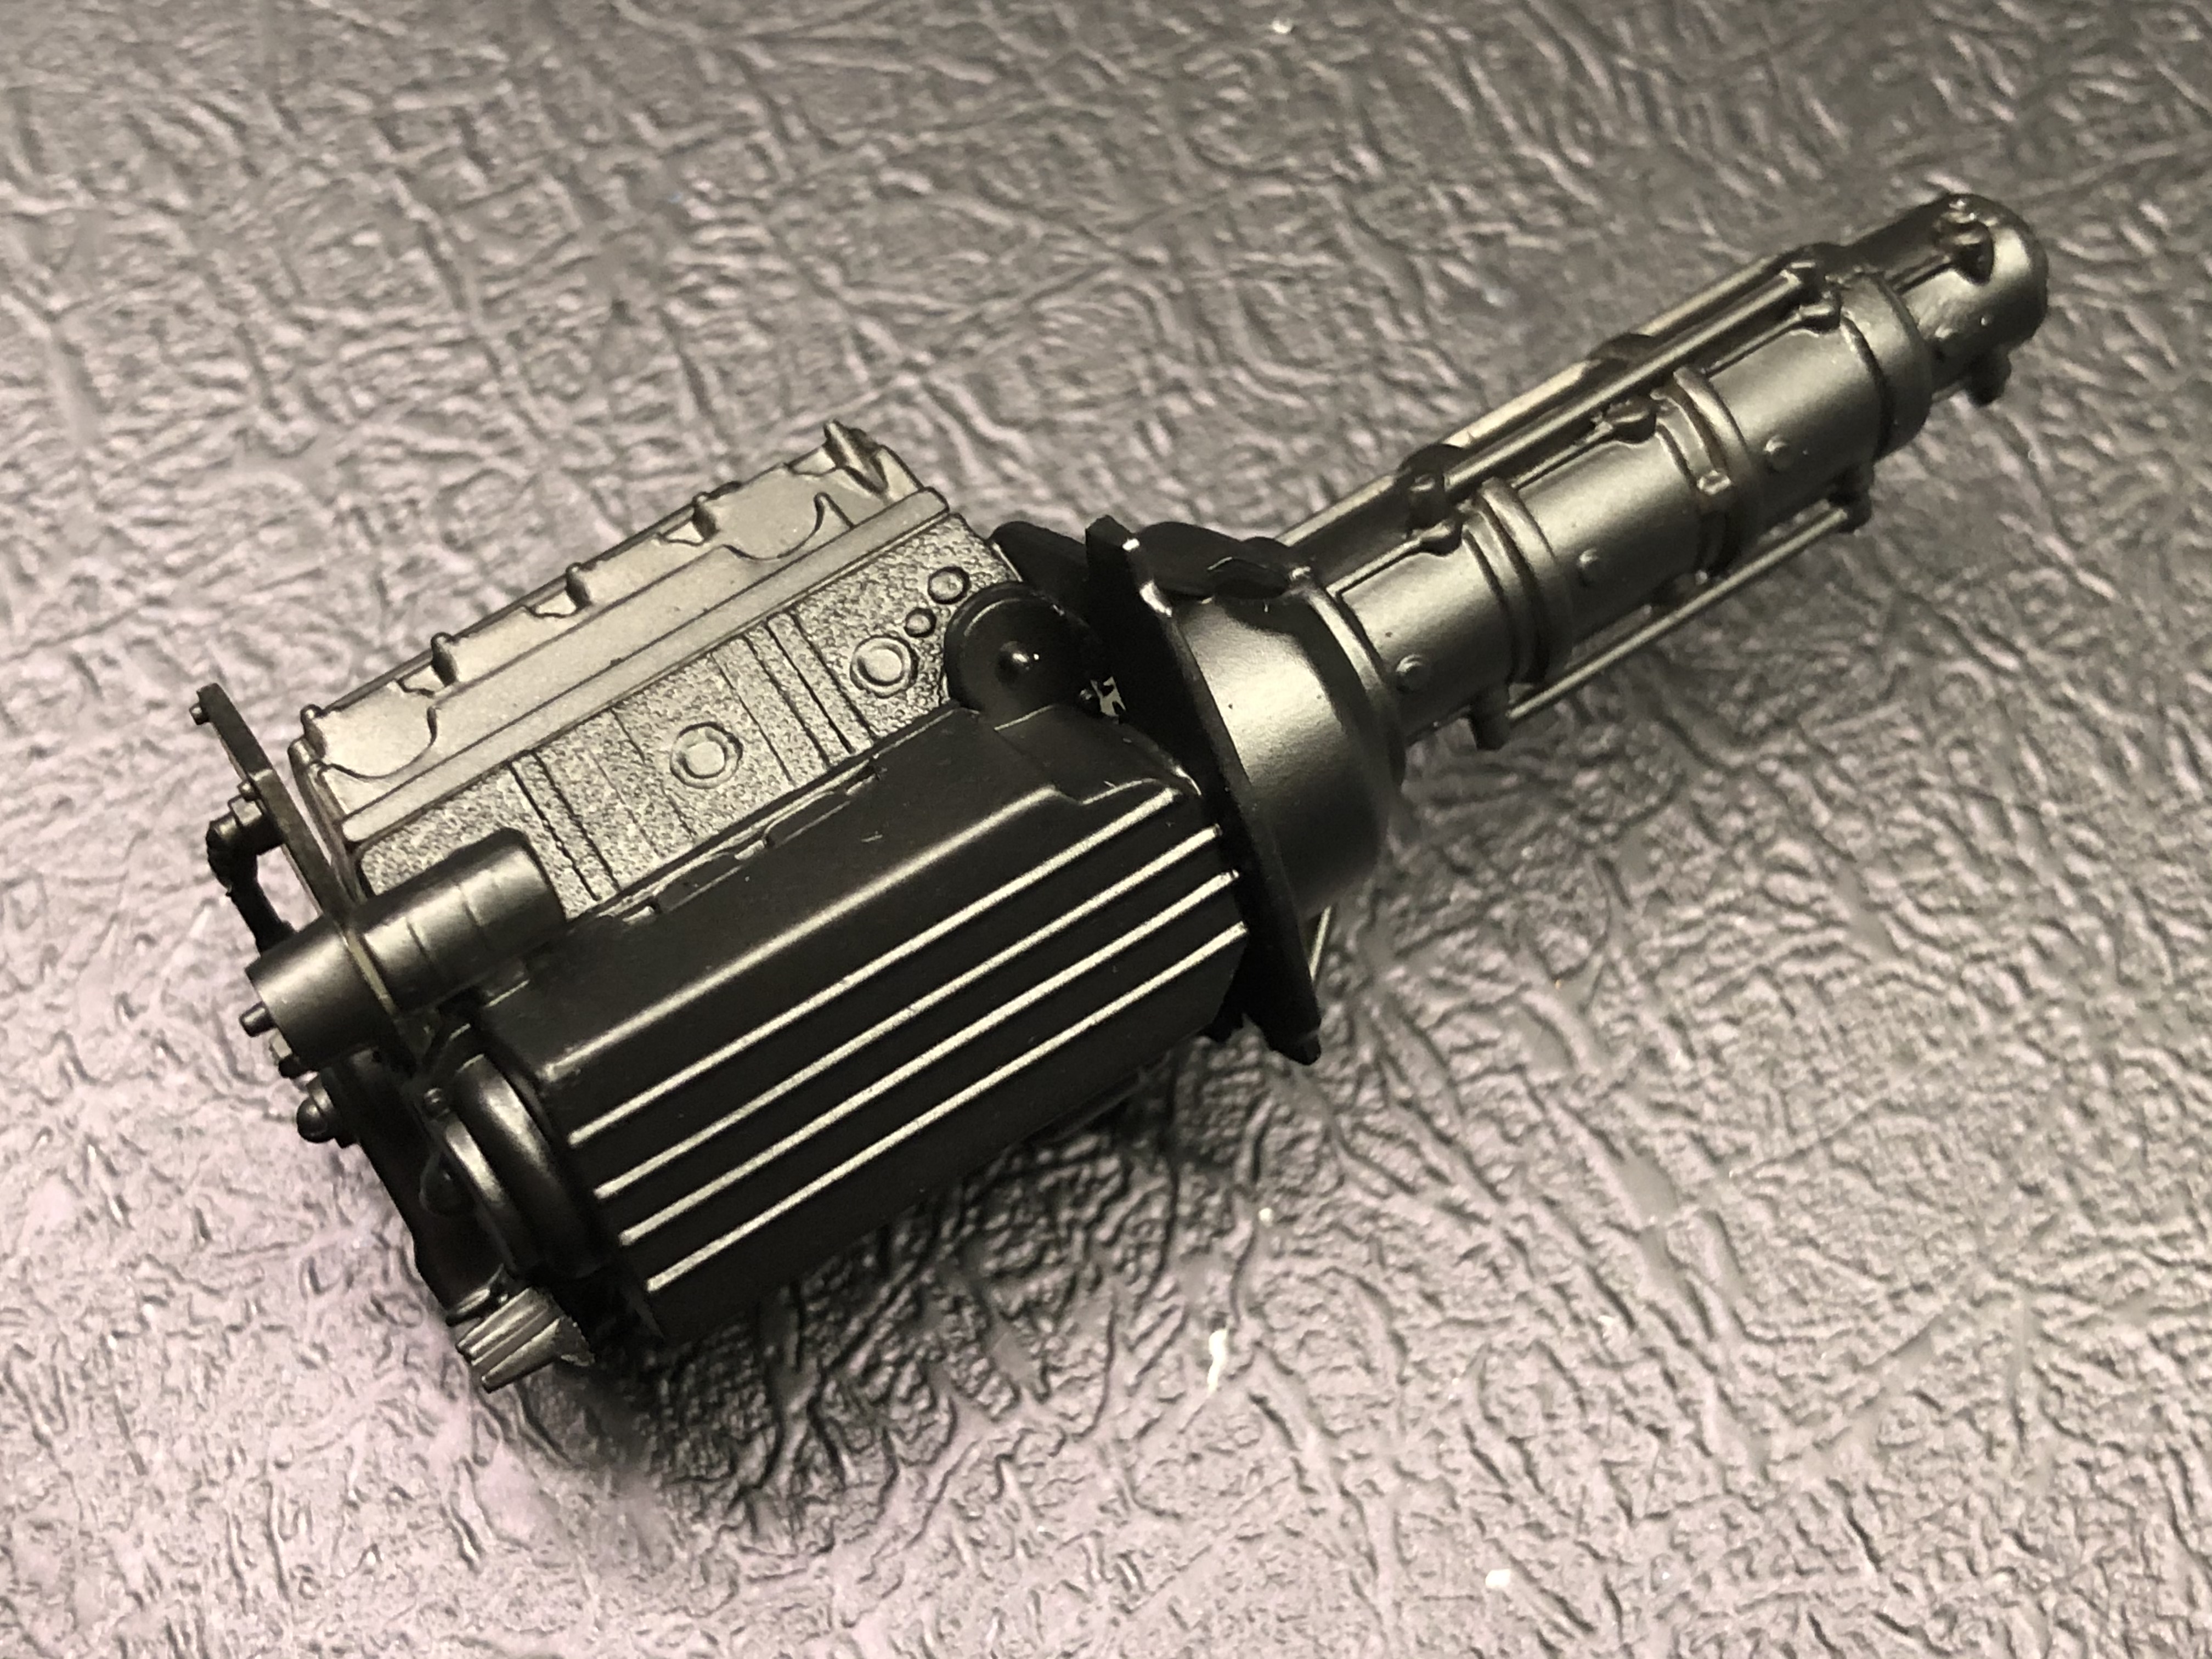
Primer day today for me, starting to feel like actual progress at last! MS1500 Black.
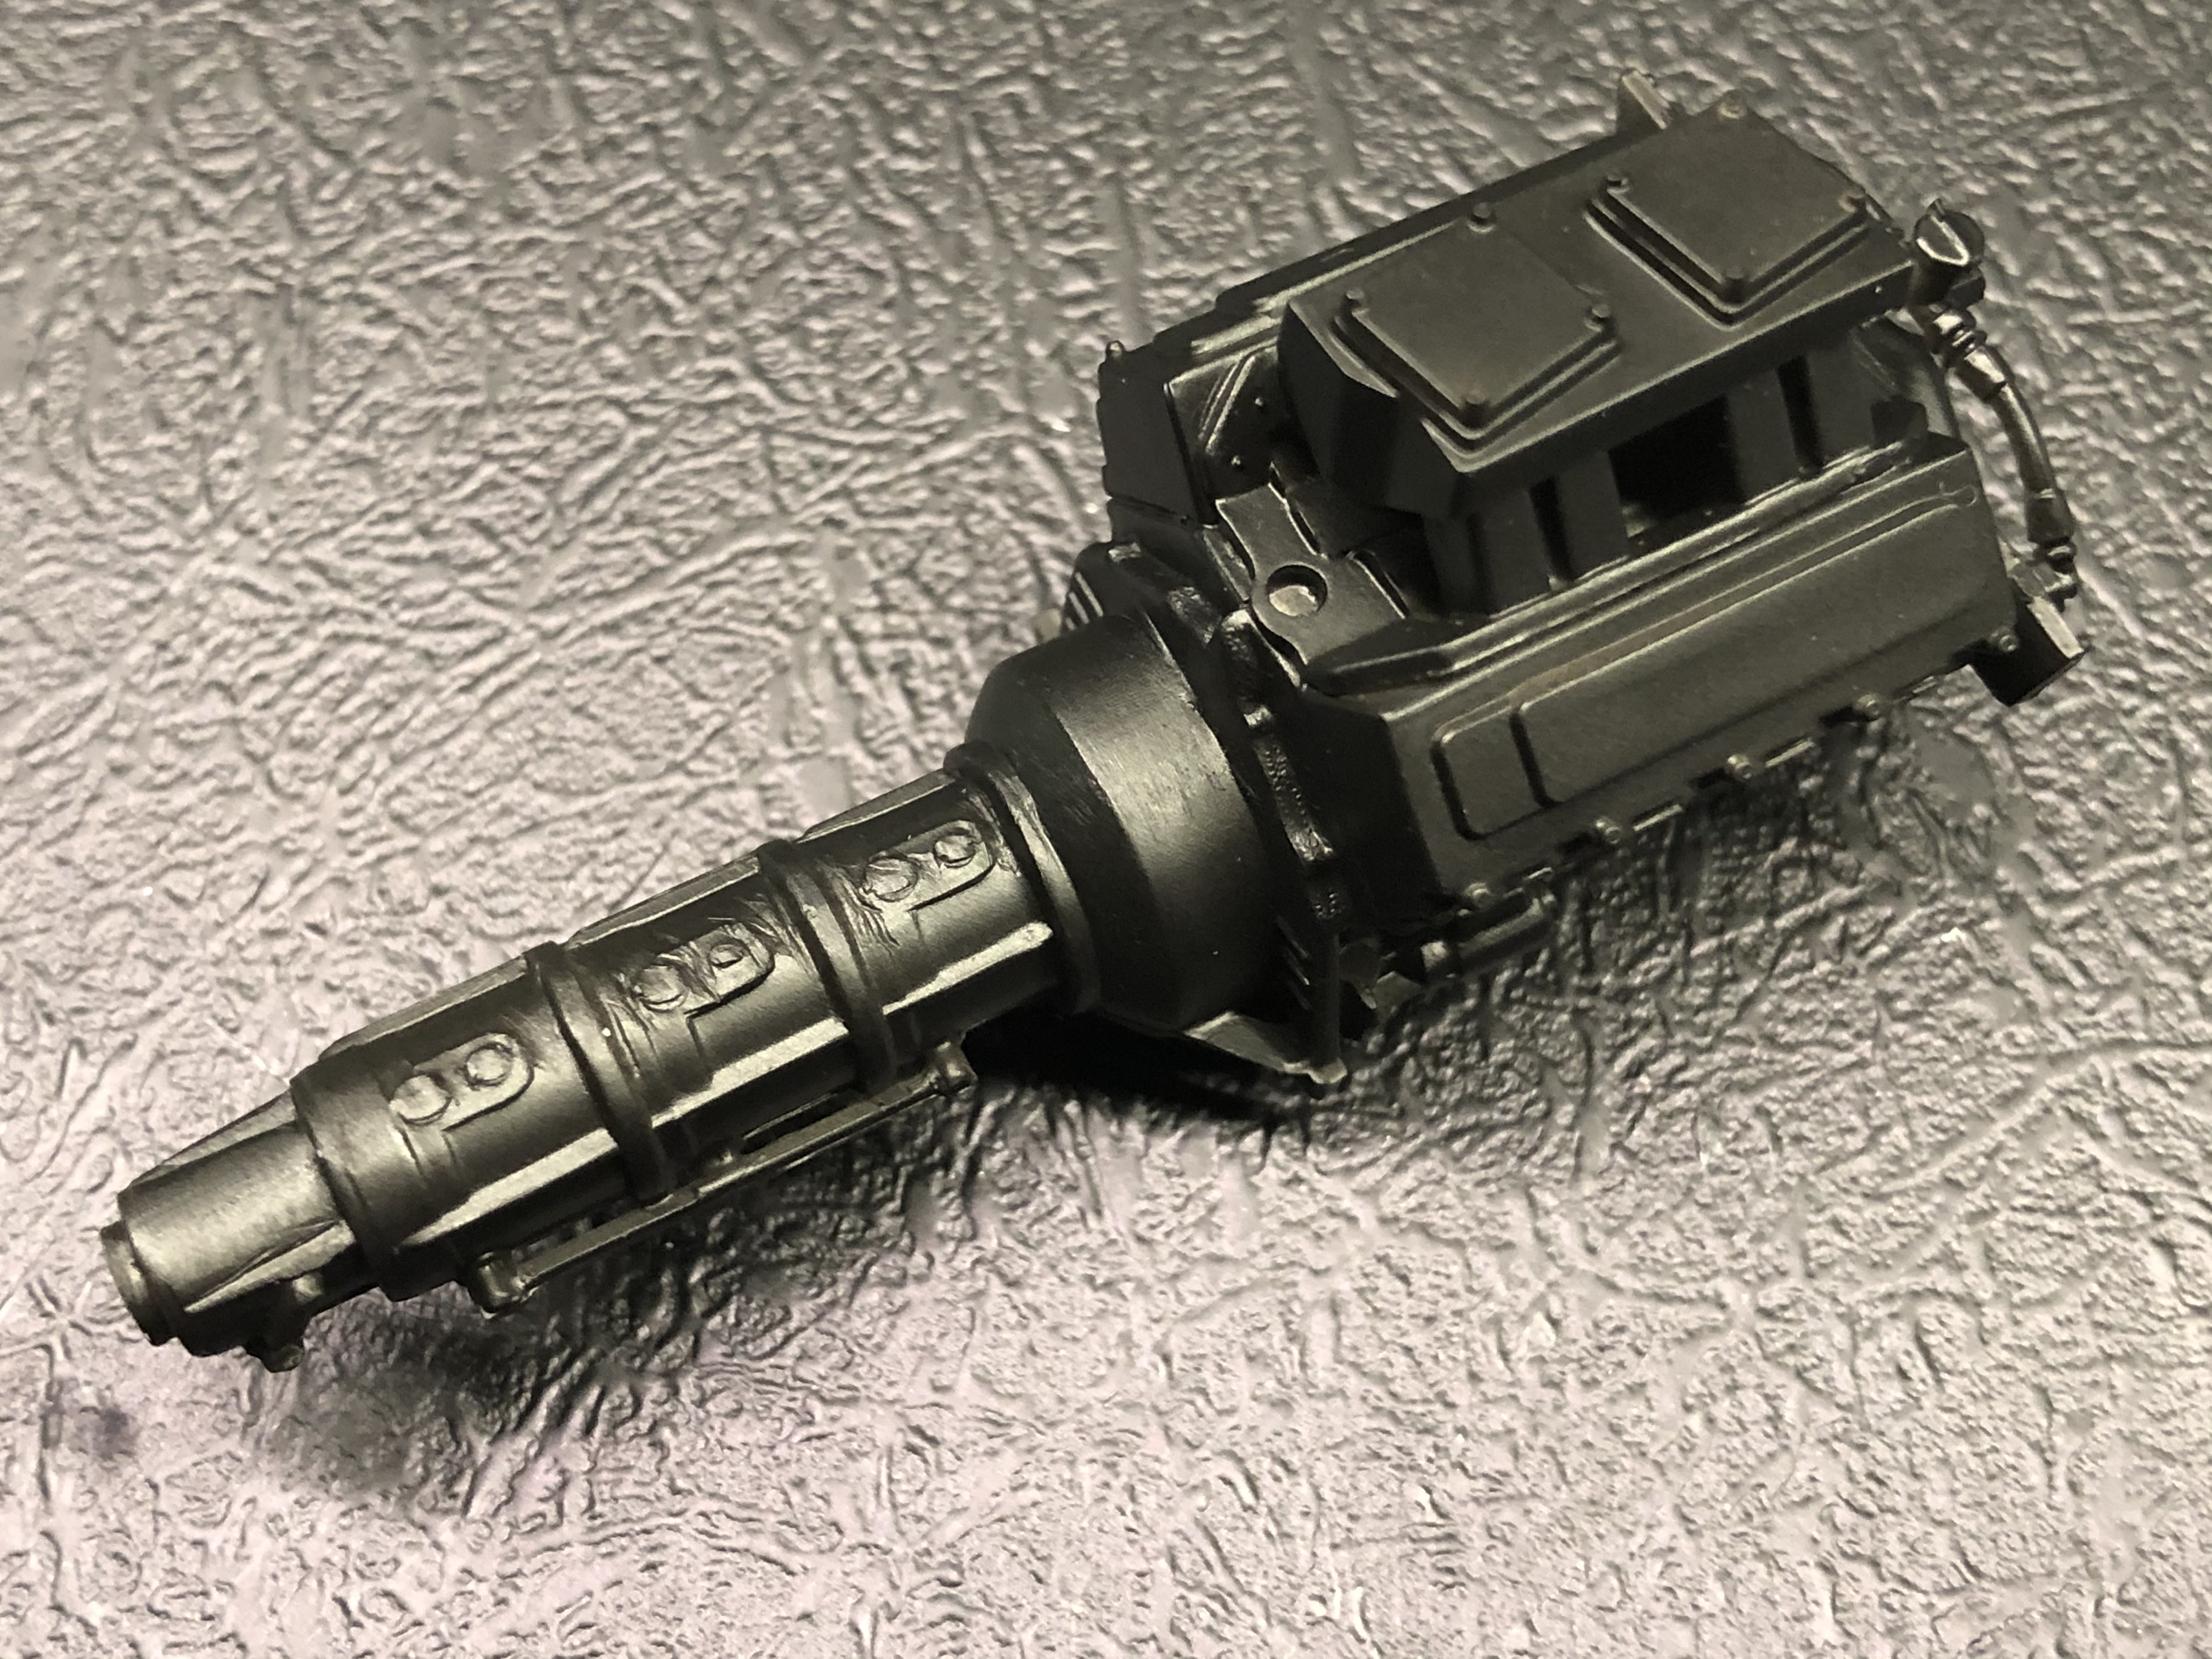
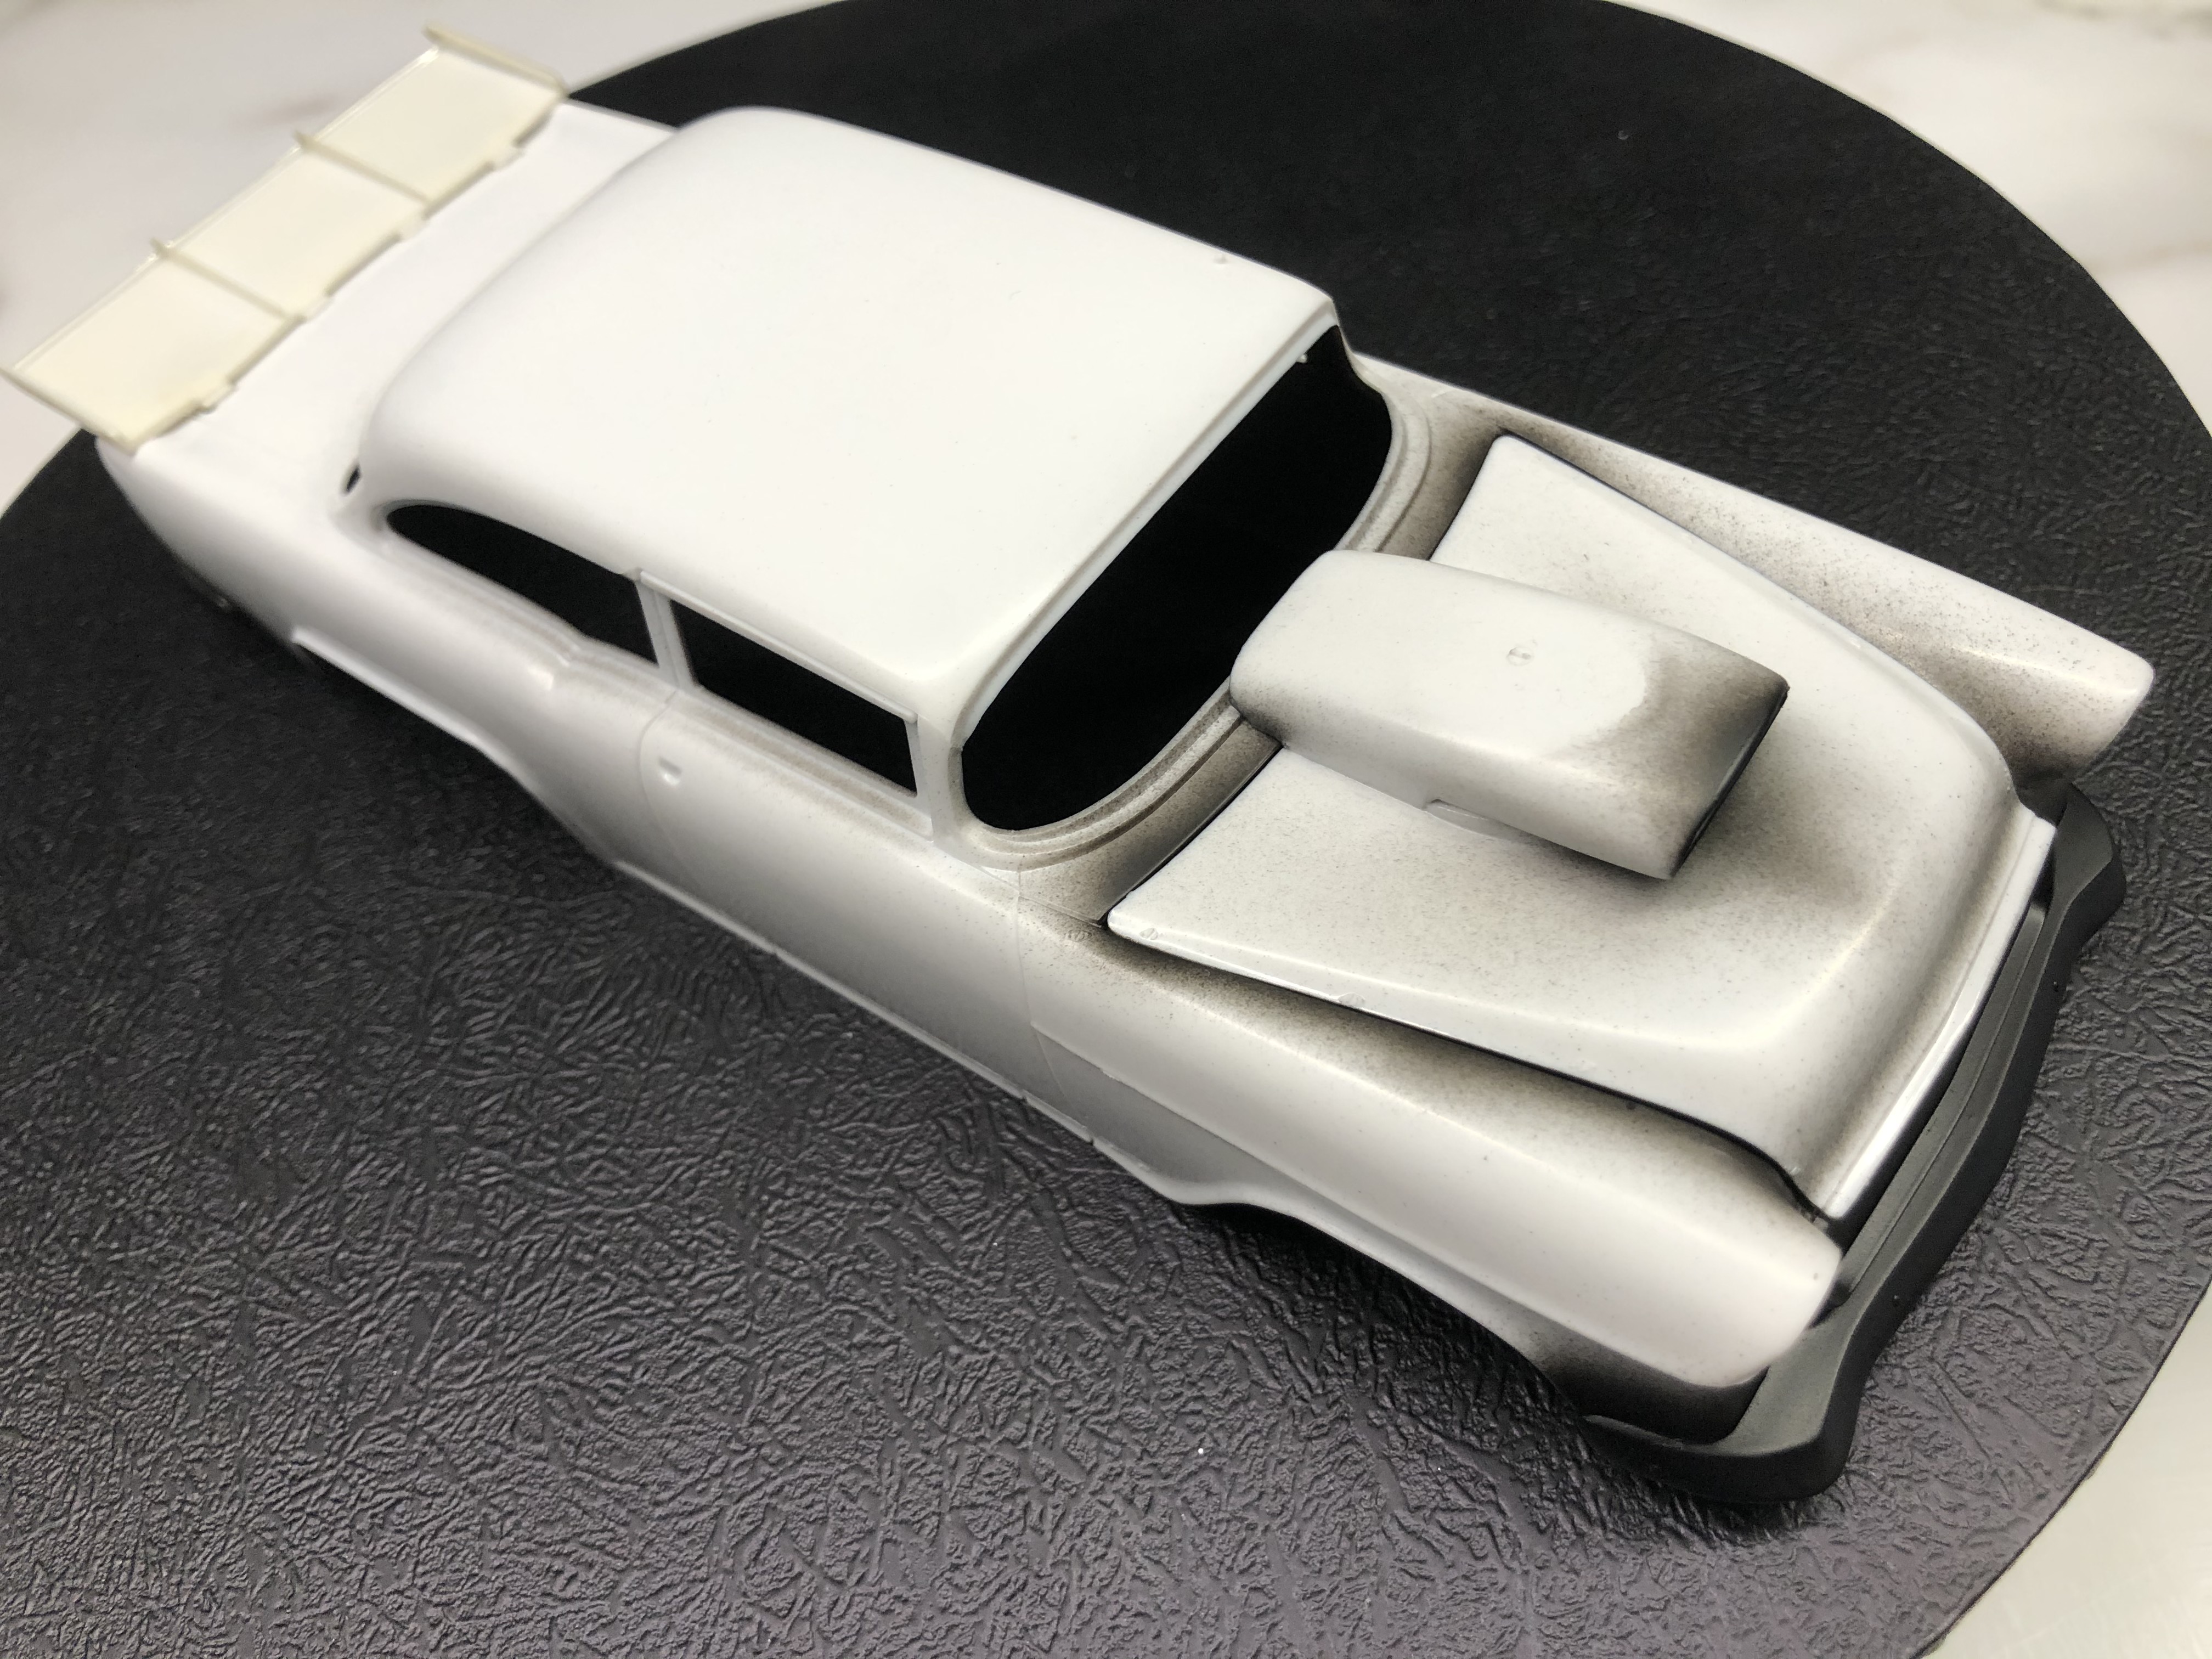
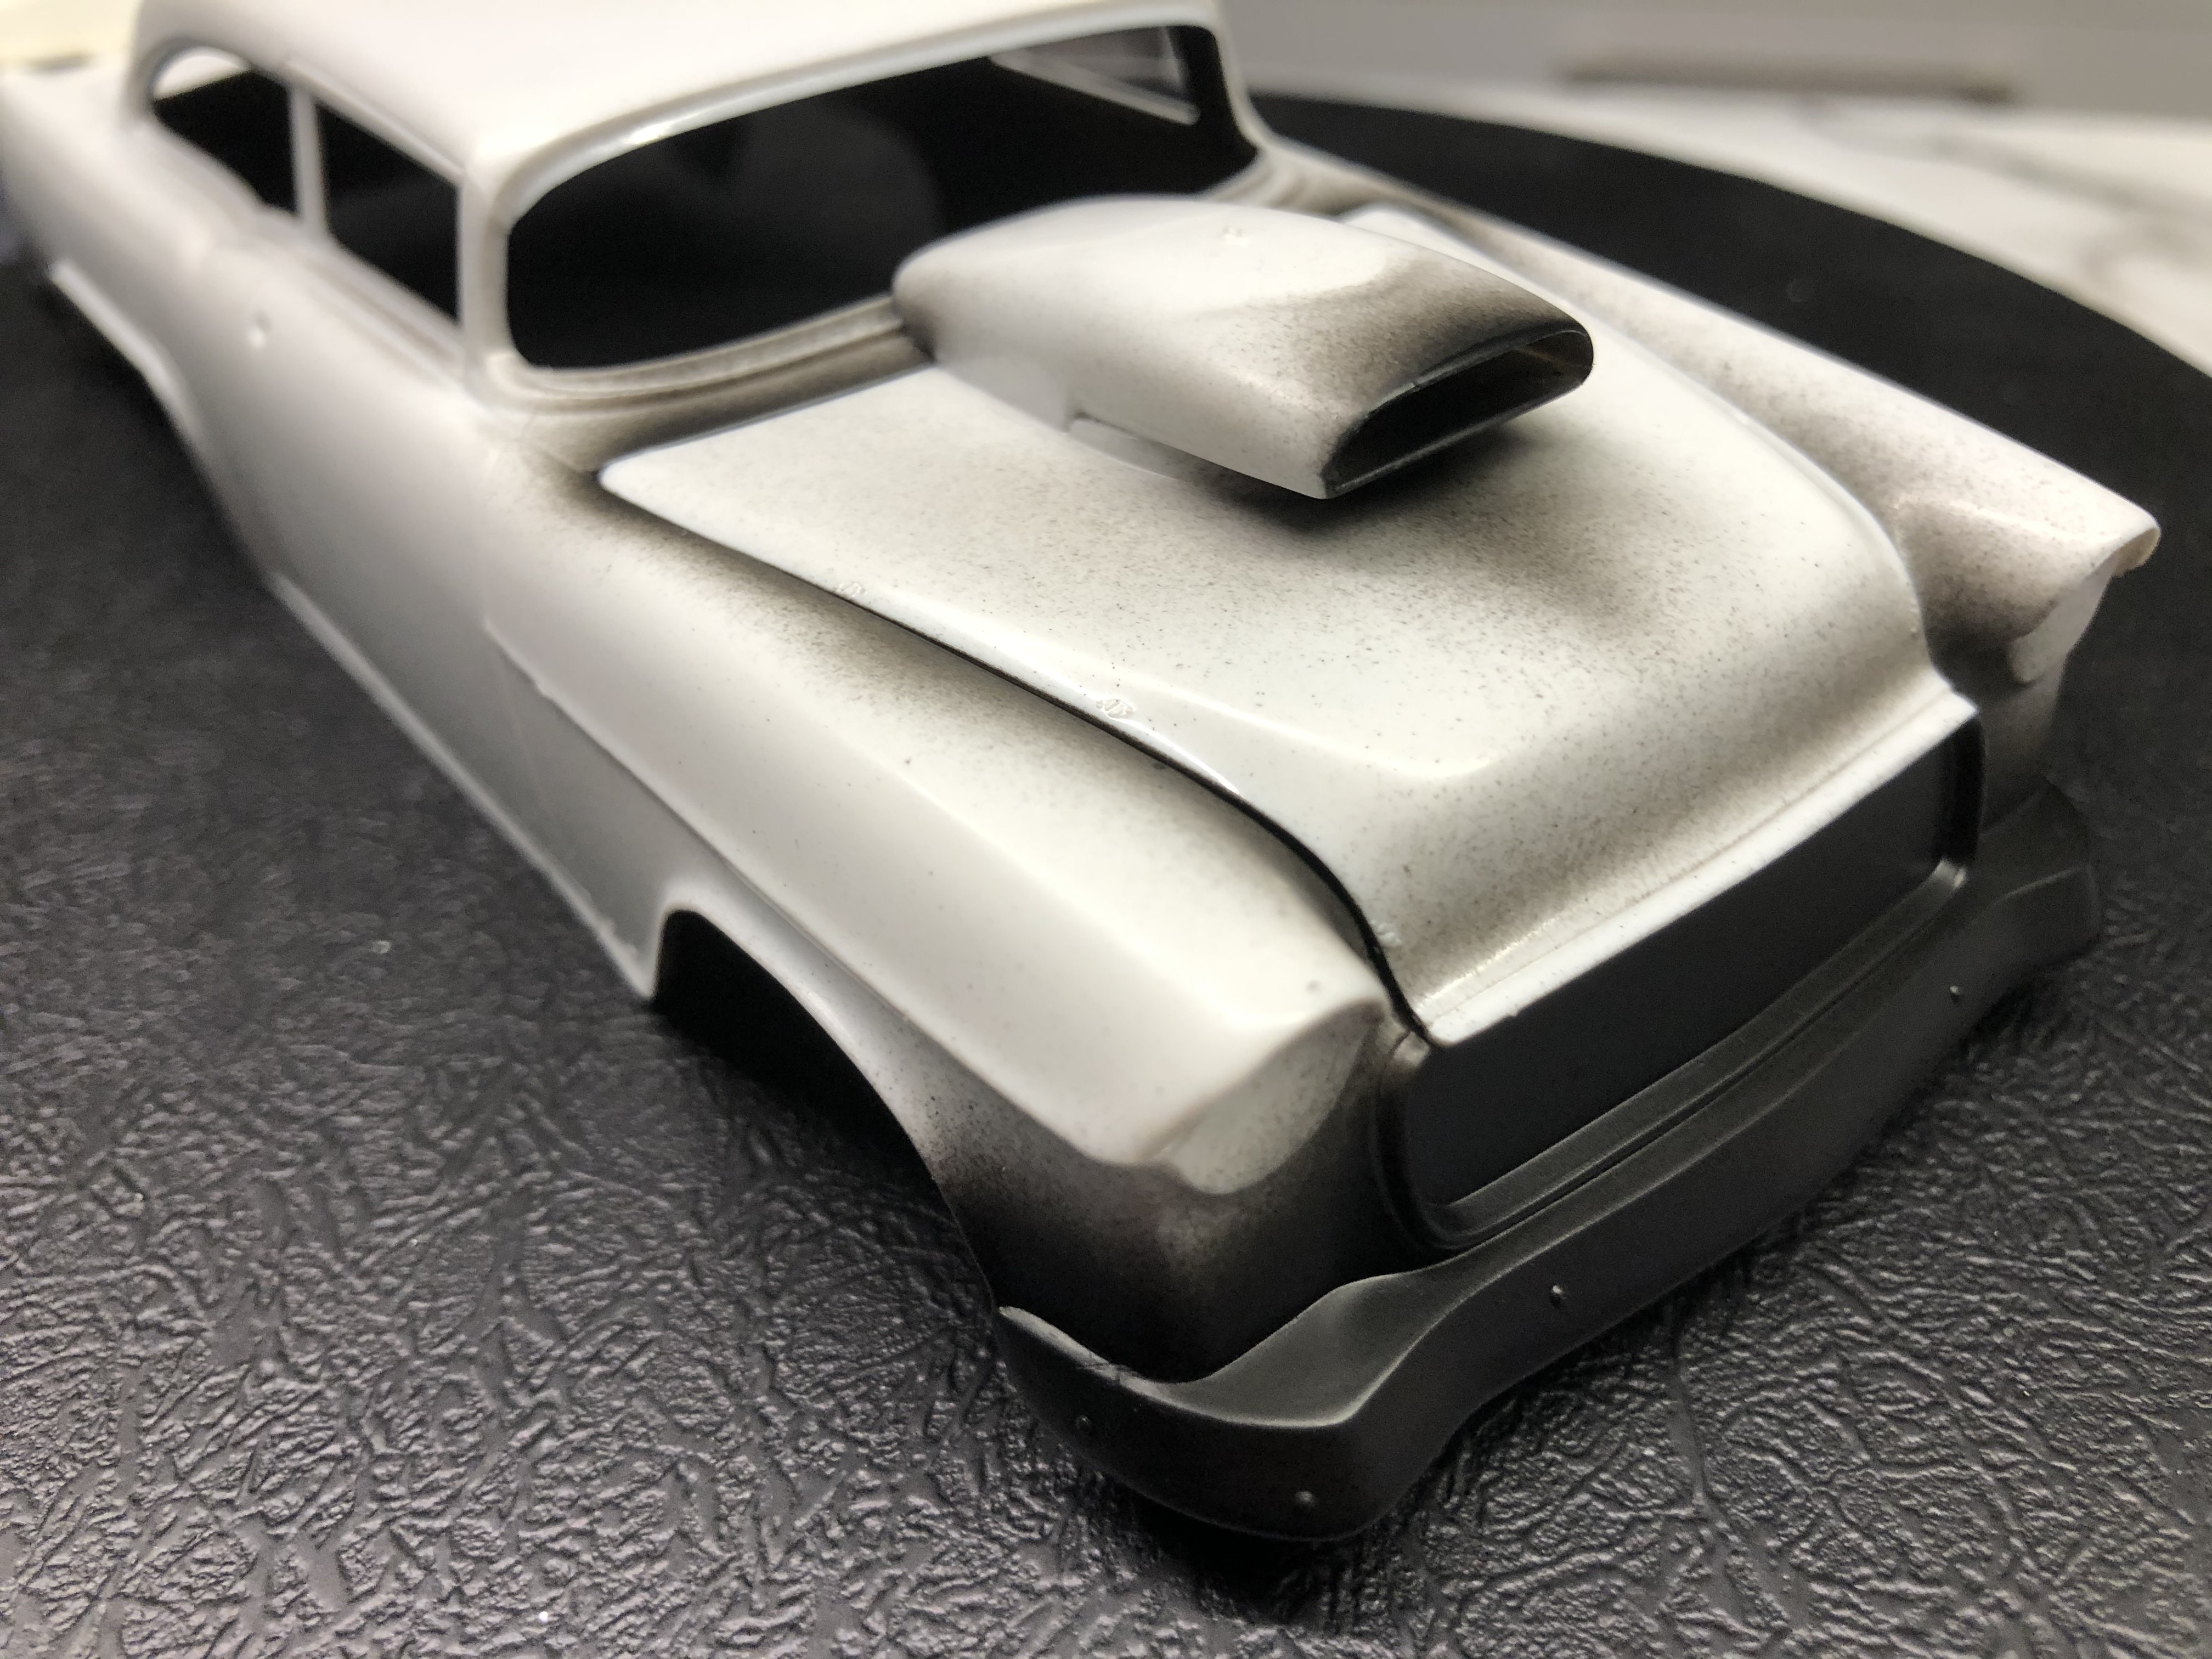
I will spray the bumpers in a chrome/silver then mask them off and prime the body in MS1500 Grey.
The engine will get a variety of metallic colours.
Cheers, D
Primer day today for me, starting to feel like actual progress at last! MS1500 Black.
I will spray the bumpers in a chrome/silver then mask them off and prime the body in MS1500 Grey.
The engine will get a variety of metallic colours.
Cheers, D
 |

WEB HOSTING BY


Copyright ©2021 Auto Modeler and Kitmaker Network, a subsidiary of Silver Star Enterprises
All Rights Reserved. Please read our Conditions of Use and Privacy Policy.
All Rights Reserved. Please read our Conditions of Use and Privacy Policy.